Loading ...
Loading ...
Loading ...
CONNECT DOOR ARM TO TROLLEY (CONTINUED)
ALL ONE-PIECE DOORS
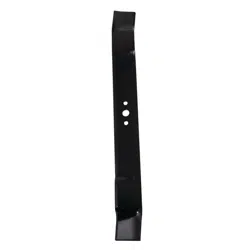
IMPORTANT: The groove on the straight door arm MUST face away from the curved
door arm (Figure 5).
1. Close the door. Disconnect the trolley by pulling the emergency release
handle.
2. Fasten the straight door arm and the curved door arm together to the
longest possible length (with a 2 or 3 hole overlap) using the bolts, nuts,
and lock washers.
3. Attach the straight door arm to the door bracket using the 5/16"x1-1/4"
clevis pin. Secure with the ring fastener.
4. Attach the curved door arm to the trolley using the 5/16"x1" clevis pin.
Secure with the ring fastener.
5. Pull the emergency release handle toward the garage door opener until
the trolley release arm is horizontal.
Lock Washer 5/16"
Nut 5/16"-18
Ring Fastener
Hex Bolt
5/16"-18x7/8"
Clevis Pin
5/16"x1" (Trolley)
Clevis Pin
5/16"x1-1/4" (Door Bracket)
HARDWARE SHOWN ACTUAL SIZE
Figure 5
CORRECT INCORRECT
Straight
Door Arm
Straight
Door Arm
Curved
Door Arm
Curved
Door
Arm
(Groove
facing out)
Curved
Door Arm
Rail Tab
Ring
Fastener
Door
Bracket
Outer Trolley
Inner Trolley
Emergency
Release
Handle
Straight
Door
Arm
Pulley
Clevis Pin
5/16"x1-1/4"
Hex Bolts
5/16"-18x7/8"
Lock Washers
5/16"
Nuts
5/16"-18
Ring Fastener
Figure 6 One-Piece Door Without Track
Clevis Pin
5/16"x1"
Clevis Pin
5/16"x1"
Ring Fastener
Ring Fastener
Nuts 5/16"-18
Figure 7 One-Piece Door With Track
Lock Washers 5/16"
Clevis Pin
5/16"x1-1/4"
Hex Bolt 5/16"-18x7/8"
INSTALLATION STEP 10
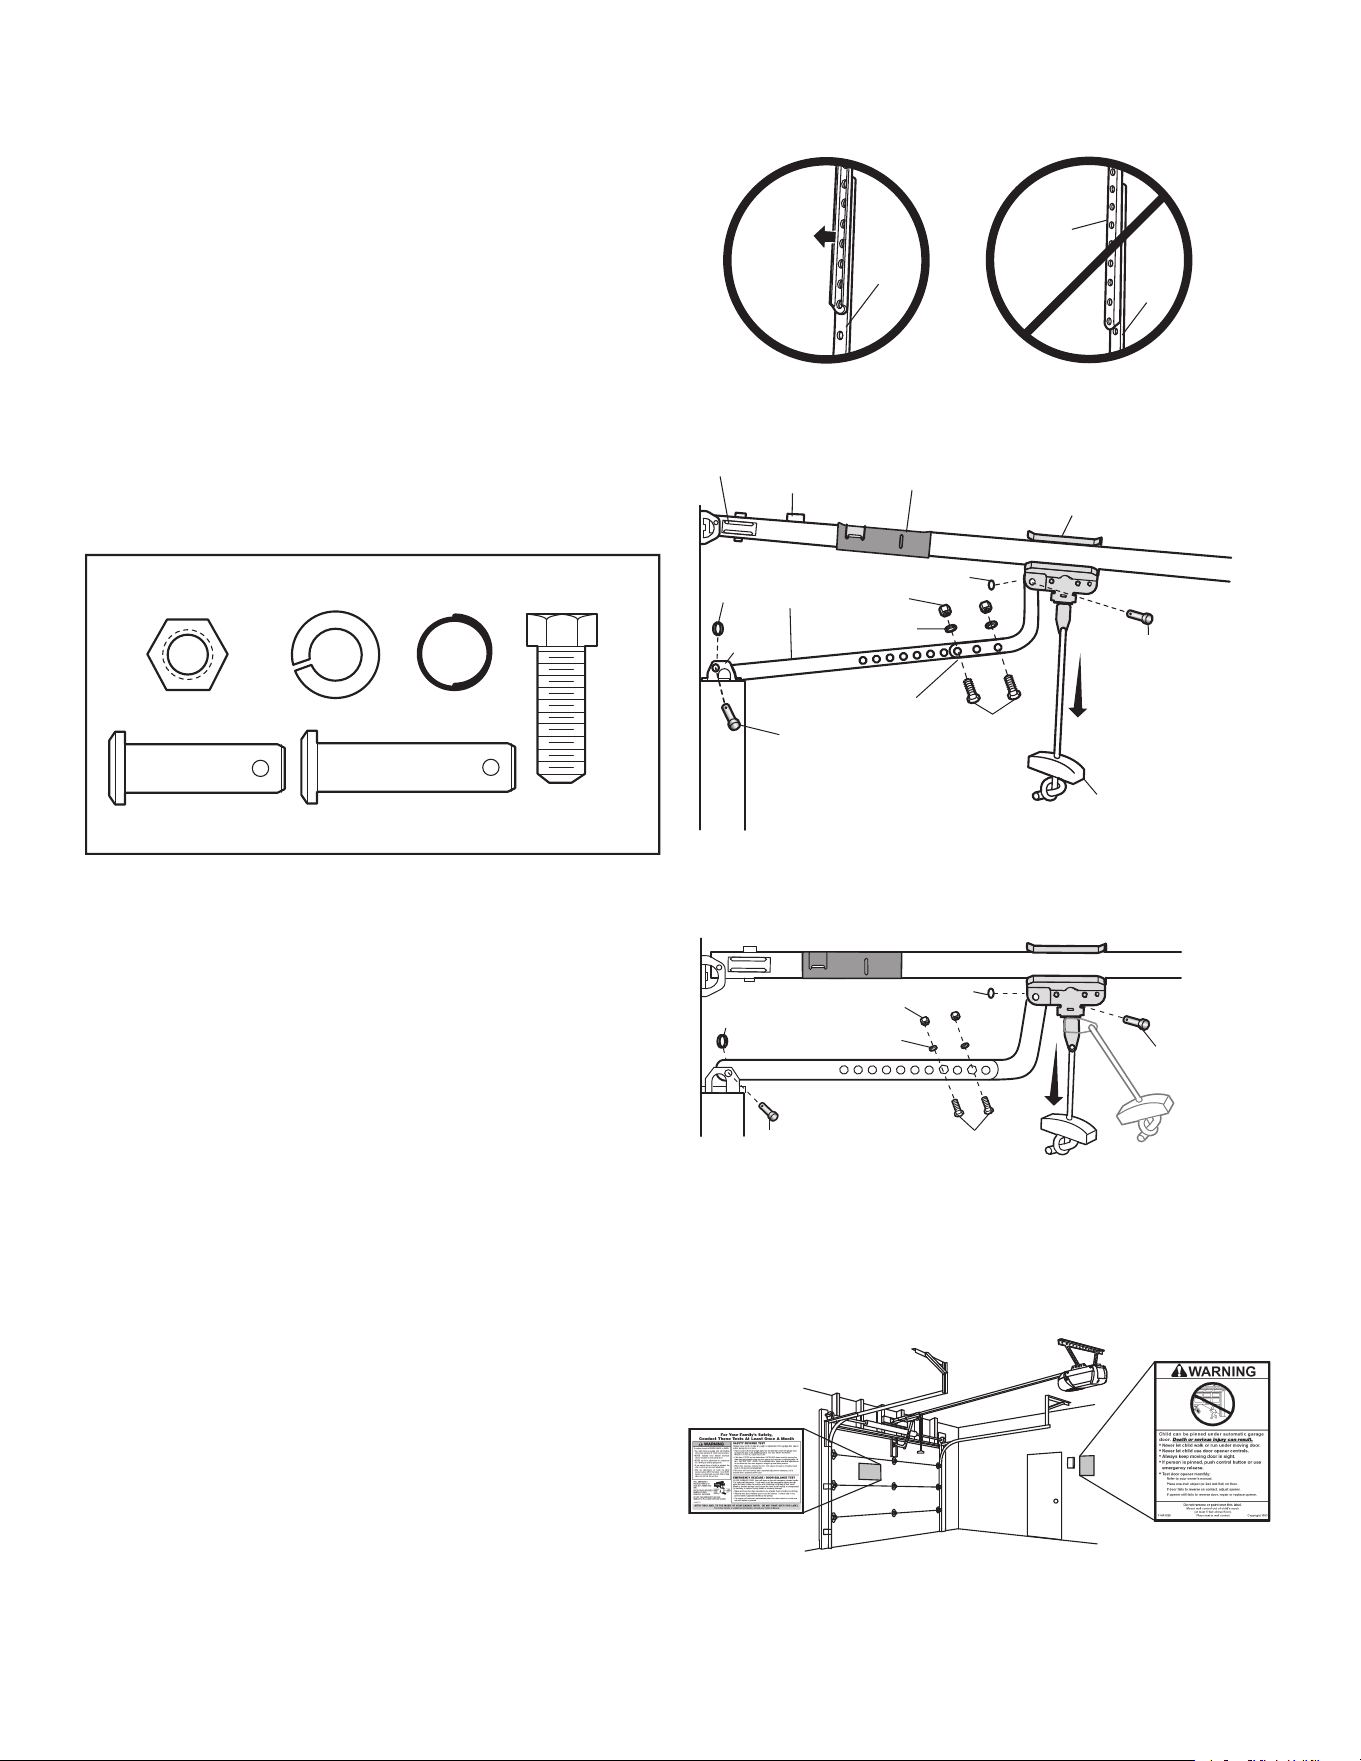
ATTACH THE WARNING LABELS
1. Attach the entrapment warning label on the wall near the door control with
tacks or staples.
2. Attach the manual release/safety reverse test label in a visible location on
the inside of the garage door.
21
Loading ...
Loading ...
Loading ...