Loading ...
Loading ...
Loading ...
INSTALLATION STEP 4
POSITION THE OPENER
Follow instructions which apply to your door type as illustrated.
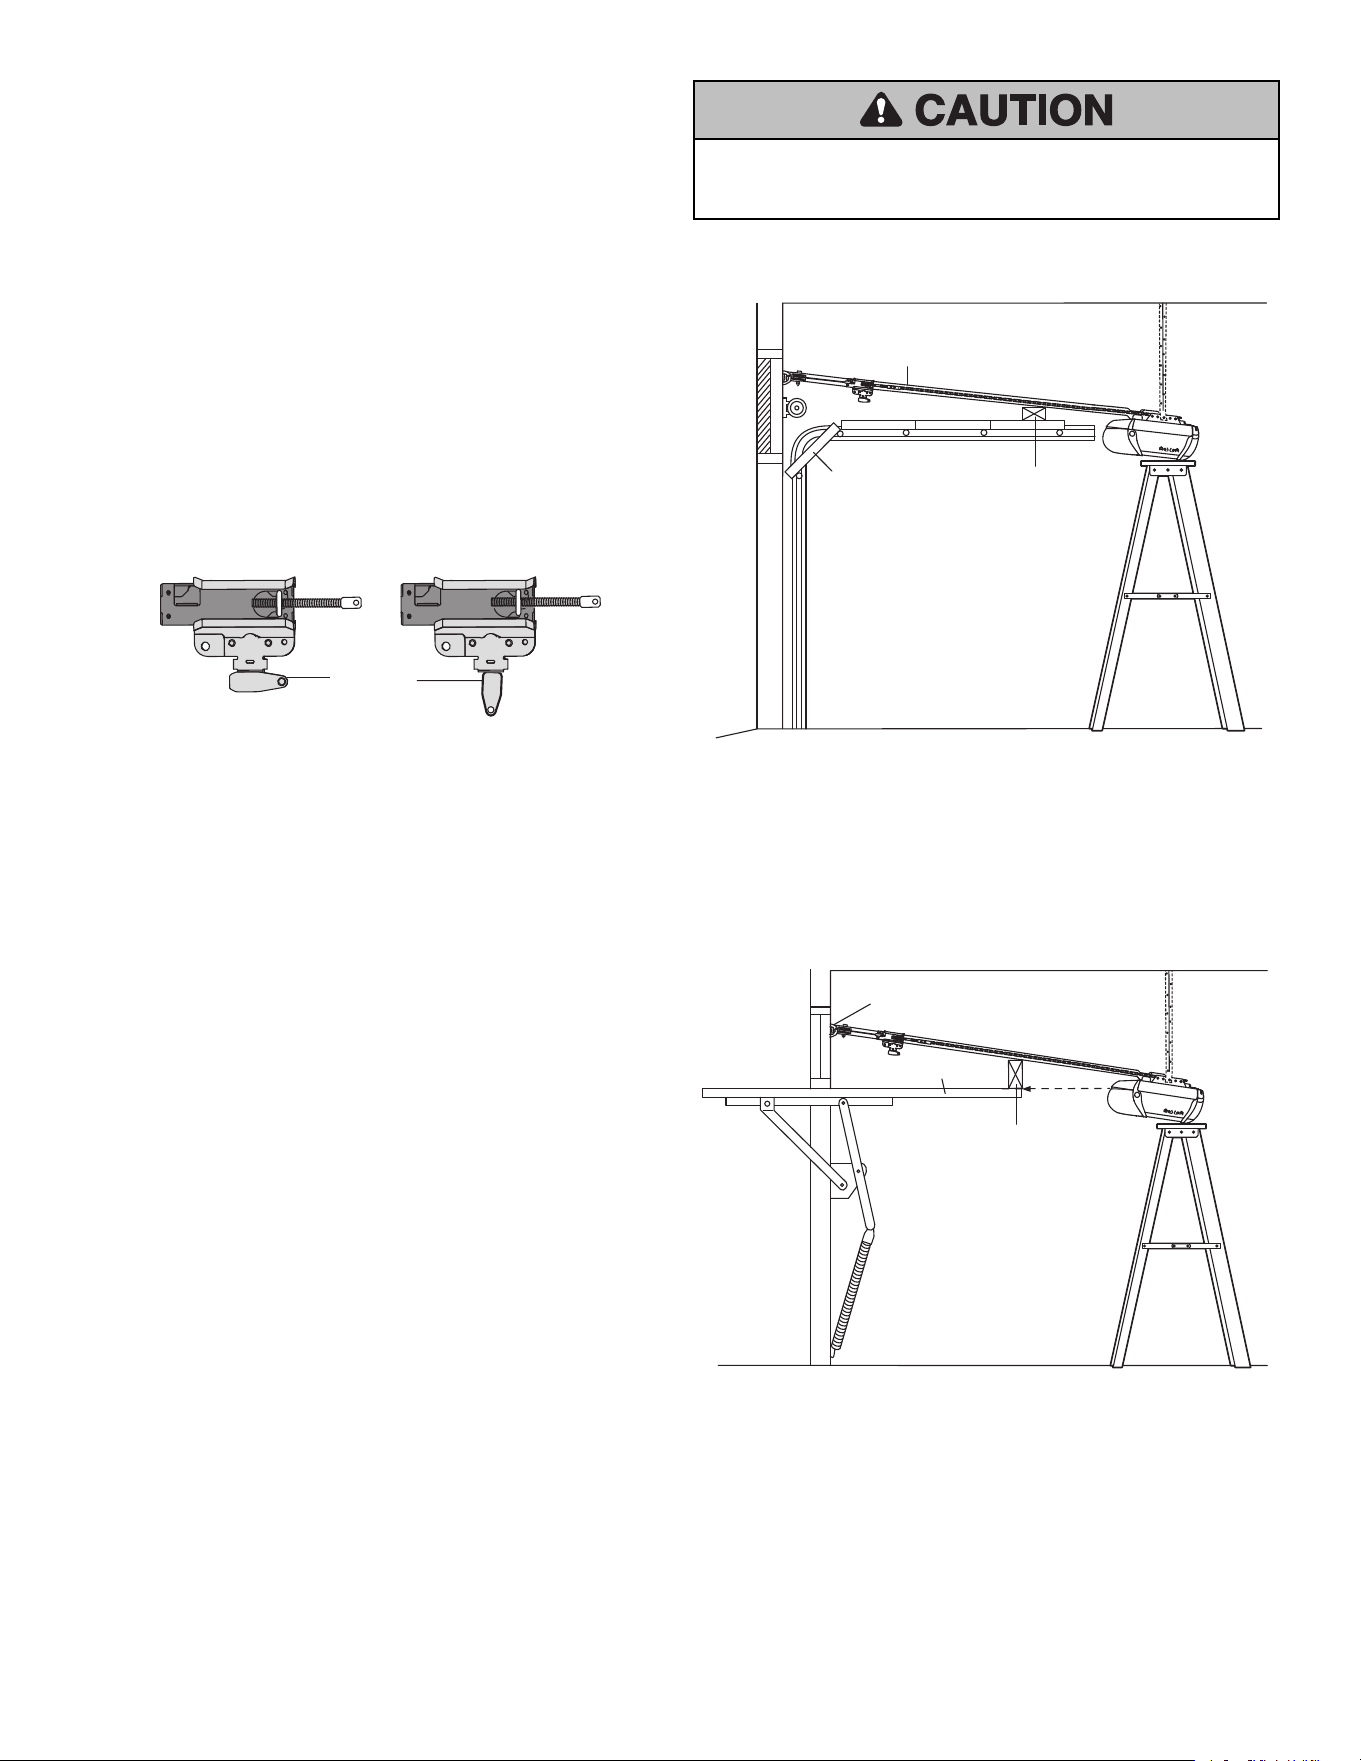
SECTIONAL DOOR OR ONE-PIECE DOOR WITH TRACK
A 2x4 laid flat is convenient for setting an ideal door-to-rail distance.
1. Raise the opener onto a stepladder. You will need help at this point if the
ladder is not tall enough.
2. Open the door all the way and place a 2x4 laid flat on the top section
beneath the rail (Figure 1).
3. If the top section or panel hits the trolley when you raise the door, pull
down on the trolley release arm to disconnect inner and outer sections.
Slide the outer trolley toward the motor unit. The trolley can remain
disconnected until Installation Step 12 is completed.
ENGAGED
RELEASED
Trolley
Release Arm
ONE-PIECE DOOR WITHOUT TRACK
A 2x4 on its side is convenient for setting an ideal door-to-rail distance.
1. Raise the opener onto a stepladder. You will need help at this point if the
ladder is not tall enough.
2. Open the door all the way and place a 2x4 on its side on the top section
of the door beneath the rail (Figure 2).
3. The top of the door should be level with the top of the motor unit. Do not
position the opener more than 4" (10 cm) above this point.
To prevent damage to garage door, rest garage door opener rail on 2x4 placed
on top section of door.
Header
Bracket
Top of Door
2x4 is used to determine
the correct mounting height
from ceiling.
Rail
2x4 is used to determine
the correct mounting height
from ceiling.
Door
Figure 1
Figure 2
15
Loading ...
Loading ...
Loading ...