
Loading ...
Loading ...
Loading ...
ACCESSORY DOOR PANEL (PTDP18)
The following installation parts are supplied
with PTDP18 door panels:
• Accessory door panel with foam insert
(finish designates color)
• 2 – Accessory side trim pieces
• 13 – #8 Sheet metal screws
Accessory Door Panel Installation (PTDP18)
The PTDP18 panel will be held on by five
screws (supplied in door panel packaging)
and two screws with locator pins pre-
attached (supplied on panels).
1. Remove all plastic covering on the
stainless steel panel.
2. Place the panel onto the outside of the
door, aligning it with the pre-drilled holes
on the trash compactor door facing.
3. Insert the panel into the door by inserting
the pre-attached locator pins into the
middle screw hole (second hole from top
on left and right-hand sides).
4. Install the five screws provided with
packaging into their designated locations
(two on left, two on right, and one at
the top).
5. Before installing the trash compactor into
its cutout, the side trim pieces must be
attached to the unit on each side. Please
refer to the template included in your
packaging and insert four screws in the
designated locations on the left and right
sides of the unit. You will be drilling
directly into the unit to attach the trim
pieces.
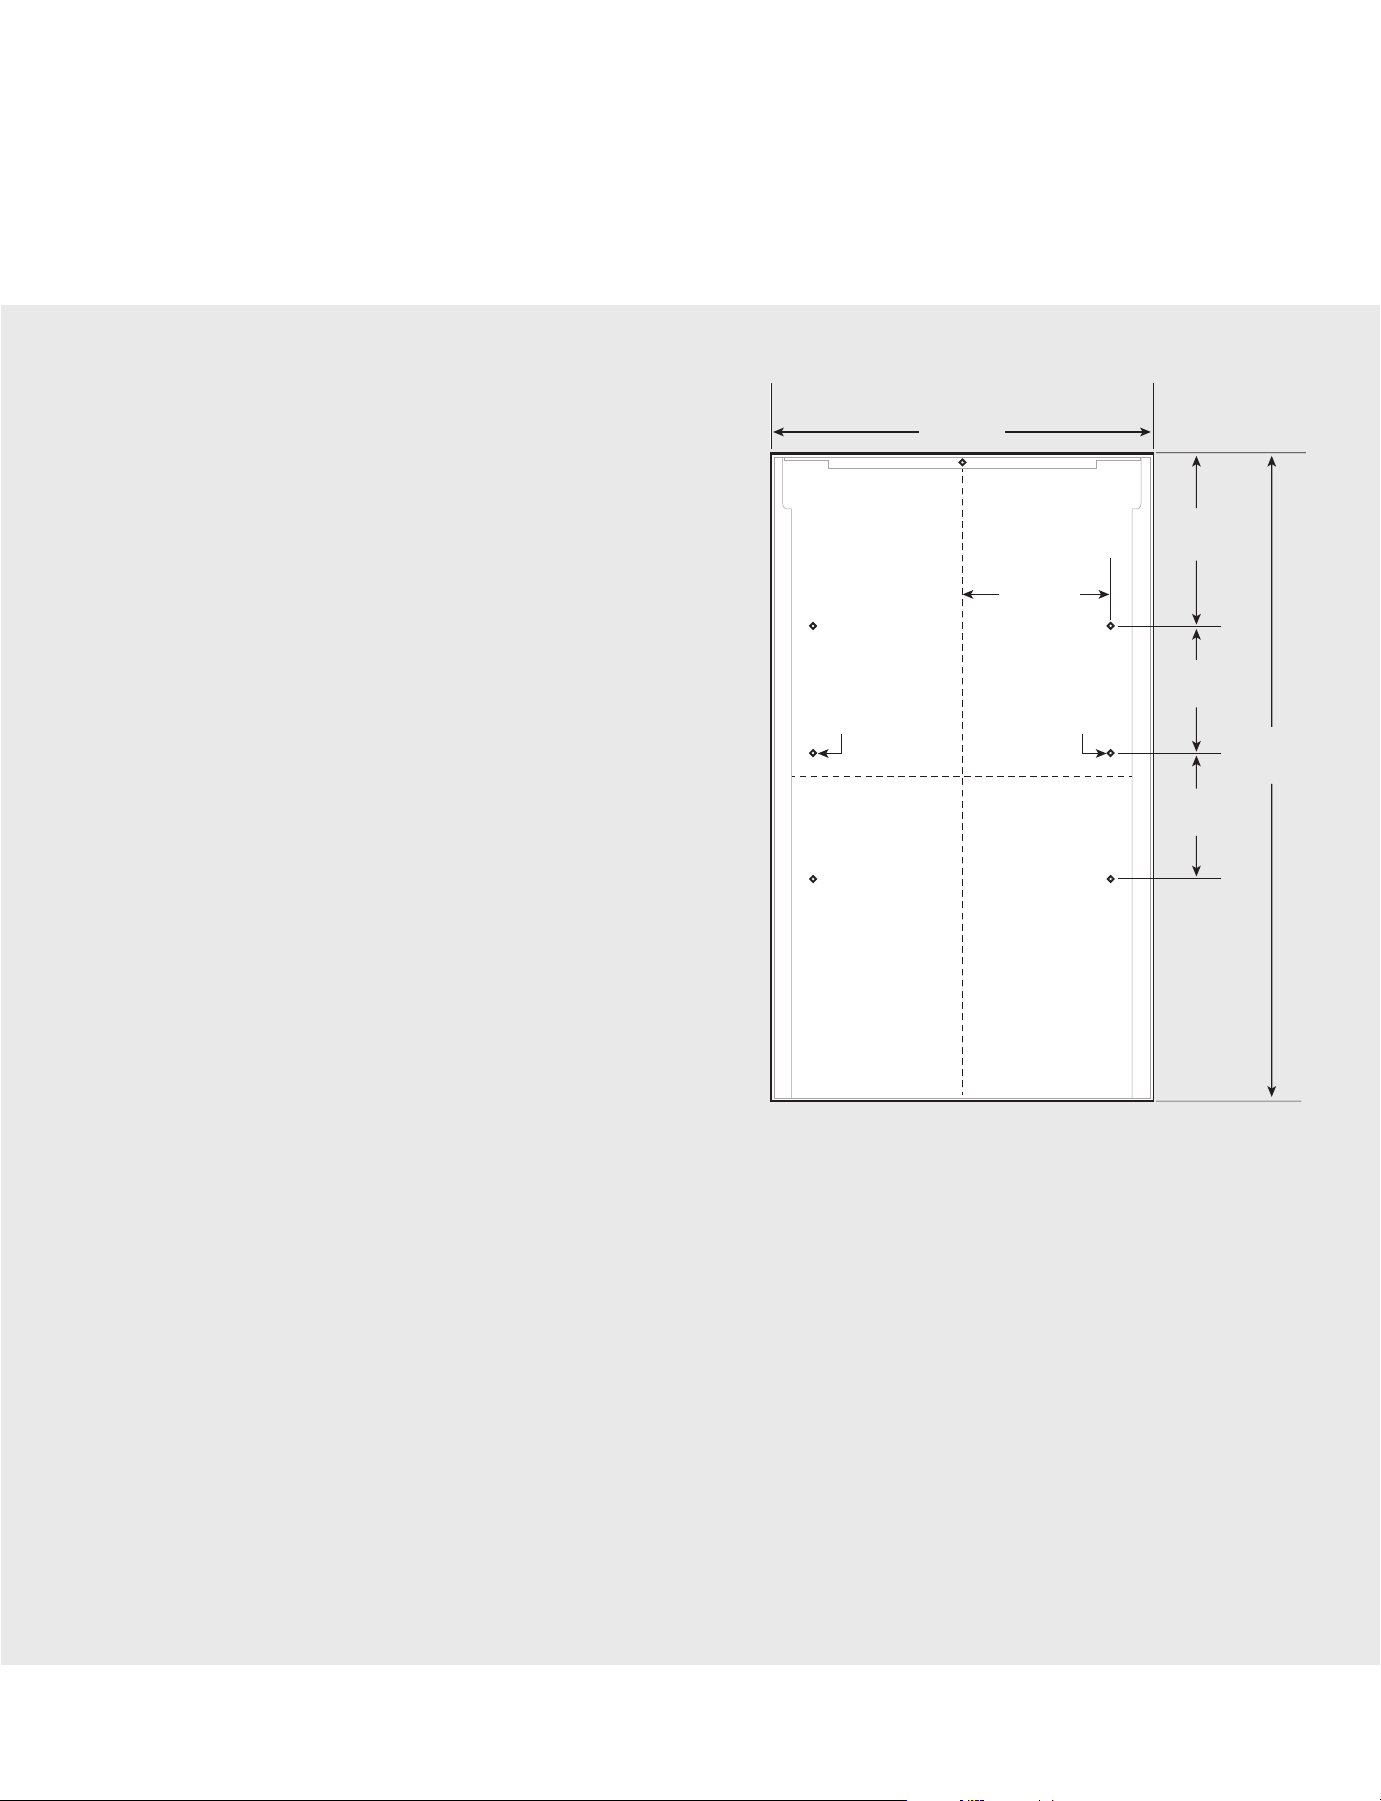
17-3/4"
(45.1 cm)
7"
(17.8 cm)
8"
(20.3 cm)
30-7/16"
(20.3 cm)
6"
(15.3 cm)
6"
(15.3 cm)
Locator
Pin
Locator
Pin
Locator
Pin
Locator
Pin
Locator
Pin
Locator
Pin
CUSTOM DOOR PANEL
A custom panel of wood or other material
not exceeding 15 lbs. can be attached to
the door.
To create and attach a custom panel:
• Panel width: 15”W. = 14-7/8” (37.9 cm);
18”W. = 17-7/8” (45.4 cm)
• Panel height: 30-5/16” (77.0 cm)
• Panel thickness: 3/4” (1.9 cm)
1. Purchase an accessory handle kit to match
your cabinet hardware and install per
handle instructions. Or you may purchase
a Viking handle kit: For a 15”W. panel use
Viking PHK14SS and for an 18”W. panel
use PHK17SS. Drill pilot holes for wood
screws. Use drill stop to prevent drilling
through the panel.
3. Mount panel to door by using wood
screws or supplied panel mounting
screws.
4. Make sure the door opens and closes
smoothly with the actuator entering and
exiting the door interlock switch on the
compactor.
Panel Installation and Dimensions
18"W=17-7/8"
(45.4 cm)
15"W=14-7/8"
(37.9 cm)
30-7/16"
(77.0 cm)
3/4"
(1.9 cm)
7"
(17.8 cm)
7"
(17.8 cm)
12 13
Panel Installation and Dimensions
Loading ...
Loading ...
Loading ...