
Loading ...
Loading ...
Loading ...
11
bromic.com/heating
HEATING INSTALLATION INSTRUCTIONS CONTINUED...HEATING INSTALLATION INSTRUCTIONS CONTINUED...
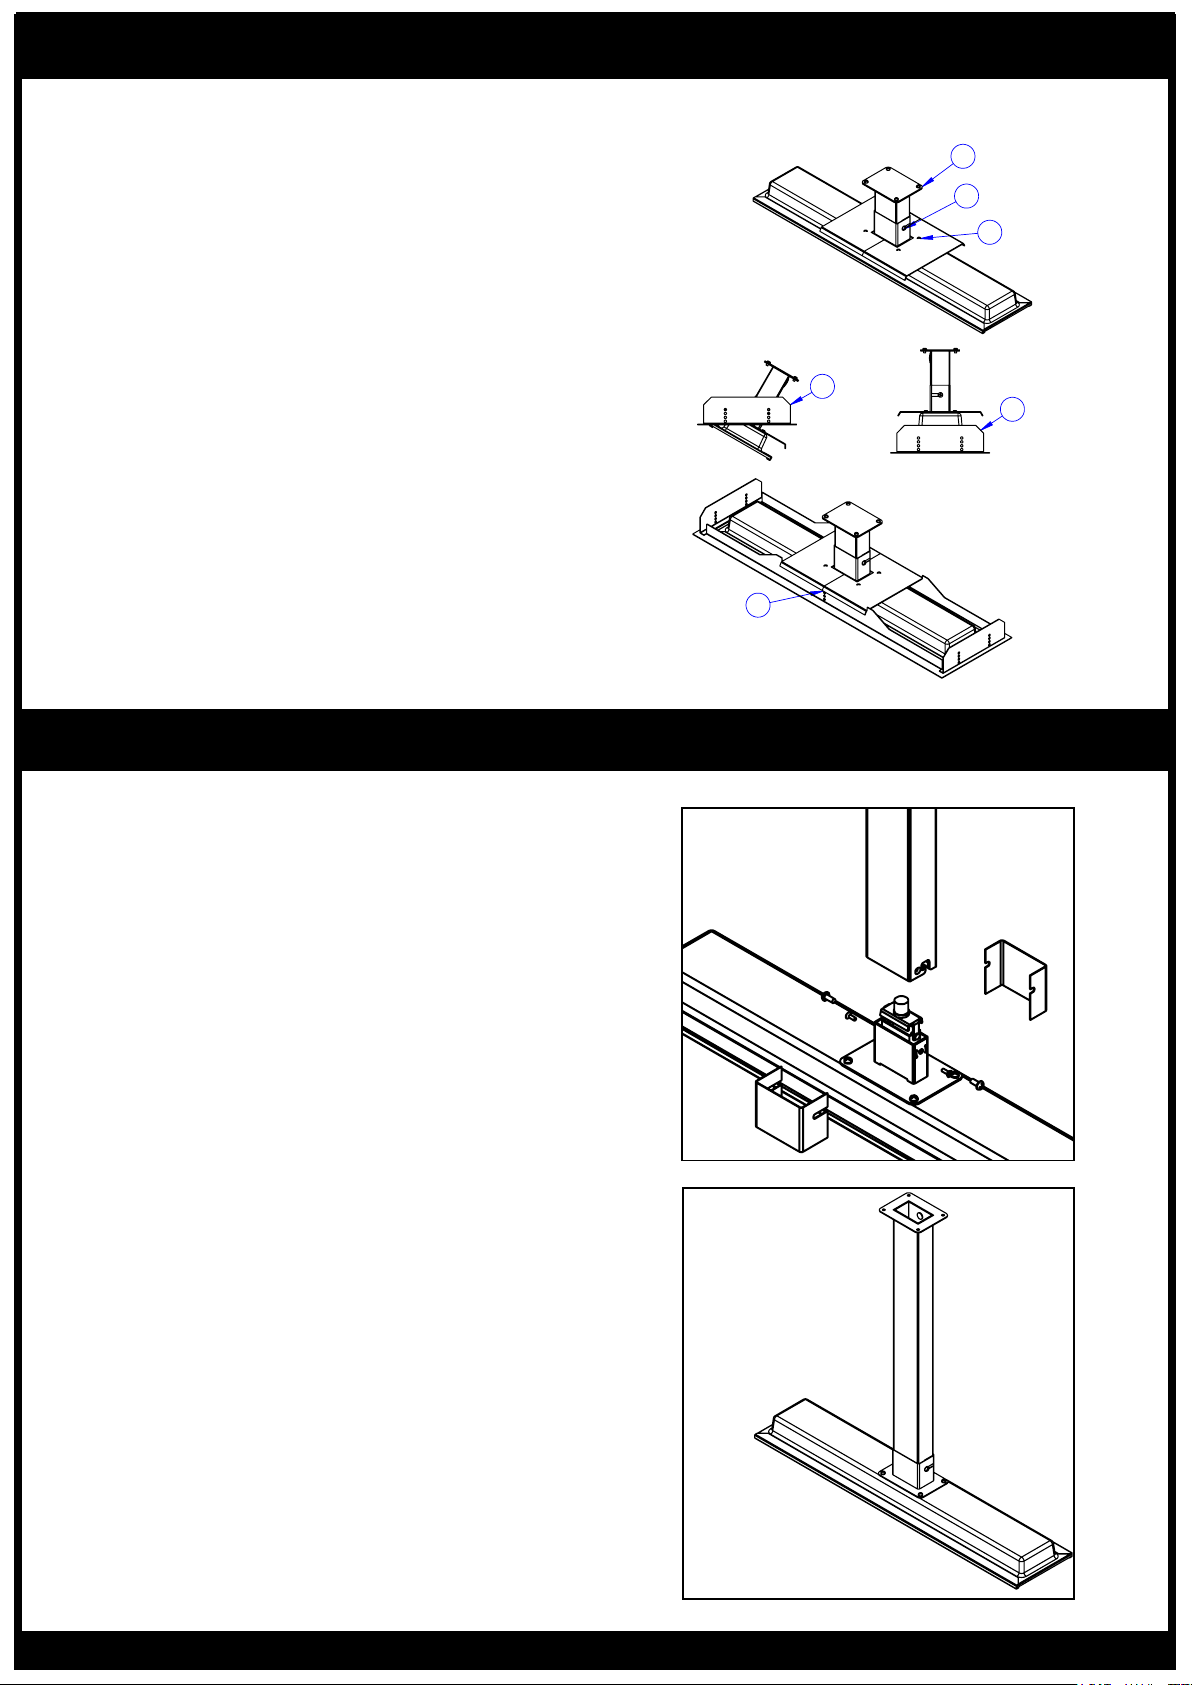
11. Attach the bracket end-cap to the wall bracket using the
4 M5 screws and nuts provided (k).
12. Carefully remove the 4 M5 screws fastening the heater
mounting bracket to the back of the heater. Be careful not
to move or put any force on the bracket. Place the 2 halves
of the ceilling recess mounting plate over the screwholes.
Re-insert the screws & tighten firmly. (l)
13. Make electrical connection from heater to power supply.
This is described under ‘Electrical Installation’
14. Raise one long side of heater up into ceiling frame cavity
& then raise whole heater into cavity. (m)
15. Rotate the heater into level position in the ceiling cavity
(n) and then lower down onto the ceiling frame . Ensure
the heater brackets are hooked over the ceiling frame and
sitting in the slots on both sides. (o)
CEILING RECESS (SOLD SEPARATELY)
• Heater must be installed with heater surface at
least 94” above the floor level.
• Installation is identical to ‘Ceiling & Wall Mounting’
above.
• Use ceiling bracket (sold separately) instead of
mounting bracket supplied with heater.
• Ceiling pole only suitable for ceiling mounting. Do
not wall mount.
TUBE SUSPENSION
m
k
l
j
o
n
11. Attach the bracket end-cap to the wall bracket using
the 4 M5 screws and nuts provided (k).
12. Remove the 4 M5 screws fastening the heater
mounting bracket to the back of the heater. Re-insert the
screws with both halves of the ceiling support bracket in
place and tighten firmly. (l)
13. Make electrical connection from heater to power
supply. This is described under 'Electrical Installation'
14. Raise one long side of heater up into ceiling
frame cavity & then raise whole heater into cavity.
(m)
15. Rotate the heater into level position in the
ceiling cavity (n) and then lower down onto the
ceiling frame . Ensure the heater brackets are
hooked over the ceiling frame and sitting in the
slots on both sides. (o)
Loading ...