Loading ...
Loading ...
Loading ...
Installation 7
TEMPERATURE CONTROL
Setthetemperaturebyusingtheslidetemperaturecontrol
in the main temperature control at slide temperature control
of the refrigerator compartment. When you first turn on the
refrigerator, set both the refrigerator and freezer temperature
controltoMID.
TIPS & INFORMATION
Changing settings
When you change the temperature settings, make small
adjustments and wait 24 hours before assessing
whether you need to make any further changes.
TIPS & INFORMATION
Settingthefreezertemperaturetothelowestisnot
recommended for normal or very hot climate condition as
this will limit the cooling capacity to other sections of the
refrigerator. In very cold climate, the freezer will need to
be set colder.
DOOR ALARM
If the refrigerator door is left open longer than two minutes,
a buzzer will sound. Re-set the alarm by pressing the
light switch.
LIGHT BULB CHANGE
1. Switchoffthepoweratthepowerpoint
andremovetherefrigerator’spower
cord from the powerpoint.
2. Remove shelves and chiller
compartment.
3. Carefully unclip the light cover
by pulling the top of the cover
towards you.
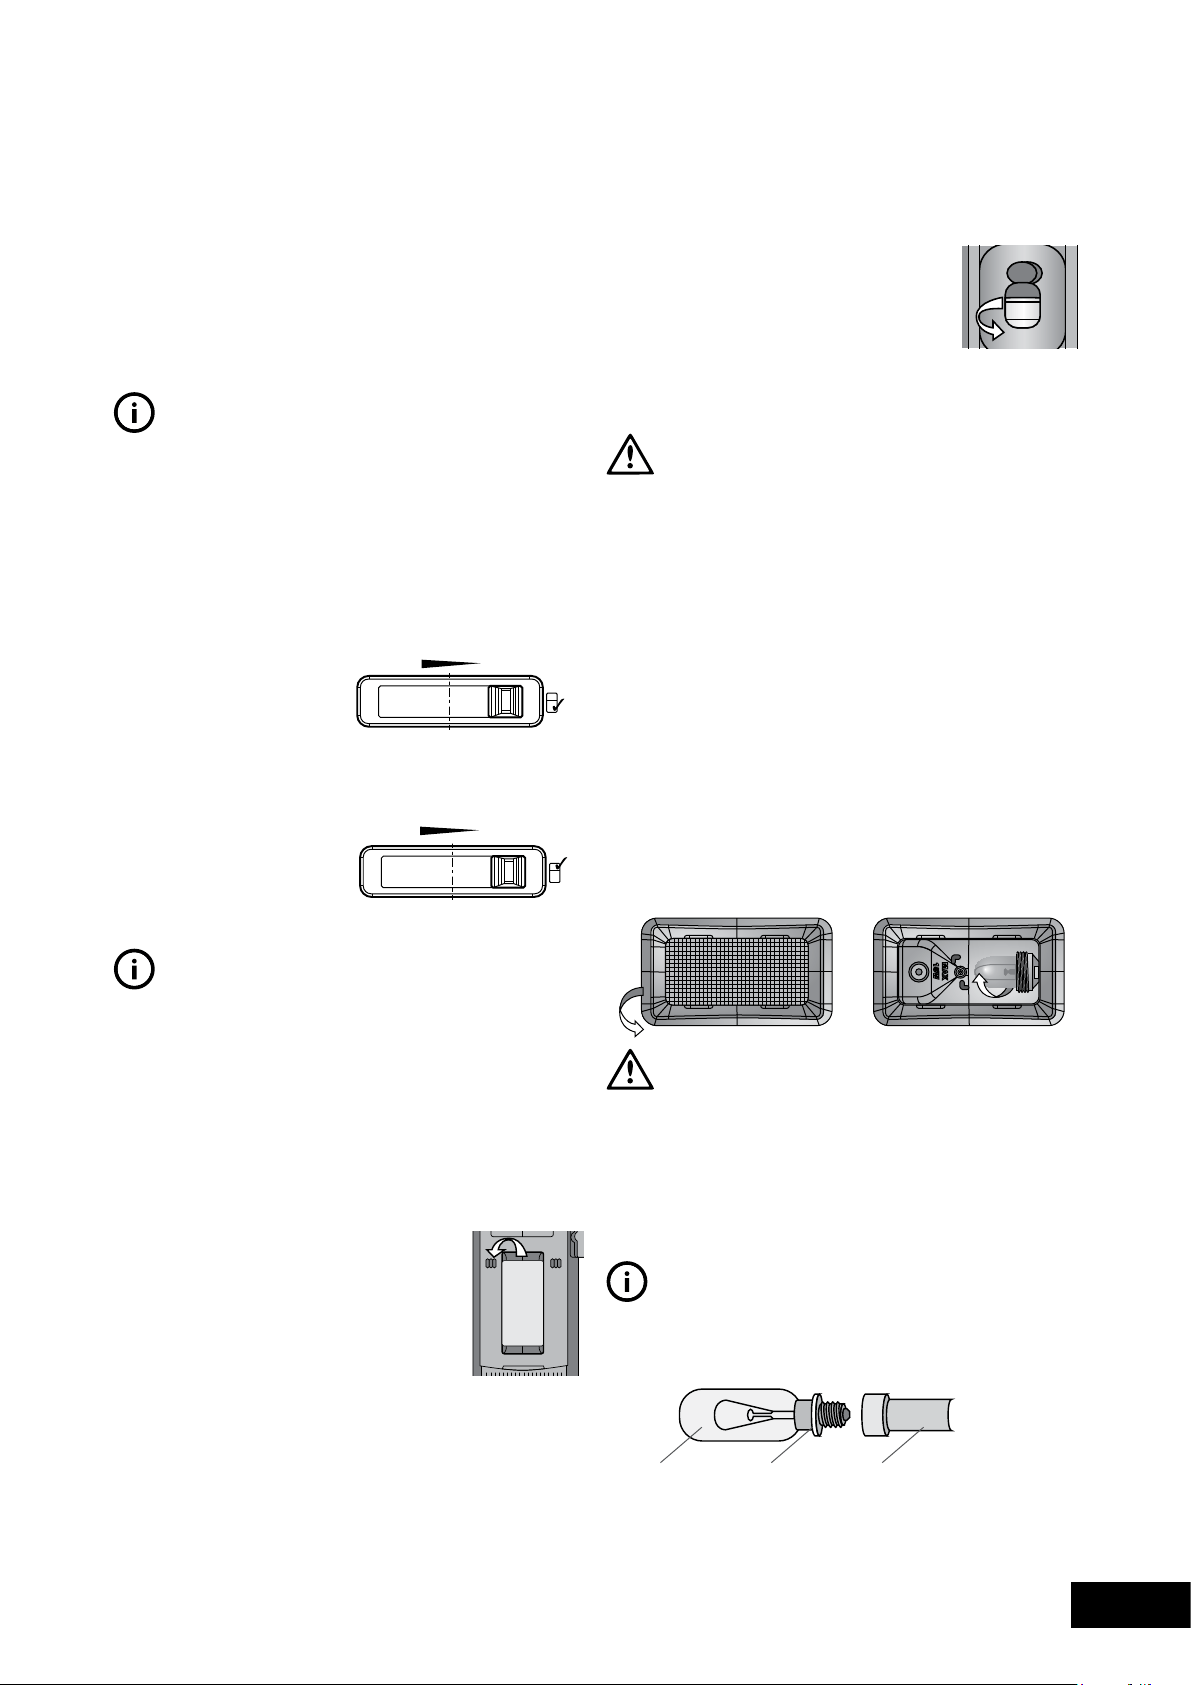
4. Unscrewthelightbulbandreplaceit
with a bulb of the same wattage and
type as the original. If, on removing
thelightbulb,asmallrubber‘O’ring
comesoffwiththebulb,fitthis‘O’ring
over the new bulb and screw the bulb
backintothesocket.Seediagram
at right.
WARNING
Never insert your finger into the light bulb socket to check
forthepresenceofthe‘O’ring.
5. Replace the light cover.
6. Replaceshelvesandchillercompartment.
7. Wait 5 minutes to ensure that pressure in the
refrigeration system is equalised. Then turn on the
refrigerator at the powerpoint.
FREEZER (WHERE FITTED)
1. Switchoffthepoweratthepowerpointandremove
therefrigerator’spowercordfromthepowerpoint.
2. Carefully unclip the light cover by pulling the top of the
cover towards you.
3. Unscrewthelightbulbandreplaceitwithabulbofthe
same wattage and type as the original. If, on removing
thelightbulb,asmallrubber‘O’ringcomesoffwith
thebulb,fitthis‘O’ringoverthenewbulbandscrew
thebulbbackintothesocket.Seediagrambelow.
WARNING
Never insert your finger into the light bulb socket to check
forthepresenceofthe‘O’ring.
4. Replace the light cover.
5. Wait 5 minutes to ensure that pressure in the
refrigeration system is equalised. Then turn on the
refrigerator at the powerpoint.
TIPS & INFORMATION
Ensurethatthe‘O’ringisinplacebeforereplacingthe
light bulb.
1.Selectthefreezercontrol.
2.Slidethecontroltothe
left to set Colder.
3.Slidethecontroltothe
right to set Less Cold.
ADJUSTING THE FREEZER TEMPERTURE
Light blub “O” ring Light socket
1.Selecttherefrigeratorcontrol.
2.Slidethecontroltothe
left to set Colder.
3.Slidethecontroltothe
right to set Less Cold.
REFRIGERATOR TEMPERTURE ADJUSTMENT
COLDER LESS COLD
COLDER LESS COLD
Loading ...
Loading ...
Loading ...