
Loading ...
Loading ...
Loading ...
Alwaysstopengine,disconnectspark plugwire, and groundagainst
enginebeforeperformingany type of maintenanceon yourmachine.
GENERAL RECOMMENDATIONS
• Alwaysobservesafetyruleswhenperformingany maintenance.
• Thewarrantyon this lawnmowerdoesnot coveritemsthathave
beensubjectedto operatorabuseor negligence.To receivefull
valuefromwarranty,operatormustmaintainthe equipmentas
instructedhere.
• Changingof engine-governedspeedwill voidenginewarranty.
• Alladjustmentsshouldbecheckedat leastonceeach season.
• Periodicallycheckall fastenersandmakesurethesearetight.
ENGINE MAINTENANCE
Spark Plug
Forgood performance,the spark plug mustbeproperlygappedand
freeof deposits.Replacethe spark plug annually.
1. Disconnectthe cap fromthe spark plug,andremoveanydirt from
the sparkplugarea.
2. Usethe propersizesparkplugwrenchto removethe sparkplug.
NOTE: Replacewitha Champion®RC12YCsparkplug.
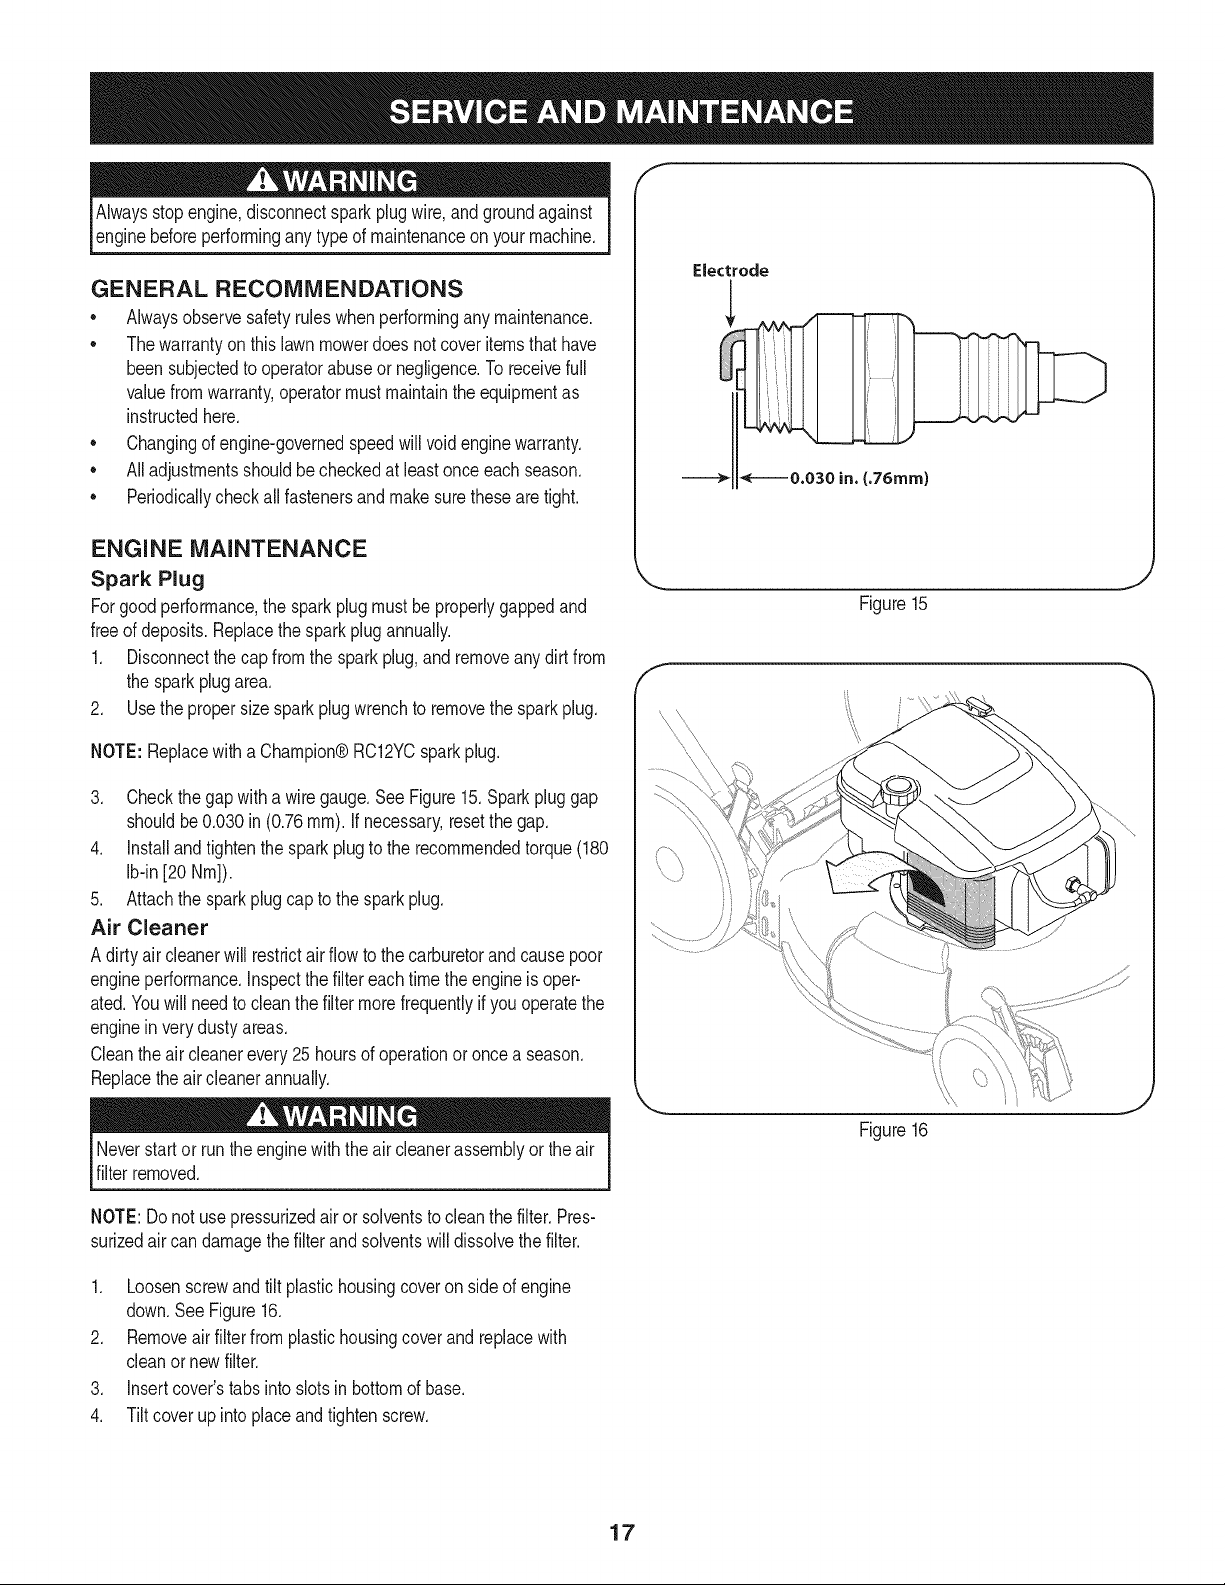
3. Checkthegapwitha wire gauge.SeeFigure15.Sparkpluggap
shouldbe 0.030in (0.76ram). If necessary,resetthe gap.
4. installandtightenthe sparkplugto the recommendedtorque(180
Ib-in[20 Nm]).
5. Attachthe sparkplug capto thesparkplug.
Air Cleaner
A dirtyaircleanerwill restrictair flow to the carburetorandcausepoor
engineperformance,inspectthe filter eachtimetheengine is oper-
ated.Youwill needto cleanthe filter morefrequentlyif youoperatethe
enginein verydusty areas.
Cleantheair cleanerevery25hoursof operationor once a season.
Replacetheair cleanerannually.
Neverstartor run the enginewith the air cleanerassemblyor theair
filterremoved.
f
Electrode
Figure15
Figure 16
NOTE:Do notuse pressurizedair or solventsto cleanthe filter.Pres-
surizedair can damagethefilter and solventswill dissolvethefilter.
1. Loosenscrewandtilt plastichousingcoveron sideof engine
down.SeeFigure16.
2. Removeairfilterfromplastichousingcoverandreplacewith
cleanor newfilter.
3. insertcover'stabs into slotsin bottomof base.
4. Tiltcoverupinto placeandtightenscrew.
17
Loading ...
Loading ...
Loading ...