Loading ...
Loading ...
Loading ...
10
3
5
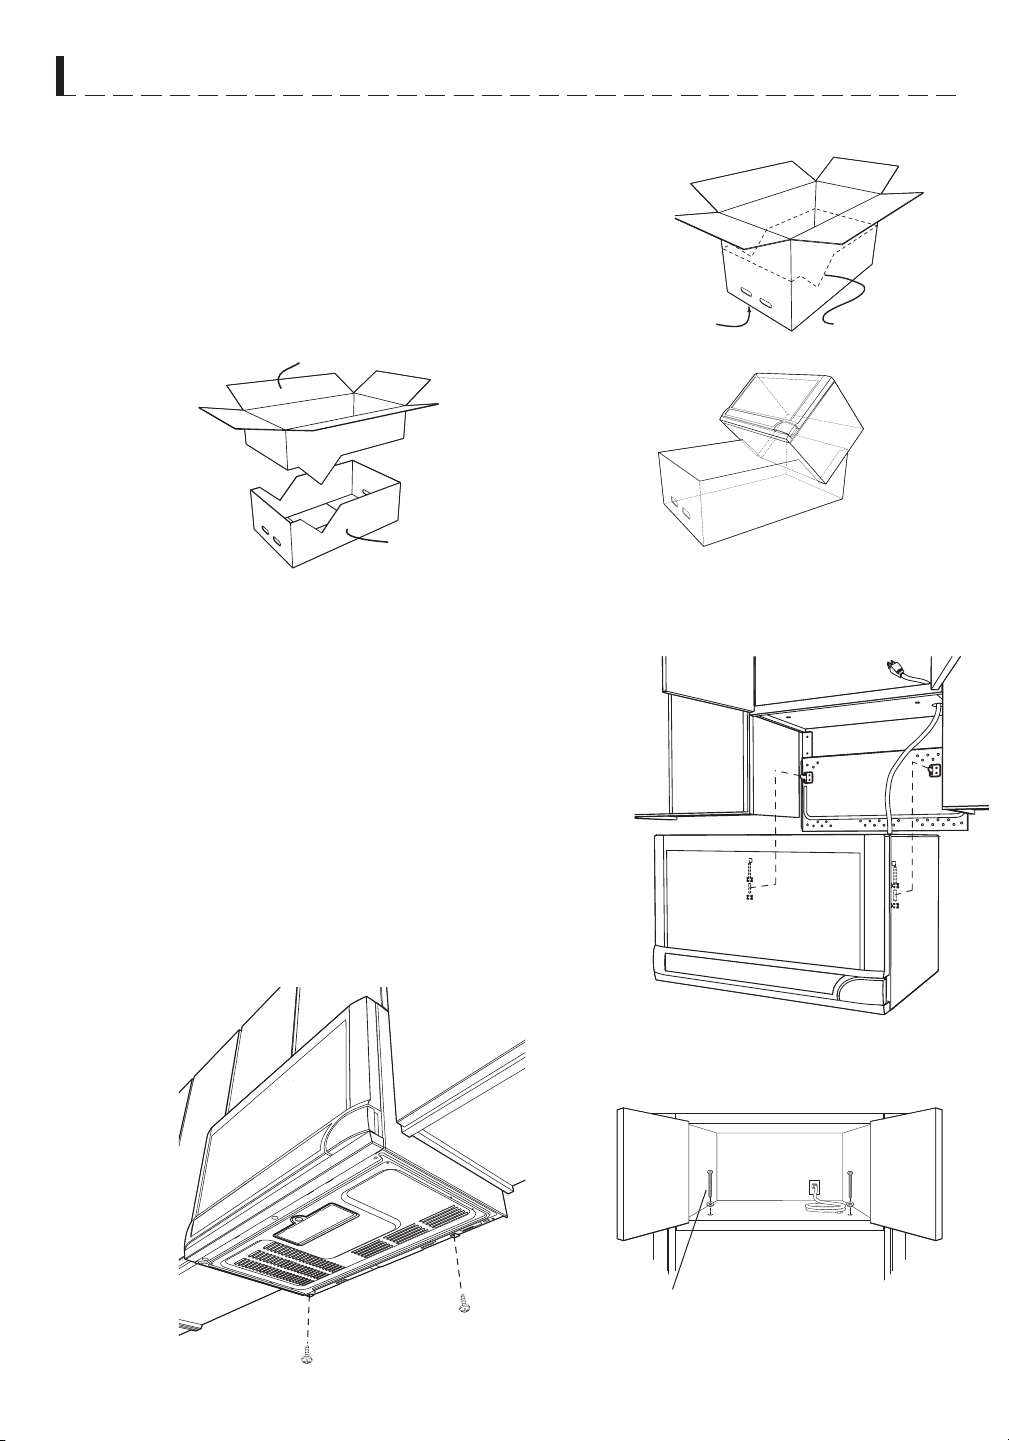
UNPACKING AND INSTALLATION INSTRUCTIONS
8 PREPARATION AND USE OF THE CARTON TO ASSIST
IN THE INSTALLATION OF THE MICROWAVE OVEN
Utilization of the carton may make installation easier.
1. Place carton upside down. See Figure 10.
2. Using cutting line around the carton, cut into two pieces (A) and (B).
See Figure 11.
3. Position oven to assist in mounting to the wall. See Figure 12.
Figure 11
Figure 10
Figure 12
MOUNTING OVEN TO THE WALL
Two people are recommended to attach the Microwave Oven to the
Mounting Plate.
1. Thread the Power Supply Cord through the hole made in the
bottom of the top cabinet. Install the oven by snapping it onto the
Mounting Plate. See Figure 13.
2. Use two Tapping Screws 4 to secure the levers that are on the
bottom of the oven. See Figure 14.
3. Use two Top Cabinet Screws 3 and two Flat Washers 5, supplied
in the INSTALLATION HARDWARE, to attach the unit to the top
cabinet. See Figure 15.
Figure 13
Figure 14
Figure 15
NOTE:
Screw length has been designed to accom-
modate 3/8" and above cabinet depth. If less,
screw must be cut to required length.
(A)
(B)
Top Side
Cutting Line
Loading ...
Loading ...
Loading ...