
Operating instructions
GK11TIFK
Induction hob

Thank you for choosing to buy one of our products. Your appliance is made to high
standards and is easy to use. Nevertheless, please take the time to read these operating
instructions in order to familiarise yourself with the appliance and get the best use out of
it.
Please follow the safety precautions.
Modifications
Text, diagrams and data correspond to the technical standard of the appliance at the
time these operating instructions went to press. The right to make technical modifications
for the purpose of the further development of the appliance is reserved.
Validity
The product family (model number) corresponds to the first alphanumerics on the identi-
fication plate. These operating instructions apply to:
Type Product family
GK11TIFKZ, GK11TIFKZS 31062
Variations depending on the model are noted in the text.
© V-ZUG Ltd, CH-6302 Zug, 2018
2

3
Contents
1 Safety precautions 4
1.1 Symbols used......................................................... 4
1.2 General safety precautions.................................. 4
1.3 Appliance-specific safety precautions ............... 4
1.4 Instructions for use................................................ 5
2 Using for the first time 7
3 Appliance description 7
3.1 Hob........................................................................... 7
3.2 Operating and display elements......................... 7
3.3 Overview of power levels ..................................... 9
3.4 Residual heat indicator......................................... 9
3.5 How induction hobs function............................... 9
3.6 Flexible cooking..................................................... 9
3.7 Cookware ..............................................................10
4 Operating the appliance 10
4.1 Operating the display..........................................10
4.2 Switching the appliance on ...............................11
4.3 Using cookware on the hob ..............................11
4.4 MemoryFunction ..................................................12
4.5 Teppan Yaki function ..........................................13
4.6 PowerPlus .............................................................14
4.7 AutoPowerPlus .....................................................14
4.8 ProfessionalMode................................................15
4.9 GourmetGuide......................................................16
4.10 Operating time .....................................................17
4.11 Restore function...................................................18
4.12 Pause cooking .....................................................18
4.13 Wipe protection....................................................19
4.14 Timer ......................................................................19
4.15 EcoManagement..................................................20
4.16 Switching a hotplate off ......................................20
4.17 Switching the appliance off................................20
5 User settings 21
5.1 Overview of user settings...................................21
5.2 Adjusting user settings .......................................21
5.3 Language ..............................................................21
5.4 Display ....................................................................21
5.5 Date.........................................................................22
5.6 Clock .......................................................................22
5.7 Notifications ...........................................................22
5.8 Signals and tones.................................................22
5.9 Assistance functions ............................................22
5.10 Childproof lock......................................................23
5.11 V-ZUG-Home..........................................................23
5.12 Appliance information ..........................................24
5.13 EcoManagement...................................................24
5.14 Factory settings.....................................................24
5.15 Service functions...................................................24
6 Care and maintenance 25
7 Trouble-shooting 26
7.1 Error messages.....................................................26
7.2 After a power failure.............................................27
7.3 Other possible problems.....................................27
8 Accessories 28
9 Technical data 29
9.1 Product fiche .........................................................29
9.2 EcoStandby............................................................29
9.3 Reference to «Open Source» licence...............29
10 Tips and tricks 30
10.1 Energy-efficient cooking ......................................30
10.2 Deep frying.............................................................30
11 Disposal 31
12 Index 32
13 Notes 34
14 Service & Support 35
4
1 Safety precautions
1.1 Symbols used
Denotes important safety precau-
tions.
Failure to observe said precautions
can result in injury or in damage to
the appliance or fittings!
Information and precautions that
should be observed.
Information on disposal
Information about the operating in-
structions
▸ Indicates step-by-step instructions.
– Describes how the appliance reacts
to the steps taken.
▪ Indicates a list.
1.2 General safety precautions
▪ Read the operating instruc-
tions before using the appli-
ance for the first time!
▪ This appliance can be used
by children aged 8 and above
and by persons with reduced
physical, sensory or mental
capabilities, or lack of experi-
ence and/or knowledge,
provided they are supervised
or have been instructed on
the safe use of the appliance
and have understood the haz-
ards involved. Children shall
not play with the appliance.
Cleaning and user mainten-
ance shall not be undertaken
by children without supervi-
sion.
▪ If an appliance is not
equipped with a mains cable
and a plug or other means for
disconnecting from the mains
with a contact opening on
each pole complying with the
conditions of overvoltage cat-
egory III for full isolation, an
isolating device must be in-
corporated into the perman-
ently installed electrical install-
ation in accordance with the
installation regulations.
▪ If the mains cable of this ap-
pliance is damaged, it must
be replaced by the manufac-
turer or its Customer Services
or a similarly qualified person
in order to avoid hazard.
1.3 Appliance-specific safety
precautions
▪ WARNING: Under no circum-
stances may hot pots or pans
be placed on the display.
▪ WARNING: If the surface has
a crack running through the
thickness of the material,
switch the appliance off and

1 Safety precautions
5
disconnect it from the mains
to avoid possible electric
shock.
▪ WARNING: The appliance
and its accessible parts get
hot during use. Be careful not
to touch the heating ele-
ments.
▪ Under no circumstances use
a steam cleaner to clean the
appliance.
▪ Do not place metal objects
such as knives, forks,
spoons, lids or aluminium foil
on the hob as they can get
hot.
▪ After use, switch the hob off
using the controls and do not
rely on the pan detector.
▪ WARNING: It can be danger-
ous to leave the hob unatten-
ded when cooking with fat or
oil, as this can lead to fires.
NEVER attempt to extinguish
a fire with water. Instead,
switch the appliance off and
then carefully smother the
flames with, for example, a lid
or a fire blanket.
▪ WARNING: Never store ob-
jects on the hob due to the
risk of fire.
▪ WARNING: The cooking pro-
cess should always be super-
vised. Shorter cooking pro-
cesses, in particular, must be
supervised the entire time.
▪ Do not operate the appliance
using an external time switch
or a separate remote control
system.
▪ When hot, the display must
not be cooled down with cold
liquid or a cold object.
1.4 Instructions for use
Before using for the first time
▪ The appliance must be installed and
connected to the electricity supply in
accordance with the separate installa-
tion instructions. Have a qualified fitter/
electrician carry out the necessary
work.
Correct use
▪ The appliance is designed for use in
the home for preparing food. No liability
is assumed for any damage caused by
improper use or incorrect handling.
▪ Any repairs, modifications or manipula-
tions to the appliance, especially any
electrically live parts, may only be car-
ried out by the manufacturer, its Cus-
tomer Services or a similarly qualified
person. Repairs if carried out incorrectly
may cause serious injury, damage to
the appliance and fittings, as well as af-
fect the functioning of the appliance. If
the appliance is not working properly or
in case of a repair order, follow the in-
structions given in the 'Repair service'
section. Contact our Customer Services
if necessary.
▪ Use original spare parts only.
▪ Retain these operating instructions for
future reference. If you sell the appli-
ance or pass it on to a third party,
please ensure these operating instruc-
tions accompany the appliance, to-
gether with the installation instructions.

1 Safety precautions
6
▪ The appliance corresponds to recog-
nized technology standards and the rel-
evant safety regulations. However,
proper use of the appliance is essential
to avoid damage and accidents. Please
therefore follow the precautions given in
these operating instructions.
▪ The heated surface will remain hot for
some time after it is switched off and
will cool down only slowly to room tem-
perature. Please allow sufficient time for
the appliance to cool down before, for
instance, cleaning it.
Caution: Burns hazard
▪ Overheated fat and oil can easily catch
fire. Never attempt to extinguish burning
oil or fat with water. Danger of explo-
sion! Smother the flames with a fire
blanket. Keep doors and windows
closed.
Caution: Risk of injury
▪ Keep pets away from the appliance.
Caution: Risk to life
▪ Packaging materials, e.g. plastic film
and polystyrene, can be dangerous for
children. Danger of suffocation! Keep
packaging material away from children.
How to avoid damaging the appliance
▪ When hot, the display must not be
cooled down with cold liquid or a cold
object.
▪ In case of overheating, switch the hot-
plate off and allow it to cool down com-
pletely. Do not put any dishes on it. Un-
der no circumstances use cold water to
cool it down quickly.
▪ Do not climb on to the appliance.
▪ Do not put hot cookware on the hob
frame in order not to damage the silic-
one joints.
▪ Do not cut or prepare food on the sur-
face and avoid impact with hard ob-
jects. Do not drag cookware across the
surface.
▪ Take particular care that sugary foods
or juices do not get onto the hot cook-
ing zones as it can damage them. If
sugary foods or juices do get on to the
hot cooking zones clean away immedi-
ately (while still hot) with a scraper.
▪ Pots with pure copper or aluminium
bases should not be used for cooking
as they can leave behind traces that
can be difficult to clean. If the traces
are not removed immediately after
cooking with a suitable cleaning agent,
they can be permanently burned on and
therefore permanently ruin the visual
appearance of the appliance.
▪ Sliding pans and cookware across the
glass ceramic causes scratches. This
can be largely prevented by lifting pans
and cookware up and then placing
them down in position.
▪ The hob is designed to be used – signs
of use, such as scratches or the wear
and tear from pans and cookware, are
normal. The more intensively it is used,
the greater the signs of use; however,
the appliance remains in perfect work-
ing order and therefore does not give a
right of complaint. Safety is guaranteed
at all times.
▪ There is no such thing as completely
scratch-proof glass; scratches can even
develop on sapphire glass, which is
used in watches. The glass ceramic
used is of the best quality available on
the market.
2 Using for the first time
The appliance must be installed and connected to the electricity supply in accord-
ance with the separate installation instructions. Have a qualified fitter/electrician
carry out the necessary work.
During the first few hours of use, the appliance can give off an unpleasant smell.
This is normal for brand new appliances. Ensure that the room is well ventilated.
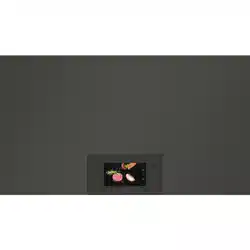
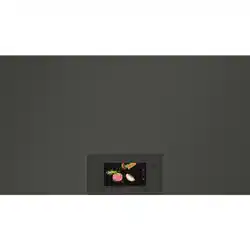
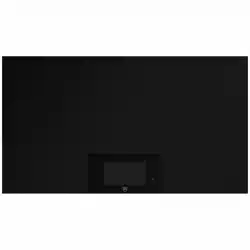
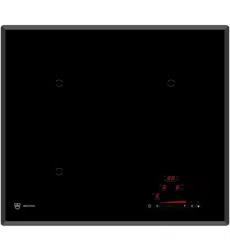
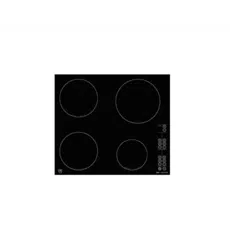
3 Appliance description
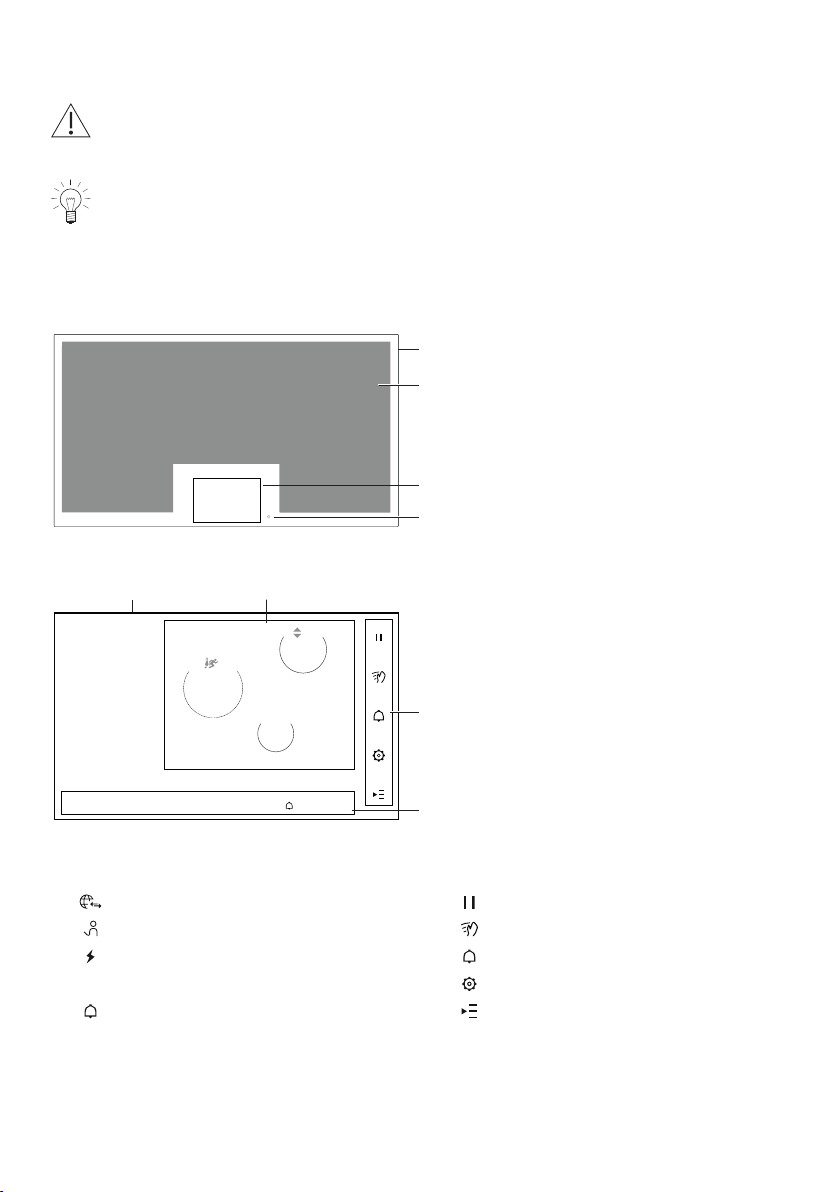
3.1 Hob
3
1
2
4
1
Hob
2
Cooking zone
3
Display
4
ON/OFF button
3.2 Operating and display elements
PLQV굛굧깄N:K
굴ʲ
4
3
21
1
Display
2
Hotplate display
3
Buttons
4
Status display / setting range
Status display Buttons
V-ZUG-Home * Pause cooking
Demo mode Wipe protection
Consumption indicator Timer
12:34 Time User settings
Timer Settings options
* Depending on model
7
3 Appliance description
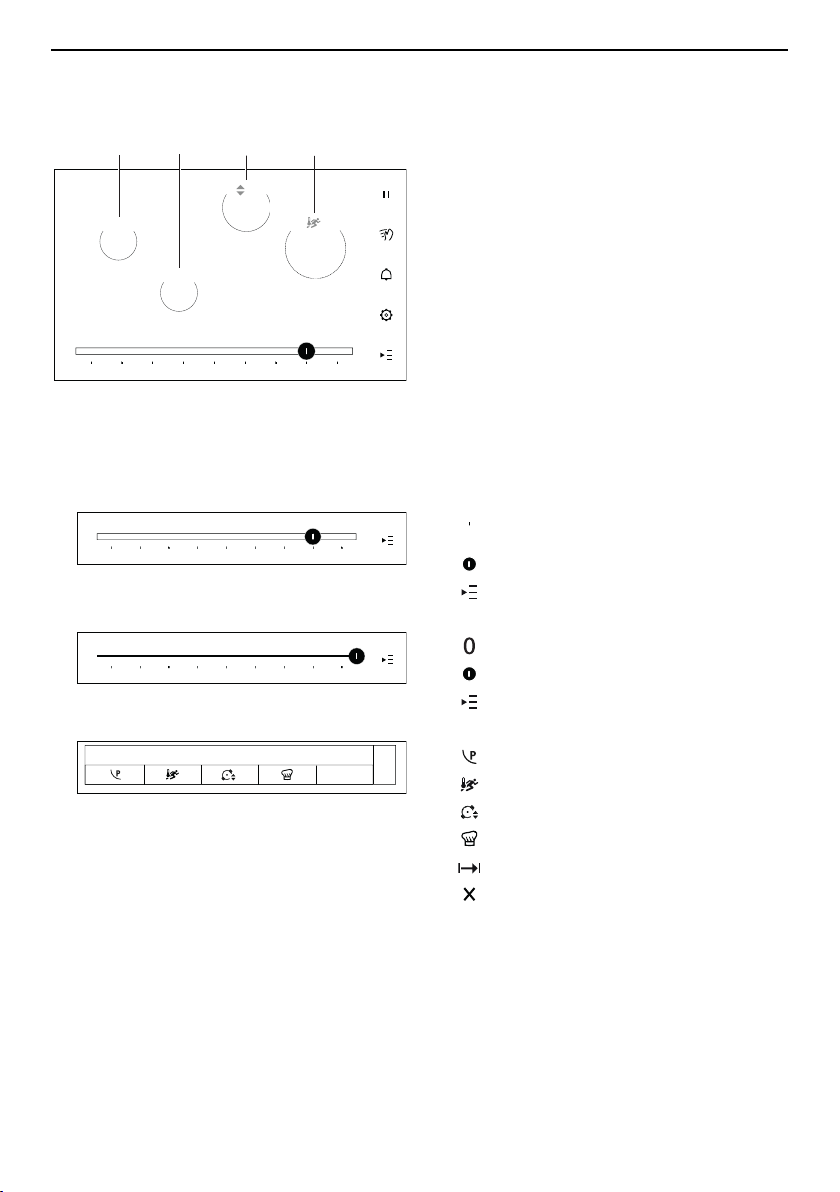
Hotplate display
The power levels selected and settings options appear in the hotplate display. The
power level, colour and type of edge show the activity of the hotplate.
굴ʲ
4
2
3
1
1 Power level «0»: Hotplate
switched off
2 Orange: Hotplate switched on
and selected in display
3 Grey: Hotplate switched on but
not selected in display; select-
able
4 Grey, with dotted edge: Hotplate
switched off; recalculating posi-
tion of cookware
Setting range
Depending on the desired setting, the following possibilities for interaction appear in the
setting range:
▪ Power level slider
Power levels 1–9
Active power level
Settings options
▪ GourmetGuide slider
.HHSZDUP
Switch off
Switch on / active state
Settings options
▪ Settings options
굴
굖
굗
K
PowerPlus
AutoPowerPlus
ProfessionalMode
GourmetGuide
Operating time
Close settings options
8

3 Appliance description
3.3 Overview of power levels
The power level selected appears in the setting range and in the corresponding hotplate
display. The power levels can be set in half-steps.
Power level Cooking method Use
1 Melting, gentle warming Butter, chocolate, gelatine,
sauces
2
3 Swelling Rice
4 Resume cooking, reducing,
stewing, steaming
Vegetables, potatoes, sauces, fruit, fish
5
6 Resume cooking, braising Pasta, soup, braised meat
7 Gentle frying Rösti, omelettes, breaded
fried foods, sausages
8 Frying, deep frying Meat, chips
9 Flash frying Steak
3.4 Residual heat indicator
After a hotplate is switched off, «Residual heat» is displayed as long as there is a risk of
burns.
3.5 How induction hobs function
Induction hobs work very differently from conventional hobs or hot plates. The induction
coils under the glass ceramic plate produce a rapidly changing magnetic field which dir-
ectly heats up the magnetic base of the cookware. The glass ceramic plate is only
warmed by the hot cookware.
Induction hobs have a quick reaction time, allow precision cooking, are powerful, energy-
efficient and safe.
3.6 Flexible cooking
In flexible cooking, there are no marked cooking zones.
The hob detects cookware with a diameter of ø10cm or larger and shows which hot-
plates they are on in the display. Up to six pans can be placed on the hob.
Pan detection
The hob detects the position and size of the cookware in the following situations:
▪ The cookware is placed on the hob when it is switched on.
▪ The cookware is moved or repositioned on the hob when it is switched on.
Hotplate display
Each hotplate detected is shown as a circle or rectangle in the display. The settings for
each hotplate detected can be made in the display.
Changing the position of the cookware
If the cookware is moved or lifted and repositioned, the hob detects the cookware’s new
position and automatically takes over all the settings from its old position. Further inform-
ation can be found in the “MemoryFunction” (see page 12) section.
9
4 Operating the appliance
3.7 Cookware
Suitable cookware
Only cookware with a full magnetic base is suitable for use with the induction hob.
This can be checked in the following ways:
▪ A magnet sticks anywhere on the base of the cookware.
▪ The cookware can be selected in the display and be repositioned or moved on the
hob without the «Cookware not induction-compatible» message appearing.
Do not heat any unsuitable cookware using aids such as metal rings and the like.
This can damage the hob.
Coated cookware
▪ Coated cookware may be operated above power level «7» provided that the bottom of
the pan is completely covered with liquid.
– The coating may otherwise become overheated and damaged.
▪ For frying, do not use a higher power level than «7».
Never use AutoPowerPlus with coated frying pans.
Noise during cooking
Cookware can make noise during cooking. This does not indicate any malfunction, nor
does it affect the functioning of the appliance in any way.
Noise depends on the cookware used. If the noise causes considerable disturb-
ance, it can help to change the cookware.
Noises when hotplate is switched off
The appliance can make clicking noises when the hotplate is switched off. This does not
indicate any malfunction, nor does it affect the functioning of the appliance in any way.
4 Operating the appliance
4.1 Operating the display
The different power levels, functions and settings options are selected by using various
hand gestures.
Touch
▸ Press the button gently.
– The function is activated
when you take your finger
off the button.
굖
Slide
▸ Move your finger from left to right or
from right to left along a scale.
▸ Take your finger off the scale.
– The desired value is set.
10
4 Operating the appliance
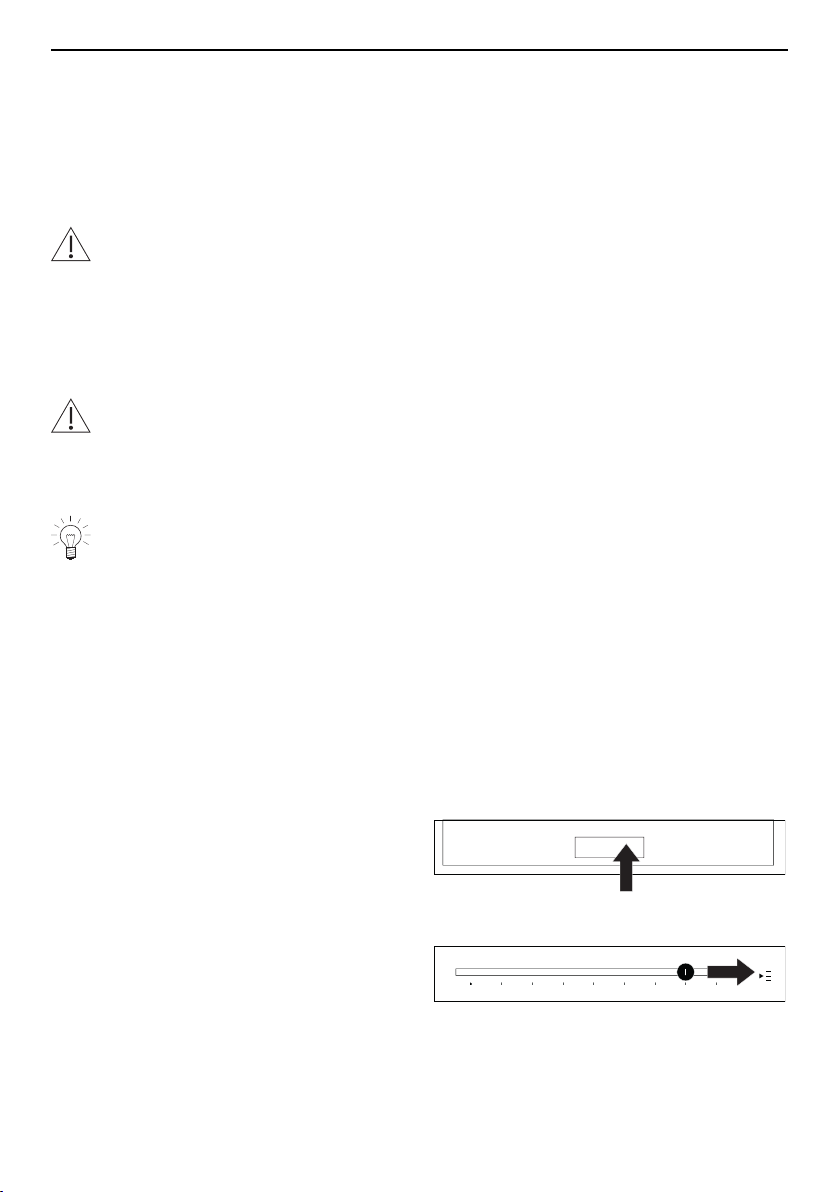
Swipe
▸ Move your finger from left to right or
from right to left.
– Other possible values and settings
appear.
'DWH
1RWLILFDWLRQV
$VVLVWDQFHIXQFWLRQV
'LVSOD\
&ORFN
6LJQDOVDQGWRQHV
&KLOGSURRIORFN
/DQJXDJH
굸굗8VHUVHWWLQJV
Scroll
▸ Move your finger from top to bottom or
from bottom to top.
– Other possible values appear.
굸굗
궓
7LPHUILQLVKHVDW
V
PLQV
K
굸굗
6HWWKHWLPHU
4.2 Switching the appliance on
▸ Hold the button depressed until the displays appear.
4.3 Using cookware on the hob
▸ If the appliance is switched off: First hold the button depressed until the displays ap-
pear.
▸ Place the cookware on the hob so that the base of cookware stands fully on the hob.
– The hotplate detected appears in the display.
▸ Touch the hotplate shown in the display.
– The slider appears in the display.
▸ Touch or slide your finger along the slider to select the desired power level.
– The power level selected appears in the hotplate shown.
▸ Make the desired settings (if any) and confirm by touching the button.
The settings options are described here:
▪ PowerPlus (see page 14)
▪ AutoPowerPlus (see page 14)
▪ ProfessionalMode (see page 15)
▪ GourmetGuide (see page 16)
▪ Operating time (see page 17)
11
4 Operating the appliance
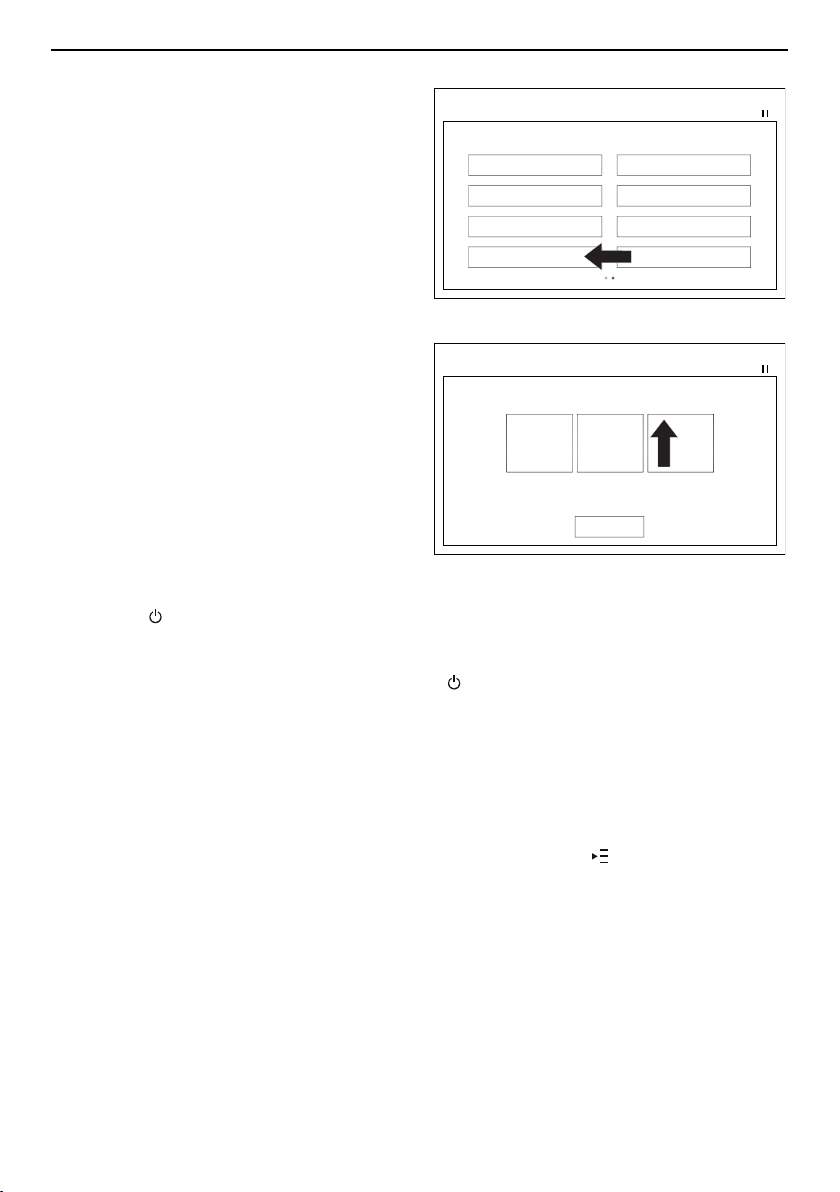
4.4 MemoryFunction
If the cookware is moved or lifted, the settings from the old hotplate are saved and auto-
matically taken over for the new hotplate.
Saving settings
The hotplate display is shown when the cookware is being moved or lifted. If the cook-
ware is not placed back on the hotplate within a set period of time, all the settings are
cleared. The time period can be changed in “MemoryFunction” (see page 22) under
“Assistance functions” in the user settings.
One item of cookware must be put down and operated before another one can be
moved or lifted. The hob only saves the settings for one item of cookware.
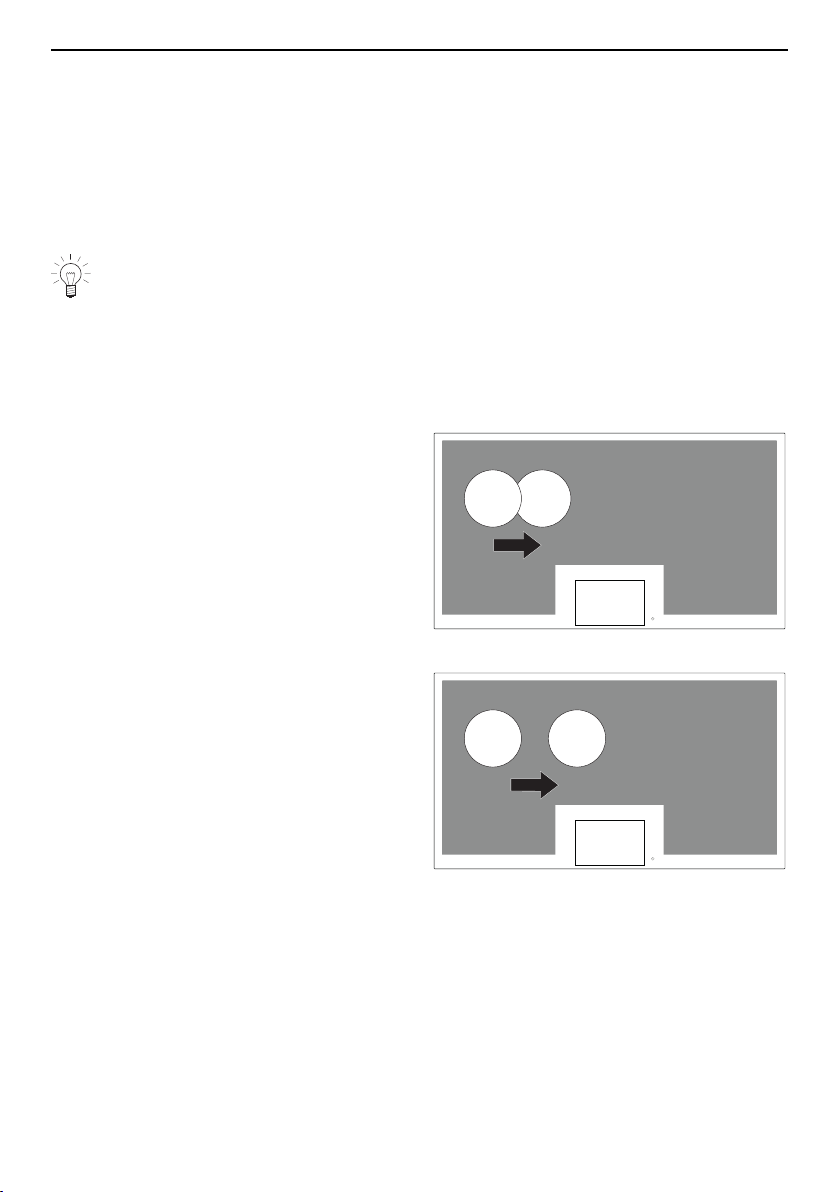
Resuming cooking
The cooking process is resumed either immediately or after 5seconds. When the cook-
ing process is resumed depends on how far the pan’s new position is from its old posi-
tion.
If the old and new pan positions overlap:
– the cooking process is resumed im-
mediately.
– all the settings from the old pan posi-
tion are taken over.
If the old and new pan positions do not overlap:
– the power output to the hob is inter-
rupted for a maximum of 5seconds.
– the slider for changing the power level
appears in the display.
12

4 Operating the appliance
4.5 Teppan Yaki function
The PowerPlus , AutoPowerPlus and ProfessionalMode are not available when the
Teppan Yaki plate is being used. A maximum of two Teppan Yaki plates can be used on
the hob.
▸ Place the Teppan Yaki plate to the left or
right of the display, flush with the hob.
– The hob detects the Teppan Yaki
plate and divides the underlying sur-
face into two hotplates.
Connecting hotplates
▸ Touch either hotplate in the display.
▸ Touch the button in the hotplate display.
– The two hotplates are connected into one hotplate.
▸ Operate the appliance as described in the “Using cookware on the hob” section (see
page 11).
Dividing hotplate
▸ Touch the hotplate in the display.
▸ Touch the button in the hotplate display.
– The hotplate is divided into two hotplates.
▸ Operate the appliance as described in the “Using cookware on the hob” section (see
page 11).
Using the Teppan Yaki plate and cookware at the same time
All other pans on the hob avail over all setting options and functions and can be oper-
ated independently of the Teppan Yaki plates. The maximum number of pans that can be
used depends on the number of Teppan Yaki plates being used:
▪ A maximum of four other pans can be used if one Teppan Yaki plate is being used.
▪ A maximum of two other pans can be used if two Teppan Yaki plates are being used.
If the Teppan Yaki plate is placed in a different position than intended, it will be op-
erated the same as normal cookware.
13

4 Operating the appliance
4.6 PowerPlus
If PowerPlus is switched on, the hotplate selected works at extra high power for a max-
imum of 15 minutes. The hotplate then reverts to the power level originally selected.
PowerPlus can be used, for instance, to heat a large quantity of water quickly.
Switching PowerPlus on
▸ Select a hotplate in the display.
– The slider appears in the display.
▸ Touch or slide your finger along the slider to select a power level between «1» and
«9».
– The power level selected appears in the hotplate display.
▸ Touch the button.
▸ Touch the button.
– appears in the hotplate display.
– The cookware is heated.
After a maximum of 15 minutes,
– an acoustic signal is emitted.
– the hotplate reverts to the power level originally selected.
If PowerPlus was switched on at power level «0», the hotplate reverts to power
level «5».
Cancelling PowerPlus
▸ Touch the button.
▸ Touch the button.
– goes out in the hotplate display and PowerPlus is cancelled.
– The hotplate reverts to the set power level.
Or:
▸ Touch the hotplate in the display.
– The slider appears in the display.
▸ Touch or slide your finger along the slider to change the power level.
– goes out in the hotplate display and PowerPlus is cancelled.
– The hotplate reverts to the set power level.
4.7 AutoPowerPlus
If AutoPowerPlus is switched on, the hotplate selected works at extra high power for
a maximum of 15 minutes or until boiling point is reached. When boiling point is
reached, the hotplate reverts to the power level originally selected. AutoPowerPlus can
be used, for instance, to heat a large quantity of water quickly.
Switching AutoPowerPlus on
▸ Select a hotplate in the display.
– The slider appears in the display.
▸ Touch or slide your finger along the slider to select a power level between «1» and
«9».
– The power level selected appears in the hotplate display.
▸ Touch the button.
▸ Touch the button.
– appears in the hotplate display.
– The cookware is heated until boiling point is reached.
14
4 Operating the appliance
As soon as boiling point is reached or after a maximum of 15 minutes
– an acoustic signal is emitted.
– the hotplate reverts to the power level originally selected.
If AutoPowerPlus was switched on at power level «0», after boiling point is
reached the hotplate reverts to power level «5».
Cancelling AutoPowerPlus
▸ Touch the button.
▸ Touch the button.
– goes out in the hotplate display and AutoPowerPlus is cancelled.
– The hotplate reverts to the set power level.
Or:
▸ Touch the hotplate in the display.
– The slider appears in the display.
▸ Touch or slide your finger along the slider to change the power level.
– goes out in the hotplate display and AutoPowerPlus is cancelled.
– The hotplate reverts to the set power level.
4.8 ProfessionalMode
The ProfessionalMode changes the power level when the cookware is moved to a
new position.
Switching the ProfessionalMode on
▸ Select a hotplate in the display.
▸ Touch the button.
▸ Touch the button.
– appears in the hotplate display – the ProfessionalMode is switched on.
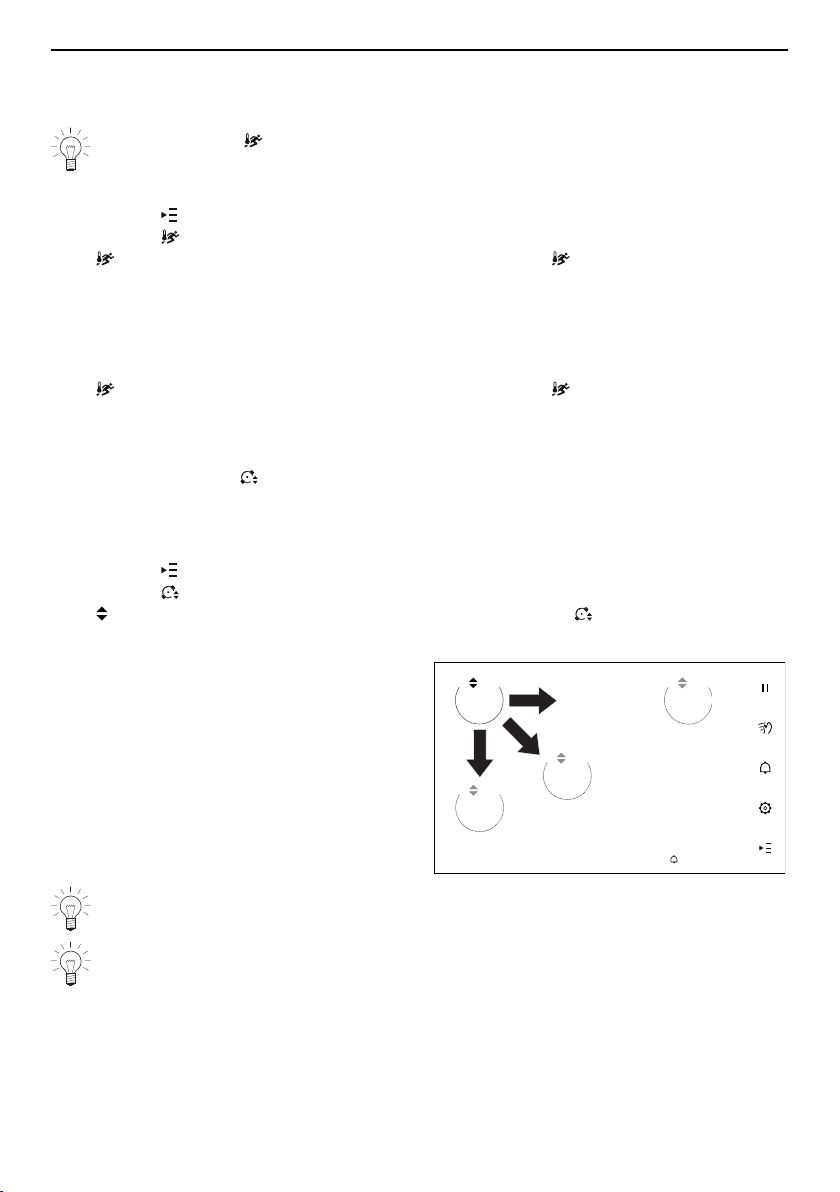
Changing the power level
▸ Move the cookware forwards or back-
wards on the hob.
– The power level of the newly selec-
ted pan position is activated.
PLQV굛굧깄N:K
Only when the cookware is moved vertically or diagonally does the power level
change. Moving the cookware horizontally does not change the power level.
The highest power level «9» can be set at either the front or back edge of the
cooking zone in “ProfessionalMode” under “Assistance functions” in the user set-
tings (see page 23).
15
4 Operating the appliance
Switching the ProfessionalMode off
▸ Select a hotplate in the display.
– The slider appears in the display.
▸ Change the power level in the display.
– goes out in the hotplate display – the ProfessionalMode is switched off.
– The hotplate reverts to the set power level.
Or:
▸ Select a hotplate in the display.
▸ Touch the button.
▸ Touch the button.
– goes out in the hotplate display – the ProfessionalMode is switched off.
– The hotplate reverts to the set power level.
4.9 GourmetGuide
The GourmetGuide encompasses several functions that make preparing meals as
easy as possible for you. The following functions can be called up:
Melting Butter, chocolate and honey, for instance, can be gently melted
at approx. 40°C.
Simmering Sausages, dumplings and stuffed pasta, for instance, can be
cooked in hot water, just below boiling point.
Reheating Food that has previously been cooked can be reheated at
85°C.
Keep warm Food that has finished cooking can be kept warm at approx.
65°C.
The precision of the simmer function depends on the cookware used. Water can
start to boil. If this is the case, we recommend the pan lid be left off when using
the simmer function.
For locations over 1,500 meters above sea level, it is generally recommended the
pan lid be left off when using the simmer function.
Starting a function
▸ Select a hotplate in the display.
▸ Touch the button.
▸ Touch the button.
– The functions appear in the display.
▸ Select a function.
– A note on the function selected appears in the display.
▸ Touch if the note is no longer to be shown.
▸ Touch to start the function selected.
– The function selected appears in the hotplate display and in the slider.
– The function selected starts.
Do not move the cookware on the hob when the GourmetGuide function is
switched on, as doing so would affect the accuracy of the temperature.
16
4 Operating the appliance
Cancelling a function
▸ Select a hotplate in the display.
– The function selected appears in the slider.
▸ Touch or slide your finger along the slider to select «Off».
– The function selected goes out in the hotplate display.
– The function selected is cancelled.
Or:
▸ Select a hotplate in the display.
▸ Touch the button.
▸ Touch the button.
– A note on the function selected appears in the display.
– The following appears in the display: «Press the button to cancel the function.»
▸ Touch the button.
– The function selected goes out in the hotplate display.
– The function selected is cancelled.
4.10 Operating time
Do not leave the hob unattended during use. Risk of food boiling over, burning on
and igniting!
With the operating time function, the hotplate switches off automatically after a set
period of time (00h00mins.00s – 99h59mins.59s).
Setting and starting the operating time
▸ Select a hotplate in the display.
▸ Touch the button.
▸ Touch the button.
– The hours, minutes and seconds counter appears in the display.
▸ Scroll to set the desired operating time.
– The end of the operating time appears in the display.
▸ Touch the button to start the operating time.
– The operating time starts.
– The countdown to the time remaining appears in the hotplate display.
Changing the operating time
▸ Select a hotplate in the display.
▸ Touch the button.
▸ Touch the button.
– The countdown to the operating time remaining appears in the display.
▸ Touch the button to change the operating time.
– The hours, minutes and seconds counter appears in the display.
▸ Scroll to shorten or extend the operating time.
– The end of the operating time appears in the display.
▸ Touch the button to resume the operating time.
– The operating time is resumed.
– The countdown to the time remaining appears in the hotplate display.
17
4 Operating the appliance
End of the operating time
When the set operating time is up:
– the hotplate is switched off.
– an acoustic signal is emitted.
– 0h 00 flashes in the hotplate display.
Switching the operating time off before time
▸ Select a hotplate in the display.
▸ Touch the button.
▸ Touch the button.
– The countdown to the operating time remaining appears in the display.
▸ Touch the button.
– The hours, minutes and seconds counter appears in the display.
▸ Touch or to switch the operating time off before time.
– The operating time is switched off.
4.11 Restore function
If the appliance has been inadvertently switched off with the button, the settings can be
restored within 6seconds.
▸ Hold the button depressed until the displays appear.
– The hotplates resume operation using the previous settings.
4.12 Pause cooking
With this function, the power level of all hotplates that are switched on can be temporarily
reduced to power level «0» for up to 10minutes. After pause cooking, the hotplates re-
sume operation using the previous settings.
Switching pause cooking on
▸ Touch the button.
– All hotplates are switched to power level «0».
– The operating time of each hotplate is interrupted.
– The following appears in the display: «The hotplates have been switched off tem-
porarily. If pause cooking is not switched off, the hob switches off automatically.»
If the pause cooking function is not turned off within 10minutes, the appliance
switches off automatically.
Switching pause cooking off
▸ Touch the button in the message.
– The hotplates resume operation using the previous settings.
18
4 Operating the appliance
4.13 Wipe protection
This function locks the display to enable the hob to be cleaned. The power output to the
hotplates is not interrupted.
Switching wipe protection on
▸ Touch the button.
– Wipe protection is switched on for 20seconds.
If wipe protection is not switched off within 20seconds, it turns off automatically.
Switching wipe protection off before time
▸ Hold depressed for 3 seconds to switch wipe protection off before time.
– Wipe protection is switched off.
Touch the button for 3seconds to switch the appliance off at any time.
4.14 Timer
The timer functions like an egg timer. It can be used at any time and independently of all
other functions.
Setting and starting the timer
▸ Touch the button.
– The hours, minutes and seconds counter appears in the display.
▸ Scroll to set the desired duration.
– The end time for the timer appears in the display.
▸ Touch to start the timer.
– The timer starts.
– The countdown to the duration remaining appears in the status display.
Checking and changing
▸ Touch the button.
– The countdown to the duration remaining appears in the display.
▸ Touch the button to change the duration.
– The hours, minutes and seconds counter appears in the display.
▸ Scroll to shorten or extend the duration.
– The end time for the timer appears in the display.
▸ Touch the button to resume the timer.
– The timer resumes.
– The countdown to the duration remaining appears in the status display.
Timer finished
When the set duration is up:
– An acoustic signal is emitted.
– «0h0mins.0s» and «Timer finished» appear in the display.
▸ Touch to close the message.
Switching the timer off before time
▸ Touch the button.
– The countdown to the duration remaining appears in the display.
▸ Touch the button.
– The hours, minutes and seconds counter appears in the display.
▸ Touch or to switch the timer off before time.
19

4 Operating the appliance
– The timer is switched off.
4.15 EcoManagement
EcoManagement provides information on the energy consumption of the appliance.
The information can be shown before, during and after cooking and promotes the sus-
tainable use of energy.
Consumption indicator when cooking
The consumption indicator shows how much energy (kWh) the entire hob uses from the
moment it is switched on to the moment it is switched off.
▸ Switch on the «Consumption indicator» function under «EcoManagement» in the user
settings (see page 24).
– The energy consumption of the entire hob appears in the status display.
Consumption information
Consumption information indicates how much energy (kWh) is used within a particular
period of time.
▸ Select the «Consumption information» function under «EcoManagement» in the user
settings (see page 24).
– The energy consumption for the following time periods appears in the status dis-
play:
▪ Total consumption (since the last reset date)
▪ Average consumption (over the last 7 days)
▪ Consumption since being switched on
The consumption values displayed are indicative and can deviate from both the
declared and measured values.
4.16 Switching a hotplate off
▸ Select a hotplate in the display.
– The slider appears in the display.
▸ Touch or slide your finger along the slider to select power level «0».
– The hotplate is switched off.
– The power level «0» appears in the hotplate display.
▸ Remove the cookware from the hob.
– The hotplate display goes out after 20seconds.
4.17 Switching the appliance off
When the timer is switched on
▸ Hold the button depressed until the following appears in the display: «Residual
heat» and the countdown to the time remaining.
– The appliance cools down.
▸ When the time remaining is up, touch .
– The appliance switches itself off after it has cooled down.
When the timer is switched off
▸ Hold the button depressed until the following appears in the display: «Residual
heat».
– The appliance cools down.
– The appliance switches itself off after it has cooled down.
20
5 User settings
5 User settings
5.1 Overview of user settings
▪ Language ▪ Childproof lock
▪ Display ▪ V-ZUG-Home *
▪ Date ▪ Appliance information
▪ Clock ▪ EcoManagement
▪ Notifications ▪ Factory settings
▪ Signals and tones ▪ Service functions
▪ Assistance functions
* Depending on model
5.2 Adjusting user settings
▸ If the appliance is switched off: First touch .
▸ Touch the button.
▸ Swipe or touch it to select the desired user setting.
▸ Make the desired setting.
– The selected user settings are saved.
▸ If a note appears, confirm it with .
▸ Touch to exit a submenu and return to the main user settings menu.
▸ Touch to exit user settings.
5.3 Language
The display language can be changed.
Different languages are available for se-
lection.
▪ German
▪ …
5.4 Display
Brightness
The brightness of the display can be
changed. Five different levels are avail-
able for selection.
▪ Level 1: very dark
▪ Level 3: medium (factory setting)
▪ Level 5: very bright
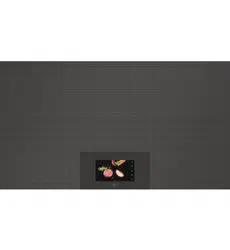
Background images
The displaying of background images
when the appliance is switched on can be
turned on or off.
▪ On (factory setting)
▪ Off
Switch-off time
If no cookware is being operated but the
appliance is switched on, it will be
switched off automatically after a set time
if there is no user interaction.
▪ 3 minutes
▪ 15 minutes (factory setting)
▪ …
▪ 30 minutes
21

5 User settings
5.5 Date
The date can be called up and changed.
5.6 Clock
Time
The time can be displayed in the
European 24-hour or the US 12-hour
format (a.m./p.m.).
▪ 12h format
▪ 24h format (factory setting)
Daylight saving time adjustment
The switch between summer and winter
time happens automatically when this
function is turned on.
▪ On (factory setting)
▪ Off
5.7 Notifications
Messages and notes can be switched off
or suppressed so that they do not appear
while operating the appliance.
▪ On
▪ Off (factory setting)
5.8 Signals and tones
Acoustic signals
The loudness of the acoustic signals can
be changed or switched off. Three differ-
ent levels of loudness are available for se-
lection.
▪ Off
▪ Low
▪ Medium (factory setting)
▪ High
The switch-off tone and alarm tones are never switched off.
Button tones
The loudness of the button tones can be
changed or switched off. Three different
levels of loudness are available for selec-
tion.
▪ Off (factory setting)
▪ Low
▪ Medium
▪ High
5.9 Assistance functions
MemoryFunction
If the cookware is moved or lifted, the set-
tings are saved for the time set and auto-
matically taken over when the cookware is
placed back on the hotplate (see page
12). The settings can be saved for up to
60 seconds.
▪ 0 seconds
▪ …
▪ 20 seconds (factory setting)
▪ …
▪ 60 seconds
22

5 User settings
ProfessionalMode
The power level of an item of cookware
can be changed by moving it further for-
ward or further back on the hob. The
highest power corresponds to power level
«9», the lowest power to power level «1».
▪ : High power at the front / low power
at the back
▪ : Low power at the front / high power
at the back (factory setting)
Maximum power consumption
The (maximum) electric power consump-
tion of the hob can be limited to a desired
value. In this case, the hob will not draw
more power than this from the mains.
▪ 600 watts
▪ …
▪ 11100 watts (factory setting)
5.10 Childproof lock
The childproof lock prevents the appli-
ance from being switched on accidentally.
When the childproof lock is activated, the
appliance can only be operated after first
entering the code 3221 in reverse order.
The «Timer» and «Wipe protection» func-
tions can be used at the same as the
childproof lock.
▪ On
▪ Off (factory setting)
5.11 V-ZUG-Home
V-ZUG-Home is only visible if this option is
built in. Further information can be found
in the operating instructions for «V-ZUG-
Home».
Information
Information about the V-ZUG-Home mod-
ule can be called up.
▪ Interface connection
▪ MAC address
▪ IP address
▪ Internet connection
Mode
V-ZUG-Home can only be used if the «Dis-
play» or «Operate and display» mode is
enabled.
▪ : Off (factory setting)
▪ : Displays
▪ : Operate and display
Time synchronization
With time synchronization, the date and
time settings are synchronized over V-
ZUG-Home.
Restart
The interface (V-ZUG-Home module) can
be restarted.
23

5 User settings
Factory settings
Settings that have been changed can be
restored to V-ZUG-Home factory settings.
5.12 Appliance information
The model, article number, serial number
(FN) and service contact information can
be found under «Info».
Information about the hardware and soft-
ware can be found under «HW» and «SW»
respectively. «Lib1» and «Lib2» are soft-
ware libraries.
▪ Information:
▪ HW
▪ SW
▪ Lib1
▪ Lib2
5.13 EcoManagement
Consumption indicator
When enabled, this function indicates how
much energy (kWh) the entire hob uses
from the moment it is switched on to the
moment it is switched off.
▪ On
▪ Off (factory setting)
Consumption information
Total and average consumption values as
well as consumption since the appliance
was last switched on are displayed (see
page 20). All consumption values can be
reset. The last time the consumption data
was reset is also displayed.
▪ Total consumption
▪ Average consumption
▪ Consumption since being switched on
▪ Last reset
5.14 Factory settings
User settings that have been changed
can be restored to factory settings. The
following user settings cannot be re-
stored:
▪ Language
▪ Date
▪ Time
▪ Maximum power consumption
▪ Childproof lock
▪ EcoManagement consumption informa-
tion
5.15 Service functions
The service functions are only available
for use by V-ZUG Service staff.
24
6 Care and maintenance
6 Care and maintenance
Clean the appliance only when it has completely cooled down.
Risk of burns!
Always clean the hob after use. This prevents food residue from burning on. Dried-on or
burned-on food residue is harder to clean off.
Use of improper cleaning techniques can result in damage to the markings or surface.
Avoid cleaning the surface of the glass ceramic hob with abrasive cleaning agents,
scouring pads, wire wool, etc. as it can damage them.
▸ Use only a soft cloth or sponge with water and a suitable detergent for cleaning every-
day soiling. Always follow the detergent manufacturer’s instructions for use. Using a
detergent with a protective additive is recommended.
▸ Remove stubborn soiling, e.g. boiled-over milk, while still warm using a glass ceramic
hob scraper. Always follow the scraper manufacturer's instructions for use.
▸ Foods with a high sugar content, e.g. marmalade, that boil over should be removed
while still hot using a glass ceramic hob scraper. The surface of the glass ceramic
hob could otherwise become damaged.
▸ Remove melted plastic while still warm using a glass ceramic hob scraper. The sur-
face of the glass ceramic hob could otherwise become damaged.
▸ Remove limescale stains when cool with a small amount of limescale remover, e.g.
vinegar or lemon juice. Then wipe clean with a damp cloth.
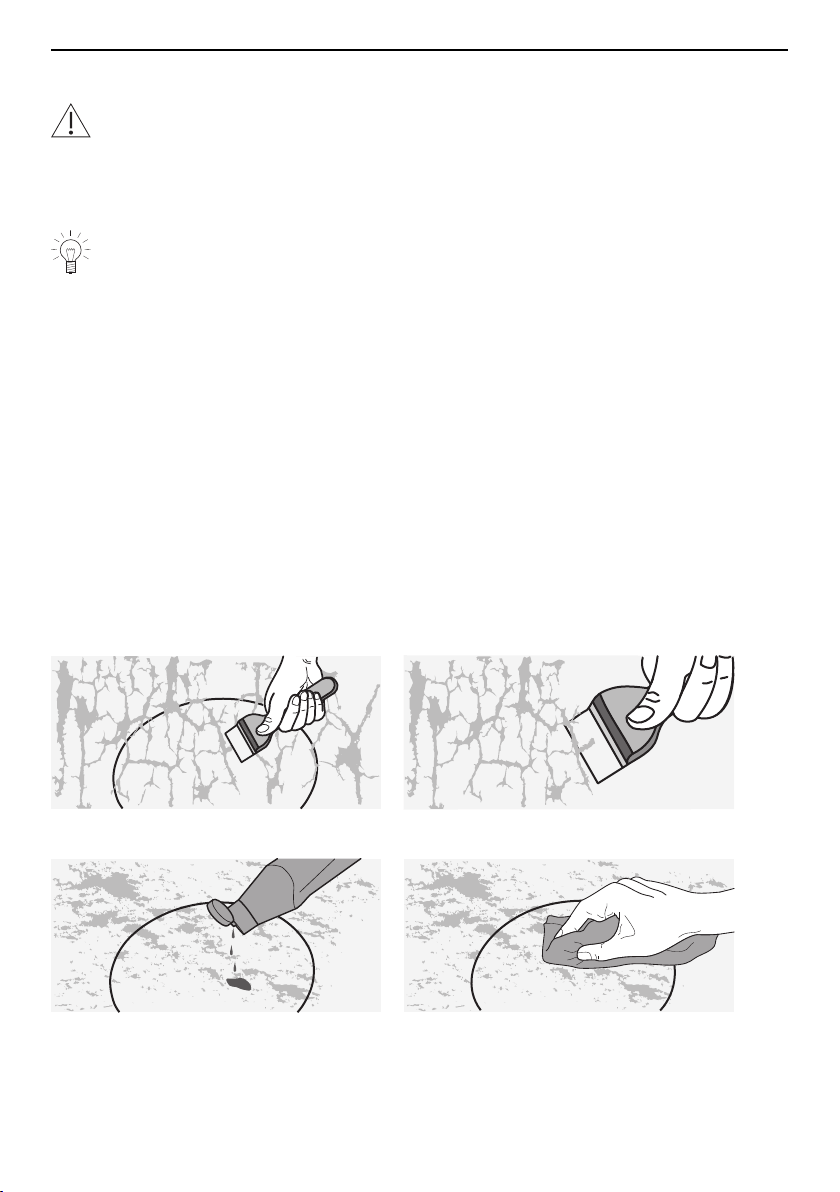
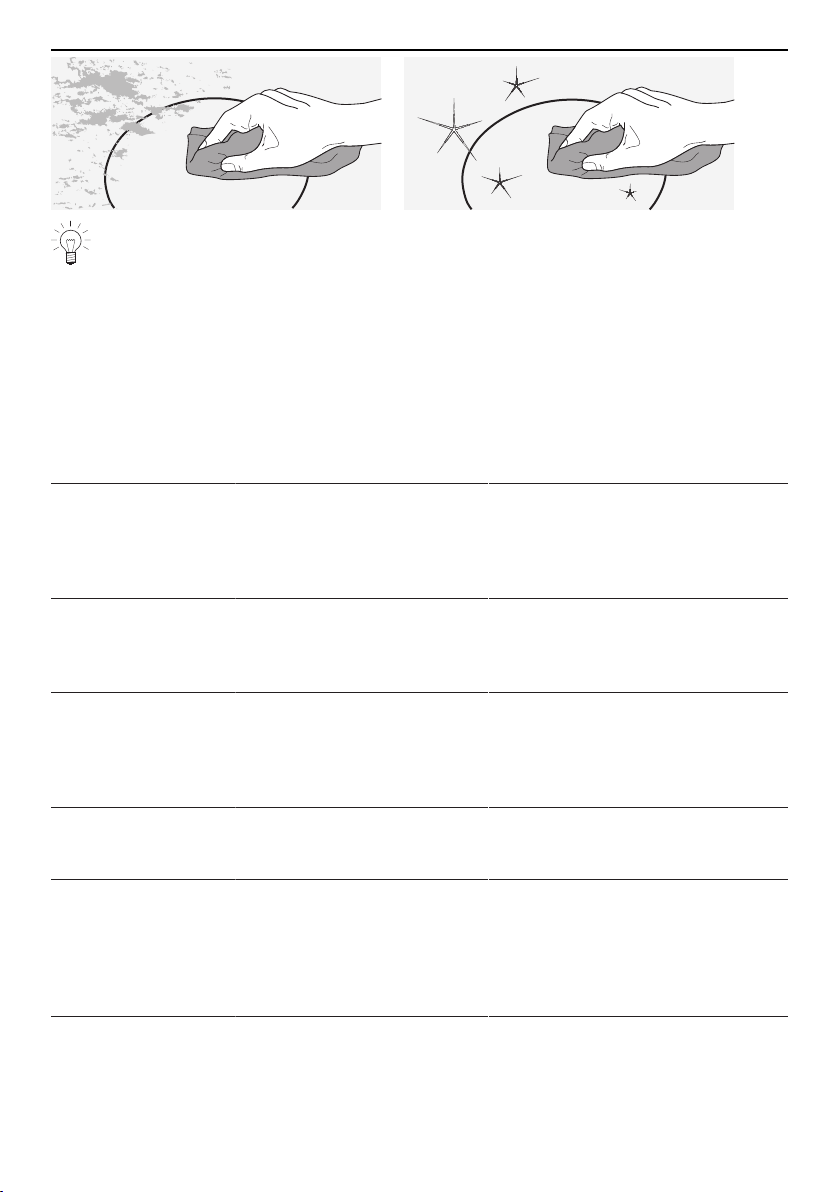
Cleaning
For good results, follow these cleaning instructions.
▸ To clean thoroughly, remove most of the soiling using a hob scraper or a special
cleaning sponge for glass ceramic hobs.
▸ Add a few drops of a suitable cleaning fluid to the cold hob surface and rub over the
surface using kitchen towel or a clean cloth.
▸ Wipe off with a wet cloth and then polish with a dry cloth or the soft side of a suitable
cleaning sponge.
25
7 Trouble-shooting
Only use the cleaning agents and methods recommended on our «Homepage».
7 Trouble-shooting
You may be able to trouble-shoot the following malfunctions yourself. If not, note down
the error message in full (message, F and E numbers) and call Customer Services.
7.1 Error messages
If U and F messages occur, any hotplates that are switched on will be switched off.
Message Possible cause Solution
«U message»
See operating in-
structions
FN XXXXX XXXXXX
▪ Various situations can lead
to a «U message».
▸ Have an electrician check the
house installation.
▸ Note down error message in full
and appliance's FN.
▸ Call Customer Services.
«F message»
See operating in-
structions
FN XXXXX XXXXXX
▪ Various situations can lead
to a «F message».
▸ Note down error message in full
and appliance's FN.
▸ Call Customer Services.
«Safety shut-off» ▪ The cookware was oper-
ated for over 2 hours
without interruption or
without any changes to the
settings.
▸ To operate cookware for over
2hours without interruption, set
the operating time (see page
17).
«Object or liquid on
the display»
▪ There is an object or liquid
on the display.
▸ Remove the object or liquid from
the display.
– The message disappears.
«ON/OFF button is
blocked»
▪ There is an object or liquid
on the display.
▪ The ON/OFF button is
faulty.
▸ Check whether there is an ob-
ject or liquid covering the ON/
OFF button.
▸ Note down the serial number
(FN) of the appliance.
▸ Call Customer Services.
«Hot object on the
display»
▪ There is a hot object or hot
liquid on the display.
▸ Remove the object or liquid from
the display.
– The message disappears.
26
7 Trouble-shooting
Message Possible cause Solution
«Exceeded maximum
power»
▪ The set power level and
the set «AutoPowerPlus»
settings option require
more power than the con-
nection type and/or the
maximum values defined
in the user settings allow.
▸ Switch the «AutoPowerPlus» set-
tings option off (see page 14).
▪ If the message appears
again:
▸ Increase the power consumption
value or set the maximum power
of the hob under «Assistance
functions» and «Maximum power
consumption» in the user set-
tings (see page 22).
▪ If the message appears
again:
▸ Call Customer Services.
«Cookware not in-
duction-compatible»
▪ The cookware is not suit-
able for use with induction
hobs.
▸ Use suitable magnetic cook-
ware.
«Unlock the child-
proof lock»
▪ The childproof lock is ac-
tivated.
▸ Switch the childproof lock off
(see page 23).
7.2 After a power failure
The user settings remain unchanged.
Problem Solution
Power failure ▸ Hold the button depressed until the following appears in the
display: «Power failure».
▸ Reset the date and time if required (see page 22).
7.3 Other possible problems
Problem Possible cause Solution
The appliance is not
working and all the
displays are dark.
▪ The fuse or circuit breaker
for electrical installations in
the home is defective.
▸ Change the fuse.
▸ Reset the automatic circuit
breaker.
▪ The fuse or circuit breaker
keeps blowing.
▸ Call Customer Services.
▪ An interruption in the
power supply.
▸ Check the power supply.
The appliance is not
working at full power.
▪ The appliance was oper-
ated for a longer period of
time without interruption.
▸ Place the cookware on a cold
spot on the hob.
▸ Switch the appliance off and al-
low it to cool down.
27
8 Accessories
Problem Possible cause Solution
The heat in the cook-
ware is not being dis-
tributed sufficiently or
evenly enough.
▪ The cookware is posi-
tioned unfavourably on the
hob.
▸ Slightly move the cookware on
the hob.
▪ The cookware is not induc-
tion-compatible or is dam-
aged.
▸ Use undamaged, induction-com-
patible cookware (see page 10).
The MemoryFunction
is not working.
▪ The time period set in the
assistance functions is too
short to change the posi-
tion of the cookware.
▸ Set a value of at least 5
seconds for the time period (see
page 22).
No cookware detec-
ted.
▪ Cookware is too small. ▸ Slightly move the cookware on
the hob.
▪ Two pans standing too
closely together.
▸ Place the pans further apart.
▸ Lift the cookware up and then
place back down on the hob.
▪ The cookware is not induc-
tion-compatible or is dam-
aged.
▸ Use undamaged, induction-com-
patible cookware (see page 10).
The display cannot
be operated.
▪ Magnetic fields are disturb-
ing the display.
▪ There is an object or liquid
on the display.
▸ Hold the button depressed for
3seconds.
▸ Hold the button depressed un-
til the displays appear.
Hotplates overlap in
the display.
▪ Hob cannot detect size of
cookware.
▪ Base of cookware is not
standing completely on the
hob.
▸ Lift the cookware up and then
place back down on the hob.
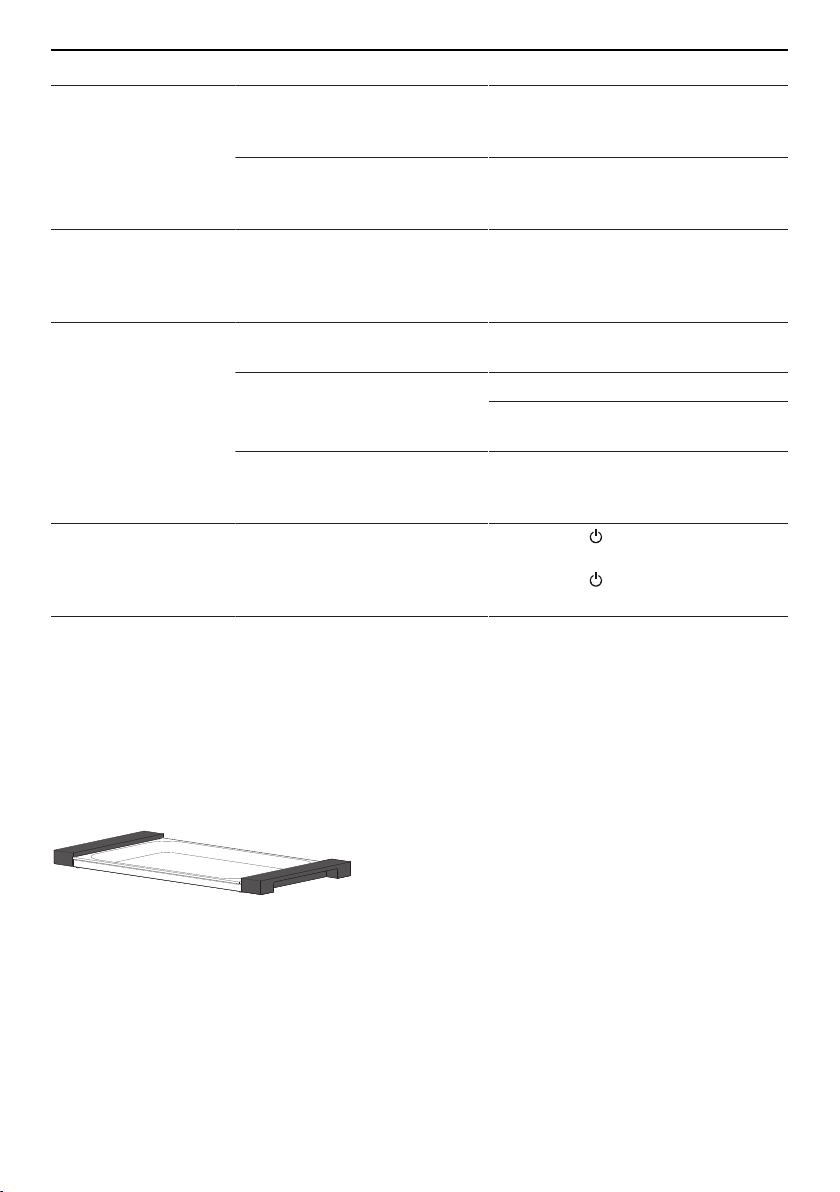
8 Accessories
The accessories listed here are included in the scope of delivery.
Premium Teppan Yaki plate (order card enclosed with appliance)
28
9 Technical data
9 Technical data
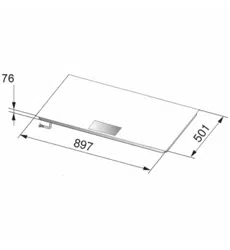
9.1 Product fiche
In accordance with EU Regulation No. 66/2014
Model number GK 31062
Type designation GK GK11TIFKZ/GK11TIFKZS
Number of cooking zones 1
Heating technology Induction cooking zone
Dimensions of cooking zone cm 45 × 80
Energy consumption per
cooking zone
Wh/kg 190.7
Energy consumption of
the entire hob EC
Wh/kg 190.7
9.2 EcoStandby
To prevent unnecessary energy consumption, the appliance is equipped with the auto-
matic energy-saving EcoStandby function.
Power consumption can be reduced to a minimum provided the following condi-
tions are met:
▪ The «V-ZUG-Home mode » user setting is selected.
▪ The timer is switched off.
▪ The fan is switched off.
▪ The residual heat indicator is switched off.
▪ No error messages appear.
▪ The appliance has been in stand-by mode for at least 5 minutes.
Despite EcoStandby, all safety functions remain active.
9.3 Reference to «Open Source» licence
Your appliance contains Newlib open-source software. This is subject to the licensing
conditions specified in Section 4.1 (4.1.1-4.1.8; 4.1.9; 4.1.10; 4.1.14-4.1.16) of the en-
closed open-source software licence text document.
The V-ZUG interface for this appliance contains the following open-source software mod-
ules, which are subject to the licensing conditions specified in each case by the en-
closed open-source software licence document:
▪ Apache Commons Codec (Copyright © 2002-2011 The Apache Software Founda-
tion): licence in accordance with Section 1.1
▪ Apache Commons Collections (Copyright © 2001-2008 The Apache Software Found-
ation): licence in accordance with Section 1.1
▪ Apache Commons Configuration (Copyright © 2001-2013 The Apache Software
Foundation): licence in accordance with Section 1.1
▪ Apache Commons Lang (Copyright © 2001-2008 The Apache Software Foundation):
licence in accordance with Section 1.1
29

10 Tips and tricks
▪ Apache Commons Logging (Copyright © 2003-2007 The Apache Software Founda-
tion): licence in accordance with Section 1.1
▪ Apache Commons Net (Copyright © 2001-2013 The Apache Software Foundation): li-
cence in accordance with Section 1.1
▪ Apache HttpComponents Client (Copyright © 1999-2012 The Apache Software
Foundation): licence in accordance with Section 1.1
▪ Apache HttpComponents Core (Copyright © 2005-2012 The Apache Software Found-
ation): licence in accordance with Section 1.1
▪ Apache log4j (Copyright © 2010 The Apache Software Foundation): licence in ac-
cordance with Section 1.1
▪ Gson (Copyright © 2008-2014 Google Inc.): licence in accordance with Section 1.1
▪ Guava (Copyright © 2007-2014 The Guava Authors): licence in accordance with Sec-
tion 1.1
▪ JavaScript Date Time Picker (Copyright © 2010-2014, Teng-Yong Ng): licence in ac-
cordance with Section 3
▪ JavaScript MD5 (Copyright © Paul Johnston 1999 – 2009): licence in accordance
with Section 2
▪ Jsr305 (Copyright © 2007-2009, JSR305 expert group): licence in accordance with
Section 2
▪ Newlib: licence in accordance with Section 4.1.1-4.1.3; 4.1.11; 4.1.13-4.1.19; 4.1.26,
4.1.35
▪ Pure (Copyright © 2013 Yahoo!, Inc.): licence in accordance with Section 2
10 Tips and tricks
10.1 Energy-efficient cooking
For maximum energy efficiency and even heat distribution note the following:
▪ The base of the cookware must be clean, dry and smooth.
▪ The base of cookware must be flat.
▪ Use a well-fitting lid.
▪ Match the diameter of the cookware to the quantity of food to be cooked.
▪ Use insulated pans or pressure cookers to cook food with long cooking times.
▪ Use a steam insert to cook vegetables such as potatoes.
10.2 Deep frying
The intense heat used in deep frying can affect the performance of the hob/appliance.
▸ Place the cookware on the back left or
back right of the hob.
30

11 Disposal
11 Disposal
11.1 Packaging
Never allow children to play with packaging material due to the danger of injury or
suffocation. Store the packaging material in a safe location or dispose of it in an
environmentally-friendly way.
11.2 Safety
Render the appliance unusable to prevent accidents caused by improper use (e.g.
through children playing):
▸ Disconnect the appliance from the mains. With a fixed appliance, this is to be carried
out by a qualified electrician. Then cut the mains cable off flush with the appliance.
11.3 Disposal
▪ The «crossed‐out wheeled bin» symbol requires the separate collection of waste
electrical and electronic equipment (WEEE). Such equipment can contain hazardous,
environmentally harmful materials.
▪ These appliances are to be handed over to a designated collection point for the recyc-
ling of electrical and electronic equipment and must not be disposed of with unsorted
household waste. And in this way, you will be helping to protect resources and the en-
vironment.
▪ For more information, please contact the local authorities.
31

12 Index
A
Accessories ...................................................... 28
Acoustic signals ............................................... 22
Alarm tones....................................................... 22
Appliance disposal .......................................... 31
Appliance-specific safety precautions
........................................................................ 4
Assistance functions ....................................... 22
AutoPowerPlus ............................................. 8, 14
B
Brightness setting ............................................ 21
Button tones...................................................... 22
C
Care and maintenance ................................... 25
Childproof lock ................................................. 23
Consumption indicator............................. 20, 24
Consumption information ............................... 20
Reset.............................................................. 24
Cooking zone ...................................................... 7
Cookware
Changing position ...................................9, 22
Coated cookware ........................................ 10
Detection ..........................................................9
Energy-efficient cooking ............................. 30
Fast heating (AutoPowerPlus)................... 14
Heating water (PowerPlus) ........................ 14
Noise during cooking ................................. 10
Suitable cookware ....................................... 10
D
Date .................................................................... 22
Deep frying.................................................... 9, 30
Demo mode ......................................................... 7
Display ........................................................... 7, 10
Background images.................................... 21
Brightness setting........................................ 21
Switch-off time .............................................. 21
Disposal............................................................. 31
E
EcoManagement....................................... 20, 24
Consumption indicator ...........................7, 20
Consumption information........................... 20
EcoStandby....................................................... 29
Error messages................................................ 26
F
Frying .................................................................... 9
Flash..................................................................9
Gentle................................................................9
G
GourmetGuide ..................................................... 8
H
Heating up............................................................ 9
Hob ........................................................................ 7
Hotplate
Display ..............................................................9
Saving settings............................................. 12
I
Identification plate............................................ 35
Instructions for use ............................................. 5
K
Keep warm........................................................ 16
L
Language........................................................... 21
Loudness ........................................................... 22
M
Malfunction
Messages...................................................... 26
Power failure................................................. 27
Malfunctions...................................................... 26
Melting ........................................................... 9, 16
MemoryFunction........................................ 12, 22
Messages
Errors ............................................................. 26
Switching off ................................................. 22
Model number ..................................................... 2
N
Notes.................................................................. 34
O
ON/OFF button ................................................... 7
Operating time.............................................. 8, 17
P
Pause ............................................................. 7, 18
Power failure ..................................................... 27
Power levels......................................................... 9
Changing automatically (ProfessionalMode)
................................................................. 15, 23
PowerPlus.......................................................... 14
Problems ........................................................... 26
Product family...................................................... 2
Product fiche..................................................... 29
ProfessionalMode ................................. 8, 15, 23
32

12 Index
Q
Queries .............................................................. 35
Quick instructions ............................................ 36
R
Reducing .............................................................. 9
Reheating .......................................................... 16
Resume cooking................................................. 9
S
Safety precautions
General .............................................................4
Service & Support................................... 35
Service agreement........................................... 35
Settings options .................................................. 8
Simmering ......................................................... 16
Slider ..................................................................... 8
Status display ...................................................... 7
Steaming............................................................... 9
Summer/Winter time ....................................... 22
Swelling................................................................. 9
Switch-off tone .................................................. 22
Symbols ................................................................ 4
T
Technical data .................................................. 29
Teppan Yaki plate..................................... 13, 28
Time
Display ..............................................................7
Setting............................................................ 22
Summer/Winter time ................................... 22
Timer .............................................................. 7, 19
Type....................................................................... 2
U
User settings........................................................ 7
Using for the first time........................................ 7
V
Validity................................................................... 2
V-ZUG-Home........................................................ 7
W
Wipe protection ............................................ 7, 19
33

34
13 Notes
14 Service & Support
The «Trouble-shooting» section gives you valuable tips on how to deal with minor
malfunctions yourself, saving you the time and trouble of calling out a service tech-
nician and any cost that goes along with it.
Information on the V-ZUG warranty can be found at www.vzug.com →Service
→Warranty information. Please read this information carefully.
Please register your V-ZUG appliance immediately:
▪ online at www.vzug.com →Service →Online warranty registration or
▪ using the enclosed registration card.
This will allow you to take advantage of the best possible support in the event of a fault
in the appliance during the guarantee period. You will require the serial number (FN) and
appliance designation to register your appliance. You will find them on the identification
plate of your appliance.
My appliance information:
FN: ___________________ Appliance: _____________________
Please have this appliance information to hand when contacting V-ZUG. Thank you.
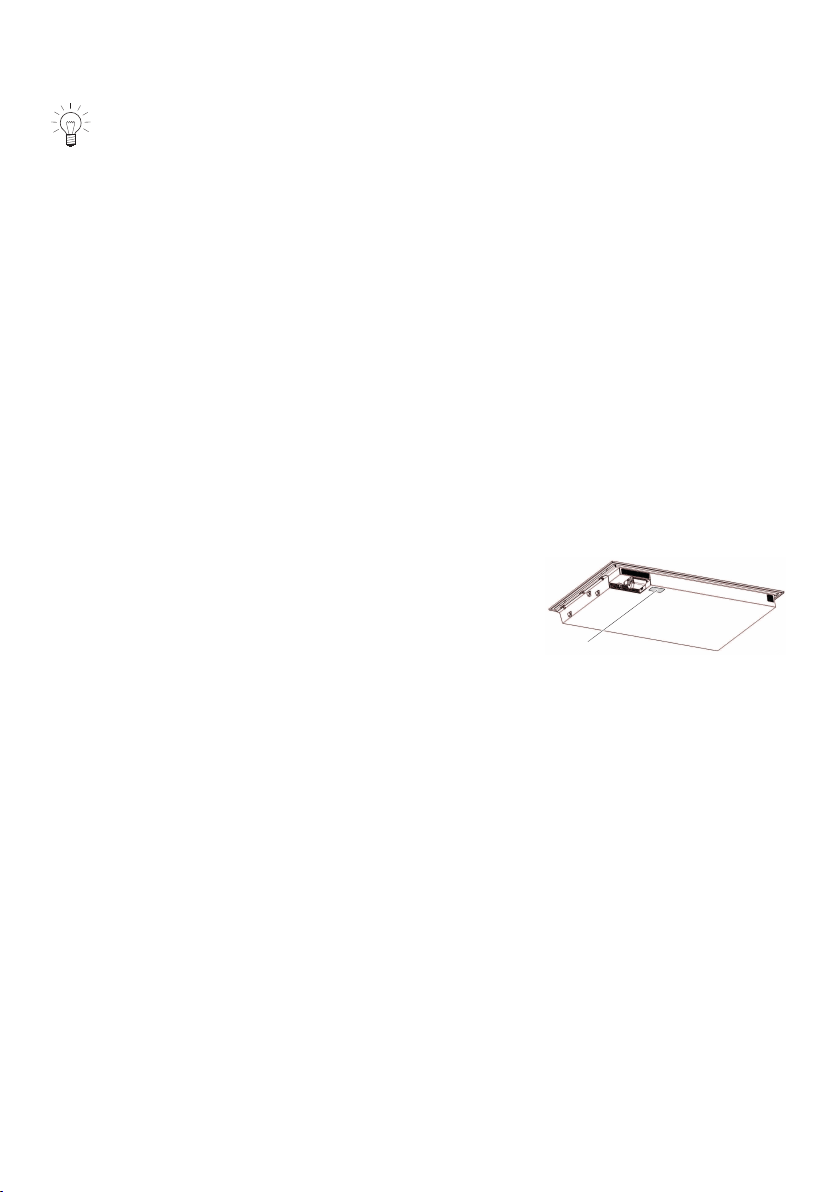
Where is the identification plate?
1
Identification plate with serial number (FN)
1
A second identification plate is supplied and should be affixed in the fitted unit under-
neath the hob.
Your repair order
Call the free service number 0800 850 850 to contact your nearest
V-ZUG service centre. You can arrange an on-site visit by us by phone if you wish.
General queries, accessories and service agreement
V-ZUG will be happy to help you with any general administrative or technical queries, to
accept your orders for accessories and spare parts and to inform you about our pro-
gressive service agreements. You can contact us by calling tel. +41 58 767 67 67 or by
going to our website at www.vzug.com.
35

Quick instructions
Please first read the safety precautions in the operating instructions!
To switch appliance on
▸ Hold the button depressed until the displays appear.
Using cookware on the hob
▸ Place the cookware on the hob so that the base of cookware stands fully on the hob.
– The hotplate detected appears in the display.
▸ Touch the hotplate shown in the display.
– The slider appears in the display.
▸ Touch or slide your finger along the slider to select the desired power level.
– The power level selected appears in the hotplate shown.
To switch hotplate off
▸ Select a hotplate in the display.
– The slider appears in the display.
▸ Touch or slide your finger along the slider to select power level «0».
– The hotplate is switched off.
– The power level «0» appears in the hotplate display.
▸ Remove the cookware from the hob.
– The hotplate display goes out after 20seconds.
To switch appliance off
▸ Hold the button depressed until the following appears in the display: «Residual
heat».
– The appliance cools down.
– The appliance switches itself off after it has cooled down.
V-ZUG Ltd, Industriestrasse 66, CH-6302 Zug
Tel. +41 58 767 67 67, Fax +41 58 767 61 61
[email protected], www.vzug.com
Service Centre: Tel. 0800 850 850
1032687-R04