Loading ...
Loading ...
Loading ...
3. Loosen (do not remove) the hex washer head screw and
insert the neutral (white) wire under the screw clamp at the
bottom of the center position terminal connector.
4. Insert the other 2wires (lines 1 and 2) under the other 2 screw
clamps.
A. Insert wire under screw clamp.
B. Hex washer head screw
5. Securely tighten the hex washer head screws to
35 Ibs-in. (4.0 N-m) minimum torque to make proper
electrical connection.
6. Tighten the locking ring of the conduit connector.
7. Replace the terminal block cover with screw.
3-wire connection: Direct Wire
Use this method only if local codes permit connecting ground
conductor to neutral supply wire.
1. Loosen (do not remove) the hex washer head screws and
insert the neutral (white) wire under the screw clamp at the
bottom of the center position terminal connector.
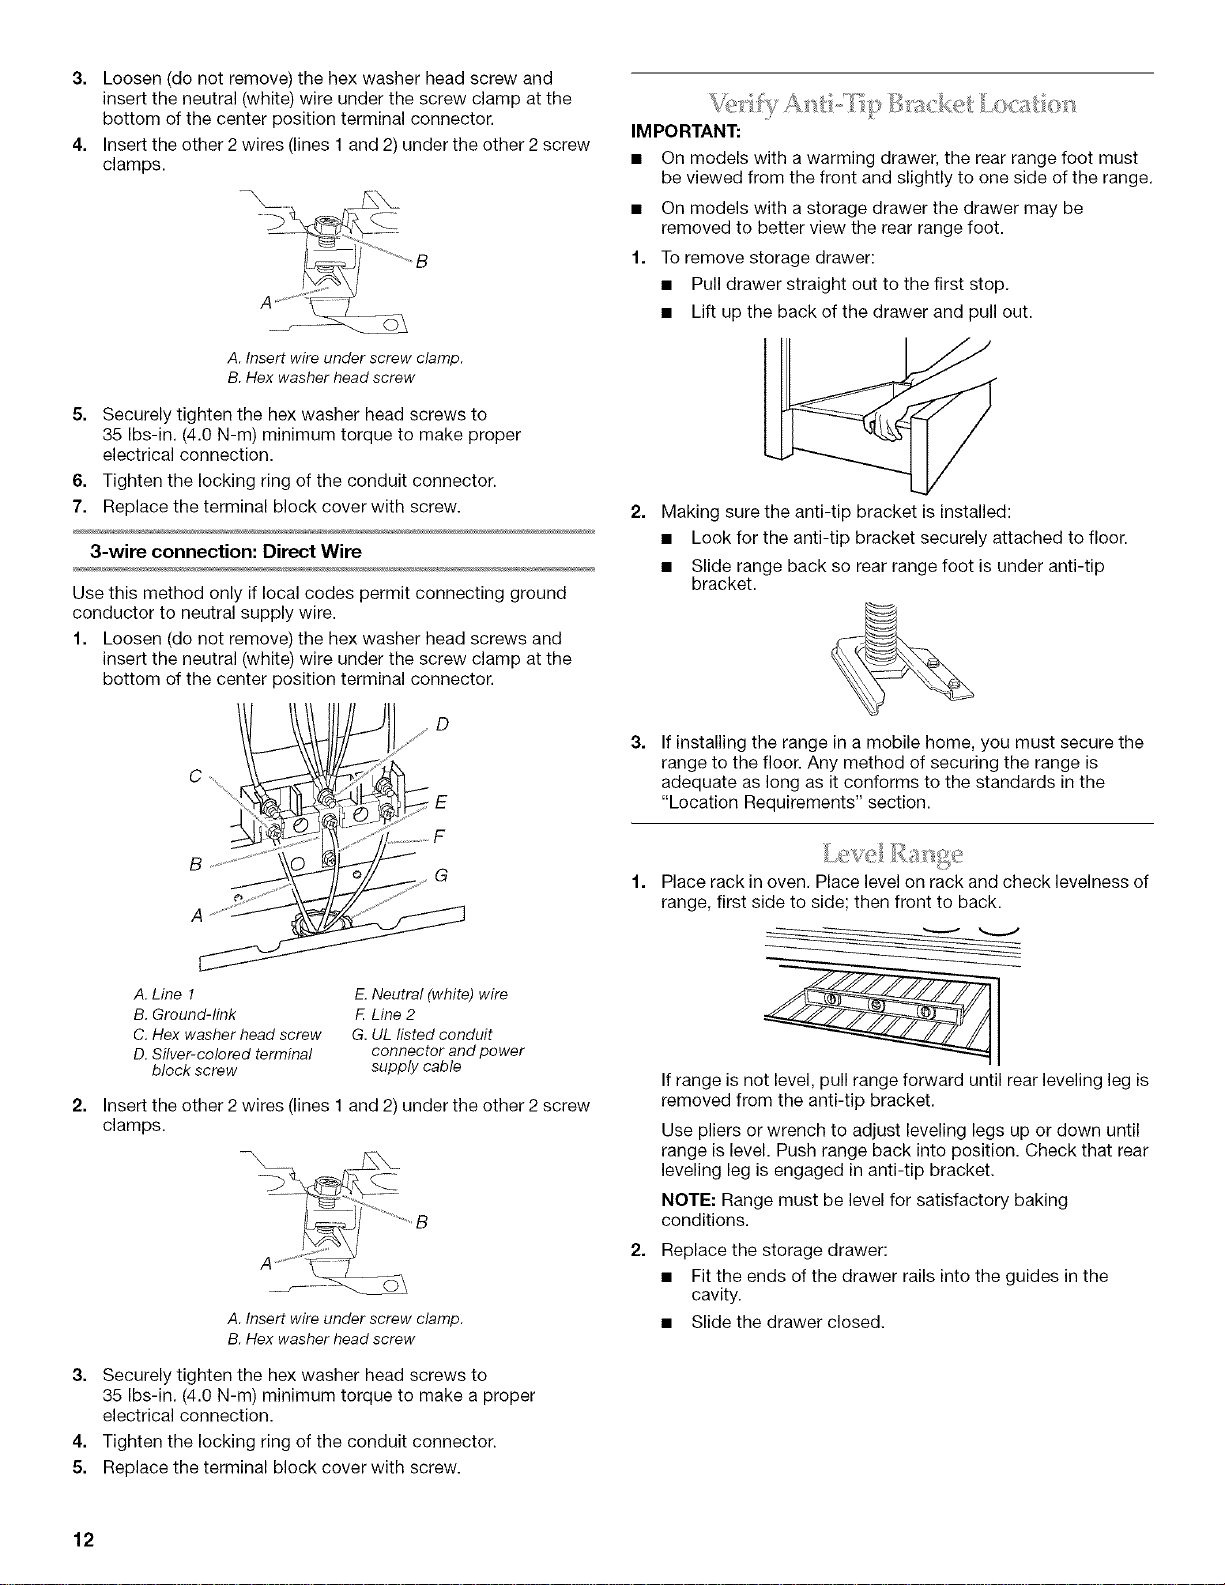
2.
A. Line 1
B. Ground-link
C. Hex washer head screw
D. Silver-colored terminal
block screw
E.Neutral (white) wire
F. Line 2
G, UL listed conduit
connector and power
supply cable
Insert the other 2wires (lines 1 and 2) under the other 2 screw
clamps.
A. Insert wire under screw clamp.
B. Hex washer head screw
3. Securely tighten the hex washer head screws to
35 Ibs-in. (4.0 N-m) minimum torque to make a proper
electrical connection.
4. Tighten the locking ring of the conduit connector.
5. Replace the terminal block cover with screw.
IMPORTANT:
• On models with a warming drawer, the rear range foot must
be viewed from the front and slightly to one side of the range.
• On models with a storage drawer the drawer may be
removed to better view the rear range foot.
1. To remove storage drawer:
• Pull drawer straight out to the first stop.
• Lift up the back of the drawer and pull out.
2.
3.
Making sure the anti-tip bracket is installed:
• Look for the anti-tip bracket securely attached to floor.
• Slide range back so rear range foot is under anti-tip
bracket.
If installing the range in a mobile home, you must secure the
range to the floor. Any method of securing the range is
adequate as long as it conforms to the standards in the
"Location Requirements" section.
1. Place rack in oven. Place level on rack and check levelness of
range, first side to side; then front to back.
2.
If range is not level, pull range forward until rear leveling leg is
removed from the anti-tip bracket.
Use pliers or wrench to adjust leveling legs up or down until
range is level. Push range back into position. Check that rear
leveling leg is engaged in anti-tip bracket.
NOTE: Range must be level for satisfactory baking
conditions.
Replace the storage drawer:
• Fit the ends of the drawer rails into the guides in the
cavity.
• Slidethe drawer closed.
12
Loading ...
Loading ...
Loading ...