Loading ...
Loading ...
Loading ...
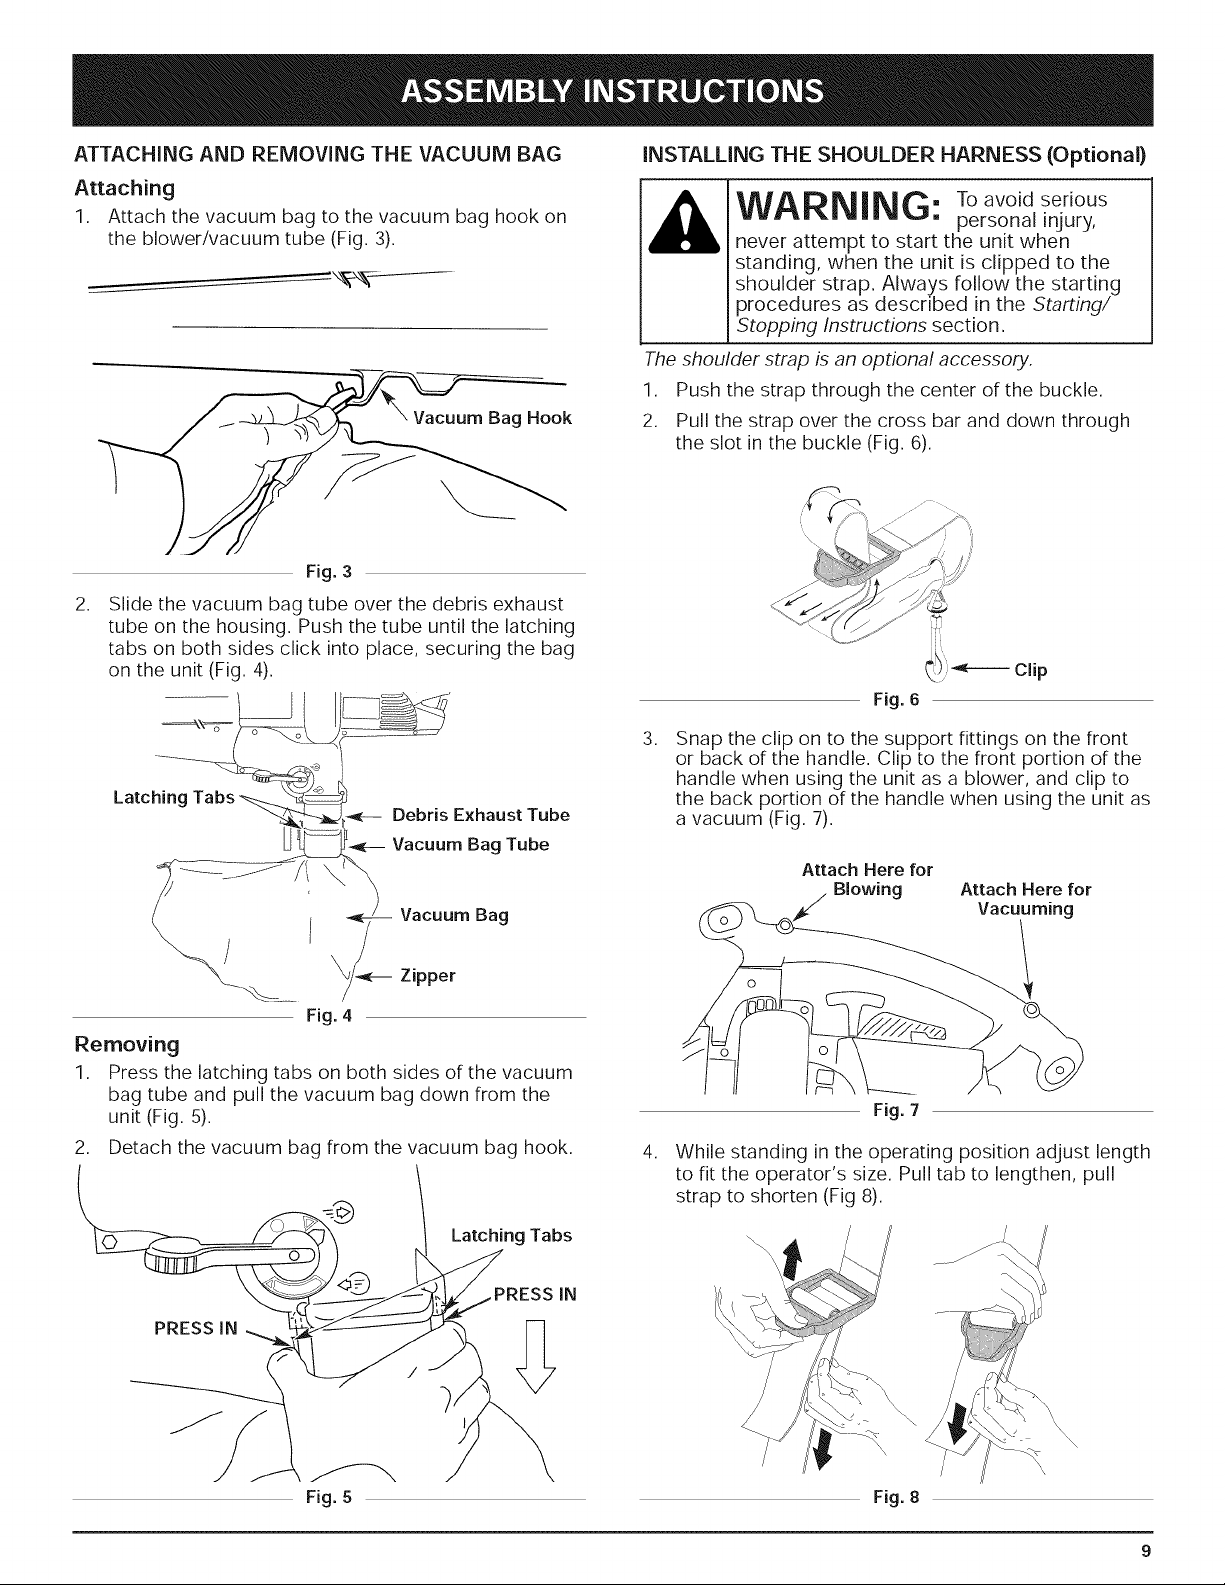
ATTACHINGAND REMOVINGTHEVACUUMBAG
Attaching
1. Attachthevacuumbagto thevacuumbaghookon
theblower/vacuumtube(Fig.3).
Vacuum Bag Hook
INSTALLING THE SHOULDER HARNESS (Optional)
WARNING: Toavoidserious
personal injury,
never attempt to start the unit when
standing, when the unit is clipped to the
shoulder strap. Always follow the starting
procedures as described in the ,Starting/
,Stopping Instructions section.
The shoulder strap is an optional accessory.
1. Push the strap through the center of the buckle.
2. Pull the strap over the cross bar and down through
the slot in the buckle (Fig. 6).
,
Fig. 3
Slide the vacuum bag tube over the debris exhaust
tube on the housing. Push the tube until the latching
tabs on both sides click into place, securing the bag
on the unit (Fig. 4).
__J
Latching Tabs
Debris Exhaust Tube
Removing
1.
Vacuum Bag Tube
Fig. 4
Vacuum Bag
Zipper
Press the latching tabs on both sides of the vacuum
bag tube and pull the vacuum bag down from the
unit (Fig. 5).
2. Detach the vacuum bag from the vacuum bag hook.
Latching Tabs
PRESS IN
IN
Fig. 5
,
,
Fig. 6
Snap the clip on to the support fittings on the front
or back of the handle. Clip to the front portion of the
handle when using the unit as a blower, and clip to
the back portion of the handle when using the unit as
a vacuum (Fig. 7).
Attach Here for
_/ Blowing Attach Here for
Vacuuming
Fig. 7
While standing in the operating position adjust length
to fit the operator's size. Pull tab to lengthen, pull
strap to shorten (Fig 8).
\
Fig. 8
Loading ...
Loading ...
Loading ...