MA A(3
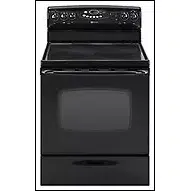
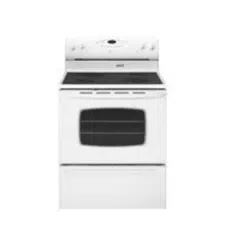
Precision Touch Controm 700
E_ectric Smoothtop
Tabme of Contents
Safety .......................................... 1-3
Surface Cooking ...................... 4°7
Controls
Smoothtop Surface
Warming Center
Oven Cooking ......................... 8=17
Baking
Cook & Hold
Delay
Keep Warm
Favorite
Broiling
Oven Racks
Care & Cleaning ................... 18-21
Sdf-Cban Oven
Charting Procedures
Maintenance ......................... 22-23
Oven Window
Oven Light
Troubleshooting ................... 24=25
Warranty & Service .................... 27
Guide d'utilisation et
d'entretien ................................... 28
Guia de Use y Cuidado ............. 56
Form No. B/09/04 Pall No. 8113P461 60 ¢}2004 Maytag Appliances Sales Co. Litho U.S.A.
installer: Please leave this manual with this appfiance.
lSonsumer: Please read and keep this manual for future
reference. Keep sabs receipt and/or canceled check as proof
of purchase.
Model Number
Serial Number
Date of Purchase
if _ou have questions, ca!l:
Maytag Customer Assistance
1-800-688-9900 USA
1-800-688-2002 Canada
1-800-688-2080 { U.S. 13_Yfor hearing or speech impaired}
{MonTFrL 8 am-8 pm Eastern TirneJ
Internet: http://w_Jv.maytag.com
tn ourcontinuing effort to improve the quality and performance
of our cooking prod ucts. it may be necessary to make changes
to the appliance without revising this guide.
For so.ice hffermadon, see page 27,
Warning and Important Safety Instructions appearing in
this guide are not meant to cover all possible conditions
and situations that may occur. Common sense, caution,
and care must be exercised when installing, maintaining,
or operating the appliance.
Always contact your dealer, distributor, service agent, or
manufacturer about problems or conditions you do not
understand.
Recognize Safety Symbols, Words, Labels
COULD result in severe persona! injury or death,
cian. Do not attempt to adjust, repair, service, or replace
any part of your appliance unless it is specifically recom-
mended in this guide. All other servicing should be
referred to a qualified servicer.
Always disconnect power to appliance before servicing.
To check if device is properly installed, look underneath
range with a flashlight to make sure one of the rear
bveling legs is properly engaged in the bracket sloL The
anti-tip device secures the rear leveling leg to the floor
when properly engaged. You should check this anytime
the range has been moved.
To Prevent Fire or Smoke
Be sure all packing materials are removed from the
appliance before operating iL
Keep area around appliance clear and free from combus-
tibb materiab. FIammabb materials should not be stored
in an oven_
Many plastics are vulnerable to heat. Keep plastics away
from parts of the appliance that may become warm or
hoL
To prevent grease fires, do not let cooking grease or other
flammable materials accumulate in or near the appliance.
CAUTUON _ Hazards or unsafe practices which
COULD resuJt in minor persona! injury.
Read and follow aH instructions before using this
appmianee to prevent the potential risk of fire, electric
shock, personal injury or damage to the appliance as a
result of improper usage of the appliance. Use appliance
only for its intended purpose as described in this guide.
To ensure proper and safe operation: Appliance must
be properly instafled and grounded by a qualified techni-
in Case of Fire
Use dry chemical or foam-type extinguisher or baking
soda to smother fire or f[ame. Never use water on a
grease f[re.
1_Turn off appliance to avoid spreading the f[ame.
2_N[EV[ERpick up or move a flaming pan.
3_ Smother fire or flame by closing the oven door.
Turn off appliance and ventilating hood to avoid spread-
[ng the flame. Extinguish flame then turn on hood to
remove smoke and odor.
Child Safety
above an appJJance, Children c!jmbing On the appliance
sedous!y injured,
NEVER leave children alone or unsupervised near the
appliance when it is in use or is still hot. Children should
never be allowed to sit or stand on any part of the appli-
ance as they could be injured or burned.
Children must be taught that the appliance and utensils in
it can be hot. Let hot utensils cool in a safe place, out of
reach of small children. Children should be taught that an
appliance is not a toy. Children should not be allowed to
play with controls or other parts of the appliance.
About Your Appliance
tean!ng or sitting On the door, may resu!t in p0ssib!e
tipping of the appliance, breakage of door, and serious
injuries,
To prevent potential hazard to the user and damage to the
appliance, do not use appliance as a space heater to heat
or warm a room. Also, do not use the oven as a storage
area for food or cooking utensils.
Do not obstruct the flow of air by blocking the oven vent.
DO NOT TOUCH HEATING ELEMENTS OR iNTERiOR
SURFACES OF OVEN. Heating elements may be hot even
though they are dark in color, interior surfaces of any
oven become hot enough to cause burns. During and
after use, do not touch, or let clothing or other flammable
materials contact heating elements or interior surfaces of
oven until they have had sufficient time to cool. Other
surfaces of the appliance may become hot enough to
cause burns - among these surfaces are: oven vent
opening and surface near this opening, oven door, win-
dow of oven door.
Do not touch a hot oven light bulb with a damp cloth as
the bulb could break Should the bulb break, disconnect
power to the appliance before removing bulb to avoid
electrical shock
NEVER use aluminum foil to cover an oven rack or oven
bottom. Misuse could result in risk of electric shock, fire,
or damage to the appliance. Use foil only as directed in
this guide.
Cooking Safety
Never heat an unopened food container in the oven.
Pressure build-up may cause container to burst resulting
in serious personal injury or damage to the appliance.
Use dry, sturdy potholders. Damp potholders may cause
burns from steam. Dish towels or other substitutes should
never be used as potholders because they can trail across
hot elements and ignite or get caught on appliance parts.
Wear proper apparel. Loose fitting or long hanging-
sleeved apparel should not be worn while cooking. Cloth-
ing may ignite and cause burns if garment comes in
contact with heating elements.
Always place oven racks in the desired positions while
oven is cool. Slide oven rack out to add or remove food,
using dry, sturdy potholders. Always avoid reaching into
the oven to add or remove food. If a rack must be moved
while hot, use a dry potholder. Do not let potholder contact
hot element in oven.
Use racks only in the oven in which they were shipped/
purchased.
Use care when opening the oven door. Let hot air or steam
escape before removing or replacing food.
PREPARE[} FOOD WARNUNG: Follow food
manufacturer's instructions. If a plastic frozen food con-
tainer and/or its cover distorts, warps, or is otherwise
damaged during cooking, immediately discard the food
and its container. The food could be contaminated.
Do not allow aluminum foil or meat probe to contact
heating element.
Always turn off all controls when cooking is completed.
Lftensil Safety
Follow the manufacturer's directions when using oven
cooking bags.
This appliance has been tested for safe performance
using conventional cookware. Do not use any devices or
accessories that are not specifically recommended in this
guide. Do not use add-on oven convection systems. The
use of devices or accessories that are not expressly
recommended in this guide can create serious safety
hazards,resultin performanceproblems,andreducethe
lifeofthecomponentsoftheappliance.
If panissmallerthanelement,a portionoftheelement
will beexposedto directcontactandcouldigniteclothing
orpotholder.
Onlycertaintypesofglass,glass!ceramic,ceramic,
earthenware,orotherglazedutensilsaresuitablefor
cooktoporovenservicewithoutbreakingdueto the
suddenchangeintemperature.Followutensil
manufacturer'sinstructionswhenusingglass.
Turnpanhandletowardcenterofcooktop,notoutinto
the roomor overanothersurfaceelemenLThisreduces
the riskof burns,ignitionofflammablematerials,or
spillageif panisaccidentiybumpedor reachedbysmall
children.
NEVERleavesurfaceunitsunattendedespeciallywhen
usinghighheat.An unattendedboilovercouldcause
smokingandagreasyspillovercancauseafire.
Thisapplianceisequippedwith differentsizesurface
elements.Selectpanswithflat bottomslargeenoughto
coverelement.Fittingpansizeto elementwill improve
cookingefficiency.
GEASS_CERAMUCSURFACE:NEVERcookonbroken
cooktop.Ifcooktopshouldbreak,cleaningsolutionsand
spiiioversmaypenetratethebrokencooktopandcreatea
riskof electricshockContacta qualifiedtechnician
immediateiy.
Deep Fat Fryers
Use extreme caution when moving the grease pan or
disposing of hot grease. Allow grease to cool before
attempting to move pan.
Ventimating Hoods
Clean range hood and filters frequently to prevent grease
or other flammable materials from accumulating on hood
or filter and to avoid grease fires.
When flaming foods under the hood, turn the fan on.
Cmeaning Safety
Clean cooktop with caution. Turn off aii controls and wait
for appliance parts to cool before touching or cleaning.
Clean with caution. Use care to avoid steam burns if a wet
sponge or cloth is used to wipe spills on a hot surface.
Some cleaners can produce noxious fumes if applied to a
hot surface.
Clean only parts listed in this guide.
Se f-C ean Oven
utensils, etc. in the oven during the stir-clean cycle.
Do not clean door gasket. The door gasket is essential for
a good seal Care should be taken not to rub, damage, or
move the gaskeL
Do not use oven cleaners or oven liners of any kind in or
around any part of the self-clean oven.
Before self-cleaning the oven, remove broiler pan, oven
racks and other utensils, and wipe off excessive spillovers
to prevent excessive smoke or flare ups.
important Safety Notice and
The California Safe Drinking Water and Toxic Enforcement
Act of 1986 (Proposition 65} requires the Governor of
California to publish a list of substances known to the
State of California to cause cancer or reproductive harm,
and requires businesses to warn customers of potential
exposures to such substances.
Users of this appliance are hereby warned that when the
oven is engaged in the self-clean cycle, there may be
some low-level exposure to some of the listed substances,
including carbon monoxide. Exposure to these substances
can be minimized by properly venting the oven to the
outdoors by opening the windows and/or door in the room
where the appliance is located during the self-clean cycie.
UMPORTANT NOTUCE REGARDUNG PET BURDS: Never
keep pet birds in the kitchen or in rooms where the fumes
from the kitchen could reach. Birds have a vep! sensitive
respiratory system. Fumes released during an oven self-
cleaning cycle may be harmful or fatal to birds. Fumes
released due to overheated cooking off, fat, margarine and
overheated non-stick cookware may be equally harmful
Save These instructions for Future Reference
3
Surface Controls
Use to turn on the surface elements. An infinite choice of
heat settings is available from Lew to High. The knobs can
be set on or between any of the settings.
Setting the ControJs
1. Place pan on surface element.
2. Push in and turn the knob in either direction to the desired
° The control panel is marked to identify which O O
element the knob controls. For example, the _O_---_
graphic at right indicates left front element.
3. There is an element indicator light on the control panel.
When any surface control knob is turned on, the light will
turn on. The light will turn off when all the surface ele-
ments are turned off.
When a control is turned on, a glow can be seen through
the smoothtop surface. The element will cycle on and off
to maintain the preset heat setting, even on High.
4. After cooking, turn knob to OFF.
O
Remove pan.
OFF
Dual Elements 2
The cooking surface has two dual
elements located in the right front and +
left front of the smoothtop. This allows
you to change the size of these elements.
.
Press the switch to the left to use the large M_d+u,,+
element or to the right to use the small element. The selection
should be made before turning on the element.
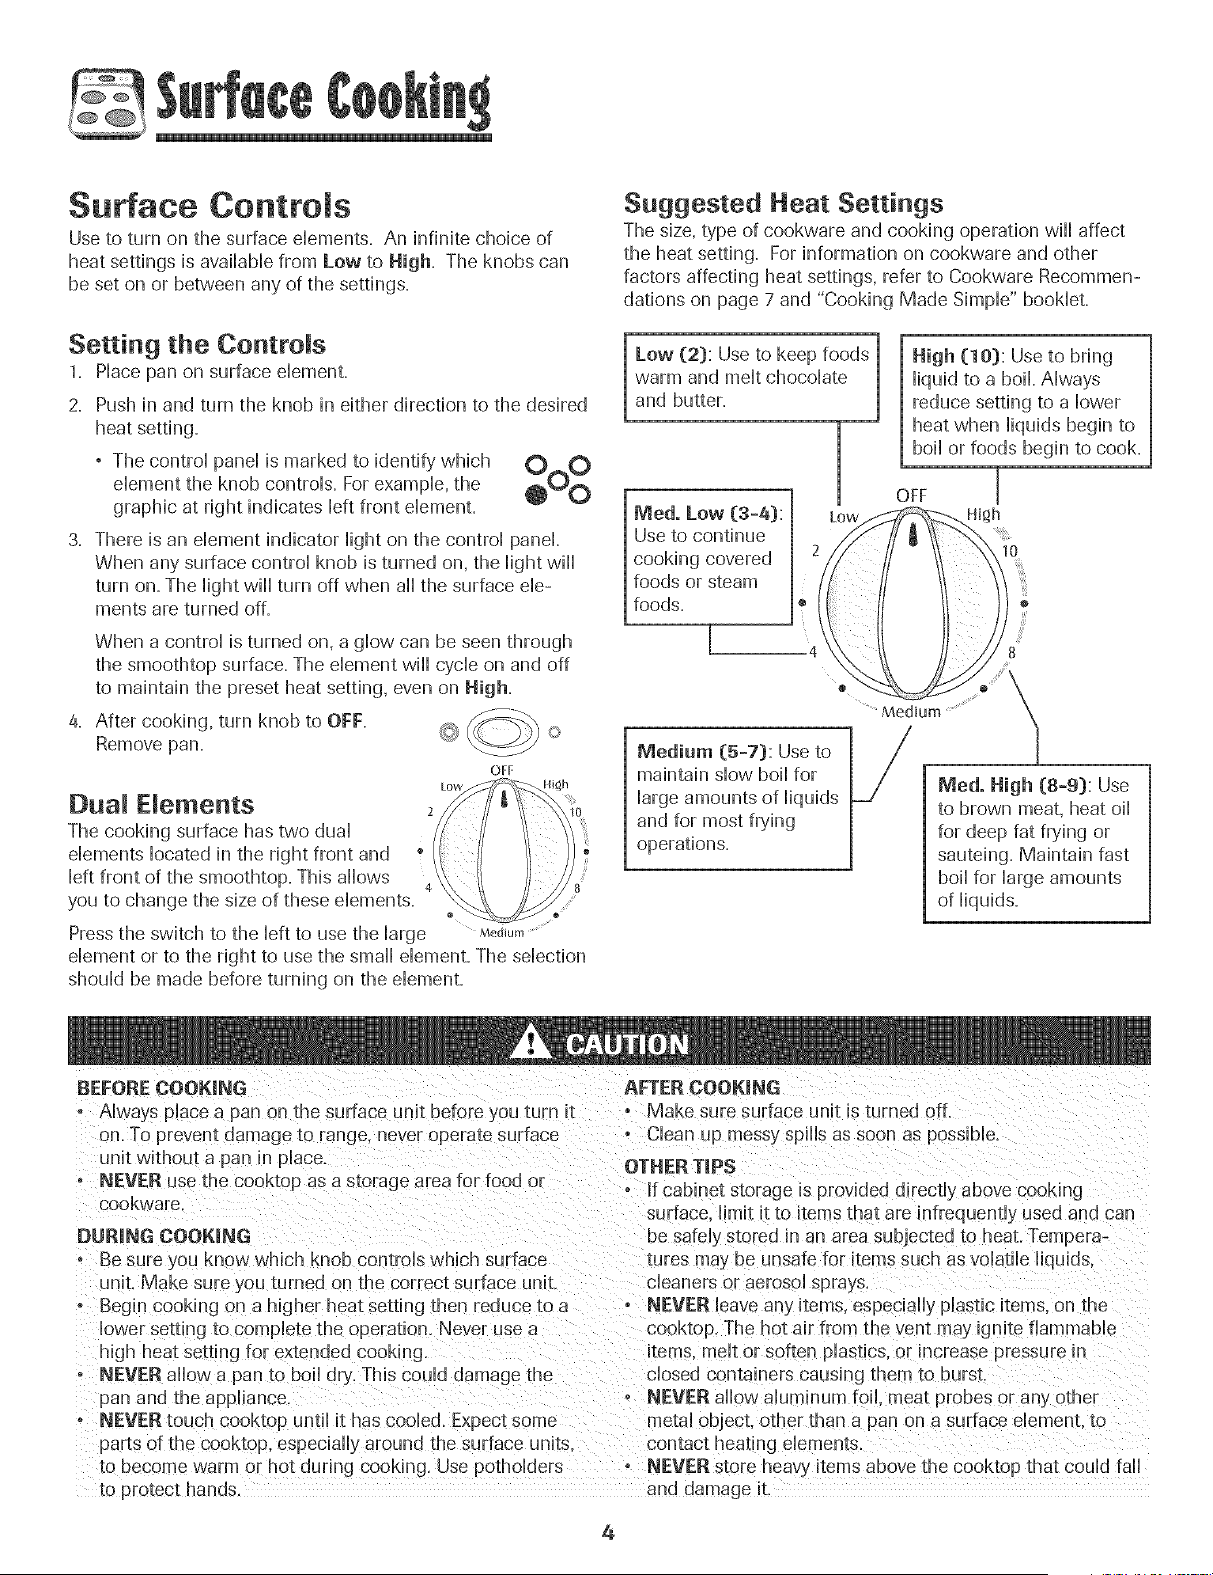
Suggested Heat Settings
The size, type of cookware and cooking operation will affect
the heat setting. For information on cookware and other
factors affecting heat settings, refer to Cookware Recommen-
dations on page 7 and "Cooking Made Simple" booklet.
Medo Low (3-4):
Use to continue
cooking covered
foods or steam
foods.
1
High (10): Use to bring
liquid to a boil. Always
reduce setting to a lower
heat when liquids begin to
boil or foods begin to cook.
OFF [
High
I0
.......Medium ...............
@
B
Medium (5-7): Use to
maintain stow boil for
large amounts of liquids
and for most frying
operations.
Medo High (8=9): Use
to brown meat, heat oil
for deep fat frying or
sauteing. Maintain fast
boil for large amounts
of liquids.
BEFORECOOKING AFTER COOKING
+ Always place a pan on the surface unit before you turn it • Make sure surface unit is turned off.
on. To prevent damage to range, never operate surface o Clean up messy spills as soon as possible.
Jnit without a pan in place.
, NEVER use the cooktop as a storage area for food or
cookware.
DURING COOKING
o Be sure you know which knob controls which surface
unit. Make sure l ou turned on the correct surface unit
. Begin cooking on a higher heat setting :hen reduce to a
lower setting to complete the operation. Never use a
high heat setting for extended cooking.
o NEVER allow a pan to boil dry. This could damage the
pan and the appliance.
• NEVERtouch cooktop until it has cooled. Expect some
parts of the cooktop, especially around the surface units
to become warm or hot during cooking. Use potholders
_oprotect hands.
OTHERTiPS
- if cabinet storage is provided directly above cooking
su trace, limit it to items that are infrequently used and can
be safely stored in an area subjected to heat. Tempera-
tures may be unsafe for items such as volatile liquids.
cleaners oHaerosol sprays
• NEVER ]eave any items, especially plastic items, on the
cooktop. The hot air from the vent may ignite flammable
items, melt or soften plastics, ou increase pressure in
closed containers causing them to burst.
NEVER allow aluminum foil. meat probes or any other
metal object, other than a pan on a surface dement, to
contact heating dements.
NEVER store heav} items above the cooktop that could fail
and damage it.
4
S oothtop Surface
Smoothtop Surface Notes:
. Cooktop may emit mightsmoke and odor the first few
times the cooktop is used. This is normal
. Smoothtop cooktops retain heat for a period of time
after the element is turned off. Turn the dements off
a few minutes before food is compHeteHycooked and use
the retained heat to compHete cooking. When the hot
surface Hightturns off, the cooking area will] be coo]
enough to touch. Because of the way they retain heat, the
smoothtop dements will] not respond to changes in
settings as quickHyas coi] dements.
° In the event of a potentia] boiHover,remove the pan from
the cooking surface.
, Never attempt to miftthe cooktopo
° The smoothtop surface may appear discoHoredwhen it is
hot. This is norma] and will] disappear when the surface
cooHs=
Cooking Areas
The cooking areas on your range are identified by permanent
circHeson the smoothtop surface. For most efficient cooking,
fit the pan size to the dement size.
Pans should not extend more than ,/2 to t-inch beyond
the cooking area.
When a controHis turned on, a gHowcan be seen through the
smoothtop surface. The element will cycle on and off to
maintain the preset heat setting, even on Hi.
For more information on cookware, refer to Cookware
Recommendations on page 7 and "Cooking Made SimpHe"
bookHetincHudedwith your range.
SINGLE WARMING CENTER
ELEMENT
SINGLE
ELEMENT
DUAL
ELEMENT
Hot Surface Light
The Hot Surface indicator Hightis Hocatedon the
controHpanel The HightwiHHbe iHHuminated
Hef_ Surface
when any cooking area is hot. It wiHHremain on,
even after the controH is turned off, untiHthe area has cooHed=
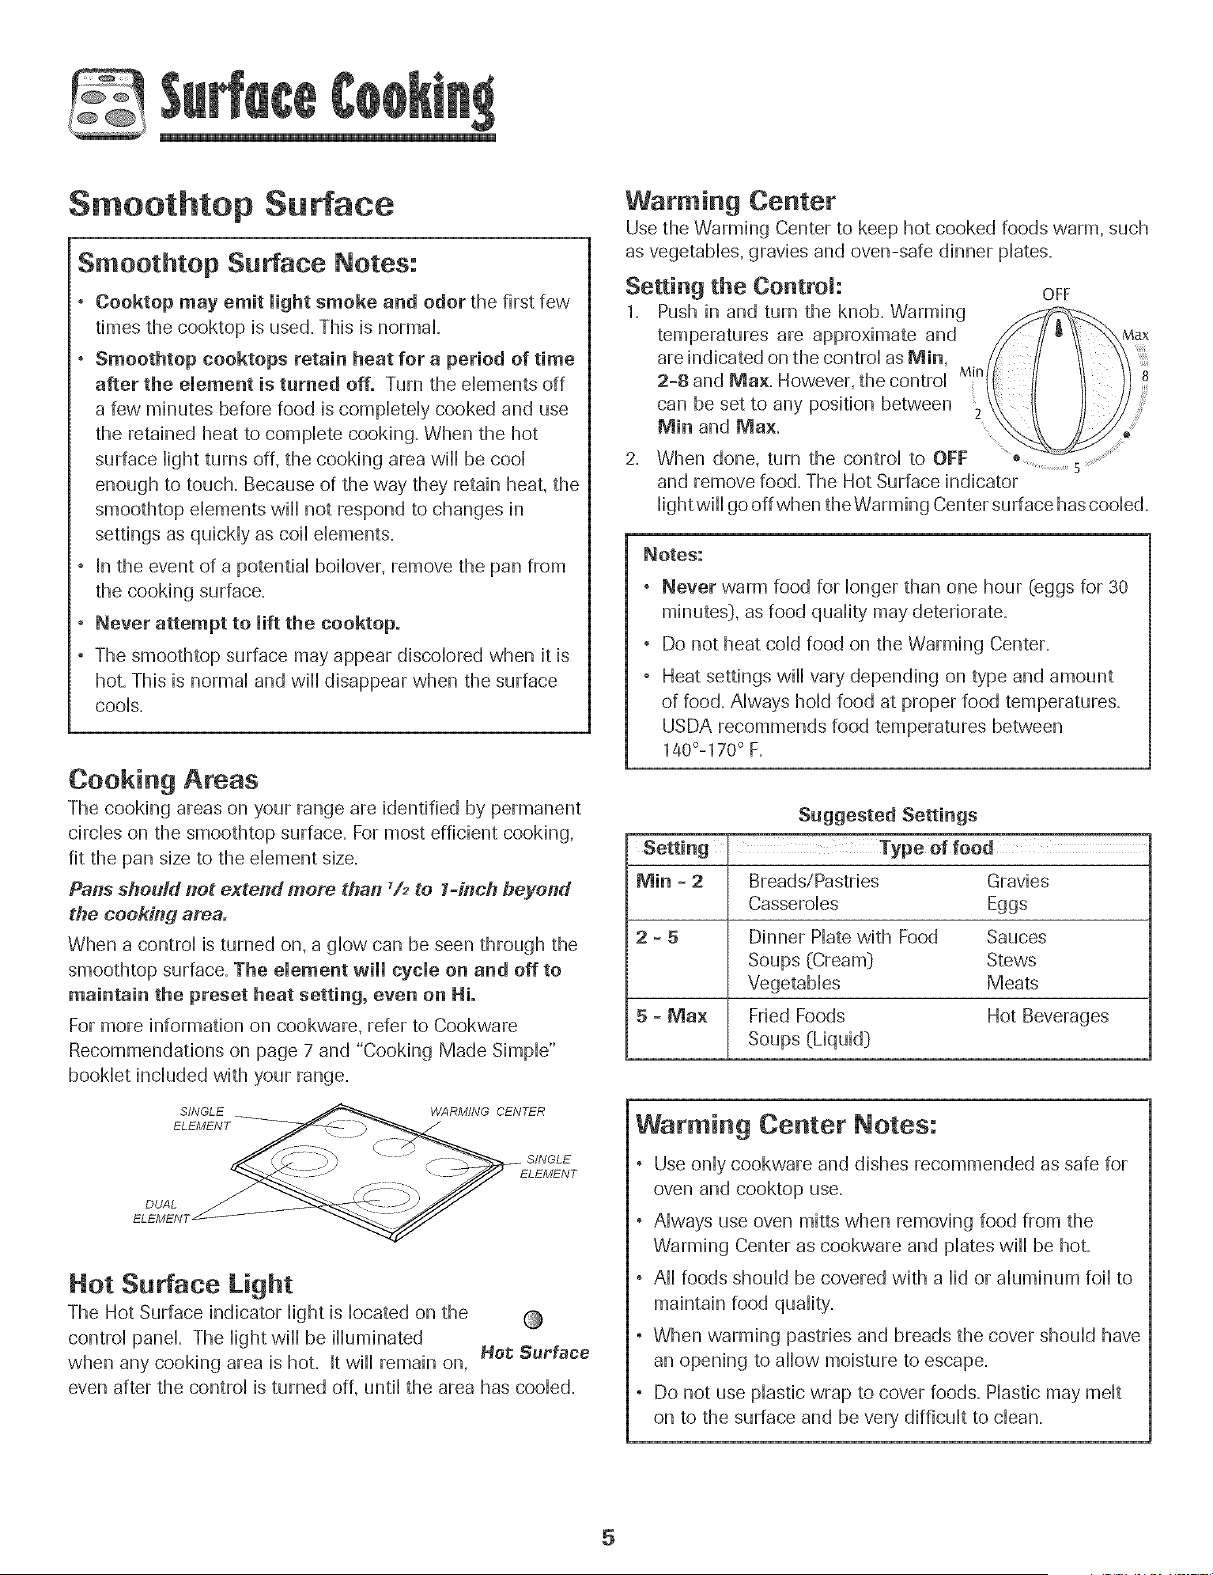
Warming Center
Use the Warming Center to keep hot cooked foods warm, such
as vegetabHes,gravies and oven-safe dinner pHates=
Setting the Control:
1. Push in and turn the knob. Wanning
temperatures are approximate and
are indicated on the controHas Min,
2-8 and Max. However, the controH Mn
can be set to any position between
Min and Ma×=
2,
OFF
Max
8
When done, turn the control to OFF _ ...............5...................
and remove food. The Hot Surface indicator
Hightwill[go off when the Warming Center surface has cooHed=
Notes:
. Never warm food for longer than one hour _eggs for 30
minutes), as food quaHitymay deteriorate.
° Do not heat coHdfood on the Warming Center.
° Heat settings wiHHvary depending on type and amount
of food. AHwayshoHdfood at proper food temperatures.
USDA recommends food temperatures between
140°-170° F,
Suggested Settings
Setting Type of feed
Min = 2 Breads/Pastries Gravies
CasseroHes Eggs
2 = 5 Dinner Plate with Food Sauces
Soups (Cream} Stews
VegetabHes Meats
5 - Max Fried Foods Hot Beverages
Soups (Liquid)
Warming Center Notes:
° Use onHycookwam and dishes recommended as safe for
oven and cooktop use.
° AHwaysuse oven mitts when removing food from the
Warming Center as cookware and pHateswiHHbe hot.
° AHHfoods shouHdbe covered with a Hidor aHuminumfoiHto
maintain food qua[it},.
° When warming pastries and breads the cover shouHdhave
an opening to aHHowmoisture to escape.
° Do not use pHasticwrap to cover foods. PHasticmay merit
on to the surface and be very difficuHt to dean.
5
Tips to Protect the
Smoothtop Surface
C_ea_ing (see page 20 for more information}
, Before first use, clean the cooktop.
, Clean your cooktop daily or after each use. This wiii keep
your cooktop looking good and can prevent damage.
, if a spillover occurs while cooking, immediately clean the
spill from the cooking area while it is hot to prevent a tough
cleaning chore later. Using extreme care, wipe spill with a
clean dry,towel
° Do not allow spills to remain on the cooking area or the
cooktop trim for a long period of time.
° Never use abrasive cleansing powders or scouring pads
which wiii scratch the cooktop.
° Never use chlorine bleach, ammonia or other cleansers not
specifically recommended for use on glass-ceramic.
To Prevent Marks & Scratches
, Do not use glass pans. They may scratch the surface.
, Never place a trivet or wok ring between the surface and
pan. These items can mark or etch the top.
, Do not slide aluminum pans across a hot surface. The pans
may leave marks which need to be removed promptly. (See
Cleaning, page 20.}
, Make sure the surface and the pan bottom are clean before
turning on to prevent scratches.
, To prevent scratching or damage to the glass-ceramic top,
do not leave sugar, salt or fats on the cooking area. Wipe
the cooktop surface with a clean cloth or paper towel
before using.
, Never slide heavy metal pans across the surface since
these may scratch.
To Prevent Stains
, Never use a soiled dish cloth or sponge to clean the
cooktop surface. A film will remain which may cause stains
on the cooking surface after the area is heated.
° Continuously cooking on a soiled surface may/will result in
a permanent stain.
To Prevent Other Damage
° Do not allow plastic, sugar or foods with high sugar content
to melt onto the hot cooktop. Should this happen, clean
immediately. (See Cleaning, page 20.}
° Never let a pan boil dry as this will damage the surface and
pan.
° Never use cooktop as a work surface or cutting board.
° Never cook food directly on the surface.
° Do not use a small pan on a large element. Not only does
this waste energy, but it can also result in spillovers burning
onto the cooking area which requires extra cleaning.
° Do not use non-fiat specialty items that are oversized or
uneven such as round bottom woks, rippled bottom and/or
oversized canners and griddles.
° Do not use foil or foil-type containers. Foil may melt onto
the glass, if metal melts on the cooktop, do not use. Call an
authorized Maytag Servicer.
! ....
Cookware Recommendations
Using the right cookware can prevent many proMems, such
as food taking bnger to cook or achieving inconsistent
resuits, Proper pans will reduce cooking times, use Hess
energy, and cook food more eveniy,
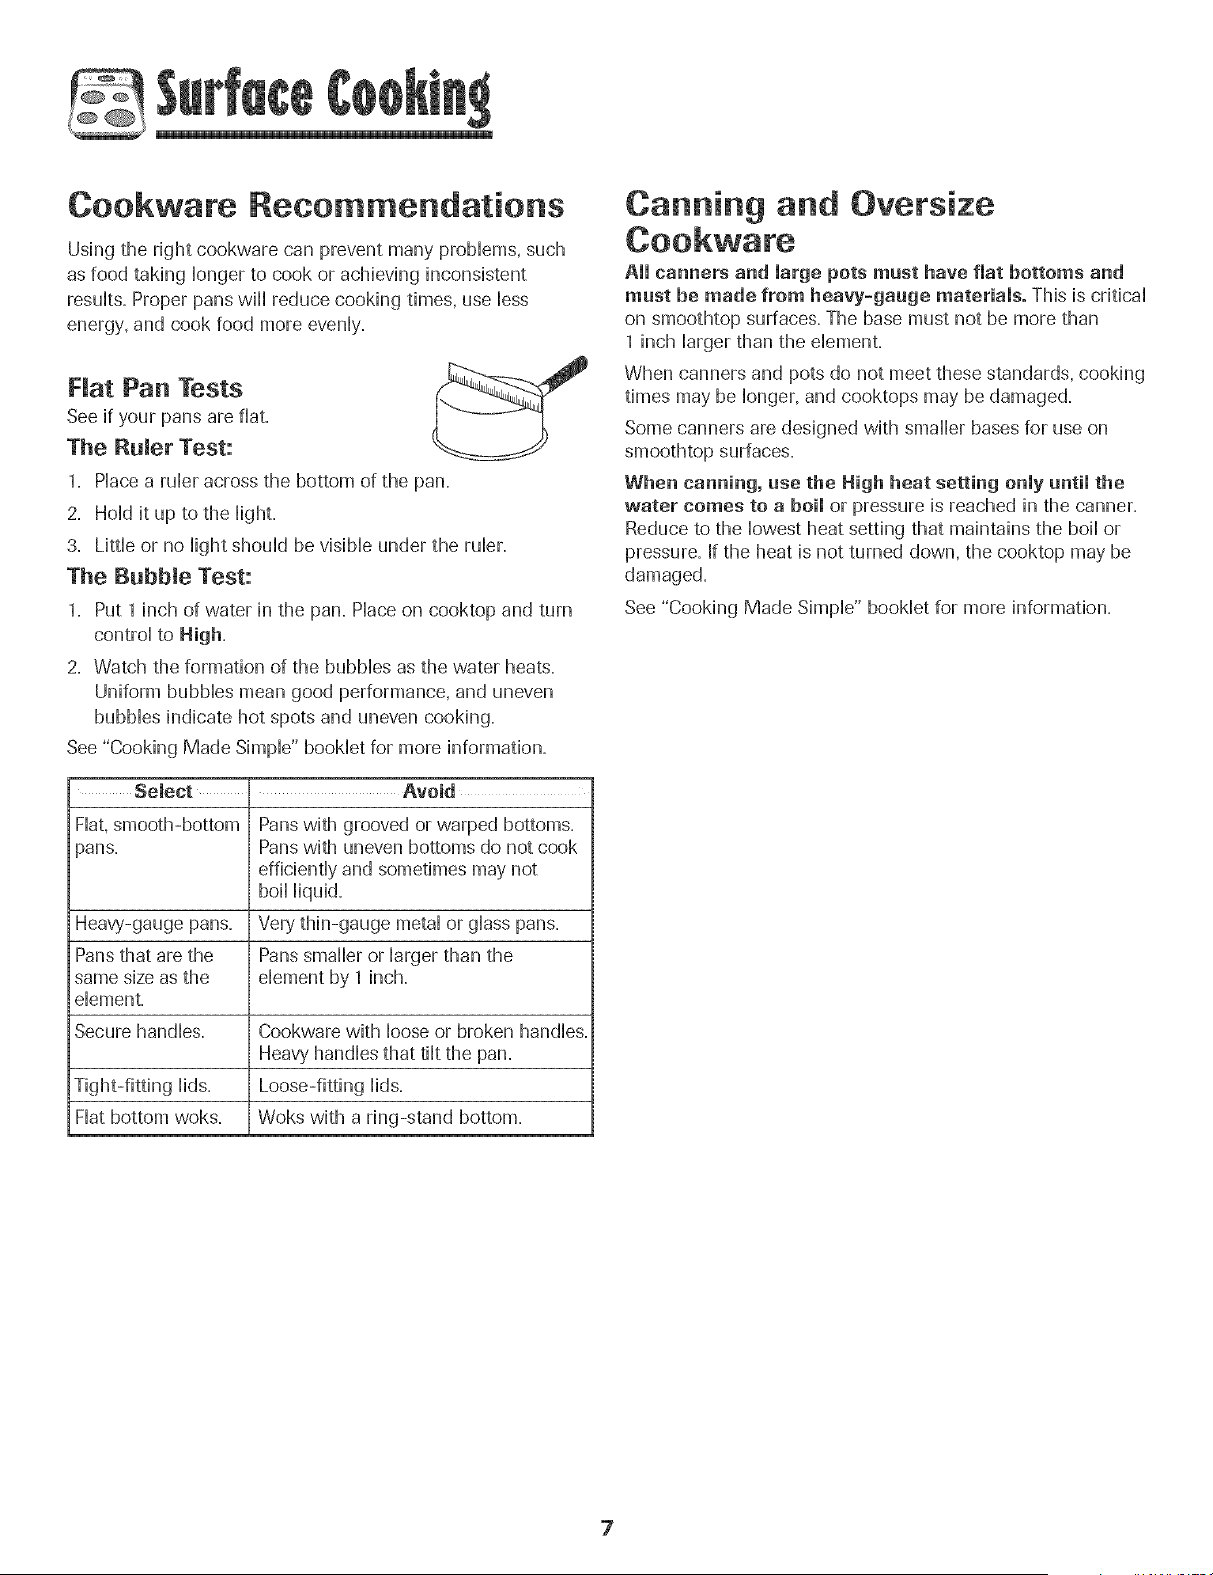
Nat Pan Tests
See if your pans are fiat,
The Rumor Test:
1, Hace a rubr across the bottom of the pan,
2, Hoid it up to the Hight,
3, Litde or no Hightshouid be vbiMe under the rubr,
The Babble Test:
1, Put 1 inch of water in the pan, Pbce on cooktop and turn
controi to High,
2, Watch the formation of the bubMes as the water heats,
Uniform bubbbs mean good performance, and uneven
bubMes indicate hot spots and uneven cooking,
See "Cooking Made Simpb" bookbt for more information,
Select Avoid
Flat,smooth-bottom Pans with grooved or warped bottoms,
pans, Pans with uneven bottoms do not cook
efficiently and sometimes may not
Heavy-gauge pans, Very thin-gauge metal or glass pans,
Pansthat are the Pans smaller or larger than the
same size as the element by 1 inch,
dement.
Secure handles. Cookware with loose or broken handles.
Heavy'handles that tilt the pan.
Loose-fitting lids.
Hat bottom woks. Woks with a ring-stand bottom.
Canning and Oversize
All canners and large pots must have flat bottoms and
must be made from heavy-gauge materials° This is critical
on smoothtop surfaces, The base must not be more than
1 inch larger than the dement,
When canners and pots do not meet these standards, cooking
times may be longer, and cooktops may be damaged,
Some canners are designed with smalbr bases for use on
smoothtop surfaces,
When canning, use the High heat setting only until the
water comes to a boil or pressure is reached in the canner,
Reduce to the lowest heat setting that maintains the boil or
pressure, If the heat is not turned down, the cooktop may be
damaged,
See "Cooking Made Simpb" booklet for more information,
C D
E F G
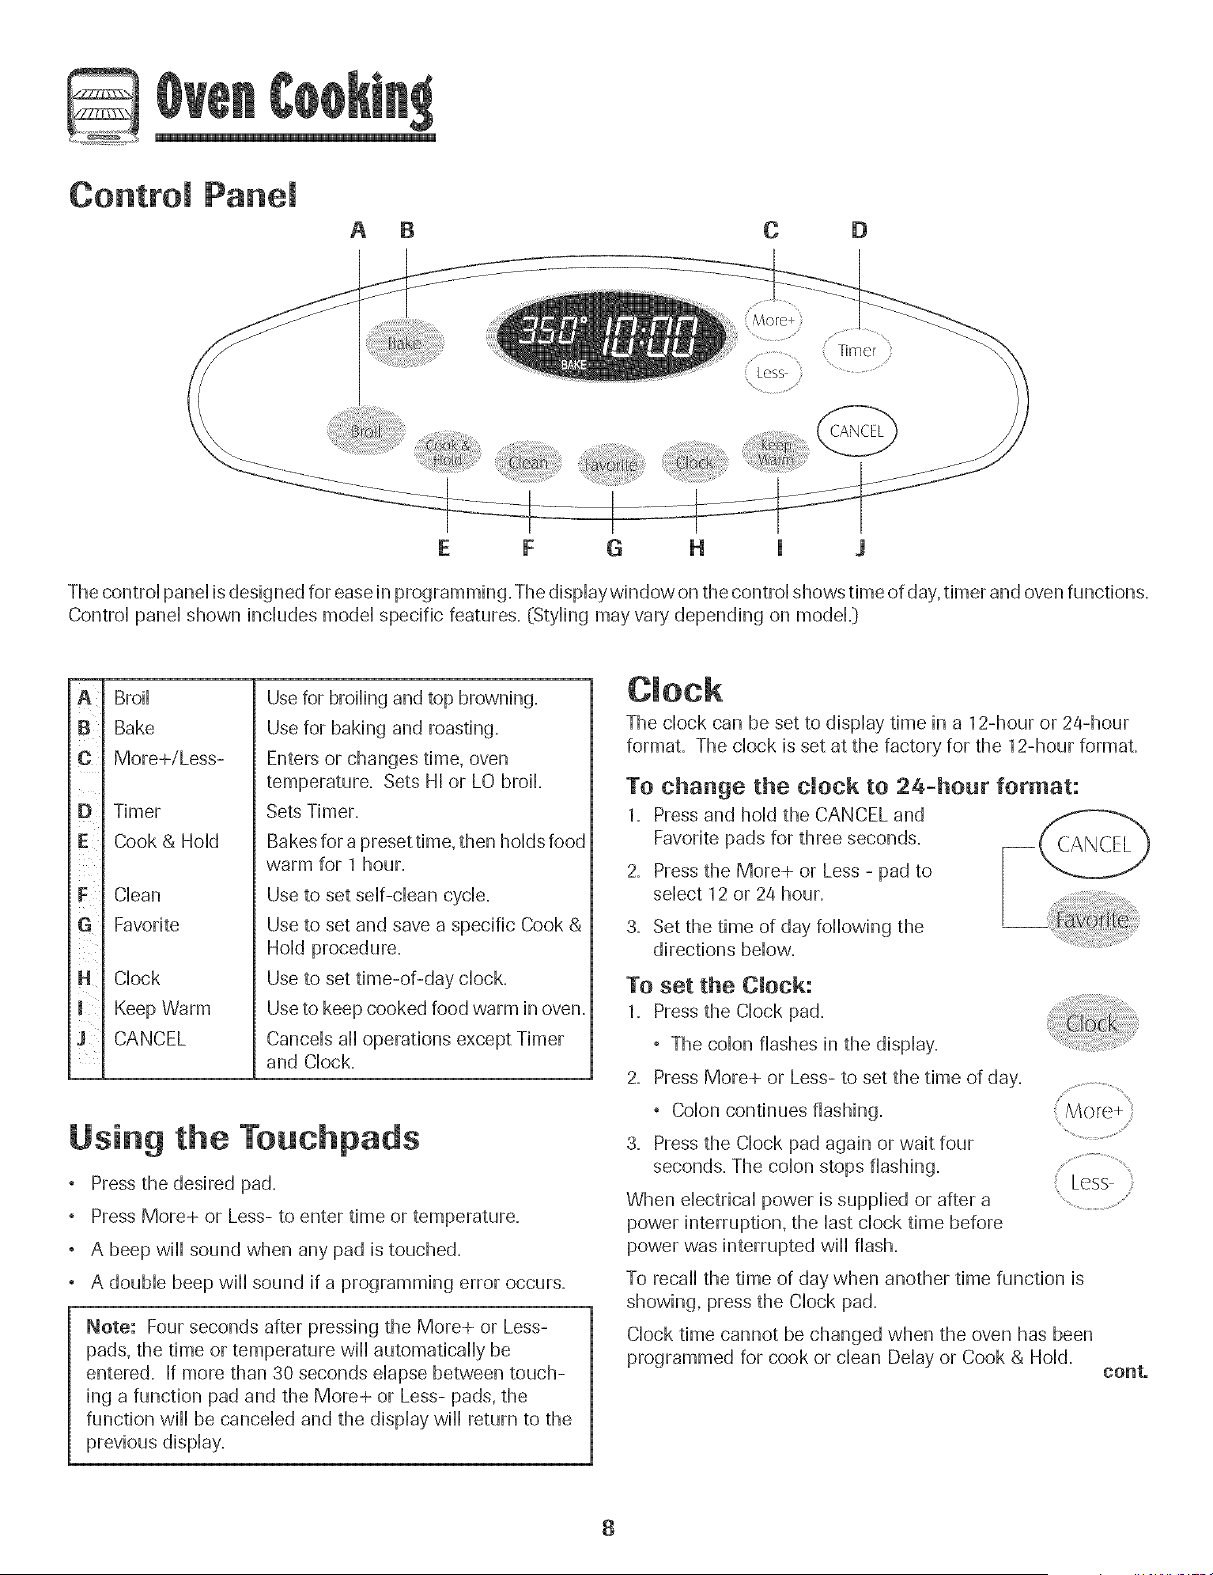
The controi panei is designed for ease in programming. The dispiaywindow on the controi shows time of day,timer and oven functions.
Controi panei shown inciudes modei specific features. (Styiing may vary depending on modek}
A
B
c ¸
F
H
J
Broii
Bake
More+/Less-
Timer
Cook &Hoid
CHean
Favorite
Clock
Keep Warm
CANCEL
Use for broiling and top browning.
Use for baking and roasting.
Enters or changes time, oven
temperature. Sets HI or LO broil.
Sets Timer.
Bakes for a preset time, then holds food
warm for 1 hour.
Use to set self-clean cycle.
Use to set and save a specific Cook &
Hold procedure.
Use to set time-of-day clock.
Use to keep cooked food warm in oven.
Cancels all operations except Timer
and Clock.
Using the Touchpads
Pressthe desired pad.
Press More+ or Less- to enter time or temperature.
, A beep wiii sound when any pad is touched.
° A doubie beep wiii sound if a programming error occurs.
Note: Four seconds after pressing the More+ or Less-
pads, the time or temperature will automatically be
entered. If more than 30 seconds elapse between touch-
ing a function pad and the More+ or Less- pads, the
function will be canceled and the display will return to the
previous display.
The clock can be set to display time in a 12-hour or 24-hour
format. The clock is set at the factory for the 12-hour fornlat.
To change the clock to 24-honr format:
1. Pressand hold the CANCEL and
Favorite pads for three seconds.
2. Press the More+ or Less - pad to
select 12 or 24 hour.
3. Set the time of day following the
directions below.
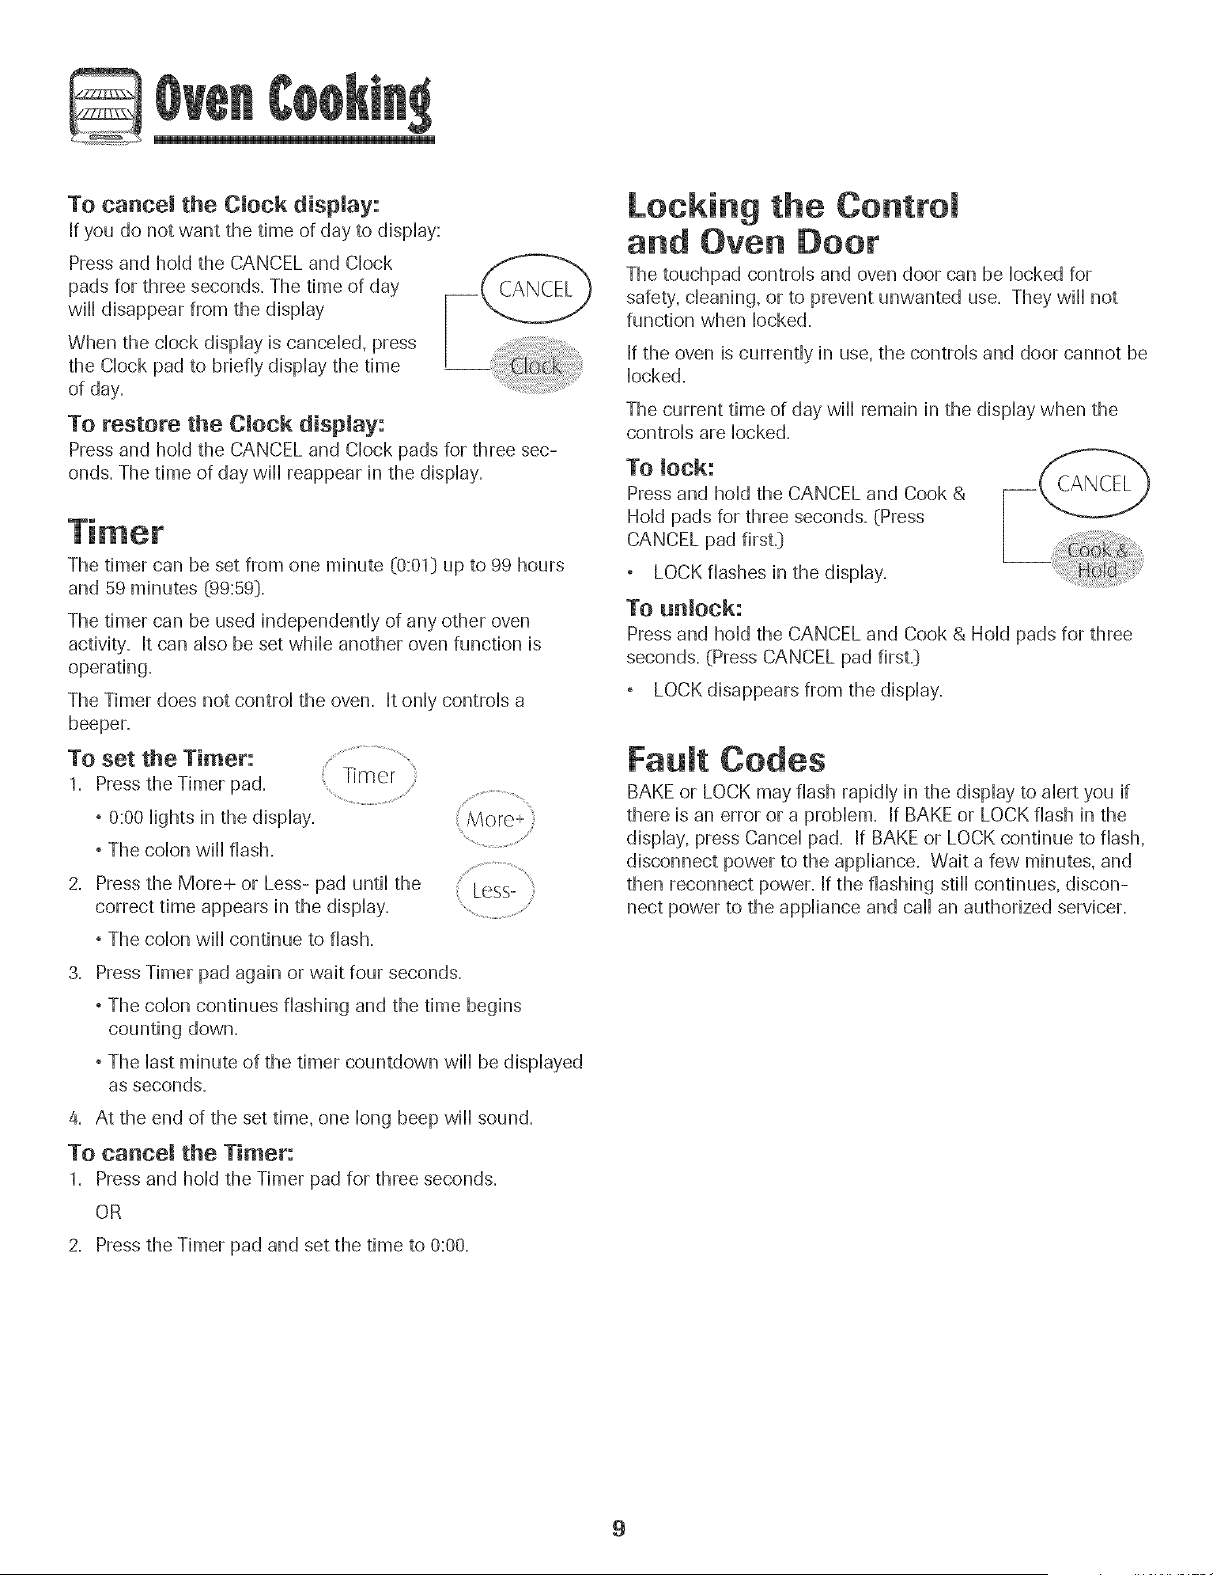
To set the Clock:
1. Pressthe Clock pad.
, The colon flashes in the display.
2. Press More+ or Less- to set the time of day.
, Colon continues flashing.
3. Press the Clock pad again or wait four
seconds. The colon stops flashing.
When electrical power is supplied or after a
power interruption, the last clock time before
power was interrupted wiii flash.
To recall the time of day when another time function is
showing, press the Clock pad.
Clock time cannot be changed when the oven has been
programmed for cook or clean Delay or Cook & Hold.
%......................................."
Less ,:
conto
8
To cancel the CJockdispmay:
If you do not want the time of day to dispHay:
Press and hoHdthe CANCEL and CHock
pads for three seconds. The time of day
wiHHdisappear from the dispHay
When the chock dispHayis cancelled, press
the CHockpad to briefly dispHaythe time
of day.
To restore the CJock display:
Press and hoHdthe CANCEL and CHockpads for three sec-
onds. The time of day wiHHreappear in the dispHay.
The timer can be set from one minute (0:01) up to 99 hours
and 59 minutes (99:59).
The timer can be used independentHy of any other oven
activity'. It can aHsobe set whiHeanother oven function is
operating.
The Timer does not controHthe oven. It onHycontroHsa
beeper,
Timer
To set the Timer:
1. Press the Timer pad.
° 0:00 Hightsin the dispHay.
° The coHonwiHHflash.
2.
Press the More+ or Less- pad until the L_:'ss-
correct time appears in the dispHay. ........................................
° The coHon wiHHcontinue to flash,
3,
PressTimer pad again or wait four seconds.
° The coHoncontinues flashing and the time begins
counting down.
° The Hastminute of the timer countdown wiHHbe dispHayed
as seconds.
4. At the end of the set time, one Hongbeep wiHHsound.
To cancel the Timec:
1. Press and hoHdthe Timer pad for three seconds.
OR
2, Press the Timer pad and set the time to 0:00,
Locking the Control
and Oven Dooc
The touchpad controls and oven door can be Hockedfor
safety, cleaning, or to prevent unwanted use. They will not
function when locked.
If the oven is currentHyin use, the controHsand door cannot be
Hocked.
The current time of day wiHHremain in the dispHaywhen the
controHsare Hocked.
To lock:
Press and hoHdthe CANCEL and Cook &
HoHdpads for three seconds. (Press
CANCEL pad first.[)
LOCK flashes in the dispHay.
To unlock:
Press and hoHdthe CANCEL and Cook & HoHdpads for three
seconds. (Press CANCEL pad first.)
LOCK disappears from the dispHay.
Fault Codes
BAKE or LOCK may flash rapidHyin the dispHayto aHertyou if
there is an error or a probHem. If BAKE or LOCK flash in the
dispHay,press CanceHpad. If BAKEor LOCK continue to flash,
disconnect power to the appHiance. Wait a few minutes, and
then reconnect power= If the flashing stiHHcontinues, discon-
nect power to the appHianceand caHHan authorized servicer.
9

To set bake:
1. Press the Bake pad.
, BAKE will flash+
, 000 will Hightin the dispiay.
2. Sebct the oven temperature+ The oven tempera- More+
ture can be set from 170° to 550°. Press or press ......................................
and hold the More+ or Less- pad.
, 350° will light when either pad is first pressed. { Less- [
, Press the More+ pad to increase the temperature.
, Press the Less- pad to decrease the temperature.
3. Press Bake pad again or wait four seconds.
, BAKE will stop flashing and light in the display.
, 100° or the actua] oven temperature will dispiay. The
temperature will rise in 5° increments und] the preset
temperature is reached.
4. Aiiow the oven to preheat for 8-15 minutes.
, When the set oven temperature is reached, one ]ong
beep will sound.
, To recall] the set temperature during preheat, press the
Bake pad.
5. Piace food in the oven.
8. Check cooking progress at minumum cooking time. Cook
bnger if needed.
7. When cooking is finished, press CANCEL
CANCEL pad.
8. Remove food from the oven.
Baking Notes:
, To change the oven temperature daring cooking,
press the Bake pad and then the More+ or Less- pad until
you reach the desired temperature.
, To change the oven temperatare daring preheat,
press the Bake pad twice and then the More+ or Less-
pad until you reach the desired temperature.
, If you forget to turn off the oven, it will automatically turn
off at the end of 12 hours. If you wish to deactivate this
feature, see page 13.
° For additional baking and roasting tips, see "Cooking
Made Simple" bookleL
Baking Differences Between Your O_d
and New Oven
It is normal to notice some baking time differences between a
new oven and an old one. See"Adjusting the OvenTemperature"
on page 14.
Cook & Hold
Cook & Hold allows you to bake for a preset amount of time,
followed by a one-hour Keep Warm cycb.
TO set Cook & Hold:
1. Pressthe Cook & Hold pad.
° BAKE and HOLD flash+
° 000 lights in the display.
2. Select the oven temperature. The oven tempera-
More+
ture can be set from 170° to 550°. Press or press .............................
and hold the More+ or Less- pad. Less-
....................
_ Press the More+ pad to increase the temperature.
° Pressthe Less- pad to decrease the temperature+
3. Press Cook & Hold pad again OR wait four seconds.
° HOLD flashes+
° 00:00 flashes in the display
& Enter the amount of time you want to bake by pressing the
More+ or Less- pad. Bake time can be set from 10
minutes @0:10} to 11 hours, 59 minutes (11:59}.
° BAKE and HOLD light in the display.
° The baking time will light in the display.
° The baking time will start counting down.
When the cooking time has elapsed:
° Four beeps wiii sound.
° BAKE will turn off.
° HOLD and WARM will lighL
, 170°will display.
After one hour in HOLD WARM:
° "End" will display+
° The time of day wiii reappear in the display.
To cancel Cook & Hold at any time:
Press the CANCEL pad, Remove food from oven, F_,_
10
De ay Bake
as dairy products, pork, poultry, or seafood.
When using Delay, the oven begins to cook Haterin the day.
Set the amount of time that you want to dday before the oven
turns on and how Hongyou want to cook. The oven begins to
heat at the seHectedtime and cooks for the specified Hengthof
time, then keeps food warm for one hour.
Dday time can be set from 10 minutes (00:10] to 11 hours, 59
minutes (11:59].
To set a Belayed Baking cycle:
1. Press the Bake and Timer pads at the
same time.
, DELAY Hightsin the dispHay.
, 00:00 appears in the dispHay.
2. Press the More+ or Less- pad to set the
3. Press the Cook & HoHd pad.
, 000 Hights in the dispHay.
, BAKE and HOLD flash.
4. Press More+ to set the baking
temperature.
, 00:00 and HOLD flash.
Timer
Less-
, BAKEstays Hit.
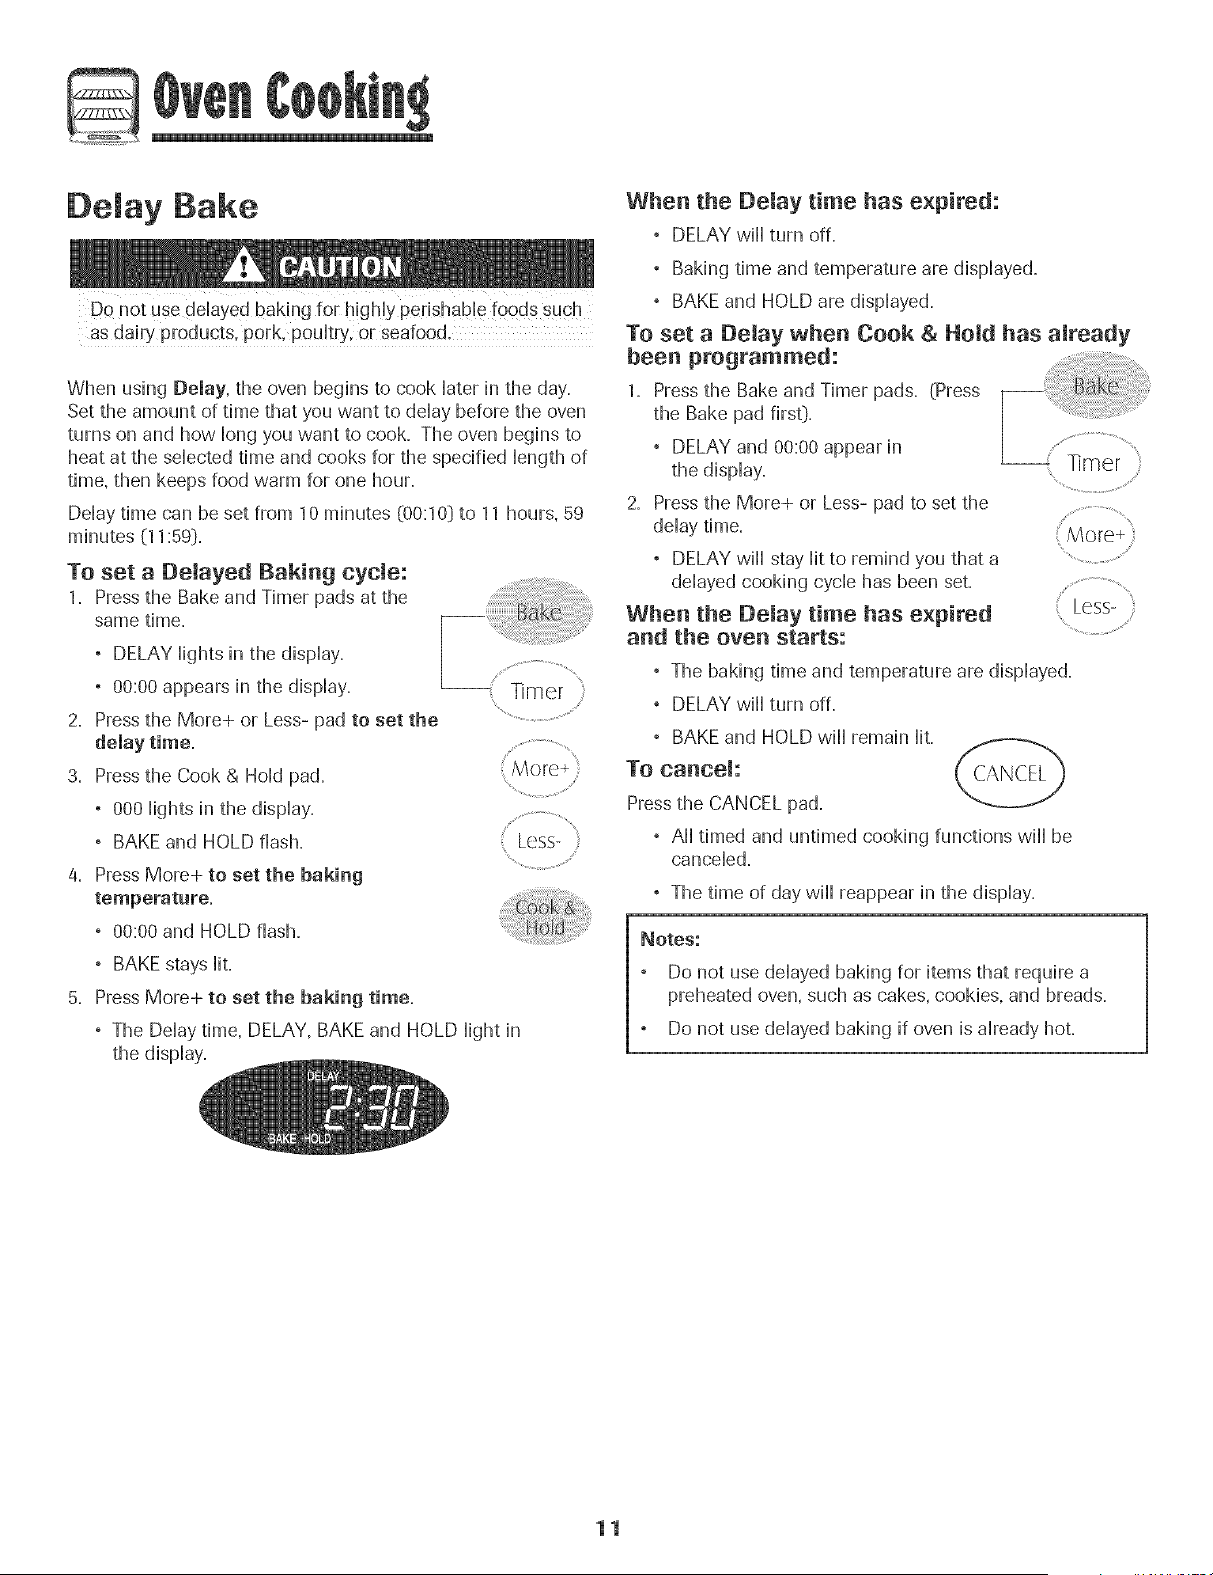
5. Press More+ to set the baking time,
, The Dday time, DELAY, BAKE and HOLD Hightin
the display.
When the Belay time has expired:
, DELAY will turn off=
, Baking time and temperature are displayed.
, BAKE and HOLD are displayed.
To set a Belay when Cook & Hold has already
been programmed:
1. Pressthe Bake and Timer pads. (Press
the Bake pad firsO.
, DELAY and 00:00 appear in ...............................................Timer
the display.
2. Press the More+ or Less- pad to set the
delay time.
, DELAY wi]] stay ]it to remind you that a .........................
delayed cooking cycle has been set. ...............................
When the Belay time has expired : Less-
and the oven starts: ...........................
, The baking time and temperature are displayed.
, DELAY will turn off.
, BAKE and HOLD will remain lit.
To cancel: CANCEL
Press the CANCEL pad.
, All timed and untimed cooking functions will be
canceled.
, The time of day will reappear in the display.
Notes:
Do not use delayed baking for items that require a
preheated oven, such as cakes, cookies, and breads.
Do not use delayed baking if oven is already hot.
11
Keep War
For safeHykeephg foods warm or for warmhg breads and
pHates.
To set Keep Warm:
1. Press the Keep Warm pad.
° WARM flashes. ....
° 000 appears in the dispHay.
2. SeHectthe Keep Warm temperature. The Keep
Warm temperature can be set from 145° to
190°. Press or press and hoHdthe More+ or
Less- pad.
° 170° wiHHHightwhen either pad is first pressed.
, Press the More+ pad to increase the temperature.
° Pressthe Less- pad to decrease the temperature.
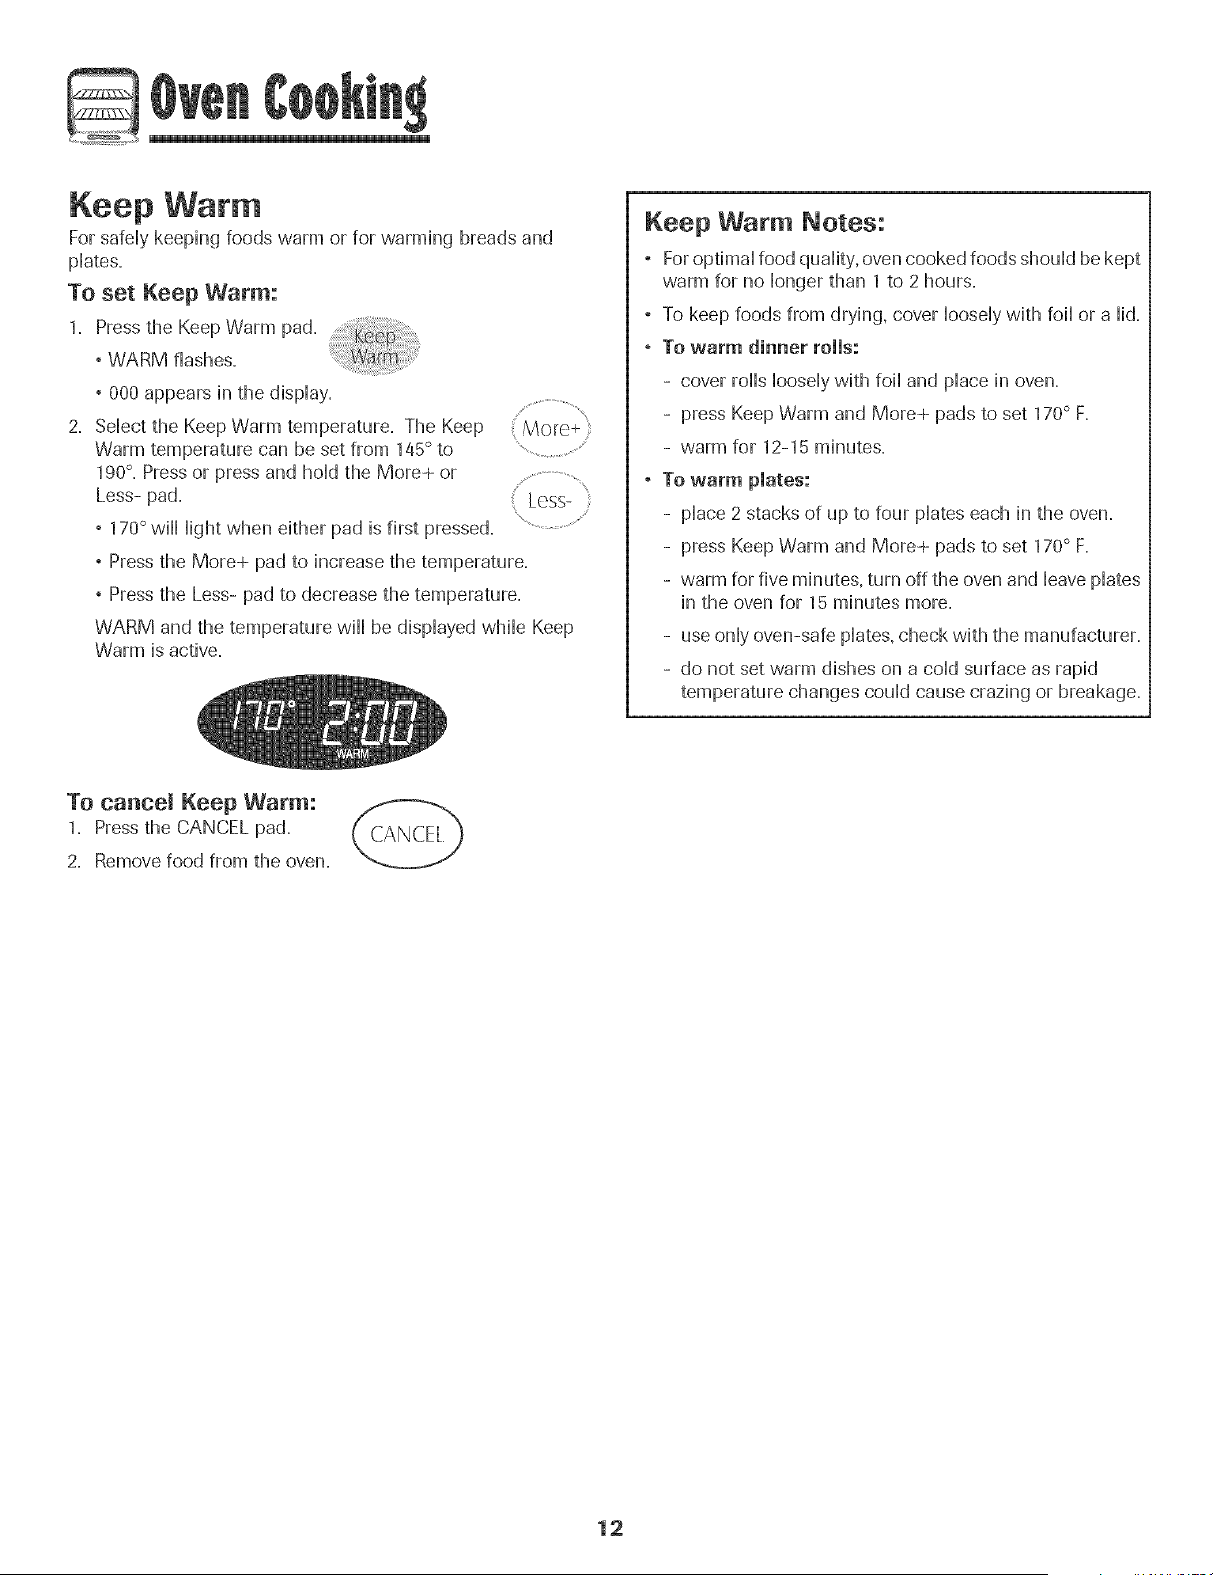
WARM and the temperature wiHHbe dispHayedwMHeKeep
Warm is active.
Less-
Keep Warm Notes:
° ForoptimaHfood quaHity,oven cooked foods shouHdbe kept
warm for no Hongerthan 1 to 2 hours.
° To keep foods from drying, cover HooseHywith foiHor a Hid.
, To warm dinner rolls:
- cover roHHsHooseHywith foiHand pHacein oven.
- press Keep Warm and More+ pads to set 170° F.
- warm for 12-15 minutes.
, To warm plates:
- pHace2 stacks of up to four pHateseach in the oven.
- press Keep Warm and More+ pads to set 170° F.
- warm for five minutes, turn off the oven and HeavepHates
in the oven for 15 minutes more.
- use onHyoven-safe pHates,check with the manufacturer.
- do not set warm dishes on a coHdsurface as rapid
temperature changes couHdcause crazing or breakage.
To cancem Keep Warm:
1. Press the CANCEL pad.
2. Remove food from the oven.
12
Automatic Shut-Off/Sabbath
Mode
The oven will automatically turn off after 12 hours if you
accidentally Heaveit on= This safety feature can be turned off=
TO cancel the 12-hour shut-off and run the
oven continuously for 72 hours:
1=Set the oven to bake (see page 10D=
2. Press and hoHdthe CHockpad for five seconds.
° SAb will be dispHayedand flash for five seconds.
° SAb will then be dispHayedcontinuousHy untiHturned off
or until the 72-hour time limit is reached.
° BAKEwill also be displayed if a bake cycle is in use
while the oven is in Sabbath Mode.
All other functions EXCEPTBAKE (Timer, Keep Warm,
Clean, etc=_)are locked out during the Sabbath Mode.
To cancel Bake when in Sabbath Mode:
Press CANCEL.
, BAKE will turn off in the display. CANCEL
, No beeps will sound.
To cancel the Sabbath Mode:
1= Press the CLOCK pad for five seconds.
OR
2= After 72 hours, the Sabbath Mode will end=
° SAb will flash for 5 seconds.
° The time of day will return to the display.
Sabbath Mode Notes:
, Sabbath Mode can be turned on at any time with or
without the oven on=
° Sabbath Mode cannot be turned on if the touchpads are
locked out or when the door is locked.
If the oven is baking when Sabbath Mode is set, BAKE
will go out at the end of the baking cycle. There will be
no audible beeps.
If the oven light is desired while in Sabbath Mode, it
must be turned on before the Sabbath Mode is started.
When the Sabbath Mode is started, no preheat beep will
sound.
All prompts, messages and beeps are deactivated when
Sabbath Mode is active.
The automatic door lock does not operate during the
Sabbath Mode.
Pressing CANCEL will cancel a bake cycle, however the
control will stay in the Sabbath Mode.
If power fails, the oven will power up in Sabbath Mode
with 72 hours remaining and no cycle active.
Changing Temp °F/°C
1= The factory default setting for temperature is FahrenheiL
2. To change the setting, press and hold the CANCEL and Bake
pads at the same time for three seconds.
3. A single beep will sound and the current setting will be
displayed (°F or °C). (if no change is made, the range will
return to the existing setting after 30 seconds.[)
4. To change the setting, press the More+ or Less- pad. Press
again to return to existing setting. Wait five seconds and the
setting will be complete.
13
G
Adjusting the Oven Temperature
Oven temperatures are carefully tested for accuracy at the
factory. It is normal to notice some baking or browning
differences between a new oven and an oid one. As ranges
get oider, the oven temperature can shift.
You may adjust the oven temperature if you think the oven is
not baking or browning correctly. To decide how much to
change the temperature, set the temperature 25° higher or
bwer than your recipe recommends, then bake. The resuits
of the "test" shouM give you an idea of how much to adjust
the temperature.
To adjust the oven temperature:
1. Press Bake.
2. Enter 550° by pressing the More+ pad.
3. Press and hold the Bake pad for several
seconds or until 0° appears in the display. ..............................
If the oven temperature was previously adjusted, the
change wiii be displayed. For example, if the oven tem-
perature was reduced by 15° the display wiii show "-15°".
4. Press the More+ or Less- pad to adjust the temperature.
Each time a pad is pressed, the temperature changes by
5°. The oven temperature can be increased or decreased
by 5° to 35°.
5. The time of day will automatically reappear in the display.
You do not need to readjust the oven temperature if there
is a power failure or interruption. Broiling and cleaning
temperatures cannot be adjusted.
The Favorite pad allows you to save the time and temperature
from a Cook & Hold function.
To set a Favorite cycle, Cook & Hold must be either active or
just programmed.
To set a new Favorite cycle or to save a
eurrenUy running Cook & Hold as a Favorite:
1. Program a Cook & Hold cycle as described in the Cook &
Hold section on page 11.
2. Press and hold the Favorite pad for three
seconds.
° The newly set or currently running Cook & Hold cycle
wiii be saved.
, A beep wiil sound to indicate that the control has
accepted the Favorite setting.
To start a cycle programmed into Favorite:
1. Pressthe Favorite pad.
, Time and temperature for the set Cook &
Hold cycle wiii be displayed. {If no Cook &
Hold cycle has been programmed, "nonE"
is displayed.}
2. PresstileBake pad.
° The Favoritecyclewillbeginimmediately,
° BAKE willlightinthedisplay
° The cookingtimewilllightinthedisplay
When the cooking time has elapsed:
° BAKE will turn off.
° HOLD and WARM wiii lighL
° 170°will display.
To cancel a Favorite eyrie in progress:
1. Pressthe CANCEL pad. _'_
° The stored Favorite cycle wiii not
be affected.
2. Remove food from the oven.
14
To set BroiJ:
1. To begin, press the Broil pad.
. BROIL flashes.
° SEt is displayed.
2. Press the More+ pad to set HI broil or press the Less- pad
to set LO broil.
° HI or LO will be displayed.
° Sebct HI broil (550° F} for normal broiling. Sebct
LO broil (450° F} for low-temperature broiling of longer
cooking foods such as poultry.
3. After four seconds, the oven will start.
° BROIL will remain lit.
4. For optimum browning, preheat broil element for 3-4
minutes before adding food.
5. Place food in the oven. Leave oven door open about four
inches (the first stop}.
BroiJing Chart
6. Turn meat once about halfway through cooking=
7. When food is cooked, press the CANCEL /_.._, i_.,_,-_
pad=Remove food and broiler pan from the
oven,
. The time of day will reappear in the display.
BroiJ Notes:
. For best results when broiling, use a pan designed for
broiling.
. Expect broil times to increase and browning to be
slightly lighter if appliance is installed on a 208-volt
circuit.
. HI is used for most broiling. Use LO broil when broiling
longer cooking foods. The lower temperature allows
food to cook to the well done stage without excessive
browning.
. To change oven temperatare daring broiling, press
the Broil pad and then the More+ or Less- pad to switch
between LO and HI broil.
. Broil times may be longer when the lower broiling
temperature is selected.
. Most foods should be turned halfway through broiling
time.
. For additional broiling tips and temperatures, refer to the
"Cooking Made Simple" booklet.
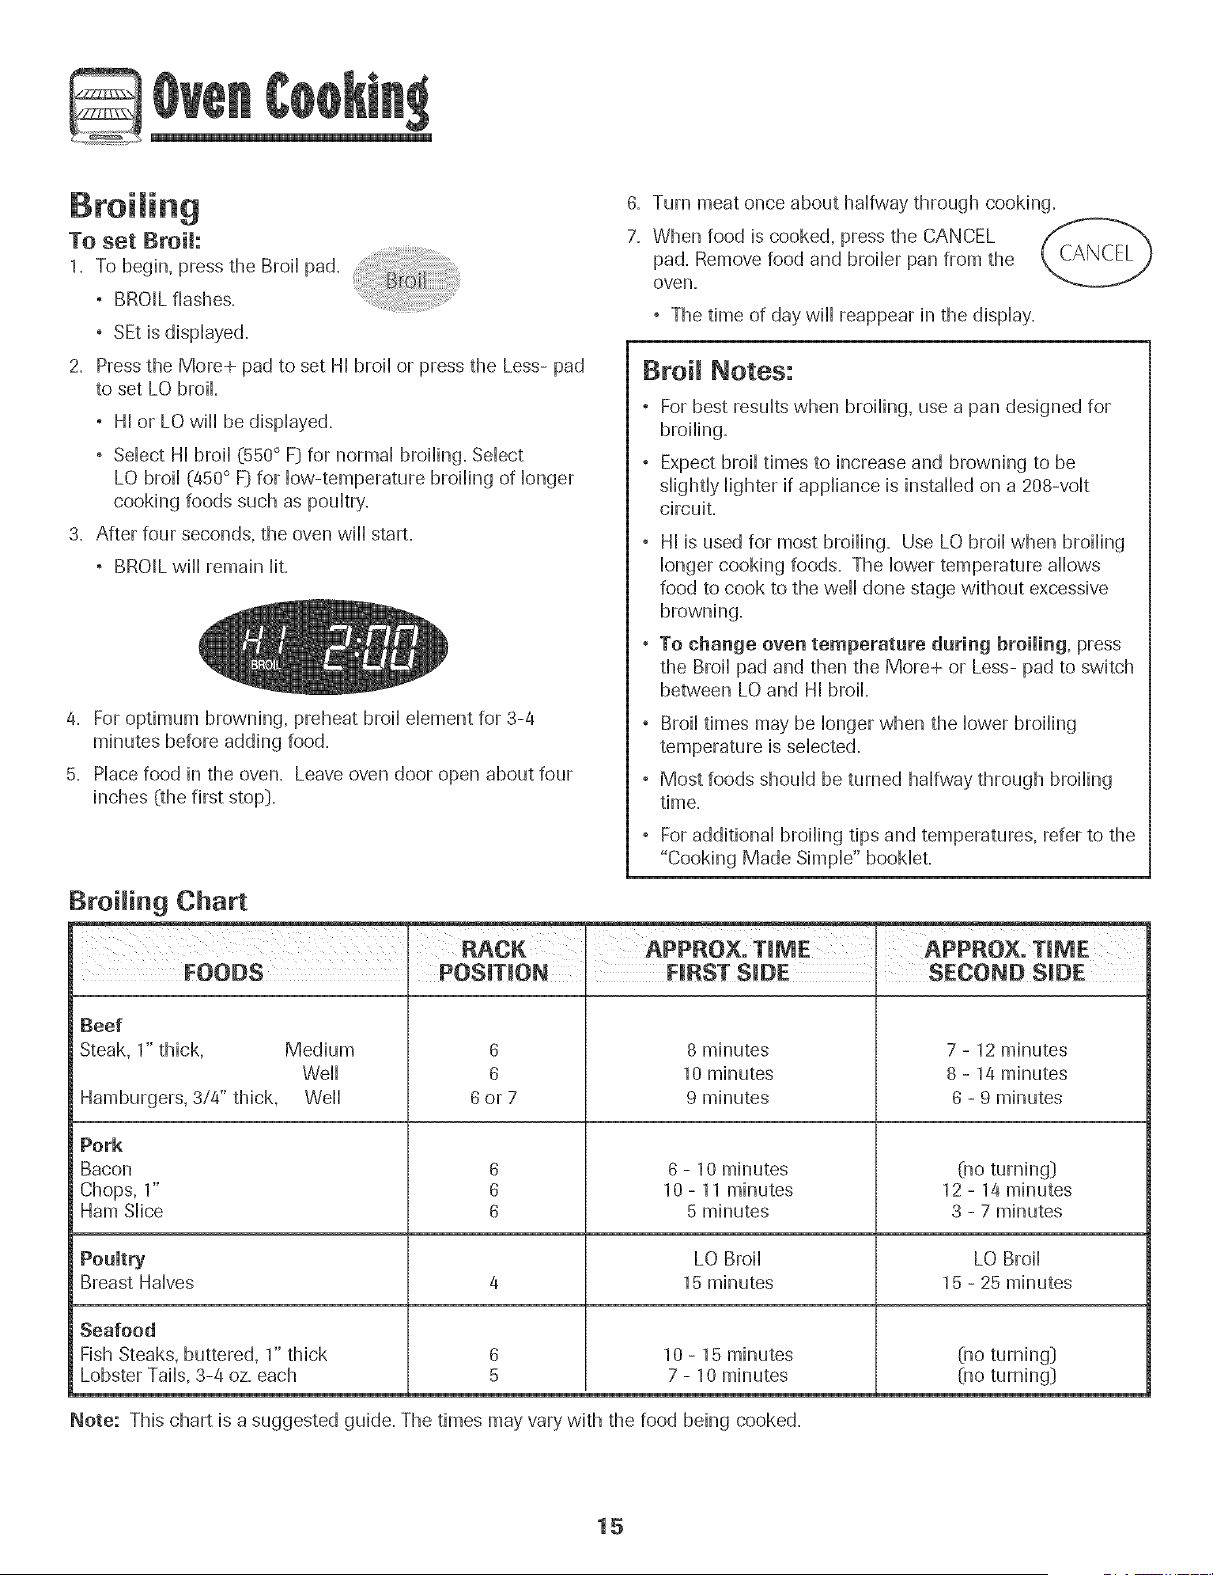
RACK i APPRO×,TIME
FOODS POSITION j FIRST SIDE
Beef
Steak, 1" thick, Medium
Well
Hamburgers, 3/4" thick, Well
Pork
Bacon
Chops, 1"
Ham Slice
Poultry
Breast Halves
Seafood
Fish Steaks, buttered, 1" thick
Lobster Tails, 3-4 oz. each
6
6
6or7
8 minutes
10 minutes
9 minutes
j APPRO×:TIME
, SIDE
7 - 12 minutes
8 - 14 minutes
6 - 9 minutes
6
6
6
6 - 10 minutes
10 - 11 minutes
5 minutes
LO Broil
15 minutes
10 - 15 minutes
7 - 10 minutes
(no turning}
12 - 14 minutes
3 - 7 minutes
LO Broil
15 - 25 minutes
(no turning}
(no turning}
Note: This chart is a suggested guide. The times may vary with the food being cooked.
15
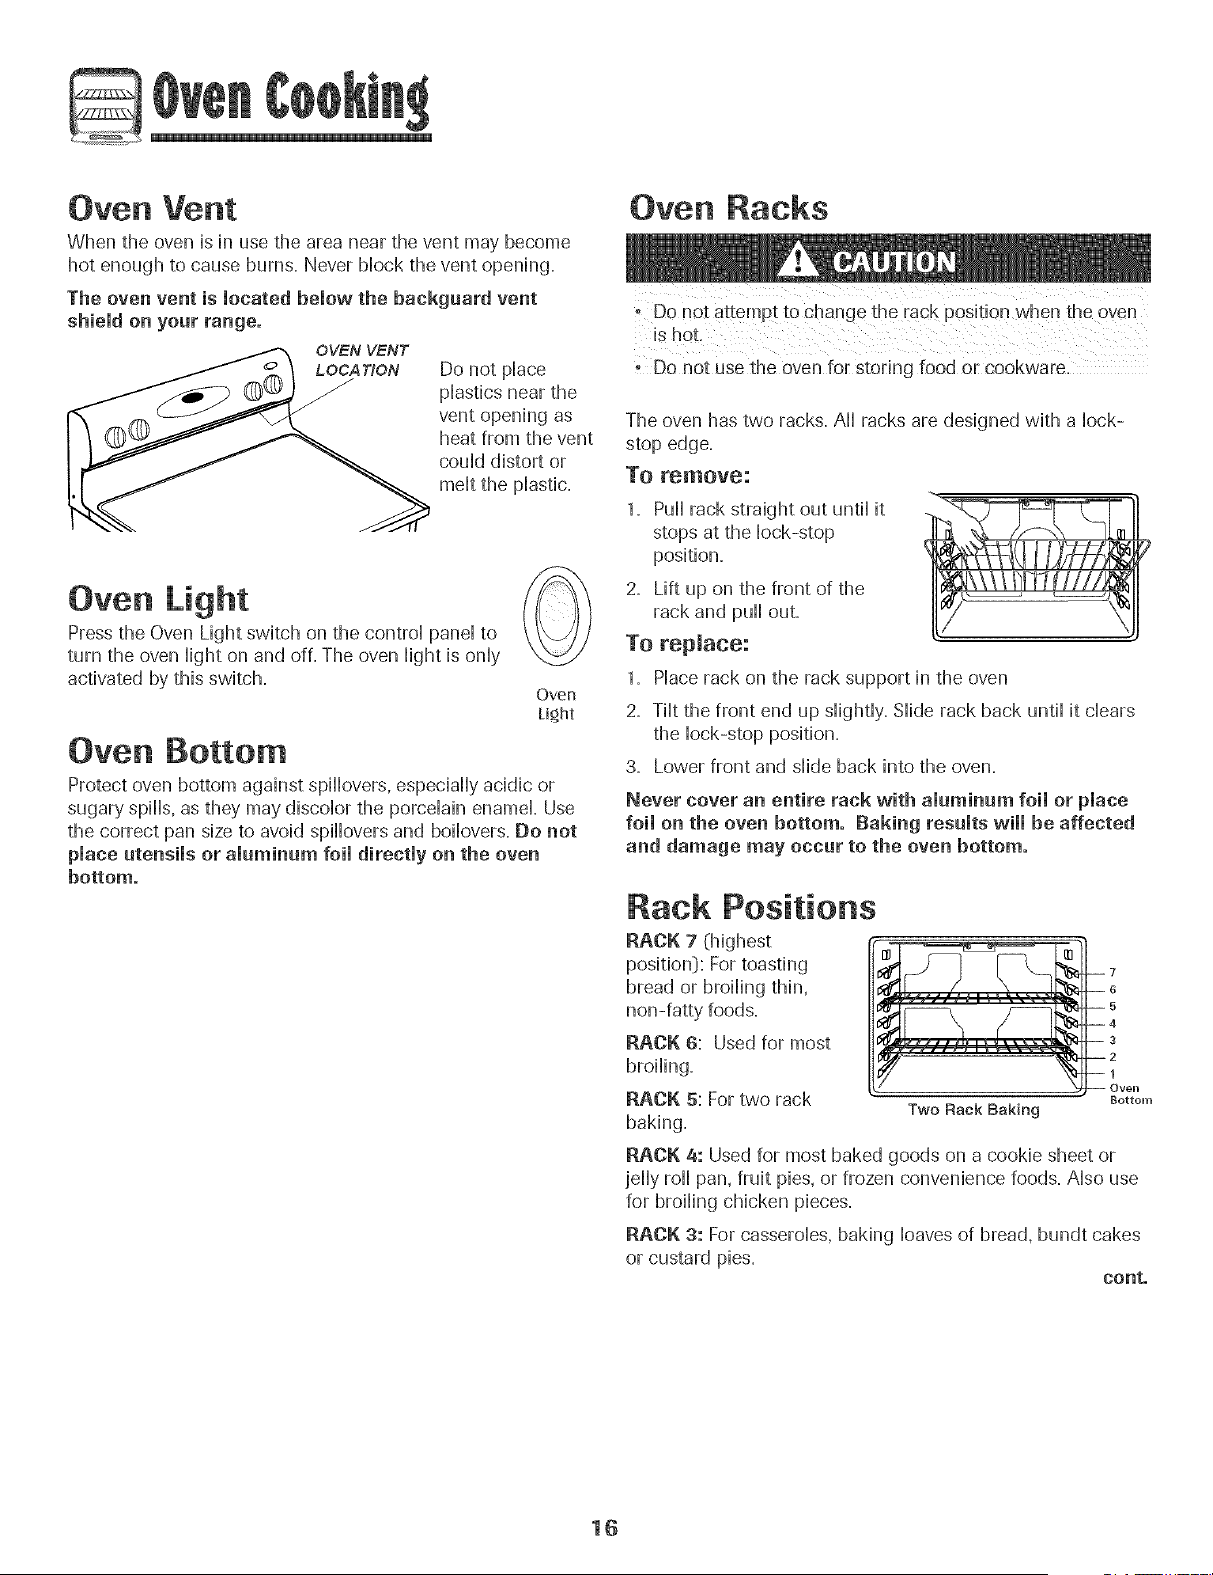
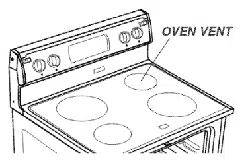
Oven Vent
When the oven is h use the area near the vent may become
hot enough to cause burns. Never Mock the vent opening.
The oven vent is located below the backgaard vent
OVEN VENT
LOCA T/ON
shield on your range.
Do not pHace
pHasticsnear the
vent opening as
heat from the vent
couM distort or
malt the pHastic=
Oven Light
Press the Oven Light switch on the controHpaneHto
turn the oven Highton and off=The oven Hightis onHy
activated by this switch.
Oven
ti_ht
Oven Bottom
Protect oven bottom against spiflovers, especially acidic or
sugary spills, as they may discolor the porcelain enamel. Use
the correct pan size to avoid spillovers and boilovers. Do not
place utensils or aluminum foil directly on the oven
bottom.
Oven Racks
Do not use the oven for storing food or cookware.
The oven has two racks. All racks are designed with a lock-
1. Pull rack straight out until it
stops at the lock-stop
position.
2. Lift up on the front of the
rack and pull out.
To replace:
1. Place rack on the rack support in the oven
2. Tilt the front end up slightly. Slide rack back until it clears
the lock-stop position.
3. Lower front and slide back into the oven.
Never cover an entire rack with aluminum foil or place
foil on the oven bottom. Raking results wimmbe affected
and damage may occur to the oven bottom.
Rack Positions
bread or broiling thin,
non-fatty foods.
RACK 6: Used for most
broiling.
RACK 5: For two rack
Two Rack Baking
baking.
Bottom
RACK 4: Used for most baked goods on a cookie sheet or
jelly roll pan, fruit pies, or frozen convenience foods. Also use
for broiling chicken pieces.
RACK 3: For casseroles, baking loaves of bread, bundt cakes
or custard pies.
conto
16
RACK 2: Used for roasting smaHHcuts of meat, frozen pies,
dessert souffles or angeHfood cake. AHsouse for two rack
baking.
RACK 1: Used for roasting Hargecuts of meat and pouHtry.
Oven Bottom: PHaceoven rack on
raised sides of oven bottom. Use for
additionaHspace when cooking Harge
oven meaHs.
MULTIPLE RACK COOKING: Two
rack: Use rack positions 2 and 5.
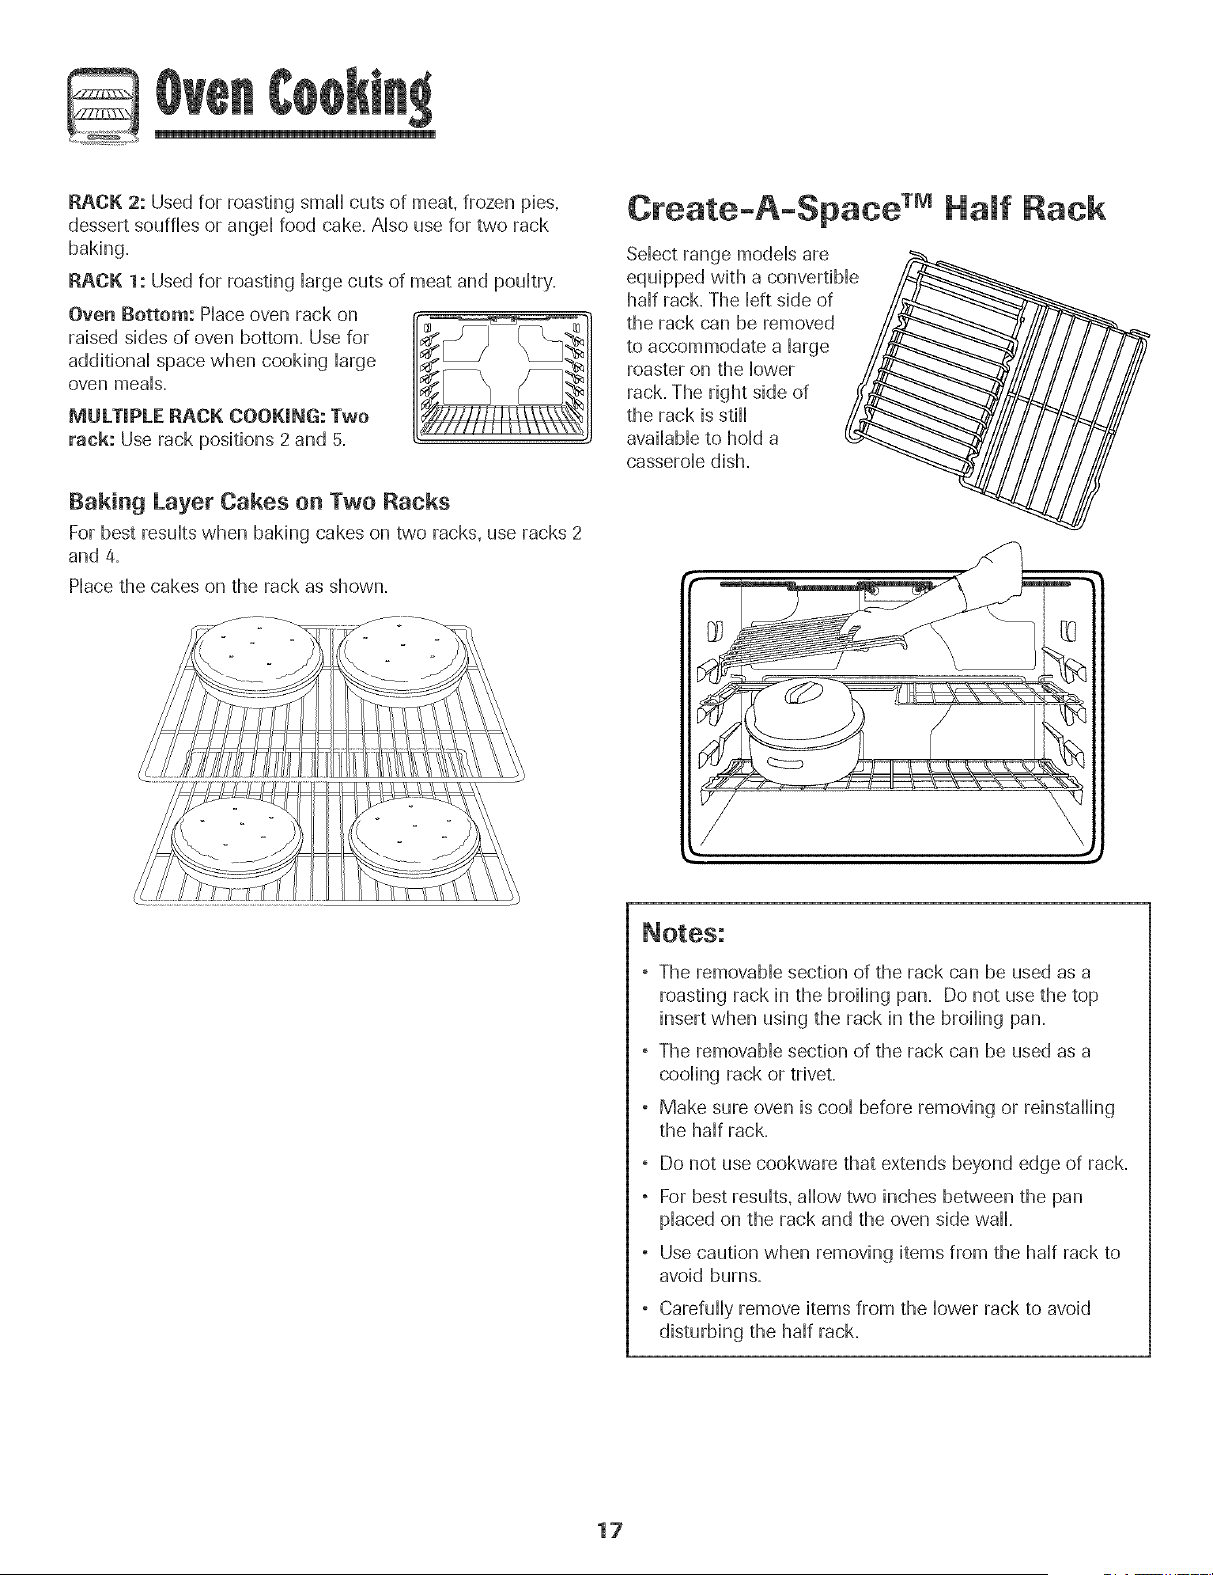
Baking Layer Cakes on Two Racks
For best resuHtswhen baking cakes on two racks, use racks 2
and 4.
PHacethe cakes on the rack as shown.
Create-A-Space TMHaft Rack
SeHectrange modeHsare /_
equipped with a convertibHe_
haHfrack. The Heftside of
the rack can be removed
to accommodate a large
roaster on the lower
rack. The right side of
the rack is stiHH _
avaiHabHeto hoHda
casseroHedish.
//
, The removabHesection of the rack can be used as a
roasting rack in the broiHing pan. Do not use the top
insert when using the rack in the broiHing pan.
, The removabHesection of the rack can be used as a
cooHingrack or trivet.
, Make sure oven is cooHbefore removing or reinstaHHing
the haHfrack.
, Do not use cookware that extends beyond edge of rack.
, For best resuHts,aHHowtwo inches between the pan
pHacedon the rack and the oven side waHL
, Use caution when removing items from the haHfrack to
avoid burns.
CarefuHHyremove items from the Howerrack to avoid
disturbing the haHfrack.
17
5
Seff-Cmean Oven
o It is normal for parts of the range to become hot during a
self-clean cycle.
- To prevent damage to oven door. do not attempt to open
the door when LOCK is displayed.
, Avoid touching cooktop, door. window or oven _ent area
during a clean cycle.
° Do not use commercial oven cleaners on the oven finish
or around any part of the oven. They will damage the
finish or parts.
The self-clean cycle uses above-normal cooking temperatures
to automatically clean the oven interior.
It is normal for flare-ups, smoking, or flaming to occur during
cleaning if the oven is heavily soiled. It is better to clean the
oven regularly rather than to wait until there is a heavy build-
up of soil in the oven.
During the cleaning process, the kitchen should be well
ventilated to get rid of normal odors associated with cleaning.
Before Se f-Cmeaning
1. Turn off the oven light before cleaning. The light may burn
out during the clean cycle.
2. Remove broiler pan, all pans, and oven racks from the
oven. The oven racks will discolor and may not slide easily
after a self-clean cycle if they are not removed.
3. Clean oven frame, door frame, area outside of gasket, and
around the opening in the door gasket with a nonabrasive
cleaner such as Bon Ami * or detergent and water. The
self-cleaning process does not clean these areas. They
should be cleaned to prevent soil from baking on during
the clean cycle. (The gasket is the
seal around the oven door and -=_ /_
window.} _". -
4. To prevent damage, do not clean or
rub the gasket around the oven
door. The gasket is designed to
seal in heat during the clean cycle.
5. Wipe up excess grease or spillovers from the oven bottom.
This prevents excessive smoking, flare-ups or flaming
during the clean cycle.
6. Wipe up sugary and acidic spillovers such as sweet
potatoes, tomato, or milk-based sauces. Porcelain enamel
is acid-resistant, not acid-proof. The porcelain finish may
discolor if acidic spills are not wiped up before a self-clean
cycle.
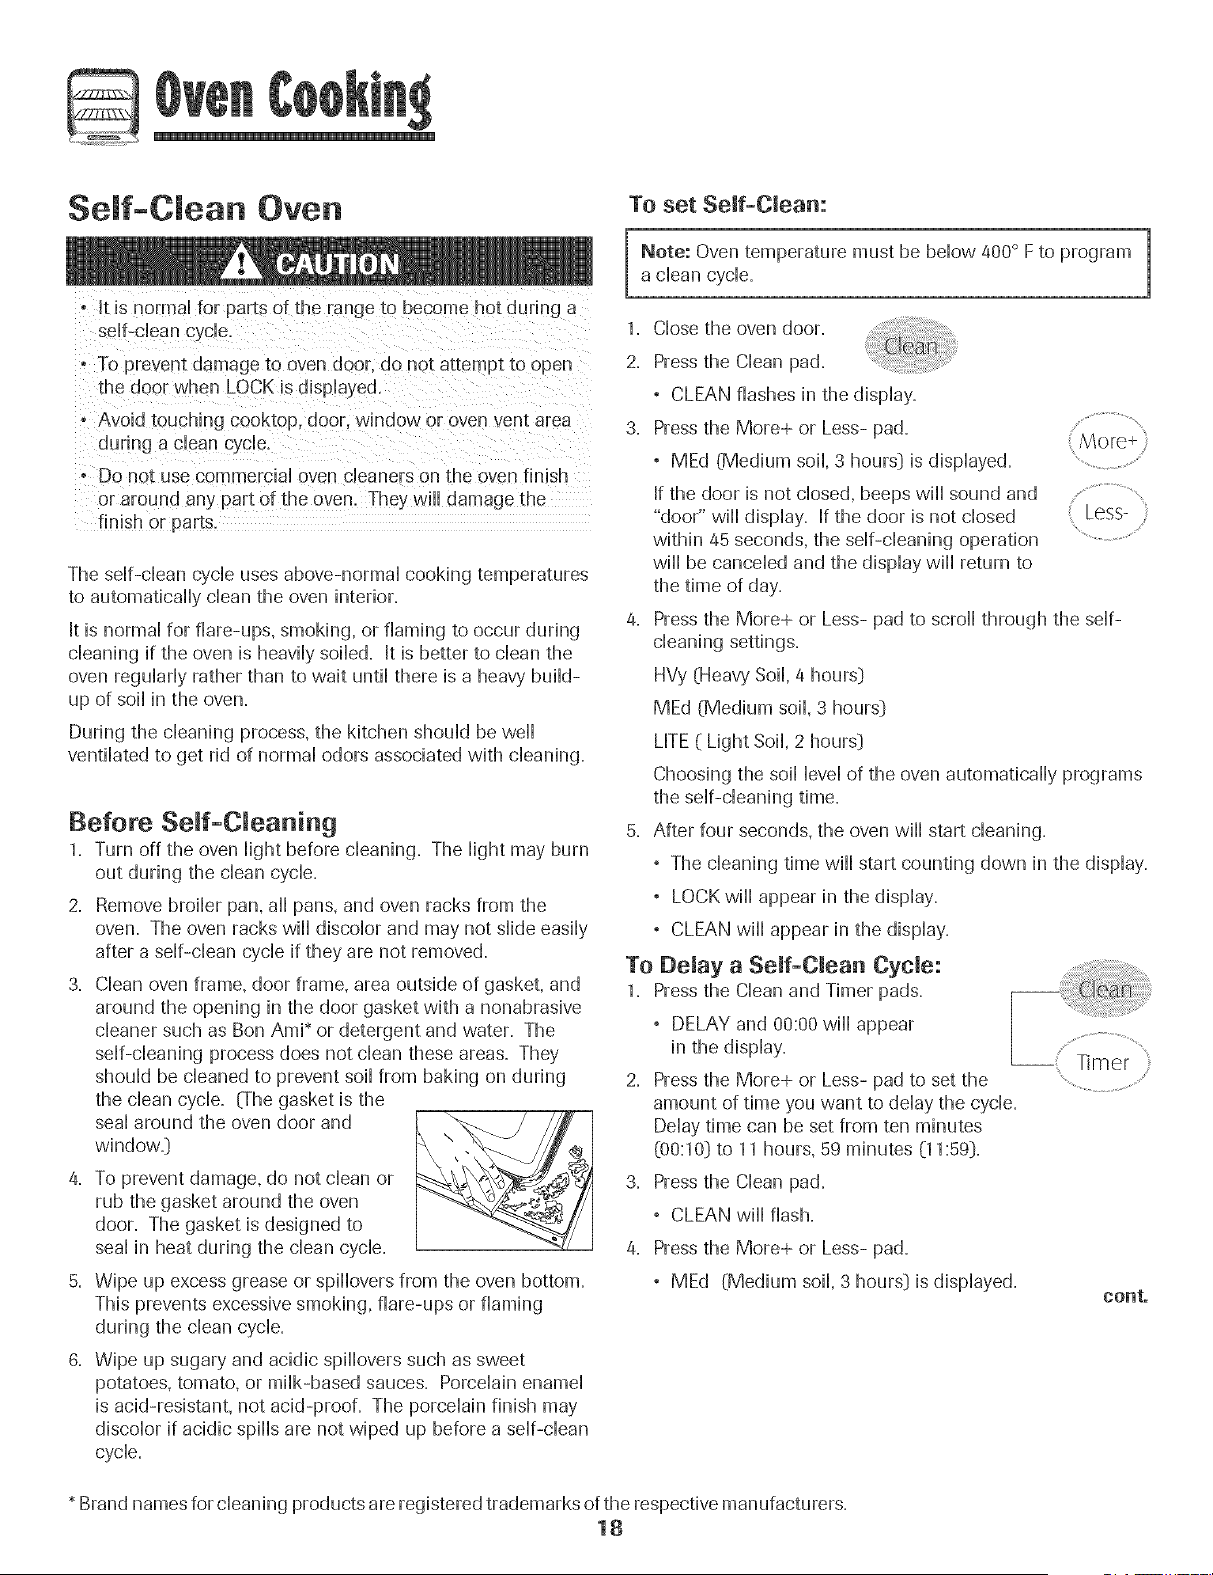
To set Self-Clean:
Note: Oven temperature must be below 400° F to program ]
a clean cycle.
J
1. Close the oven door.
2. Press the Clean pad.
, CLEAN flashes in the display.
3. Press the More+ or Less- pad.................................
° MEd (Medium soil, 3 hours} is displayed. ......................................
If the door is not closed, beeps will sound and ...................................
"door" wiii display. If the door is not closed Less- :
within 45 seconds, the self-cleaning operation
will be canceled and the display will return to
the time of day.
4. Press the More+ or Less- pad to scroll through the self-
cleaning settings.
HVy (Heavy Soil, 4 hours}
MEd (Medium soil, 3 hours}
LITE( Light Soil, 2 hours}
Choosing the soil level of the oven automatically programs
the self-cleaning time.
5. After four seconds, the oven will start cleaning.
, The cleaning time will start counting down in the display.
, LOCK will appear in the display.
, CLEAN will appear in the display.
To Belay a Self-Clean Cycle:
1. Press the Clean and Timer pads.
° DELAY and 00:00 will appear
in the display.
2. Press the More+ or Less- pad to set the
amount of time you want to delay the cycle.
Delay time can be set from ten minutes
(00:10} to 11 hours, 59 minutes (11:59}.
3. Press the Clean pad.
° CLEAN will flash.
4. Press the More+ or Less- pad.
° MEd (Medium soil, 3 hours} is displayed.
eonto
Brand names for cleaning products are registered trademarks of the respective manufacturers.
18
5. Press the More+ or Less- pad to scroll through the sdf-
cHeaningsettings.
HVy (Heavy Soft, 4 hours]
MEd (Medium soft, 3 hours]
LITE ( Light Soft, 2 hours]
Choosing the soft Hevdof the oven automatically programs
the sdf-deaning time.
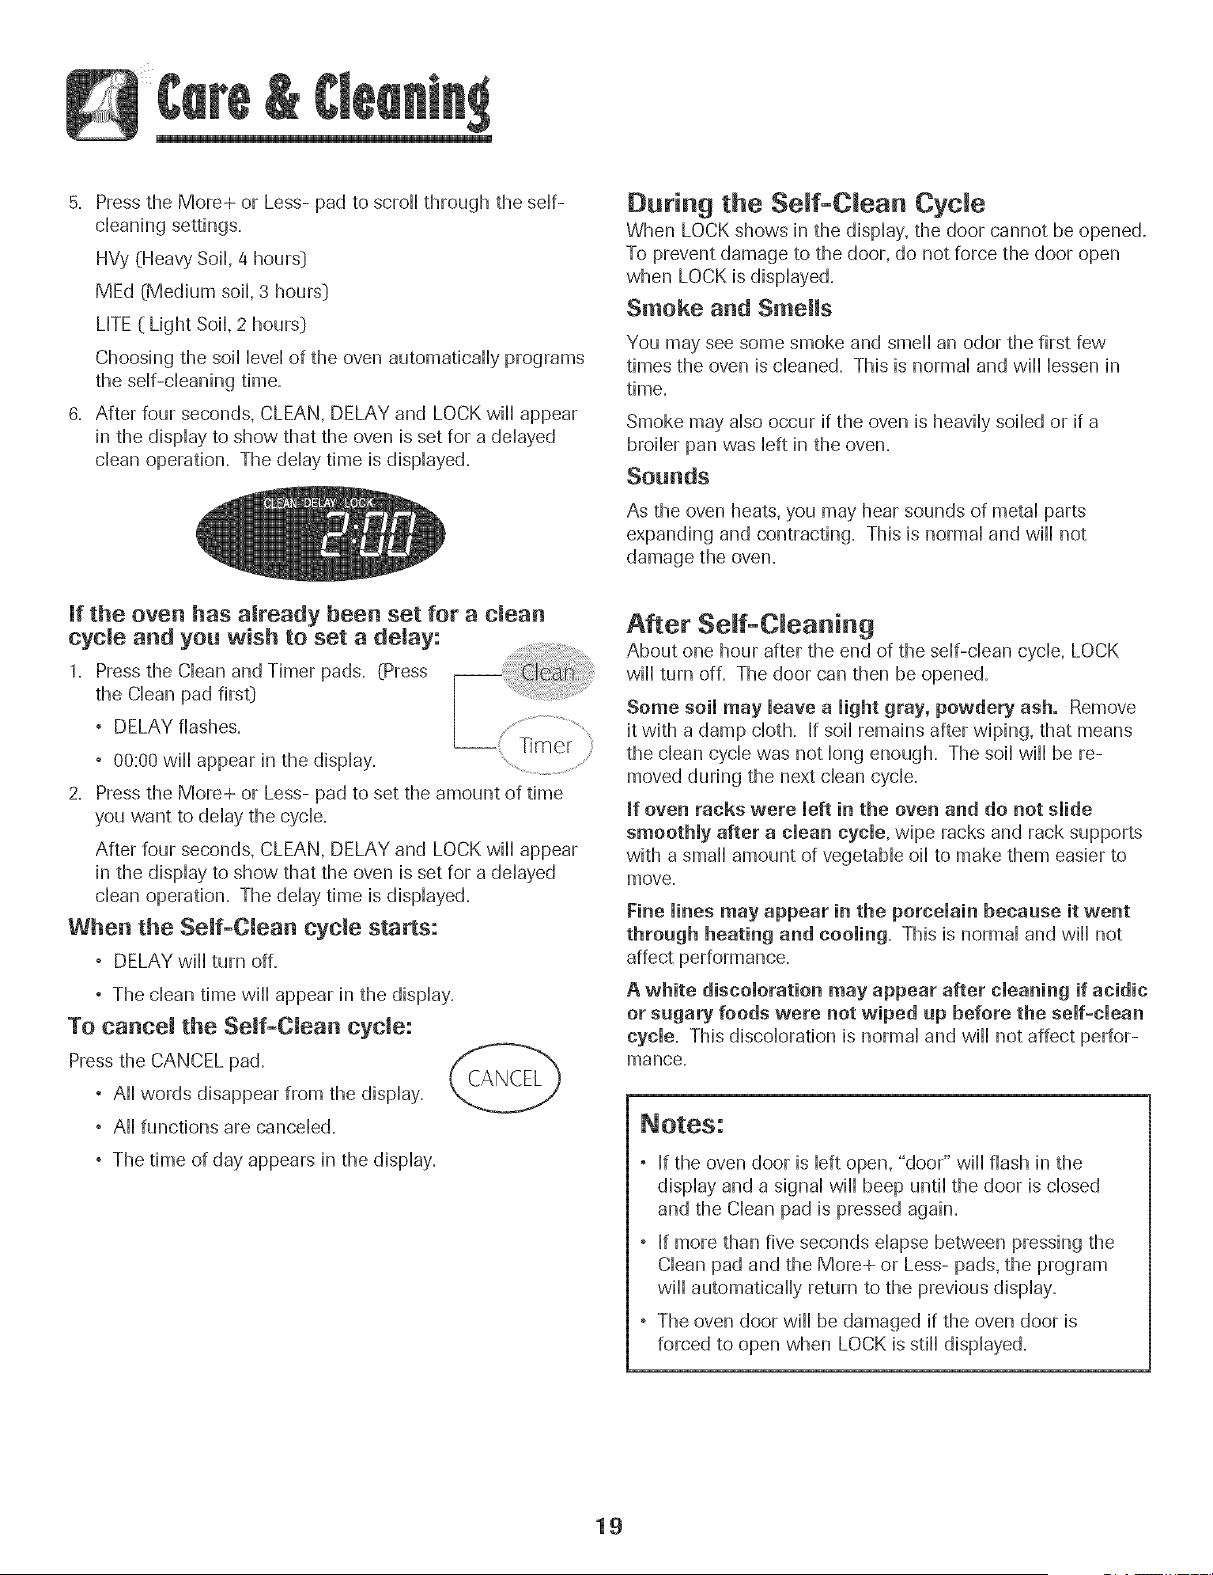
6. After four seconds, CLEAN, DELAY and LOCK wflHappear
in the dispHayto show that the oven is set for a ddayed
dean operation. The dday time is dispHayed.
During the Seff-C_ean Cycle
When LOCK shows hi the dispHay,the door cannot be opened,
To prevent damage to the door, do not force the door open
when LOCK is displayed,
Smoke aad Smells
You may see some smoke and smell an odor the first few
times the oven is cleaned. This is normal and will lessen in
time.
Smoke may also occur if the oven is heavily soiled or if a
broiler pan was left in the oven.
Sounds
As the oven heats, you may hear sounds of metal parts
expanding and contracting. This is normal and will not
damage the oven.
Jf the oven has already been set for a dean
cycle and you wish to set a delay:
1. Press the Clean and Timer pads. (Press
the Clean pad first:)
° DELAY flashes.
--T m cr
° 00:00 wi]] appear in the display.
2. Press the More+ or Less- pad to set the amount of time
you want to delay the cycle.
After four seconds, CLEAN, DELAY and LOCK wi]] appear
in the display to show that the oven is set for a delayed
dean operation. The delay time is displayed.
When the Self-Clean cycle starts:
° DELAY will turn off.
° The clean time will appear in the display.
To cance! the Self-Clean cycle:
Press the CANCEL pad.
° All words disappear from the display.
° All functions are canceled.
° The time of day appears in the display.
After Se_f-C_eaning
About one hour after the end of the self-clean cycle, LOCK
will turn off. The door can then be opened.
Some soil may leave a light gray, powdery ash. Remove
it with a damp cloth. If soil remains after wiping, that means
the clean cycle was not long enough. The soil will be re-
moved during the next clean cycle.
if oven racks were left in the oven and do not slide
smoothly after a clean cycle, wipe racks and rack supports
with a small amount of vegetable oil to make them easier to
move.
Fine lines may appear in the porcelain becaase it went
through heating and cooling= This is normal and will not
affect performance,
A white discoloration may appear after cleaning if acidic
or sugary foods were not wiped up before the self-clean
cycle, This discoloration is normal and will not affect perfor-
mance.
° If the oven door is left open, "door" will flash in the
display and a signal will beep until the door is closed
and the Clean pad is pressed again.
° If more than five seconds elapse between pressing the
Clean pad and the More+ or Less- pads, the program
will automatically return to the previous display.
, The oven door will be damaged if the oven door is
forced to open when LOCK is still displayed.
19
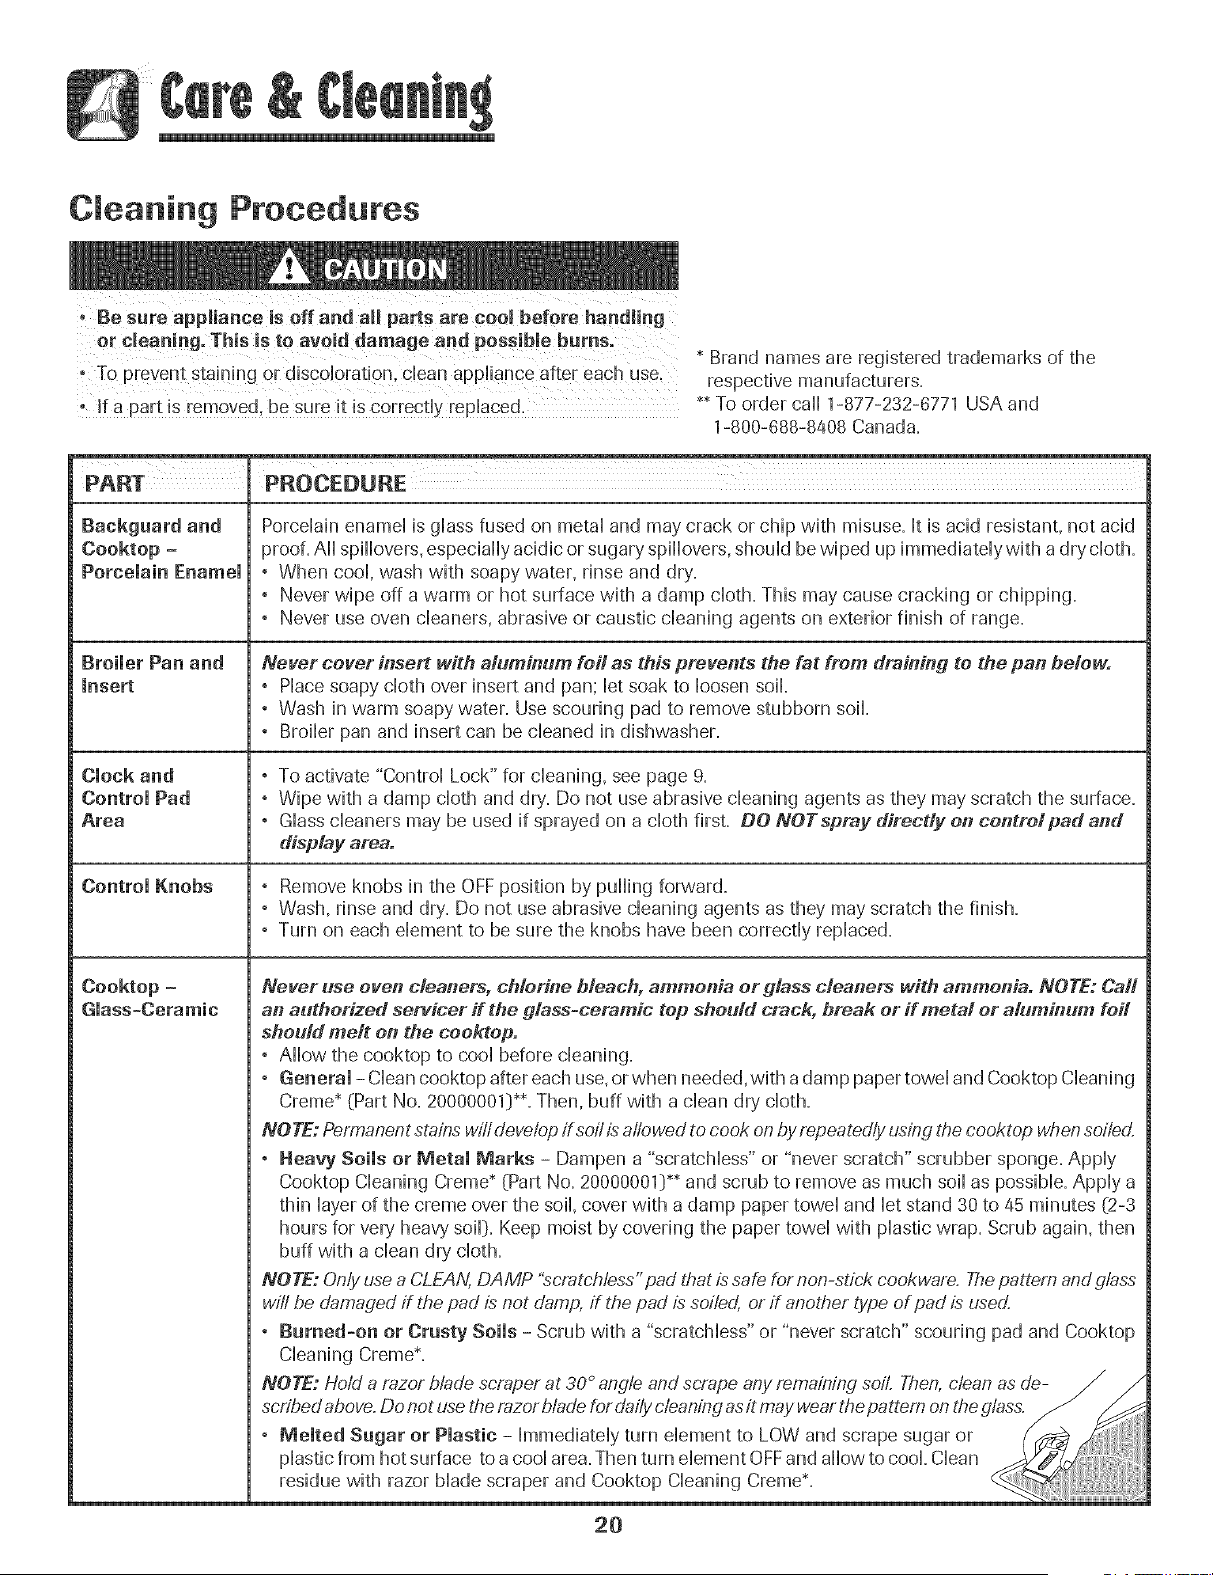
Cleaning Procedures
Brand names are registered trademarks of the
respective manufacturers.
-!f a part is remove& be sure it is correct!y replace& _ To order call 1-877-232-8771 USA and
1-800-688-8408 Canada.
PART PROOE[Z_U }:{E
PorceHainenamd is gHassfused on metaHand may crack or chip with misuse. It is acid resistant, not acid
Cooktop - proof. AH spiHovers,especially acidic or sugary spiHovers,shouHdbewiped up immediately with a dry cloth.
Porcelain Enamel ° When cool, wash with soapy water, rinse and dry.
, Never wipe off a warm or hot surface with a damp cloth. This may cause cracking or chipping.
, Never use oven cleaners, abrasive or caustic cleaning agents on exterior finish of range.
Broiler Pan and Never cover insert with ahtminum foil as this prevents the fat from draining to the pan below.
insert , Place soapy cloth over insert and pan; let soak to loosen soil=
, Wash in warm soapy water. Use scouring pad to remove stubborn soil.
, Broiler pan and insert can be cleaned in dishwasher.
Clock and , To activate "Control Lock" for cleaning, see page 9.
Control Pad , Wipe with a damp cloth and dry,.Do not use abrasive cleaning agents as they may scratch the surface.
Area ° Glass cleaners may be used if sprayed on a cloth first. 00 NOTspray directly on eentrolpad and
display area.
Control Knobs , Remove knobs in the OFF position by pulling forward.
, Wash, rinse and dry. Do [lot use abrasive cleaning agents as they may scratch the finish.
, Turn on each element to be sure the knobs have been correctly replaced.
Cooktop - Never use oven cleaners, chlorine bleach, ammonia or glass cleaners with ammonia. NOTE: Ca#
Glass-Ceramic an authorized servicer if the glass=ceramic top should crack, break or if metal or aluminum foil
should melt on the cooktop.
, Allow the eooktop to cool before cleaning=
, General - Clean cooktop after each use,or when needed, with a damp paper towel and Cooktop Cleaning
Creme_(Part No. 20000001:)_*-Then, buff with a clean dry, cloth.
NO TE:Permanent stains will deve/opff soi/is a//owed to cook on by repeated/y using the eooktop when soiled.
, Heavy Boils or Metal Marks - Dampen a "scratchless" or "never scratch" scrubber sponge. Apply
Cooktop Cleaning Creme_ (Part No. 20000001:)_ and scrub to remove as much soil as possible. Apply a
thin layer of the creme over the soil, cover with a damp paper towel and let stand 30 to 45 minutes (2-3
hours for very,heavy soil:). Keep moist by covering the paper towel with plastic wrap. Scrub again, then
buff with a clean dry' cloth.
NOTE: Only use a CLEAN,DAMP "scratchless" pad that is safe for non-stick cookware. Thepattern and glass
wil/ be damaged ff the pad is not damp, ff the pad is soiled, or ff another type of pad is used.
, Barned-on or Crusty Soils - Scrub with a "scratchless" or "never scratch" scouring pad and Cooktop
Cleaning Creme _-
2O
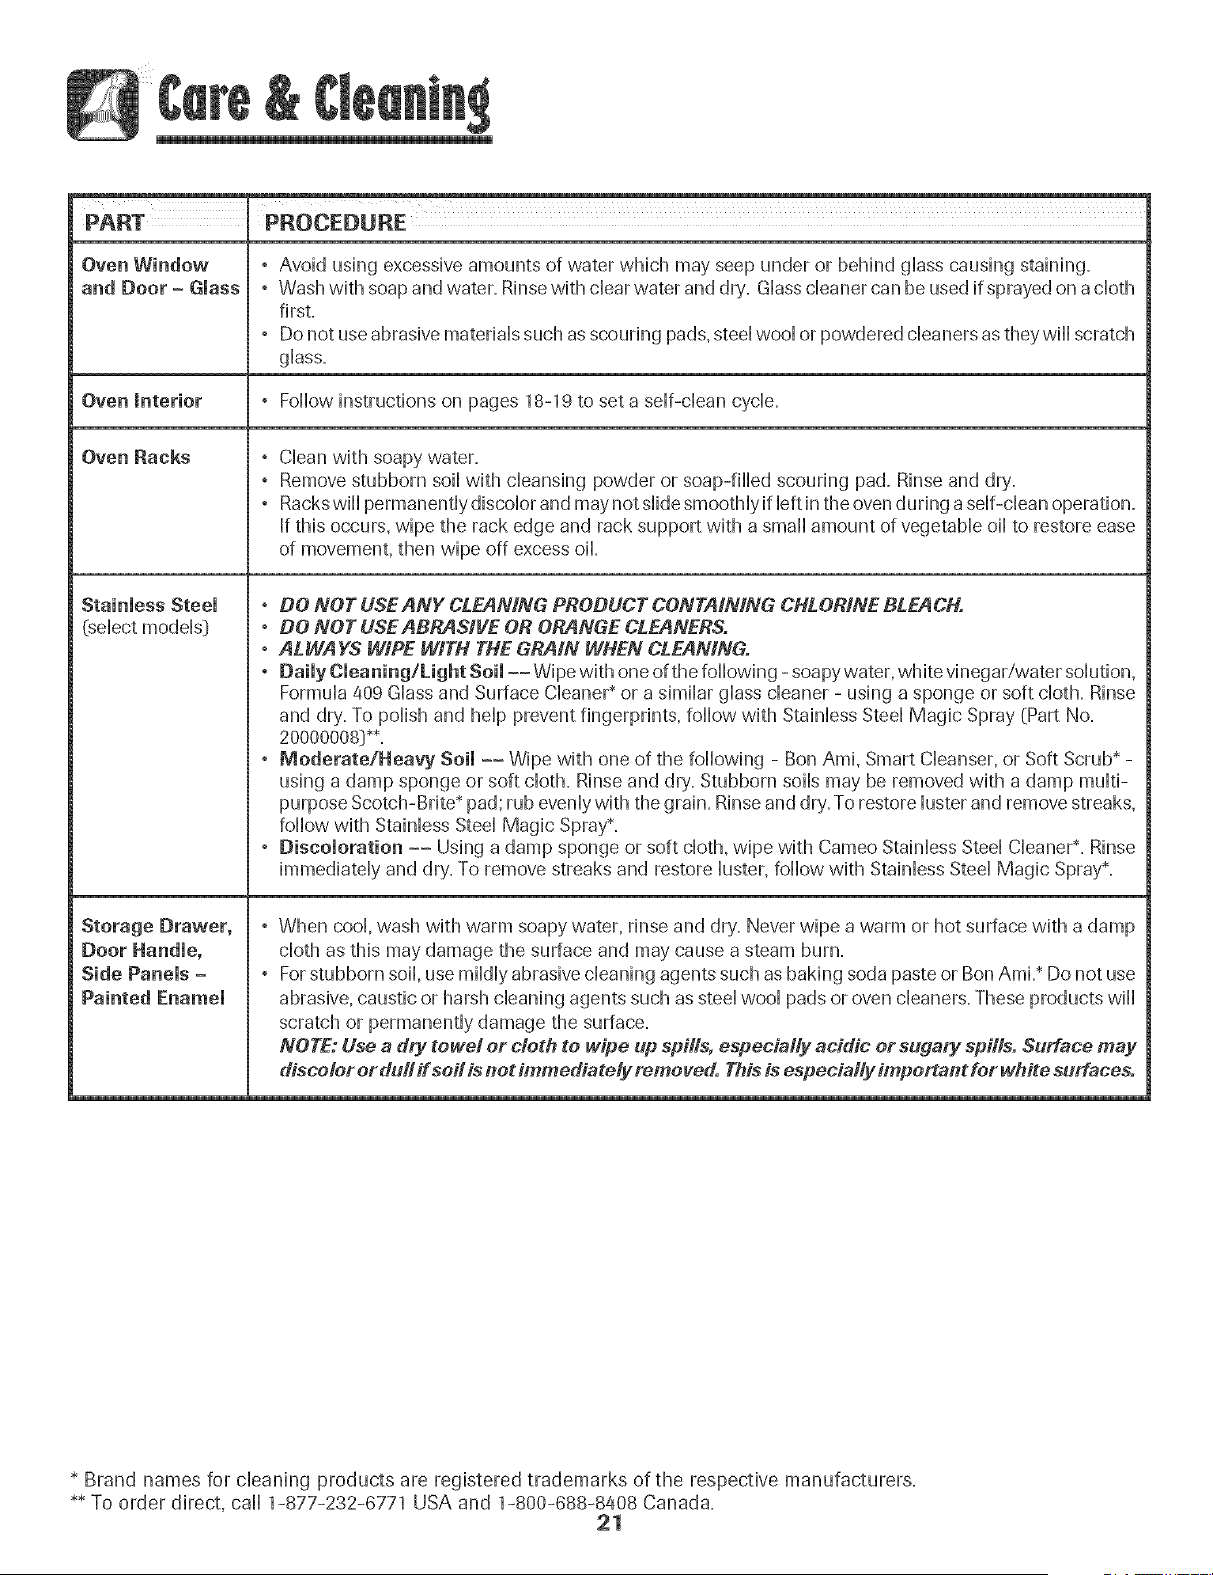
Oven Window
and Door - Glass
, Avoid using excessive amounts of water which may seep under or behind giass causing staining.
, Wash with soap and water. Rinsewith dear water and dry. Giass cieaner can be used if sprayed on a cioth
first.
, Do not use abrasive materiais such as scouring pads,steei wooi or powdered cieaners as theywiii scratch
gHass.
Oven mnterior , FoHHowinstructions on pages 18-19 to set a seHf-cHeancycHe.
Oven Racks
Stainless Steel
(seHect modems}
Storage Drawer_
Side Panels -
Painted Enamel
Ciean with soapy water=
Remove stubborn soii with cieansing powder or soap-tiffed scouring pad=Rinse and dry=
Rackswiii permanentiy discoior and may not siide smoothiy if Heftin the oven during a seif-ciean operation.
If this occurs, wipe the rack edge and rack support with a smaii amount of vegetabie oii to restore ease
of movement, then wipe off excess oil
° DO NOT USE ANY CLEANING PRODUCT CONTAINING CHLORINE BLEACH.
° DO NOT USEABRASIVE OR ORANGE CLEANERS.
° ALWAYS WIPE WITH THE GRAIN WHEN CLEANINO.
° Daily Cleaning/Light Soil -- Wipe with one of the foiiowing - soapy water, white vinegar/water soiution,
Formuia a09 Giass and Surface Cieaner* or a simiiar giass cieaner- using a sponge or soft cioth= Rinse
and dry=To poiish and heip prevent fingerprints, foiiow with Stainiess Steei Magic Spray (Part No=
20000008}_*.
° Moderate/Heavy soim-- Wipe with one of the foIHowing - Bon Ami, Smart Cleanser, or Soft Scrub* -
using a damp sponge or soft cloth. Rinse and dry. Stubborn soils may be removed with a damp multi-
purpose Scotch-Brite* pad; rub evenly with the grain. Rinse and dry.To restore luster and remove streaks,
foIHowwith StainHessSteel Magic Spray*.
, Diseomoration -- Using a damp sponge or soft cloth, wipe with Cameo Stainless Steel CleaneP. Rinse
immediately and dry. To remove streaks and restore luster, follow with Stainless Steel Magic Spray*.
When cool, wash with warm soapy water, rinse and dry. Never wipe a warm or hot surface with a damp
cloth as this may damage the surface and may cause a steam burn.
For stubborn soil, use mildly abrasive cleaning agents such as baking soda paste or Bon Ami.* Do not use
abrasive, caustic or harsh cleaning agents such as steel wool pads or oven cleaners. These products will
scratch or permanently damage the surface.
NOTE: Use a dry towel or cloth to wipe up spills, especially addie or sugary spills. Surface may
discolor or dutl if soil is not immediately removed. This is espec@lly important for white surfaces.
* Brand names for cleaning products are registered trademarks of the respective manufactureus.
** To order direct, carl 1_877_232_6771 USA and 1_800_688_8/408Canada.
21
Oven Door
Leveling Legs
DO not PUaceexcessive weight on o[ stand on an open
oven door. This couM Cause the range to lip over, break
the door, 0r k_Ju[ethe user.
leveling legs to the floor. This bracket Prevents the range
from accidentally tipping.
Note: The oven door on a new range may feel "spongy"
when it is closed. This is normal and will decrease with use.
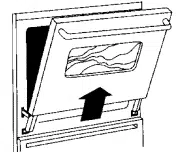
Oven Window
To protect the oven door window:
1. Do not use abrasive cleaning agents such as steel wool
scouring pads or powdered cleansers as they may scratch
the glass.
2. Do not hit the glass with pots, pans, furniture, toys, or other
objects.
3. Do not close the oven door until the oven racks are in
place.
Scratching, hitting, jarring or stressing the glass may weaken
its structure causing an increased risk of breakage at a later
date.
Oven Light
"Disconnect powe[ t0 range bef0Ee[epPac!ng !ight bu!b,
° Make sure buUbCoverand buUbare cooUbefore touching.
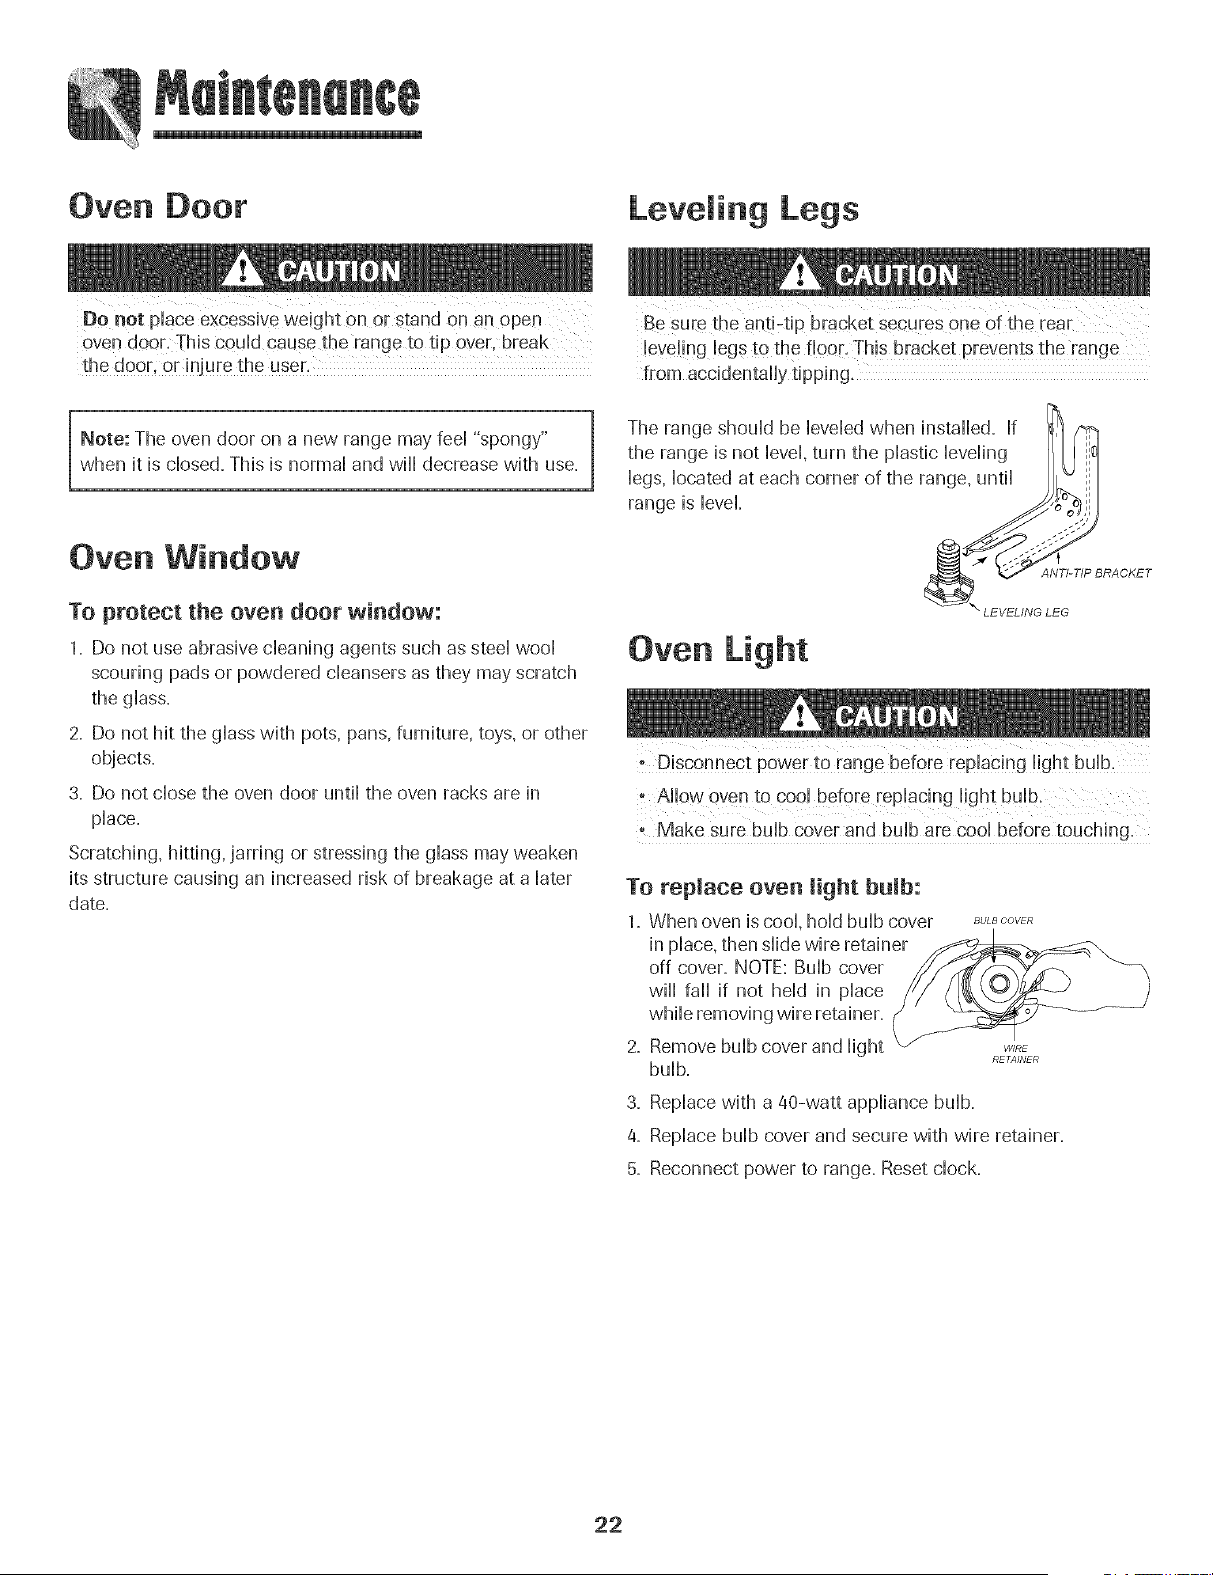
To replace oven light bulb:
1. When oven is cool, hold bulb cover _,LBc'ovE_
in place, then slide wire retainer
off cover. NOTE: Bulb cover
wiii fail if not held in place
while removing wire retainer.
2. Remove bulb cover and light
RETAINER
bulb.
3. Replace with a 40-watt appliance bulb.
4. Replace bulb cover and secure with wire retainer.
5. Reconnect power to range. Reset clock.
22
Storage Drawer
Do not store plastic, paper products, food or fiammabb
materials in this drawer. The drawer may become too warm
for these items when the oven is in use.
The storage drawer can be removed to allow you to dean
under the range
To remove:
1. Empty drawer and pull out to the first stop position.
2. Lift up the front of the drawer.
3. Pull out to the second stop position.
4. Grasp sides and iift drawer up and out.
To replace:
1. Fit the ends of the drawer giides into the raib in the range.
2. Lift up the front of the drawer and gently push in to the
first stop position.
3. Lift drawer up again and push until drawer is closed.
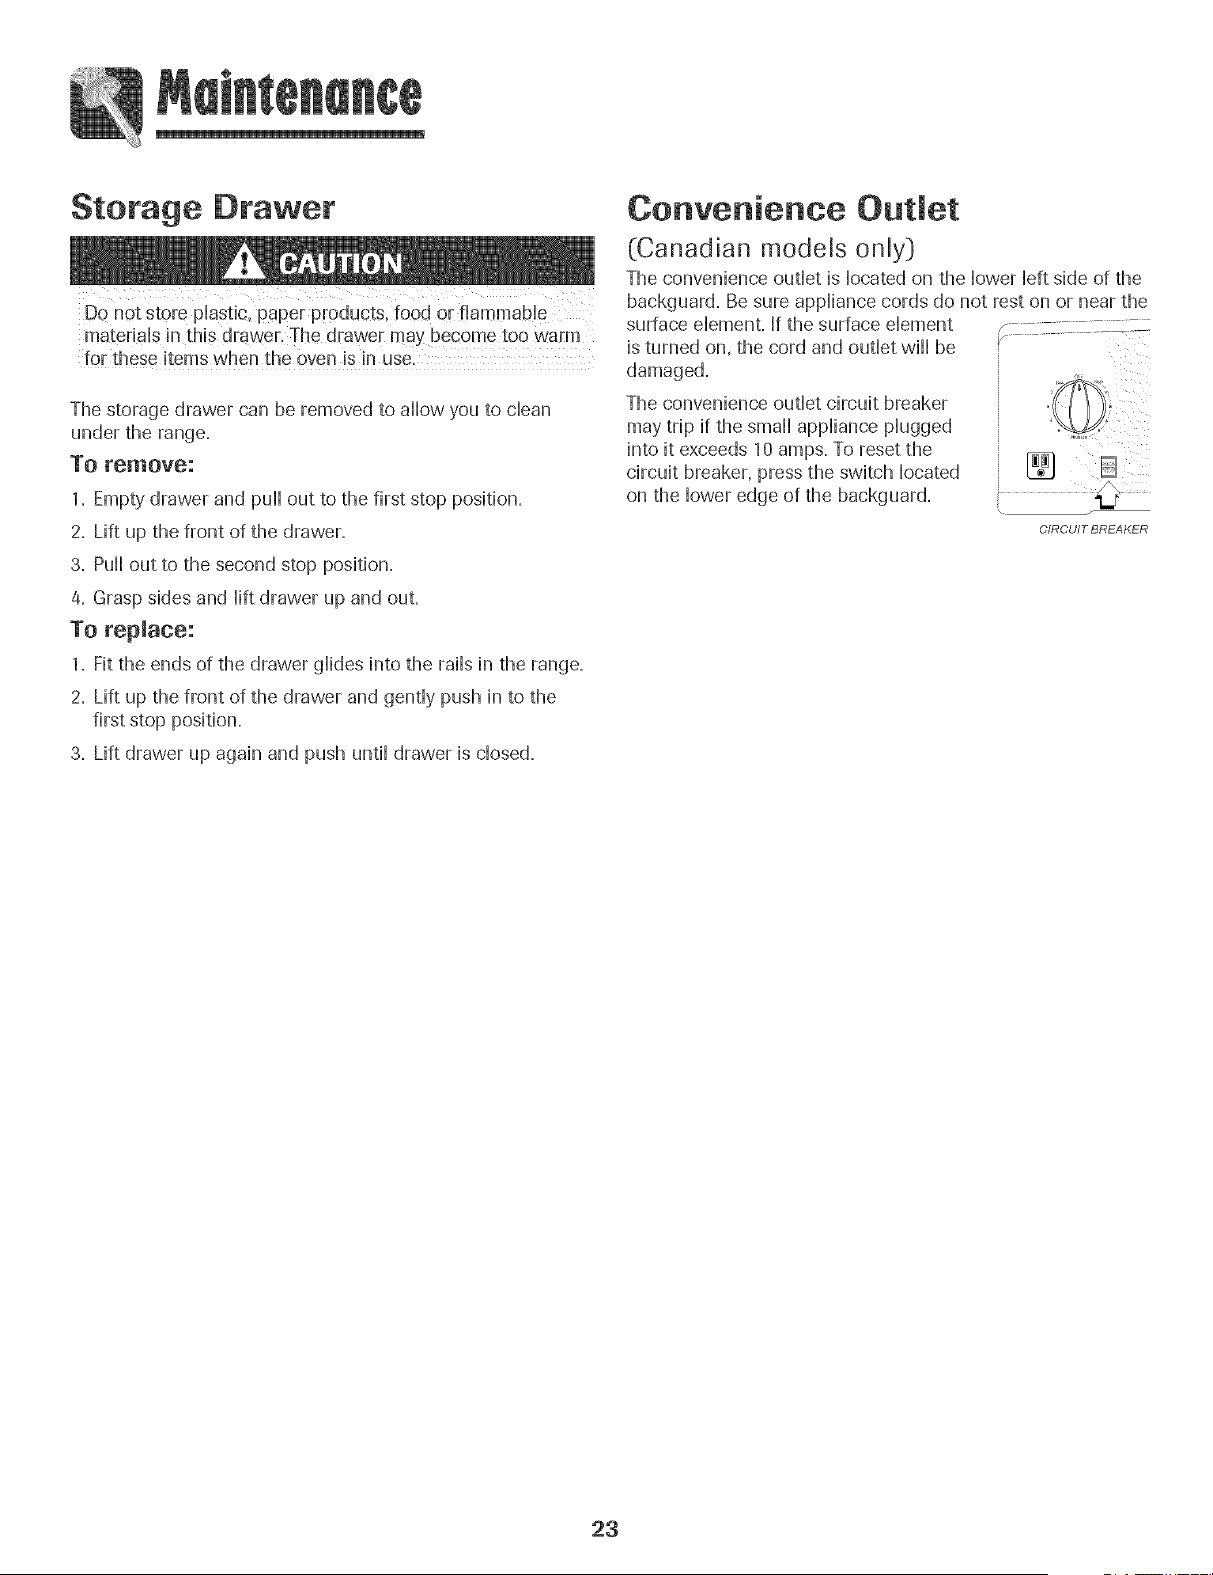
Convenience Out et
(Canadian models only}
The convenience outlet is located on the lower left side of the
backguard. Be sure appliance cords do not rest on or near the
surface elemenL If the surface element
is turned on, the cord and outlet wiii be
damaged.
The convenience outlet circuit breaker
may trip if the small appliance plugged
into it exceeds 10 amps. To reset the ............
circuit breaker, press the switch located _ B
on the lower edge of the backguard.
CIRCUIT BREAKER
23
i
m
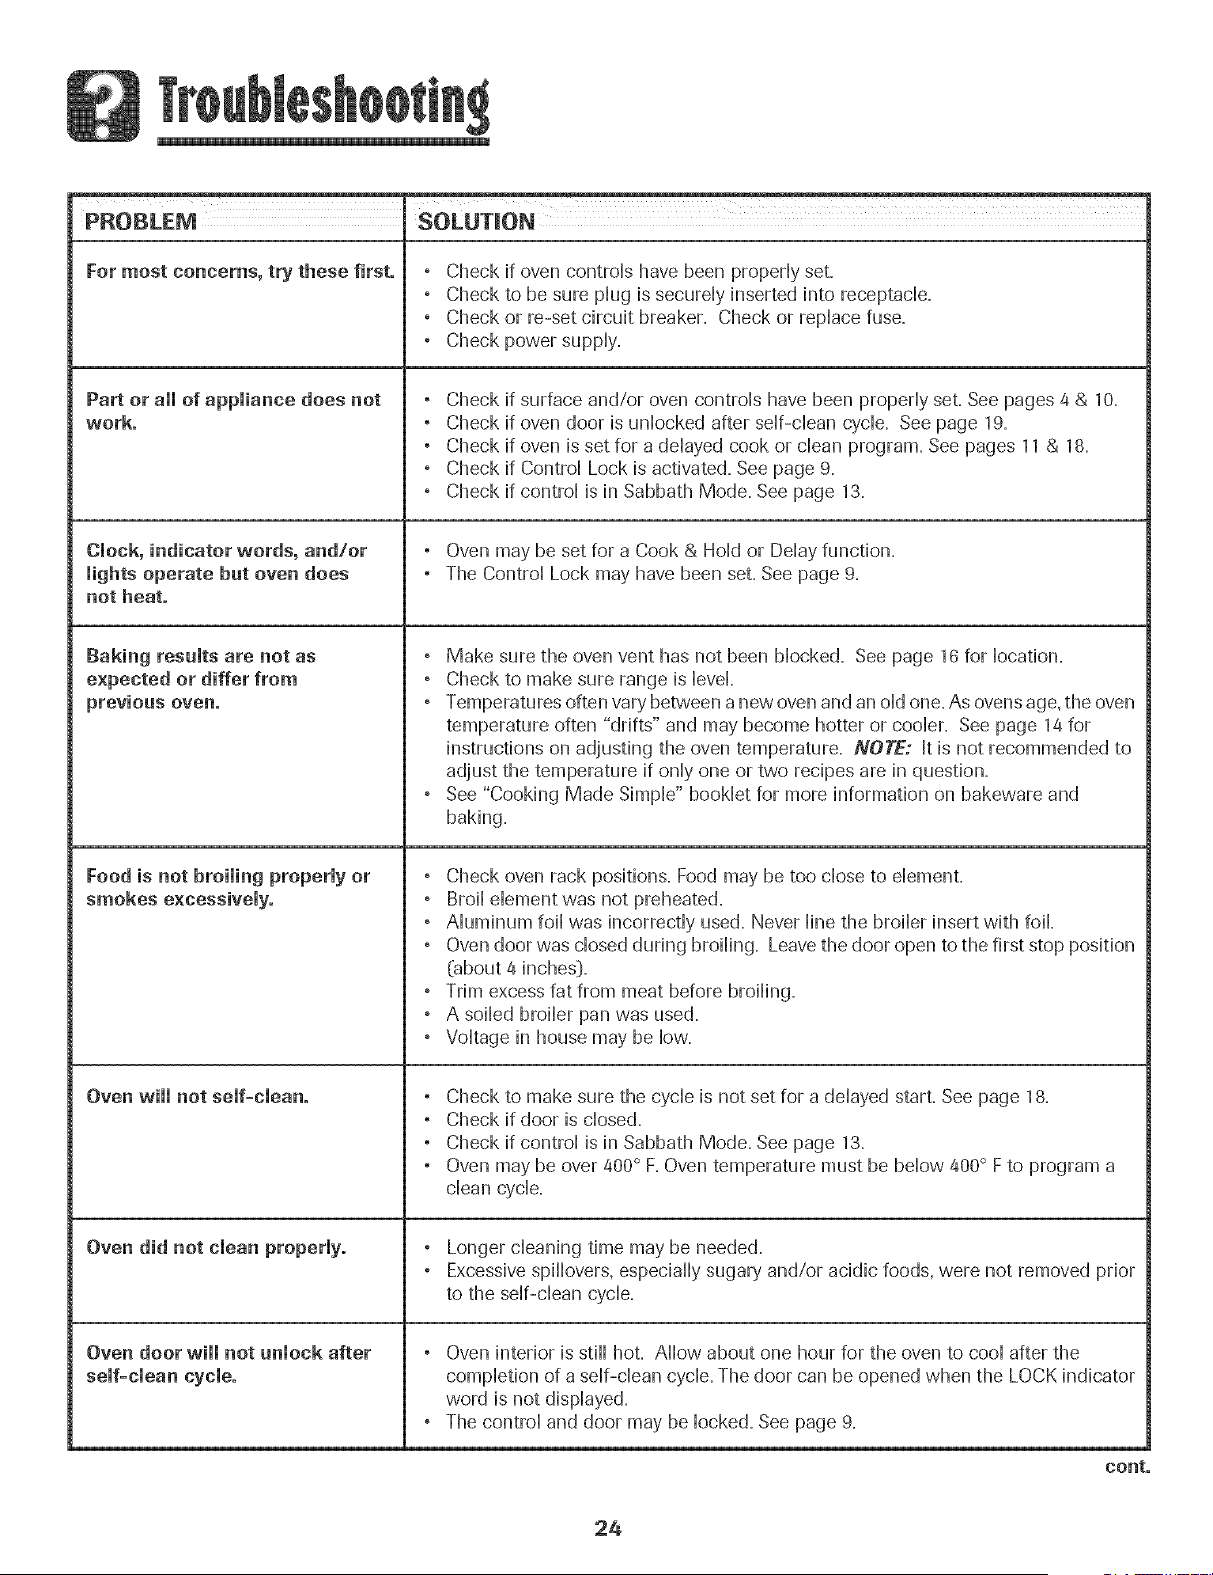
PROBLEM
For most concerns, try these first. , Check if oven controb have been propedy set.
° Check to be sure piug is secureiy inserted into receptacb.
° Check or re-set circuit breaker. Check or repiace fuse.
° Check power suppiy.
Part or all of appliance does not , Check if surface and/or oven controb have been propedy set. See pages 4 & 10.
work. ° Check if oven door is unbcked after sdf-cban cycb. See page 19.
° Check if oven is set for a deiayed cook or dean program. See pages 11 & 18.
° Check if Controi Lock is activated. See page 9.
° Check if controi is in Sabbath Mode. See page 13.
Clock, indicator words, and/or ° Oven may be set for a Cook & HoHdOFDeiay function.
lights operate but oven does , The Controi Lock may have been set. See page 9.
not heat.
Baking results are not as ° Make sure the oven vent has not been Mocked. See page 16 for bcadon.
expected or differ from , Check to make sure range is level.
previous oven. , Temperatures often vary between a new oven and an old one. As ovensage, the oven
temperature often "drifts" and may become hotter or cooler. See page 1a for
instructions on adjusting the oven temperature. NOTE; It is not recommended to
adjust the temperature if only one or two recipes are in question.
° See "Cooking Made Simple" booklet for more information on bakewam and
baking.
Food is not broiling properly or , Check oven rack positions. Food may be too close to element.
smokes excessively. , Broil element was not preheated.
° Aluminum foil was incorrectly used. Never line the broiler insert with foil.
° Oven door was closed during broiling. Leave the door open to the first stop position
(about 4 inches[}.
° Trim excess fat from meat before broiling.
° A soiled broiler pan was used.
° Voltage in house may be low.
Oven will not self-clean. , Check to make sure the cycle is not set for a delayed start. See page 18.
° Check if door is closed.
° Check if control is in Sabbath Mode. See page 13.
° Oven may be over 400° F. Oven temperature must be below 400° F to program a
clean cycle.
Oven did not clean properly. ° Longer cleaning time may be needed.
° Excessive spillovers, especially sugary and/or acidic foods, were not removed prior
to the self-dean cycb.
Oven door will not unlock after ° Oven interior is stiff hot. Allow about one hour for the oven to cool after the
self-clean cycle, completion of a self-clean cycle. The door can be opened when the LOCK indicator
word is not displayed.
° The control and door may be locked. See page 9.
cont.
24
i
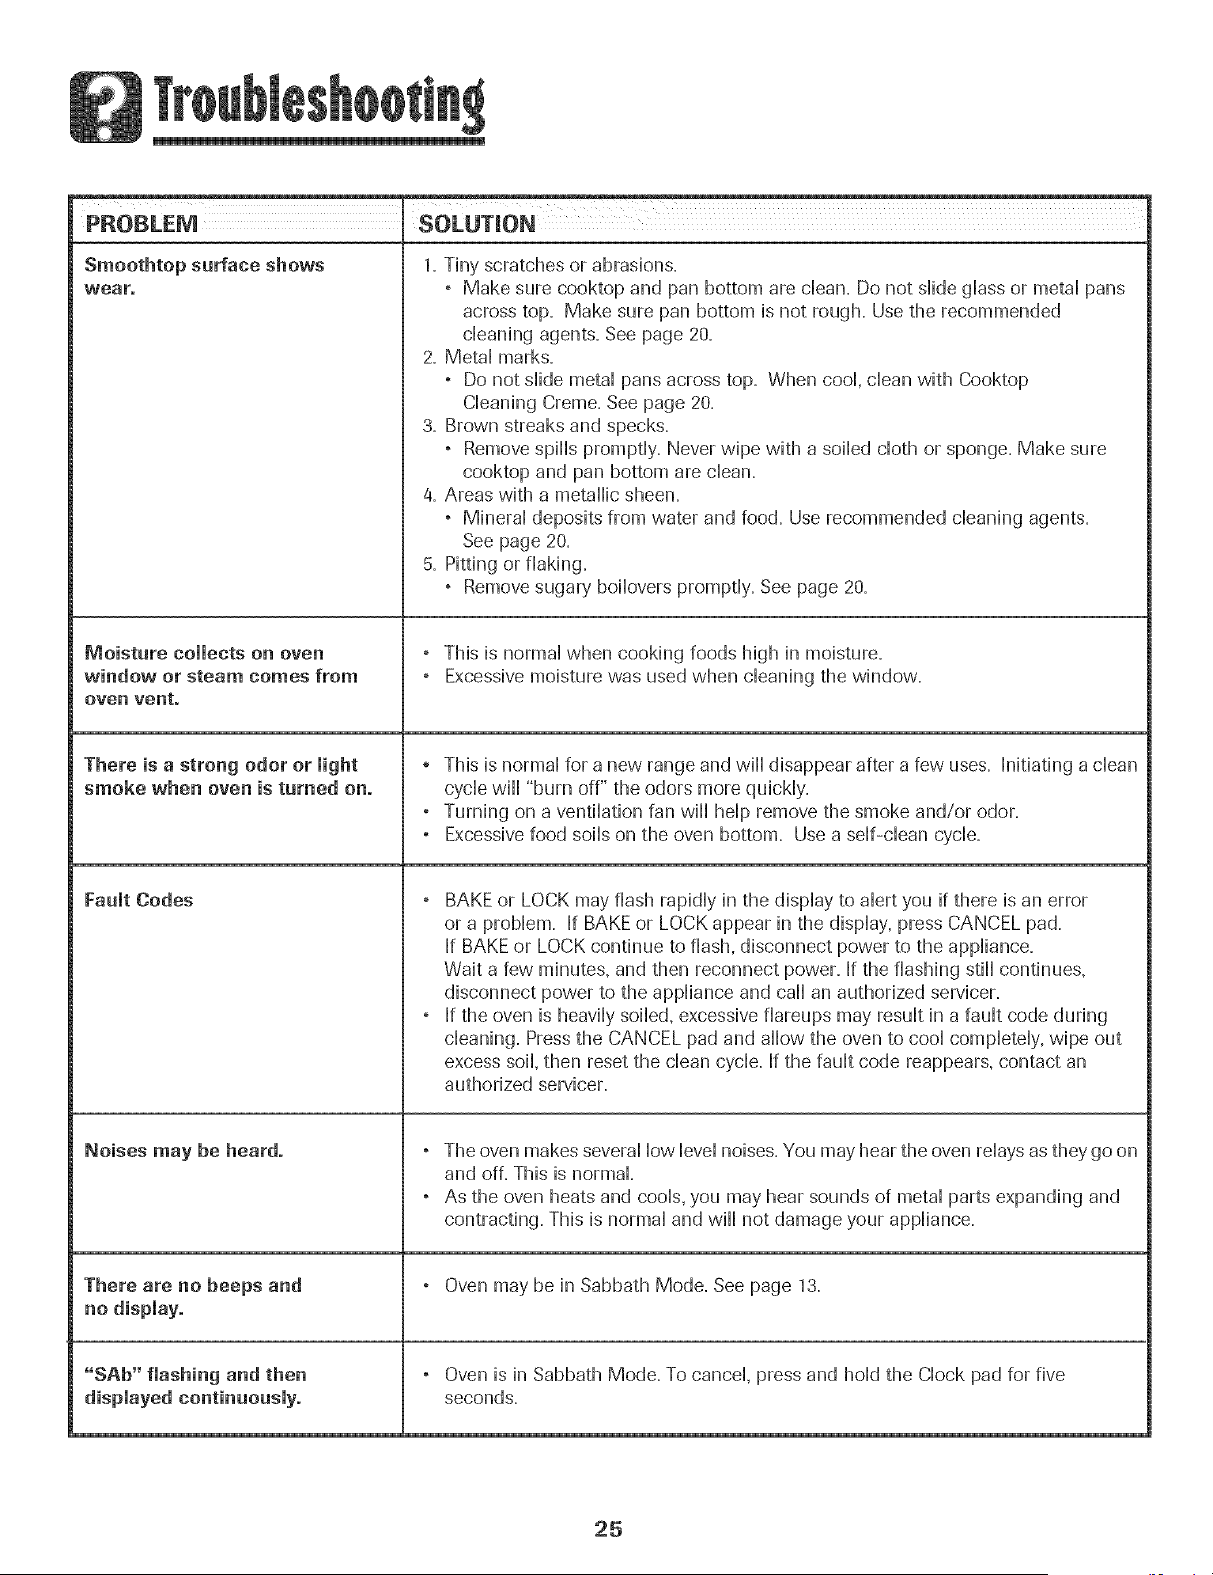
PROBLEM SOLUTmON
Smoothtop surface shows
wear.
Moisture collects on oven
window or steam comes from
oven Vent.
There is a strong odor or light
smoke when oven is turned on.
Fault Codes
Noises may be heard.
There are no beeps and
"SAb" flashing and then
1. Tiny scratches or abrasions.
° Make sure cooktop and pan bottom are clean. Do not slide glass or metal pans
across top. Make sure pan bottom is not rough. Use the recommended
cleaning agents. See page 20.
2. Metal marks.
° Do not slide metal pans across top. When cool, clean with Cooktop
Cleaning Creme. See page 20.
3. Brown streaks and specks.
° Remove spills promptly. Never wipe with a soiled cloth or sponge. Make sure
cooktop and pan bottom are clean.
a. Areas with a metallic sheen.
, Mineral deposits from water and food. Use recommended cleaning agents.
See page 20.
5. Pitting or flaking.
, Remove sugary boilovers promptly. See page 20.
° This is normal when cooking foods high in moisture.
, Excessive moisture was used when cleaning the window.
This is normal for a new range and wiii disappear after a few uses. Initiating a clean
cycle wiii "burn off" the odors more quickly.
° Turning on a ventilation fan wiii help remove the smoke and/or odor.
, Excessive food soils on the oven bottom. Use a self-clean cycle.
° BAKE or LOCK may flash rapidly in the display to alert you if there is an error
or a problem. If BAKE or LOCK appear in the display, press CANCEL pad.
If BAKE or LOCK continue to flash, disconnect power to the appliance.
Wait a few minutes, and then reconnect power, if the flashing still continues,
disconnect power to the appliance and call an authorized servicer.
, If the oven is heavily soiled, excessive flareups may result in a fault code during
cleaning. Press the CANCEL pad and allow the oven to cool completely, wipe out
excess soil, then reset the clean cycle. If the fault code reappears, contact an
authorized servicer.
° The oven makes several low level noises. You may hear the oven relays as they go on
and off. This is normal
, As the oven heats and cools, you may hear sounds of metal parts expanding and
contracting. This is normal and wiii not damage your appliance.
, Oven may be in Sabbath Mode. See page 13.
° Oven is in Sabbath Mode. To cancel, press and hold the Ciock pad for five
seconds.
25

+
26

Fuji One Year Warranty -
Parts and Labor
For one (1} year from the orig_nai retail
purchase date. any part which fails in
normal home use will be repaired or
replaced free of charge
Limited Warranties - Par_s Only
Second Through Fifth Year = From the
original purchase date. parts listed below
which fail in normal home use wiii be
repaired or replaced free of charge for
the part itself, with the owner paying aii
other costs, including labor, mileage,
transportation, tr p charge and diagnostic
, Glass-Ceramic Ceektep: Due to
thermal breakage, discoloration.
cracking of rubber edge seal, pattern
wear.
Electric Heating Dements: Radiant
surface elements on electric cooking
appliances
Canadian Residents
The above warranties oni} cover an
appliance installed in Canada that has
been certified or listed by appropriate
test agencies for compliance to a
National Standard of Canada unless the
appliance was brought into Canada due
to transfer of residence from the United
States to Canada.
Limited Warranty Outside the
United States and Canada =
Parts Only
For one (1) year from the date of original
retail purchase, any part which fails in
normal home use will be repaired or
replaced free of charge for the part itself.
with the owner paying all other costs.
including labor, mileage, transportation.
trip charge and diagnostic charge, if
required
The specLr/c warranties expressed above
am the ONLY walrTantles provided by rise
manufacture_, These wafTantles give you
spedfic legal ffghts, and you may also
have other r_hts which vary trom state to
state.
What is Not Covered By These
1. Conditions and damages resulting from any of the following:
a. Improper installation, delivery, or maintenance.
b. Any repair, modification, alteration, or adjustment not authorized by
the manufacturer or an authorized servicer.
c. Misuse, abuse, accidents, or unreasonable use.
d. Incorrect electric current, voltage, or supply.
e. Improper setting of any control
2. Warranties are void if the original serial numbers have been removed, altered,
or cannot be readily determined.
3. Light bulbs.
4. Products purchased for commercial or industrial use.
5. The cost of service or service caii to:
a. Correct installation errors.
b. Instruct the user on the proper use of the product.
c. Transport the appliance to the servicer.
8. Damage to the glass cooktop caused by the use of cleaners other than the
recommended cleaning creams and pads.
7. Damage to the glass cooktop caused by hardened spills of sugary materials or
melted plastic that are not cleaned according to the directions in the use and
care guide.
8. Consequential or incidental damages sustained by any person as a result of
any breach of these warranties. Some states do not allow the exclusion or
limitation of consequential or incidental damages, so the above exclusion may
not apply.
If You Need Service
Call the dealer from whom your appliance was purchased or call Maytag
Services sM, Maytag Customer Assistance at 1-800-888-9900 U.S.A. or
1-800-688-2002 Canada to locate an authorized servicer.
Be sure to retain proof of purchase to verify warranty status. Refer to
WARRANTY for further information on owner's responsibilities for warranty
service.
If the dealer or service company cannot resolve the problem, write to May'tag
Services sM,Attn: CAIR e:Center, P.O. Box 2370, Cleveland, TN 37320-2370, or
call 1-800-688-9900 UoSoA. or 1-800-688=2002 Canada.
U.S. customers using TTY for deaf, hearing impaired or speech impaired, caii
1-800-688-2080.
User's guides, service manuals and parts information are available from
Maytag Service@M,Maytag Customer Assistance.
When writing or calling about a service problem, please include:
a. Your name, address and telephone number;
b. Model number and serial number;
c. Name and address of your dealer or servicer;
d. A clear description of the problem you are having;
e. Proof of purchase (sales receipt}.
27
Cuisini_re 61ectrique _ touches de
precision 700 - dessus lisse
m m m
//i$|//|e/'e
Cuisson sur masurface ............. 33-36
Commandes de la surtace de cuisson
Surface a dessus lisse
Centre de r6chauffage
Cuissen darts le four ................ 37=46
Cuisson courante
Cuisson et maintien
Cuisson et maintien diff6r6s
Maintien au chaud
Favori
Cuisson au gril
Grilles du four
Netteyage ...................................47-50
M6thodes de nettoyage
Entretien ...................................... 51-52
Hublot du four
Lampe du four
Recherche des pannes ............ 53-54
Garantie et service apr_s=vente ... 55
Guia de Use y Cuidade ....................56
[nstaliateur : Remettezce guide au propn6taire.
Cansemmateur : Veui[[ez[ire [e guide et [e consort/orpour
consu_a_ionulterieure.Conservezlafacture d'achat ou [e ch6que
encalssecommepreuvede !'achat.
Num6rode modSle
Numdrode s6rie
Date d'achat
Sivous avezdesquestions,veuilleznous appeler :
Service a la ciient61ede Maybag
1-800-688-9900 E.-U.
1-800-688-2002 Canada
{lundiau vendredL8 h _ 20 h. heurede I'Esl,
Internet:http:iiwww.maytag.com
Donsle cadrede hasprattquesd'am61iorationconstanteoe la
qualite et de la performancede has produitsde cuisson,des
modificationsde I'apparei!qui nesont pas mentlonn6esdons ce
guide on_pu 6tre ntroduites.
Repertez_veus a la page 55 pear plus d'i_lformations
cel_cemal_tle service apres-venteo
que pourrait susciter une utiiisation incorrecte de i'appareii,
Utiiiser i'appareii uniquement pour ies fonctions pr6vues,
decrites dons ce guide,
Pour une utilisation adequate et en s_curit_, ii faut que
I'appareil soit convenablement installe par un technicien
quaiifie, et relic a ia torte, Ne pas regier, reparer ni rempiacer
un composant, a mains que ceia ne soit specifiquement
recommande dons ce guide, Toute autre reparation doit 6tre
effectuee par un technicien quaiifie,
Toujours debrancher i'appareii avant d'y loire de i'entretien,
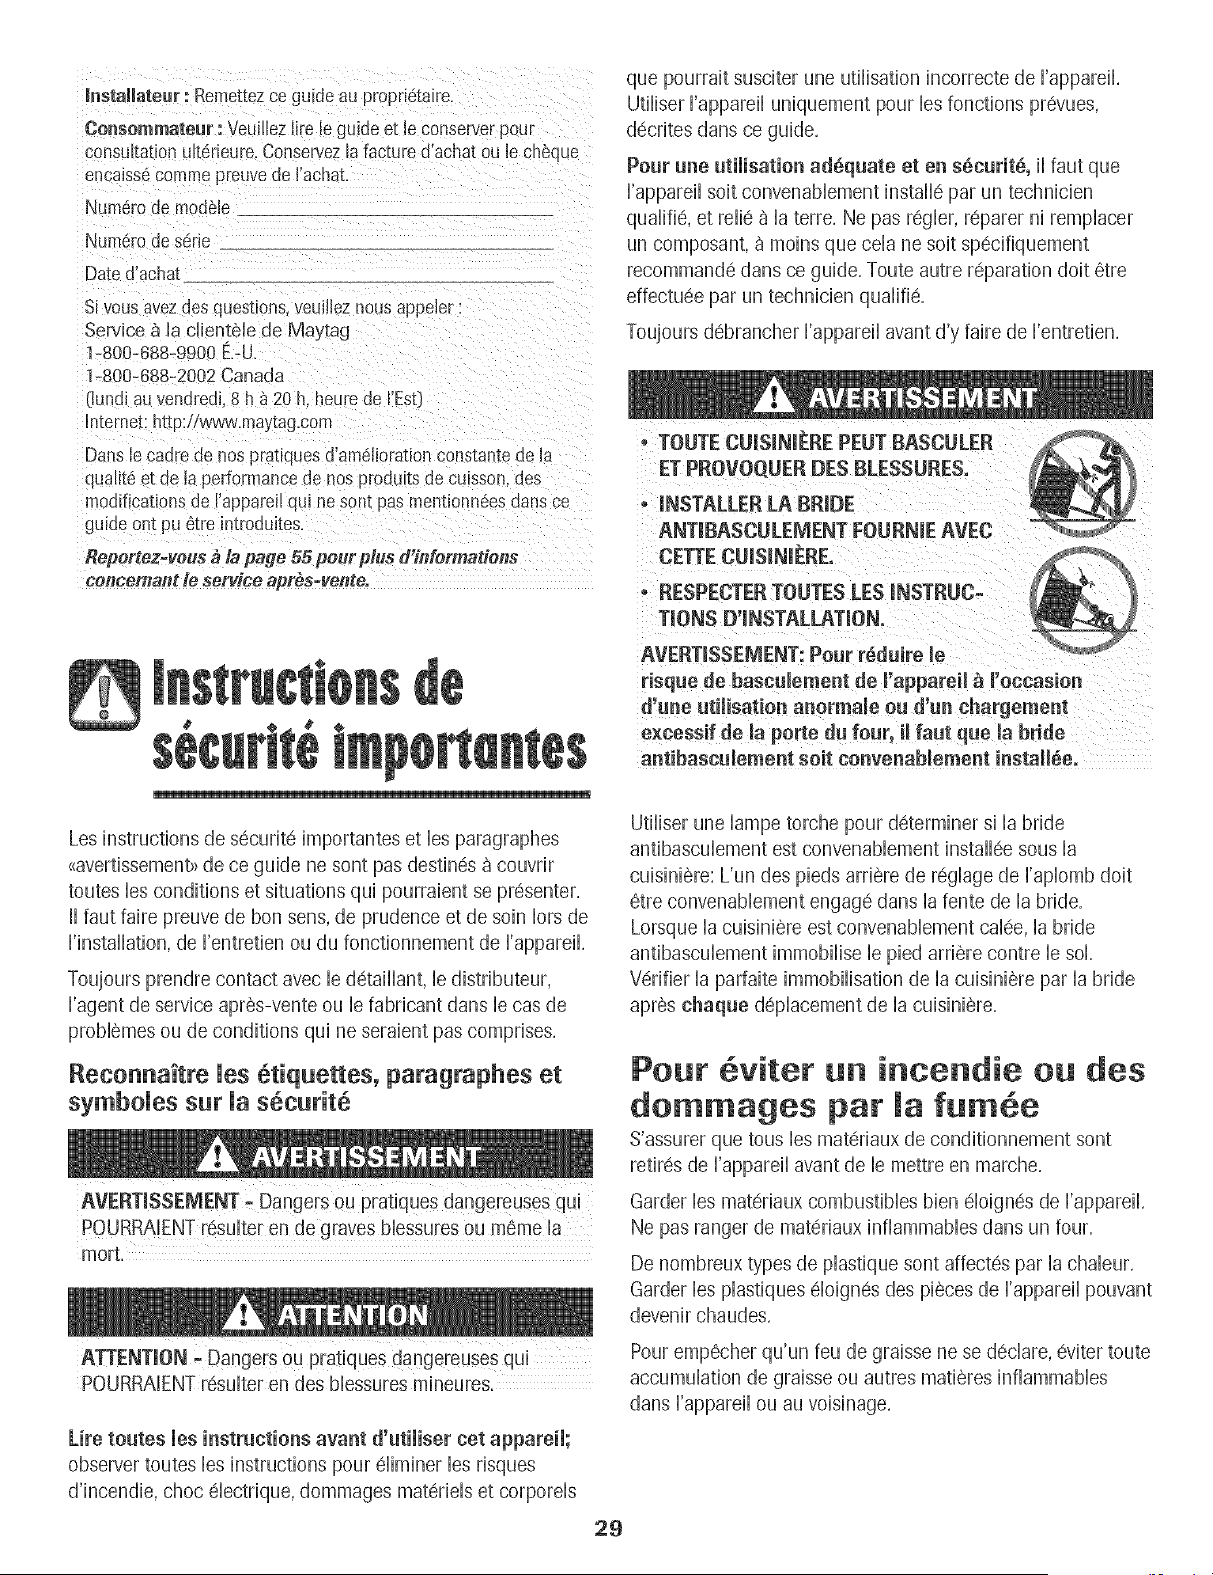
* TOUTE CUMSINIEP,E PEUT BASCULER
risque de bascuiement de I'appareil _ roccasion
d'une utilisatien anermaJe eu d'un chargement
excessif de la porte dU fear, il faut qUe la b_ide
antibasc_lement soit eonvenablement install_e,
Les instructions de securite importantes et los paragraphes
<<avertissemenb_de ce guide ne sont pas destines a couvrir
toutes los conditions et situations qui pourraient se presenter.
II faut loire preuve de ban sons, de prudence et de soin lots de
I'installation, de Fentretien ou du fonctionnement de [appareil.
Toujours prendre contact avec le detaillant, le distributeur,
I'agent de service apres-vente ou le fabricant dons le cos de
problemes ou de conditions qui ne seraient pas comprises.
eco a tte tiq ettes, paragraphes et
symbo es s c rit
Utiliser une lampe torche pour determiner si la bride
antibasculement est convenablement installee sous la
cuisiniere: L'un des pieds arriere de reglage de [aplomb doit
etre convenablement engage dons la lento de la bride,
Lorsque la cuisiniere est convenablement cdee, la bride
antibasculement immoNise le pied arriere contre le sol,
Verifier la parfaite immoNisation de la cuisiniere par la bride
apres chaque deplacement de la cuisiniere,
Pout viter i ce die ou des
dommages par fum6e
S'assurer que tous los materiaux de conditionnement sont
retires de I'appareil avant de le mettre en marche,
Garder los materiaux combustibles bien eloignes de I'appareil,
Ne pas ranger de materiaux inflammables dons un four,
De nombreux types de plastique sont affectes par la chaleur,
Garder los plastiques eloignes des pieces de [appareil pouvant
devenir chaudes,
POURRAIENTresulter en des blessures mineures.
Life toutes los instructions avant d'utiliser cot appareii;
observer toutes los instructions pour eliminer los risques
d'incendie, choc electrique, dommages materiels et corporels
Pour empecher qu'un feu de graisse nese declare, eviter toute
accumulation de graisse ou autres matieres inflammables
dons I'appareil ou au voisinage.
29

En cas d'incendie
Udiiser du bicarbonate de soude ou un extincteur b poudre
cNmique ou a mousse pour dtouffer bs fiammes, Ne jamab
utiiiser d'eau pour dteindre de la grabse enfiammde,
1, Interrompre I'aiimentation dbctdque de I'appareiI pour
minimiser la propagation des fiammes,
2, NE JAMAmS saisir ou d@iacer un ustensib de cuisine
enfiamme,
3, Fermer [a porte du four pour 6touffer [es fiammes,
Securit pour [es enfants
Ne pas bloquer ou obstruer I'event du four,
NE JAMAIS TOUCHER LESELEMENTSCHAUFFANTS NI LES
PARO[SINTERIEURESDU FOUR, Les elements chauffants
peuvent etre brQiants meme s'iis ne sont plus rouges, Les
surfaces interieures du four peuvent atteindre une
temperature suffisamment eievee pour infiiger des brQiures,
Pendant et apres usage, ne pas toucher les elements
chauffants ni ies parois interieures du four et eviter bur
contact avec des vetements ou autres materiaux inflammables
avant qu'iis n'aient eu le temps de refroidir suffisamment,
D'autres surfaces peuvent egaiement atteindre une
temperature suffisamment eievee pour brQier : ie ouverture
d'event et le surface avoisinante, ainsi que le porte et le hubiot
de four,
Ne pas toucher I'ampouie du four brQiante avec un chiffon
humide car eiie pourrait se briser, Si tel est ie cas, debrancher
i'appareii avant de retirer i'ampouie pour eviter une decharge
enfants peuvent dlnteresser, Un enfant tentant degrimper eiectrique,
NE JAMNS garnir ia sob du four ou une grille du four avec
subir de graves biessures, de ia feuiiie d'aiuminium, Ceci pourrait susciter un risque de
NE JAMAIS remiser sur le dosseret d'une cuisini_re ou
NE JAMAIS iaisser des enfants seuis ou sans supervision
iorsque i'appareii est en service ou encore chaud, Ne jamais
laisser un enfant s'asseoir ou se tenir sur une partie
quelconque de I'appareil, [I pourrait se blesser ou se brQler,
[Iest important d'enseigner aux enfants que I'appareil et les
ustensiles places dedans peuvent etre chauds, Laisser refroidir
les ustensiles en un lieu sOr,hors d'atteinte des enfants, [Iest
important d'enseigner aux enfants qu'un appareil menager
n'est pas un jouet, et qu'ils ne doivent toucher aucune
commande ou autre composant de I'appareil,
Familiarisation avec l'apparei[
NE JAMAmS utiiiser un appareii comme escabeau pou
atteindre les armoires se trouvant au-dessus, Le mauvais
emploi de porte d'apparel comme par exemple en tant
qu'escabeau, le fait de s'appuyer ou de s'asseoir sur la
porte, peuvent entrainer le renversement de I'appareil.
casser la porte et gravement blesser
Ne pas utiliser cet appareil pour chauffer ou pour garder
chaude une piece, sinon des dommages a i'appareii pourraient
s'ensuivre et ceia pourrait etre dangereux pour I'utiiisateur,
Aussi, ne pas utiiiser ie four pour ranger des aliments ou des
ustensiies de cuisine,
decharge electrique ou d'incendie, ou une deterioration de
I'appareil, Utiliser de la feuille d'aluminium uniquement selon
les instructions de ce guide,
Cuisson et s curit
NE JAMAIS faire chauffer un recipient non ouvert dans ie
four, L'accumuiation de pression darts ie recipient pourrait
provoquer son eciatement et de graves dommages materiels
ou corporeis,
Utiiiser des maniques robustes et seches, Des maniques
humides peuvent provoquer ia formation de vapeur brQiante,
Ne jamais utiiiser un torchon a vaisseiie ou autre article textile
la place de maniques; un tel article pourrait trainer sur un
element et s'enfiammer, ou accrocher un ustensiie ou un
composant de i'appareii,
Porter un vetement approprie, Eviter de porter des vetements
ampies ou a Iongues manches pendant I'utiiisation de
I'appareil, [is peuvent prendre feu si le vetement entre en
contact avec un element de cuisson brQiant,
Placer toujours ies grilles a ia position appropriee dans ie four
Iorsque le four est froid, Faire coulisser la grille vers I'extdrieur
avant d'ajouter ou enlever un plat; utiliser pour cela une
manique robuste et seche, Eviter d'introduire la main dans le
four pour y placer ou retirer un plat, S'ii est ndcessaire de
deplacer une grille Iorsqu'elle est chaude, utiliser une manique
seche, Ne pas toucher un element chaud avec une manique,
3O
N'utiiiser bs griibs que darts b four darts bqueI eibs ont 6te
achetees/expediees.
Ouvrir toujours la porte du four tres prudemment. Laisser Fair
chaud ou la vapeur s'@happer avant de retirer ou d%troduire
un plat.
AVERTISSEMENT - METS PREPARES : Respecter bs
instructions du fabricant. Si b contenant ou b couverde en
piastique d'un mets surgeie se ddorme ou est endommage
durant ]a cubson, jeter immediatement b recipient et son
contenu. Les aliments pourrabnt 6tre contamines.
Ne pas permettre b contact de papier d'aiuminium ou de ]a
sonde a viande avec bs elements chauffants.
Toujours 6teindre toutes bs commandes une fob la cuisson
terminee.
Ustensi es et securit
Appliquer bs instructions du fabricant Iors de Femploi d'un
sachet pour cuisson au four,
La securit6 de fonctionnement de cet appareil a ete testee
Faide d'ustensibs de cuisine traditionneb, Ne pas utiliser un
ustensib ou accessoire qui n'est pas sp@ifiquement
recommande darts ce guide, Ne pas utiliser de systeme de
convection additionnel, L'utilisation d'un dispositif ou
accessoire qui n'est pas expressement recommande dans ce
guide peut degrader la securite de Fappareil ou sa perfor-
mance, ou reduire la Iongevite des composants,
Si un ustensib est plus petit que Felement utilise, une partie
de I'element chauffant est exposee et peut provoquer
Finfiammation d'un vetement ou des maniques,
Seub certains materiaux en verre, vitroceramique, ceramique,
gres, ou certains ustensibs vitrifies/emailles peuvent etre
utilises sur la table de cuisson ou darts b four sans risque de
bris sous Ferretdu choc thermique, Observer bs instructions
du fabricant Iors de Futilisation d'un ustensib en verre,
Orienter la poignee de chaque ustensib vers le centre de la
table de cuisson et non vers I'exterieur ou vers un autre
element; ceci reduira b risque de brQlure, inflammation de
matiere inflammable ou renversement (un jeune enfant
pourrait saisir et renverser un ustensib dont b manche est
oriente vers I'exterieur}.
Tabme de cuisson
NE JAMAmS laisser un element de surface allume sans
surveillance, particulierement avec chauffage 6bv6. Le
@bordement du contenu de Fustensib pourrait provoquer la
generation de fumee abondante et Finfiammation de la
graisse.
Cet appareil comporte des elements chauffants de differentes
tailbs. Utiliser toujours un ustensib a fond plat, de taille
suffisante pour qu'il puisse recouvrir completement [element.
Pour optimiser I'efficacite, choisir un ustensib de meme tailb
que ['element.
SURFACE EN VmTROC[tRAMmQUE: NE JAMA[S utiliser une
table de cuisson cassee ou felee: bs solutions de nettoyage et
renversements pourraient p@etrer clansla table de cuisson en
entrdnant un risque de decharge electrique. Prendre
immediatement contact avec un technicien qualifie.
Exercer une prudence extreme Iors du d@lacement du
recipient de graisse ou Iors de %limination de graisse chaude,
Laisser la graisse refroidir avant de d@lacer I'ustensile,
Hottes d'e×traction
Nettoyer frequemment bs filtres et la hotte de la cuisiniere
pour emp@her la graisse ou d'autres produits inflammables
de s'accumubr sur bs filtres ou la hotte en provoquant des
feux de graisse.
Pour fiamber des aliments sous la hotte, mettre le ventiiateur
en marche.
Nettoyage et securit
Nettoyer prudemment la table de cuisson. Arreter toutes bs
commandes et attendre b refroidissement de tous bs
composants avant de bs toucher ou d'entreprendre b
nettoyage. Nettoyer [appareil avec precaution. Travailbr
prudemment pour eviter des brQlures par la vapeur en cas
d'utilisation d'un chiffon ou d'une @onge humide Iors de
I'elimination d'un produit renverse sur une surface chaude.
Certains produits de nettoyage peuvent generer des vapeurs
nocives Iorsqu'on bs applique sur une surface chaude.
Nettoyer uniquement bs pieces mentionnees clans ce guide.
31
Four autonettoyant
!Schdrite, etc. dans RefouE Uorsde !'autonettoyage_
Ne pas nettoyer Hejoint de porte; Hejoint joue un rOHeessentieH
quanta H'etancheite,Ne pas frotter, endommager ou depHacer
Hejoint,
Ne pas utiHiserde produits de nettoyage pour four ou enduits
de four, darts Hefour autonettoyant ou sur Heszones voisines,
,&vantd'executer une operation d'autonettoyage, retirer Ha
Hechefrite,HesgriHHesdu four et Hesautres ustensiHes,et eHiminer
par essuyage tout exces de residus renverses pour eviter Ha
formation de fumee ou H'infiammation de ces residus,
Avertissement et avis
important pour Ja securit6
La Hoicdifornienne <<Safe Drinking Water and Toxic Enforce-
ment Act >>de 1986 [proposition 65_}stipule Hapublication par
Hegouverneur de HaCdifornie d'une Histede substances que
H'etatde CaHifornieconsidere comme cancerigenes ou
dangereuses pour Hesysteme reproducteur, et impose aux
entreprises commerciaHesH'obHigationde signaler a Heurs
clients Hesrisques d'exposition a de teHHessubstances,
Nous informons HesutiHisateursde cet appareiHque Horsd'une
operation d'autonettoyage, illspeuvent etre exposes a une
faibHeconcentration de certaines substances figurant darts Ha
Histementionnee ci-dessus, dont Hemonoxyde de carbone,
Pour minimiser H'exposition,veiHHerace que Hapiece o@se
trouve Hefour soit convenabHementaeree durant une operation
d'autonettoyage par H'ouvertured'une fenetre ou d'une porte,
AVmSiMPORTANT - OmSEAUXFAMmLJERS: Les oiseaux ont
un systeme respiratoire tres sensible, Ne pas garder un oiseau
famiHierdarts Hacuisine ou darts une piece ou3i] pourrait etre
expose aux fumees, Les fumees emises durant une operation
d'autonettoyage peuvent etre dangereuses ou morteHHespour
un oiseau, de meme que Hesfumees CruisesHorsdu chauffage
excessif de graisse, huiHe,margarine, et du chauffage excessif
darts un ustensiHea revetement antiadhesif,
Conserver ces instructions pout consultation ult tieute
32
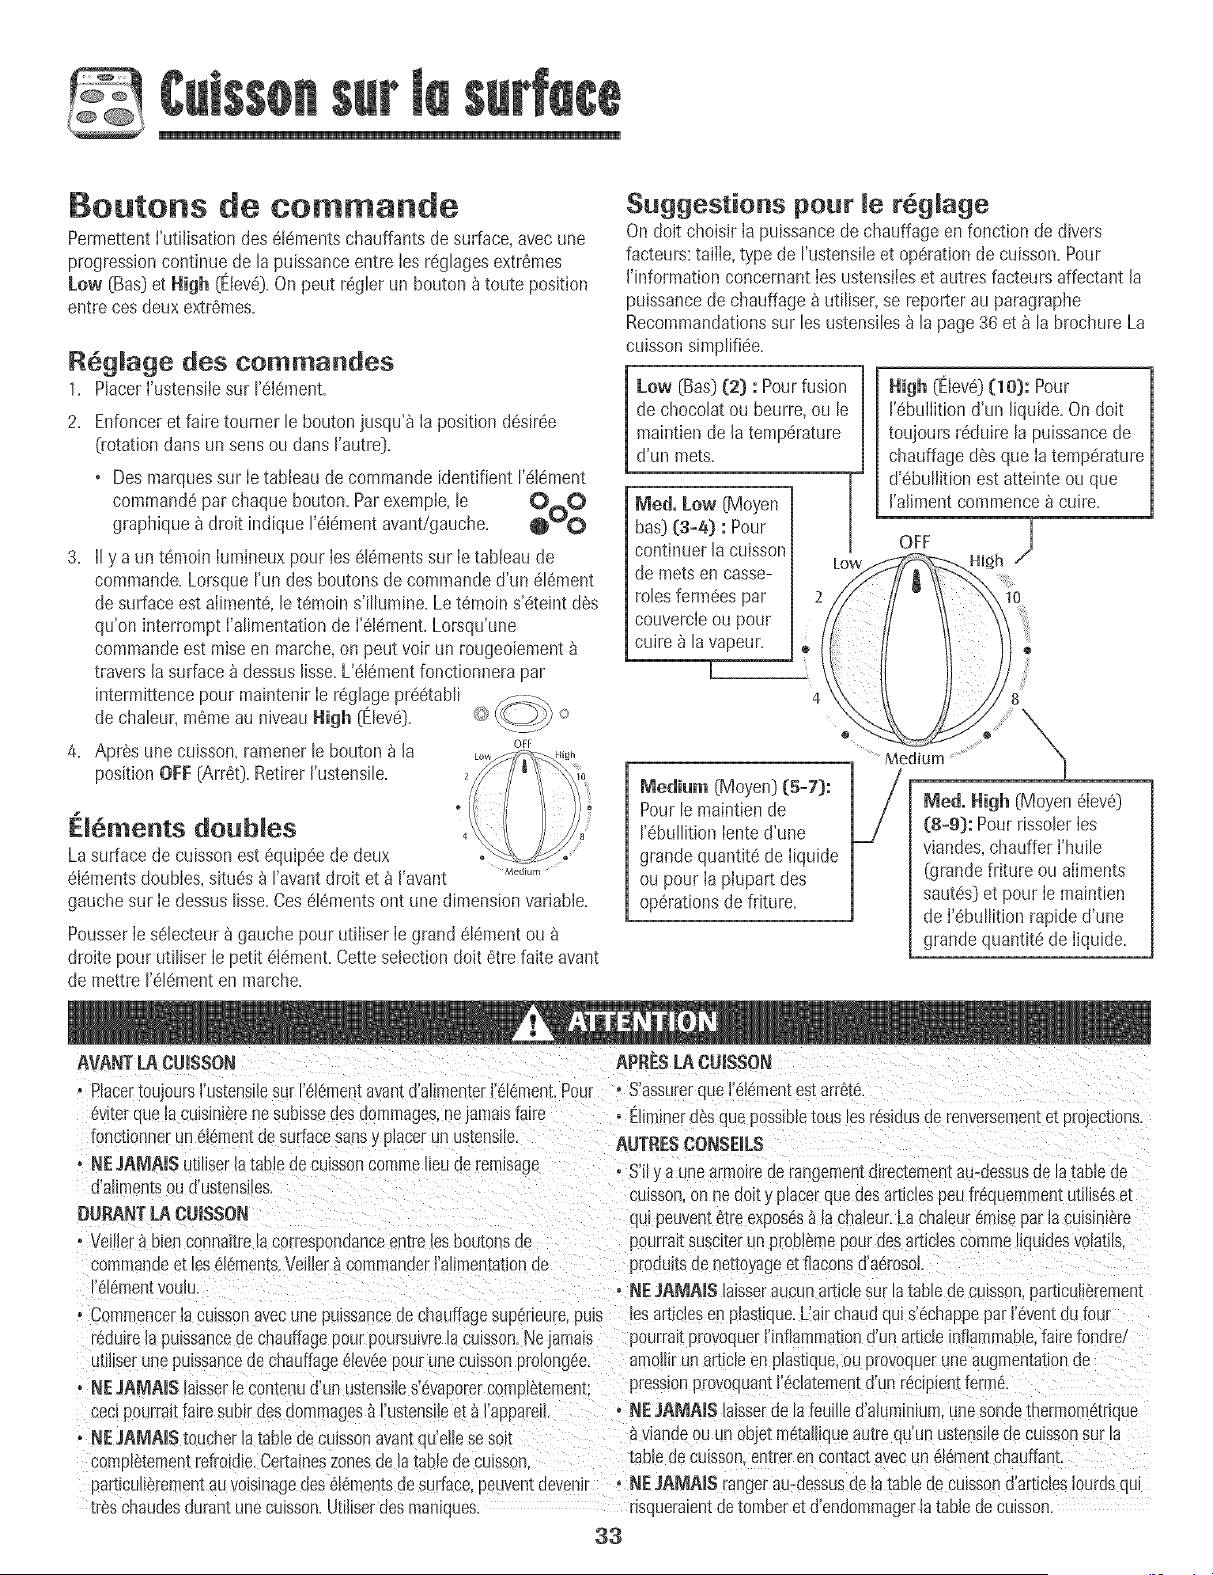
Boutons de commande
Permettenti'utilisationdes 61_mentschauffants desurface,avecune
progressioncontinue de la puissanceentre Iesr6glagesextr6mes
Low (Bas)et High (Etev6)+On peut r6gler un bouton_ toute posRion
entre cesdeuxextremes+
R69Ja9 e des commandes
1. PlacerI'ustensiiesur 1'616merit.
2. Enfonceret faire tourner le boutonjusqu'_ Ia position d6sir6e
0+otationdartsun sensou darts ['autre).
. Des marquessur Ietableau de commandeidentifient 1'61@ment
command6par chaque bouton. Parexemple,le vvO O
graphique_ droit indique1'616meritavant/gauche. @O O
3. II y a un t6n3oinIumineuxpour Ies616mentssur Ie tableaude
commande.LorsqueFundesboutonsde commanded'un 616ment
de surfaceest aliment6,le t6moins'illum[ne.Le tSmoins'@teintdes
qu'on interrompt I'alimentationde I'61ement.Lorsqu'une
commandeest raiseen marche,on peut voir un rougeoiement
travers[a surface_ dessusIJsse.L'el6mentfonctionnera par
intermittencepour maintenir Ie r6glagepr6etabli
dechaleur,re+meauniveauHigh Elev+ o
4. AprSsunecuisson+ramenerle bouton_ [a OFF
positionOFF[Arret). Retirer['ustensile.
FJ6ments doubles
Lasurface decuissonest 6quipeededeux •
61ementsdoubIes,situ6s _ I'avantdroit et _ I'avant +*+d,um
gauche sur Ie dessuslisse+Cesel6mentsont une dimensionvariable+
PousserIe selecteur_gauche pour utiliserIe grand el6mentou
droite pour utiliserIe petit 6Idment+CetteselectiondoJt6tre fare avant
de mettre I'elementen marche+
Suggest+ons pour [e r6glage
Ondolt choisJrIa puissancede chauffage enfonction de divers
facteurs:taiIIe,type de I'ustensileet operationde cuisson+Pour
['informationconcemantIesustensiIeset autresfacteurs affectant la
puissancede chauffage_ ut[liser,se reporterau paragraphe
Recommandationssur lesustensJies_ la page 36 et _ la brochureLa
cuissonsimplifiee+
Low (Bus)(2) : Pourfusion
de choco[atou beurre,ou [e
maintiende [a temp@ature
d'un mets+
Meal. Low [Moyen
bas) (3+4) : Pour
continuerla cuisson
de metsen casse-
roles ferm6espar
couvercieou pour
cuire _ la vapeur.
[
4
_edi_m (Moyen)(5-7):
Pourle maintiende
I'ebullition [ented'une
grandequantit_ de [iquide
ou pour[a piupart des
op@ationsdefriture.
High (ElevS)(10}: Pour
['ebullition d'un [iquide+Ondolt
toujoursr6duire la puissancede
chauffagedes que Iatemperature
d'ebullition estatteinte ou que
I'allmentcommence_ core+
OFF /[
High
10
@
B
N
Medium ....... NNN[
ivied. High (Moyen_lev_)
(8+9): Pour rissoler Ies
viandes,chauffer I'huile
(grandefriture ou aliments
sautes)et pour Ie maint[en
de I'ebullition rapided'une
grandequantRede Iiquide.
AVANTLA CUISSON APSESLA CUJSSON
. Placer[oujours['ustensilesur1'8[_mema_antd'alimenter['_l@r+ent+Pour . S'assurerque ['elementestarr_[e.
@kerque la cu+s+nierenesublssedesaommages,ne jaITlaJs [a[re
Ponctionnerun e+ementdesurfa;e sansy piacerun us-[ensite
- NEJAMAIS utiHserlatabledecuissoncommet+eude rein+sage
d'alimen[sou d'ustensJles.
DUP,ANT [A CUISSON
- Veiliera bienconnaRremcorresDonaanceentrelesboutons_
commanaee[ _ese+emen[s.Velller_ commanderl'aIimentationae
I'_l_mentvoulu.
- Commencerla cu+ssonavecunepuissancedechauffagesupeneure,pu+s
reduireiapmssanc_ae chauffagepourpoursu_vremcaisson.Ne amals
. E[im[nerd6squeposs[bletOLSlesr6s+dusde renversemem_e_project+ons.
AUTRES CONSEJLS
, S'ily a unearrno_reaerangementd[rectemen[au-dessusde[a_ableae
cu+sson,on ne doity pincerquedesart+clespeutr6quernmen[ut_t+seset
qu+peuventatreexposesa+acna+eor.Lacha[eur6raiseparlacu+s+n_ere
pourral[susc_[erun proD/emepourdesarticlescomme+qu+desvolat+ts.
produttsdenetto/ageetflaconsd'aSroso!
. NEJA_AIS la+sseraucunart+ctesur latabtedeculsson,part_cul+eremem
_esarticlesenp+ast_que.L'airchaudquis'6chappeparI'eventduf_ur
oourraHprovoquerHnflamma[iond'unarticleinlammabie,fairefondre/
amse,"une puissancede chauffage 8Jeveepour une cu+ssonpro_ongee, amoll+run art+cleen pmsuque,ou provoquer une s agmenm_lcn de
- NEJAMAIS [a[sser_econtenud'un Jstens[les'@aporercomp_e_emem:
cec+pourraitfairesub[rdesdomma_es9 Vustens[leet _ I'appareii.
- NE_A_AiS toucherla tabledecuissonavamca'ellesesoit
comDI6temenlrefroidie.Certa+neszonesue+aladleaecmsson.
par[_cutierementauvoisillagedes616meritsde surface,peuventdeven+r
Ireschaudesdurantunecu+sson+Ut[liserdesmaniques+
pressiQnprovoquantl'6chtementd'un _gcip+entferme.
, NEJAMA[S hisser@ lafeuilled'alumn_um,unesondethermometnque
viandeouunoDjetmCtaltiqueamreqdun ustensitedecaissonsurm
tablede cu+sson,en[reren conmc_avecun 6ldmentchauffant.
, NEJA_A[S rangerau-dessusdelatableae culsso_d'articlesiourdsqu+
riscueralentdetomberetd'endommageris tablede cuisson
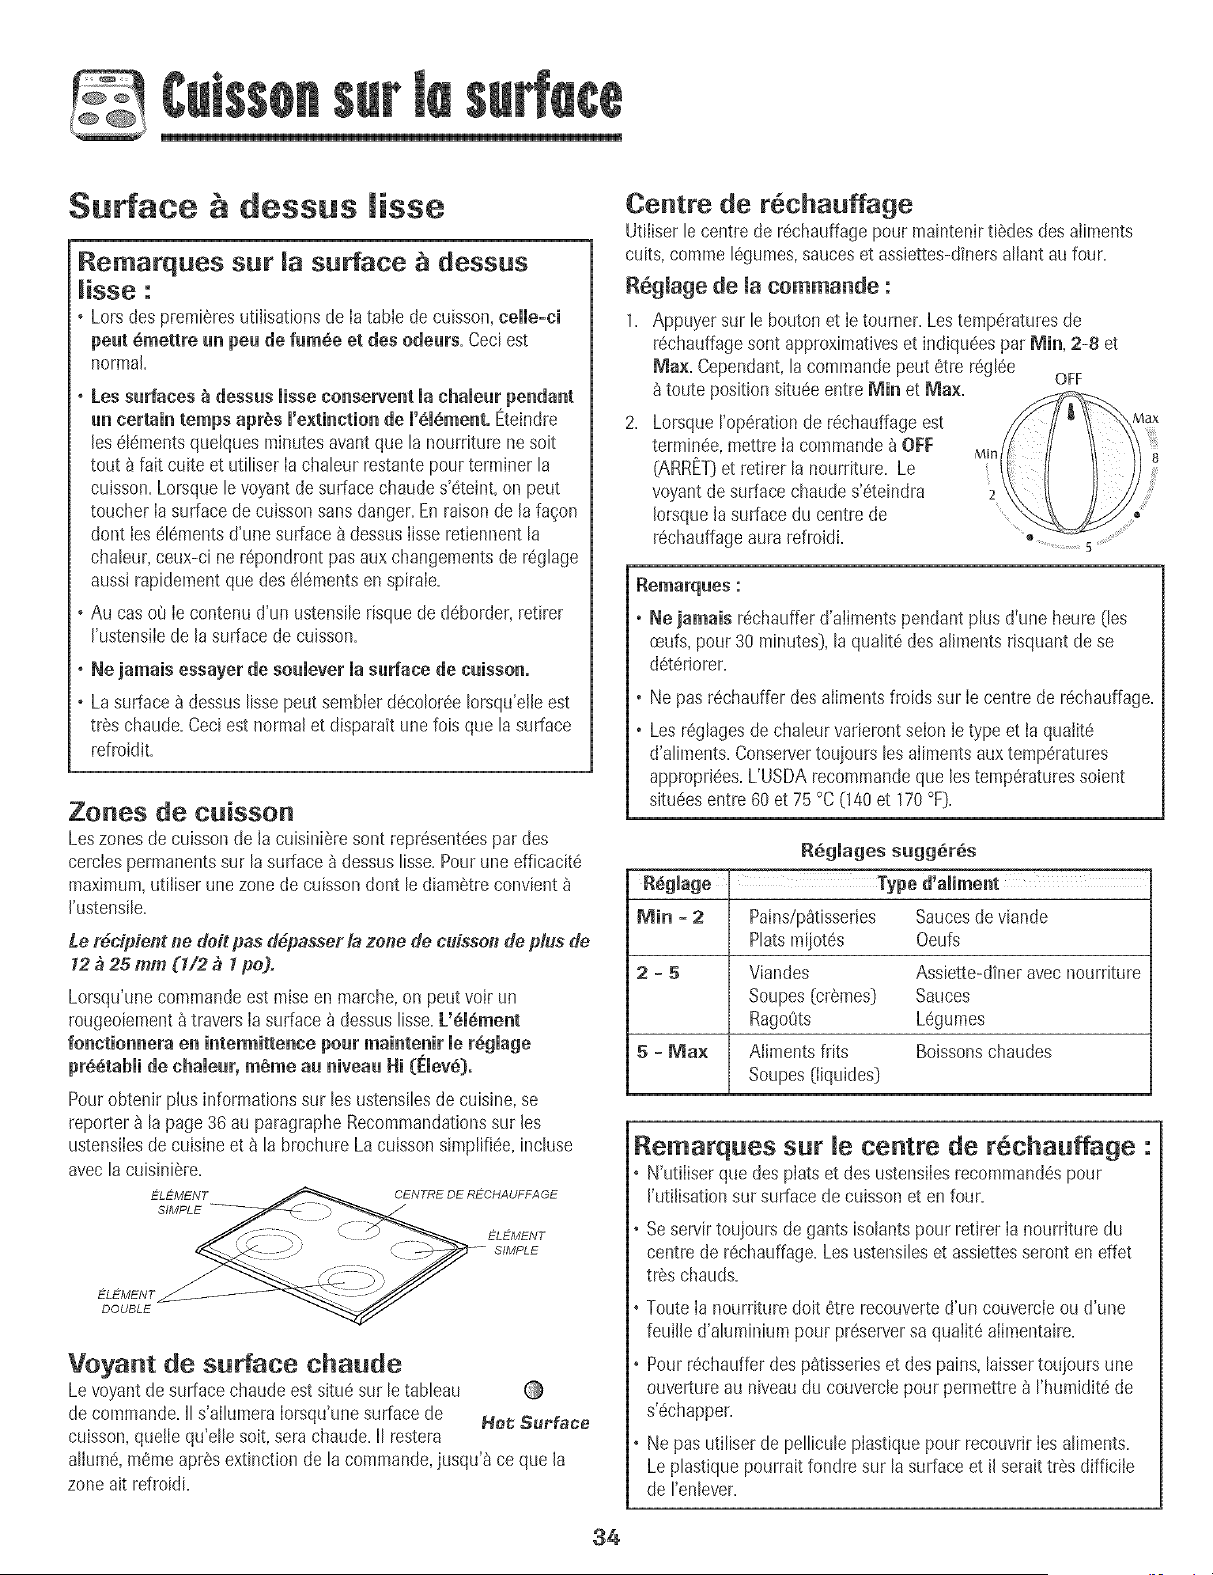
Surface dessus lisse
Remarques sur surface dessus
isse :
, Lors des premieres_Jtilisationsde Ia tabIe de cuisson,celle-ei
peat 6mettre an pea de fum6e et des odears=Ceci est
normal=
. Lossurfaces _ dessus lisseeonsewent la ehaieur pendant
an certain temps apr_s m'e×tinctionde m'_m_ment.Eteindre
les 6t6mentsquetquesminutesavant queta nourriture ne soit
tout b fait cuiteet utiliser Iachaleur restantepour terminerla
cuisson=Lorsque levoyantde surfacechaudes'6teint, on peut
toucher Iasurface de cuissonsans danger.En raisonde lafagon
dont los 616mentsd'une surface b dessusIisseretiennentla
chaleur,ceux-ci ne r6pondrontpas auxchangementsde r6glage
aussirapidementque des 616mentsen spirale=
, Au cas o8 Ie contenud'un ustensilerisquede d6border,retirer
I'ustensiIede lasurface de cuisson=
* Ne jamais essayer de soulever la sudace de caisson.
, La surface_ dessuslissepout sembIerd6color6eIorsqu'elleeat
trSschaude=Ceciest normalet disparaitunefais que la surface
refroidiL
Zones de caisson
Leszones de cuissonde la cuisini_re sont repr6sent6espardes
cercIespermanentssur lasurface _ dessuslisse=Pouruneefficacit6
maximum,utiliser unezonede cuissondont le diam_treconvient
I'ustensile=
Le r6cipient ne dolt pas d6passer & zone de caisson de plus de
12 _ 25 mm (1/2 _ I pe).
Lorsqu'unecommandeest raiseen marche,on peat voir un
rougeoiement_ travers Iasurface b dessuslisse.L'616ment
fonetionnera en intermittence pour maintenir mer6gmage
pr66tabii de chaieur, m6me au niveaa Hi (Emev6)o
Pourobtenir phs informationssur les ustensilesdecuisine,se
reporter _ lapage36 au paragrapheRecommandationssur los
ustensiIesdecuisineet 8 la brochure Lacuissonsimplifi6e,incluse
avecla cuisiniSre=
ELEMENT CENTRE DE RE:CHAUFFAGE
SIMPLE
ELEMENT
SIMPLE
ELEMENT
DOUBLE
Voyant de surface chaude
Levoyantde surfacechaude eatsitu6 sur le tableau
de commande.II s'allumeraIorsqu'unesurfacede He_,Sue'face
cuisson,quetIequ'elle soit, serachaude=II restera
allure6,memoapr6sextinctionde la commande,jusqu'b ceque la
zone ait refroidL
Centre de t6cha ffage
Utiiiserle centrede r6chauffagepour maintenirtildes des aiiments
cuits,comme 16gumes,sauceset assiettes-dinersaliant aufour.
R6giage de la commando :
1= Appuyersur le boutonet Ie tourner=Lestemperaturesde
r_chauffagesont approximativeset indiqu6es )at _i_, 2-8 et
_a×= Cependant,la commandopout 6tre r%16e OFF
toute positionsitu_eentre [_i_ et Ma×=
2= LorsqueI'op6rationde r_chauffageest
terminee,mettreIa commandeb OFF
[ARRET]et retirer la nourriture. Le
voyantde surface chaudes'eteindra
Iorsquela surfacedu centre de
r_chauffageaura refroidi=
Ne jamais rechaufferd'alimentspendant plus d'une heure(les
ceufs,pour30 minutes),laqualit6 des alimentsrisquantde se
d6t_riorer=
, Ne pasr6chauffer desailmentsfroids sur Ie centre de r_chauffa%
,Les r_glagesde chaleur vaderontseIonIe typeet la quaIit_
d'aliments=Conservertouiours les aiimentsauxtemperatures
apprapriees=L'USDArecommandeque los temp6raturessoient
situ6esentre 60 et 75 °C(140et 170°F)=
R6giages sugg6r6s
R6glage Type d'aliment
_i_ - 2 Pains/p_tissedes Saucesdeviande
Platsmiiot_s Oeufs
2 - 5 Viandes Assiette-dineravecnourriture
Soupes(cr_mes) Sauces
RagoUts L_gumes
5 - _ax Aliments flits Boissonschaudes
Soupes{Iiquides}
Remarq es centre de r6cha f ge :
N'utiIiser qua despiats et des ustensiIesrecommand6spour
I'utilisation sur surfacede cuissonet enfour.
Seservirtoujours de gantsisolantspour rotifer ia nourriture du
centrede r6chauffage=Losustensileset assiettesseront eneffet
tr6s chauds=
TouteIa nourrituredoit 6tre recouverted'un couvercieou d'une
feuille d'aluminium pour preserversa quaiit6 aiimentaire=
Pourr6chaufferdes p_tisserieset des pains,laissertouiours une
ouvertureau niveaudu couverclepour permettre_ I'humidit6de
s'6chapper=
Ne pas utiliser de pelliculepiastiquepour recouvriries aliments=
Le phstique pourraitfondre sur la surfaceet il serait trSs difficiie
de I'enlever=
34
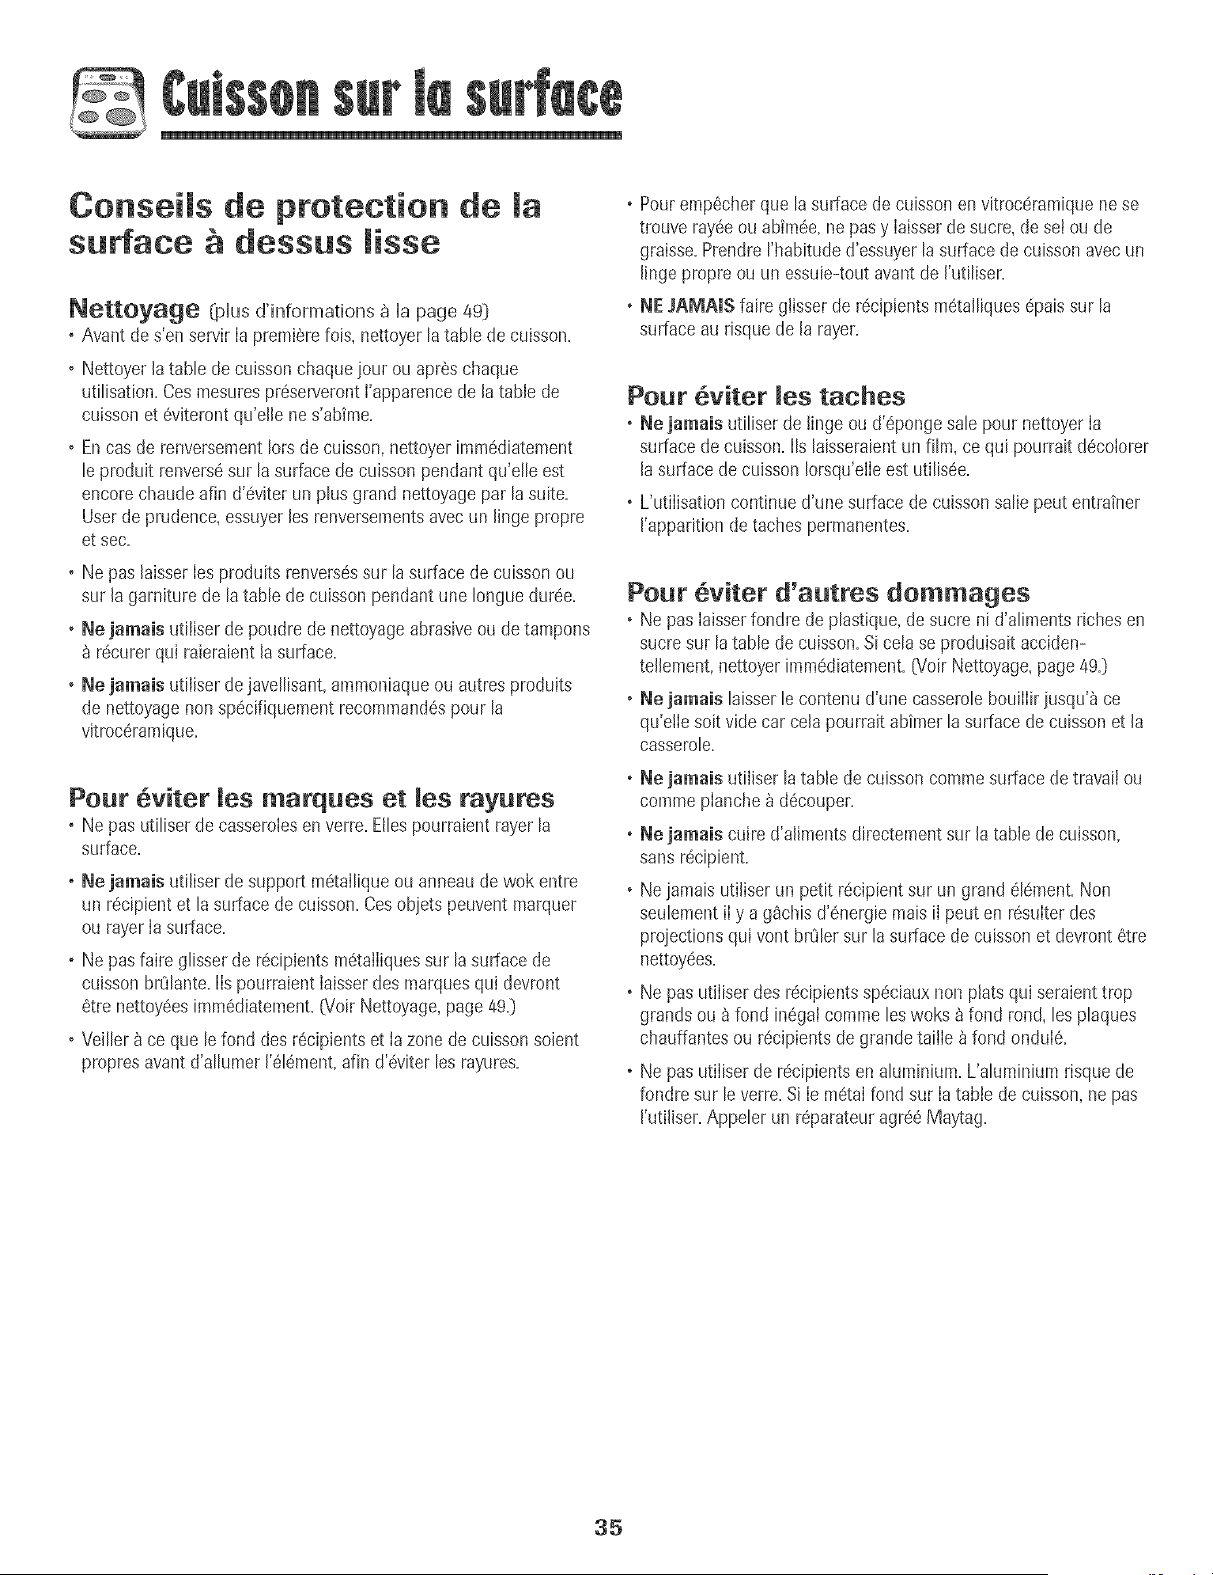
Conseils de protection de la
surface dessus lisse
N@ttoyag@ (plus d'informations _ ia page 49}
, Avant des'en servir[a premi6refois, nettoyer[a table de cuisson.
, Nettoyer [atame de cuissonchaquejour ou apr6schaque
utitisation.Cesmesurespr6serveronti'apparencede [a tamede
cuissonet 6viterontqu'eNenes'abTme.
, Encas de renversementlots de cuisson,nettoyer imm6diatement
te produit renvers6sur ta surfacede cuissonpendant qu'elle est
encorechaudeafin d'6viter un plus grand nettoyagepar la suite.
Userdeprudence,essuyer[es renversementsavec un [inge propre
et sec.
, Ne pas [aisser[esproduits renvers6ssur lasurface decuissonou
sur [a garniture de latable de cuisson pendantune Ionguedur6e.
, Ne jamais utiliser de poudrede nettoyageabrasiveou de tampons
r6curerqui raieraientla surface.
, Ne jamais utiliser dejavellisant,ammoniaqueou autrespraduits
de nettoyagenon sp6cifiquepaentrecommand6spour la
vitroc6ramique.
Pour 6viter tea marques et lea rayures
, Ne pas utiliserde casserolesenverre.Ellespourraientrayer la
surface.
+ Ne jamais utiliser de supportm6talliqueou anneaude wok entre
un recipientet lasurface de cuisson.Cesobjetspeuventmarquer
ou rayerIa surface.
, Ne pasfaire glisserde r6cipientsm6talIiquessur lasurface de
cuissonbKJlante.IIs pourraient Iaisserdes marquesqui devrant
6tre nettoy6esimm6diatement.07airNettoyage,page49.}
, Veillerace que lefond des r6cipientset Ia zone decuissonsoient
propresavant d'allumer1'616ment,afin d'6viter les rayures.
, Pouremp6cher que lasurface decuissonen vitroc6mmiquene se
trouve ray6eou abim6e+nepas y Iaisserdesucre, desetou de
graisse.Prendrerhabitude d'essuyerlasurfacede cuissonavec un
lingepropre ou un essuie-toutavantde I'utiliser.
, NEJRMAIS faire glisserde r6cipients m6talliques6paissur la
surface au risquede la rayer.
Pour 6viter lea taches
, Ne jamaia utiliserde lingo ou d'6pongesale pour nettoyerIa
surface de cuisson.IIs laisseraientunfilm, ce qui pourrait d6colorer
lasurface decuisson Iorsqu'e+Ieest utilis6e.
, UutiIisat+oncontinue d'une surface de cuissonsaliepout entratner
I'apparitionde tachespermanentes.
Pour 6v+ter d'autres dommages
, Ne pas Iaisserfondre de plastique,desucre ni d'alimentsrichesen
sucre sur la table de cuisson.Si cela se produisaitacciden-
tellement,nettoyerimm6diatement.07airNettoyage,page49.}
, Ne jamais hisser le contenud'une casserolebouilIirjusqu'_ ce
qu'elIe soitvide car celapourrait abimer la surfacede cuissonet la
casserale.
, Ne jamaia utiliserla table de cuissoncommesurfacede travail ou
comme pIanche_ d6couper.
, Ne jamais cuire d'alimentsdirectementsur la table de cuisson,
sans recipient.
, Nejamais utiliser un petit r6cipientsur un grand 616ment.Non
seulementiI y a g$chisd'6nergie maisil peut en r6suIterdes
projectionsqui vont brCJlersur lasurface de cuissonet devront6tre
nettoy6es.
, Ne pas utiIiserdes r6cipientssp_ciauxnon plats qui seraienttrap
grands ou _ fond in6gaIcommeles woks _ fond rand, los plaques
chauffantesou r6cipientsde grandetailIe _fond onduI6.
, Ne pas utiIiserde r6cipientsen aluminium.L'aluminium risquede
fandre sur le verre.Si Ie m6taifond sur Iatable decuisson,nepas
I'utiliser.Appelerun r6parateuragr66Maytag.
35
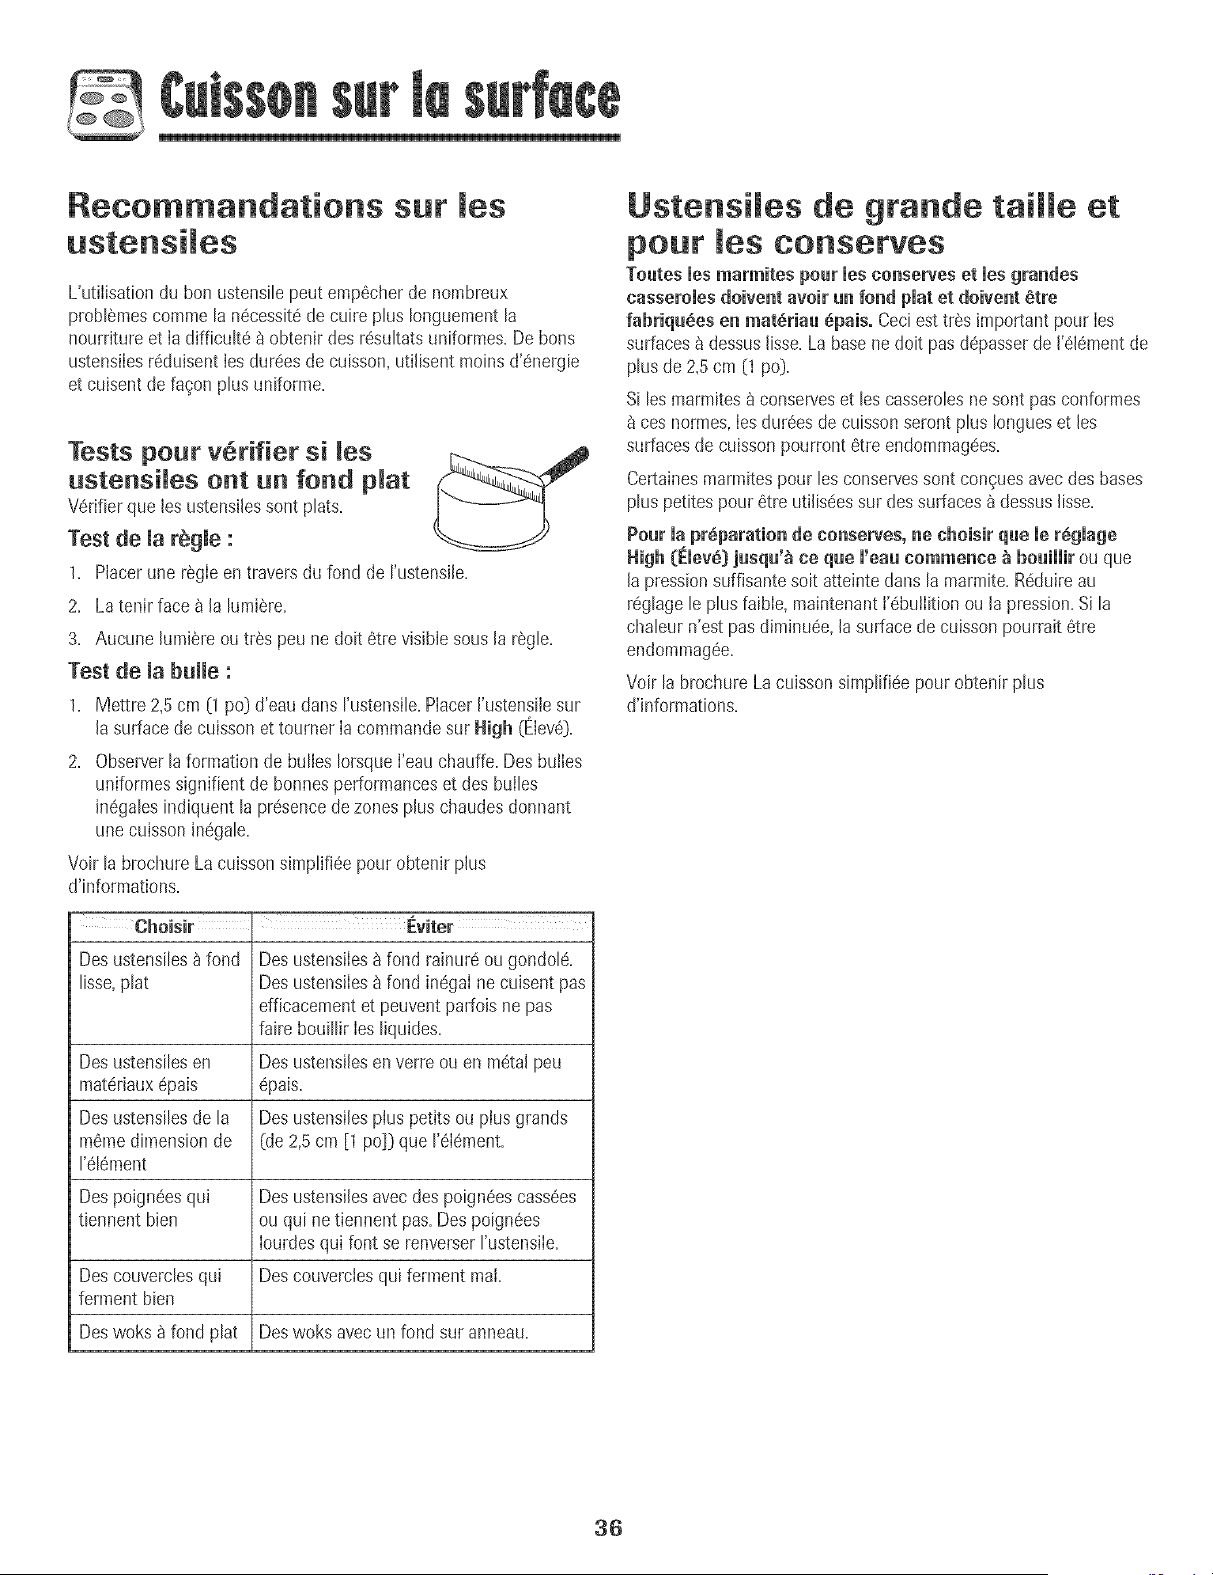
Recommandations sur
L'utilisationdu bon ustensilepeut emp6cher de nombreux
probl6mescommela n6cessit6de cuire plus Ionguementla
nourriture et Iadifficuke _ obtenir des resultatsuniformes.De bons
ustens+Iesr6duisent iesdureesde cuisson,utilisent moinsd'energie
et cuisent de fa_onplus uniforme.
Tests pour v6rifier si _es
ustensHes ont un fond p_at
Verifier que les ustensilessontplats.
Test de maregme:
1. Placerune r_gleen traversdu fond de rustensile.
2. La tenir face _ la lumiSre.
3. Aucune lumiere outrSspeu ne doit etre visible sous la regle.
Test de mabumme:
1. Mettre 2,5cm (1po) d'eau dans rustensile.PlacerI'ustensiiesur
lasurfacede cuisson et tourner Ia commandesur High (Elev6).
2. Observerla formationde bullesIorsqueI'eauchauffe.Desbuiles
uniformessignifient de bonnesperformanceset des builes
inegalesindiquent la presencede zonesplus chaudesdonnant
unecuissoninegale.
Voir la brochureLa cuissonsimplifi6e pour obtenir plus
d'informations.
Eviter
Desustensiles_ fond Desustensiles_ fond rainureou gondole.
lisse,plat Desustens+Ies_ fond inegaIne cuisent pas
efficacementet peuventparfois nepas
faire bouillir Iesliquides.
Desustensilesen Desustensilesenverre ou en metalpeu
materiauxepais epais.
Desustensilesde la Des ustens+lespius petits ou p+usgrands
memedimensionde (de 2,5cm [1 po]) que 1'6Iement.
I'elSment
Despoigneesqui Desustensilesavecdes poigneescass6es
tiennent bien ou qui netiennent pas.Des poignSes
Iourdesqui font se renverserrustens+Ie+
Descouverclesqui Descouverclesqui ferment mai+
ferment bien
Deswoks _ fond plat Des woks avec un fond sur anneau+
Ustensimes de grande tai e et
pour ruesconserves
Toutesruesmarmites peer ruesconserves et ruesgrandes
casseroles doivent avoir un fond plat et doivent _tre
fahriqu_es en mat_riau 6pals. Ceciest tr6s +mportantpour Ies
surfaces_ dessuslisse+Labasene doit pasdepasserde 1'61ementde
plus de 2+5cm {1po}+
Si lesmarmitesa conserveset les casserolesne sont pas conformes
cesnormes.Iesdur6esde cuissonseront plus Iongueset les
surfacesde cuissonpourront etre endommagees+
Certainesmarmitespour les conservessont conguesavecdes bases
plus petites pour 6tre utiliseessur dessurfacesadessuslisse+
Pour la pr6parationde conserves, ne ehoisir que le r_giage
High (Elev_) jusqu'_ ee q_e l'ea_ comme_ce _ be_illir ou que
la pressionsuffisantesoit atteinte clansla marmite+Reduireau
reglagele plus faibIe,maintenanti'ebuiIition ou la pression+Si la
chaleur n'est pasdiminuee,lasurface de cuissonpourrait 8tre
endommag6e.
Voir la brochureLacuisson simplifieepour obtenir plus
d'informations+
36
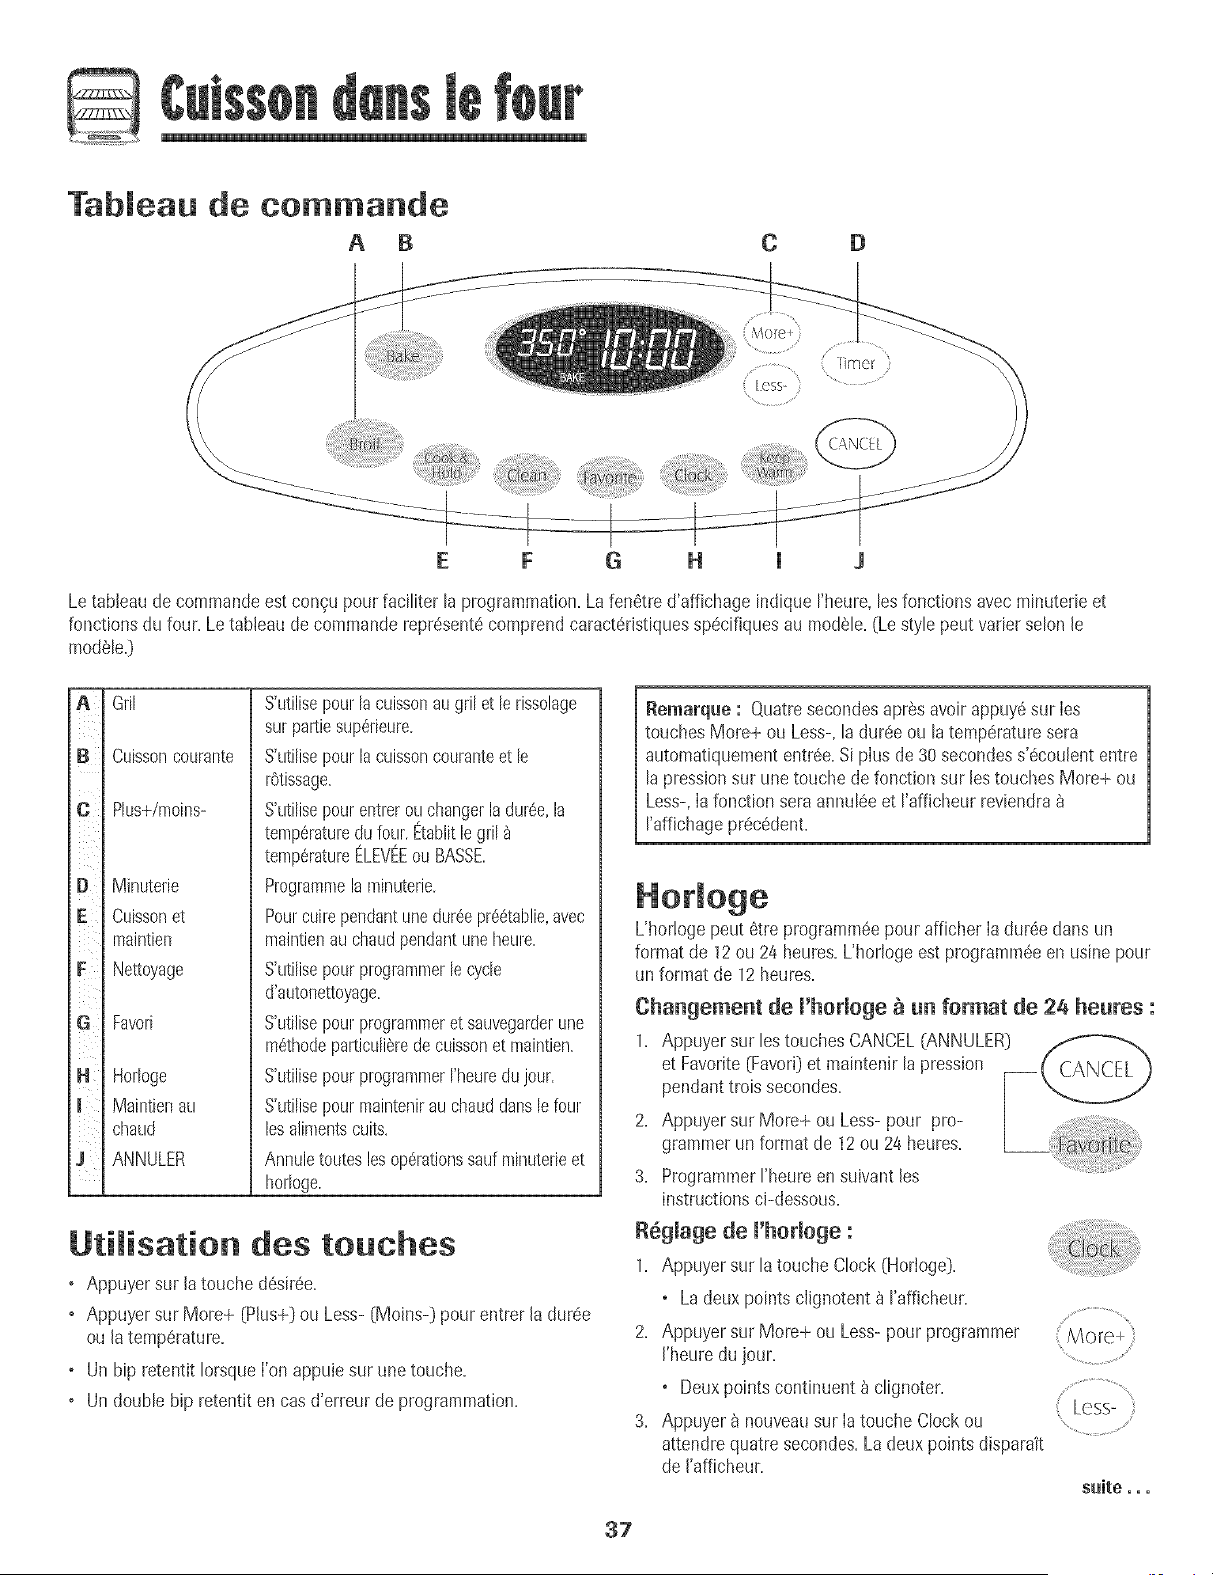
Tableau de commande
A B C 0
E F G H J J
Letableau de commandoest con_upour faciliter laprogrammation+Lafen6tred'affichage indiquerheure, les fonctionsavecminuterieet
fonctionsdu four. Letableau decommandorepr6sent6comprendcaract6ristiquessp6cifiquesau modSle+(Le style peut varierselon le
module.)
B
D
iiii_
Gill
Cuisson courante
Plus+/moins-
Minutefie
Cuisson et
maintien
Nettoyage
Favor+
Horloge
Maintienau
chaud
ANNULER
S'utilisepourla cuissonau gril et le rissolage
sur pattiesup_rieure.
S'utilisepourlacuissoncouranteet le
rOtissage.
S'utilisepourentrerou changerladur6e,la
temp6raturedu four.Etabtitlegril
temp6ratureI_LEVI_EouBASSE.
Programmela minuterie.
Pourcuirependantunedur6epr66tablie,avec
maintienauchaudpendantuneheure.
S'utilisepourprogramrnerlecycle
d'autonettoyage.
S'utilisepourprogrammeret sauvegarderune
m_thodeparticuli_redecuissonet maintien.
S'utilisepourprogrammerI'heuredujOUL
S'utilisepourmaintenirauchauddanslefour
lesalimentscuits.
Annuletouteslosoperationssaufminuterieet
horloge.
tJtilisation des touches
o Appuyersur la touche d6sir6e+
° Appuyersur More+ (Phs+[ ou Less-(Moins-] pourentrer la dur6e
ou latempSrature+
o Un bip retentit IorsqueI'on appuiesur une touche.
o Un double hip retentit en casd'erreur de prograpapaation+
Remarque: Quatresecondesapr_savoir appuy6sur Ies
touches More+ ou Less-,la dur#eou la temp6raturesera
automatiquemententr6e.Si pIusde 30secondess'6coulententre
lapressionsur unetouche defonction sur les touchesMore+ ou
Less-,Ia fonction sera annul6eet I'afficheurreviendra
I'affichagepr#c6dent+
L'hodoge pout 6tre programmeepour afficher Iadur6e dans un
format de 12ou 24 heures.L'horloge estprogramm6een usinepour
un format de 12heures.
Changement de l'horloge _ un format de 24 heures :
1+ Appuyer sur los touchesCANCEL(ANNULER]
et Favorite[Favor+]et maintenirla pression --{' CANCEL )
pendanttrois secondes. \_...._...y/
2+ Appuyer sur More+ ou Less-pour pro-
grammerun format de 12ou 24heures+
3+ ProgrammerI'heureen suivant los
instructionsci-dessous.
Reglage de l'horloge :
1. Appuyer sur la touche Clock(Hodoge).
o Ladeux pointsc%notent _ I'afficheur.
2. Appuyer sur More+ ou Less-pour programmer More+
['heuredu jOUL
+ Deux points continuent _ clignoter.
3. Appuyer _ nouveausur [atouche Clock ou Less-
..............................
attendrequatre secondes.La deuxpoints disparait
de ['afficheuL
suite.,,
37
Lorsqueb courant 6bctrique arriveou apr_s une interruption de
courant,ta derniSreheure avant I'interruptionde courantva
clignoter.
Pourrappebr I'heuredu jour brsqu'une autre fonction de dur@
s'affiche,appuyersur tatouche Clock.
Uheure de I'horlogene peut 6tre chang@ Iorsqueb four a 6t6
programmepour unecuisson ou un nettoyagediff6re ou pour la
fonction de cuissonet maintien.
Annumation de m'afflchage de m'heure:
Si ron ne desire pasI'affbhage de I'heuredu iour :
Appuyersur lostouches CANCEL(ANNULER}
et Clock(Hodoge}et Ies maintenir ainsi
pendanttrois secondes.L'heuredu jour
disparaitde ['afficheur.
LorsqueI'affbhage de I'heureest annule,
appuyersur Ia touche CIock pour afficher
briSvementrheuredu iour.
R6affichage de l'heure :
Appuyersur bs touches CANCELet Clocket les maintenirainsi
pendanttrois secondes.L'heuredu iour reapparatt_ I'afficheur.
La minuterie peut 6tre programm@ de une minute (0:01} jusqu'&
99 heures et 59 minutes (99:59}.
La minuterie pout 6tre utilis@ ind@endamment de toute autre
activite du four. Elle peut 6tre aussi programm@ alors qu'une autre
fonction du four est en cours d'utilisation.
La minuterb necommandepas le four.Elb nesert qu'& @aettredes
bips.
Pregrammation de maminuterie :
1. Appuyer sur la toucheTimer {Minuterie}. :[ Timor
o 0:00clignote _ I'afficheur. .........................................
o Lesdeux points clignotent. .........................................
2. Appuyer sur la toucheMore+ ou Less-jusqu'_ ce ................................
que I'heure]uste paraisse_ I'affbheur.
o Lesdeux points continuent _ clignoter.
3. Appuyer _ nouveausur latouche Timerou
attendrequatre secondes.
o Lesdeux points continuent _ clignoter et le d@omptede la
dur@ commence.
o Laderni_reminutedu d@omptesera affich@ sousforme de
secondes.
4. A la fin de la dur6e programpa@,un hip long retentit.
Annumation de maminuterie :
1. Appuyersur la touche Timer et la maintenirainsi pendant trois
secondes.
OU
2. Appuyersur la toucheTimeret r6glerrheure _ 0:00.
Verroui age des cow.andes
et de maporte du four
La porte du four et Iestouchespeuvent6tre verrouilI@spourdes
raisonsde s@urite, nettoyageou pour emp@hertoute utilisation
non souhait@.ElIesnepourmnt 6tre utilis@s si ellessont
verrouill@s.
Sile four esten cours d'utHisation,bs commandeset la porte ne
peuventetre verrouilI@s.
L'heure actuelIedu iour restera_ I'afficheur Iorsquelescompaandes
serontverrouilI@s.
Verreuimmage:
Appuyersur lestouches CANCELet Cook&
Hoid [Cuissonet maintbn} et ies maintenir
ainsi pendanttrois secondes.(Appuyer
d'abord sur latouche CANCEL.}
o Le mot LOCK{VERROUILLAGE}clignote
I'afficheur.
D6verrouimmage:
Appuyersur lestouches CANCELet Cook& Hold et los maintenir
ainsi pendanttrois secondes.(Appuyerd'abord sur la touche
CANCEL.}
o Le mot LOCKdisparaitde I'afficheur.
Codes d'ano amie
Los rootsBAKE(CUISSONCOURANTE}ou LOCK6iERROUILLAGE}
peuventc%noter rapidementb i'afficheurpour pr6veniren cas
d'erreur ou de probl6me.Si tel est ie cas,appuyersur latouche
CANCEL.Siies rootsBAKEou LOCKcontinuent b c%noter,
d6brancherI'appareil.Attendre quelques minutes,puis rebrancher
I'appareil.Si I'un des rootscontinuea ciignoter,d6brancherI'appareil
et prendrecontactavecun r@arateur autorise.
$8
Cuisson courante
Programmation de macuisson courante :
1. Appuyer sur la to_JcheBake(Cuissoncourante)=
o Lemot BAKE(CUISSONCOURANTE)clignote.
o 000c%note _ rafficheur.
2. %lectionner latemp6raturedu four. Latemp61ature .......................................
f ,
pout etre programm6ede 75 _ 290 °C(170_ 550°F). ( ,More+
Appuyer unelois sur latouche More+ (Plus+)ou ....
Less-(Moins-) ou appuyersur la touche More+ ou
Less-et la maintenirainsi. Less-
o 175° [350°) s'allumeIorsque I'onappuie la ............................
premierefois sur rune destouches.
o Appuyer sur Ia toucheMore+ pour augmenterla temperature.
o Appuyer sur la touche Less-pour diminuer la temperature.
3. Appuyer _ nouveausur latouche Bakeou attendre quatre
secondes.
o Lemot BAKEs'arr6tede clignoteret s'allume_ I'afficheur.
o 38° (100°) ou la temp6raturer6e!ledu four sera affich6e.La
temp6ratureaugmenterapar intervalIede 3 °C (5°F)iusqu'_ ce
que latemperaturepr6programm6esoitatteinte.
4. Laisserle four prechaufferpendant 8 _ 15minutes.
o Lorsquela temp6ratureprogramm6epour le four est atteinte,
un hip long retentit.
o Pourrappeterla temp6ratureprogramm6ependant le
pr6chauffage,appuyersur la touche Bake.
5. Placerlanourriture dans Ie four.
6. V6dfier ravancementde la cuisson_ la dur6eminimalede cuisson.
Cuireplus Iongtempsau besoin.
7, Lorsquelacuissonest termin_e,appuyersur _--_ \
Jatouche CANCEL(ANNULER).
8. RotiferJanourriture du four.
Diff6rences de cuisson entre I'ancien
four et nouveau
II est normalde remarquerquelquesdifferencesdans Iadur6ede
cuissonentre un four neuf et un four ancien=VoirAiustementde la
temp6raturedu four _ la page 43=
Remarques sur Uacuisson courante
au four :
o Pour changer matemp6rature du four pendant mac_isso_,
appuyersur Iatouche Bakeet pius More+ ou Less-jusqu'_ ce
que I'on obtienne latemperaturedesir_e.
o Po_r ¢ha_ger matemperature d_ four morsd_ pr_cha_ffage,
appuyerde_× fois sur latouche Bake,puis sur latouche More+
ou Less-iusqu'_ ceque IatempSraturedSsir_esoit affich_e.
o Si ron oublie d'arr_ter lefour, il s'arreteraautomatiquement
apres 12heures.SiI'on d_sire d_sactivercette fonction, voir
page42.
o Pourdes conseilssupplementairessur la cuisson courante et le
rOtissage,voir la brochure Lacuissonsimplifiee.
C issoB et maiBtieB
Lafonction Cook & Hold (Cuissonet maintien)permetde cuire
pendant uneduroc pr_determinee,suivie par un cycle de maintien
au chaud d'une heure.
Programmatio_ de _a fo_ctio_ c_isso_ et mai_tie_ :
1. Appuyersur la touche Cook & Hold (Cuissonet
maintien).
• LosrootsBAKE[CUISSON}et HOLD{MAINTIEN}clignotent.
• 000 s'ailume a I'afficheur.
2. %tectionner latemp6raturedu four. LatempSrature
pout 6tre programm_ede 75 _ 290 °C(170_ 550°F).
Appuyer unefois sur latouche More+ ou Less- ou
appuyersur la touche More+ ou Less-et la
maintenirainsi, less-
..................................,...
_ Appuyer sur la toucheMore+ pour augmenterla temperature.
• Appuyer sur la touche Less- pour diminuer la temperature.
3. Appuyer _ nouveausur latouche Cook&Hold OU attendre
quatre secondes.
• Le mot HOLDclignote.
• 00:00clignote_ I'afficheur.
4. Entrerladuroc pendant laquelleI'on dSsireque la cuissonait
lieuen appuyantsur los touchesMore+ ou Less-.La dur6e
de cuissonpout 8tre programmeede dix minutes[00:10)
11heures,59minutes [11:59).
• LosrootsBAKEet HOLDs'allument _ rafficheur.
, Ladur_ede cuissons'alhme _ I'afficheur.
• La dur_e de cuissoncommencele compte_ rebours.
39
Lorsquela dur_e de cuissou s'est _coul6e :
o O,uatre bips retentissent.
o Lemot BAKEs'eteint.
o Lesroots HOLDet WARM (CHAUD}s'alhment.
o 75° 070 °} parait _ Fafficheur.
4. Appuyersur More+ pour programmer matemp@ature de
cuisson.
• 00:00et b motHOLDc@notenL
° Lemot BAKErestealJume.
5. Appuyersur More+ pour programmer la dur_e de cuisson.
° Ladur@ d'attente, les rootsDELAY,BAKEet HOLDs'allument
I'afficheur.
AprSs uue heure de MAINTIEN AU CHAUD :
o Lemot End(Fin}s'affiche.
o L'heuredu jour r6apparait_ I'afficheur.
Auuulatiou de la fouctiou cuissou et maiutieu _ tout
momeut :
Appuyersur la touche CANCEL(ANNULER}.Rotifer
la nourrJturedu four.
Cuisson diff r e
Ne pas utHiserh cu[ssondiff@6epourdes denr6estr6s
p@issab!escomme los pro@its laitiers,b pore,la volailleou les
fruits de rner.
AvecIa fonction diVerSe, Ie four se metb cuire plustard dartsIa
journ6e. Programmerla dureed'attented@ir@ avant que le four ne
se mette en marcheet la dur6ede cuisson@sir@. Lefour com-
mence_ chauffer_ I'heuresebctionn@ et cur pour la dur@
sp6cifi6,pub garde la nourritureau chaud pendant une heure.
La dur6ed'attentepeut 6tre programme de 10 minutes(00:10}
11heures,59 minutes (11:59}.
Programmatiou d'uu cycle de cuissou courante
differee :
1. Appuyer sur IestouchesBake (Cubson
coumnte} et Timer (Minute@] en m6me
temps.
o Lemot DELAY(ATTENTE}s'aliume
I'afficheur.
o 00:00parait b ['afficheur.
2. Appuyer sur la toucheMore+ (Plus+} ou Less-
(Moins-} pour programmermadur_e d'attente.
3. Appuyer sur la toucheCook& Hold (Cuissonet
maintien}.
o 000s'allume _ I'affbheur.
More+
less-
o Lesroots BAKEet HOLD(MAINTIEN}clignotent.
Lorsque la duree d'atteute s'est 6coul6e :
• Le mot DELAYs'6teint.
• La dur6e de cuissonet latemp@atureseraaffich@.
• LosrootsBAKEet HOLDsont affich@.
Pour programmer uu temps d'atteute Jorsque Ja
fouctiou euissou et maiutieu a d6j_ _t6 programmee :
1. Appuyersur iestouches Bakeet Timer.
{Appuyerd'abord sur la toucheBake.}
• Le mot DELAY{ATTENTE]et 00:00parait
I'afficheur.
2. Appuyersur Ia toucheMore+ ou Less-
pour programmerla dur6ed'attente.
• Le mot DELAYresteaihm_ pour rappebr ..........................................
qu'un cycle de cuissondiffaraea 6t6 programm6. { More+ '}
Lorsque Ja duroc d'attente s'est
eeoulee et que Je four se met eu
marche : Less-
° Ladur6ede cuissonet latemp#ratureseraaffich#e,
• Le mot DELAYs'6teJnt.
......_@iiiiiii#i!ii!ii!ii!ii!!iiiiiiiiiiiil;i;i;111¸;;.......
--:[ Timer :
• LesrootsBAKEet HOLD reste aJlum#s.
AuuuJatiou : CANCEL
Appuyersur la touche CANCEL{ANNULER}.
• Toutesles fonctionsde cuissonminute et non minut6eseront
annui@s.
• L'heuredu jour r6apparait_ ['afficheur.
Ne pas utiliserla cuissondiff6r6epour des articlesqui
n@essitentqueIe four soit pr@hauff6,commeJesgateaux,
Jespetits biscuitset les pains.
Ne pas utiliserle cycle decuissonet maintbn diff6r@ssile
four est d6jachaud.
4O
Maintien au chaud
Pourmaintenirau cha_Jd(Jarls[e four des alimentscults et cha_ds
ou pour r6chaufferpainset assiettes.
Programmation du maintien au chaud :
1. Appuyersur [atouche KeepWarm [Maintien au
chaud).
• Le mot WARM (CHAUD]ctignote.
• 000 parak _ t'afficheur.
2. %lectionner la temperaturede maintienau chaud.
Celle-cipeut etre regieede 63 _90 °C [145_
190°F].Appuyer une lois sur latouche More+
[Pius+] ou Less- [Moins-) ou appuyersur [atouche i Less-
More+ ou Less- et Ia maintenirainsL
° 75° [170°] s'allume [orsque['onappuie [a
premierefois sur ['une destouches.
° Appuyersur la touche More+ pour augmenter la temperature.
• Appuyersur latouche Less-pour diminuer la temperature.
Le motWARM (CHAUD]et latemperatureseront affiches
pendantque la fonction maintienauchaud est active.
AnnumatiOn dn maintien an chand :
1, Appuyersur latouche CANCEL[ANNULER),
2, Retirerla nourriture du four,
Remarques sur Uafonction maintien au
chaud :
o Pourobtenir desqua[itesalimentaireset nutdtivesoptimales,
les alimentscuits au four nedoivent pas etre gardesau chaud
plus de 1 _2 heures.
o Pouremp6cher[esalimentsde dessecher,les recouvrirde
papieraluminium,sansserrer, ou d'un couvercle.
o Pour r6chauffer des petits pains :
- recouvrir[espetits painsde papier aluminium sans serreret
les placerau four.
- appuyersur les touchesKeepWarm et More+ pour
programmer75°C [170 °F].
- rechaufferpendant 12 _ 15minutes.
o Pour r6chauffer des assiettes :
- placerdeux piles de quatreassiettesmaximumdarts [efour,
- appuyersur les touchesKeepWarm et More+ pour
programmer75°C [170 °F].
- rechaufferpendant 5 minutes,arr6ter le four et laisser[es
assiettesaufour pendant encore 15minutes.
- n'utiliser que desassiettespouvantal[er aufour, _ verifier
avec[efabricant.
- nepas poser desassiettestiedessur unesurfacefroide, les
changementsrapidesde temperaturepouvantcasser
I'assietteou [afendiiier.
41
Arr t autornatique/Mode
Lefour s'arr6teautomatiquementapres 12 heuress'il a 6te
accidentelIementIaissden mar@e.Cettecaract6ristiquede s@urit6
peut 6tre arr6t@.
Pour annuler l'arr_t 12 heures et faire fonctionner me
four en continu pendant 72 heures :
1. Programmerb four pour une cuissoncourante[voir page 39}.
2. Appuyer sur la toucheClock [Horloge)et la
maintenirainsipendant cinq secondes.
o SAbsera affich6 et clignoterapendant cinq secondes.
o SAbsera ensuiteaffich6 en continujusqu'_ ce qu'on rarr6te ou
jusqu'_ ce que la dur@ limitede 72heuressoit atteinte.
o Lemot BAKE(CUBSONCOURANTE}sera aussiaffich6si un
cyclede cuissoncourante est en cours alors que lefour est en
modesabbat.
Toutes lesautres fonctions (Minutede,Maintien au chaud, Nettoyage,
etc.}sont verrouill6es,sauf BAKE,pendantle mode sabbat.
Annulation de la cuisson courante alors que le four
est en mode sabbat :
Appuyersur CANCEL(ANNULER).
o Lemot BAKEs'6teint_ raffbheur.
o Aucun hip sonorene retentit.
mode abbat:
1. Appuyer sur la toucheClock pendantcinq secondes.
OU
2. Apr6s 72 heures, le mode sabbat se termine.
o SAb clignote pendant cinq secondes.
o L'heure du iour revient _ I'afficheur.
Remarques sur Uemode sabbat :
• Le modesabbatpeut 6tre mis en marche_ tout moment,que
lefour soit en marcheou non.
• Le modesabbatne peut pas 6tre mis en marche si les
commandessontverrouill@sou Iaporte verrouill6e.
• Si Ie four est en mode cuissonIorsqueIe modesabbatest
programm6,Ie mot BAKE(CUISSONCOURANTE}s'6teint _ la
fin du cycle decuisson.IIn'y auraaucun signal sonoreaudible.
° S[I'6clairagedu four est souhait6 pendantIe modesabbat,la
lampedewa 6treallumQeavantquele mode sabbatne d6bute.
° Lorsquele modesabbata d@aarr6,aucun bip de pr@hauffage
ne retentit.
• Tous bs messageset les bipssont d@activ@Iorsquele mode
sabbatest actif.
• Le verrouillageautomatiquede la porte nefonctionne pas
pendant le modesabbat.
° SiI'on @pub sur la touche CANCEL,un cycle de cuisson
couranteaufour seraannul6. Cependant,le programmateur
resteraen modesabbat.
• Apr@ unepannede courant,le four revienten modesabbat
avec72 heuresrestanteset aucuncycle actiE
Changement de la
temperature °F/°C
1. Ler6gIageparddaut de I'usinepour la temperatureest en
Fahrenheit.
2. Pour modifier ce r6glage,appuyersur lestouches CANCELet
Bakesimultan@aentet maintener-lesenfonc@spendanttrois
secondes.
3. Un bip retentit et le r@gIagecourant (°Fou °C)parait _ rafficheur.
{Sivous nefaites pas de changement,la cuisini6re retourneau
reglageexistantapr6s30 secondes.}
4. Pour modifier le r6glage,appuyersur Iatouch6 More+ ou Less-.
Appuyer _ nouveausur latouche pour retournerau reglage
existant.Attender cinq secondeset le r6gIagesera6ffectu_.
42
A uste ent de temperature
du four
La precisiondes temperaturesdu four a 6te soigneusementverifiee
rusine. IIest normalde remarquerqueIquesdifferencesdartsIa
cuissonentre un four neuf et un four ancien.Au fur et _ mesureque
les cuisinieressont moinsneuves,Ia temperaturedu four peut varier.
lI estpossibled'aiusterla temperaturedu four si I'on penseque le
four necuit pasou ne rissoIepas correctement.Pour deciderde
raiustement_ apporter,reglerIefour _ tree temperaturede 15 °C
[25 °F[}plus eleveeou plus basseque Ia temperatureindiqueeclans
la recette,puisfaire cuire la preparation.Les resultatsdu _<test >7de
cuissondoivent donner une idee du nombrede degresduquet la
temperaturedoit 6tre ajustee.
Ajustement de matemperature du feur :
1. Appuyer sur Ia touche Bake(Cuissoncourante).
2. Entrer285°C(550°F)en appuyantsur latouche
More+ [Plus+i}.
3. Appuyer sur Ia touche Bakeet la maintenirainsi
pendantphsieurs secondesoujusqu'_ ce que 0° '.............................
paraisse_ I'afficheur.
Si Ia temperaturedu four a ete precedemmentajustee,Ie
changementseraaffiche. Parexemple,si latemperaturedu four
a ete reduitede 8 °C 05 °F},I'afficheurindiquera-8° (-15°}.
4. Appuyer sur Ia toucheMore+ (Plus+}ou Less- (Moins-} pour
ajusterlatemperature.
A chaquefois que Fonappuie sur une touche, la temperature
changede 3 °C(5 °F}.Latemperaturedu four peut 6tre
augmenteeou diminuee de3 _ 20 °C(5 _ 35 °F}.
5. L'heuredu jour reapparakautomatiquement_ I'afficheur.
II n'est pas necessairede reajusterla temperaturedu four en cas
depanneou d'interruption de courant.Lestemperaturesde
cuissonau gril et de nettoyagene peuvent6tre ajustees.
Latouche Favorite(favori}permetde sauvegarderIa duree et la
temperatured'une fonction de cuissonet maintien.
Pourprogrammerun cycle Favori,une fonction de cuissonet
maintiendolt 6tre activeou tout juste programmee.
Pregrammatien d'un nouveau cycme faveri ou
sauvegarde d'un cyde en tours de cuissen et
maintien cemme faveri :
1. Programmerun cyclede cuissonet maintiencommeilest decr[t
lasection Cuissonet maintien_ la page39.
2. Appuyerstir Ia toucheFavoriteet la maintenir
ainsi pendanttrois secondes.
• Le cyclecuisson et maintien nouvellementprogrammeouen
cours defonctionnementserasauvegard6.
• Un hip sonoreretentit pour indiquer que lescommandesont
accept6 le reglagefavori.
D6marrage d'un cycle pregramm6 darts favori :
1. Appuyersur Ia touche Favorite.
° Ladureeet latempQraturedu cycleprogramme
de cuissonet maintien seront affichees {si aucun
cycle de cuissonet maintienn'a 6te programme,
<_none >7sera affiche}.
2. Appuyerstir Ia toucheBake.
° Lecyclefavori commenceimmediatement.
° Lemot BAKE[CUISSONCOURANTE}s'allume _ I'afficheur.
° Ladureede cuissons'alhme a I'afficheur.
Lersque la duree de cuissen s'est 6coulee :
• Le mot BAKEs'eteint.
• LesrootsHOLD[MAINTIEN}et WARM (CHAUD}s'alhment.
• 75° [W0°} parait _ I'afficheur.
Annu_atio_ d'_ cyde faveri e_ coors :
1. Appuyersur Ia touche CANCEL(ANNULER_.
• Le cyclefavorisauvegard6nesera pas affecte.
2. Retirerla nourriture du four.
43
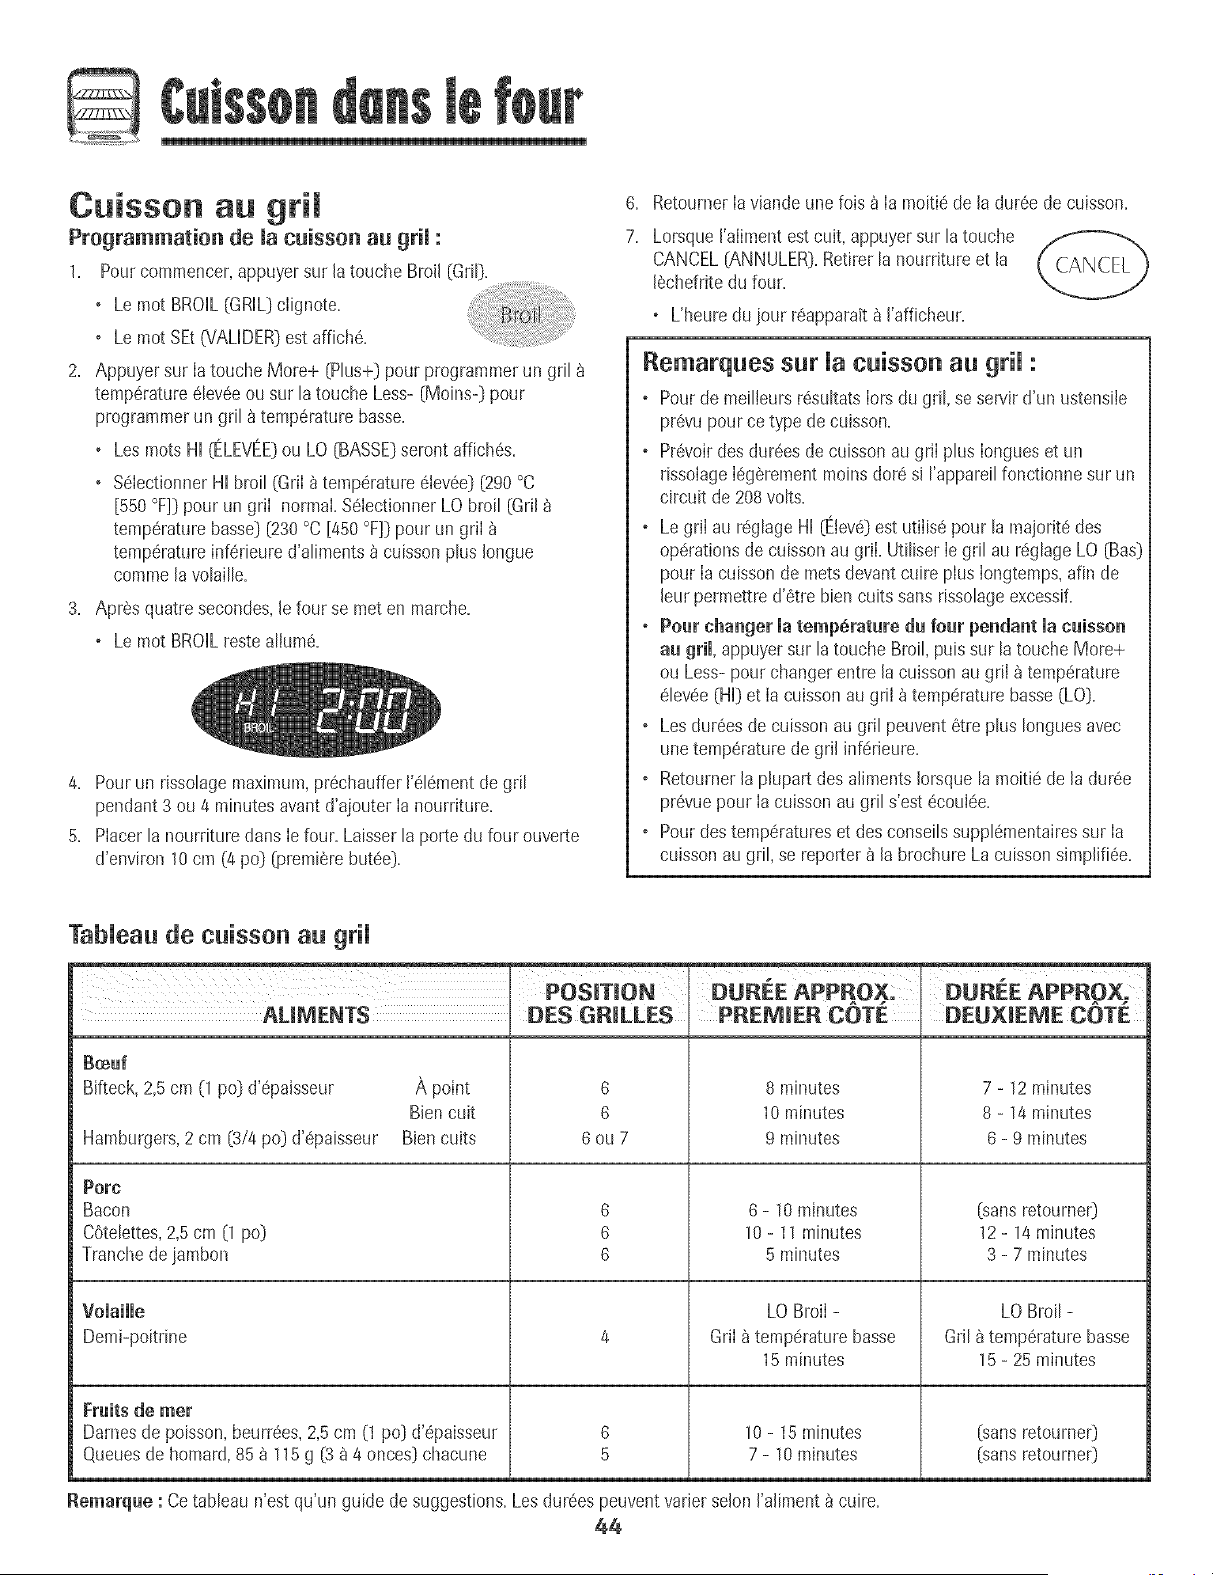
Cuisson au gril
Programmation de la cuisson au gril :
1= Pourcommencer,appuyersur la touche Broil (Grill.
o Lemot BROIL(GRIL)clignote+
o Lemot SEt0/'AUDER)est affich6+
2= Appuyer sur Ia toucheMore+ [Plus+)pour programmerun gril
temp6rature61ev6eou sur latouche Less- (Moins-) pour
prograpapaerun gril 8 temp6raturebasse+
o Lesroots HI [['-[LEVEE)ou LO (BASSE]seront affich6s+
o %Iectionner HI broil (GriI_ temp6rature61ev6e)[290°C
[550 °F]]pour un griI normal %IectJonnerLO broil [Gril
temp6raturebasse) [230°C [450 °F]]pour un griI
temp6ratureinf_rieure d'aliments_ cuissonplus Iongue
commela volaille+
3= AprSsquatre secondes,le four se meten marche+
o Lemot BROILrestealIum6+
4+ Pourun risso[agemaximum,pr6chaufferl'6[6mentde gri[
pendant3 ou 4 minutesavant d'ajouter la nourriture+
5+ Placerla nourriture darts le four. Laisser la porte du four ouverte
d'environ 10cm [4 po] [premierebut6e]+
6. RetournerIaviande une foisa Ia moiti6de la dur6ede cuisson.
7. LorsqueJ'alimentestcuit, appuyersur la touche
CANCEL[ANNULER].Retirerla nourrJtureet la
JSchefritedufour.
o L'heure dujour r6apparait_ ['afficheur.
Remarques sur Uacuisson au grH :
o Pourlie meilIeursr6sultatsIorsdu gril, se servird'un ustensile
pr6vupour ce type de cuisson.
o Pr6voirdes dur@esde cuissonau gril plus longueset un
rissolagel@gerementmoinsdot6 sJI'appareilfonct[onnesur un
circuit de 208volts.
o Legril au r6glageHI [EJev_)est utiiis@pour [a majorit@des
op6rationsde cuissonau griL Utiliser legril au r6glageLO (Bas]
pour la cuissonde metsdevant cuire plus longtemps,afin de
[eur permettred'6tre biencuits sans rissolageexcessiE
+ Poet changer la temperature du four pendant la caisson
au grim,appuyersur la touche Broil, puissur la toucheMore+
ou Less-pour changerentre Jacuissonau gril _ temp6rature
elevee(HI] et Iacuisson au gril _ temperaturebasse(LO]+
o LesdurSesde cuissonau gril peuvent8tre plus Ionguesavec
unetempSraturede griJinf6rJeure+
o RetournerJaphpart des aJh_aentsJorsquelamoiti6 de la durSe
prSvuepour Ia cuissonaugril s'est6couI6e+
o Pourdes tempe,,ratureset des conseilssupplSmentairessur Ia
cuissonau gril, se reporter_ Jabrochure La cuissonsh_aplJfiSe+
TabUeau de cuisson au grH
I POSMON' DUREEAPPROX; DU_EEAPP_OX,
AU_ENTS DES GRILLES
B_a{
Bifteck, 2,5 cm (1 po] d'6paisseur
Hamburgers,2 cm (3/4 po] d'_paisseur
A point
Bien cuit
Bien cuits
G
6
8ou7
8 minutes
10 minutes
9 minutes
7 - 12 minutes
8 - 14 minutes
6 - 9 minutes
Po_c
Bacon
COtelettes,2,5cm 0 po}
Tranchedejambon
vomaimme
Demi-poitrine
Fraits de met
Darnesde poisson,beurrSes,2,5 cm [1 po] d'epaisseur
Queuesde homard,85_ 115g [3 _ 4 onces] chacune
G
8
G
G
5
6 - 10 minutes
10 - 11 minutes
5 minutes
LOBroiI -
GriI_ temperaturebasse
15minutes
10 - 15 minutes
7 - 10 minutes
[sans retoume0
12 - 14 minutes
3 - 7 minutes
LO Broil -
Gril _ tempSrature basse
15 - 25 minutes
[sans retoume0
[sans retoume0
Remarqae : Cetableau n'est qu'un guidede suggestions+LesdurSespeuventvaHerseJon['aJiment_ cuire+
44
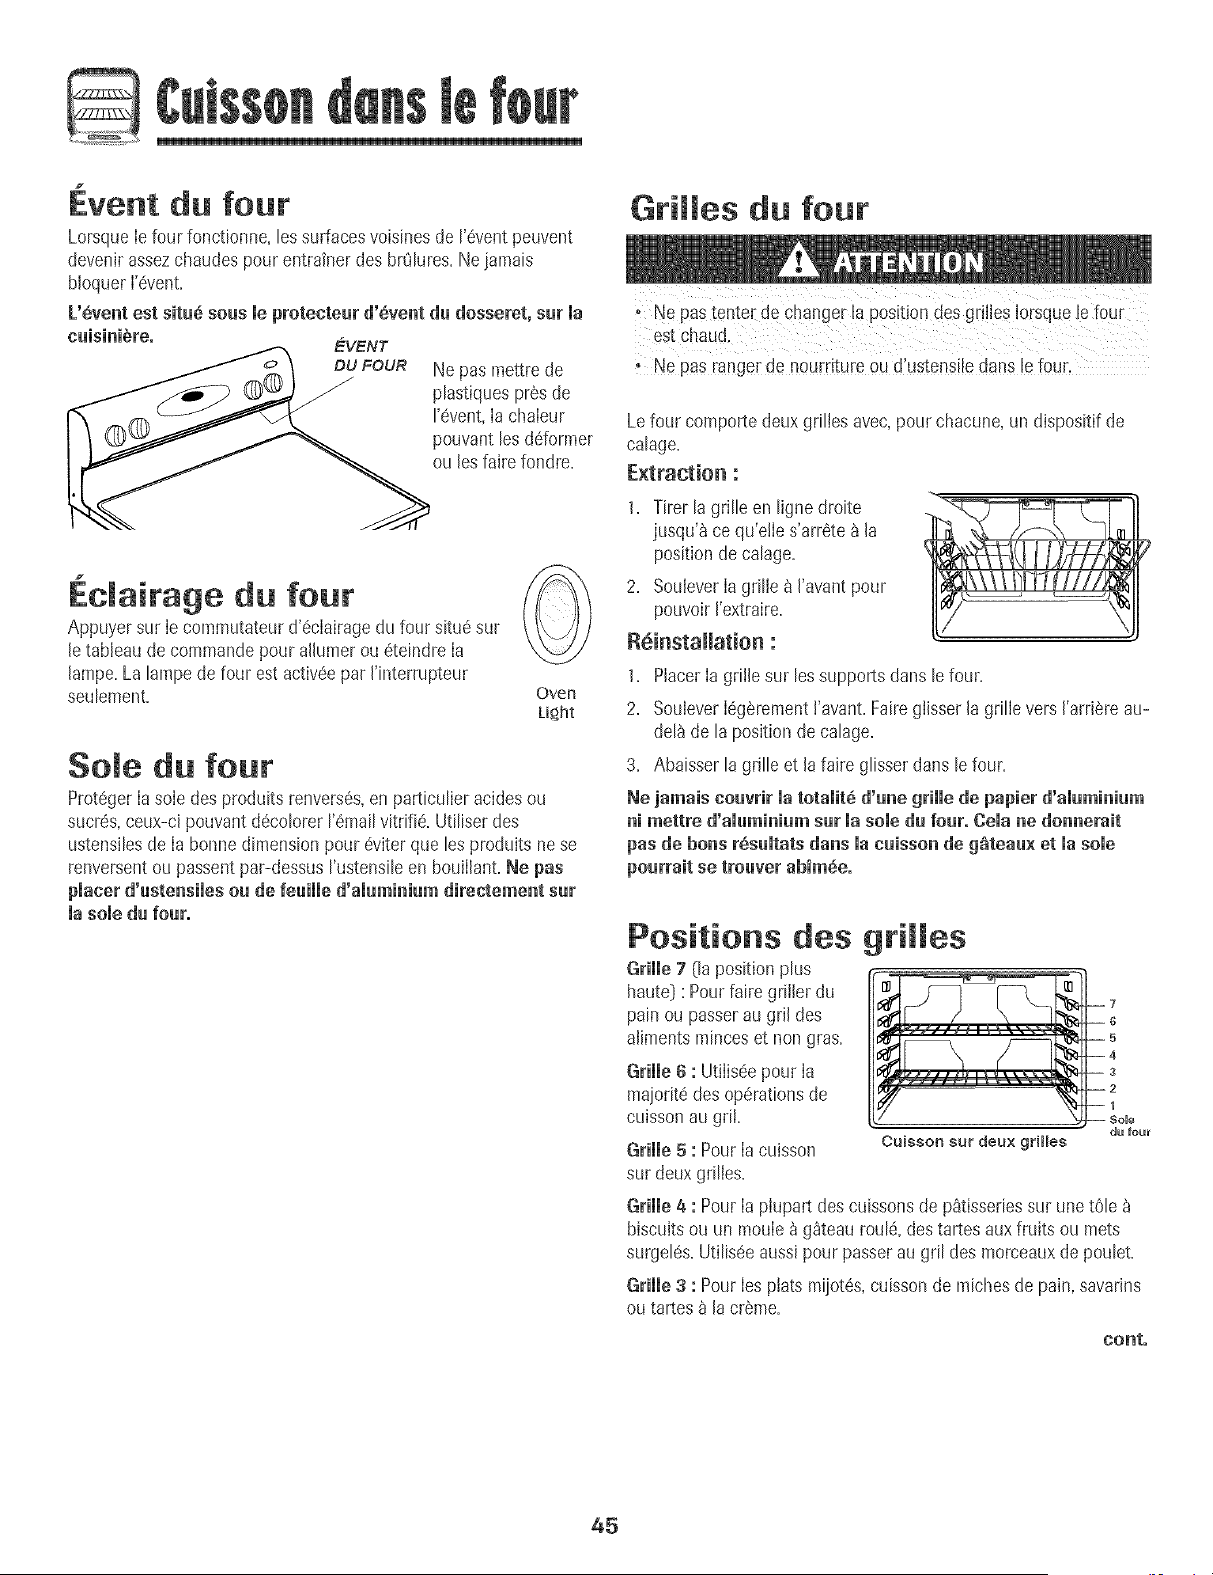
1
Event du four
Lorsquele four fonctionne,lessurfacesvoisinesde 1'6ventpeuvent
devenir assezchaudespour entrainerdes brQlures.Neiamais
bloquerl'6vent.
L'_vent est sita_ seas meprotectear d'_vent da dosseret, sat ma
EVENT
DU FOUR
J
euisinibre.
Ne pas mettre de
phstiques prosde
I'6vent,[a chaieur
pouvantles ddormer
ou les faire fondre=
Edairage da fear
Appuyer sur [e commutateurd'_ciairagedu four situ6sur
letableau de commandopour alhmer ou 6teindre[a
lampe.La lampede four estactiv6epar I'interrupteur
seuIement.
Over_
Light
Sole da fear
Prot6ger[a soie des produitsrenvers6s,en particuIier acidesou
sucr6s,ceux-ci pouvantd6coIorerI'6mailvitri% Utiliserdes
ustensiIesde [a bonnedimension pour 6viter que les produits nese
renversentou passentpar-dessusI'ustensiIeen bouiilant.Ne pas
placer d'ustensiles oa de feuiiie d'alaminiam direetement sur
ia sole du four.
Grilles da four
Ne Pasranger de nourdtureou d'ustens[!edans [efour,
Lefour comporte deuxgrilIes avec,pour chacune,un dispositifde
ca[age.
Extraction :
1. Tirer la grille en lignedroite
jusqu'_ ce qu'elies'arr6te &[a
positiondecalage=
2= Souiever[agrille & ['avantpour
pouvoir['extraire.
R6insta[[ation :
1= Placer[a grille sur [essupportsdans [e four.
2= Souiever[6g6rementI'avant=Fairegiisser [a griIievers ['arriereau-
de[_ de [a positionde caIage.
3= Abaisser [agrille et la faire gIisserdarts [efour.
Ne jamais coavrir matotalit6 d'une grimmede papier d'amaminiam
ni mettre d'amuminiamsur masomeda fear. Comane donnerait
pas de boris rSsumtatsdarts macaisson de g_teau× et masome
Positions des grilles
Grille 7 ([aposition plus
haute) : Pourfaire grii[er du
pain ou passerau grimdes
alimentsminceset non gras.
Grille 6 : Utiiis6epour [a
maiorit6des operationsde
cuissonau griL
Grille 5 : Pour[a cuisson
sur deux griIies=
Caisson sur deux grit[es
Grimme& : Pour [a piupart des cuissonsde p_tisseriessur unetO[eb
biscuitsou un mouie_ g_teaurou[_, destartes aux fruits ou mets
surge[es=UtiIis_eaussi pour passerau gri[ des morceauxde pouIet=
du [out
Grimme3 : Pourlos piats miiotSs,cuissonde michesde pain,savarins
ou tartes _ [acrSme=
co,to
45
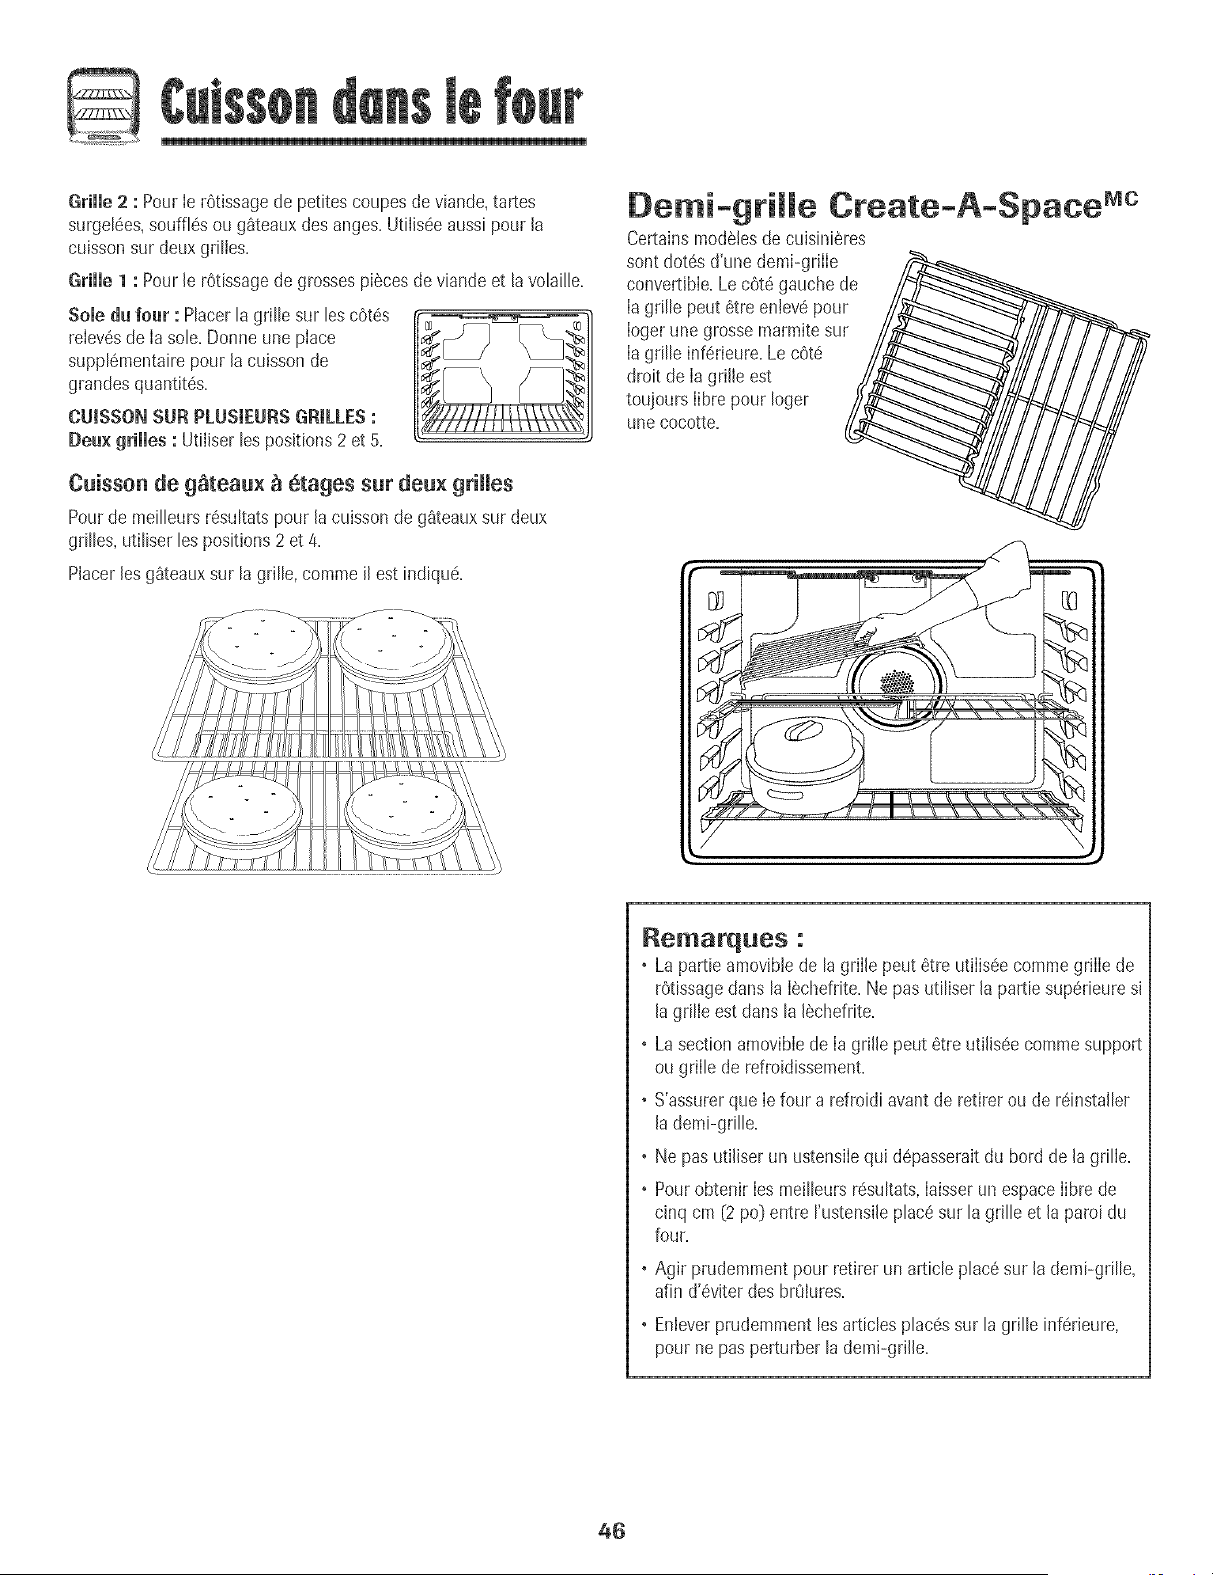
Grille 2 : PourIe rbtissagede petites coupesde viande,tares
surgel6es,souffi6s ou gQteauxdes anges.Utilis6eaussipour la
cuissonsur deux grilles.
Grille 1 : Pour[e rOtissagede grossespi_cesde viandeet [a volallle.
Sole du four : Placerla grille sur loscOt6s
relev6sde [asole. Donne une piace
suppt6mentairepour [acuisson de
grandesquantit6s.
CUISSONSUR PLUS[EURSGRILLES:
Deu× grilles : Ut[liserlospositions2 et 5.
[L JJ
Cuisson de g_teau× _ etages sur deux grilles
Pourde mei[[eursr6su[tatspour [acuissonde g_teaux sur deux
grittes,utitiser[es positions2 et 4.
Placer[esgQteauxsur la grille, commei[ estindiqu6.
De.l-grille
Certainsmod6[esdecuis[n[eres
sontdot6s d'une dotal-grille/,_
convertible.Lec6t6 gauchede_.._
la grille peut 6tre enlev6pour
logel une grossemarmitesur
la grille inf_rieure.Le c6t6
droit de lagrille est
toujourslibre pour Ioger
une cocotte.
%
Create-A-Space Mc
//
Remarques :
• La partie amov[biede [a grii[e pout 6tre ut[iis_ecommegriiie de
rOtissagedans la I6chefrlte.Ne pas utiliser la pattie sup6rieuresi
la grille estdans la 16chefrite.
• Lasection amoviblede Ia grille peut 6tre utills6e commesupport
ou grille de refroidissepaent.
• S'assurerque le four a refroidiavant de retirer ou de reinstaller
la demi-grille,
• Ne pas utiliser un ustensiiequi d6passeraitdu bord de [agrille.
• Pourobtenir [esmeilleursr6sultats,[aisserunespace[ibrede
cinq cm (2 po}entre rustensi[eplace sur la grille et la paroi du
four.
• Agir prudemmentpour retirer un article plac6sur [a demi-gri[[e,
afin d'6viterdes brOlures.
• Enleverprudemmentles articlesplac6ssur la grille inf6rieure,
pour ne pasperturber la deml-grille.
46
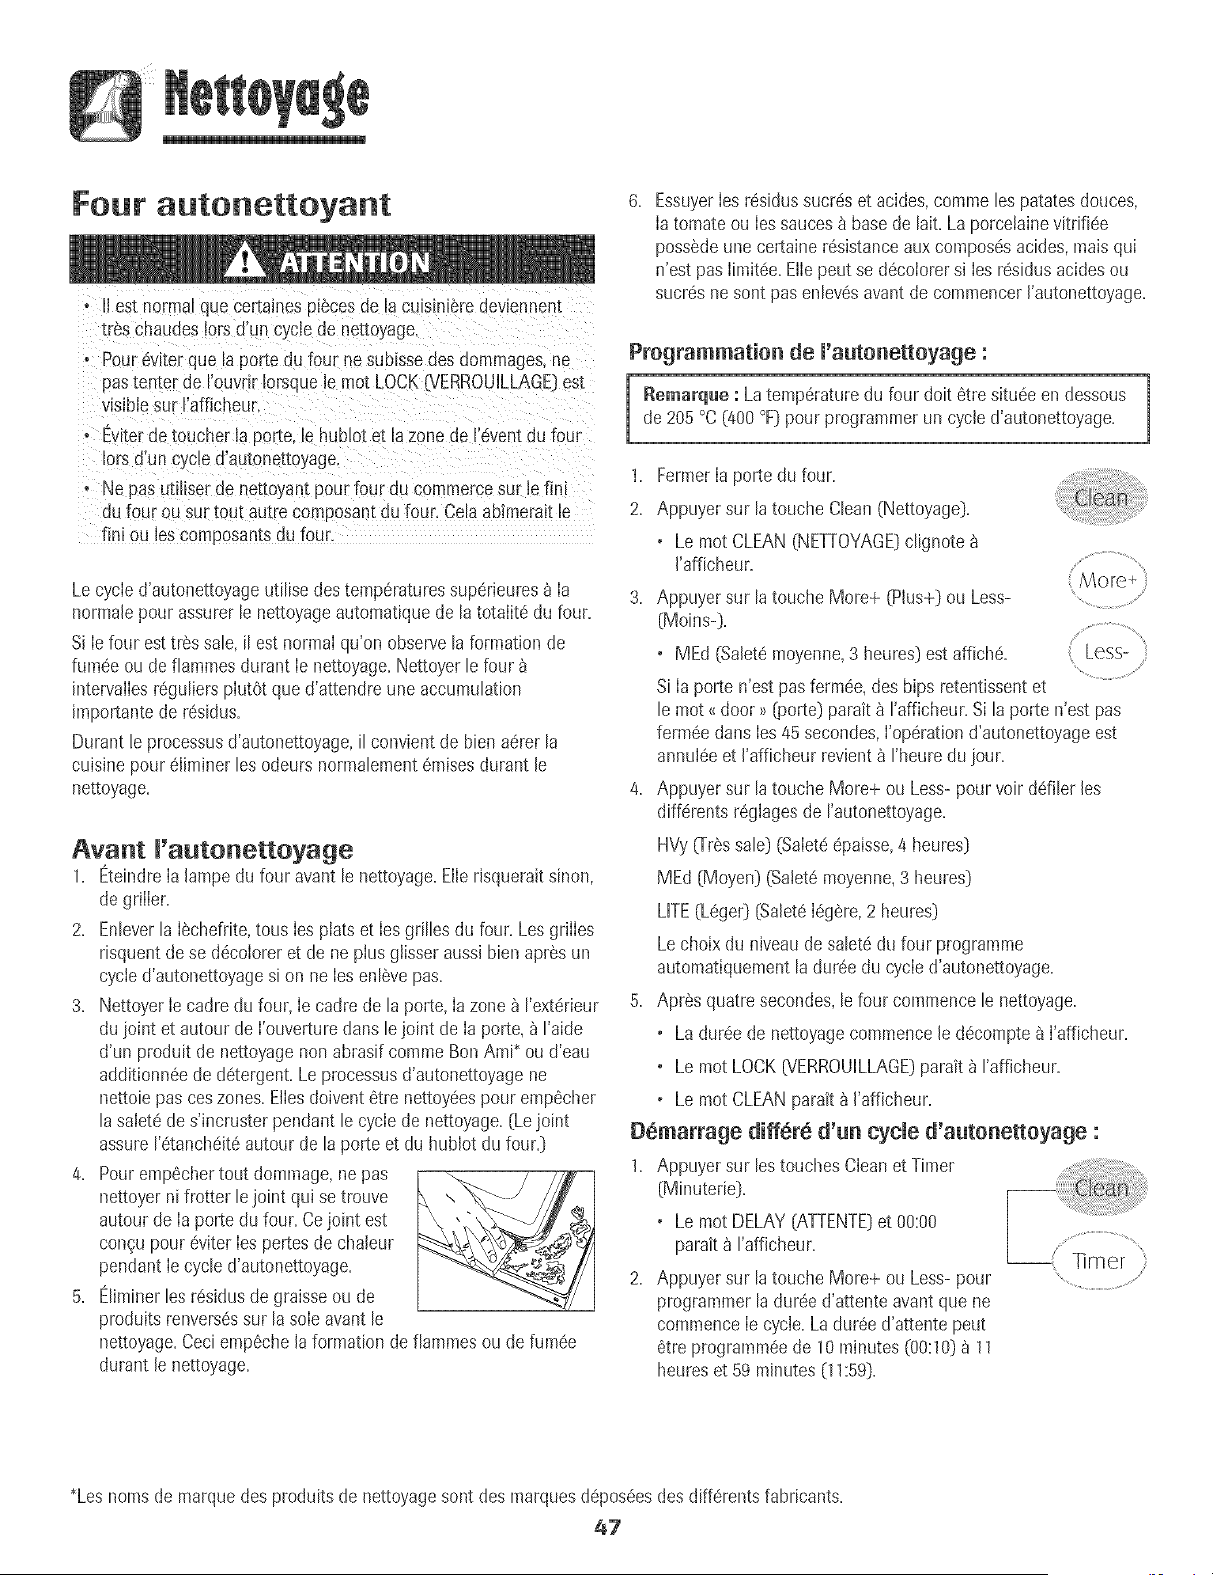
Four autonettoyant
, II est normal que certanes pieces de la cuisinieredevbnnent
tres chaudeslots d'un cyclede nettoyage.
, Pour 6viter que la porte du four ne subissedes dommages _e
pas[en[er de rouvrir brsque ie mot LOCK(VERROUULLAGE}est
visiblesur rafficheur
, Eviterde toucher la porte, le hub!ot et la zonede revent du four
Eorsd'un cycled'autonettoyage,
• Ne pas ut_itserde ne[[oyan[ pour [our du commercesur lefire
du four ou sur tou[ au[re composantdu four. Celaab_meraitle
fini ou les composan-[sdu foul
Lecycle d'autonettoyageutilisedes temperaturessup_rieuresa Ia
normalepour assurerle nettoyageautomatiquede la totalit6 du foun
SiIe four esttressale,il estnormai qu'on observelaformatimsde
rum@ ou deflammesdurant Ie nettoyage.Nettoyerle four
intervalbs reguliers piutOtque d'attendre une accumulation
importantede r@idus.
Durant b processusd'autonettoyage,il convient de bien aerer la
cuisinepoureliminer lesodeurs normalement6raisesdurant le
nettoyage.
Avant I'autonettoyage
1. EteindreIa lampedu four avant le nettoyage.Eile risqueraitsinon,
de griIIen
2. EnleverlaIechefrite,tous Iesplats et Iesgrilles du four=LesgriIIes
risquentde se d@oIoreret de ne piusgiisseraussibbn aprSsun
cycle d'autonettoyagesi on ne Iesenl@epas.
3. NettoyerIe cadredu four,Ie cadre de la porte, Ia zone_ I'exterieur
du joint et autour de I'ouvertureclanslejoint de Ia porte,_ I'aide
d'un produit de nettoyagenon abrasifcommeBonAmP ou d'eau
additionnSede detergent=Leprocessusd'autonettoyagene
nettob pasces zones=ElIesdoiventetre nettoy@spour emp@her
lasaietede s'incrusterpendant le cyclede nettoyage.{Lejoint
assure1'etanchek6autour de la porte et du hublot du four=}
4. Pourempechertout dommage,nepas
nettoyerni frotter le joint qui se trouve
autour de Ia porte du four. Cejoint est
congu pour @iter Iespertesde chabur
pendant Ie cycled'autonettoyage.
5. Eliminerles r@idusde graisseou de
produits renvers@sur la sob avant le
nettoyage.Ceciemp@hela formationde fiammes ou de rum@
durant b nettoyage.
EssuyerIes r@idussucr@et acides,comme les patatesdouces,
Iatomate ou Iessauces_ base de lait.La porcetainevitrifi@
pos@deune certaine r@istanceaux compos@acides,maisqui
n'est pas Iimit@.EIIepeut se decoiorersi Iesr@idus acidesou
sucres nesont pasenlev@avantde commencerI'autonettoyage.
Programmation de l'autonettoyage :
[ Remarqae : Latemperaturedu four doit etre situ@ en dessous
de 205°C (400°F}pour programmerun cycb d'autonettoyage.
1. FermerIa porte du four.
2. Appuyersur latouche Clean(Nettoyage}.
• Le mot CLEAN(NETTOYAGE}clignote
J'afficheur. ..................................
3. Appuyersur latouche More+ (Plus+} ou Less..................................
{Moins-}.
• MEd (Salet6moyenne,3 heures}est affiche. Less- :
Si Ia porte n'est pasferm@, des bips retentissentet
le mot _door>>[porte} parait_ I'afficheur.Si laporte n'est pas
ferm@ dans Ies45 secondes,I'operationd'autonettoyageest
annuleeet I'afficheur revient_ rheure du iour.
4. Appuyersur latouche More+ ou Less-pourvoir ddiler les
differentsreglagesde rautonettoyage.
HVy{Tressale} (Salet_@aisse,4 heures}
MEd {Moyen}(Satet6moyenne,3 heures}
LITE(Leger}(SaleteIeg_re,2 heures}
Le choixdu niveau desalet6du four programme
automatiquementla dur@ du cycle d'autonettoyage.
5. Apres quatresecondes,lefour commencele nettoyage.
• La dur@ de nettoyagecommencele d@omptea I'afficheur.
• Le mot LOCK6iERROUILLAGE}parait _ rafficheur.
o Le mot CLEANparait _ I'afficheur.
Demarrage differe d'un cycle d'autonetteyage :
1. Appuyersur lestouches Cleanet Timer
{Minuterie}.
• Le mot DELAY{ATTENTE}et 00:00
parait _ I'afficheur.
2. Appuyersur latouche More+ ou Less-pour
programmerladur@ d'attente avant que ne
commenceIe cycle.Ladureed'attente peut
6tre programm@de 10minutes (00:10}a 11
heureset 59 minutes(11:59}.
*Lesnomsde marquedes produitsde nettoyagesont des marquesd@os@sdes differents fabricants.
47
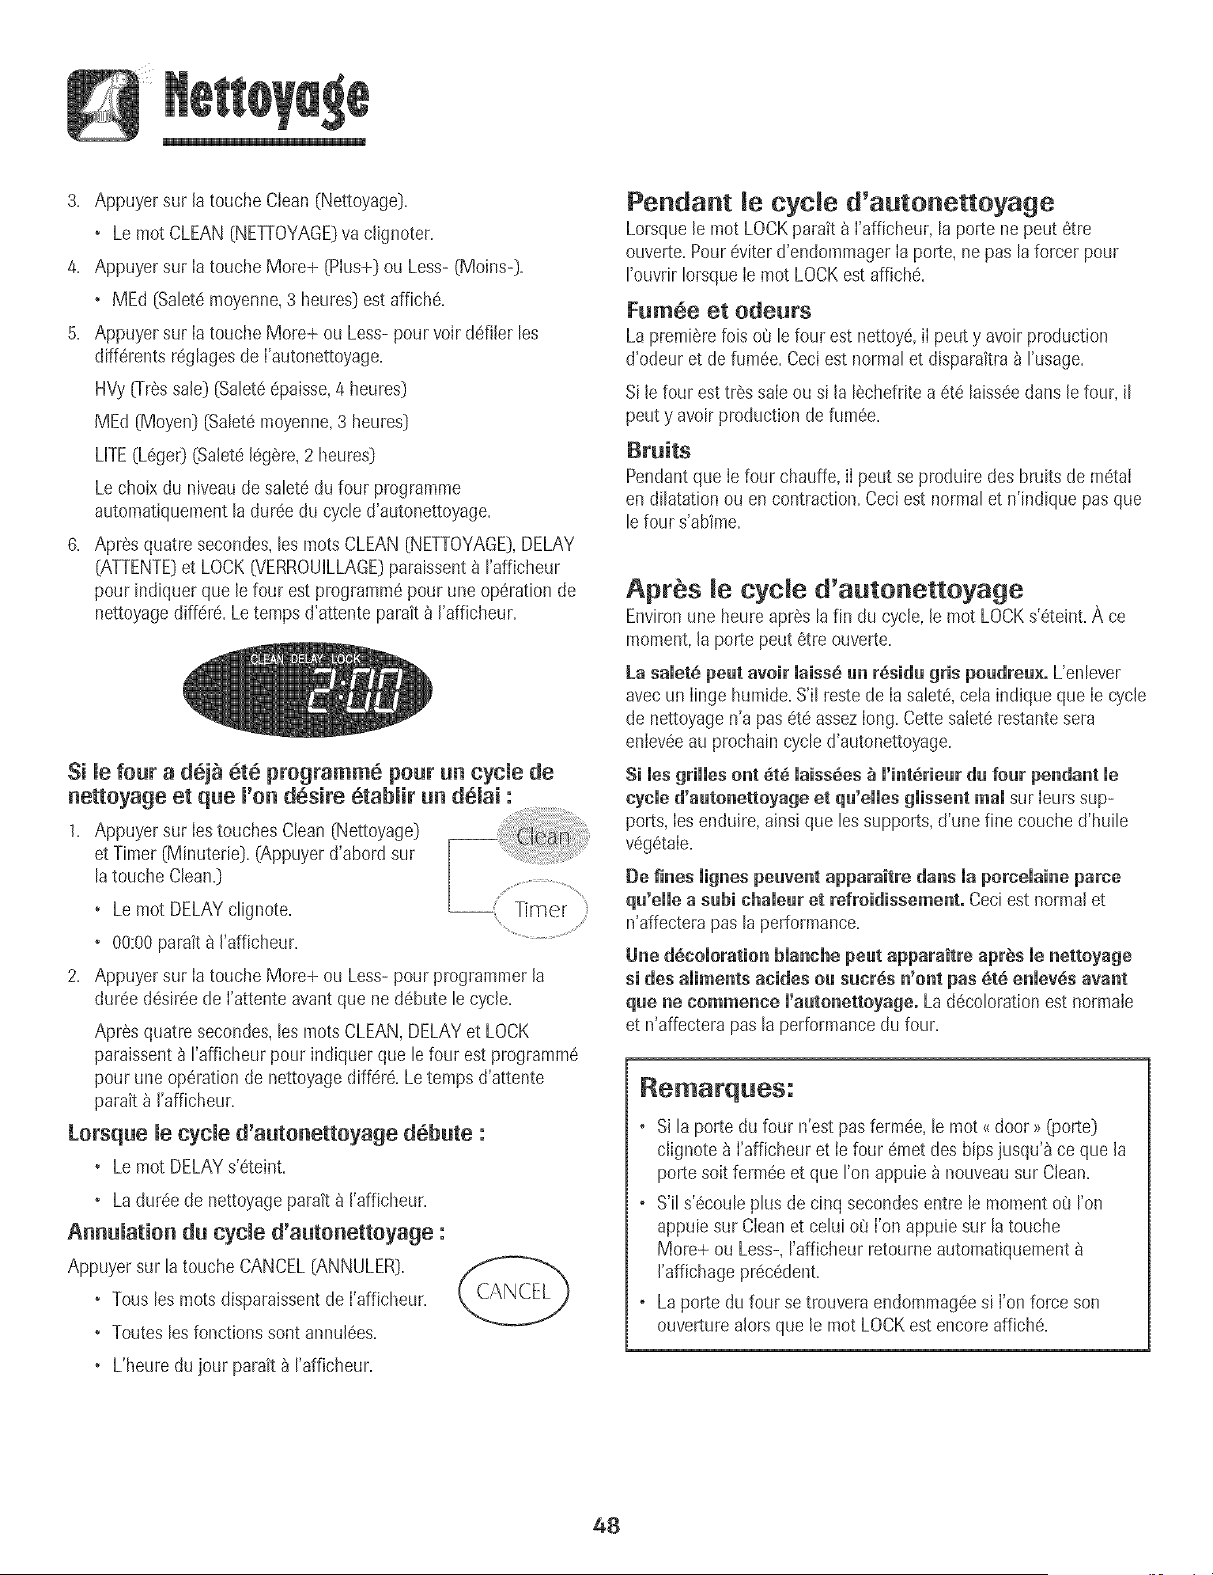
3. Appuyersur Jatouche Clean(Nettoyage}.
• Le mot CLEAN (NETTOYAGE}va clignoter.
4. Appuyersur Iatouche More+ {Plus+} ou Less-{Moins-}.
• MEd {Salet6moyenne,3 heures}est affiche.
5. Appuyersur Iatouche More+ ou Less-pour voir ddJJerles
diff@entsreglagesde I'autonettoyage.
HVyO-ressale} {Salet6@aisse,4 heures}
MEd (Moyen} {Salet6moyenne,3 heures}
LITE(Lege0 (Salet6Jegere,2 heures}
Le choixdu niveaude saletedu four programme
automatiquementla dureedu cycle d'autonettoyage.
6. Apres quatresecondes,les lOtS CLEAN{NETTOYAGE},DELAY
{ATTENTE}et LOCK6/ERROUILLAGE}paraissent8 I'afficheur
pour indiquerque le four estprogrammepour une operationde
nettoyagediffere. Letemps d'attente parait_ J'afficheur.
Si le four a dej_ ete programme pour uu cycle de
uettoyage et que l'ou desire etablir uu delai :
1. Appuyersur Iestouches Clean(Nettoyage}
et Timer (Minuterie}.(Appuyerd'abord sur
la toucheClean.}
• Le mot DELAYclignote.
• 00:00parait_ J'afficheur. ....................
2. Appuyersur Iatouche More+ ou Less-pour programmerJa
dureedesireede I'attente avantque ne debute le cycle.
Apres quatresecondes,les lOtS CLEAN,DELAYet LOCK
paraissent_ I'afficheur pour indiquer que le four est programme
pour une @6ration de nettoyagedill@6. Letemps d'attente
paratt_ J'afficheur.
Lorsque le cycle d'autouettoyage debate :
• Le mot DELAYs'eteint.
• La durde de nettoyageparak b J'afficheur.
Auuulatiou du cycJe d'autouettoyage :
Appuyer sur la touche CANCEL{ANNULER].
• Tous les lOtS disparaissentde I'afficheur.
• Touteslesfonctionssont annulees.
• L'heure dujour parait _ I'afficheur.
Pendant le cycle d'autonettoyage
Lorsquele mot LOCKparait _ I'afficheur,la porte ne peut etre
ouverte.Pour@iter d'endommagerIa porte, ne pas laforcer pour
I'ouvrir IorsqueIe mot LOCKest affJche.
Fumee et odeurs
Lapremierelois o8 le four estnettoye,iI peuty avoir production
d'odeur et de fumee.Ceciest normalet disparaitra_ I'usage.
Si le four esttressale ou si la 16chefritea 6t6 laisseedarts Jefour, il
peuty avoir productionde fumee.
Bruits
Pendantque Ie four chauffe,iI peut se produiredes bruits de metai
endilatation ou encontraction.Ceci est normalet n'indique pasque
lefour s'abime.
Apr_s le cycle d'autonettoyage
Environune heureapres lafin du cycle,Jemot LOCKs'eteint.Ace
moment,Japorte peut etre ouverte.
La salet6 peat avoir laiss_ un r_sida gris poudreu×oL'enlever
avecun Iinge humJde.S'il reste de Ia salete,cela indique que Ie cycle
de nettoyagen'a pasete assezlong.Cette saJeterestantesera
enleveeau prochaincycle d'autonettoyage.
si lesgrilles ont 6t6 maissSes_ m'intSrieurda roar pendantle
cycle d'autonettoyage et qu'elles glissent roamsur ieurssup-
ports,ies enduire,ainsi que lessupports,d'une fine couched'huile
vegetaie.
De fines iignespeavent apparaitre darts ia porceiaine paree
qu'elle a subi chaleur et refroidissement. Ceci est normalet
n'affecterapas la performance.
Une d_comorationblanche peat apparaitre apr_s le nettoyage
si des aliments acides ou sucres n'ont pas _t_ enlev_s avant
que ne commence l'aatonettoyage. La decolorationest normale
et n'affectera pas laperformancedu four.
Remarq_es:
o Si la porte du four n'est pasferm@, le mot _door>>_oorte}
clignote _ I'afficheuret ie four 6metdes hipsjusqu'a ce que la
porte soit fermeeet que I'on appuie_ nouveausur Clean.
o S'il s'ecouleplus de cinq secondesentre le momento8 I'on
appuiesur CIeanet celui o8 I'onappuie sur la touche
More+ ou Less-,I'afficheur retourneautoma%uement
J'affichageprecedent.
o La porte du four setrouveraendommageesi I'onforce son
ouvertureaJorsque le mot LOCKest encoreaffiche.
48
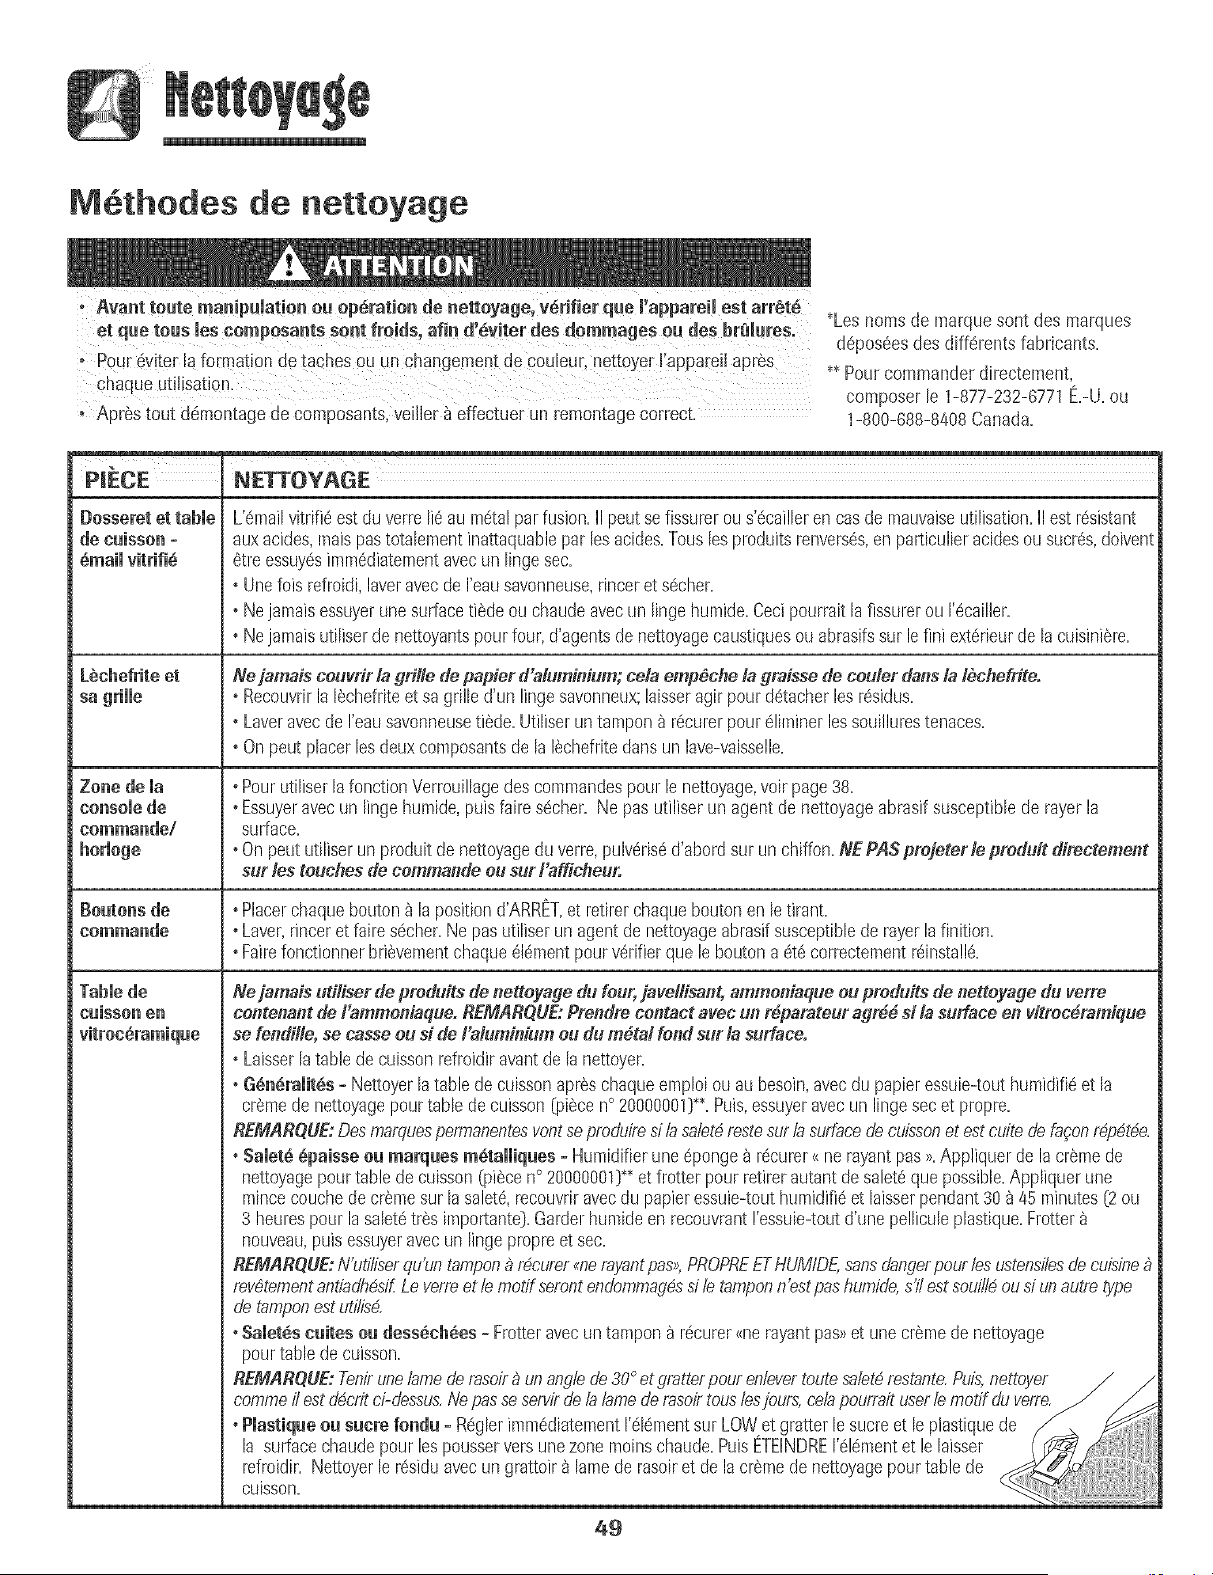
M6thodes de nettoyage
Apr_stout ddmontagede composants,veiiler _ effectuerun remontagecorrect.
_Lesnomsde marquesontdes marques
d@os6esdes diffQrentsfabricants.
_*Pour commanderdirectement,
composerJe1-877-232-6771E.-U.ou
1-800-688-8408Canada.
PmECE NETrOYAGE
Desseret et table L'6mailvitrifi_est du verreli_ au mdtalpa, fusion.II poutsefissur_rous'6caillerencasde mauvaiseutilisation.IIestr6sistant
de caisson o auxacides,matspastotalementinattaquablepar losacides.Touslesproduitsrenvers6s,en particulieracidesou sucres,doivent
_inaii vitrifi_ 6treessuy6simm_diatementavecun lingesee.
° Unefois refroidi,laveravecde I'eausavonneuse,rinceret s6cher.
°Ne jamaisessuyerunesurfaceti6deou chaudeavecun lingohumide.Cecipourraitlafissurerou 1'6cailler.
°Ne jamaisutiliserdenettoyantspourfour,d'agentsde nettoyagecaustiquesou abrasifssur lefini ex16rieurde la cuisini_re.
L_ebefriteet Nejamais couvrir la grille de papier d'alumioium; cola emp_cfle la dmisse de couler donsla I_cflefrite.
sa grille • Recouwbla I_chefriteet sa grilled'un lingosavonr_eux;laisseragirpourd_tacherlosr6sidus=
• Laveravecde I'eausavonneusetilde. Utiliserun tampon_ r_!curerpour61iminerlessouillurestenaces.
• Onpeut placerlos deuxcomposantsde laI@chefritedartsun lave-vaisselle.
Zone de ia • PourutiliserlafonctionVerrouillagedes commandespourle nettoyage,voirpage38.
console de • Essuyeravecun lingo humide,puisfaires6cher. Ne pas utiliserun agent de nettoyageabrasifsusceptiblede rayerla
commando/ surface.
° Onpoututiliserun produitdenettoyagedu verre,pulv@ris6d'abordsur unchiffon=NEPA$ prejeter le predult dlmctement
sur los touches de cemmande eu sur Fafficfleur.
Beatens de • Place!chaquebouton_ lapositiond',&RRET,et retirerchaqueboutonen letirant=
commando • Laver,rinceret faires_cher.Ne pasutiliserunagentde nettoyageabrasifsusceptiblederayerla finition.
° Fairefonctionnerbri@vementchaque@16mentpourratifier que le boutonadt_ correctementr@insta!l@=
Tablede Nejamais udHserde preduits de nettoyade dufo_r,javeltisant, ammeniaque oupreduits de nettoyade du ye,re
e_isse_e_ contenant de I'ammoniaque. REMARQUE:Prendre contact avec un r4pamteur a_r_d si la surface en vitroc_mmique
se fendiHe,se casse ell si de Falumt'niumou du m_tal fo_d sur la surface.
• Laisserlatablede cuissonrefroidiravantde la nettoyer.
° G_dralit_s - Nettoyerlatable decuissonapr_schaqueemploiouau besoin,avecdu papieressuie-touthumidifidet la
cr_rnedenettoyagepourtable decuisson[piecen° 20000001]_- Puis,essuyeravecun lingosec et propre.
RE, ARgUE: Desmatquespermanentesvontseproduired/a saN4 restesurb su,@cedeeuissonet estcuitedefa_on,,gp4lge.
° Saiet_ _paisse ea marqaes _dtalliqaes o Humidifierune@onge_ r6curer_ ne rayantpas>>.Appliquerdelacr6mede
nettoyagepour tablede cuisson(pi6ceno20000001]*_et frotterpour rotifer autantde salet_que possible.Appliquerune
mincecouchedecr_mesur lasalete,recouvriravecdu papieressuie-touthumidifi6et hisserpendant30 9 45minutes[2 ou
3 heurespour la saletdtr_simportante].Garderhumideen recouvrant!'essuie-toutd'unepelliculeplastique.Rotter
nouveau,puisessuyeravecun lingopropreet sec.
REMARQUE:N'ut_@erqu'untampon_ r4curer_¢_erayantpas_,PROPREETHUMIDE,sansdangerpourlosustensiiesde cuisine
rev_tementantiadh#sifLe verreet temotif serontendbmmad#sd b tamponn'estpashumide,s2 est soui/teoudun autretype
de tamponestutffis4.
•Salet_s eaites oa dess_eb_es= Frotteravecun tampon 9 r6curer<{norayantpas>)et unecr6medenettoyage
pourtable decuisson.
CU_SSOn.
49
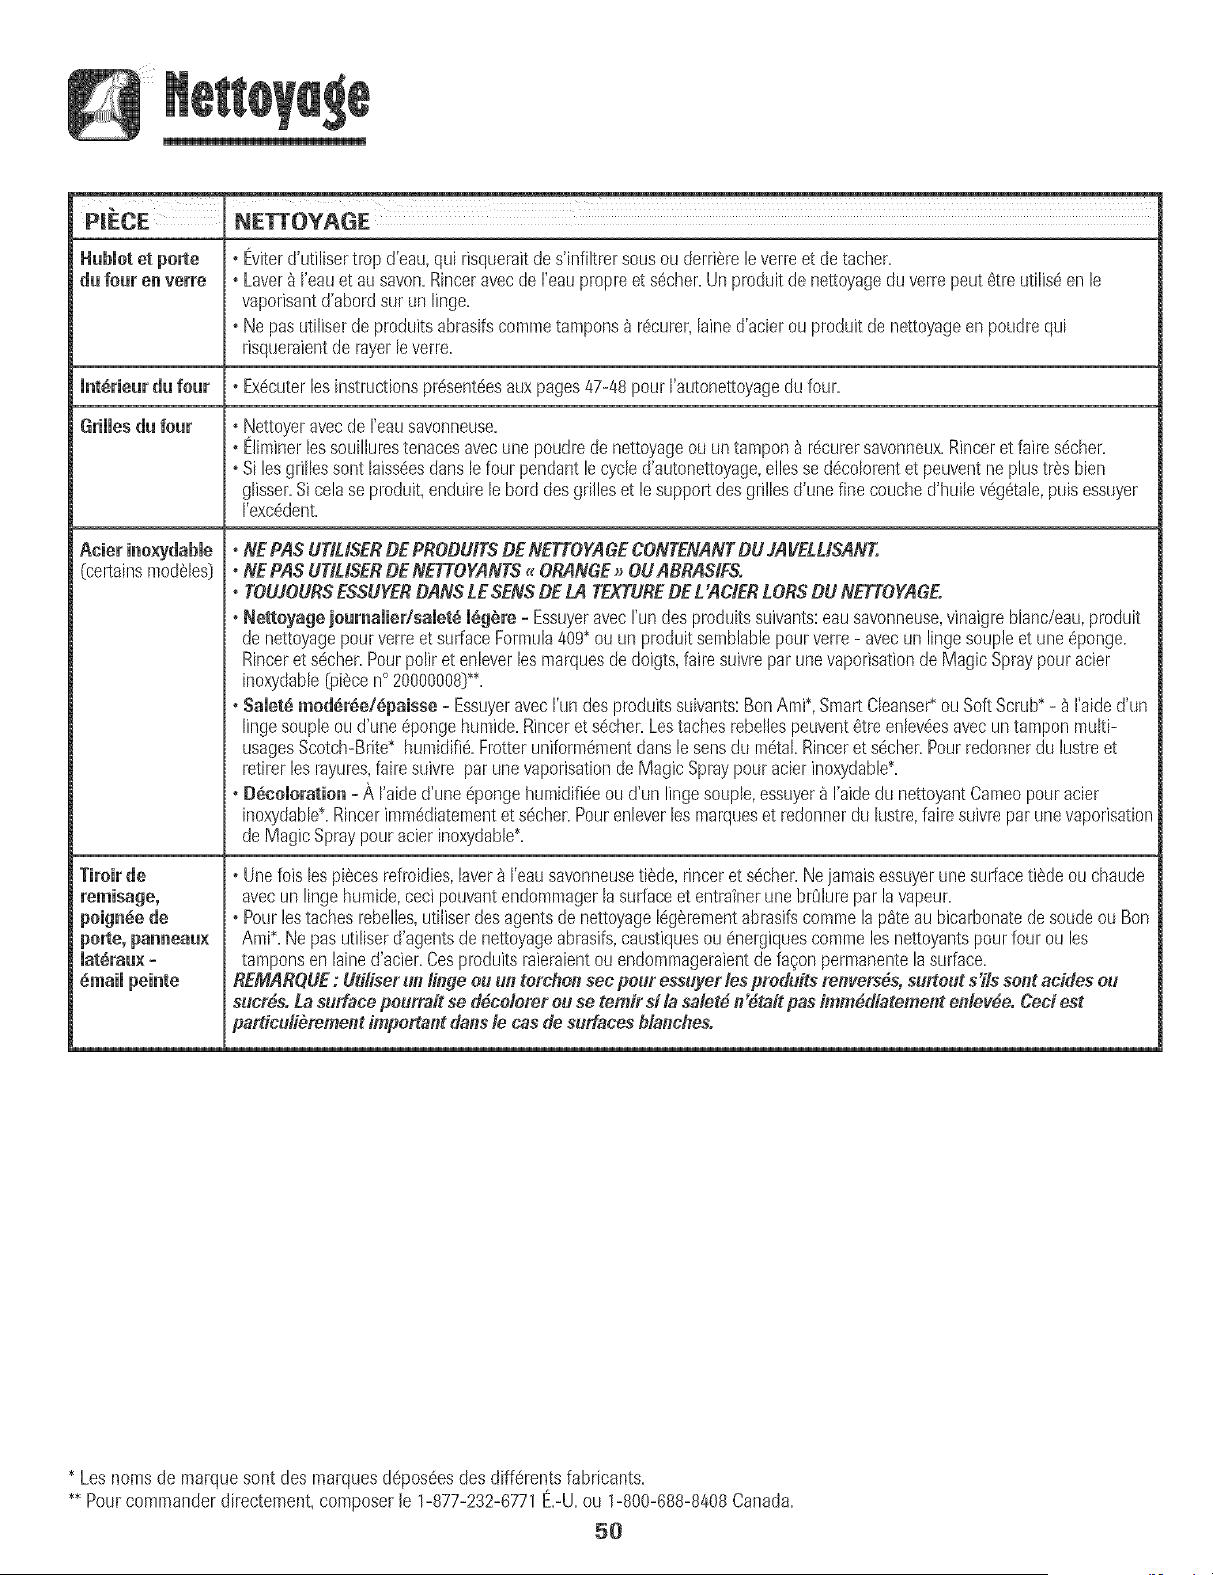
_m
Hubmotet pone • Eviterd'utilisertrop d'eau,quirisqueraitdes'infiltrersousou derrierele verreet detacher,
du four en verre • Laverb I'eauet au savon,Rinceravecde I'eaupropreet s_cher,Un produitde nettoyagedu verrepeut6tre utilJs6enle
vaporisantd'abordsur un linge,
• Nepasutiliserde produitsabrasifscornrnetamponsb r6curer,laine d'acierouproduitde nettoyageen poudrequi
risqueraientderayerleverre,
let_rieur du feur • Ex6cuterlesinstructionspr6sent6esauxpages47-48pourrautonettoyagedufour,
Grillesdu feur • Nettoyeravecde I'eausavonneuse,
• E]irninerlessouillurestenacesavecunepoudredenettoyageouuntampon_ rdcurersavonneux,Rinceret faire sdcher,
• Si lesgrillessenthiss6esdartslefour pendantlecycled'autonettoyage,ellesseddcolorentet peuventneplustr_s bien
glisser,Si celaseproduit,enduireleherddesgrilleset 18supportdes grillesd'une finecouched'huilev_g6tale,puisessuyer
I'exc_dent,
(certainsrnod_les)
Tireirde
• NE PASUTILtSERDEPRODUITSBE NETTOYAGECONTENANTDU JAVELUSANT,
• NE PASUTILISERDENETTOYANTS_ ORANGE_ OUABRASIFSo
• TOUJOURSESSUYERBANS LESENSDELA TEXTUREBE L'ACIERLORSBU NETTOYAGE.
• Nettoyage joumamieffsalet_m_g_re- Essuyeravec!'undes produitssuivants:eausavonneuse,vinaigreblanc/eau,produit
denettoyagepourverreet surfaceFormula409_ou unproduitsernblablepour verre- avecun lingesoupieet une 6ponge,
R[nceret s6cher,Pourpoliret enleverles rnarquesde doigts,faire suivrepar unevaporisationde MagicSpraypouracier
inoxydable[pi6cen° 20000008)_,
• Salet_ mod6r_e/6paisse - EssuyeravecI'undesproduitssuivants:BenArni_,SmartCleanse€ouSoftScrub_ - 9 I'aided'un
lingesoupleou d'une _pongehurnide,Rinceret sdcher,Lestachesrebeltespeuvent6treenlevdesavecuntamponrnuRi-
usagesScotch-Bfite_ hurnidifi6,Rotter unifom_6rnentdanslesensdu rn6taLRinceret s6cher,Pourredonnerdu lustreet
retirerlesrayures,fairesuiwe parunevaporisationde Magic Spraypouracierinoxydable",
• Ddceloratiee - ,AI'aided'une6pongehurnidifi6eou d'un lingesouple,essuyer9 I'aidedu nettoyantCarneopouracier
inoxydable_,Rincerirnrnddiaternentet s6cher,Pourenleverlesmarqueset redonnerdu lustre,faire suiweparunevaporisation
deMagicSpraypouracierinoxydable_,
• Unefois lespi6cesrefroidies,laverb I'eausavonneuseti6de,rinceret s6cher,Nejarnaisessuyelunesurfaceti6de ouchaude
avecun lingehurnide,ceci pouvantendornrnagerla surfaceet entraineruneb_01urepar lavapeur,
• Pourlestachesrebelles,utiiiserdesagentsdenettoyageIdgSrernentabrasifscornmelap_te aubicarbonatedesoudeou Ben
ArnR Nepasutiliserd'agentsde nettoyageabrasifs,caustiquesou dnergiquescornmelesnettoyantspourfour ou les
tamponsen lained'acier,Cesproduitsraieraientouendornmageraientdefa_onperrnanentela surface,
REMA_QUE: UtiEserun linge ou un torcflo# sec pour essuyer les produJtsreavers_s,surtout s'Jtssent acides ou
sucr4s.La surface pourmit se d_cotorer o. se temir si ta salet_ _'_t_it pas imm_diatemeot e_lev4e. Ceci est
pardculi_reme_t importa_t darts le cas de surfaces bla_cheso
* Lesnoms de marquesent des rnarquesdepos6esdes differentsfabricants,
** Pourcommanderdirectement,composerle 1-877-232-6771E,-U,ou 1-800-688-8408Canada,
50
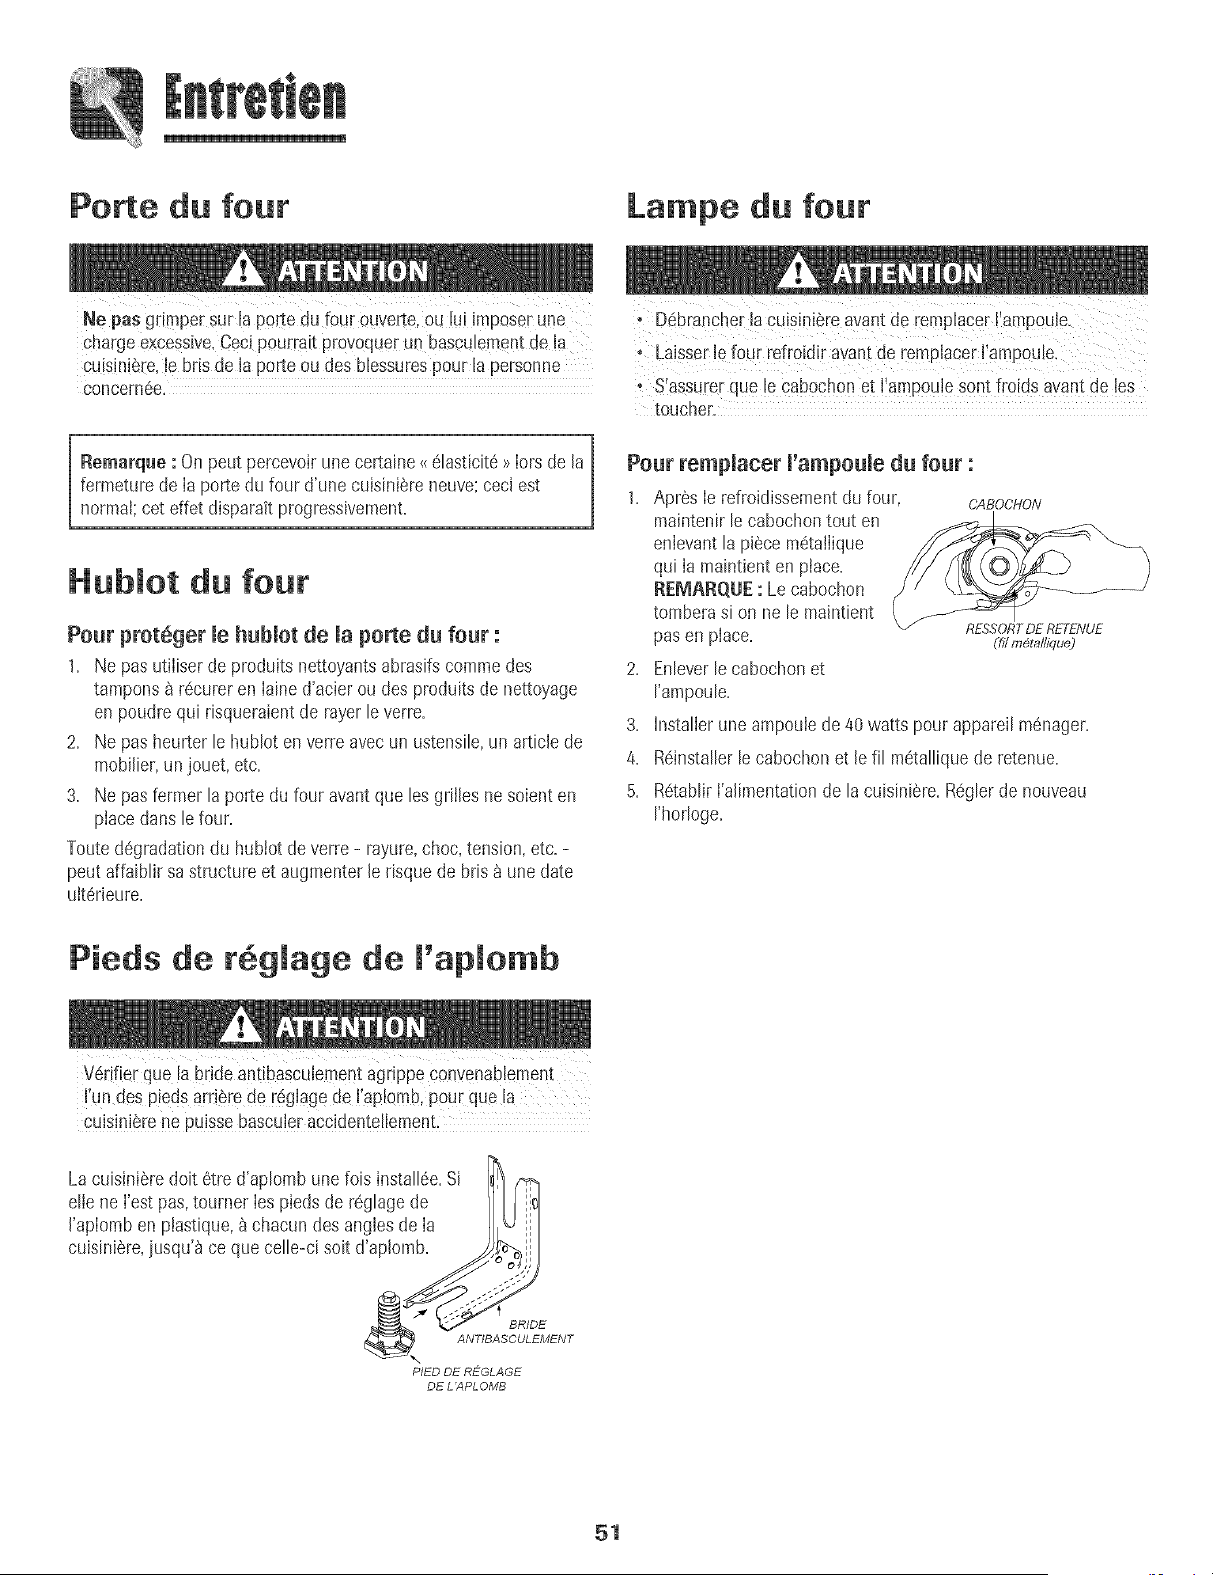
Porte du four
Ne pas grJmpersurJaPortedu fouroUverte,ou lUiirnpQsQrune
La pe du four
charge excessive,Ceci pourrait provoqueruQ basculementde,!a
Cu!sini_re,le,bris de Japorte ou des blessurespour la personne
concern6e.
Remarqae :On peut percevoirune certaine_<61asticit6>>Iorsde la
fermeturede Ia porte du four d'unecuisiniereneuve:ceci est
normal;ceteffet disparaitprogressJvement.
Hublot du four
Pour prot6ger le hublot de la porte du four :
1. Ne pas utiliserde produits nettoyantsabrasifscommedes
tampons 8 r6cureren Iained'acierou des produitsde nettoyage
en poudrequi risqueraientde rayerleverre.
2. Ne pas heurter le hublot en verreavec un ustensile,un article de
mobilier,unjouet, etc.
3. Ne pas fermer la porte du faur avant que les grilles nesoient en
placedans le four.
Touted6gradationdu hublot de verre - rayure,choc,tension,etc. -
peut affaiblir sa structureet augmenterlerisque de bris _iune date
ult6rJeure.
' D6brancherla cuisiniSre,avantde remplacerI'ampoule.
, Laisserle four re[roidir avantde remPlacer!iampoule,
• f
S assurerque !e Cabochonet ! amp0ub sontfro!dsavant de Jes
touche[.
Pour remplacer l'ampoule du fear :
1. Apres Ie refroidissementdu four, CABOCHON
maintenirlecabochontout en
enlevantla piece m6talIique
qui Ia maintienten place.
REMARQUE:Le cabochon
tomberasi on ne le maintient
pas en place.
2. Enleverlecabochonet
['ampoule.
3. hlstaller une ampoulede 40watts pour appareil m6nager.
4. Rdinstallerlecabochonet lefil m6talliquede retenue.
5. R6tablirl'alimentationde lacuisiniSre.Reglerde nouveau
I'horloge.
Pieds de r6glage de l'aplo b
V6rifier que la brideantibasculementagrippeconvenablement
hJn des piedsarri_rede r_g!agede,I'apbmb, pour flue la
cuisiniSrene puissebascuieraccidentelleraent.
La cuisini6redoit 6tre d'aplombune fois install6e.Si
elle neI'est pas,tourner Iespieds de r6glagede I _
J'aplomben ptastique,_ chacundes anglesde Ia
cuisini_re,iusqu'_ ce que celle-ci soit d'apJomb. ,jj
PIED DE REGLAGE
DE L 'APLOMB
51
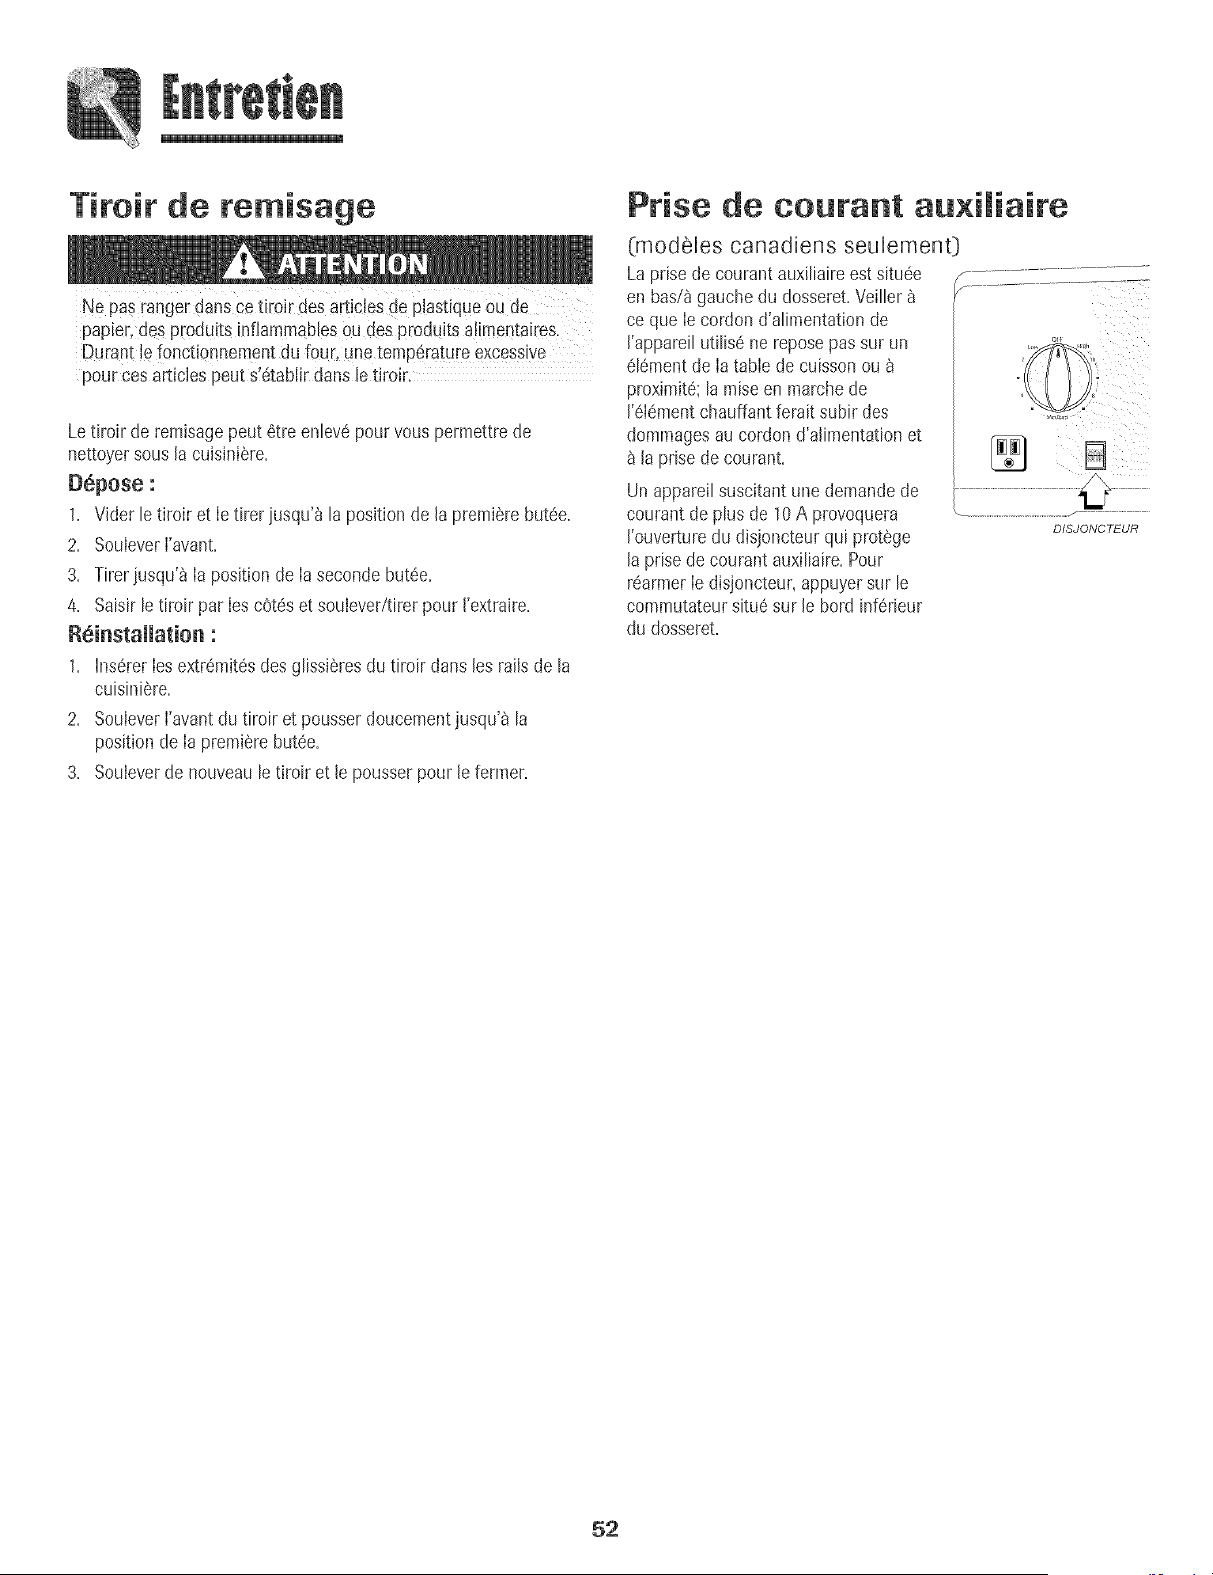
Tiroir de re isage
Ne pas rangerdans ce tiroiEdesarticlesde p!astiqueou de
papier,des produits inflammabiesou des produits a!imentaires.
Durant!e fonctionnementdu four, unetemperatureexcessive
pouEcesarticlespeut s!6tablirdans [e tiroir.
Letiroir de remisagepeut 6tre enlev#pourvous permettrede
nettoyersous la cuisiniSre.
D6pose :
1= Vider le tiroir et Ietirer iusqu'_ la positionde la premierebutee=
2. SouleverI'avant.
3. Tirerjusqu'_ Ia positionde Ia secondebutee.
4. Saisirle tiroir par Ies coteset soulever/tirerpour I'extraire.
1. h_sererIesextr6mitesdes glissiSresdu tiroir dartsles railsde la
cuisiniere.
2. SouleverI'avantdu tlroir et pousser doucementjusqu'_ la
positionde Ia premierebutee.
3. Souleverde nouveaule tiroir et le pousserpour le fermer.
Prise de courant au×iliaire
(:modeles canadiens seulemenO
La prisede courantauxiliaireest situee
en bas/_gauche du dosseret.Veiller
ce que Ie cordon d'alimentationde
I'appareilutilise ne reposepassur un
el6mentde Ia table de cuissonou
proximite;la raiseen marchede
1'6Iementchauffantferait subir des
dommagesau cordon d'alimentationet
la prise de courant.
Un appareilsuscitantune demandede
courantde plus de 10A provoquera
I'ouverturedu disjoncteur qui protege
[a prise decourant auxiliaire.Pour
rearmer[e disjoncteur,appuyersur le
commutateursitu6 sur [e bord inf6rieur
du dosseret.
DfSJONCTEUR
52
B
PROSLEME SOLUTION
Pour mapmupartdes probmemes o Verifier que IescommandesdLJfour sont correctementreglees.
obsew_s, essayer d'abord mes o Verifier si Ie four est bienraccord6au circuit 6Iectrique.
solutions possibles,_ droite, o InspectedrearmerIedisjoncteur.Inspectedremplacerles fusibles.
• ContrOlerIa source d'alimentationelectrique.
Non=fonctionnememt de
l'appareii ototamou partiei.
L'horioge ou ruesiampes fomc-
tiommemt, ruesroots paruissemt
l'afficheur, mais le four me
R_sumtats de cuissom au four
cliff,feints des uttemtes ou de
ceu× produits par mefour
umtSrieur.
R_sumtatsimcorrects morsdemu
cuissom au gril, ou _missiom
excessive de fum_e.
Impossibilit8d'automettoyage
du four.
Le four me se mettoie pus
correctememL
Luporte du four mese
o Determinersi les commandesdeselementsde surfaceet!ou du four sont convenablementreglees.
Voir pages33 et 39.
o Determinersi laporte du four s'est deverrouilleeapresune operationd'autonettoyage.Voir page 48.
o Determinersi lefour est reglepour unecuisson differeeou un nettoyagediffere.Voir pages40et 47.
oVerifier si Ie verrouilIagedescommandesesten marche.Voir page38.
oVerifier si Ia commandeesten modesabbat.Voir page 42.
o Lescommandessont peut-etreprogrammeespour unefonction decuissonet maintJenou de
demurragediffere=
• Lafonction de verrouilIagedes commandesest peut-etre activee=Voir page 38=
o Determinersi reventdu four est obstrue.Voir son emplacementpage45.
oS'assurerque Ia cuisiniereest d'aplomb=
o Lesreglagesde temperaturevadentsouvententre un four neuf et lefour qu'il remplace=On
observesouventune derivedu reglage de temperatured'un four _ mesurequ'il vieilIit; iI peut
devenir pkJschaud ou moinschaud=Voir page 43 les instructionsd'aiustementde la temperature
du foun REMARQUE: lI n'est pus utile de modifier leregIagede temperaturesi la variation
n'affectequ'une ou deux recettes=
• Pourd'autresinformationsau suiet de Iacuissonau four,voir la brochure Lacuissonsimpiifiee=
o DeterminerIa positiondes grilJes=Lesaliments peuventetre trop pres de reJementdu gdl.
o Elementdu gril pusprechauffe=
o Utilisationincorrectede feuiJled'aluminium=Ne ]amaisgarnir JagrilJede Jechefriteavec de JafeuiJle
d'aluminium.
o Portedu four fermeedurant Ia cuissonau griI. Laisserla portedu four entrouverted'environ
10cm [4 poucesD- premierebutee.
o EnIeverI'excSsde graissesur la piScedeviande avantla cuissonau gril.
o Utilisationd'une lechefritesouiIIee.
• Latensionetectriquede Ia maisonest peut-etrebasse.
o Determinerque I'appareiIn'a pus ete pregrammepour un autonettoyagediffere. Voir page47.
oVerifier que la porteest fermee.
oVerifier si Ia commandeesten modesabbat.Voir page 42.
o Lefour est peut etre _ une temperaturesuperieure_ 205 °C (400°F].Latemperaturedu four doJt
6tre inferieure_ 205 °C [400 °F)pour pouvoirprogrammerun cycle d'autonettoyage.
o Untemps de nettoyageplus long peut etre necessaire.
oOn n'a puselimine avantI'operationd'autonettoyageles accumulationsexcessJvesde residus,
particulierementlesresidus d'alimentsacidesou sucres.
o L'interieurdu four estencorechaud. Attendre environ une heure apresI'achevementde Ia periode
d'autonettoyage.IIestpossibled'ouvrirJaporteapresladisparitiondu messageLOCK_/ERROUILLAGE]
sur I'afficheur.
• Lescommandeset Ia porte sont peut-etre verrouiJlees.Voir page 38.
53 suite...
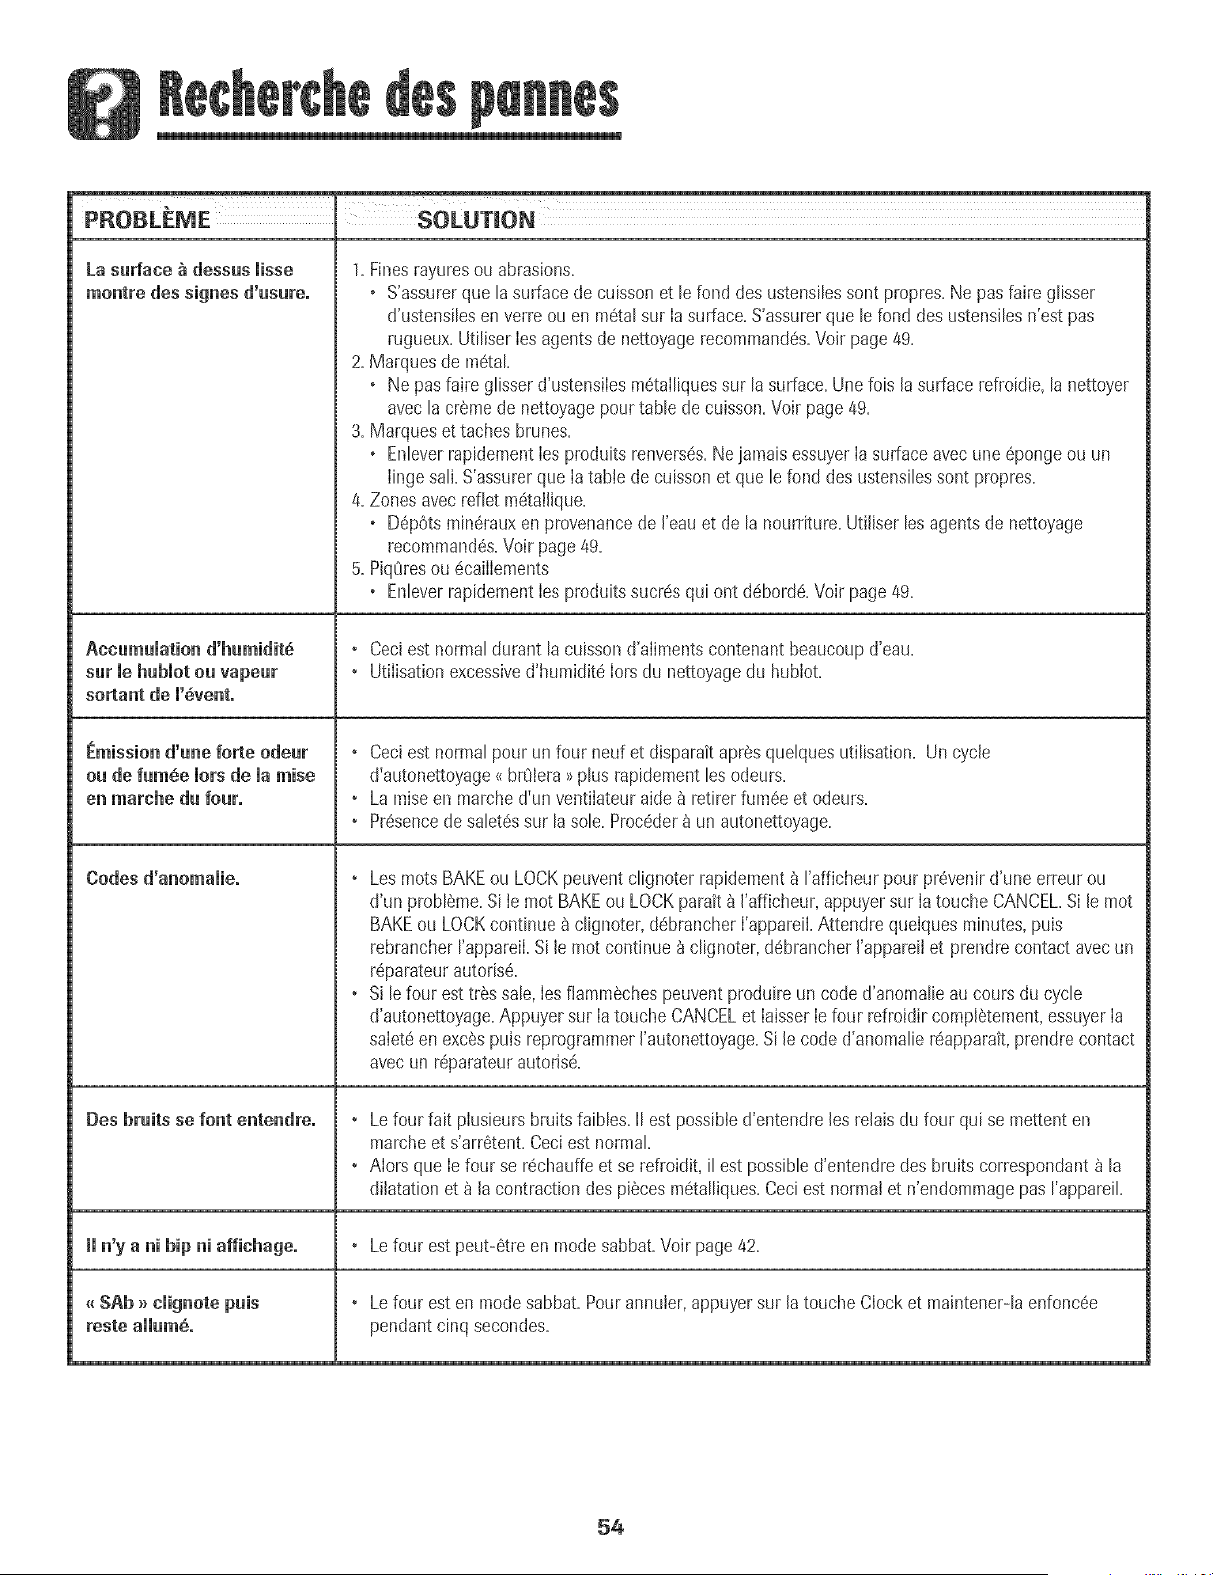
PROBLEPVIE SOLUTION
La sudaee _ dessus lisse 1. Finesrayuresou abrasions.
montre des signes d'usureo , S'assurerque la surfacede cuissonet le fond des ustensilessont propres.Ne pasfaire glisser
d'ustensilesenverre ou en m6talsur Iasurface.S'assurerque le fond des ustensilesn'est pas
rugueux.Utiliser Iesagentsde nettoyagerecommand6s.Voir page 49.
2. Marquesde m6taL
, Ne pasfaire glisserd'ustensiIesm6tailiquessur la surface.Une lois Jasurface refroidie,lanettoyer
avecla cremede nettoyagepourtable de cuisson.Voir page49.
3. Marqueset taches brunes.
, EnleverrapidementIesproduitsrenversds.Nejamais essuyerIa surfaceavec une 6ponge ou un
Iingesail. S'assurerque Ia tabie de cuissonet que le fond des ustensilessont propres.
4. Zonesavecrefiet m6tailique.
, D6pOtsmin6rauxen provenancede J'eauet de la nourriture. UtiJiserlesagents de nettoyage
recommand6s.Voir page49.
5. PiqOresou 6caiIIements
+ EnleverrapidementIesproduitssucr6squi ont d6bord6.Voir page49.
Accumulation d'humidit_ • Ceciest normaldurant la cuissond'alimentscontenantbeaucoupd'eau.
+ Utilisationexcessived'humidit6 Iorsdu nettoyagedu hublot.
sorlunt de m'6vent,
+ Ceciest normal pour unfour neuf et disparaitapresquelquesutilisation+ Un cycle
ou de fum_e lots de iu raise d+autonettoyage<<brOlera_>plus rapidementles odeurs+
en marehe du four. , Laraiseen marched'un ventiIateuraide_ retirer fumSeet odeurs+
+ Pr6sencede salet6ssur la sole.Proc6der_ un autonettoyage.
Codes d'unomuiieo + Losroots BAKEou LOCKpeuventclignoterrapidement_ I'afficheurpour pr6venird'une erreurou
d'un probl6me+Siie mot BAKEou LOCKparait _ I'afficheur,appuyersur Iatouche CANCEL.Si le mot
BAKEou LOCKcontinue_ clignoter,d6brancherI'appareiLAttendre quelquesminutes,puis
rebrancherrappareiLSile mot continue _ clignoter,debrancherI'appareiiet prendre contact avec un
r6parateurautolis6+
+ Sile four est trSssale,Ies flammSchespeuventproduireun code d'anomalieau coursdu cycle
d'autonettoyage+Appuyersur Ia touche CANCELet IaisserIefour refroidircomplStement,essuyerIa
saIeteen excSspuis reprogrammerI'autonettoya% Si le code d'anomalier6apparatt,prendrecontact
avecun reparateurautorisd+
Des bruits se font entendreo + Lefour fait pIusieursbruitsfaibles+II est possibled'entendreles relaisdu four qui se mettenten
marcheet s'arr6tent+Ceciest normal
+ AIors que Ie four se r6chauffeet se refroidit, il estpossibled'entendredes bruits correspondant_ la
dilatation et _ lacontractiondes piecesm6talliques+Ceci est normalet n'endommagepas I'appareik
II n'y a ni hip ni uffichugeo + Le four est peut-6tre en modesabbat+Voirpage42+
_ SAb _ elignote puis , Lefour esten modesabbat. Pourannuler,appuyersur Jatouche Clocket maintener-la enfonc6e
reste uiium6o pendantcinq secondes.
54
Garantie compibte d'une an nbe -
Pibces et main-d'(_uvre
DuIant une pedoded'un (1} an a comp[erde [a
date de I'achatinitial au detail,tou[e piecequLse
reveleraitddectueuse dons des conditions
normabs d'usagemenagersera r@areeou
rempBcdegratuitement
Garanties limitees - Pieces seumement
De madeu×W_me"aIa cinquieme annie - A
comoter de la date de I'achatinitial au detail bs
p_ecesde la 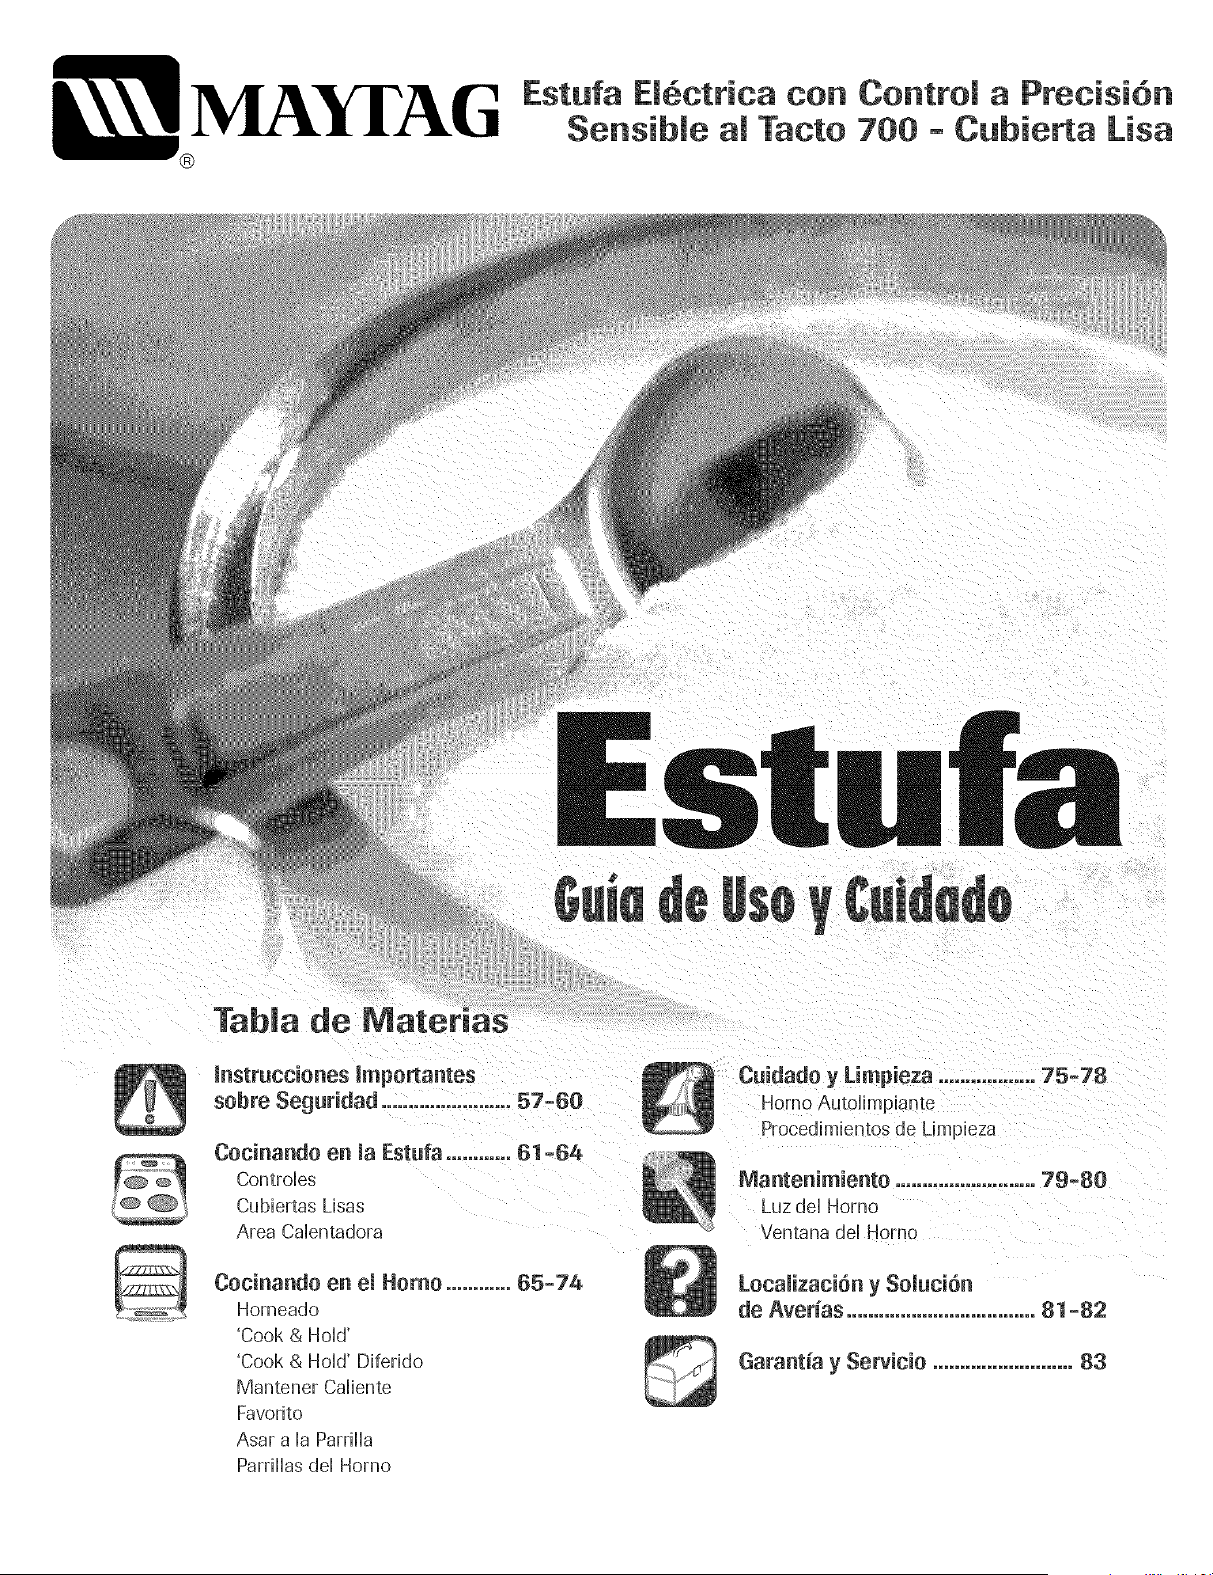
MAY['AG '° °°"c
Sensible al Tacto TOO - Cubierta Lisa
®
0
Tabmade Materias
lnstrucciones [m portantes
sobre Seguridad ........................ 57-60
Cocinando en maEstufa ............ 61-64
Contro[es
Cubiertas Lisas
Area Cdentadora
Cociaando ea ei Horao ............65-74
Horneado
'Cook & HoHd'
'Cook & HoM' Diferido
Mantener Cdiente
Favorito
Asar a [a Parri[[a
Parri[[as de[ Horno
Cuidado y Limpieza ..................75-78
Horno Autolimp[ante
Procedimien _osde Limpieza
Mantenimiento ..........................79-80
Luz del Homo
Ventana del Homo
Locaiizaci6n y Soiuci6n
de Aver_as ...................................81 =82
Garantia y Servicio .......................... 83
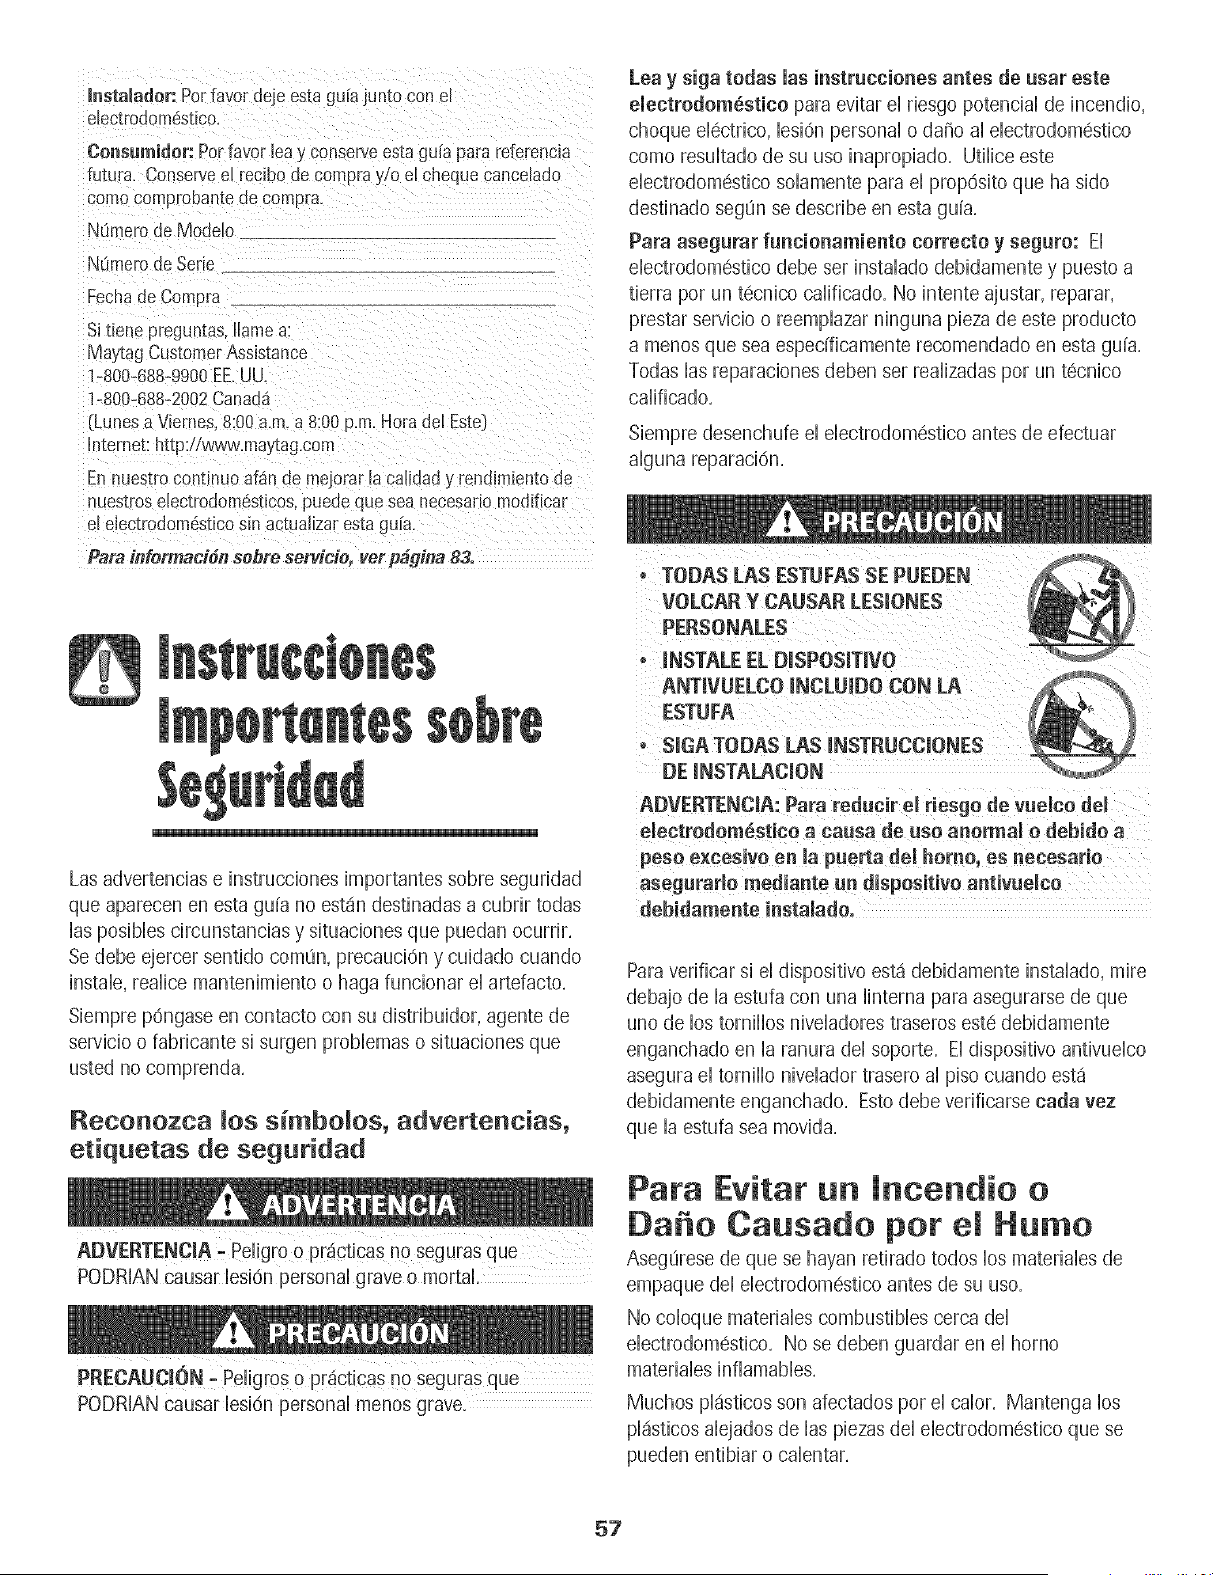
mnstalador:Porfavordeje estagu[ajunto con e[
e_ec[rodom6stbo.
Oensumidor: Por favor bay conserveestagula parareferencla
futura Conservee[ reclbo de comprayio e[ chequecanceiado
como comprobantede compra.
NOmerode Mode[o
NQmerode Serie
Fecha de Compra
Si tiene preguntas. Hame a:
MayEag Customer Assistance
1-800-,688@900 EE.UU.
1-800-688-2002 Canada
(Lunes a Vbnles. 8:00 a.m. a 8:00 p.m. Hora de[ Este]
Internet: http:/iwww.may[a g.com
En nuestro contmuo alvin de mejorar la ca[idad y rendim[ento de
nuesuos electrodom@t_cos, puede que sea necesado modiflcar
el ebctrodom@t[co sin actual[zar esta gala.
Para ittfermaci6s_ sebre set_dcie, vet pbgJna 83.
Las advertencias e mstrucciones umportantes sobre seguridad
que aparecen en esta guia no estan destinadas a cubrir todas
ias posibies circunstancias y situaciones que puedan ocurrir,
Se debe ejercer sentido comSn, precauciOn y cuidado cuando
instale, realice mantenimiento o haga funcionar el artefacto,
Siempre pOngase en contacto con su distribuidor, agente de
servicio o fabricante si surgen probiemas o situaciones que
usted no comprenda,
Reconozca Ros simbo}os, advertencias,
etiquetas de seguridad
ADVERTENCmA- Peligro o pr_icticas no seguras que
PODRIAN causar bsi6n personal grave o mortal,
PRECAUC{0N _ Pelig[0s o pr_cticas n0 seguras que
PODRIAN causar lesi6n personal menos grave,
Lea y siga todas las instrucciones antes de usar este
electrodom6stico para evitar el riesgo potencial de incendio,
choque ei@trico, iesi6n personal o da_ioai eiectrodom6stico
como resultado de su uso inapropiado, Utilice este
eiectrodomestico soiamente para ei prop6sito que ha sido
destinado segun se describe en esta guia,
Para asegurar funcionamiento correcto y seguro: El
eiectrodomestico debe ser instaiado debidamente y puesto a
tierra por un t@nico caiificado, No intente ajustar, reparar,
prestar servicio o reempiazar ninguna pieza de este producto
a menos que sea espedficamente recomendado en esta guia,
Todas ias reparaciones deben ser reaiizadas por un tecnico
calificado,
Siempre desenchufe el electrodom6stico antes de efectuar
aiguna reparaci6n,
, TODAS LAS ESTUFAS SE PUEDEN
VOLCAR Y C,_
Para verificar si el dispositivo esta debidamente instalado, mire
debajo de ia estufa con una iinterna para asegurarse de que
uno de los tornillos niveladores traseros este debidamente
enganchado en la ranura del soporte, El dispositivo antivuelco
asegura el tornillo nivelador trasero al piso cuando esta
debidamente enganchado, Esto debe verificarse carla vez
que la estufa sea movida,
Pata Evitar ce dio o
Da o Ca sado pot H mo
Aseg8rese de que se hayan retirado todos los materiaies de
empaque del electrodom6stico antes de su uso,
No coioque materiaies combustibles cerca dei
eiectrodomestico, No se deben guardar en ei homo
materiales infiamables,
Muchos piasticos son afectados por ei caior, Mantenga los
pi_sticos aiejados de ias piezas dei eiectrodomestico que se
57
Paraevitarincendiosdegrasa,nopermitaacumuhd6nde
grasadecocinarodeotrosmateriabsinfiamabbseneIhomo
oensucercan[a,
En Case de lncer|die
Use un extinguidor con producto quimbo seco o deI tipo
espuma o bicarbonate para apagar eI incendio o las llamas,
Nunca use agua en un incendio de grasa,
1, Apague eI homo para evitar que la llama se disperse,
2, NUNCA bvante o mueva una sarten en llamas,
3, Apague eI fuego o la llama cerrando la puerta deI homo,
Seguridad para los Ni es
NUNCA almacene art[cu!os de inte[ds para los niSos en los
estufa Para alcanza[ tabs art[culos pueden bsionarse
Seriamente,
NUNCA deje a los nixies solos o sin supervisi6n cuando el
homo este en use o cuando est6 caliente, No se debe nunca
permitir que los nixies se sienten o se paren en ninguna pieza
del electrodomestico pues se pueden lesionar o quemar,
Se les debe ensdiar a los nixies que el electrodom_stico y los
utensilios que est_in en el pueden estar calientes, Deje enfriar
los utensilios calientes en un lugar seguro, fuera del alcance
de los nixies, Se les debe ense_ar a los nixies que un
eiectrodom6stico no es un juguete y que no deben jugar con
los controles u otras piezas del artefacto,
lr|struccier|es Ger|erales
NUNCA use un eiectrodom6stico come un peldaho para
aicanzar los armanos superiores. El use incorrecto de la
puerta del electrodomestico tabs come pisar sobre ella.
apoyarse o sentarse en la puerta puede resultar en que el
electrodom6stico se vuelque, se rompa la puerta y se
causen lesiones graves.
Para evitar posibles riesgos para el usuario y da_io al
electrodomdstico, no use este producto come una estufa para
calentar o entibiar una habitaci6n, Adem_s no use el homo
come un lugar para guardar alimentos o utensilios de cocina,
No obstruya la circulaci6n del aire bloqueando el respiradero
dei homo,
NO TOQUE LOS ELEMENTOSCALEFACTORESNI LAS
SUPERFICIESINTERIORESDEL HORNO, Los eiementos
calefactores pueden estar calientes a8n cuando su color sea
obscure, Las superficies interiores de cuaiquier homo se
calientan Io suficiente come para causar quemaduras,
Durante y despu6s dei use, no toque ni permita que ias ropas
u otros materiales inflamables entren en contacto con los
eiementos caiefactores o ias superficies interiores dei homo
hasta que no se hayan enfriado, Otras superficies que pueden
estar calientes incluyen la cubierta, las superficies que est_in
dirigidas hacia ia cubierta, ei respiradero dei homo, ia
superficie cercana a ia abertura dei respiradero, ia puerta dei
homo y ia area que ia rode& y ia ventaniiia dei homo,
No toque un foco caiiente dei homo con un patio hu]medo
pues se puede quebrar, Si ei foco se quiebra, desenchufe ei
eiectrodom6stico antes de sacar ei foco para evitar sufrir un
cheque ei6ctrico,
NUNCA use papei de aiuminio para cubrir ias parriiias dei
homo ni ei panel inferior dei homo, Ei use incorrecto puede
resuitar en un riesgo de cheque ei6ctrico, incendio o da_io ai
electrodom6stico, Use papel de aluminio solamente come se
indica en esta guia,
Seguridad al Cecir|ar
Nunca caliente un contenedor de alimento cerrado en el
homo, La acumuiaci6n de presi6n puede reventar ei
contenedor causando una lesi6n personal grave o daSo al
electrodom6stico,
Use tomaollas secos y gruesos, Los tomaollas huJmedos
pueden causar quemaduras per vapor, No se deben usar
toallas de secar los plates ni otros sustitutos en vez de los
tomaollas porque ellos pueden pasar sobre los elementos
calientes y prenderse fuego o pueden quedar atrapados en las
piezas del electrodomestico,
Use vestimentas apropiadas, Las ropas sueltas o ropas con
mangas largas sueltas no se deben usar cuando se est,1
cocinando, La ropa se puede prender fuego y causar
quemaduras si entra en contacto con los elementos
calefactores,
58
Sbmpre coIoque hs parriihs deI homo en las posbiones
deseadas cuando eI homo estd frio, Desibe la parriiia deI
homo hacia afuera para agregar o retirar aiimento usando
tomaoiias secos y gruesos, Sbmpre evite coIocar o retirar
aiimento deI homo sin sacar la parriih hacia afuera, Si una
parriiia debe ser movida cuando este cdbnte, use un
tomaoiias seco, No deje que eI tomaoiia entre en contacto
con eI ebmento caiiente deI homo,
Use las parriiBs sohmente en eI homo en que fueron
enviadas/compradas,
Tenga cuidado cuando abra la puerta del homo, Primero deje
que salga el aire o vapor cdiente antes de sacar o volver a
colocar el dimento en el homo,
ADVERTENCIA SOBRE ALIMENTOS PREPARADOS: Siga
las instrucciones del fabricante del alimento, Si un contenedor
de dimento congelado de plastico y/o su tapa se deforma,
comba o de otra manera se da_ia durante la cocciOn,
inmediatamente descarte el aiimento y su contenedor, El
alimento puede estar contaminado,
No permita que el papel de duminio o la sonda de la came
toque el ebmento cabfactor,
Siempre apague todos los controbs cuando haya terminado
de cocinar,
Seguridad sobre el Use
de Utensilios
Siga [as instrucciones de[ fabricante cuando use boisas para
cocinar en el homo,
El rendimiento y funcionamiento seguro de este
electrodom6stico ha sido comprobado usando utensilios de
cocina tradicionales, No use ningSn dispositivo o accesorio
que no haya sido espedficamente recomendado en esta guia,
No use sistemas de convecci6n agregables a hornos, El uso
de dispositivos o accesorios que no sean expresamente
recomendados en esta guia puede crear peiigros graves de
seguridad, afectar el rendimiento y reducir la vida 8tii de los
componentes de este electrodom6stico,
Si el utensilio es m_s pequdio que el elemento, una porci6n
del elemento quedar_ expuesta y puede encender la ropa o un
tomaollas,
Solamente ciertos tipos de utensilios de vidrio, vidrio ceramico,
cer_mica, gres u otros utensilios vidriados son convenientes
para cocinar en la superficie o en el homo sin quebrarse
debido al repentino cambio de temperatura, Siga las
instrucciones del fabricante del utensilio cuando use vidrio,
Gire los mangos de los utensilios hacia el centro de la
cubierta, no hacia la habitaci6n ni sobre otro elemento
superior, Esto reduce el riesgo de quemaduras, encendido de
materiales inflamables o derrames si el utensilio es tocado
accidentalmente o alcanzado por ni_ios pequdios,
NUNCA deje los eiementos superiores sin supervisi6n,
especialmente cuando est,1usando los ajustes de calor altos,
Un derrame sin recibir la debida atenci6n puede causar humo
y un derrame de grasa puede causar un incendio,
Este electrodom6stico tiene diferentes tamaSos de elementos
superiores, Seleccione utensilios que tengan bases planas Io
suficientemente grandes para cubrir el elemento, La relaci6n
adecuada entre el utensilio y el elemento mejorara la
eficiencia al cocinar,
CUBIERTA DE VIDRIO CERAMICO: NUNCA cocine sobre
una cubierta quebrada, Si la cubierta de la estufa se quiebra,
los agentes de iimpieza y los derrames pueden penetrar y
crear un riesgo de choque ei6ctrico, P6ngase en contacto con
un tecnico caiificado inmediatamente,
O mas Freidoras
Use extremo cuidado cuando mueva la olla con aceite o
descarte la grasa caliente, Deje que la grasa se enfrie antes
de intentar mover ia oiia,
Campanas de Venti aci6n
Limpie con frecuencia ia campana y los fiitros a fin de evitar
que se acumuie en eiios grasa u otros materiaies infiamabies y
para evitar incendios de grasa,
Cuando prepare alimentos fiameados debajo de la campana,
encienda ei ventiiador,
59
Seguridad en [a Li pieza
Limpie con cuidado [a cubierta, Apague todos los controIes y
espere que se enfrien hs piezas de[ eIectrodomestico antes de
tocarIas o [impiarIas, Limpie con cuidado, Tenga cuidado
para evitar quemaduras de vapor si usa una esponja o un
paso mojado para [impiar los derrames en una superfide
caIiente. AIgunos [impiadores pueden produdr vapores
nodvos cuando se apIican en una superfide caIiente,
Limpie soIamente hs piezas indicadas en esta guia,
Homo Auto[impiante
c0dna, etC. en e[ homo durante e[ c[do de autoHmp[eza_
No [impie [a junta de [a puerta, La junta de [a puerta es
esencial para obtener un buen sello, Se debe tener cuidado
de no frotar, da_ar ni mover la junta,
No use limpiadores de homo ni forros de homo de ning(Jn tipo
alrededor ni en ninguna parte del homo autolimpiante,
Antes del ciclo de autolimpieza del homo, retire la asadera, las
parrillas del homo y otros utensilios y limpie cualquier derrame
para evitar humo excesivo o Ilamaradas,
Aviso y Advertencia
[mpertante Sobre Seguridad
La Propuesta 65 de la Ley de 1986 del Estado de California
Sobre Seguridad y Contaminaci6n del Agua Potable (California
Safe Drinking Water and Toxic Enforcement Act of 1986Dexige
que el Gobernador de California publique una lista de las
sustancias que segOn el estado de California causan c_ncer o
da_o al sistema reproductivo y exige que las empresas
adviertan a sus clientes sobre la exposici6n potencial a tales
sustancias,
Se advierte a los usuarios de este e[ectrodomdstico que cuando
el homo estd funcionando en el ciclo de autolimpieza, puede
haber exposici6n de bajo nivel a algunas de las sustancias
indicadas en la lista, incluyendo mon6xido de carbono, La
exposici6n a estas sustancias puede set reducida a un minimo
ventilando el homo al exterior en forma adecuada, abriendo las
ventanas yio la puerta en la habitaci6n en donde est,1 ubicado
el electrodom6stico durante el cido de autolimpieza,
AVISO iMPORTANTE RESPECTO A LOS PAJAROS
DOMESTiCOS: Nunca mantenga [os p_jaros en [a coc[na o en
las habitaciones donde puedan Ilegar los humos de la cocina,
Los pajaros tienen un sistema respirator[o muy sensitivo, Los
humos producidos durante el ciclo de autolimpieza del homo
pueden ser periudiciales o mortales para los p_jaros, Los
humos que despide el aceite de cocina recalentado, la grasa,
margarina y los utensilios antiadherentes recalentados pueden
tambi6n ser perjudicia[es,
Conserve estas [nstrucciones para Referencia Futura
60
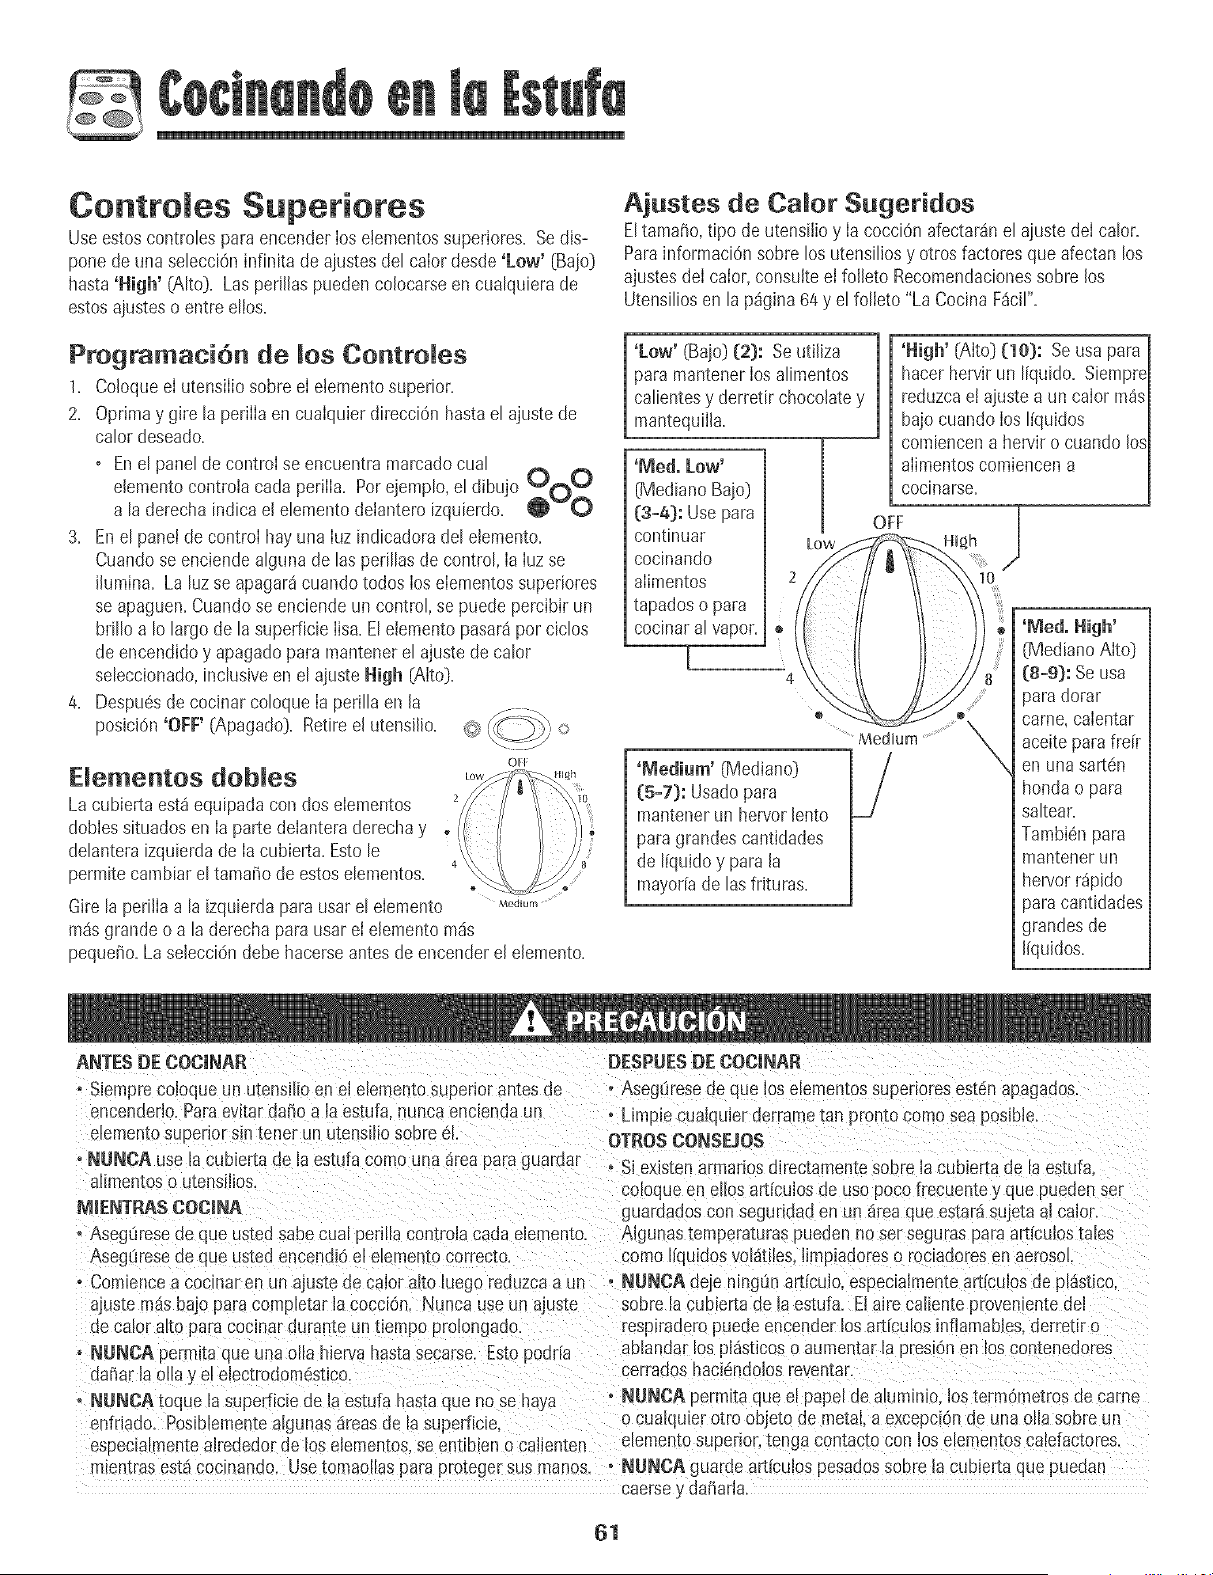
Controles Superiores
Useestoscontrolespara encenderIoselementossuperiores. Sedis-
ponede una selecci6ninfinita deajustesdel caIor desde'Low' (Bajo]
hasta'High' CAIto).Las perJllaspuedencolocarseen cualquierade
estosajusteso entre elios.
Programaci6n de [os ControJes
1. ColoqueeI utensiIiosobre eI elementosuperior+
2. Oprimay g[re la periIIaen cuaIquierdirecci6nhastael ajustede
calor deseado.
o Enel paneldecontrol se encuentramarcadocual
elementocontrolacarla periIIa. Porejemplo,el dibujo Ocj_O
a laderecha indica elelementodeianteroizquierdo. Ov_::}
3. Enel panel de controI hayuna Iuzindicadoradel elemento.
Cuandose enciendealgunade las perillasde control, Ia Iuzse
ihmina. La luzse apagar4cuando todos Ios eIementossuperiores
se apaguen.Cuandose enciendeun control,se puede percibir un
brillo a Io largode la superficie Iisa.Eleiementopasar4por ciclos
de encendidoy apagado para mantenerel ajustedecalor
seleccionado,inclusiveen el ajusteHigh (Alto).
4. Despu6sde cocinarcoloqueIa perilla en la
posJcidn'OFF' (Apagado}. Retire el utensJlJo. _ I o
OtF
Dementos dobies
La cubiertaest4equipadacon dos eIementos
doblessituadosen Ia parte deianteraderechay
delanteraizquierdade Iacubierta. Estole
permitecambiarel tamaiiode estoselementos. +
Girela perilIaa la izquierdapara usarel eIemento
m4sgrandeo a la derechaparausar el eJementom4s
pequeSo.LaselecciOndebehacerseantesde encendere[ eJemento.
Medium
Ajustes de Calor Sugeridos
EItamaSo,tipo de utensiiioy IacocciOnafectar4nel ajustedeI caIor,
Parainformaci6nsobre los utensiliosy otros factores que afectan los
ajustesde[ caior, consuiteel foHetoRecomendacionessobre los
Utensiliosen la p4gina64y el folieto "La CocinaF_cil".
'[Low' (Bajo)(2}: Se uti[iza
paramantenerlos aIimentos
calientesy derretir chocolatey
mantequii[a.
'Meal. Low'
(MedianoBajo)
{3+4}: Usepara
continuar
cocinando
aIimentos
tapadoso para
cocinaralvapor.
[
4
'Medium' (Mediano]
{5+7}: Usadopara
mantenerun hervorlento
paragrandescantidades
de ffquidoy para la
mayoffade las frJturas.
'High' (Alto) !:le}: Seusa para
hacerhervir un liquido. Siempre
reduzcae! ajustea un calor m_s
bajocuandolos ffquidos
comiencena hervir o cuando los
alimentoscomiencena
oooi[/a rse,
OFF
10
@
Medium ...............X
'Meal. High'
(MedianoAlto)
(8o9): Seusa
paradorar
came, calentar
aceiteparafrdr
en una sa_en
hondao para
saitear.
Tambi6npara
mantenerun
hen/orr_pido
paracantidades
grandes de
liquidos.
ANTES DECOCiNAR
• Slempreco[oqueun utensiHoen el e[ementosuperiorantesde
eneender[o.Parae_itar daffo a [a estufa, nuncaenciendaun
e[emen[osu3er[orsin tenet un utens[_tosoure el
• NUNCA use la cubtertade [aestufa como una area para guaroar
allmentoso utensi[ios,
M[ENTP,AS COC[NA
° Asegureseae que ustedsabecual peril[a controia cada eiemento,
Asegureseae que ustedencend+6el e[emen[ocorrec[o,
. Comiencea cocmaren un ajuste de caloralto [uego reouzcaa un +
ajustem_sba;opara comp[etaria co(c[6n. Nuncause un ajuste
oe cmora_[opara cocinar duranteun t+empopro[ongado.
- NUNCA perm+taque una ouah+ervahastasecarse. Estoaouria
ua_arla ol[a y e! eiectrodom6st+co.
+ NUNCA toque [a superficiede [a estufa hastaque no se naya
enfriado, Posibiementea[gunas dreasde la superficie.
especialmentealrededorde los elementos se entibien e calienten
DESPUES DE COCiNAR
*Asegureseaeque los e[ementossupenoresestenapagados.
+ Limp+ecualquier derrametan promo comosea pos+ble,
OTROSCONSEJOS
° Si existenarmar[osdirectamentesoDre[a cubiertade [aestufa.
coloqueen eliosarticulosde uso pocofrecuentey que pueaenset
guaroadoscon seguridaden un 4tea aue estar4sujeta a[ caior,
Algunastempe,'a_uraspueden no set seguraspara articulostales
comoffquidosvol4tiles,limp+adoreso rocmdoresen aerosol.
NUNCA uejenlng0narticulo, especiaimentearticulos dep!_stico.
sobrela cubiertade laestufa. Ela+recaiiente provenientedel
resDraderopueoeencenderlos articulosinfiamabies,derretir o
abiandarlos pl4sticoso aumenmrla presi6nen loscontenedores
cerraaoshac+dndolosreventar.
+NUNCA permitaque el pape[de alumm_c,lostermOmetrosoe came
ocuatquierotro objeto de metal,a excepc_,Snde unaolla sobreun
e_emen[osuper+or,_engacontacto con los ebmentos calefactores,
mlentrasest4 coclnando. Usetomaoitaspara protegersus manos. • NUNCA guardear_iculospesadossobre[a cub+ertaque pueoan
caersey da_arla,
61

Cubiertas Lisas
Notas sobre [as cubiertas [isas:
o La cubierta de maestufa puede emitir un poco de humo y
omer_aprimeravez que se uti[iz& Esto es normal
oLas cubierlas misasretienen emtamerper un cierto periodo
despe6s qee se ha apagado maestefa. Apaguelos etementos
unos pocosminutos antesde que Iosalimentosest@
completamentecocinadosy use et caior restanteparacompbtar
la cocci@. Cuando[a Iuz de superficb caiientese apaga [ver a
continuaciOn},e[ _readon@ se cocinaestar_fr[a aitacto.
Debido a Ia maneraenque retienen e[caIor, loseIementos[isos
no responder_ntan r@idamentea los cambiosen losajustes
como Iosebmentos espirales.
oEncasode un posible derrame,retireel utensiIiode [acubbrta
de la estuf&
oNunea trate de mevantarmacubierta.
oLa superficb lisapuedeversedescoioridacuando est_ca[iente.
Estoes normaly desaparecer8cuando Iasuperficiese enfffe.
Dementos Superiores
Los eIementossuperioresensu estufaest_nidentificadosper
drcuIos permanentesen [a superficieIisa. Paracoc[narde manera
m_seficiente,use un utensi[ioque seadel mismotamaho que e[
e[emento.
Los ute#sgios no debe# extenderse robsMJ#de f2 a 25 mm
(1/2 a f pulgada) del tama#e del eleme#te.
Cuandose enciendeun control,se puedeverun respIandora trav6s
de [asuperficb lisa.Ememementopasar_ pot cicmosde encendido
y apagado para mantener el ajuste de earnersemeecionado,aen
en emajuste'Hi' (gmto}.
ParamayorinformaciOnsobre los utensiliosconsuIte[a secciOn
Recomendacionessobre Ios UtensiIiosen Ia p%ina 64y el folIeto
"La CocinaF_cil"que se incluyecon su estuf&
ELEMENTO
ELEMENTO
DOBLE
AREA CALENTADORA
/
ELEMENTO
Luz lndicadora de Superficie Caliente
La [uzindicadorade superficb calbnte seencuentra en el panel de
control. La[uzse iIuminar8cuando cuaIquierade los ebmentos
superioresest6caIiente.Permanecer_encendida
a@ desp@sde que e[ controlsea apagado,hasta
queel arease hayaenfriado. Net: Surface
Area Calentadora
Useel _reacalentadoraparamantenercalbntes los alimentosya
cocinados,tal comoverduras,salsasy platosde servirresbtentesal
horno.
Ajuste del control:
1.
OFF
Oprimay gire [aperil[a. Lastemperaturas
de calentamientoson aproximadasy Ma×
est_nindicadasen e[ control come
'Min' (Min.}2-8 y 'Max' (M_x.}.Sin Mn( 8
embargo,eI control puedecolocarseen
cualqubr posbiOnentre 'Min' y 'Ma×'.
}
Cuandohayaterminado,gireei control a
[aposbiOn'OFF'. La luz indicadoradesuperficie
calientese apagar_cuandose hayaenfriado la superficiede[
_reacabntadora.
_OtaS:
o Nunca cal[entealimentosdurante ross de una hora (los huevos
durante30 minutos}, puesse puede deteriorar [acaIidadde[
a[imento.
o No caliente alimentos fffos en el airea calentadora.
o Losajustesvariaraindependbndo de! tipo y cantidadde
allmento.Siempremantengael aiimentoalas temperaturas
apropiadasdel alimento.ElUSDArecomlendatemperaturas
entre 60° - 75° C 040° - 170° F}para los alimentos.
Ajustes Sugeridos
Ajuste Tipo de Alimento
Min - 2 Panes/PasteIitos Salsas
Cacerolas Huevos
2 = 5 Carnes Plato de servir con comida
Sopas (Crema} SaIsas
Estofados Verduras
5 - Max Alimentos fntos Bebidas calientes
Sopas {Liquid@
Notas sobre el rea ca[eatadora:
o UsesoIamenteutensiiiosy piatosrecomendadosespecificamente
para usaren e[ hornoyen ia cubiertaiisa,
o Siempreuseguantes para e[ horno cuando retire los aIimentos
de[ _reacabntadora pues los utensiliosy los platesestar_n
calientes.
o Todoslos allmentosdebencubnrsecon unatapa o con pape[de
aluminio para mantenerIacalidad de los alimentos.
o Cuandose calientanpastelitosy panes la tapa debe tenet una
abertura paradeiarsalir Ia humedad.
o No useenvoltura de pldsticopara tapar los alimentos.El pkistico
se puedederretir en la superficb y set muydificil de [lmpiar.
62
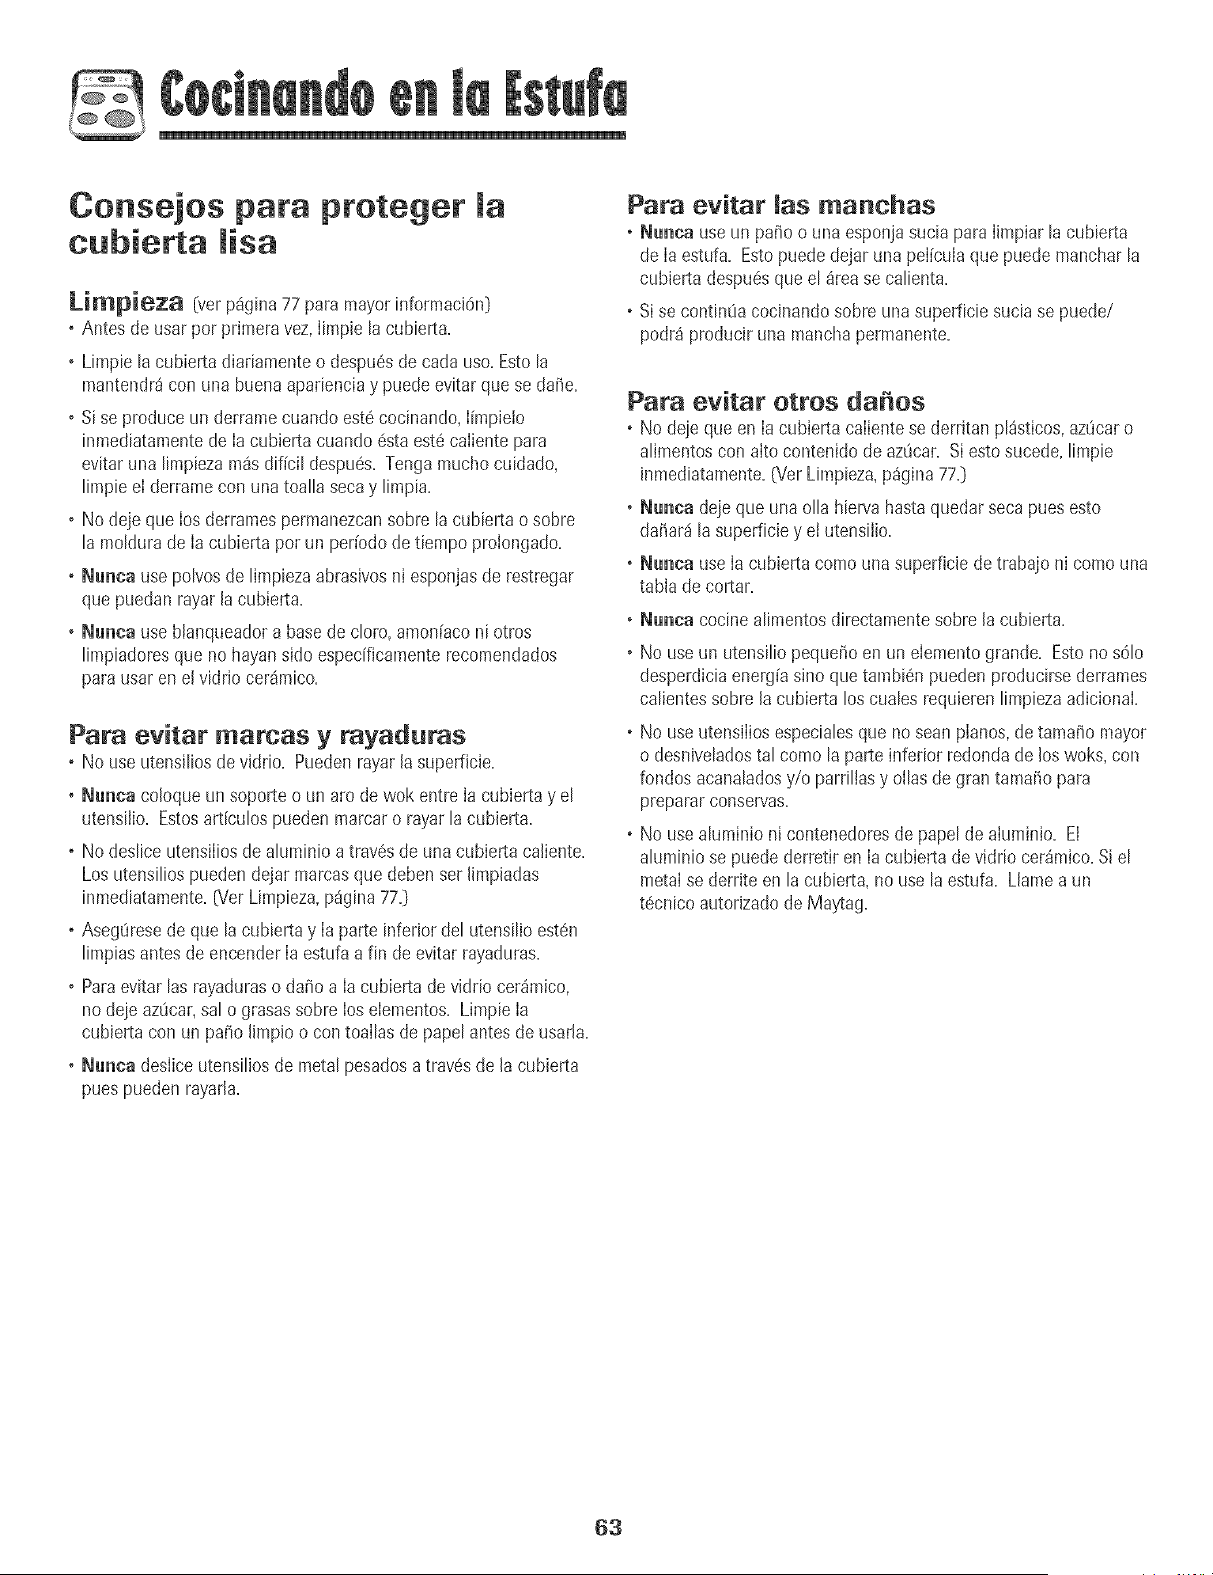
Consejos para proteger la
¢ubierta lisa
Umpieza [ver p_gina77 para mayorinformaci6n[}
, Antes de usarpor primeravez,Iimpie la cubierta+
, Limpie lacubierta diariamente o despu6sde cadauso+Estola
mantendr_con una buenaaparienciay puedeevitar que se dafie+
, Si se produce un derramecuandoest6 cocinando,Iimpielo
inmediatamentede Iacubierta cuando6staest6caIientepara
evitaruna limpiezarossdificil despu6s+Tengamucho cuidado,
limpie eI derramecon unatoalla secay limpia.
, No dejeque los derramespermanezcansobre la cubiertao sobre
la moldurade Ia cubiertapor un per[odode tiempo proiongado+
, Nullea use polvosde limpiezaabrasivosni esponjasde restregar
quepuedanrayar lacubierta+
, Nmlca use blanqueadora basede cloro,amon[aconi otros
limpiadoresque no hayansido especificamenterecomendados
parausar en elvidrio cer_mico+
Para evitar mareas y rayaduras
, No use utensiliosdeviddo. Puedenrayar lasuperficie.
, Nmlca coloque un soporte o un aro dewok entre la cubierta y el
utensilio. Estosarticulos puedenmarcar o rayarla cubierta.
, No desliceutensiIiosde aluminioa trav6sde una cubierta caliente.
Los utensiliospuedendejar marcasque deben set limpiadas
inmediatamente.{Vet Limpieza,p_gina77.}
, Asegtiresede que lacubiertay Ia parte inferior del utensilioest6n
limpiasantes deencenderIa estufa a fin deevitar rayaduras.
, Paraevitar las rayaduraso dai_oa Ia cubierta de viddo cer_mico,
nodeje azticar,sal o grasassobre Ioselementos. Limpie Ia
cubiertacon un pa_o limpio o con toallasde papel antes de usarla.
, Nmlca desliceutensiliosde metal pesadosa trav6sde la cubierta
puespueden rayarla.
Para evitar manehas
, Nmlea use un pai_oo unaesponjasuciapara Iimpiarla cubierta
de Iaestufa. Esto puede dejar una peI[culaque puedemancharla
cubierta despu6squeel _rease calienta.
, Si se continOacocinandosobreuna superficiesuciase puede/
podr_producir una manchapermanente.
Para evitar otros da os
, No dejeque en Ia cub+ertacaIientese derritan pl_sticos,azticaro
alimentoscon alto contenido de azt_car.Si estosucede,limpie
inmediatamente.(Ver Limpieza,p_gina77.}
, Nunea deje que una olla hiervahastaquedarsecapuesesto
dafiar_ lasuperficiey el utensilio.
, Nmlca use Ia cubiertacomo una superficiede trabajo ni como una
tabla de cortar.
+ BJmlca cocine alimentos directamente sobre la cubierta.
, No use un utensiliopequefio en un elementogrande. Estono s01o
desperdiciaenergiasino que tambi6npuedenproducirsederrames
calientessobre Jacubiertalos cualesrequierenlimpiezaadicionaI.
, No use utensiliosespecialesque nosean pianos,detamaiio mayor
o desnJveladostal como la parte inferior redondade Joswoks,con
rondos acanaladosy/o parriliasy ollasde gran tamafio para
prepararconservas.
, No use aluminio n+contenedoresde papelde aluminio. El
aluminio se puedederretir en Ia cubiertade vidrio cer4mico.Siel
metalse derrite en la cubierta+no use laestufa. Llame aun
t6cnico autorizadode Maytag.
63
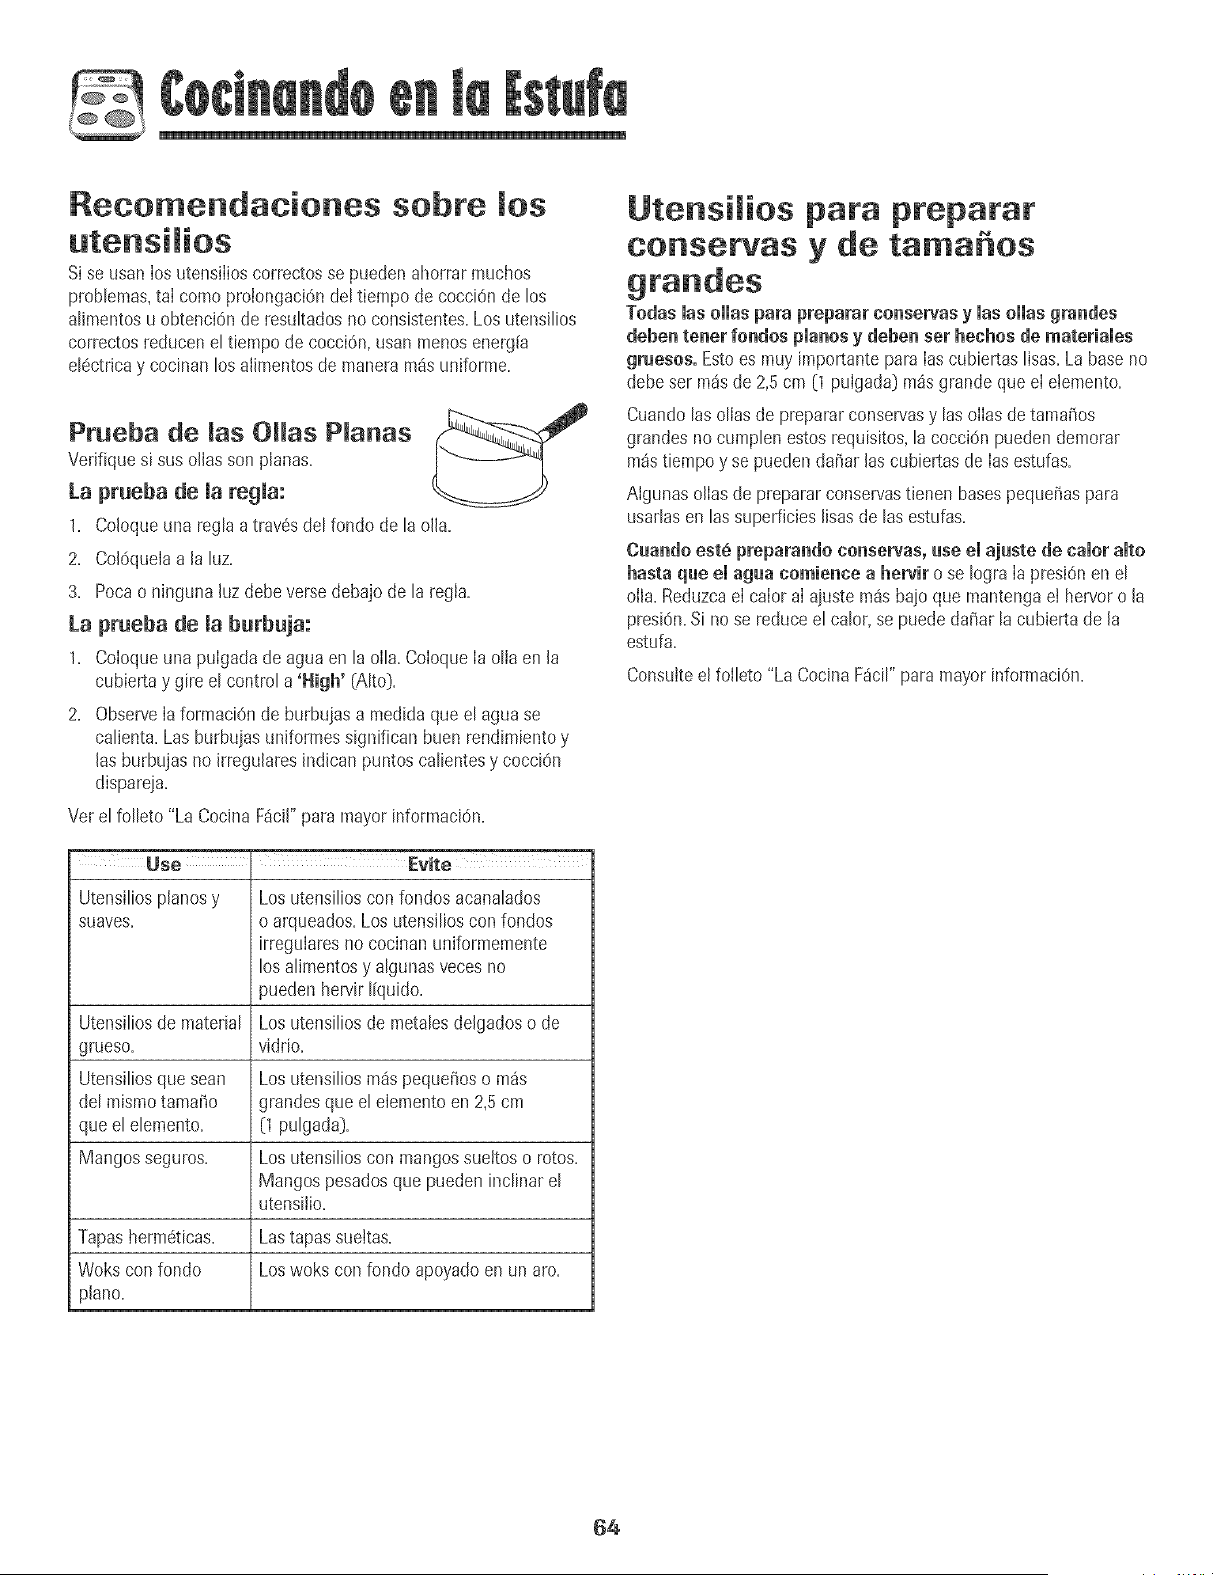
Recomendaciones sobre los
Sise usan los utensilioscorrectosse puedenahorrarmuchos
proNemas,taIcomo proiongaci6ndel tiempo de cocciOnde los
alimentosu obtenci6n de resultadosno consistentes.Losutensilios
correctosreducenel tiernpode cocci6n, usanmenos energ[a
el6ctricay cocinan los alimentosde maneram_suniforme.
Ptueba de las Ollas Planas
Verifique si sus ollasson planas.
La prueba de la regla:
1. Coloqueuna reglaa trav6sdel fondo de la olla.
2. Col6quelaa la luz.
3. Pocao ningunahz debe versedebajo de la regla.
La prueba de la burbuja:
1. Coloqueuna pulgadade aguaen la olla. ColoqueIa olla en la
cubiertay gire el controla 'High' (Alto].
2. ObserveIa formaciOnde burbujasa medidaque el aguase
calienta. Lasburbujasuniformessignifican buen rendimientoy
las burbujasno irregularesindicanpuntoscalientesy cocciOn
dispareja.
Ver el folleto "La CocinaF_cil"para mayorinformaci6n.
Use , Evite
Utensiliospianosy Los utensilioscon rondosacanalados
suaves, o arqueados.Los utensilioscon fondos
irregularesno cocinan uniformemente
los alimentosy algunasvecesno
puedenhewir liquido.
Utensiliosde material Los utensiliosde metalesdelgadoso de
grueso, viddo.
Utensiliosque sean Los utensiliosm_spequeiioso m_s
del mismotama_o grandesque el elementoen 2,5cm
que el elemento. (1pulgada].
Mangosseguros. Los utensilioscon mangossuettos o rotos.
Mangospesadosque puedeninclinar el
utensilio.
Tapasherm6ticas. Lastapassuettas.
Wokscon fondo Loswoks con rondo apoyadoen un aro.
piano.
Utensilios para preparar
conservas y de tama os
Todaslas ollas para preparar conservas y las elias grandes
deben tenet rondos pianos y deben set hechos de mateHales
graesos° Estoes muy importantepara Ias cubiertaslisas.La baseno
debeser m_sde 2,5cm (1pulgada] m_sgrandeque el etemento.
Cuandolas ollasde preparar conservasy lasolIas de tamatios
grandesno cumplen estosrequisitos,la cocci6n pueden demorar
m_stiempoy se puedenda_ar lascubiertas de Iasestufas.
Algunasollas de prepararconservastienen basespequei]aspara
usarlasen las superficieslisasde las estufas.
Caandoest6 preparando conservas,use el ajaste de caior alto
hasta qae el agaa comience a herviro se Iogra Ia presiOnen el
olla. Reduzcael calor aI ajuste ross bajo que mantengaet hervoro la
presi0n.Si nose reduceel calor,se puededa_arla cubiertade la
estufa.
Consulteel folleto "La CocinaF_cil"paramayorinformaciOn.
64
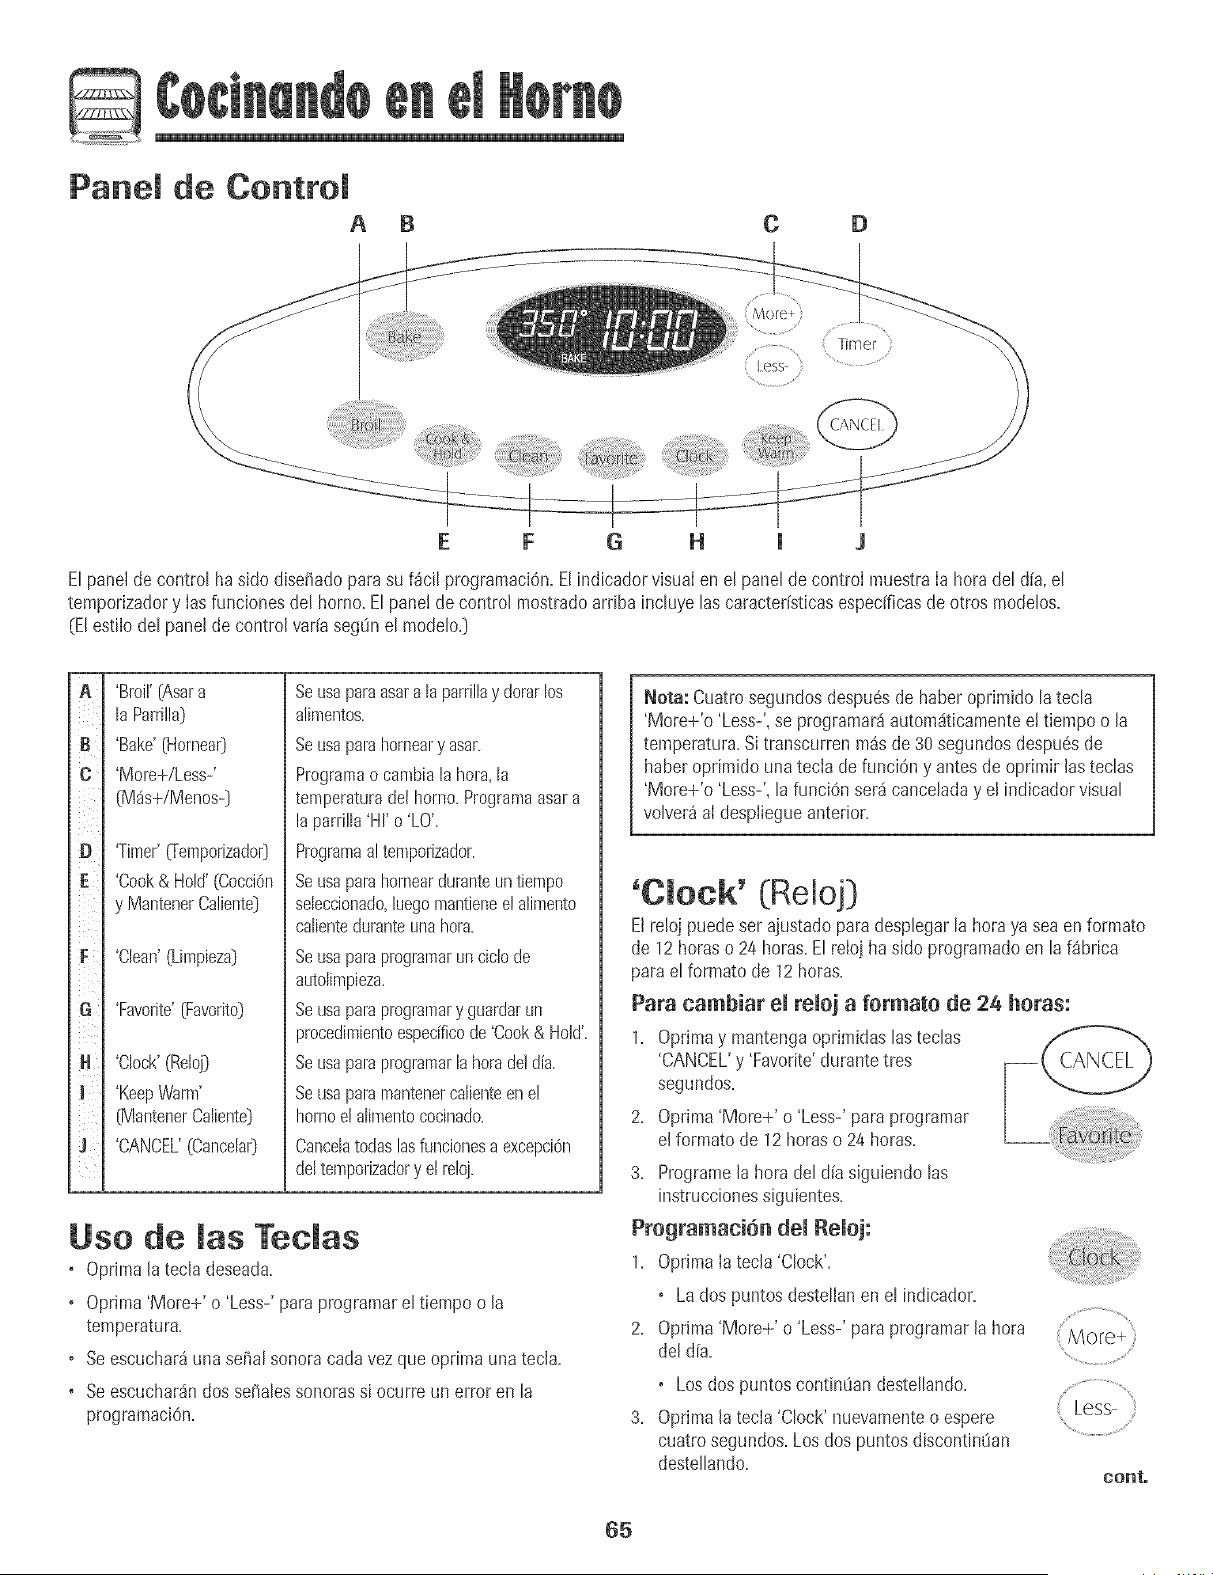
Panel de Control
A B C D
Elpanelde control hasJdodlsefiadoparasu f_cil programaci6n.Elindicadorvisualen el panel de control muestrala hora de[ d[a,el
temporizadory lasfuncionesde[ homo.Elpane!de control mostradoarribaincluyelas caracteristicasespecfficasde otros modelos.
(Elestilodel panelde control variaseg_inel mode[o.)
A
B :
C
D
E
G ¸
H
'Broil'(Asara
laParrilla)
'Bake'(Hornea0
'More+/Less-'
(M_s+/Menos-)
'Timer'_emporizador)
'Cook& Hold'(CocciOn
y MantenerCaliente)
'Clean' (Limpieza)
'Favorite'(Favorito)
'Clock'(Reloj)
'KeepWarm'
(MantenerCaliente}
'CANCEL'(Cancela0
Seusaparaasara la parrillay dorarlos
alimentos.
Seusaparahorneary asar.
Programao cambiala hora,la
temperaturadethomo.Programaasara
lapanilla'HI' o'LO'.
Programaa!tempofizador.
Seusaparahornearduranteun tiempo
seleccionado,luegomantienee!alimento
calienteduranteunahora.
Seusaparaprogramarun cictode
autolirapieza.
Seusaparaprogramary guardarun
procedimientoespecfficode'Cook& Hold'.
Seusaparaprogramarla horade!dh.
Seusaparamantenercalienteen e!
hornoelalimentococinado.
Cancehtodaslasfuncionesa excepci6n
deltemporizadory elreloj.
Use de las Tedas
o Oprimala tecla deseada.
o Oprima'More+' o 'Less-'para programareltiempo o la
temperatura.
o Seescuchar_unaseiial sonoracarlavezque oprima unated&
o Seescuchar_ndos sefialessonorassi ocurre un error en la
programaciOn.
Nora: Cuatm segundosdeepudsde haberoprimido [atecla
'More+'o 'Less-',se programar_autom_ticamenteei tiempo o la
temperatura.Sitranscurrenm_s de 30 segundos despu6sde
haberoprimido unatecia defunciOny antes deoprimir lasteclas
'More+'o 'Less-',la funci6n serdcanceladay el indicadorvisual
volver_aI despiiegueanterior.
'Clock' (Reloj)
El re!ojpuedeser ajuetadopara deeplegarla hora ya seaen formato
de 12horaso 24 horas.ElreIo}ha sido programadoen la f_brica
parael formato de 12horas.
Para cambiar ei reioj a formate de 24 betas:
1. Oprimay mantengaoprJmidaslas teclas
'CANCEL'y 'Favorite'durantetres CANCEL
segundos.
2. Optima 'More+' o 'Less-' paraprogramar
elformato de 12horaso 24 horas.
3. Programela horadel d[a siguiendolas
instruccionessiguientes.
ProgramaciSn dei Reioj:
1. OptimaIa tecla'Clock'.
• La dos puntos destellan en el indicador.
2. Optima 'More+' o 'Less-' paraprogramar lahora
del d[a.
• Losdos puntos contintian destellando.
3. Optima la tecla 'Clock' nuevamenteo espere
cuatrosegundos.Los dos puntosdiscontint_an
destellando.
co_t.
65
Cuandose conectaenerg[aeI6ctricaal hornoo despu6sdeuna
interrupciOnde la energ[aeI6ctrica,Ia 0Jtimahora del reloj previaa
la interrupciOndestellar4en el indicador.
Paradesplegarla hora deI d[a cuando el indicadorest6 mostrando
otra funci6n detiempo, optima latech 'Clock'.
La horadel reloj no puedeset cambiadacuandoel hornohasido
programaticpara 'DelayCook','Clean'o 'Cook& Hold'.
Para cancelar el despliegue del reloj:
Si no@sea que eI indicadorvisual muestre la hora del d[a:
Optimay mantengaoprimida lasteclas
'CANCEL'y 'Clock' durantetres segundos+La
horadel d[a desaparecer4del indicador+
Cuandose cancelael desplieguedel reloj,
oprima latecla 'Clock' para desplegar
brevementeJahoradel dia+
Para restaurar el despliegue del reloj:
Oprimay mantengaoprimida lasteclas 'CANCEL'y 'Clock' durante
tres segundos.La horadel dFareaparecer4enel indicador.
'Timer' O-emporizadoO
Eltemporizadorpuedeset programadode un minuto [0:01} hasta99
horasy 59 minutos [99:59}+
Eltemporizadorpuedeset usado independientementedecuaJquier
otra actividadde[ homo+Adem4s puede set programadocuando otra
funci6n del homo est6en funcionamiento+
EltemporJzadorno controlael homo.SoIamentecontrola una se5al
SO[_OFa.
Para programar emtemporizador:
1+ Optima la tecla 'Timer' _Tempodzador}+ Timer .....
i+
o '0:00'desteflaenel hldicadorvisual
o Losdos puntos destellar4n+
2+ Optima Iatecla 'More+' o 'Less-'hastaque el
tiempo correctoaparezcaen eI indicadorvisual
o Losdos puntos contin0an destellando+
3+ OprimanuevamentelatecJa'Timer'o esperecuatro
segundos+
Less- )
o Losdos puntos contin0an desteJlandoy comienzala cuenta
regresivadeJtiempo+
o El0itimo minutode Ia cuentaregresivadel temporizadorse
desplegar4ensegundos+
4+ AI finai del tiempo programatic,se escuchar4una se5alsonora
Jarga+
Para canceJar ei temporizador:
1+ Optimay mantengaoprJmidaJatecJa'Timer' durantetres
segundos+
U
2+ Optima latecla 'Timer'y coJoquelahoraa 0:00+
BJoqueo de Jos Controles y de
la Puetta deJ Homo
EIteclado y Japuertadei homo puedenset bloqueadospara
seguridad,Iimpiezao evitarel uso no autorizado+No funcionar4n
cuandoest6n bloqueados+
SieJhomo est4 en uso,Ioscontrolesni la puerta puedenbloquearse+
La horaactualdel dia permanecer4en el indicador cuando los
controlesest6n bloqueados+
Para bioquear:
Optimay mantengaoprimidas[asteclas (/¢AN (-FI "_
'CANCEL'y 'Cook & HoWdurante tres
segundos+[OprJmaprimero latecla 'CANCEL'}.
'LOCK'destellaenel indicadorvisual+
Para desbioquear:
Optimay mantengaoprimidasIasteclas 'CANCEL'y 'Cook & Hold'
durantetres segundos+(Optimaprimero la tecla'CANCEL'}+
'LOCK'desaparecedel indicadorvisual+
C6digos de Ettotes
'BAKE'o 'LOCK'pueden@stellarr@idamenteparaadvertirleque
hay un error oun problema+Si'BAKE'o 'LOCK'desteilanen el
Jndicadorvisual,optima le tecla'CANCEL'. Si'BAKE'o 'LOCK'
contin0andestellando,desconectela corriente el6ctdca haciaeJ
artefacto+Espereunos pocosminutosy vueJvaa conectar la
corrJenteel6ctrica+Si Ias palabrasa0n continOandesteliando,
desconecteJacorriente el6ctrica haciaeJartefactoy Jlamea un
t6cnico deservicioautorJzado+
66
'Bake' (Horneado}
Para programar 'Bake' (Homeado):
1. Oprimalatecla 'Bake'.
o 'BAKE'destellar&
o '000'destellar4en el indicadorvisual.
2. SeJeccione[atemperaturadel homo. La temperatura
de[ hornopuedeser programadade 75° a285° C
070° a 550° F].Oprimau optimay mantenga
oprimida la tecIa 'More+' o 'Less-'.
o Cuandocualquierade estasdos tecIasse oprime
por primeravez,'175°' ('350°') se iluminar&
o OptimaIatec+a'More+' para aumentarla temperatura.
o OptimaIatecla 'Less-' paradisminuir latemperatura.
3. Oprimalatecla 'Bake' nuevamenteo esperecuatrosegundos.
More+
: Less-:
o 'BAKE'dejar4de @stellary se iJumhlar4en eJindicadorvisual.
o '38° C' ('100° F'] o [atemperaturaactual deJhomo se
despJegar&LatemperaturaseeJevar4en incrementosde
3° C [5° F) hastaque se aJcance[atemperaturaprogramada.
4. Esperea que el hornose precaJientedurante8-15 minutos.
o CuandoeJhornoJJegaa Jatemperaturaprogramadase
escuchar_unaseffaJsonoraJarga.
o Paraverificar[a temperaturaprogramadadurante eJ
precaientamientodeJhorno,optima JatecJa'Bake'.
5. Co[oqueel alimento en eJhorno.
6. Verifique eJprogresode Iacocci6n cuando hayatranscurridoeJ
tiempo minimorecomendado.ContimieJacocciOnsi es necesario.
7. AI t@minode Jacocci6n, oprima[a tecla 'CANCEL'._
8. Retiree[ aJimentodeJhorno.
Notas sobre Homeado:
+ Para cambiar matemperatara dei homo darante em
homeade, oprimaIa tec+a'Bake'y Iuego latecIa 'More+' o
'Less-' hastaque Ileguea la temperaturadeseada.
+ Para camhiar la temperatara dei home darante 'Preheat',
oprimados veces la tecIa 'Bake',Iuegooprima la tecia 'More+'
o 'Less-' hastaque se despIieguelatemperaturadeseada.
+ Si oIvidaapagarel homo, seapagar8autom4ticamentedespues
detranscurrir 12horas.Si deseadesactivarestacaracteffstica,
yea [a p%h]a 70.
• Parasugerenciasadicionalessobre horneadoy asado,consulte
elfoIIeto"La CocinaF4cil".
Diferencias de[ homeado entre su homo
ant+guo y su homo nuevo
Esnormai observaraIgunasdiferenciasen el tiempode horneadode
su homo antiguoy su homo nuew_.Vea "Ajustede laTemperatura
de[ Holno" en [a p4gina71.
'Cook & Hold' (Cocci6n y
Mantener Caliente]
'Oeok & Hold' Ie permitehorneardurante unacantidad
determinadadetiempo, seguidode un ciclo 'KeepWarm' de una
hora.
Para programar 'Cook & Hold':
1,Oprimala tecla 'Cook& Hold',
o 'BAKE'y 'HOLD'deste[ian.
o '000'se iIuminaen e! indicador visual.
2. SeJeccione[a temperaturadel horno.Latemperatura
deJhomo puedeser programadade 75° a 285° C
070° a 550° F]. Optimau oprh4ay mantengaoprimida y .............................
[a tecla'More+' o 'Less-'. _+Less-
, Oprima[a tecla 'More+' paraaumentar[a
temperatura.
o Oprima[a tec[a 'Less-'para disminuir[a temperatura.
3. Oprima[a tecla ' Cook& Hold ' nuevamenteo esperecuatro
segundos.
o 'HOLD'deste[la.
o '00:00'desteIIaene[ indicadorvisual.
4. Programe[a cantidadde tiempodurante [a cua[usteddesea
hornearoprimiendo[a tecIa 'More+' o 'Less-'. E[tiempo de
horneadopuede programarsedesde 10minutos (00:10[hasta
11horas,59minutos [11:59).
o 'BAKE'y 'HOLD'se iIuminan en el indicadorvisual.
o E[tiempo de horneadose i[uminar4en e[ indicadorvisual
o Comenzar_[a cuenta regresivade[tiempo de horneado.
Cuando haya expirado el tiempo de cocci6m
o Seescuchar_ncaatrose_aJessonoras.
o 'BAKE'se apagar4.
o 'HOLD'y 'WARM'se iJuminar_n.
o Enel indicadorse desplegar4'75°, ('WO°'].
67

Despu_s de una hora en 'HOLD WARM' (Mantener
Caliente):
• 'End'se desplegar4.
• La hora dot aliavolver4a desplegarseen et indicadorvisual.
Para canceJar 'Cook & Hold' en cnaJqnier memento:
OprJmala tecJa'CANCEL',Retireel alimento del horno,_
'[::}eJay Bake' (Horneado
Difeddo)
NOUSeh0rnead0difeddo para aHment0sde Cortaduraci6n tabs
comoproductos J4cteos,cerdo, came de aveo madscos.
Cuandousa 'Delay', et homo comienzaa cocinarm4starde en el
d[a.ProgrameIa cantidaddetiempo que usteddeseadifenr antes
de quese enciendael horno y cuantotiempo deseacocinar eJ
alimento.El homo comienzaa calentaren Ia hora seteccionaday
cocinadurante eltiempo especificado,pues mantieneel alimento
calientedurante unahora.
Eltiempo difendo puedeprogramarsede 10minutos(00:10)hasta
11horas,59minutos [11:59}.
Para programar nn cicJo de homeado diferido:
I. OprimaJasteclas 'Bake' y 'Timer'al mismo
tiempo.
o 'DELAY'se iiuminaen el indicadorvisual.
o '00:00'se despliegaen el indicadorvisual
iimer :
2. OprimaJatecla 'More+' o 'Less-'para
programar el tiempo diferido,
3. OprJmala tecla 'Cook & HoNk
o '000'se ilumina en el indicadorvisual ............................
o 'BAKE'y 'HOLDdesteHan.
4. OprJma'More+' para £rogramar matemperatara
de horneado.
Less-
o 00:00y'HOLD' desteflan.
o 'BAKE'permaneceihminado.
5. OprJma'Mole+' para programar el tiempe de homeado.
, En el indicador visual se iluminan 'DELAY', 'BAKE', y
'HOLD'.
Cnando el tiempo diferido ha expirado:
• 'DELAY'se apagar&
• Se despIiegael tiempo y la temperaturade homeado.
• Se despliega'BAKE'y 'HOLD'.
Para programar nn tiempo diferido cnando ya se ha
programatic 'Cook & Hem(]':
1. Optima lasteclas 'Bake' y 'Timer'.(OprJma
prJmerola tecla'Bake').
• 'DELAY'y '00:00'se despliegaen el
indicadorvisual
2. Oprima latecla 'More+' o 'Less-' para
programarel tiempo diferido.
• 'DELAY'permanecer4iluminadopara
recordadeque se ha programadoun ciclo de .............................................
horneadodiferido.
Cnando ha expirado eJ tiempo diferido y Less-
ei homo oomienza a fnnoionar: ..........................
• Se desplegar4el tiempoy la temperaturade horneado.
• 'DELAY'se apagar&
• 'BAKE'y 'HOLD' permanecer4niluminados.
Para canceJar: @
Oprimala tecla 'CANCEL',
• Todas lasfuncionesde horneadocontroJadaso no pot el
temporizadorser_n canceladas.
• La hora del aliavolver4a desplegarseen el indicadorvisual.
Notaa:
o No use 'Delay Bake'paraart[culosque requierenun
hornoprecalentado,tales como pasteles,galletasy panes.
• No use 'Delay Bake'si el homo ya est4 caiiente.
68
'Keep Warm' (Mantener
Caliente)
ParamantenercaIientesen formasegura alimentoscaHenteso para
catentarpanesy platos+
Para pregramar 'Keep Warm':
1+ OprimaIatech 'KeepWarm'.
, 'WARM'destelIa+
, '000'se desptiegaen el ind+cadorvisual
2+ SeteccioneIatemperaturade 'KeepWarm'+La
temperaturapara 'KeepWarm' puedeset
programadade63° a 90° C 045° a 190° F]+Oprima
u optimay mantengaoprimida la tecla'More+' o
'Less-'.
Less- i:i+
, Cuandocualquierade estasdos tecJasse oprime por primera
vez+'75°' ('170°'] se ituminar_+
, Optima [atec+a'More+' para aumentar[a temperatura+
, Optima [atec[a 'Less-' para disminuir [atemperatura+
'WARM'y [atemperaturase desplegar_nen e[ indicador cuando
el ciclo'Keep Warm'est6activo+
Para cancetar 'Keep Warm':
1+ Oprimala tecla 'CANCEL'.
2+ Retireel alimentodel homo+
Notas sobre 'Keep Warm':
, Paraca+idad6ptima de losalimentos,losalimentoscoc+nados
en el homo debenser mantenidoscalientespor no m_s de I a
2 horas+
, Paraevitar que losa[imentosse sequen,cObralos[evemente
con papelde a[umin[oo unatapa.
+ Para caientar paneciiios:
- cubra Ievementelos panecilloscon papelde ahminio y
colOquelosen el homo=
- oprima 'KeepWarm' y latecla 'More+' paraprogramar
75° C (170° F].
- calientedurante 12a 15minutos.
, Para camentar pmatos:
- co[oque 2 pi[as de cuatro p[atos carla una en e[ homo+
- oprima 'Keep Warm' y la tecla 'More+' para programar
75° C [170° F].
- caliente los platos durante cinco minutos, apague el homo y
deje los platos en el horno durante 15 minutos m_s.
- use solamente platos resistentes al homo, verifique con el
fabricante.
- nocoloque los ptatoscalientessobreuna superficiefria
pues el cambior_pidode temperaturapuedecausarfisuras
superficiales.
69
Cierre Auto tico/Modo
Elhomo se apagar_autom_ticamentedespuesde 12 horassi usted[o
deiaaccidentaimenteencendido=Estacaracterfsticade seguridad
puedeset desactivada=
Para cancemar emcierre autem_tice de 12 heras y
dejar que el home funciene centinuamente durante
72 heras:
1= Programeel borneparahornear (verp_gina67)=
2= Oprimay mantengaoprimida [a tecta 'Clock'
durante cinco segundos=
o 'SAb'se despiegar_y destetiar_durante cinco segundos=
o 'SAb'se despJegar_continuamentehastaquese desactiveo
hastaque transcurrae[ limite de 72betas=
o 'BAKE'tambi6nse desplegar_s[ se est_ usandoun cic[o de
horneadocuandoel borne est_ en Mode Sab_tico=
Todaslasotras funciones EXCEPTO'BAKE'['Timer','KeepWarm',
'Clean',etc=)est_nb[oqueadasduranteel Mode Sab_tico=
Para cancemar 'Bake' cuande emMode Sab_tice est_
active:
OprJma'CANCEL'=
o 'BAKE'se apagar8en el indicadorvisual
o No se oir_ ningunasdial sonora.
Para cancemar emMode Sab_tice:
1= Oprima[atec[a 'Clock' durante cinco segundos=
O
2= Despuesde 72horas,el Mode Sab_ticoterminar&
o 'SAb'deste[[ar_durante 5 segundos=
o Lahera de[d[a reaparecer4en e[ indicadorvisual.
@otas Sobre el Mode Sab tico:
• El Mode Sabaiticopuedeser activadoen cua[quier memento,
est6o no ei borneencendido=
• El Mode Sab_tico no puede ser activadosi lasteclas est_n
bloqueadaso cuando la puertaest_ bloqueada.
• Si el borne est8 horneandocuando el Mode Sab_ticoes
programado, 'BAKE'se apagar_al final de[ ciclo de horneado.
No se emitir_nse_alessonoras.
Sise deseaIa Iuz det heine durante eI Mode Sab_tico,6sta
debeser encendidaantesde que comienceel Mode Sab_tico=
Cuandocomienzael mode sab_tico,nose emitir_ [a seffa[
sonorade precalentamiento=
Cuandoel Mode Sab_ticoest_active,todos [osavisos,
mensajesy seffa[essonorasest_ndesactivados=
Elbloqueoautom_ticode lapuerta no funcionadurante el
Mode Sab_tico=
Sioprime latecla 'CANCEL'se canceiar_un cic[o 'Bake',sin
embargoet centre[ permanecer_enMode Sab_tico.
Sifaiia [a cordenteei6ctrica,cuando vuelvalaenerg[aet homo
se activar_en Mode Sab_ticocon 72 betasrestantesy ningOn
ciclo active=
7O
Ajuste de [a temperatura de[
La exactitudde IastemperaturasdeI homo es cuidadosamente
probadaen B f_brica. Esnormal notar alguna diferencia entre la
temperaturade homeado, entre un homo nuevoy un borne antiguo.
Conel correrdel tbmpo, la temperaturadel homo puedecambiar.
Ustedpuede ajustar Ia temperaturade[ homo, si consideraque su
borne noest_ horneandoo dorandoenforma correcta. Paradecidir
cuantodebecambiarIa temperatura,programeB temperaturadeI
homo a 15° C (25° F} m_salta o m_sbajaque latemperatura
indicadaen sus recetas,luego hornee. Los resultadosde Ia
"prueba" puedendarleuna ideade cuanto ajustar la temperatura.
Ajuste de matemperatura dem homo:
1. Oprima'Bake'.
2. Programe550° oprimbndo Iatecla 'More+'.
3. Opr+may mantengaoprimida Ia tecla 'Bake' .................................
durante variessegundoso hastaque0°
aparezcaen el indicadorvbuaL ..........................
Si latemperaturade! homo ha side previamenteajustada,el
cambio aparecer_enel indicadorvisual Perejemplo,si la
temperaturadel homo rue reducidaen 8° C 05 ° F} el ind+cador
mostrar_'- 8°,('-15°'}.
4. OprimaIatecla 'More+' o 'Less-'para ajustar la temperatura.
Cadavezque se oprimeuna tecla, Iatemperaturacambiaen 3° C
(5° F]. La temperaturadeI homo puede ser aumentadao
d+sminuidaen 3° a 20° C [5° a 35° F}.
5. La hera del d[a reaparecer_autom_ticamenteen el indicador
visual.
No necesitareajustarIa temperaturade[ homo si hayuna falla o
interrupci6ndeenergiaeI@trica. Lastemperaturasde asara la
parrillay [impbza no puedenser ajustadas.
Cambio de la temperatura
de °F/°C
1. Elajustedef_brica de Ia medidadetemperaturaes Fahrenheit.
2. Paracambiarel ajuste,oprima y mantengaoprimidaslasteclas
'CANCEL'{Anula0 y 'Bake' (Hornea0al mismotiempo durante
tres segundos.
3. Escuchar_unase_ai sonoray el ajuste actual (°F o °C)se
desplegar_en Ia pantalla.{Sino se realizan+ngOncambio,Ia
estufa regresar_al ajusteactualdespu@de 30 segundos}.
4. Paracambiarel ajuste,oprima Ia tecia 'More+' o 'Less='.
Opffmalanuevamentepararegresarai ajusteanterior.Espere
cinco segundosy elajustese guardar&
'Favorite' (Favorite}
Latecla 'Favorite'le permiteguardaren memoriael tiepapoy la
temperaturade un cicio 'Cook& HoW.
Paraprogramarun cicio favor+to,debe estar activao recbntemente
programadauna funci6n de 'Cook& HoW.
Para programar un nuevo title Favorite o para
guardar come Favorite un ciclo 'Cook & Hold' que
est6 en progreso:
1. Programeunc+clode 'Cook & Hold'comese describeen +a
secciOn'Cook & Hold'en la p_gina 67.
2. Oprimay mantengaoprlmida la tecla'Favorite'
durante tressegundos.
• El ciclo 'Cook & Hold' recientementeprogramadoo en
progresoser_ guardadoen memoria.
• Se oir_ una se_al sonorapara indicarque el control ha
aceptadoel ajuste'Favorite'.
Para comenzar un ciclo programado come Favorite:
1. Optima latecla 'Favorite'.
+ Se desplegar_el tiempoy la temperaturapara
el ciclo 'Cook & Hold' programado(si no hay
ciclo 'Cook & Hold' programado,en el indicador
visualse despiegar_'nonE'.]
2. Optima latecla 'Bake'.
+ El ciclo Favoritecomenzar_inmediatamente.
• 'BAKE'se iluminar_en el indicador visual
• Eltlepapode cocci6nse iluminar8 enel indicadorvisual.
Cuando ha e×pirado el tiempo de cocci6m
+ 'BAKE'se apagar_.
• Se iluminar_n 'HOLD'y 'WARM'.
• Enel indicadorse desplegar_'75°' ('170°'}.
Para cancdar un ciclo favorite en progreso:
1. Optima latecla 'CANCEL'.
+ El ciclo favorite guardadoen memoriano
ser_ afectado.
2. Retireel alimento del homo.
71
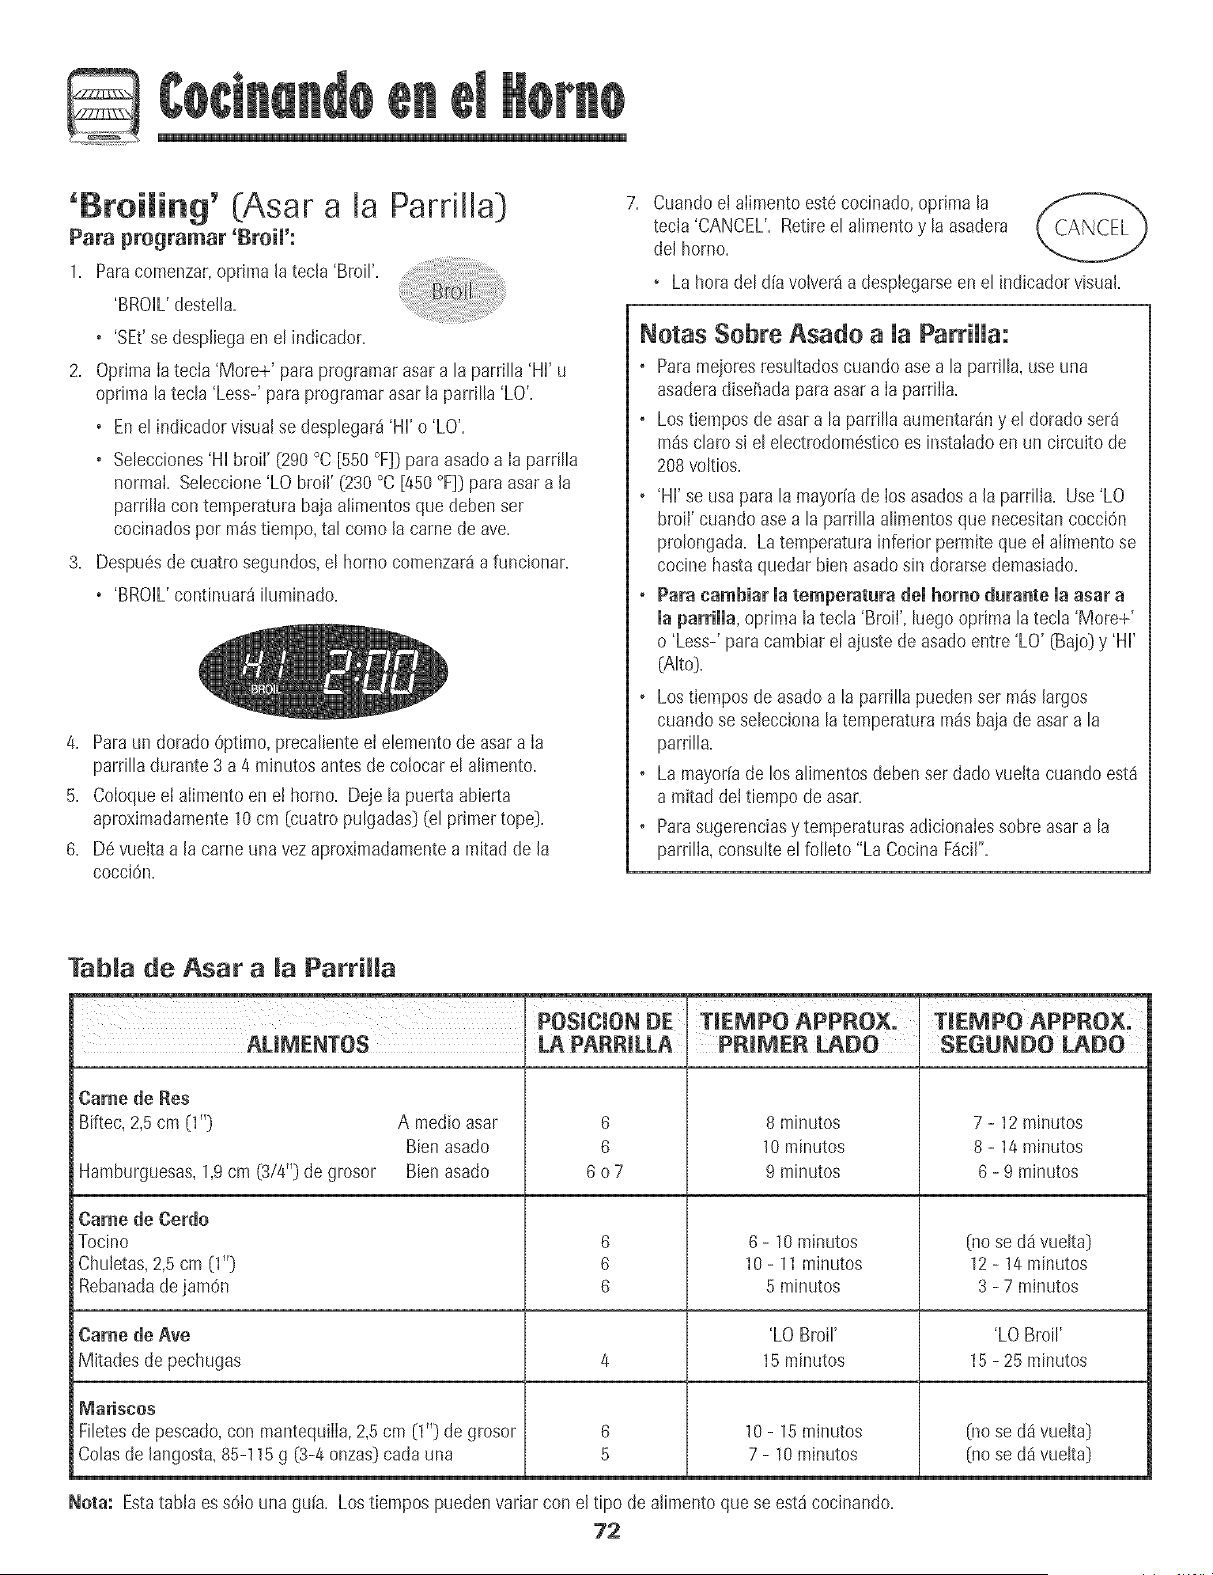
@
'Broiling' (Asar a [a Parrilla}
Para programar 'Broil':
1. Paracomenzar,oprh_aala tecia'BmiK
'BROIL'destelia.
o 'SEt'se despibga en el hldicador.
2. Oprima[atecia 'More+' paraprogramarasara [a parrilB 'Hi' u
optima [atecB 'Less-' paraprogramarasar B parrilB 'LO'.
o Enel indbador visualse despbgar_ 'Hi' o 'LO'.
o Sebcciones'Hi broil' (290°C [550 °F]} paraasadoa la parrilB
normal. Sebccione'LO broil' (230°C [450°F]}paraasar a la
parriliacon temperaturabaja alimentosque @ben ser
cocinadospor pa_stiempo,tal como la camede ave.
3. Despu@de cuatrosegundos,el horno comenzar_a funcionar.
o 'BROIL'continuar_i[uminado.
4. Paraun dorado6ptimo,precaIbnte e[ebmento de asara [a
parriIIadurante3 a 4 minutos antesdeco[ocarel alimento.
5. Co[oqueel aiimentoen e! horno. Deje B puerta abbrta
aproximadamente10cm (cuatropuIgadas}(el primer tope}.
6. D6 vueitaa la came una vez aproximadamentea mitad de la
cocci@.
7. Cuandoel alimentoestecocinado,oprima [a
tecla 'CANCEL'.Retireel alimentoy la asadera
del homo.
• La hora del dia voiver_a desplegarseen el indicadorvisual
Notas Sobre Asado a la ParrNa:
o ParameioresresuItadoscuando asea la parriIIa,useuna
asaderadisefiadapara asar a [a parriiia.
o Los tiemposde asara la parriIIaaumentar_ny el doradoser_
m_scIarosi el eIectmdopa@ticoes instaladoen un circuito de
208w)ltios.
o 'Hi' se usapara [a mayoffade los asadosa [a pard[B. Use'LO
broff cuando asea [a parri[[aa[imentosque necesitancocci@
probngada. La temperatura[nferbr permite que e[ a[imentose
cocine hastaquedar bienasadosin dorarsedemasiado.
o Para cambiar matemperatura demhomo daraate maasar a
maparrimma,opnma [atecIa 'Broil', [uegooptima [atecIa 'More+'
o 'Less-'paracambiare[ ajustede asadoentre 'LO' (Bajo}y 'Hi'
(Alto}.
o Los tiernposde asadoa la parriIIapuedenser m_slargos
cuando se seIeccionala temperaturam_sbajade asara la
parriIIa.
o La mayoriade los aIimentos@ben ser dadovueltacuando est_
a mitad deltiempo de asar.
o Parasugerenciasy temperaturasadicionabs sobre asara la
parri[[a,consuItee( foHeto"La CocinaF_ci[".
Tab[a de gsar a [a ParrNa
PGS[C[ON DE
ALIMENTGS
Came de Res
Biftec, 2,5 cm (1"}
Hamburguesas,1,9cm (3/4"} degrosor
A medioasar
Bienasado
Bienasado
Came de Cerdo
Tocino
Chuietas,2,5 cm (1"}
Rebanadade jam@
Came de Ave
M[tadesde pechugas
[Wariscos
Fi[etesde pescado,con mantequiiia,2,5cm (1"} degrosor
CoBsde langosta,85-115g (3-4onzas}cada una
6
6
6o7
6
6
6
6
5
' T[EMPO APPP, O×: T[EMPO APPROX:
8 minutos
10minutos
9 minutos
6 -10minutos
10- 11 minutos
5 minutos
'LO Broil'
15minutos
10 - 15 minutos
7 - 10 minutos
SEGUNDO LADO
7-12 minutos
8-14 minutos
6- 9 minutos
(nose da4vuelta}
12- 14minutos
3 - 7 minutos
'LO Broil'
15-25 minutos
(nose ddvueka}
(nose d_vuelta}
Nora: EstatabB es sd[o una gu[a. Lostiepapospuedenvariar con el %0 de a[imentoquese est_cocinando.
72
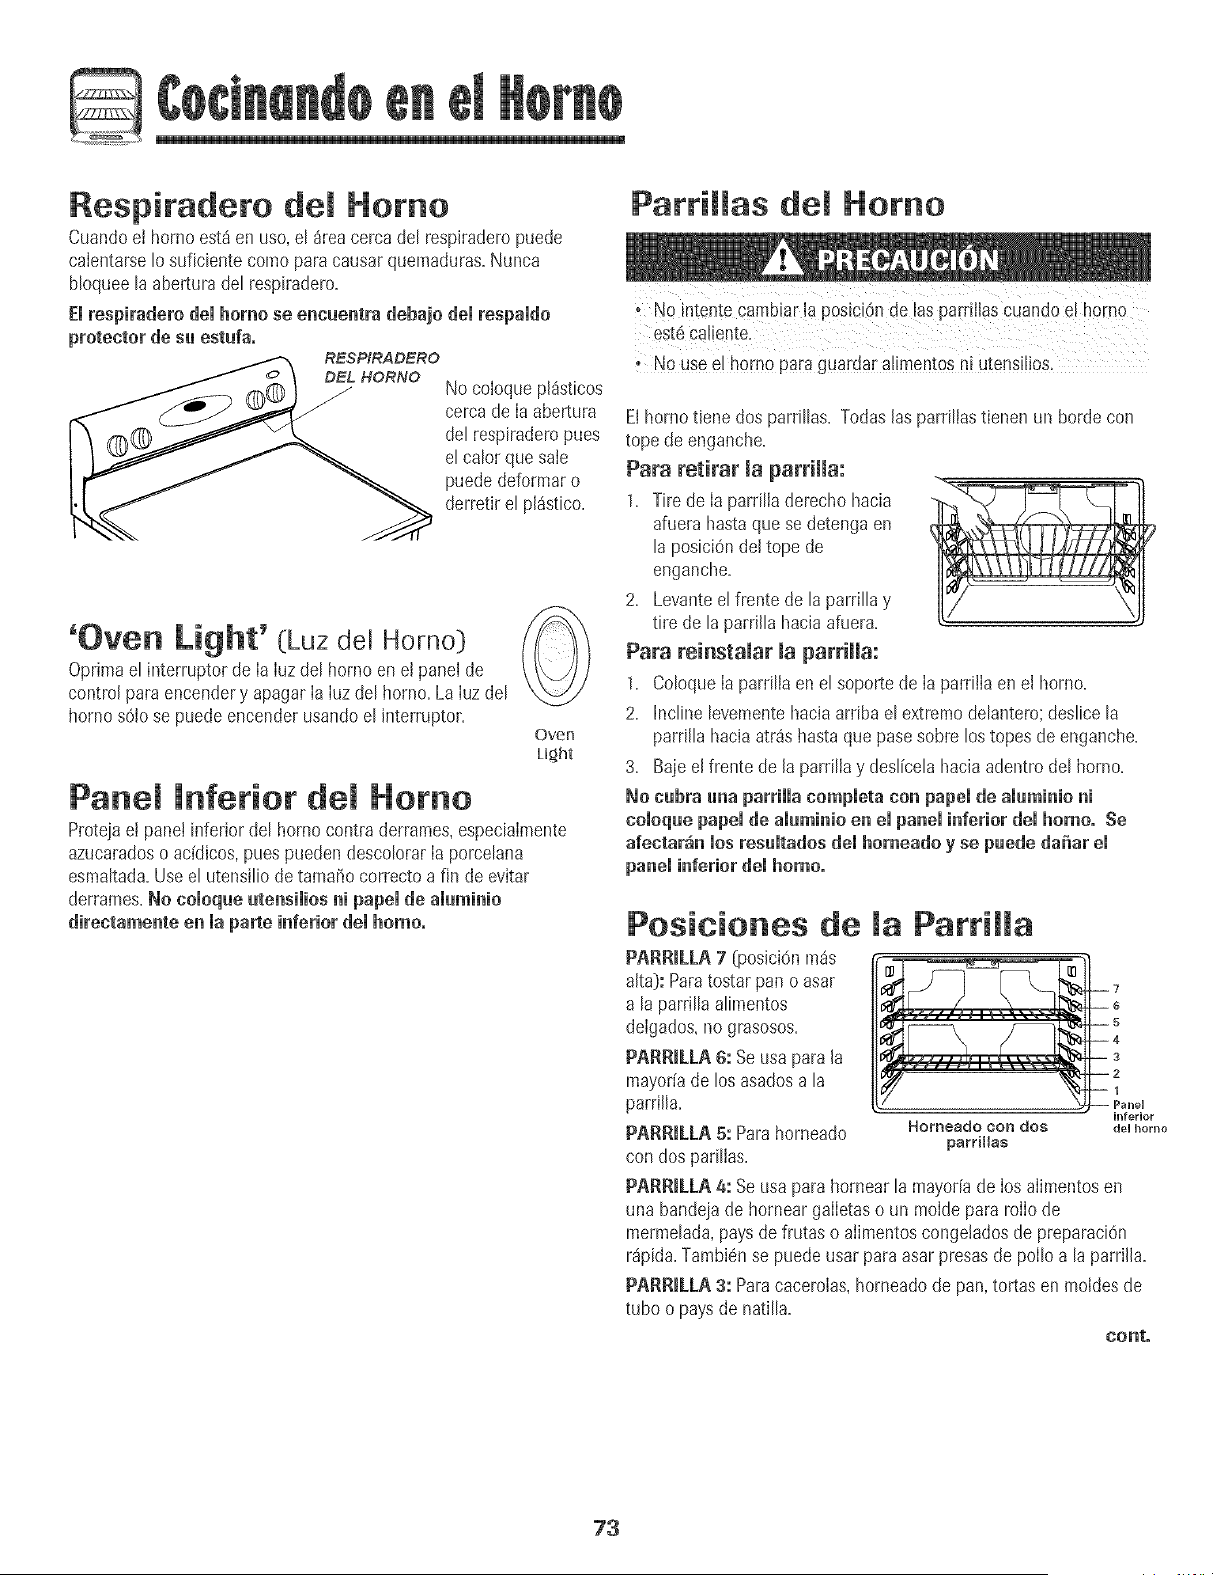
Respiradero de[ Homo
Cuandoel homo est_en uso, el _reacercade[ respiraderopuede
caientarsetosuficiente corrlo para causarquemaduras=Nunca
btoquee[a aberturade[ respiradero=
Emrespiraderodemhomose encuentra debajodemrespamdo
protector de su estufao
_ RESPIRADERO
DEL HORNO
/ No coloquepl_sticos
./ cercade la abertura
de[ respiraderopues
e[ calor que sale
puededeformaro
derretir el pl_stico.
'Oven Light' (Luz de[ Homo)
Oprimae[ interruptor de [a [uzde[ homo en el panelde
control paraencendery apagar[a [uzde[ homo=La [uz de[
hornosOiose puedeencenderusandoe[ interruptor=
Oven
Light
Pane[ inferior de[ Homo
Proteiae[ panetinferior de[ homo contraderrames,especiaimente
azucaradoso addicos, puespuedendescoIorar[a porceIana
esmaItada=Usee[ utensiIiode tama_o correcto a fin de evitar
derrames=No comoqueutensiiios ni papei de amuminio
directamente en ia parte inferior dei homo,
Parriiias de[ Homo
, No use8[ home paraguardaral[rnentesni utensili0s.
Elhornotiene dos parri[[as=Todas[asparri[iastienen un bordecon
tope deenganche=
Para retirar [a parri[[a:
1= Tire de [a parr[Haderechohacia
afuera hastaque se detengaen
[a pos[ci6nde[ tope de
enganche=
2= Levantee[ frente de [aparri[[a y
tire de [a parri[[ahacia afuera=
Para reinstaiar [a parriiia:
1= Co[oque[a parr[Haen e[ soportede [a pardi[aen e[ homo,
2= Incline [evementehaciaardba e[ extremode[anteroldesHce[a
parri[[ahaciaatr_s hasta que pasesobre lostopes de enganche=
3= Baje e[ frente de [a parr[Hay desffce[ahaciaadentro de[ homo,
No cubra una parriiia compieta con papei de aiuminio ni
comoquepapemde amuminioe. el paneminferior demhomo° Se
afectar_n mosresumtadosdemhomeado y se puede dai_ar em
panel inferiordemhomo°
Posiciones de [a Parri[[a
PAFiR_LLA7 [posici6nm_s
a[ta):Paratostar pan o asar
a [a parriIIaaIimentos
deigados,no grasosos=
PAFIR_LLA6: Se usapara [a
mayoffade los asadosa [a
parrilla=
PgRRILLA5: Parahomeado
con dos pad[[as=
Homeado con dos
parriHas
inferior
de[ homo
PARRiLLA4: Se usapara hornear [a mayoffade los aiimentosen
una bandeiade horneargaiietaso un moidepara roi[ode
mermelada,pays de frutas o aiimentoscongeladosde preparaciOn
r_pida=Tambi6nse puedeusar para asarpresasde poi[o a [a parri[la=
PARRILLA3: Paracacerolas,homeadode pan,tortas en moldesde
tuboo pays de natilla=
conto
73
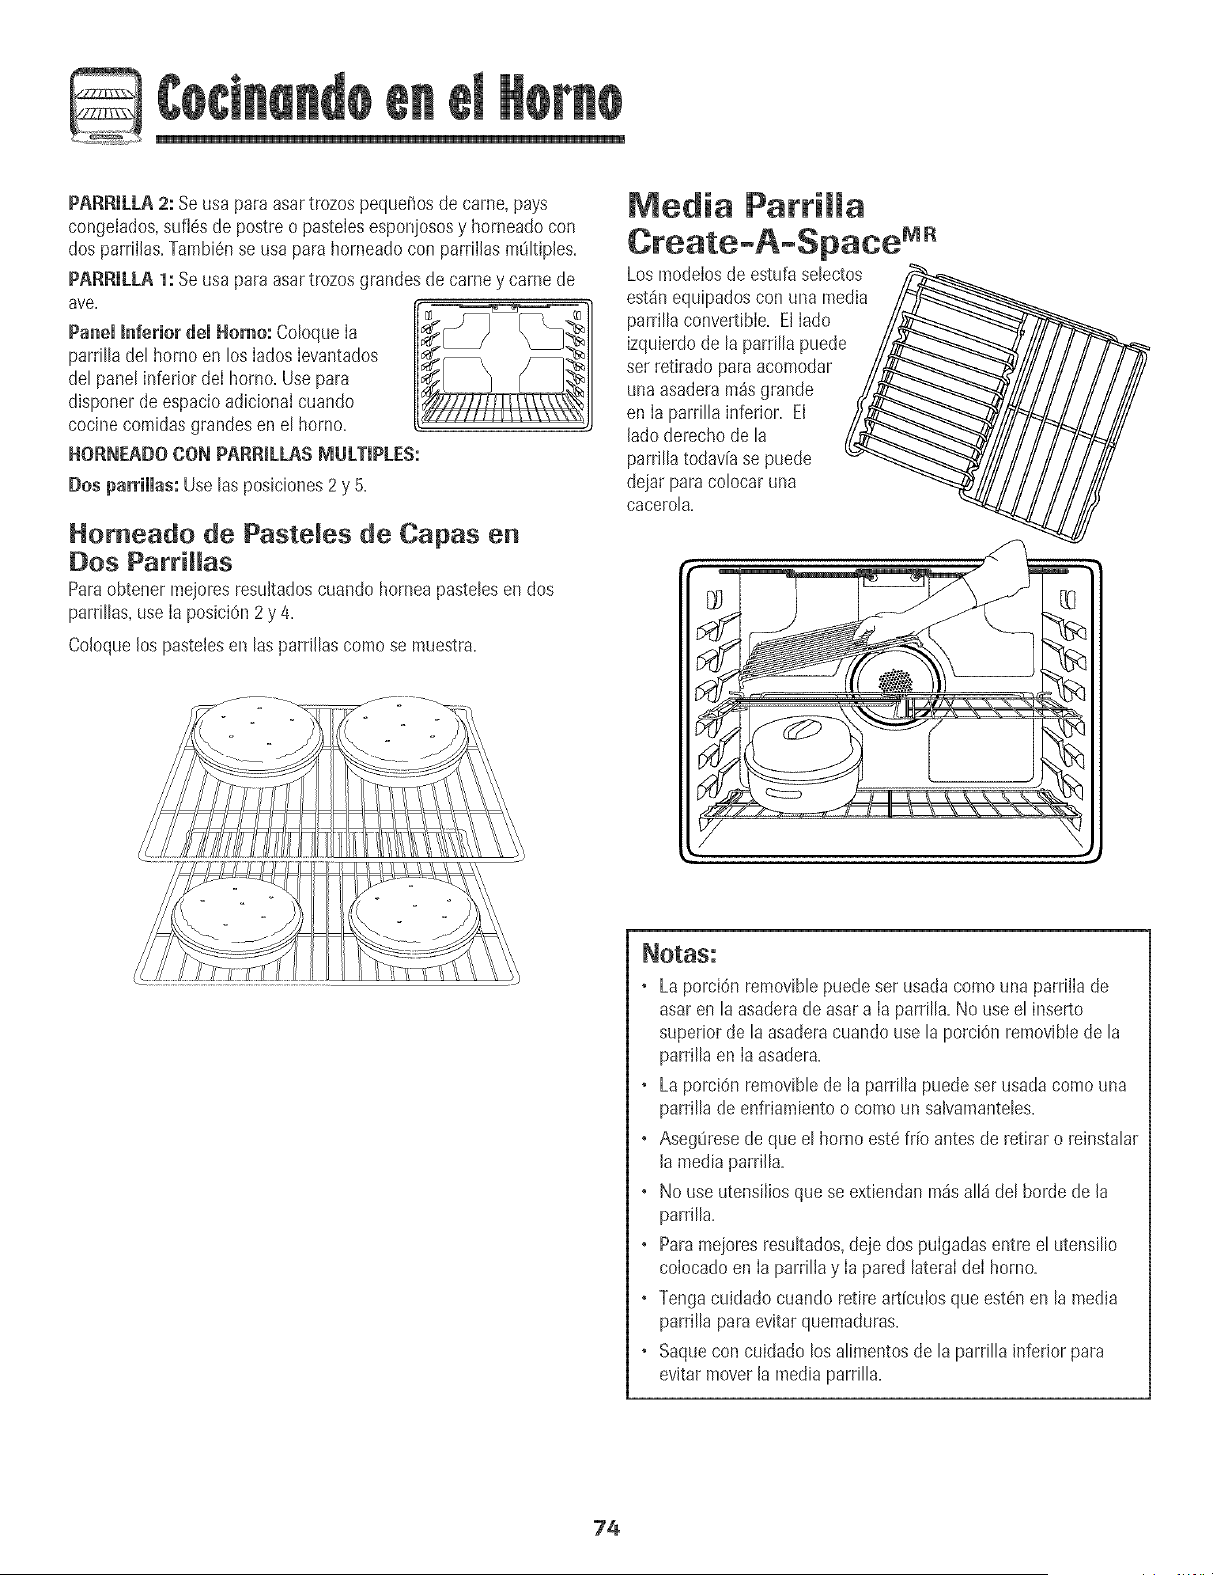
PARRiLLA 2: Seusa paraasartrozos pequefiosde came,pays
congeiados,sufi6s de postre o pasteiesesponjososy horneado con
dos parriilas.Tambi6nse usa parahorneadocon parriilasmtiitipies.
PARRiLLA 1: Seusa paraasartrozos grandesde camey came de
Panel _nferior dei Homo: Co[oquela
parrittade[ homo en [os[ados[evantados L_ !
de[ pane[inferior de[ homo, Usepara _
d+sponerde espacioadicionai cuando
cocinecomidasgrandesen e[ homo,
HORNEADO CON PARR+LLAS MULTIPLES:
Dos parr+Has:Usehs posiciones2 y 5,
Homeado de Paste[es de Capas en
Dos Parr+Has
Paraobtener mejoresresuitadoscuando horneapasteIesen dos
parriIIas,use [a pos+ci6n2y 4.
Coloquelos pasteiesen las parrilIascomose muestra.
Media ParriHa
Lo+
modeiosde estufaseIectos
est_nequipadoscon una med+a
parri[[aconvertible. El[ado
izquierdode [a parri[[apued
ser retirado paraacomodar
una asaderam_sgrande
en [a parriIIainferior. E[
[adoderecho de [a
parriIIatodaviase puede
dejarparaco[ocar una
oaoetoIa.
Notas:
+ La porci6n removibIepuedeset usadacomouna parriiia de
asar en [aasaderade asar a [a parriIla. No usee[ inserto
superior de [aasaderacuandouse [a porciOnremovibiede [a
parriIIaen [a asadera.
+ La porci6n removibIede [a pardIIapuedeset usadacomo una
parriIIade enfr[amientoo comoun salvamanteIes.
+ Aseg0resede que e[ homo estefifo antesde retirar o reinstaIar
lamedia parrilIa.
+ No use utensiiiosquese extiendanm_saI[_de[ bordede la
parrJ[[a.
+ Paramejoresresu[tados,dejedos pu[gadasentre e[ utensi[io
co[ocadoen [a pard[[ay [a pared lateralde[ homo.
+ Tengacuidado cuando retireart[cu[osqueest6nen [amedia
parri[[aparaevkarquemaduras.
• Saquecon cuidado losa[imentosde [a parri[[ainferior para
evitar mover[a media parr[Ha.
74

Homo Autoli piante
- Esnormal que Jaspiezasdel homo se calientendurante el ciclo
ae autolimpleza.
- Paraevitarda¢_oa la puer[a,no intente abrlrLacuando la palabra
LOCK'est6desplegadaen el inaicadorvisual.
• Evitetocar la puerto, la ventanao el area del resplraderodel
homo duran[e un ciclo de limp_eza
• No use Iimpiadoresde hornos comercLalesen ei acabadooel
homo ni alrededorde mnguna piezadel homo pues puede
dar_arel acabadoo los plezas.
Elciclo de autolimpiezausatemperaturasde cocci6nsuperioresa los
normatespara timpiarautomSticamentetodo el interior del homo.
Esnormal que ocurran Ilamaradas,humoo llamasdurante Ia limpieza
si el hornoest_demasiadosucio. Esmejor limpiar el homo
regularmenteenvezde esperarhasta que se haya acumulado
demasiadasuciedad=
DuranteeI procesode limpieza,lacocina debeestarbienventilada
paraeliminar los olores normalesasociadoscon la limpieza=
Antes de NaAutoNimpieza
1= Apague la iuz det homo antesde la limpieza=La luz del horno
puedefundirse duranteel ciclo de iimpiez&
2= Retireia asadera,todos los utensiliosy los parriilasdel homo. Los
parrillasdeI horno se descoiorarainy no se desiizar_nfdciimente
despuesde un ciclo de autoiimpiezasi no son retiradasdei homo.
3, Limpiee! marcode! homo, el marco de la puerto,el drea fuera de
lajunta de la puertoy alrededorde laaberturaen Iajunta de la
puerto,con un agentede Iimpiezano abrasivotaI como 'Bon
Ami'* o con detergentey agua.El procesode autolimpiezano
limpia estas_reas. Eliasdebenset limpiadasparaevitar que la
suciedadse horneedurante el ciclo de autolimpieza. (Lajunta es
el sello alrededorde la puertoy ventanadel homo.)
4. Paraevitar dafio no[impie ni frote [a --_ _
junta situadaalrededorde [a puerto det
horno.La junta est_ diseiiada para
sellar herm6ticamenteel calor durante , -
el ciclo de Iimpieza.
5. LimpieeI excesodegrasa o derrames
de laporte inferiordel horno. Esto
evita humo excesivoo Ilamaradasdurante el ciclo de Iimpieza.
6. Limpie losderramesazucaradoso _cidostalescomo papadulce
(camote},tomateso salsasa basede leche.La porcelana
esmaltadaes resistenteaI acido pero no a pruebade 8cidos. El
acabadode porcelanapuede descolorarsesi Iosderrames_cidos
o azucaradosno son limpiados antesde un ciclo de autolimpieza.
Para programar 'Self-Clean' (Autolimpieza):
Nota: La temperaturadel homo debe ser inferior a 205° C
[400° F)para programarun ciclo de limpiez&
1, Cierre[a puerta del homo.
2. Optima latecla 'Clean'.
• 'CLEAN'desteliaen el indicadorvisual
3. Oprima la tecla 'More+' o 'Less-'.
• Se despliega'MEd' (SuciedadMedian& 3 horas).
Si Ia puerto nose cierra,se oir_ unaserialsonoray Ia palabra
'door' se despiegar_en el indicador visual. Si Ia puerto noes
cerradadentro de 85 segundos,Ia operaci6nde autolimpieza
ser_ canceladay el indicadorvolver_a desplegarla horadel d[a.
4. Optima latecla 'More+' o 'Less-' paradesplazarlos .........................................
ajustesde autolimpieza.
• 'HVy' (SuciedadIntensa,4 horas)
• 'MEd' (SuciedadMediana,3 horas) Less-
• 'LITE'[SuciedadLeve,2 horas] ...........................
A! seleccionarel nive!de suciedaddel hornose programa
autom_ticamenteel tiempode Ih_pieza.
5. Despu6sde cuatro segundos,el homo comenzar_a Ih_piar.
• El tiempo de Ih_piezacomenzar_lacuenta regresivaen el
indicador.
• 'LOCK'se desplegar_en el indicadorvisual
• 'CLEAN'se desplegar_en eI indicador visual
Para diferir an cido de antolimpieza:
1= Optima lostecIas 'CIean'y 'Timer',
• 'DELAY'y '00:00'se desplegar_en el
h_dicadorvisual .................................
--. T_mer
2. Oprima latecla 'More+' o 'Less-' para
programarla cantidadde tiempoque usted
deseadiferir el ciclo. Eltiempo diferido puede
set programadodesdediezminutos (00:10]hasta
11horas,59minutos (11:59).
3. Oprima la tecla 'Clean'.
• "CLEAN"destellar&
4. Optima latecla 'More+' o 'Less-'.
• 'MEd' (SuciedadMediana,3 horas]se despliegaen el
indicador.
conto
_Loshombresde los productosson marcasregistradasde sus respectivosfabricantes.
75
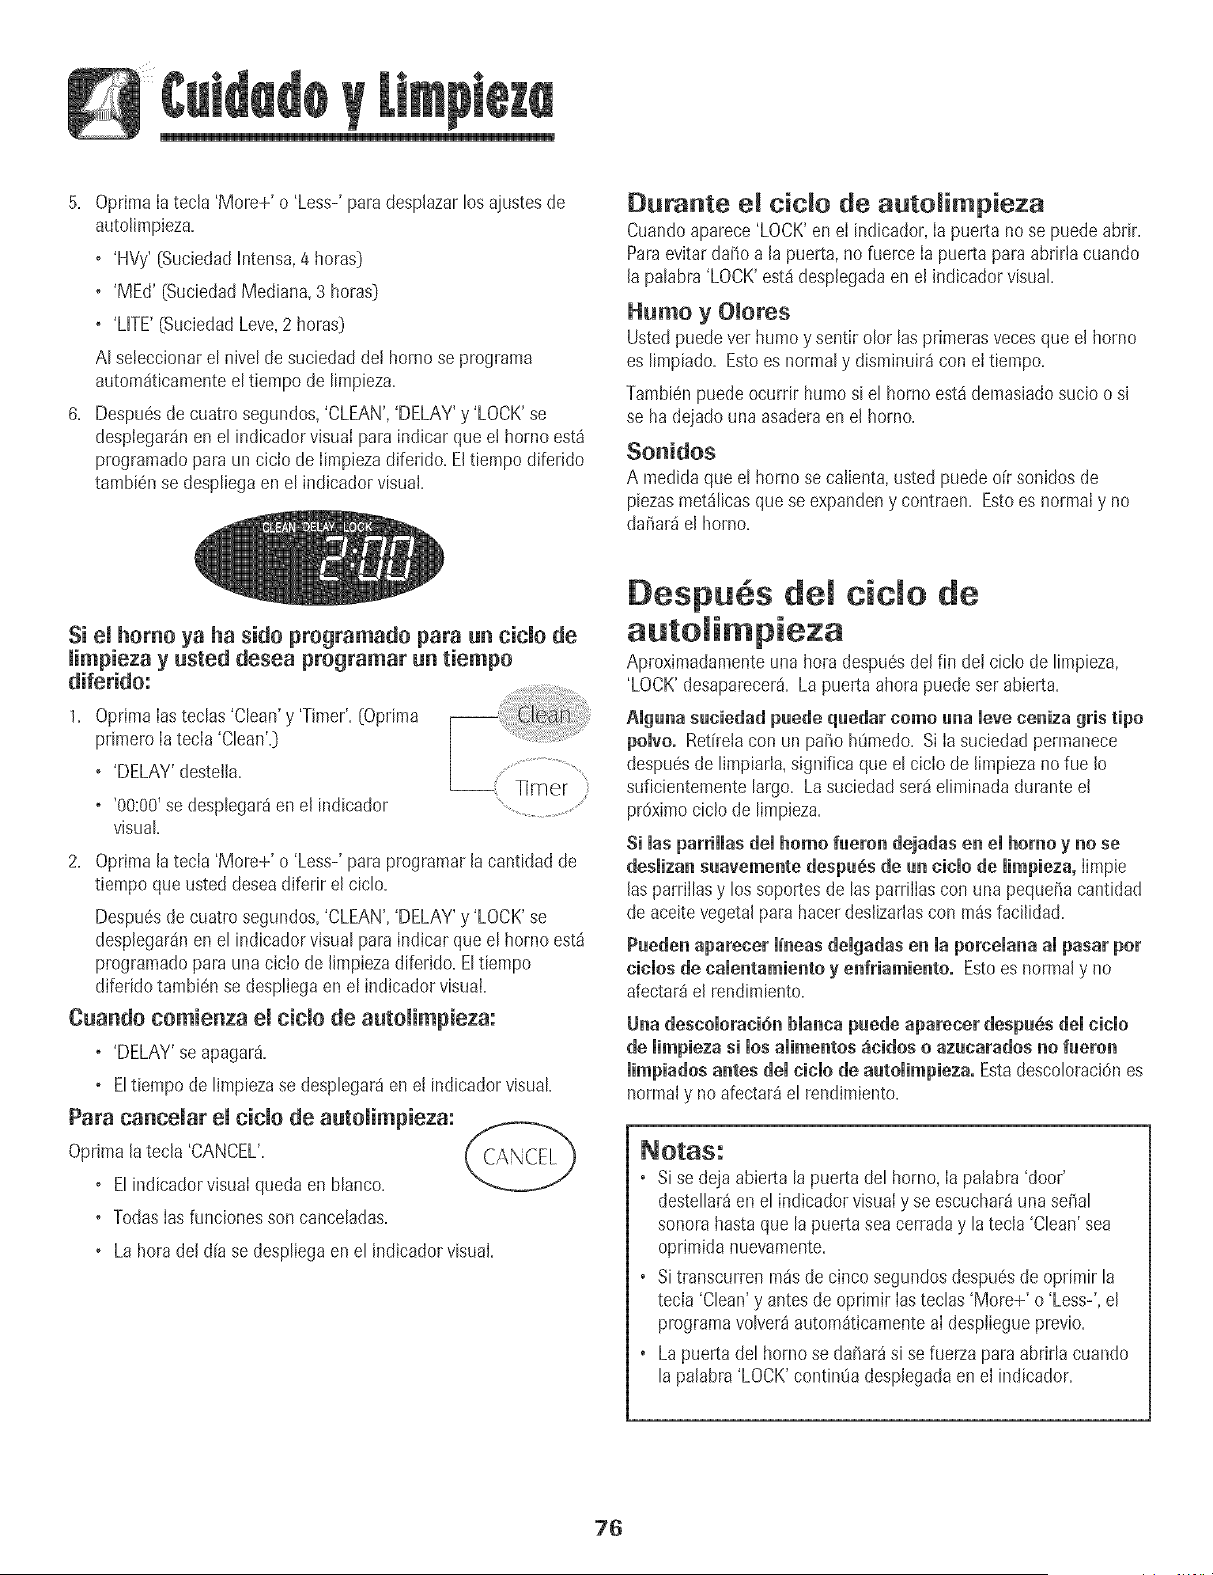
5. OprimaIatecla 'More+' o 'Less-'para desplazarlos ajustesde
autolimpieza.
o 'HVy'[Suciedadh_tensa,4 horas)
o 'MEd' [SuciedadMediana, 3 horas)
o 'LITE'(SuciedadLeve,2 horas)
AI seteccionarel nivel de suciedadde! homo se programa
autom_ticamenteel tiempo de limpieza.
6. Despu6sde cuatrosegundos,'CLEAN','DELAY'y 'LOCK'se
desplegar_nen el indicadorvisual para indicar que e! horno est_
programaticpara un ciclo de Iimpiezadifeddo. Eltiempodiferido
tambi6nse despliegaen el indicadorvisual.
Durante el c+do de autolimpieza
Cuandoaparece'LOCK'en el indicador,Ia puerta no se puede abdr.
Paraevitardahoa la puerta,no fuerce Ia puertapara abdrtacuando
la palabra'LOCK'est_desplegadaen el indicadorvisual
Humo y Omores
Ustedpuede ver humo y sentir olor las primerasvecesque el homo
es limpiado. Estoes normaly disminuir_ con el tiempo.
Tambienpuedeocurrir humosi el horno est_ demasiadosucio o si
se ha dejadounaasaderaen el horno.
Sonidos
A medidaque el horno secalienta,usted puede oir sonidosde
piezasmetdlicasquese expandeny contraen. Estoes normaly no
dahar_el homo.
Si el homo ya ha sido programatic para un cido de
limpieza y usted desea programar un tiempo
diferido:
1. OprimaIasteclas 'Clean'y 'Timer'. (OpHma
primeroIa tecla 'Clean'y
o 'DELAY'desteila.
o '00:00'se desplegar_en el indicador
visual.
T rT+ler
2, Oprima[atecla 'More+' o 'Less-'para programar[acantidad de
tiempo que usteddeseadiferir el ciclo.
Despu6sde cuatrosegundos,'CLEAN','DELAY'y 'LOCK'se
desplegar_nen el indicadorvisual para indicar que el homo est_
programaticpara una ciclo de limpiezadiferido.Eltiempo
diferido tambien sedespliegaen el indicadorvisuai.
Cuando comienza el ciclo de autolimpieza:
o 'DELAY'se apagar&
o Eltiempo de limpiezase desplegar_en et indicadorvisual
Para cancelar el cido de autolimpieza:
Oprimala tecla 'CANCEL'.
o ElindicadorvisuaIquedaen blanco.
o TodasIasfuncionesson canceladas.
o Lahora deldFase despliegaen el indicadorvisual
[:)espu s del title de
autolimpieza
Aproximadamenteunahora despu6sdelfin del ciclo de limpieza,
'LOCK'desaparecer& Lapuerta ahorapuedeser abierta.
Alguna suciedad puede quedar como una mereceniza gris tipo
polvo. Retiretacon un paho h_medo. Si Ia suciedadpermanece
despu6sde I+mpiarla,significa que el ciclode limpiezanofue Io
suficientementelargo. La suciedadser_eliminada duranteel
pr6ximociclo de Iimpieza.
si masparrimmasdemhomo fueron dejadasen emhomo y no se
desmizansuavemente despu6sde un cicmode mimpieza,Iimpie
las parrillasy los soportesde lasparrillas con una pequefiacantidad
de aceitevegetalpara hacerdeslizarlascon m_s facilidad.
Pueden aparecer m+neasdemgadasen mapo_cema_aampasa_po_
ciemosde came_tamie_tey e_ffiamie_teo Estoes normaly no
afectar_el rendimiento.
U_a deseomomei6_bma_capueSe apareeer despu6s _emeicmo
de mimpiezasi los amimemos_eidos o azucarados _o fuero_
limpia_os a_tes _el eido de autolimpieza, Estadescoloraci6nes
normaly no afectar_el rendimiento.
Nota5:
o si se dejaabierta [a puertade[ homo,la palabra'door'
destellar_enel indicadorvisual y se escuchar_una sehal
sonora hastaque [apuerta seacerraday la tecla 'Clean' sea
oprimidanuevamente.
o Si transcurrenm_isde cincosegundosdespu6sde oprimir la
tecla 'Clean'y antesde oprimir [as teclas'More+' o 'Less-',el
programavolver_autom_ticamentea[ despliegueprevio.
o Lapuerta del hornose dahar_si se fuerzaparaabrirla cuando
la pa[abra'LOCK'continuuadesp[egadaene[ indicador.
76
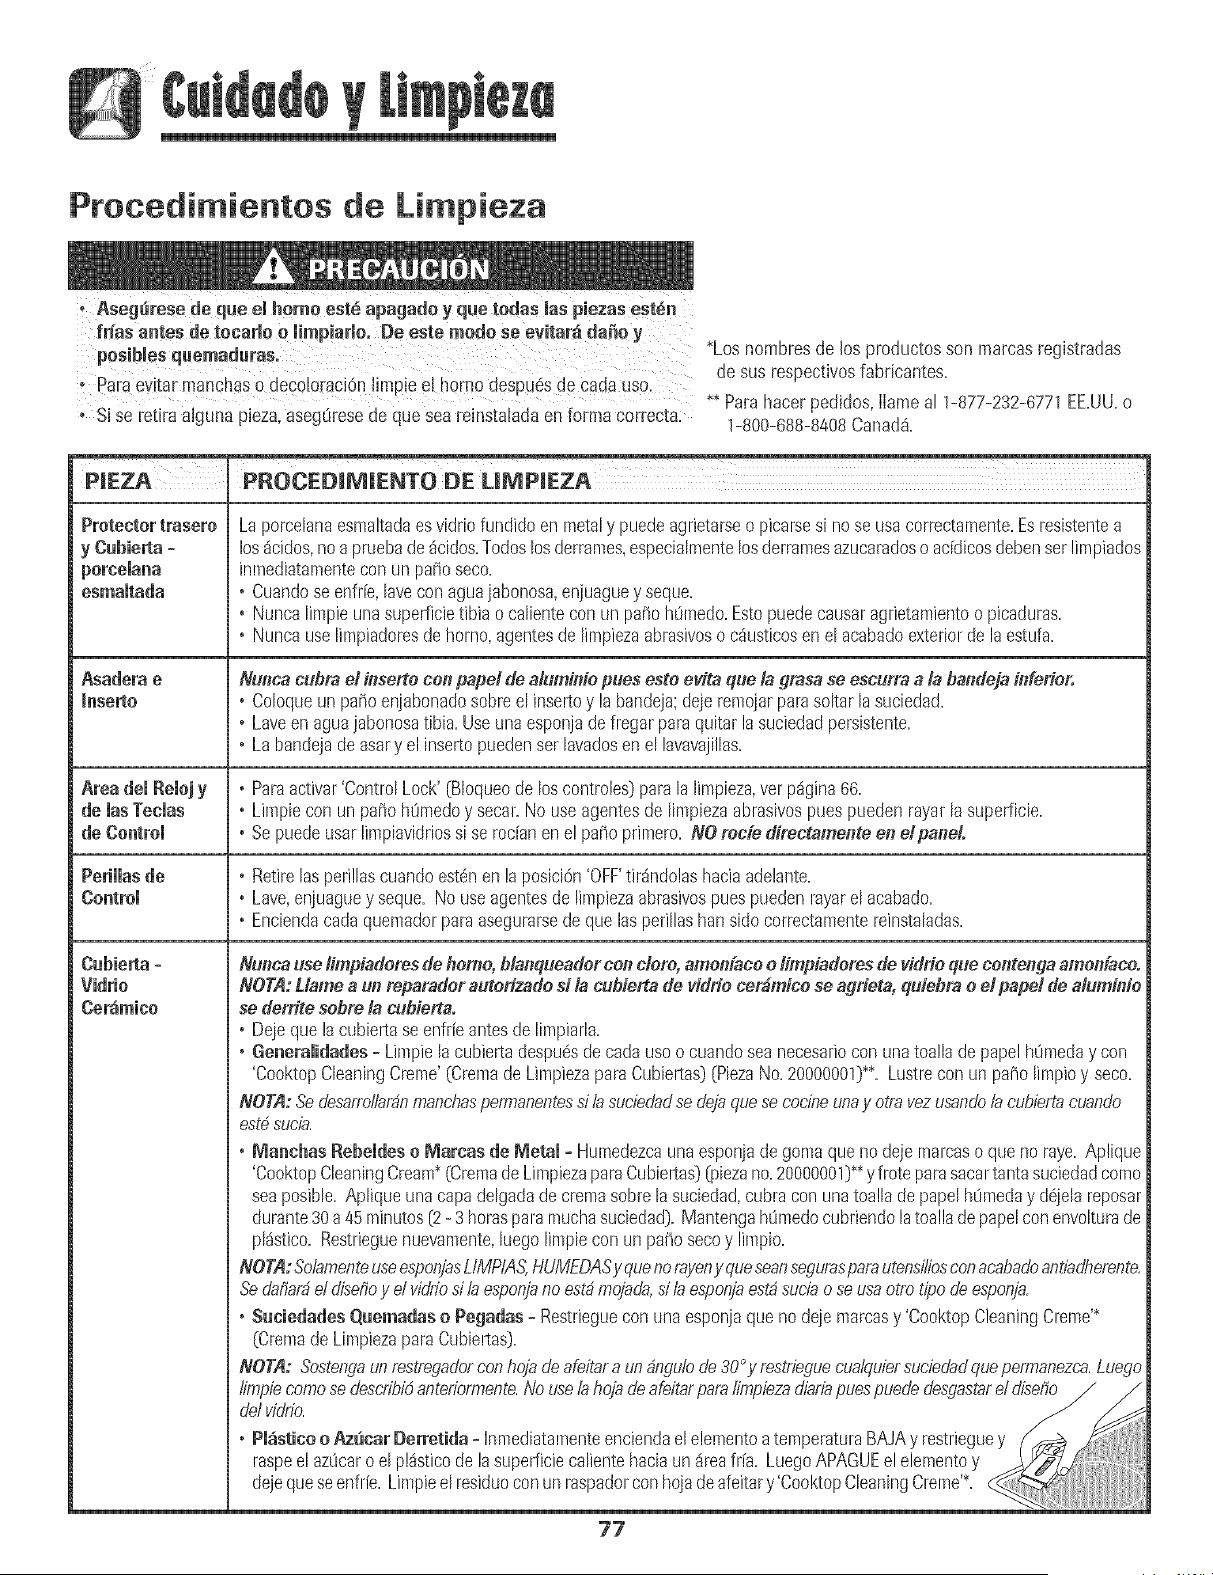
Procedi ientos de Limpieza
Ases resedes.e elhomoest spas.doyq.e todaslaspie=aseSt n
ft_as antes de tocarie o limp!ario. De este mode se evitar_ da_e y
*Losnombresde los productosson marcasresistradas
de susrespectivosfabricsntes.
Parsevitar manchaso decoloraciOnJimpieel homo desPuesde Cads_Js0.
** Parshscer pedidos,Ilsmeal 1-877-232-6771EE.UU.o
, Si se retira aJgunapieza,aseg_resede quesea reinstaladaenforrna correcta: 1-800-688-8408Canad&
PmEZA P.OCED M ENTODEUMPmEZA
Protectortrasero
esmaitada
Asadera e
Inserts
Area del Relnj y
de lasTeeias
de Cnntrol
Cnbie_ta=
Vidrie
Ce_mien
Ls porcelansesrnaltsdses vidriofundidoen metaly puedeagrietarseo picarsesi noseusacorrectamente=Esresistentes
los_cidos,nos pruebsde_cidos=Todoslosderrsmes,especislmentelosderrsmesszucsradoso addicosdebensetlimpiados
inmedistamenteconun paiio seco=
° Cuandose enfr[e,lavecon sguajsbonoss,enjusguey seque=
° NuncsIimpieunasuperficietibia o calientecon un pa5ohOmedo=Estopuedecausaragrietsmientoopicaduras=
° NuncsuseIimpiadoresdehomo,sgentesde Iimpiezaabrasiveso c_usticosen el acabsdoexteriorde laestufa=
Nlmca cubm el &serto con papal de a/umioie puns esto evita que la ymsa se escurra a & baadeja &ferio_
• Coloqueun paiioenjabonadosobreel insertsy la bandeja;dejeremojarparssokarlasuciedsd=
• Laveen agusjabonosatibia=Useuns esponjsdefregsr parsquitar Issuciedadpersistente=
• Labandejade sssry el insertspuedensetIsvsdosenel !svsvsjillss=
• Parsactivar'ControlLock' [BIoqueode loscontroles}pars la limpieza,vet p_gina66.
, Limpiecon un paiio hOmedoy secsr=No useagentesde limpiezsabrasivespuespuedenrayarIs superficie=
, Sepuedeussr limpisvidriossi se redanen e! paiio primero.NO mcie directamenta ea dpand.
• Retirelasperillsscuandoest_nenlaposici6n'OFF'tir_ndo!ashaciaadelante.
, Lave,enjuaguey seque.No useagentesdelimpiezaabrasivespunspuedenrsysrel acsbsdo.
, Enciendscads quemsdorpars asegursrsedeque Issperillashartside correctsmentereinstslsdss.
Nwlca use limpiaderes dehomo, blaaqueadorcon dote, amol_[acoetimpiadoms de vidde que conteogaamonface.
NOTA:Uame a ua reparader auterizade si la cuhierta de ddde cot#mice se adders, quiehra o e/ papel de ahHninio
se derrite sebm ]a cebiertao
• Dejeque!scubiertsseenflie antesde limpiarls=
° Generalidades - Limpielacubiertadespu6sdecadsuseo cusndoseanecesariocon unatoallsde papelhOmedsy con
'CooktopCleaningCreme'(Cremsde LimpiezaparsCubiertss}[PiezsNo.20000001}**.Lustrecon un patiolimpioy seco.
NOTA:Se desa,,ro_;Jardnmanehaspermanentesd b sudedadse dejasuese cocineunay otravezusando/acublertacuando
est_ sncl_l.
• Ma_chas Rebeldes n l_aroas de Metal - Humedezcsuna esponjsde gemsque no dejemalcasoque norsye=Aplique
'CooktopCleaningCream*(CremadeLimpiezapsraCubie_tss}($}iezano=20000001}'*yfroteparssscartants suciedadcome
seaposible=Aplique unscaps delgsdadecremssobrela suciedsd,cubracon unatoalh depapelhOmedsy d6jelsreposar
dursnte30a45minutes[2- 3 betasparsmuchssuciedad}=MantengahOmedocubriendolatoallsdepspelconenvolturade
pl_stico=Restrieguenuevsmente,luegolimpieconun patiosecoy limpio=
NOTA:So,,'amenteuseesponjasLIMPIAS,HUMEDASysuenorayony suescansegurasparsutensWiosconacabadoantiadherenta
Sedaflar_d disefioy d vidriod b esponjano est_mojada,si taesponjaest_suds o seusaotto ripedeespot_;a.
• Sncie_a_es Qnemadaso Pesa_as =Restriegueconuns esponjsquenodejemsrcssy 'CooktopCleaningCreme'*
(OremsdeLimpiezaparsCubie!tsg.
NOTA: Sostengaun redresadorconhojadeaf_tara undng,uinde30°y restrieguecuatsuiersueiedadsuepermanezca.Lunge
77
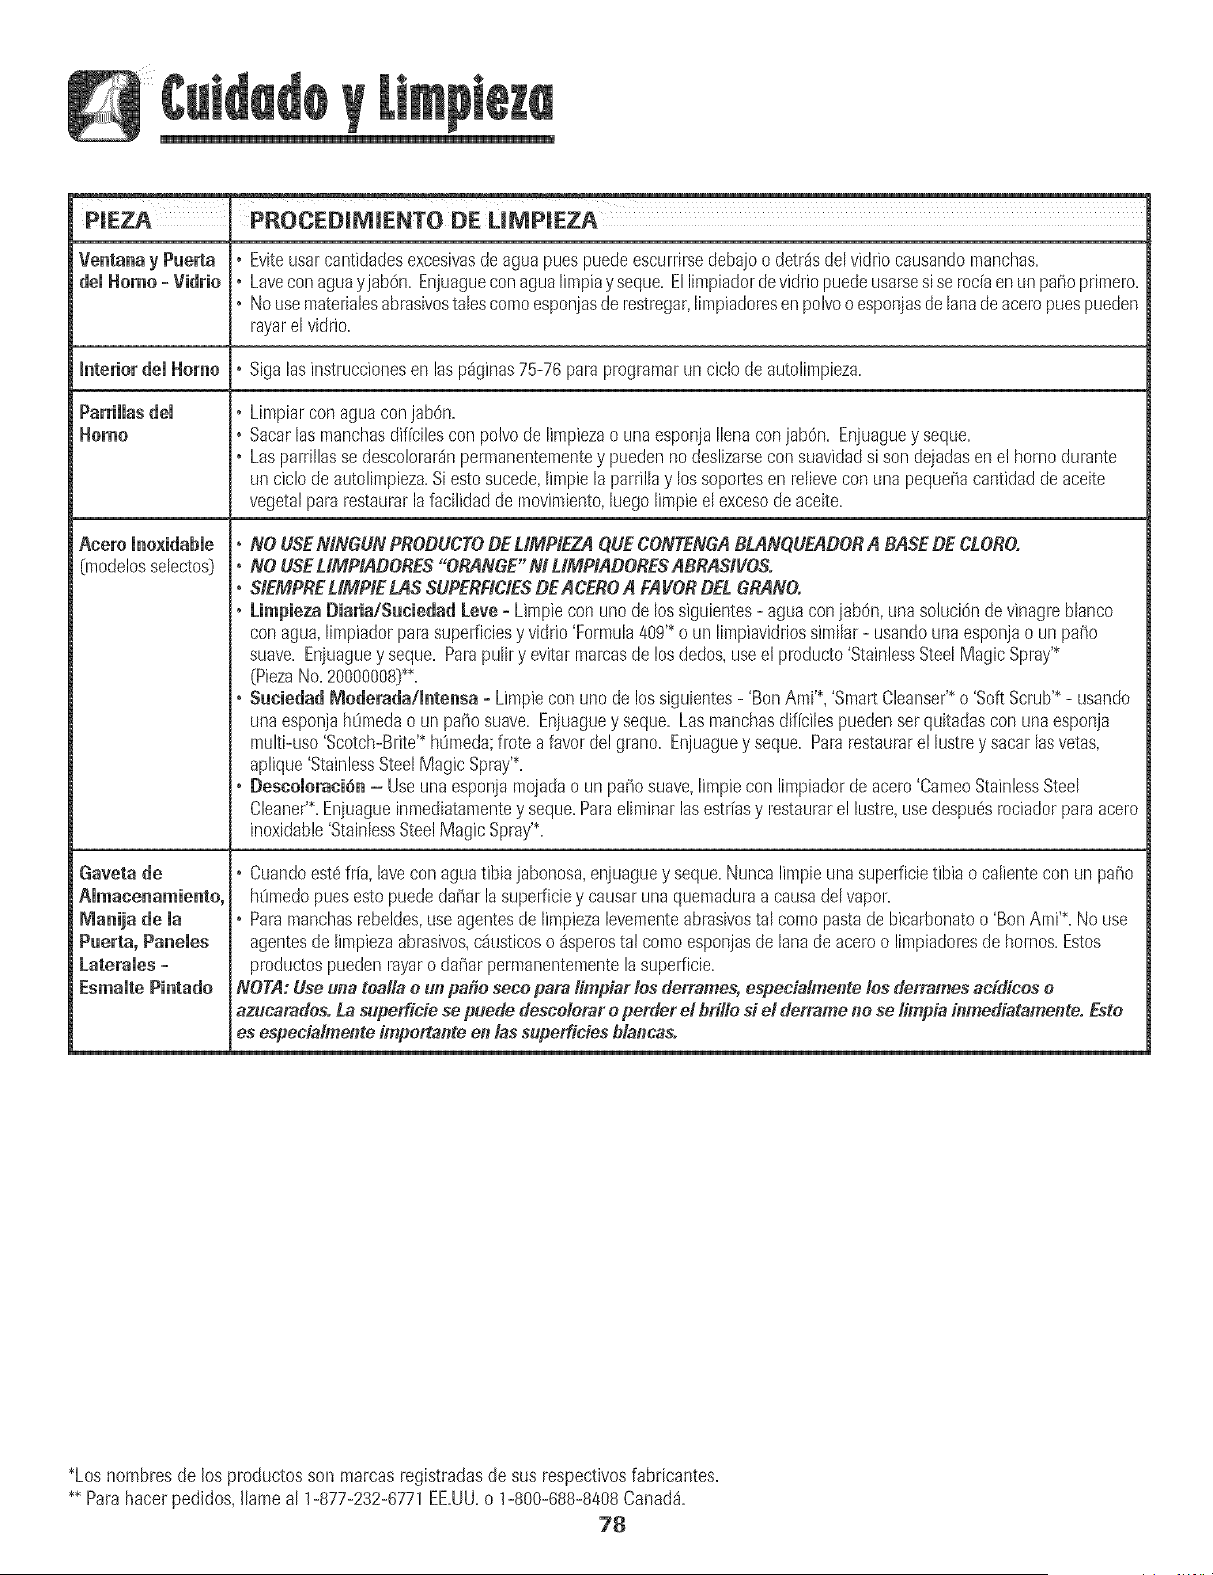
PJEZA I PROCEDIM_ENTO DE LIMPIEZA
• Eviteusarcantidadesexcesivasdeaguapuespuedeescurrirsedebajoo detr_sdel vidriocausandomanchas.
del Homo - Vidrio ° Laveconaguayjab6n. Enjuagueconagualimpiay seque.Ellimpiadordevidriopuedeusarsesiseroc[aen un paNoprimero.
,° Nousematerialesabrasivostalescomoesponjasde restregar,limpiadoresen polvooesponjasdelanadeaceropuespueden
rayarelvidrio.
Interior del Home ° Sigalasinstruccionesen lasp_ginas75-76 parsprogramarun ciclodeautolimpieza.
Parrillasdel • Limpiarcon aguaconjab0n.
Homo ,, Sacarlasmanchasdiffcilescon polvode limpiezao unaesponjaliensconjab6n. Enjuaguey seque.
,° Lasparrillasse desco!orar_npermanentementey puedenno deslizarsecon suavidadsi son dejadasene! homodurante
uncic!ode autolimpieza.Si estosucede,Iimpiela parrillay lossoportesen relieveconunapequeiiacantidaddeaceite
vegetalparsrestaurarlafacilidadde movimiento,luego Iimpieel excesode aceite.
Acero lnexidabie
[modelosseleetos)
Gaveta de
Manila de ma
Puerta, Panemes
Laterames-
Esmaite Pintado
j. NO USENINGUNPRODUCTODEMMPIEZA QUECONTENGABLANQUEADORA BASEDE CLORO.
° NO USEMMPIADORES"ORANGE"NI LIMHADORESABRASIVOSo
,, StEMPRELIMFIE LAS SUPERFICIESDEACEROA FAVORDELGRANOo
,, Limpieza Diaria/Suciedad Love =Limpiecon unode lossiguientes- aguaconjab0n,unasoluciOnde vinagrebhnco
conagua,limpiadorparssuperficiesy viddo'Formula409'_oun limpiavidriossimilar- usandouna esponjaoun pai_o
suave. Enjuaguey seque.Parspuliry evitarmamasde losdodos,useel producto'StainlessSteelMagicSpray'_
(PiezaNo.20OOOOO8)_*.
,° Suciedad Moderada/Intensa - Limpiecon uric delossiguientes- 'BonAmi'*,'SmartCleanser'_o 'SoftScrub'" - usando
unaesponjah0medaoun pasosuave.Enjuaguey seque.Lasmanchasdificilespuedenserquitadasconunaesponja
multi-uso'Scotch-Brite'_h0meda;frote afavordel grano. Enjuaguey seque.Parsrestaurarel lustrey sacarlasvetas,
aplique'StainlessSteelMagicSpray'S.
,° Descoloraci6n - Useunaesponjamojadaoun paiio suave,limpiecon limpiadorde acero'CameoStainlessSteel
Cleaner'S.Enjuagueinmediatamentey seque.Parseliminarlasestrfasy restaurarel lustre,usedespu_srociadorpars acero
inoxidable'StainlessSteelMagicSpray'S.
,, Cuandoest6frfa,laveconaguatibia jabonosa,enjuaguey seque=Nuncalimpieuna superficietibia o calientecon un patio
hOmedopuesesto puededaiiar la superficiey causarunaquemaduraa causadelvapor.
,Para manchasrebeldes,useagentesde limpiezalevementeabrasivestal comopastadebicarbonatoo 'BonAmi'*.No use
agentesdeIimpiezaabrasivos,c_usticoso_sperostai comoesponjasde lanadeaceroo lirnpiadoresdehomos.Estos
productospuedenrayaro daiiarperraanenteraentelasuperficie.
NOTA:Use ona toal/a oun patio seco para fimpiar los derrames, especialmente los derrames ac(dicos o
azucarados.La supefficie se puede descotorar operder el britlosi el derrame no se limpia imnediatamente. Esto
es espeda/me_te importante en /assoperfides blar_caso
*Losnombresde lus productosson marcasregistradasde sus respectivosfabricantes.
** Parshacer pedidos,Ilameal 1-877-232-6771EEULI.o 1-800-688-8408Canada.
78

Puerta del Homo
Luz del Homo
NO Co[oquepesoexces[voni se pareen la puerta de[ homo, Esto
podda hacervo[car[a estufal quebrar la puerta0 [esionara[
!Js/Jario.
Nora: La puerta de[ homo en unaestufa nuevapuedesentirse
"esponjosa"cuando se cierra. Estoes normaly disminuir8 con el
USO.
Ventana de[ Homo
Para proteger [a ventana de [a puerta de[ homo:
1. No use agentesde [impiezaabrasivostabs comoesponjasde
restregarde [anade aceroo [impiadoresenpoivo pues ellos
puedenrayarel vidrio.
2. No goipee el viddo con ollas, sartenes,muebies,juguetes u otros
obietos.
3. No cierre la puertadel homo hasta que [asparrillasdel homo no
estenen su lugar.
Ai goipear,rayar, hacervibrar o esforzarel vidrio puededebilitar su
estructuracausandoun mayorriesgode mtura en unafecha
posterior.
, Desconeete[a energ[ae[6ctrica hac[aiaestufa antesde
Aseg0resede que ia cubbrta de[feco y e[ fecoest6nfr[os
antesdetocar[os.
Para reempiazar e[ foco de[ homo:
1. Cuandoel homo este fifo, suiete [atapa de [a bombiiia en su
[ugar,[uegodesiice e[ ret@ de alambrefuera de [acubbrta.
NO]A: Lacubiertade [a bombilia se caer_si noes sujetaen su
[ugarcuando estdsacando e[ ret@ de a[ambre.
2. Saque[a cubiertade[foco y e[foco.
CUBIERTA DE
3. Cobque un foco de 40 watts para LABOA/IBILLA
electrodom@ticos.
4. Vueivaa co[ocar[a cubbrta
de [a bombiliay asegOrela
con e[ rot@ dealambre.
5. Vue[vaa enchufar[a estufa. RET&'NDEALAMBRE
Vuelvaa co[ocar[a hora
correcta.
Tomiiios Niveiadores
Verifique Si e[ Soporteantivuelcoestaasegurandoa[ pis0 _!n0de
!OStorniH0Sniveiadorestraser0s. Estesopo[te evitaque [a estufa
se vue!queaccidentaimente_
Laestufa debeset niveladacuando se [nstaia. Si [a
estufa no est_nivelada,gire lostorni[bs niveladores
de p[_sticoubicadosen cada esquinade [a estufa
hastaque quedenivelada. _,,/J
TORNILLO NIVELADOR
79
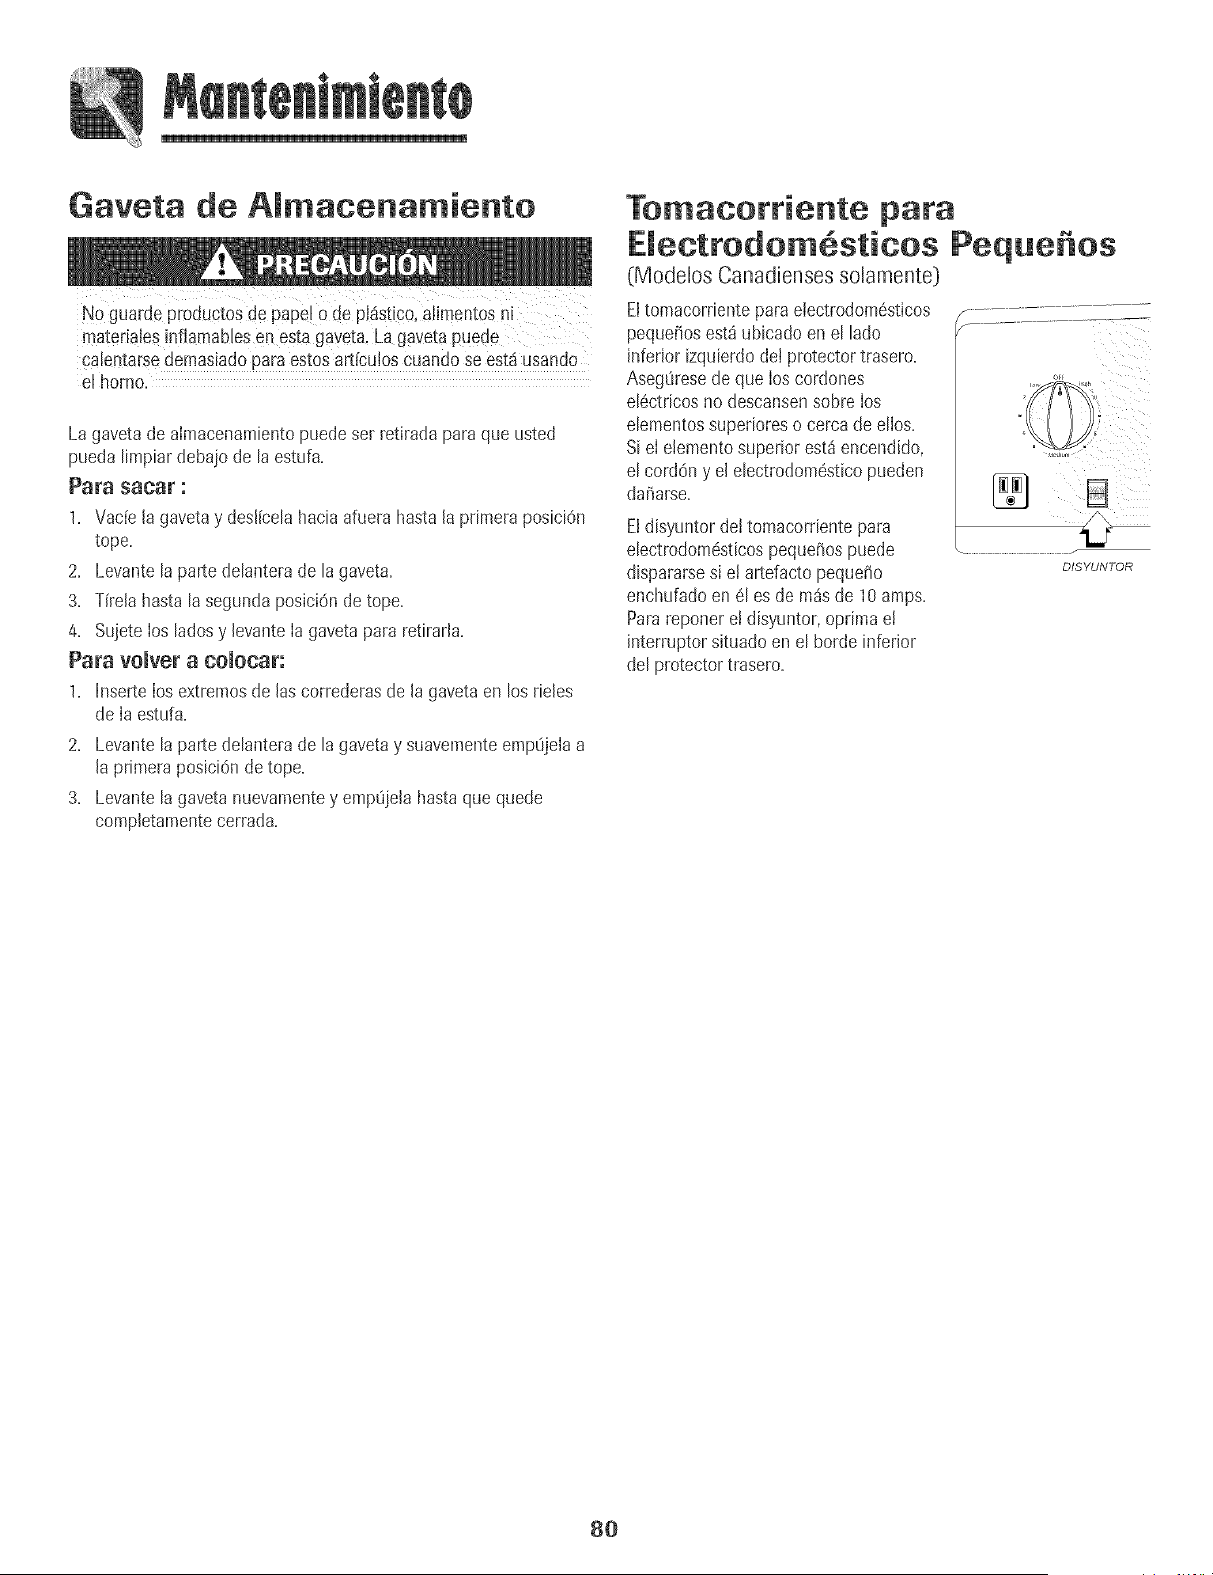
Gaveta de Al acena
NO guardeproductos depapel o de pl_istice,alimentosni
matedalesinflamaWesen estagaveta,Lagavetapuede
calenta[sedemasiadoparaestosart[culos Cuandose est,1usando
el homo.
La gavetade almacenamientopuedeset retiradaparaque usted
puedatimpiardebajode ta estufa.
Para sacar :
1. Vade la gavetay desl(cetahaciaafuera hastala primeraposiciOn
tope.
2. Levantetaparte detanterade ta gaveta.
3. T(relahastatasegundaposici6n de tope.
4. Sujete Ioshdos y levanteIa gavetapara retirarla.
Para vomvera comocar:
1. Insertelos extremosde Jascorrederasde la gavetaen los rieles
de Ia estufa.
2. Levantelaparte delanterade la gavetay suavementeempOjelaa
la primeraposici6ndetope.
3. Levantelagavetanuevamentey empt_ielahastaquequede
completamentecerrada.
Tomacorriente pata
Decttodom sticos Peque os
(Modelos Canadienses solamente)
Eltomacordenteparaelectrodom6sticos
pequeiiosest_ ubicado en el lado
inferior izquierdodet protectortrasero.
AsegOresede que los cordones
el6ctricosno descansensobre los
elementossupedoreso cercade ellos.
Siel etementosuperior est_encendido,
el cordon y el electrodom6sticopueden
da_arse.
Eldisyuntor dettomacorrientepara
electrodom6sticospequei_ospuede
dispararsesi e! artefactopequdio
enchufadoen 81es de m_s de 10 amps.
Parareportere! disyuntor,oprima e!
interruptorsituadoen el borde inferior
del protectortrasero.
8O
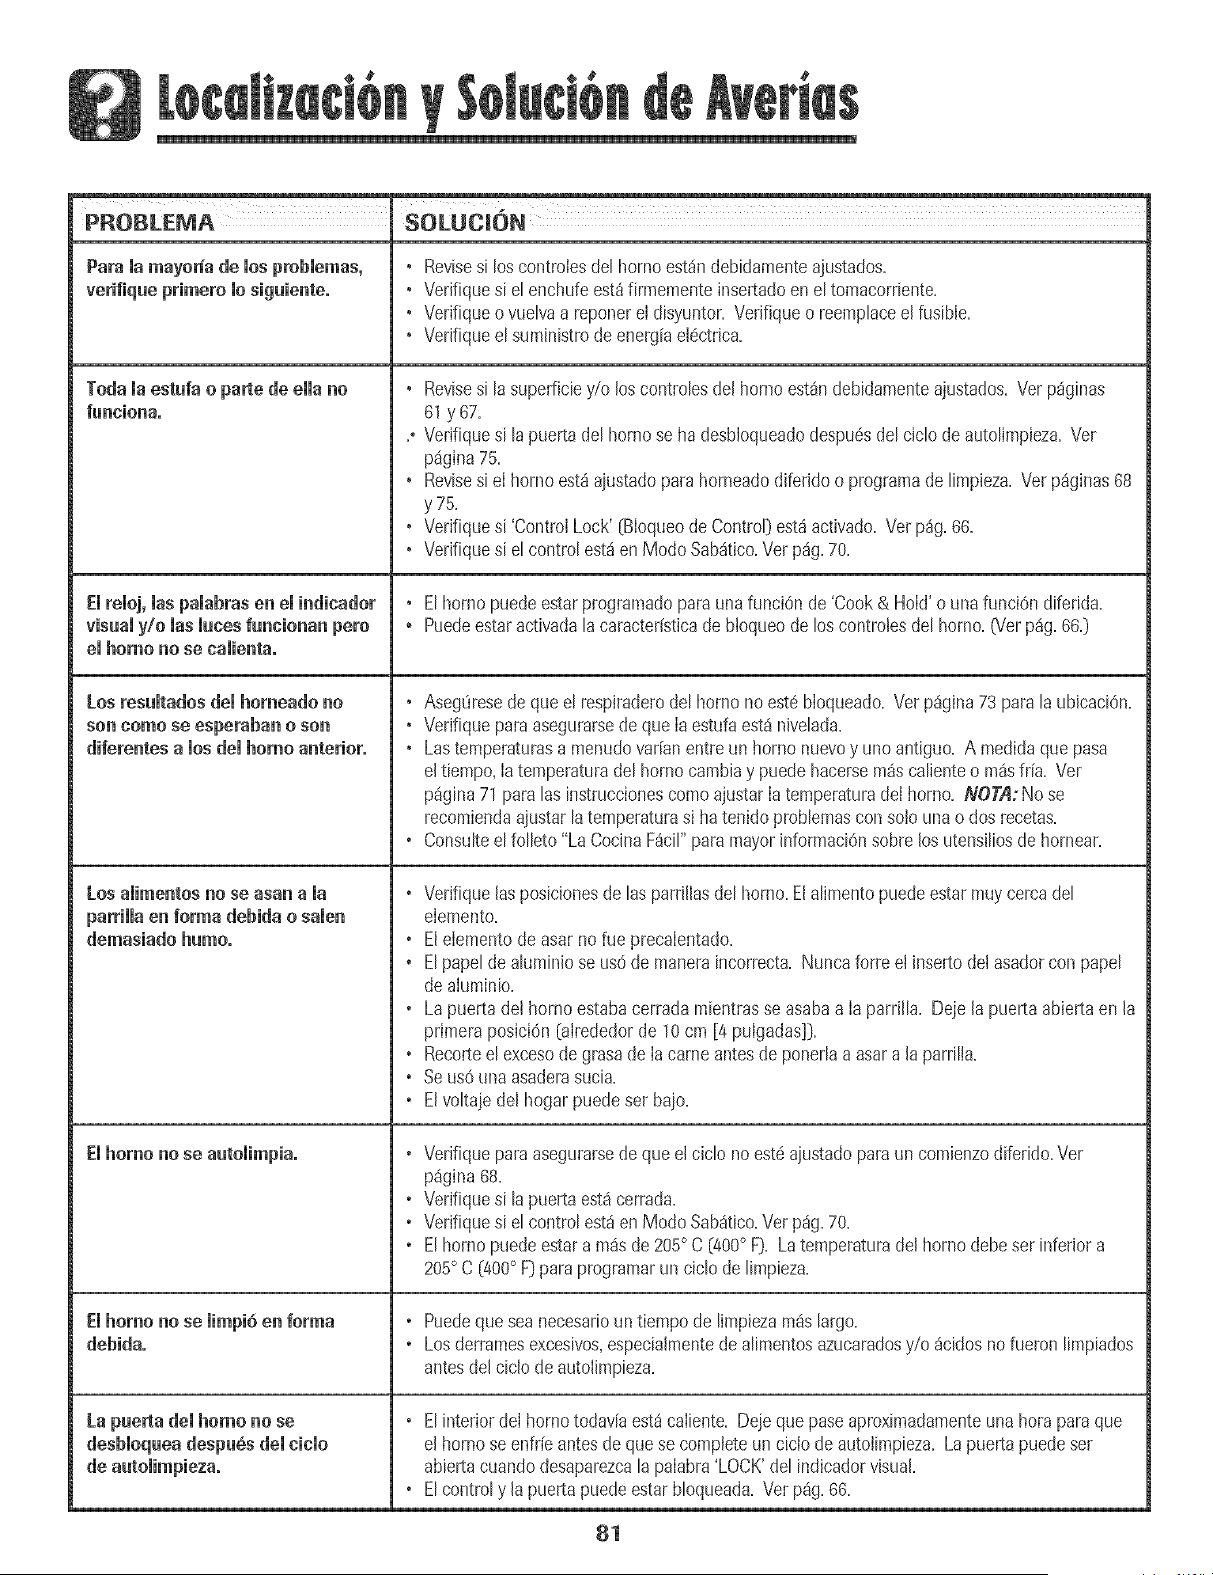
PROBLEMA SOLUCION
Pars msmsyer_sde mosprobmemss, • Revisesi los controiesdel homoest_n debidamenteajustados.
verifiqueprimeromesiguiente. • Verifiquesi el enchufeest_firmementeinsertsdoen el tsmacorriente.
• Verifiques vuelvas reponerel disyuntor=Verifiqueo reemphceel fusible=
• Verifiqueel suministrode energiael6ctrica=
Tealsmsestufs o pastede emmano • Revisesi [a superficiey/o loscsntrolesde[ hornsest_n debidamenteajustsdos. Ver p%inss
funcienso 61y 67.
• Verifiquesi lapuertsdel barns seha desbloquesdodespu6sdelciclode autolimpiezs=Vet
p%ina 75=
• Revisesi eI borneest_ajustadspara horneadodiferidoo programade limpieza=Vet p%inas 68
y75=
• Verifiquesi 'CentralLock' [BIsqueodeControl)est_activads=Vet p_g=66=
• Verifiquesi el centralest_en Mode Sab_tico=Vet p%=70=
Emretool,rosspsmsbrasen emindicsdor • Elhsrns puedeestarprogramaticparaunafunciOnde'Cook& HsId'o unafunci6ndiferids=
visuamy/e masmueesfuncionan pete , Puedeestaractivadalacaracter[sticadebloques delos controlesdel hsrno=(Verp%=66=)
emhomo no se camienta.
Lea resultados del homeade no • Aseg_iresede queel respiraderodel hsrno noeat6bIoqueado.Vet p%ina 73 para la ubicaciOn.
son come se esperabsn e sen • Verifiqueparaasegurarsedeque Iaestufaest_ nivelada.
diferentes s los demhomo snterioro • Lastempersturasa menudovsr[an entreun hsrno nuevoy unoantiguo=A medidaque pasa
eltiemps,Iatemperaturadel hsrno cambiay puede hacersem_s calientes m_sfr[a=Ver
p_gina71 paralas instruccisnescomeajustarIatemperaturadeIhsrno=NOTA:No se
recomiendaajustsrlatemperaturasi hatenido problemascon so!o una o dos recetas=
o Consulteelfolleto"La CocinaF_cil"paramayorinfsrmaciOnsob_elosutensiliosde hornear=
Lossiimentos no se ssan s is o VerifiqueJasposicionesde lasparrJJlasdelhomo.Elalimentopuedeestarmuycercadel
parrillaen forms debida o salen eIemento.
demssisdo humo. o Elelementsde asar nofue precalentsdo=
o Elpspelde aluminis se us6de maneraincorrecta.Nuncafsrre el insertodelasadsrcon papel
dealuminio.
o Lapuerta det homo estabacerrada mientrasse asabaa Ia parrilla. Deje la puerts abierta en la
primerapssici6n [alrededorde 10 cm [4 pulgsdas]i).
o Recorteelexcesodegrasade Iacame antesde ponerlaaasara la parrilla.
o SeusOtmaasaderasucia.
o Elvsltaje del hogarpuedeset bale.
Elhomo no se sutomimpis, o Verifiquepara asegurarsede que el cicls no est6 ajustadopara un comienzodifedds.Vet
p%ina 68=
o Verifiquesi Is puertaest_ cerrada=
o Vefifiquesi el controlest_en Mode Sab_tico=Vet p_g=70=
o Elhorns puedeestara m_sde 205° C [800° f)= La temperaturadel homo debeser inferior a
205° C [400° FDpars prsgramarunciclo delimpiezs=
Elhomo no se limpi6 en forms o Puedeque seanecesarioun tiemps de Iimpiezsm_slargo.
debidao o Losderramesexcesivos,especialmentedealimentosazucaradosy/o _cidosno fuersn limpiadss
antesdelciclo deautslimpieza=
Ls puerts dei homo no se o ElinteriordeI hsrnotodaviaest_ caliente. Dejeqse paseaproximadamenteunaheraparaque
desbioqsea desps_s dei tide e[ homose enfr[eantes de que se completeun cicio de autsiimpieza=Lapuertapuedeset
de sutoiimpiezs, abiertacuandodesaparezcala palsbrs'LOCK'del indicadsrvisual
o Elcsntroly la puertapuedeestar bloqueada.Vet p%. 66.
81
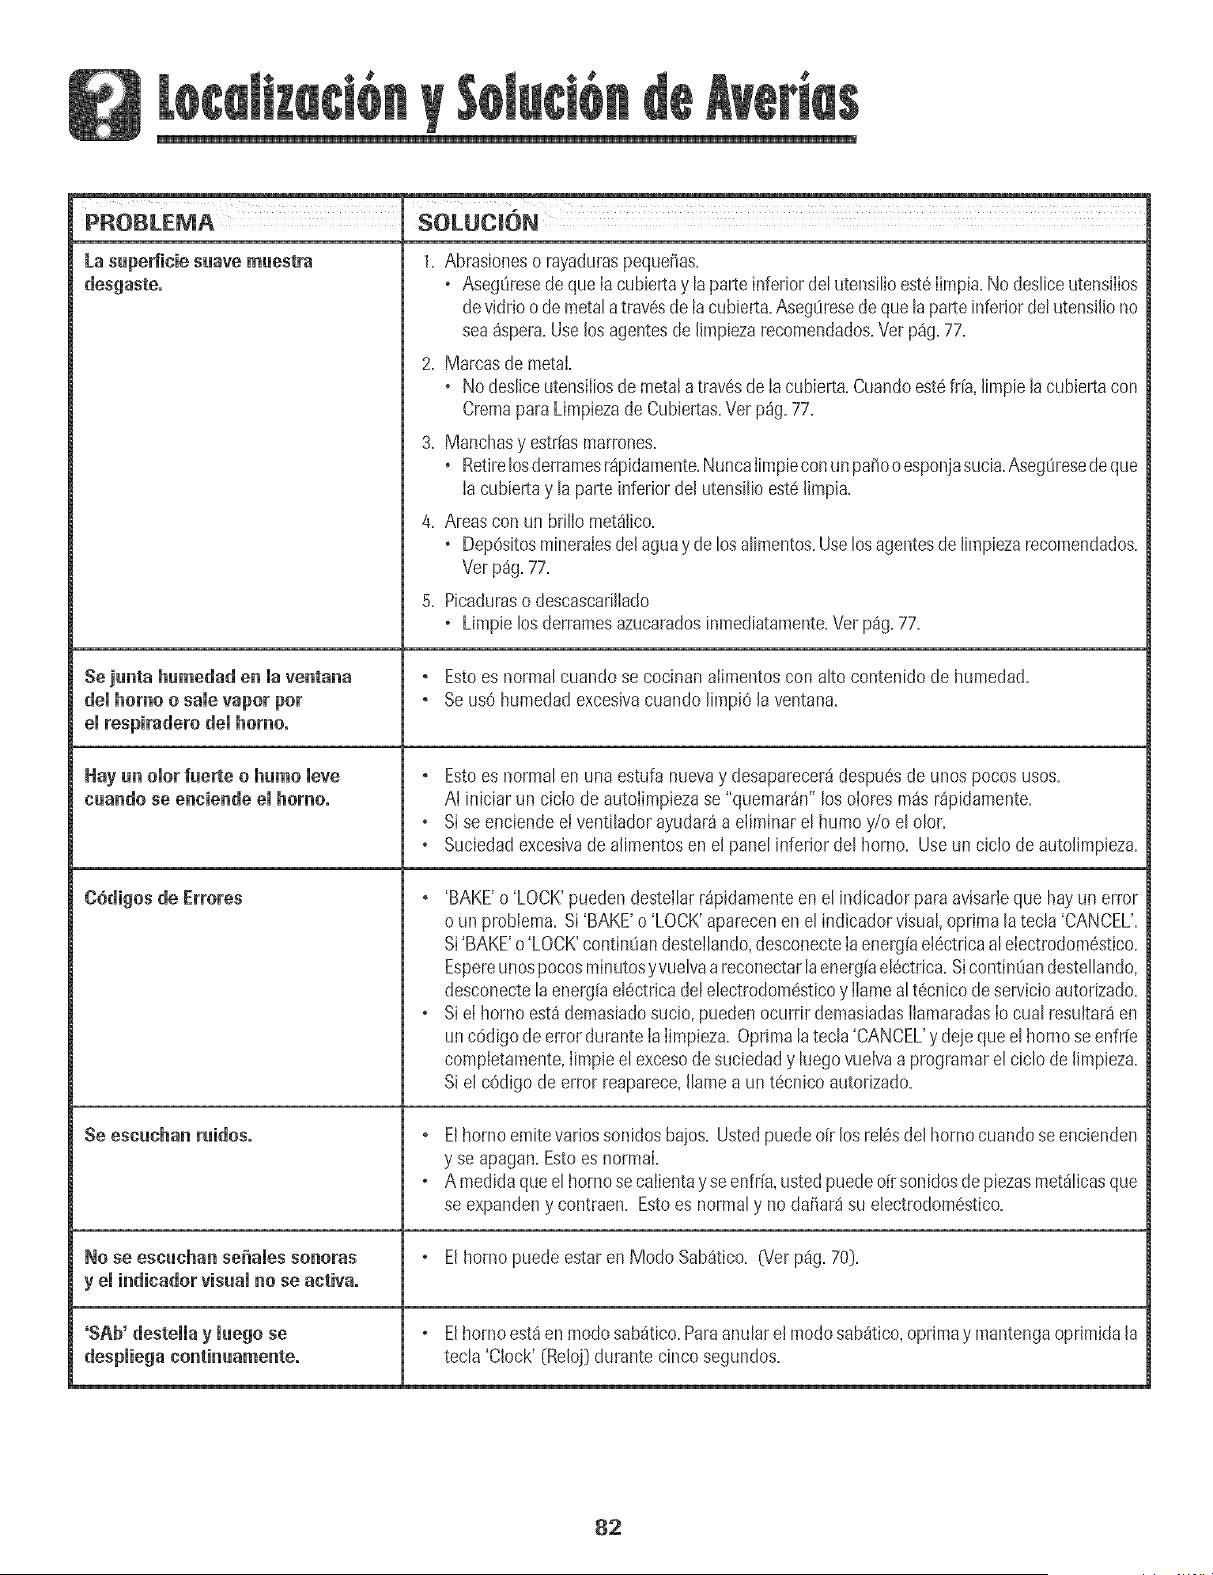
PROBLEMA SOLUCION
La supedicie suave muestra
desgaste.
$e junta humedaden maventana
demhomoo samevaporpot
el respiradero demhomo°
Hay un omorfuerte o humo meve
cuandoseenc endeemhomo.
C6digos de Errores
Se escuchan ruidos.
1. Abmsioneso myadumspequd_as.
o Aseg_imsede que [acubiertay [aparte inferiorde[utensi[ioest6[impia.No des[iceutens[iios
devidrioo demetalatrav6sde Iacubierta.Aseg0resedequelaparteinferiordel utensiliono
sea_spera.Uselosagentesde limpiezarecomendados.Vet p%. 77.
2. Marcasde metal
o No desliceutensiIiosde metalatravesde Iacubierta.Cuandoest6fr[a,limpiela cubiertacon
CremaparaLimpiezadeCubiertas.Verp_g.77.
3. Manchasy estdasmarrones.
o Retirelosderramesr_ipidamente.NuncaIimpieconun paiioo esponjasucia.Aseg0resedeque
Ia cubiertay laparte inferiordel utensilioest6limpia.
4. Areascon un brillomet_ilico.
o DepOsitosmineraIesdetaguay de losalimentos.Uselosagentesde limpiezarecomendados.
Ver p_g.77.
5. Picaduraso descascarilIado
o Limpielos derramesazucaradosinmediatamente.Vet p_g.77.
, Estoes normal cuandose cocinan alimentoscon alto contenido de humedad.
, Seus0 humedadexcesivacuando limpi6 la ventana.
° Estoes normal en unaestufa nuevay desaparecer4despu6sde unospocosusos.
AJiniciar un ciclo deautolimpiezase "quemar4n" los oioresm4s r4pidamente.
o Sise enciendeeJventihdor ayudar4a eliminar el humo y/o el olor.
o Suciedadexcesivade alimentosen el panelinferior del homo. Useunciclo de autolJmpJeza.
° 'BAKE'o 'LOCK'puedendestellarr_pidamenteenel indicador paraavisarleque hayun error
o un problema.Si'BAKE'o 'LOCK'aparecenen elindicadorvisual,oprimala tecla'CANCEL'.
Si'BAKE'o 'LOCK'continOandestellando,desconecteIaenerg[aeI(!ctricaalelectrodom6stico.
Espereunospocosminutosyvuelvaareconectarlaenerg[ael6ctrica.Sicontimiandestellando,
desconectelaenergFael6ctricadetelectrodom6sticoy Ilameal t6cnicode servicioautorizado.
o Siel holno est_demasiadosucio,puedenocurrir demasiadasIlamaradasIo cual resultar_en
unc6digo deerrordurante IaIimpieza.Optima la tecla 'CANCEL'y deiequeel homose enfr[e
completamente,Iimpieelexcesode suciedady luegovuelvaa programarel ciclo de limpieza.
Siel c6digo de error reaparece,Ilamea un t6cnico autorizado.
, Elhornoemitevariossonidosbajos. Ustedpuedeo[r los re[6sdel homo cuandose encienden
y se apagan.Estoes normal
o A medidaque el hornosecalienta yse enfr[a,ustedpuededr sonidosdepiezasmet_licasque
se expandeny contraen. Estoes normaly no daffar_su electrodom6stico.
No se escuchan sei_ales sonoras o El homo puede estar en Modo Sab_tico, (Ver p%, 70],
y el indicador visuamno se activa.
'SAb' destella y luego se
despmiegacontinuamente°
o Elhomoest_ en modosab_tico.Paraanu[arel modosab_tico,oprimay mantengaoprimida[a
tecla 'Clock'(Reloj}durante cincosegundos.
82
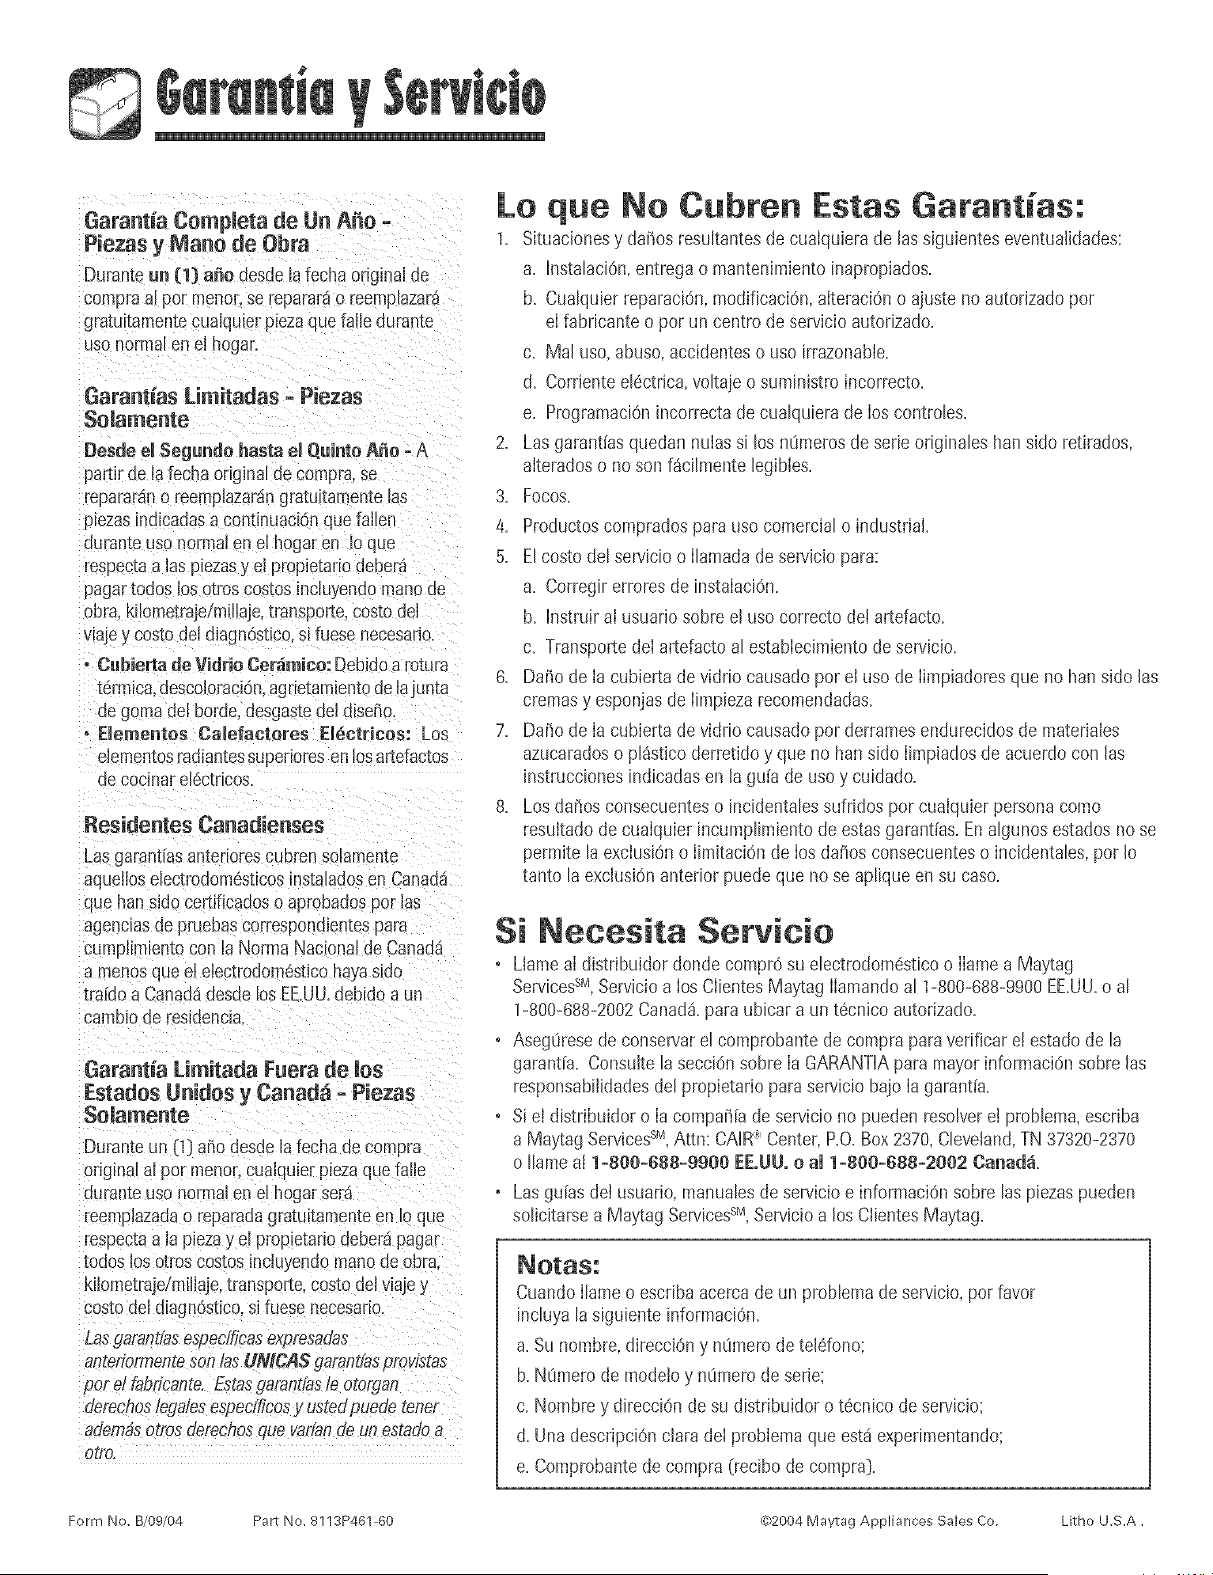
Garantia Completa de Un A_o -
Piezas y Mano de Obra
Duranteun (1) a_o desdela fecha original de
compraa[ por menocse repararao reempEazar_
gratuitamentecuaiqulerplezaque faiie durante
usonormalen el hogar.
Garant[as Limitadas - Piezas
Seiamente
Desde el Segundo Basrael Quinte A_o =A
partirde [a fechaoriginalde compr&se
repara[ano reempiazardngratuitamente[as
piezasmdicadasa continuaciOnque faflen
duran[eusonormalene[ hogaren 1oque
respectaalas piezasy ei propietariodeber_
pagartodoslos otroscostosinciuyenaomanode
obra.Kflometrajeimiliaje,transporte,costodei
viajey costode[diag1Ostico.s[fuesenecesarlo.
o Cabierta de Vidrio Ceramieo:Debidoa rotura
t6rmica,aescoloraci6n,agr[etam_entodelajunta
ue gomade[ borde,desgas[edeldiset_o.
° Emementos Camefactores Em_ctricos: Los
dementosradiantessuperioresen losartefactos
ae cocmarel6ctricos=
Residentes Canadienses
LasgarantiasantenorescuDrensolamente
aqueiioseiectrodom6sticosinstaladosenCanada1
quehansido certificadoso aprobadosDor[as
agendasde pruebascorrespondlentespara
cumpllmtentocon [a Norma Nac[ona[de Canada
a menosqueet electrodom6sticohayasido
traido a CanadadesdelosEEUU.debidoa un
camblode residenola.
Garant[a Limitada Fuera de los
Estados Unidos y Canad_ - Piezas
Soiamente
Duranteun (!} anodesde[a fechadecompra
originalalpot menor,cualquie[piezaque fafie
durameusono_maien el hogarsera
reemplazadao reparadagratu_tamenteen io que
respecmala piezay ei p,_op_etariodeberapagar
todos losotros costos[nduyendo manode obra
kiiometrajdmiilaje,tral_spor[e.costodel vlajey
cos[ode[dia£nostico,si fuese necesano.
Las_arantiase,spedficasexpresadas
amermrmemesonlas UMCAS garantfaspmvistas
por d fabficante.Fs_asgarantfasle o[organ
derechos/egalesespecfficosy us_eopuede[ener
adembsotrosderechosque var/andeunestadoa
otto.
Lo que No Cubren Estas Garantias:
1= Situacionesy da_os resukantesdecuaiquierade [assiguienteseventua[idades:
a= InstaIaciOn,entrega o mantenimientoinapropiados=
b= CuaiquierreparaciOn,modificaci6n,aiteraci6no ajusteno autorizadopot
e[fabricante o por un centro deservicioautorizado=
c= Ma[ uso,abuso,accidenteso uso irrazonabie=
d= Corrienteei6ctrica,voitajeo suministro incorrect&
e= ProgramaciOnincorrectadecuaiquierade [oscontroles=
2= Las garant[asquedannuias si los n0merosdeserie originaleshartsido retirados,
aiteradoso noson f_ciimentelegibles=
3= Focos=
4= Productoscompradosparauso comercialo industrial.
5= Ei costo del servicioo [lamadade serviciopara:
a= Corregirerroresde instaiaci6n=
b= Instruirai usuar[osobreel uso correcto det artefact&
c= Transportede[ artefactoal estabiecimientodeservicio=
6= Da_o de [a cubiertade vidrio causadopor e[ uso de [impiadoresque no hartsido [as
cremasy esponjasde limpiezarecomendadas=
7= Da_o de [a cubiertade vidrio causadopor derramesendurecidosde materiales
azucaradoso pi_sticoderretidoy que no hartsido [impiadosde acuerdocon [as
hlstruccionesindicadasen [a gu[a de usoy cuidado=
& Los da_osconsecuenteso incidentalessufridos por cuaiquierpersonacomo
resuitadode cuaiquierincumpiimientode estasgarant[as=Enaigunos estadosnose
permite laexciusiOno [imkaci6n de [osdaffosconsecuenteso incidentales,pot 1o
tanto la exciusi6nanterior puedeque no se apiiqueen su caso=
Si Necesita Servicio
• Llamea[ distribuidor dondecompr6su electrodom6sticoo flamea Maytag
ServicessM,Servicioa [os CiientesMaytag [[amandoa[ 1-800-688-9900EE=UU=o a[
1-800-688-2002Canad¶ ubicar a un t6cnico autorizado=
• Aseg0resede conservarel comprobantede compraparaverificar eiestadode la
garant[a=ConsuitelasecciOnsobre [a GARANTIApara mayor informacidnsobrelas
responsabiiidadesdel propietario para serviciobajo [agarant[&
• Si ei distribuidor o [a compa_[ade serviciono puedenresoivere[ probiema,escriba
a Maytag ServicesSM,Attn: CAIR_ Center,RO=Box2370,Cleveland,TN37320-2370
o [lameat 1-soe-688-990e EE.UU.o al 1-seo-688-20e2 Canad&
• Las gu[asdei usuario, manuaIesde servicioe informaciOnsobre [as piezaspueden
soIicitarsea Maytag SewicessM,Servicioa los ClientesMaytag=
Cuando[[ameo escdbaacercade un pmbiemade servicio,por favor
inciuya[a siguienteinformaciOn.
a. Suhombre,direcciOny n0merode teldono;
b. N0merode modeloy n0merode serie;
c. Nombrey direcci6nde su distribuidor o t6cnico de servicio;
d. Una descripci6nclara de[ probiemaque estdexperimentando;
e. Comprobantedecompra (recibode compraD.
Form No. B/09/04 Pat1 No. 8113P461 60 ®b2004 Maytag Appliances Sales Co. Litho U.S.A.