Loading ...
Loading ...
3
This cleaner was inspected and packaged carefully before being shipped from the factory. If you should happen
to need assistance during assembly or operation,
Visit us online at www.hoover.com to find the service outlet nearest you (click on the “Service” button) OR
Call 1-800-944-9200 for an automated referral of authorized service outlet locations (U.S. only) OR
Call 1-330-499-9499 to speak with a representative in the Hoover Consumer Response Center.
PLEASE DO NOT RETURN THIS PRODUCT TO THE STORE.
1. Assembling cleaner
Questions or Concerns?
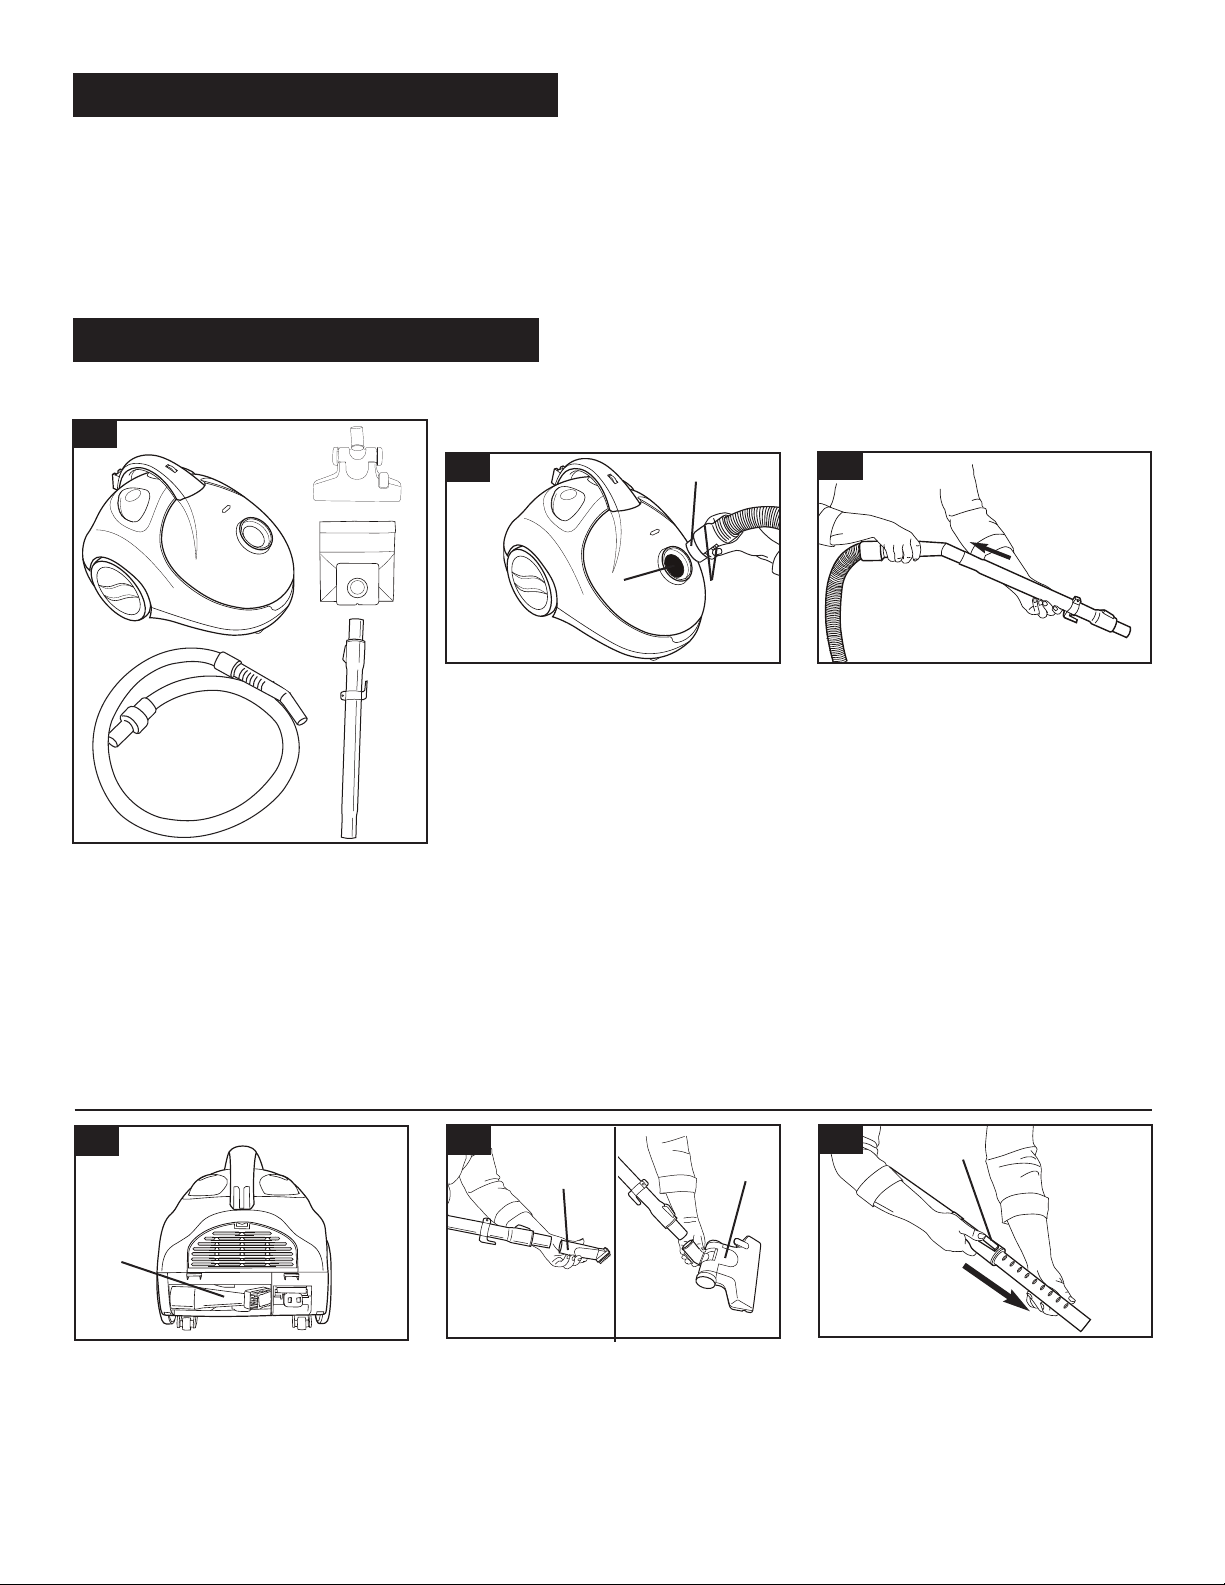
Carton contents
Unpack cleaner from carton and
identify the parts shown.
Remove and dispose of packing.
A. Canister cleaner
B. Rug and floor nozzle
C. Extra filter paper bag (one bag
is installed in cleaner)
D. Hose
E. Telescopic wand
Connect hose
Push hose connector (A) into opening
(B) in bag lid. To disconnect hose,
depress buttons (C) on hose connec-
tor and pull up.
Attach wand, tools and
nozzle
To attach wand to hose, push wand
firmly onto hose; twist wand to
tighten.
To attach tool (D) to the hose or the
wand, push tool firmly onto hose.
Twist tool slightly to tighten or loosen
connection.
To attach the nozzle (E) to the wand,
push the nozzle firmly onto the
wand.
1-1
1-2
1-3
1-4
To adjust the telescoping wand,
push spring latch (F) forward and
pull down on lower portion of wand.
Adjust wand to desired length.
Release latch to lock the wand in
position.
1-5
1-6
A
E
D
D
B
C
A
B
C
E
F
Connecting hose,
wand and nozzle
D
The combination dusting brush/
crevice tool (D) is stored on the
back of the cleaner.
Loading ...
Loading ...
Loading ...