Loading ...
Loading ...
Loading ...
27
INSTALLATION
Check the appliance is electrically safe when you have nished.
Moving the Range
On no account try and move the range while it is
plugged into the electricity supply.
The range is very heavy, so take great care.
We recommend that two people manoeuvre the range. Make
sure that the oor covering is rmly xed, or removed, to
prevent it being disturbed when moving the range around.
To help you, there are two levelling rollers at the back, and
two screw-down levelling feet at the front.
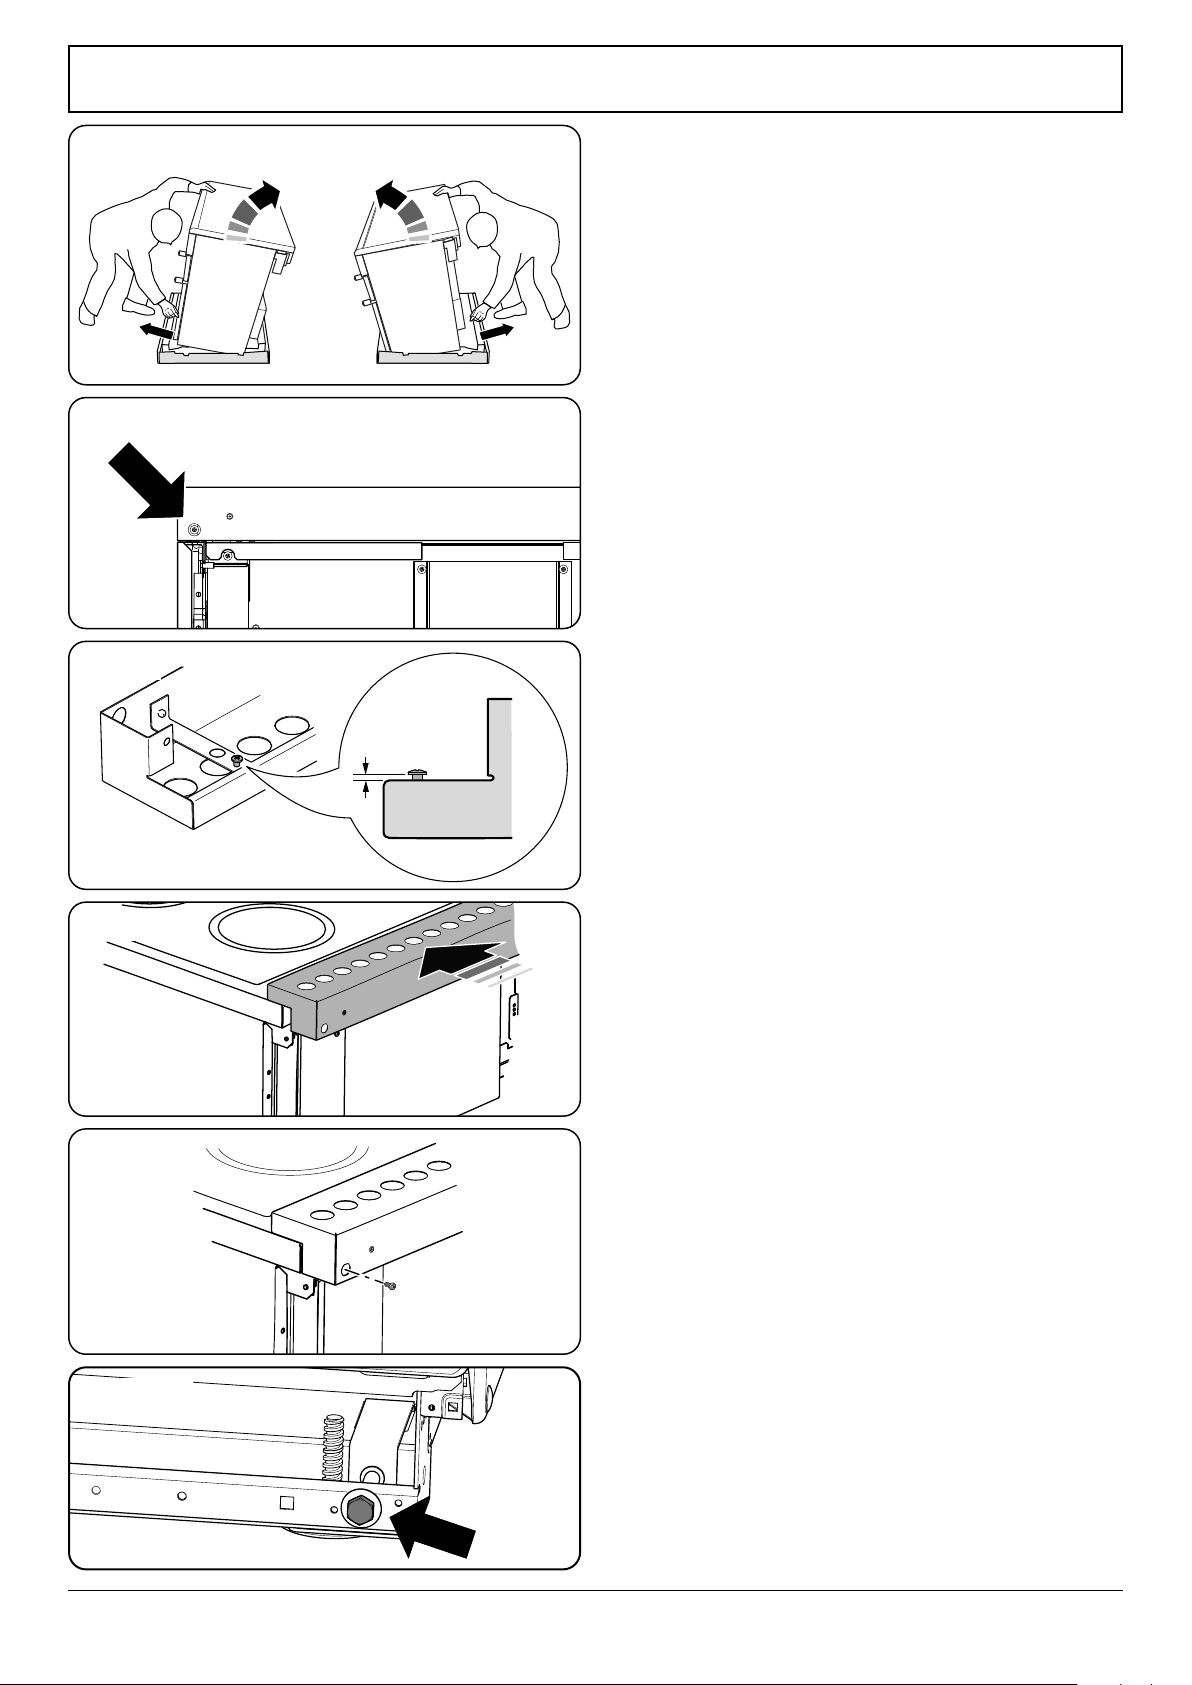
Remove the polystyrene base pack. From the front, tilt the
range backwards and remove the front half of the polystyrene
base (Fig. 10.5). Repeat from the back and remove the rear
half of the polystyrene base.
Fitting the Flue Grille
Unscrew and remove the two screws from the upper rear
corners of the range (Fig. 10.6). These will be used to secure
the grille.
The ue grille is packed separately. There are four screws
supplied tted to the underside of the grille. These will need
to be unscrewed until there is a space of 7 mm between the
underside of the screw head and the grille (Fig. 10.7).
Locate the grille with the screw heads inside the keyhole slots
in the range. Gently push the grille towards the hob to lock it
(Fig. 10.8).
Fix the grille in place using the two screws removed
previously (Fig. 10.9). Tighten the four screws on the
underside of the grille.
Lowering the Two Rear Rollers
To adjust the height of the rear of the range, rst t a 13 mm
spanner or socket wrench onto the hexagonal adjusting nut
(Fig. 10.10).
Rotate the nut – clockwise to raise – counter-clockwise to
lower. Make 10 complete (360°) turns clockwise.
Make sure you lower BOTH REAR ROLLERS.
7 mm
Fig. 10.5
Fig. 10.6
Fig. 10.7
Fig. 10.8
Fig. 10.9
Fig. 10.10
Loading ...
Loading ...
Loading ...