Cleaning ........................................ 15-17
Sdf-CHean Oven
CHeaningProcedures
Maintenance ..................................................... 18
Oven Light
Oven Window
Form No, A/04/03 Part No, 8112P219-60 Q2003 Maytag Appliances Sales Co. Litho U.S.A,
|nstaHer: Phase leave this manual with this appliance.
Oensumer: Please read and keep this manual for future
reference. Keep sabs receipt and/oH cancdbd check as
proof of purchase.
Modal Number
Serial Number
Date of Purchase
Jf you have questions, caik
Amana Customer Assistance
1-800-843-0304 USA
1-866-587-2002 Canada
Internet: http:/iwww.amana,com
In our continuing effort to improve the quality and perfor-
mance of our cooking products, it may be necessary to make
changes to the appliance without re_ising this guide.
For service ##fermade#, see pacJe 21.
To ensure proper and safe operation: Appliance
must be properly installed and grounded by a qualified
technician. Do not attempt to adjust, repair, service, or
replace any part of your appliance unless it is specifi-
cally recommended in this guide. All other servicing
should be referred to a qualified servicer.
Always disconnect power to appliance before servicing.
To Prevent Fire or Smoke
• Be sure all packing materials are removed from the
appliance before operating it.
, Keep area around appliance clear and free from
combustible materials. Flammabb materials should not
be stored in an oven.
Many plastics are vulnerable to heat. Keep plastics
away from parts of the appliance that may become
warm or hot.
* To prevent grease fires, do not let cooking grease or
other fiammabb materials accumulate in or near the
appliance.
iMPORTANT SAFETY
INSTRUCTIONS
Warning and important Safety Instructions appearing in
this guide are not meant to cover all possible conditions
and situations that may occur. Common sense, caution,
and care must be exercised when installing, maintain-
ing, or operating the appliance.
Always contact your dealer, distributor, service agent, or
manufacturer about problems or conditions you do not
understand.
Recognize Safety Symboms, Words, Labels
In Case of Fire
Use dry chemical or foam-type extinguisher or baking
soda to smother fire or flame. Never use water on a
grease fire.
1, Turn off appliance to avoid spreading the flame.
2, NEVER pick up or move a flaming pan.
3, Smother fire or flame by closing the oven door.
Child Safety
WARNnNG. Hazards or unsafe practices which
COULD resu!t !n severe persona! injury 0r death.
COULD result in minor personal injury.
Read and follow all instructions before using this
appmiance to prevent the potential risk of fire, electric
shock, personal injury or damage to the appliance as a
result of improper usage of the appliance. Use appliance
only for its intended purpose as described in this guide.
ance or on the appliance door to reach items coutd be
NEVER leave children alone or unsupervised near the
appliance when it is in use or is still hot. Children
should never be allowed to sit or stand on any part of
the appliance as they could be injured or burned.
Children must be taught that the appliance and
utensils in it can be hot. Let hot utensils cool in a safe
place, out of reach of small children. Children should
be taught that an appliance is not a toy. Children
should not be allowed to play with controls or other
parts of the unit.
About Your Appliance
above, Misuse of appliance doors, such as stepping,
leanJug or sitting on the door, may result in possib!e
serious injuries,
To prevent potential hazard to the user and damage to
the appliance, do not use appliance as a space heater
to heat or warm a room. Also, do not use the oven as a
storage area for food or cooking utensils.
Do not obstruct the flow of air by blocking the oven
vent.
• DO NOT TOUCH HEATING ELEMENTS OR INTERIOR
SURFACES OF OVEN. Heating elements may be hot
even though they are dark in color, htedor surfaces of
any oven become hot enough to cause burns. During
and after use, do not touch, or let clothing or other
flammable materials contact heating elements or
interior surfaces of oven until they have had sufficient
time to cool. Other surfaces of the appliance may
become hot enough to cause burns - among these
surfaces are: oven vent openings and surfaces near
these openings, oven doors, windows of oven doors.
Do not touch a hot oven light bulb with a damp cloth
as the bulb could break. Should the bulb break,
disconnect power to the appliance before removing
bulb to avoid electrical shock.
A fan should be heard during some bake, convect
bake, convect roast, and all broil and cleaning opera-
tions. If you do not hear the fan, call an authorized
servicer.
NEVER use aluminum foil to cover an oven rack or
oven bottom. Misuse could result in risk of electric
shock, fire, or damage to the appliance. Use foil only
as directed in this guide.
Cooking Safety
* Never heat an unopened food container in the oven.
Pressure build-up may cause container to burst
resulting in serious personal injury or damage to the
appliance.
Use dry, sturdy potholders. Damp potholders may
cause burns from steam. Dish towels or other substi-
tutes should never be used as potholders because they
can trail across hot elements and ignite or get caught
on appliance parts.
• Wear proper apparel. Loose fitting or long hanging-
sleeved apparel should not be worn while cooking.
Clothing may ignite and cause burns if garment comes
in contact with heating elements.
Always place oven racks in the desired positions while
oven is cool Slide oven rack out to add or remove
food, using dry, sturdy potholders. Always avoid
reaching into the oven to add or remove food. If a rack
must be moved while hot, use a dry potholder. Do not
let potholder contact hot element in oven.
Use care when opening the oven door. Let hot air or
steam escape before removing or replacing food.
• PREPARED FOOD WARNUNG: Follow food
manufacturer's instructions. If a plastic frozen food
container and!or its cover distorts, warps, or is other-
wise damaged during cooking, immediately discard
the food and its container. The food could be contami-
nated.
Do not allow aluminum foil or meat probe to contact
heating element.
Always turn off all controls when cooking is com-
pleted.
Utensil Safety
Follow the manufacturer's directions when using oven
cooking bags.
This appliance has been tested for safe performance
using conventional cookware. Do not use any devices
or accessories that are not specifically recommended
in this manual. Do not use add-on oven convection
systems. The use of devices or accessories that are not
expressly recommended in this guide can create
serious safety hazards, result in performance problems,
and reduce the life of the components of the appli-
ance.
Only certain types of glass, glass/ceramic, ceramic,
earthenware, or other glazed utensils are suitable for
oven service without breaking due to the sudden
change in temperature. Follow utensil manufacturer's
instructions when using glass.

i
Cmeaning Safety
• Turn off all controls and wait for appliance parts to
cool before touching or cleaning. Clean with caution.
Use care to avoid steam burns if a wet sponge or cloth
is used to wipe spills on a hot surface. Some cleaners
can produce noxious fumes if applied to a hot surface.
Clean only parts listed in this guide.
Se f-C ean Oven
Do not leave food or cooking utensils, etc, in the oven
during the seJf:c!ean cycJe,
Do not clean door gasket. The door gasket is essential
for a good seal. Care should be taken not to rub,
damage, or move the gasket.
Do not use oven cleaners or oven liners of any kind in
or around any part of the self-dean oven.
Before self-cbaning the oven, remove broiler pan,
oven racks and other utensils, and wipe off excessive
spillovers to prevent excessive smoke or flare ups.
important Safety Notice and
The California Safe Drinking Water and Toxic Enforce-
ment Act of 1986 (Proposition 65} requires the Governor
of California to publish a list of substances known to the
State of California to cause cancer or reproductive harm,
and requires businesses to warn customers of potential
exposures to such substances.
Users of this appliance are hereby warned that when
the oven is engaged in the self-dean cycle, there may
be some Iowqevel exposure to some of the listed
substances, including carbon monoxide. Exposure to
these substances can be minimized by properly venting
the oven to the outdoors by opening the windows and/
or door in the room where the appliance is located
during the self-clean cycle.
UMPORTANT NOTUCE REGARDUNG PET BURDS:
Never keep pet birds in the kitchen or in rooms where
the fumes from the kitchen could reach. Birds have a
very sensitive respiratory system. Fumes released during
an oven self-charting cycle may be harmful or fatal to
birds. Fumes released due to overheated cooking oil, fat,
margarine and overheated non-stick cookware may be
equally harmful.
Note: For microwave oven operation (select models}
refer to the use and care guide packed in the micro-
wave oven_
Save These instructions for Future Reference
3
Control Panem
A B CDE G H J K
M m 0
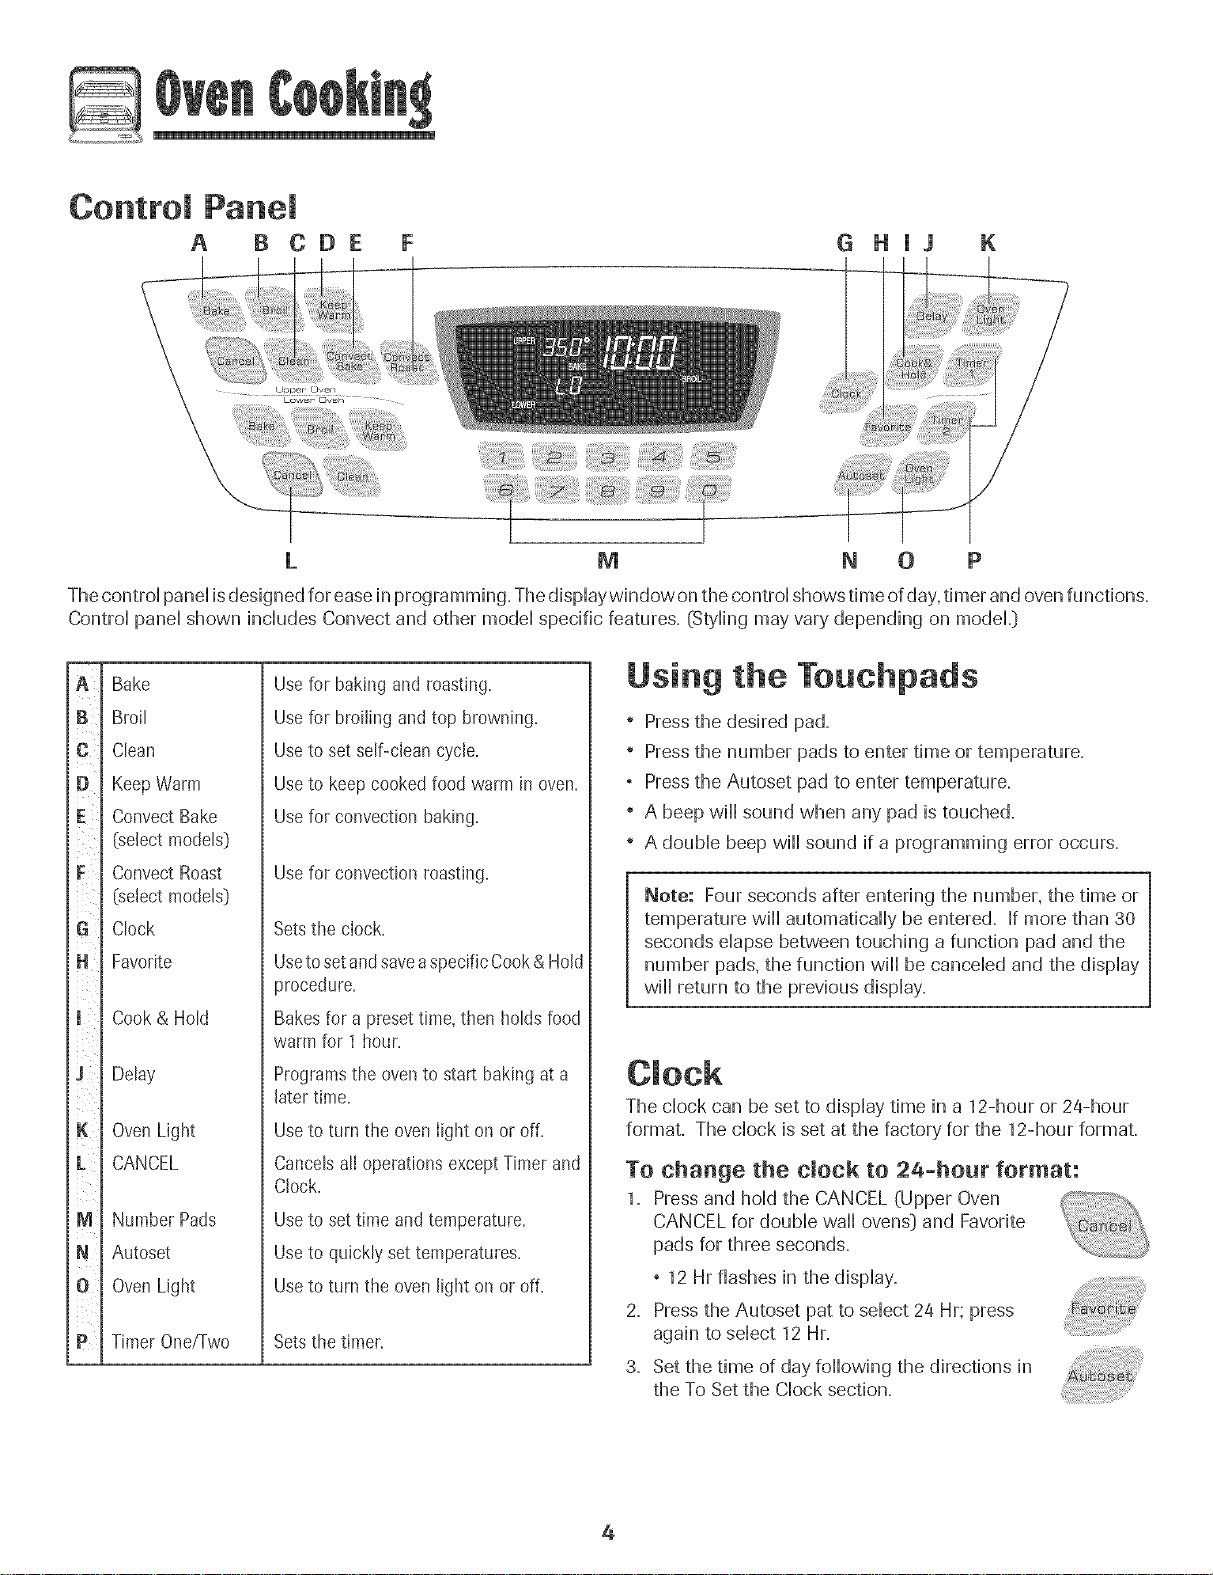
Thecontroi panei isdesigned for easein programming. Thedispiaywindow on the controi shows time of day,timer and ovenfunctions.
Controi panei shown inciudes Convect and other modei specific features. (Styling may vary depending on modeL}
G
D
E
iii/iii
F
G
H
J
K
M
N
t ¸
P
Bake
Broil
Cban
Keep Warm
Convect Bake
(select modeb]
Convect Roast
(select modeb)
Clock
Favorite
Cook& Hold
Delay
OvenLight
CANCEL
Number Pads
Autoset
OvenLight
Timer One/Two
Usefor baking and roasting.
Usefor broiling andtop browning.
Useto set self-cleancycle.
Useto keepcookedfood warmin oven.
Usefor convectionbaking.
Use for convection roasting.
Setsthe clock.
UsetosetandsaveaspecificCook&Hold
procedure.
Bakesfor a presettime,then holdsfood
warm for 1 hour.
Programs the oven to start baking at a
later time.
Useto turn the ovenlight on or off.
CancelsalI operationsexceptTimer and
Clock.
Use to set time and temperature,
Use to quickly set temperatures.
Use to turn the oven light on or off.
Sets the timer,
Using the Touchpads
+ Press the desired pad.
+ Press the number pads to enter time or temperature.
° Press the Autoset pad to enter temperature.
+ A beep will sound when any pad is touched.
+ A double beep will sound if a programming error occurs.
Note: Four seconds after entering the number, the time or
temperature will automatically be entered. If more than 30
seconds elapse between touching a function pad and the
number pads, the function will be canceled and the display
will return to the previous display.
The clock can be set to display time in a 12-hour or 24-hour
format. The clock is set at the factory for the 12-hour format.
To change the clock to 2a-hour format:
1. Pressand hold the CANCEL (Upper Oven
CANCEL for double wall ovens} and Favorite
pads for three seconds.
° 12 Hr flashes in the display.
2. Pressthe Autoset pat to select 24 Hr; press
again to select 12 Hr.
3. Set the time of day following the directions in
the To Set the Clock section.
4
To set the Clock:
I. Pressthe Clock pad.
, The time of day flashes in the display.
2. Pressthe appropriate number pads to set the time of day.
, Colon flashes in the display.
3. Pressthe Clock pad again or wait four seconds.
, The colon will remain on.
When electrical power is supplied or after a power interrup-
tion, the last clock time before power was interrupted will
flash.
To recall the time of day when another time function is
showing, press the Clock pad.
Clock time cannot be changed when the oven has been
programmed for Delay cook or clean or Cook & Hold.
To canceJ the Clock display:
If you do not want the time of day to display:
Press and hold the CANCEL and Clock pads for
three seconds. The time of day will disappear
from the display.
When the clock display is canceled, press the
Clock pad to briefly display the time of day.
When the clock display is canceled, after 15 minutes, the oven
control will go into Standby Mode to save energy. The display
will be blank and the oven light will not operate. To "wake up"
the control from Standby Mode, press any touchpad. A double
beep will sound.
To restore the Clock display:
Press and hold the CANCEL and Clock pads for three sec-
onds. The time of day will reappear in the display.
The timer can be set from one minute @0:01}up to 99 hours
and 59 seconds @9:59}.
The timer can be used independently of any other oven
activity'. Itcan also be set while another oven function is
operating.
The Timer does not control the oven. It only controls a
beeper.
To set the Timer:
1. Pressthe Timer pad.
° 00:00and TIMER icon flash in the display.
2. Pressthe appropriate number pads until the correct time
appears in the display.
° The colon and TIMER icon will continue to flash.
3. PressTimer pad again or wait four seconds.
° The colon stops flashing and the time begins counting
down.
° The last minute of the timer countdown will be displayed
in seconds.
4. At the end of the set time, one long beep will sound and
"End" will be displayed.
5. Pressthe Timer pad to clear the display.
To cancem the Timer:
1. Pressand hold the Timer pad for three seconds.
OR
2. Pressthe Timer pad and press '0' using the
number pads.
Locking the Control
and Oven Door
The touchpad and oven door call be locked for safety',
cleaning, or to prevent unwanted use. The touchpads will not
function when locked.
If the oven is currently in use, the touchpads and door cannot
be locked.
The current time of day will remain in the display when the
touchpads and door are locked.
To lock:
1. Pressand hold the CANCEL and Cook & Hold
pads for three seconds.
° OFFappears in the display
° The LOCK icon flashes while the door is
locking.
To unJock:
Press and hold the CANCEL and Cook & Hold pads for three
seconds. OFFdisappears from the display.
Note: The touchpads and oven door cannot be locked if
the oven temperature is a00° For above.
FauJt Codes
The BAKE or LOCK icon may flash rapidly ill the display to
alert you if there is all error or a problem. If the BAKE or
LOCK icon flashes in the display, press CANCEL pad. Jfthe
BAKE or LOCK icon continues to flash, disconnect power to
the appliance. Wait a few minutes, and then reconnect
power. If the icon flashing still continues, disconnect power to
the appliance and call an authorized servicer.
5

To set Bake:
1_ Pressthe Bake pad_
, The BAKE icon will flash.
, 000 will flash in the dispHay.
2. Sdect the oven temperature. Press the Autoset pad for
350° For the appropriate number pads.
, EachadditionaH press of the Autoset pad will increase
the temperature by 25°.
, The oven temperature can be set from 170° to 550°,
3. Press Bake pad again or wait four seconds.
, The BAKE icon will stop flashing and Hightin the dispHay.
, The PREHEATicon will Hightin the dispHay.
, 100° or the actuaHoven temperature if over 100° Fwill
dispHay. It will rise in 5° increments until the preset
temperature is reached.
4. Allow the oven to preheat for 8-15 minutes.
, When the set oven temperature is reached, one long
beep will sound.
, The set temperature will display.
, The PREHEATicon will turn off.
, To recall set temperature during preheat, press Bake pad.
5. Placefood in the oven.
8. Check cooking progress at the minimum cooking time.
Cook longer if needed.
7. When cooking is finished, press CANCEL pad.
iiiiiiiiiii!iiiiiiiiiiii!!!!!
8. Remove food from the oven.
Baking Notes:
, To change the oven temperature during cooking, press
Bake.then press the Autoset or appropriate number pads
until the desired temperature is displayed.
To change the oven temperature during preheat, press the
Bake pad twice, then press the Autoset pad or appropriate
number pads until the desired temperature is displayed.
If you forget to turn off the oven. it will automatically turn
off at the end of 12 hours. If you wish to deactivate this
feature, see page 11.
Foradditional baking and roasting tips. see "Cooking Made
Simple" booklet.
Baking Differences Between Your
and New Oven
It is normal to notice some baking time differences between a
new ovenand an old one. See"Adjusting the OvenTemperature"
on page 12.
Baking with Convection
(select models)
When convection baking, enter your normal baking tempera-
ture. The control will automatically reduce the set oven
temperature by 25°.
To set Conveet Bake:
1. Pressthe Convect Bake pad.
, The BAKE and FAN icons will flash
, 000 will flash in the display.
2. Select the oven temperature. Press the Autoset pad for
350° For the appropriate number pads.
, Eachadditional press of the Autoset pad will increase
the temperature by 25 degrees. The oven temperature
can be set from 170° to 550°,
3. Press Convect Bake pad again or wait four seconds.
, The BAKE icon will stop flashing.
, The PREHEATicon will light in the display.
, 100° or the actual oven temperature if over 100° Fwill
display. It will rise in 5° increments until the preset
temperature is reached.
, The FAN icon will start to rotate.
4. Allow the oven to preheat for 8-15 minutes.
, When the set oven temperature is reached, one long
beep will sound.
, The PREHEATicon will turn off.
, The set temperature will display.
, To recall the set temperature during preheat, press the
Convect Bake pad.
5. Placefood in the oven.
8. Check cooking progress at the minimum cooking time.
Cook longer if needed.
7. When cooking is finished, press CANCEL pad.
8. Removefood from the oven.
Roasting With Convection
(seJect modeJs)
When convection roasting, enter your normaHroasting time
and temperature. The controHwill automaticafly prompt you to
check the food for aloneness at 75% of the set time.
, When convection roasting, the cooking time must be set
before setting the temperature.
° If your recipe requires a preheated oven,add 15 minutes
to the cooking time programmed.
° Roasting times can vary with different cuts of meat.
° Refer to "Cooking Made Simple" booklet for suggested
roasting temperatures and times.
To set Convect Roast:
1. Pressthe Convect Roast pad.
° The ROASTand FAN icons will flash
° 00:00will flash in the display.
° 000lights in the display.
2. Enter the roasting time using the number pads.
° Time can be set from 10 minutes (00:10} to 11 hours,
59 minutes (11:59}.
, Press Convect Roastagain or wait 4 seconds.
° 'Roast' flashes in the display.
3. Select the oven temperature. Press the
Autoset pad for 350° For the appropriate
number pads.
° Eachadditional press of the Autoset pad will increase
the temperature by 25°.
° The oven temperature can be set from 170° to 550°.
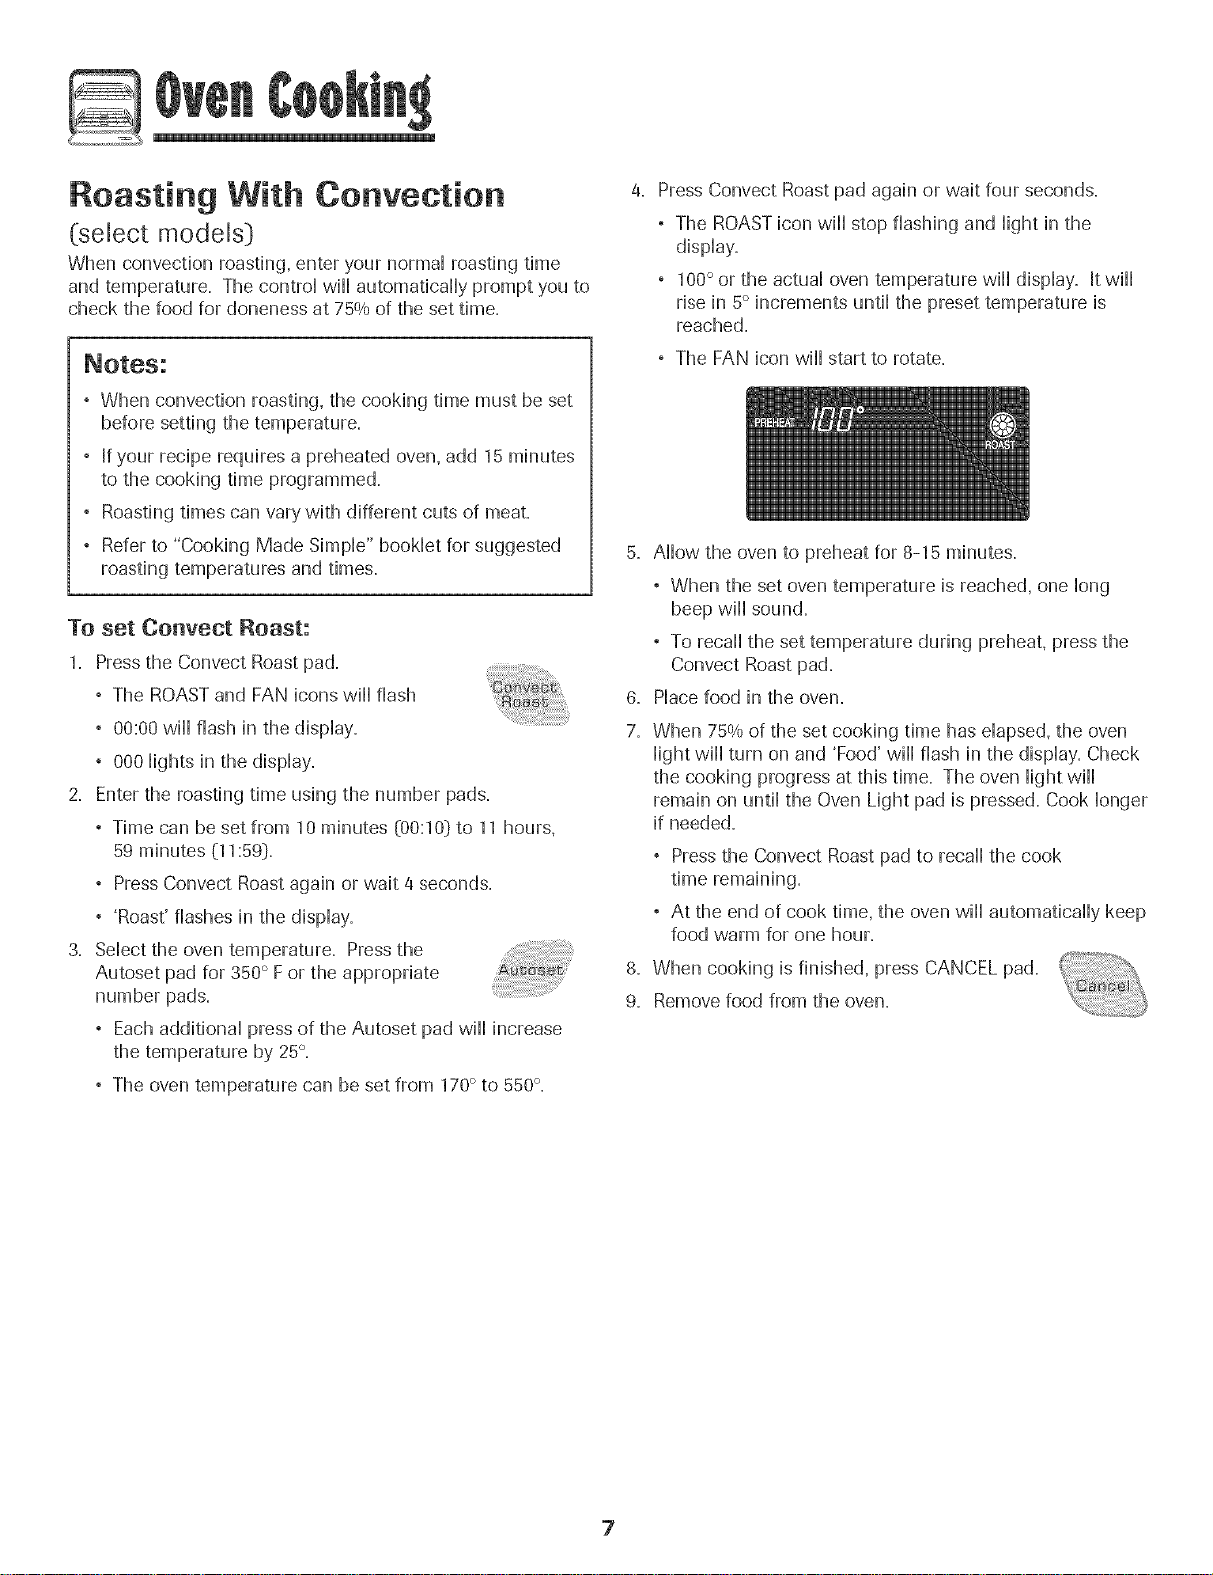
Press Convect Roast pad again or wait four seconds.
° The ROASTicon will stop flashing and light in the
display.
, 100° or the actual oven temperature will display. Jtwill
rise in 5° increments until the preset temperature is
reached.
, The FAN icon will start to rotate.
5. Allow the oven to preheat for 8-15 minutes.
° When the set oven temperature is reached, one long
beep will sound.
° To recall the set temperature during preheat, press the
Convect Roast pad.
6. Placefood in the oven.
7. When 75% of the set cooking time has elapsed, the oven
light will turn on and 'Food' will flash in the display. Check
the cooking progress at this time. The oven light will
remain on until the Oven Light pad is pressed. Cook longer
if needed.
° Pressthe Convect Roast pad to recall the cook
° At the end of cook time, the oven will automatically keep
food warm for one hour.
8. When cooking is finished, press CANCEL pad.
9. Removefood from the oven.
7
Cook & Hold
When using the Cook & Homdoption, the oven begins to heat
immediateHyafter the controHhas been set. Then, the oven
cooks for a specified Hengthof time. When that time has
eHapsed,the oven wiHHkeep the food warm for up to an hour
then automaticaHHyturn off.
To set Cook & Hold:
1. Pressthe Cook & HoHdpad.
° The HOLD icon wiHHflash to indicate that you are in Cook &
HoHdprogramming.
° 00:00wiHHflash in the dispHay.
2. SeHectthe amount of time you want to cook by using the
number pads.
° The HOLD icon continues to flash.
° The time wiHHHightin the dispHay.
° Time can be set from 00:10to 11:59.
3. Press Bake, Convect Bake or Convect Roast (seHectmodeHsD
and seHectthe oven temperature. Pressthe Autoset pad for
350° For the appropriate number pads.
° The desired cycHeicon wiHHflash.
° The oven temperature can be set from 170° Fto 550° R
4. Pressthe desired cycHepad again ORwait four seconds.
° The desired cycHeicon wiHHremain Hit.
° The cooking time wiHHshow in the dispHay.
° The PREHEATicon wiHHshow in the dispHay.
° The actuaHoven temperature wiHHbe dispHayed
during preheat.
° The set temperature wiHHdispHaywhen the oven is
preheated.
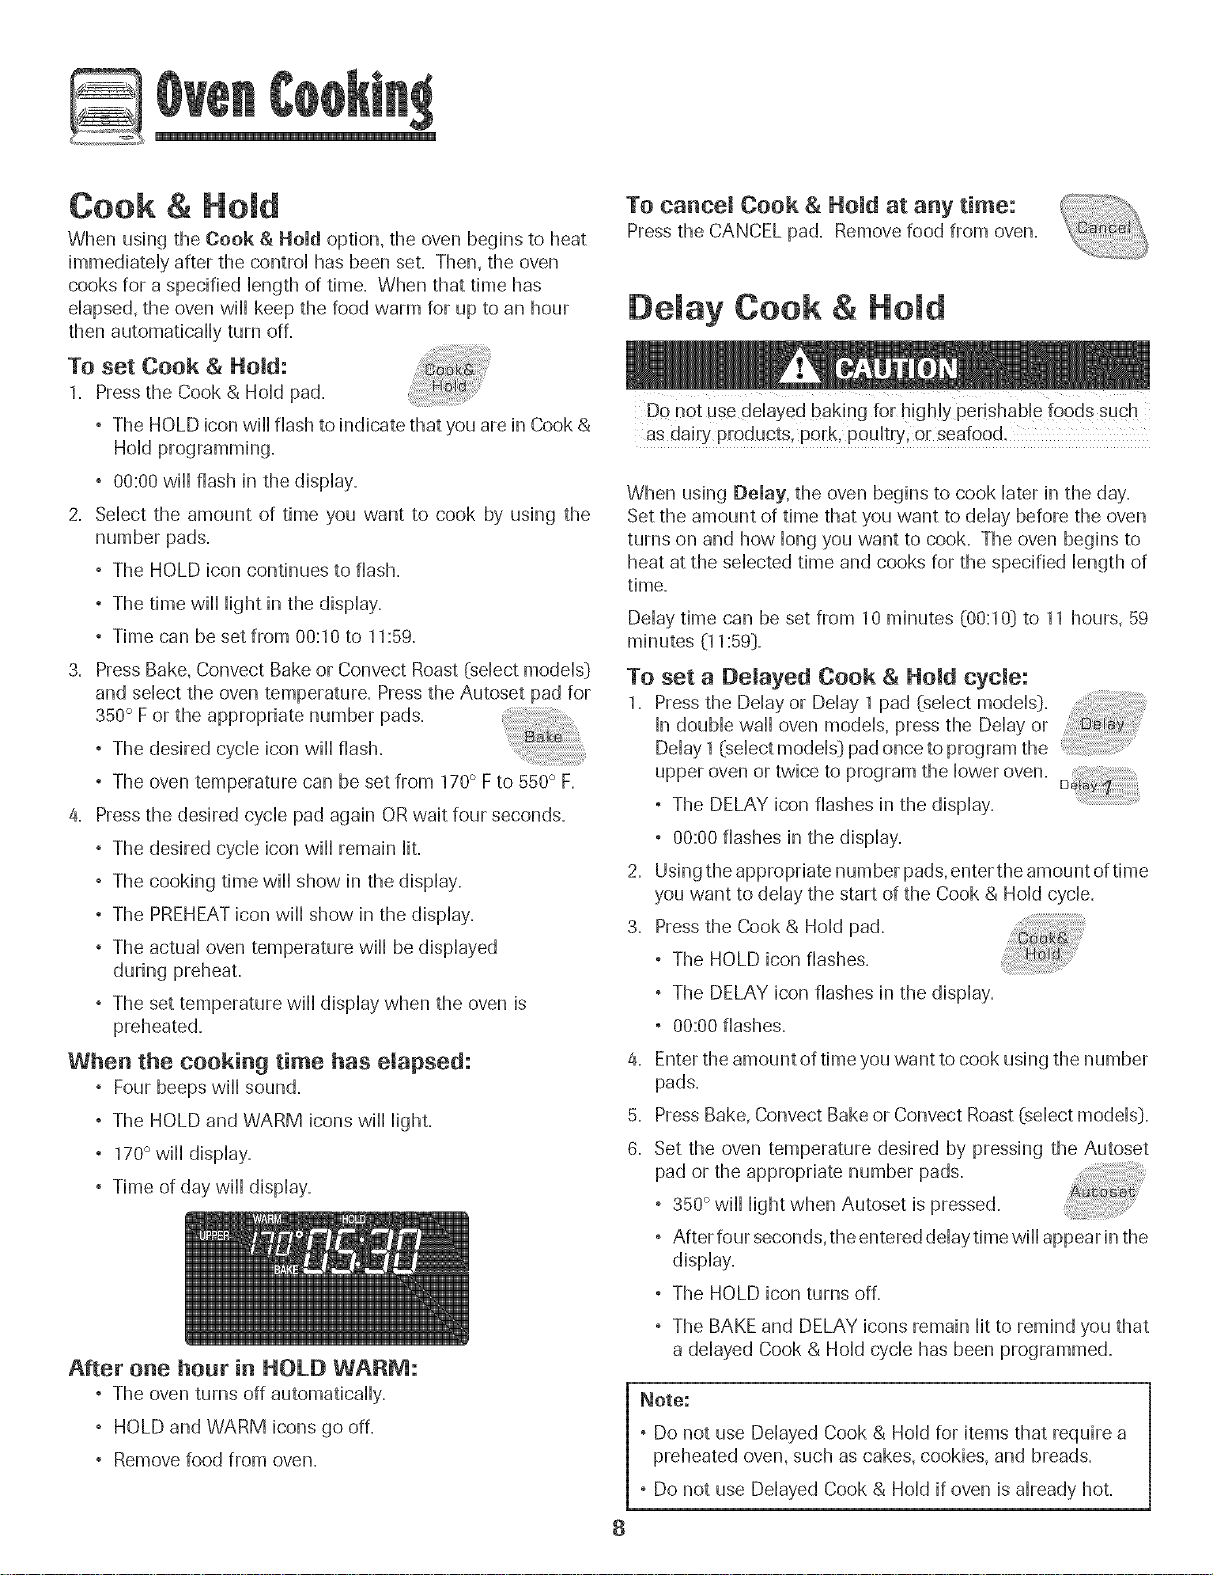
When the cooking time has elapsed:
, Four beeps wiHHsound.
, The HOLD and WARM icons wiHHHight.
, 170°wiHHdispHay.
, Time of day wiHHdispHay.
After one hour in HOLD WARM:
° The oven turns off automaticaHHy.
, HOLD and WARM icons go off.
° Remove food from oven.
To cancel Cook & Hold at any time:
Press the CANCEL pad. Remove food from oven,
Delay Cook & Hold
8
as dairy products, pork, pouHtry;or seafood,
When using Delay, the oven begins to cook later in the day.
Set the amount of time that you want to delay before the oven
turns on and how Hongyou want to cook. The oven begins to
heat at the seHectedtime and cooks for the specified Hengthof
time.
Delay time can be set from 10 minutes (00:1O}to 11 hours, 59
minutes (11:59}.
To set a Delayed Cook & HoJd eyeme:
1. Press the DeHayor DeHay1 pad (seHectmodeHs_).
In doubHewaHHoven modeHs,press the DeHayor
DeHay1(seHectmodeHsDpad once to program the
upper oven or twice to program the Howeroven.
° The DELAY icon flashes in the dispHay.
° 00:00 flashes in the dispHay.
2. Using the appropriate number pads, enter the amount of time
you want to deHaythe start of the Cook & HoHdcycHe.
3. Pressthe Cook & HoHdpad.
° The HOLD icon flashes.
° The DELAY icon flashes in the dispHay.
° 00:00 flashes.
4,
5.
6.
Enter the amount of time you want to cook using the number
pads.
Press Bake, Convect Bake or Convect Roast (seHectmodeHsD.
Set the oven temperature desired by pressing the Autoset
pad or the appropriate number pads.
° 350° wiHHHightwhen Autoset is pressed.
° After four seconds, the entered deHaytime wiHHappear in the
dispHay.
° The HOLD icon turns off.
° The BAKEand DELAY icons remain Hitto remind you that
a deHayedCook & HoHdcycHehas been programmed.
Note:
° Do not use DeHayedCook & HoHdforitems that require a
preheated oven, such as cakes, cookies, and breads.
° Do not use DeHayedCook & HoHdif oven is aHreadyhot.
To set Broil:
1. Press the Broi[ pad.
+ The BROIL bon flashes,
+ 000 flashes,
, SETflashes.
2. Press the Autoset pad once to set HI broii or
twice to set LO broil
° HI or LO wiii be dispiayed.
Seiect Hi broii for normai broiiing. Seiect LO broii for
How-temperature broiiing of ionger cooking foods such
as pouitry.
3. After four seconds, the oven wiii start.
° The BROIL icon wiii remain Hit.
, HI or LO wiii remain Hit.
4. Foroptimum browning, preheat broil dement for 3-4
minutes before adding food.
5. Piace food in the oven. Leaveoven door open about four
inches (the first stop}.
6. Turn meat once about haifway through cooking.
7. When food is cooked, press the CANCEL pad.
Removefood and broiier pan from the oven.
, The time of day will[ reappear in the dispiay.
BroH Notes:
, For best results when broiling, use a pan designed for
broiling.
, Expect broil times to increase and browning to be
slightly lighter if appliance is installed on a 208-volt
circuit.
, If more than 30 seconds elapse between pressing the
Broil pad and the Autoset pad, the oven wiil not be set
and the display wiil return to the previous display.
° A cooling fan wiil automatically turn on during broiling. If
it does not operate, contact an authorized servicer.
° HI is used for most broiling. Use LO broil when broiling
longer cooking foods. The lower temperature allows
food to cook to the weil done stage without excessive
browning.
° Broil times may be longer when the lower broiling
, Food should be turned halfway through broiling time.
, Foradditional broiling tips and temperatures, refer to the
"Cooking Made Simple" booklet.
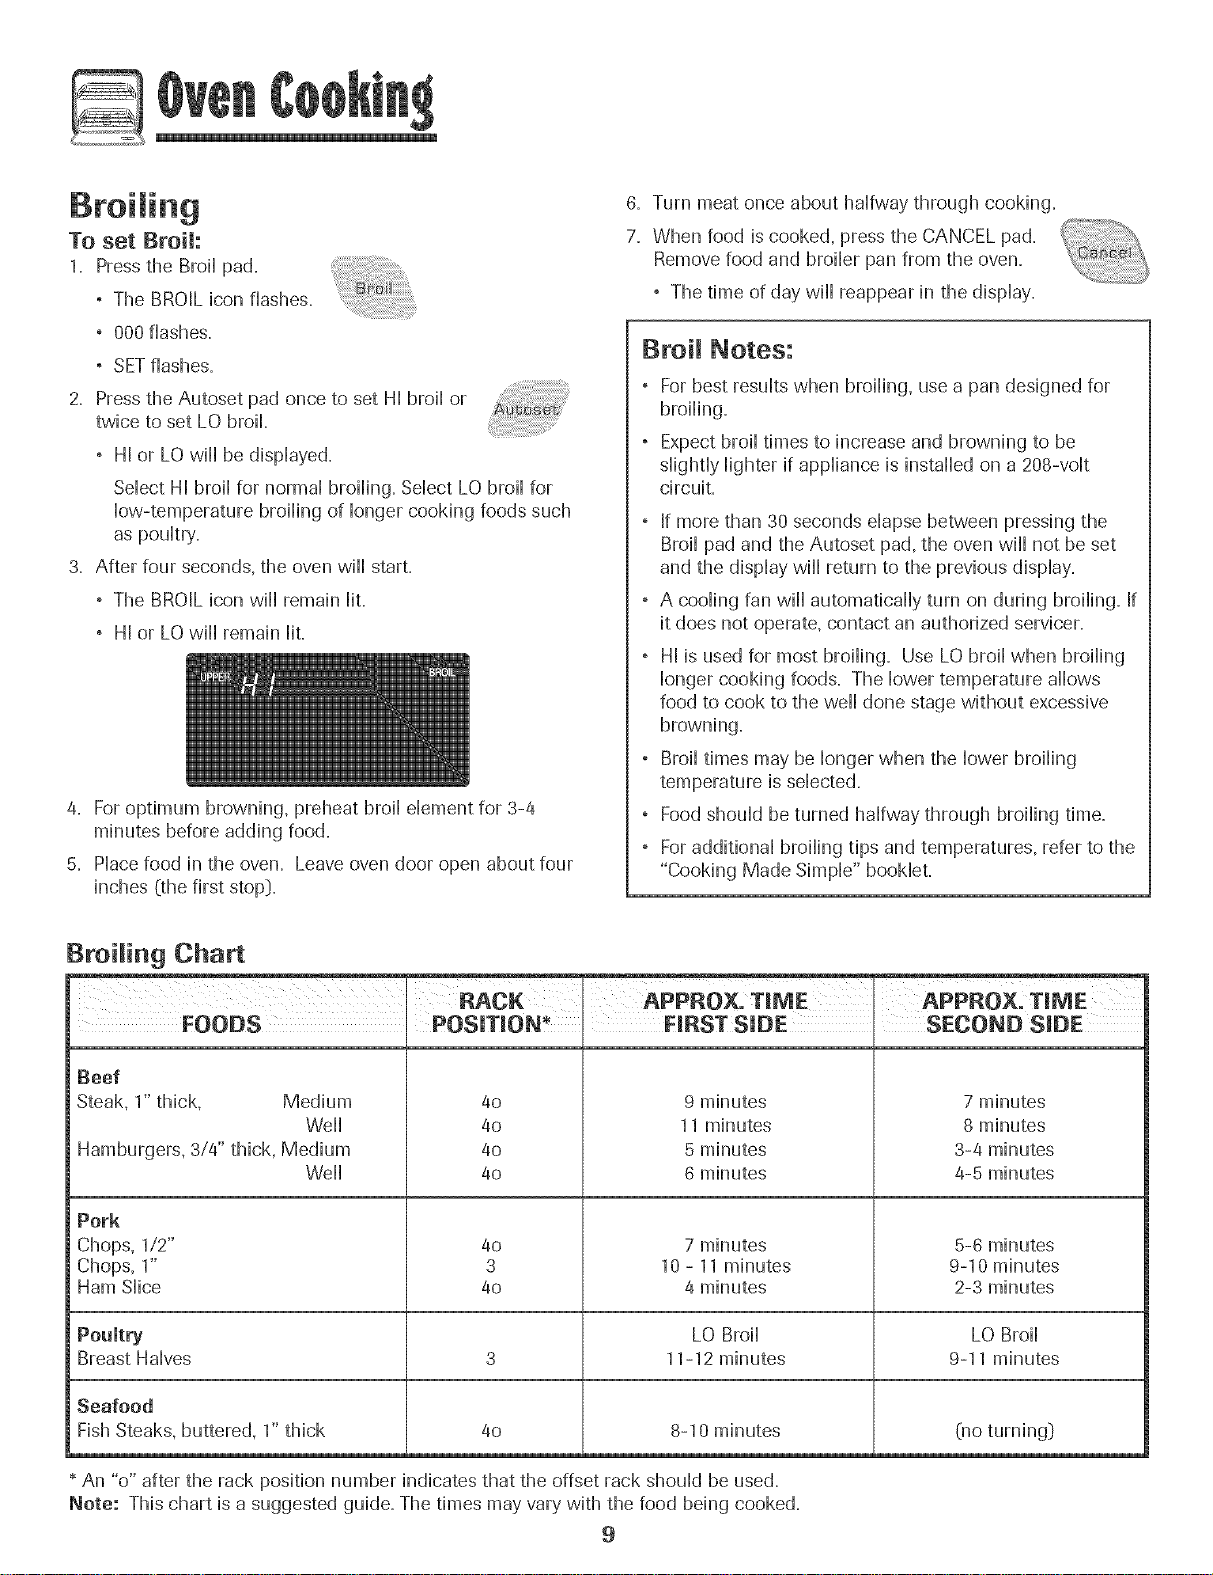
Broiling Chart
I:_CK APPROX, TIME APPROX, T_I_IE
FOODS POSITION* I FIRST SIDE SECOND SIDE
i Beef
Steak, 1" thick, Medium
Weii
Hamburgers, 3/4" thick, Medium
Weii
Pork
Chops, 1/2"
Chops, 1"
Ham Slice
Poultry
Breast Halves
Seafood
Fish Steaks, buttered, 1" thick
4o
4o
40
4o
9 minutes
11 minutes
5 minutes
6 minutes
7 minutes
8 minutes
3-4 minutes
4-5 minutes
4o
3
4o
7 minutes
10 - 11 minutes
4 minutes
5-6 minutes
9-10 minutes
2-3 minutes
LO Broil LO Broil
3 11-12 minutes 9-11 minutes
8-10 minutes4o
Olo turning}
* An "o" after the rack position number indicates that the offset rack should be used.
Note: This chart is a suggested guide. The times may vary with the food being cooked.
9
Keep Warm
For safeHykeephg hot foods warm or for warmhg breads and
pHates=
To set Keep Warm:
1= Pressthe Keep Warm pad=
° The WARM icon flashes,
° 000flashes in the dispHay=
2= SeHectthe Keep Warm temperature, Pressthe Autoset pad
or the appropriate number pads,
° 170°wiHHHightwhen the Autoset pad is pressed,
° Each press of the Autoset pad wiHHincrease the
temperature by 5°=
The Keep Warm temperature can be set from 145° to 190°=
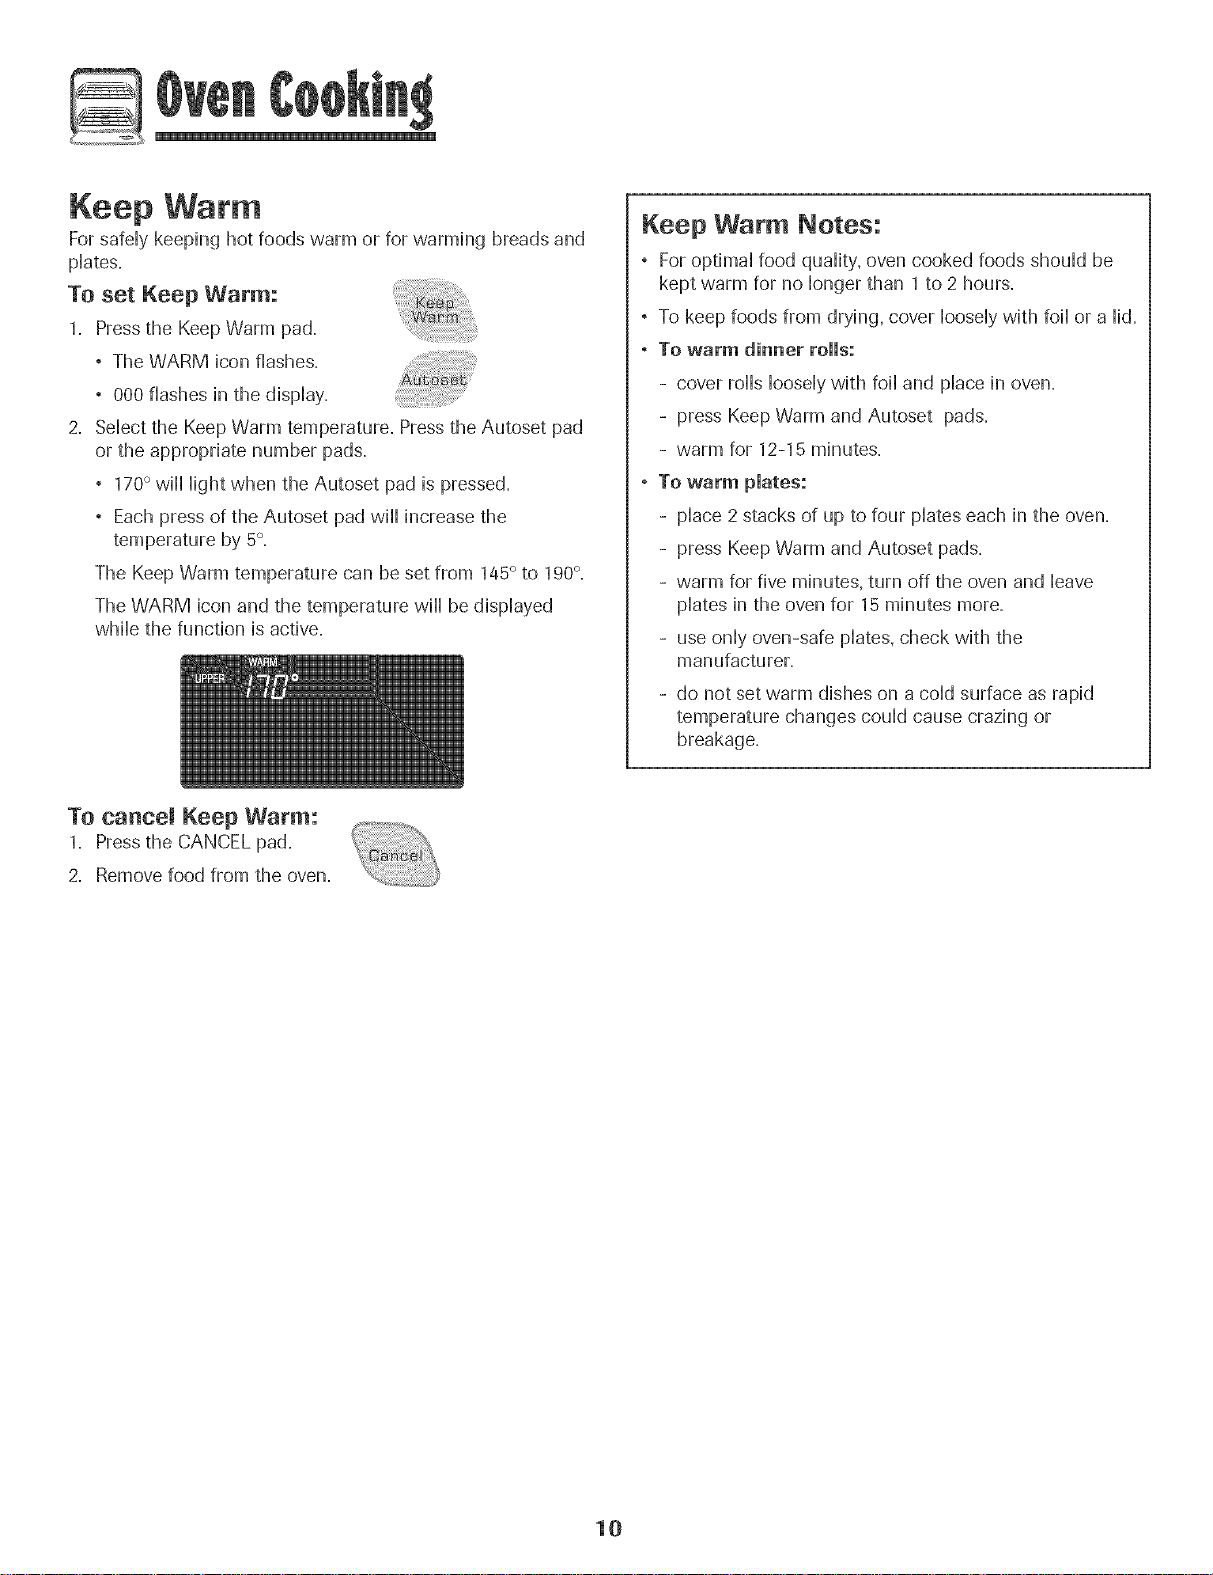
The WARM icon and the temperature wiHHbe dispHayed
wMHethe function is active,
Keep Warm Notes:
° ForoptimaHfood quaHity,oven cooked foods shouHdbe
kept warm for no Hongerthan 1 to 2 hours,
° To keep foods from drying, cover HooseHywith foiHor a Hid=
° To warm dinner rolls:
- cover forthsHooseHywith foiHand pHacein oven,
- press Keep Warm and Autoset pads,
- warm for 12-15 minutes,
, To warm pmates:
- pHace2 stacks of up to four pHateseach in the oven,
- press Keep Warm and Autoset pads,
- warm for five minutes, turn off the oven and Heave
pHatesin the oven for 15 minutes more,
- use onHyoven-safe pHates,check with the
manufacturer,
- do not set warm dishes on a coHdsurface as rapid
temperature changes couHdcause crazing or
breakage,
To cancel Keep Warm:
1= Pressthe CANCEL pad,
2, Remove food from the oven,
10
Automatic Shut-Off/Sabbath
Mode
The oven w,iHautomatically turn off after 12 hours if you
accidentally Heaveit on= This safety' feature can be turned off.
To cancel the 12=hour shut=off and run the oven
continuously for 72 hours:
1= Pressand hoM the CHockpad for three seconds
° "SAb" will be dispHayedand flash for five seconds.
° "SAb" will then be displayed continuously until turned
off or until the 72-hour time limit is reached.
° The BAKE icon will also be displayed if a bake cycle is in
use while the oven is in Sabbath Mode.
° All keys are inactive except CANCEL and Clock. All other
functions EXCEPTBAKE (Timer, Keep Warm, Clean, etc=:}
are locked out during the Sabbath Mode.
° A Cook & Hold can be programmed during the Sabbath
Mode, however a Delay Cook & Hold is not allowed.
To cancel the Sabbath Mode:
1. Pressthe CLOCK pad for three seconds.
OR
2= After 72 hours, the Sabbath Mode will end.
° "SAb" will flash for five seconds.
° The time of day will return to the display.
Sabbath Mode Notes:
° Sabbath Mode can be turned on at any time with or
without the oven on=
° Sabbath Mode cannot be turned on if the keypads are
locked out or when the door is locked.
° Most prompts and messages and all beeps are
deactivated when Sabbath Mode is active.
° If the oven is baking when Sabbath Mode is set, the
BAKE icon will go out at the end of the baking cycle.
There will be no audible beeps.
° If the oven light is desired while in Sabbath Mode, it
must be turned on before the Sabbath Mode is started.
° When the Sabbath Mode is started, the temperature
display will immediately show the set temperature, rather
than the actual oven cavity temperature. No preheat
beep will sound.
° The self-clean cycle and automatic door lock do not
operate during the Sabbath Mode.
° Pressing CANCEL pad will cancel a Bake cycle, however
the control will stay in the Sabbath Mode.
° If power fails, the oven will power up in Sabbath Mode
with 72 hours remaining and no cycle active.
11
Adjusting the Oven Temperature
Oven temperatures are carefld[y tested for accuracy at the
factory. It is normal to notice some baking or browning
differences between a new oven and an old one. As ovens
get older, the oven temperature can shift.
You may adjust the oven temperature if you think the oven is
not baking or browning correctly. To decide how much to
change the temperature, set the temperature 25 degrees
higher or lower than your recipe recommends, then bake.
The results of the first bake should give you an idea of how
much to adjust the temperature.
TO adjust the oven temperature:
1. Pressthe Bake pad.
2. Enter 550° by pressing the appropriate number pads.
3. Pressand hold the Bake pad for several seconds or until
00° appears in the display.
If the oven temperature was previously adjusted, the
change wi[[ be displayed. For example, if the oven tem-
perature was reduced by 15° the display wi[[ show "-15°",
4. Pressthe Autoset pad to adjust the temperature.
Eachtime the Autoset pad is pressed, the temperature
changes by 5°, The oven temperature can be increased or
decreased by 5° to 35°,
5. The time of day wi[[ automatically reappear in the display.
You do not need to readjust the oven temperature if there is a
power failure or interruption. Temperature adjustment applies
to Bake, Convect Bake and Convect Roast (select mode[s_
only.
The Favorite pad allows you to save the time and temperature
from a Cook & Hold Bake, Convect Bake or Convect Roast
(select models) cycle.
To set a Favorite cycle, a Cook & Hold function must be either
active or just programmed.
To set a new Favorite cycle or to save a cur-
rent[y running Cook & Hold as a Favorite:
1. Program a Cook & Hold cycle as described in the Cook &
Hold section on page 8.
2. Pressand hold the Favorite pad for three
seconds.
° The newly set or currently running Cook & Hold cycle
will be saved.
, A beep wi[[ sound to indicate that the control has
accepted the Favorite setting.
TO start a cycle programmed into Favorite:
1. Pressthe Favorite pad.
° Time and temperature for the set Cook & Hold cycle wi[[
be displayed. (If no Cook & Hold cycle has been pro-
grammed, "nonE" is displayed.)
2. Pressthe Bake,Convect Bake or Convect Roast (select
mode[s_ pad.
° The Favorite cycle wi[[ begin immediately.
° The selected cycle icon wi[[ light in the display
° The cooking time wi[[ light in the display
When the cooking time has elapsed:
° The selected cycle icon wi[[ turn off.
° The HOLD WARM icon wi[[ light.
° 170°wi[[ display.
To canoe[ a Favorite cycle in progress:
1. Pressthe CANCEL pad.
° The stored Favorite cycle wi[[ not be affected.
2. Removefood from the oven.
12

Oven Light
The Oven Light automatically comes on whenever the oven
door isopened. When the door is dosed, press the Oven Light
pad to tum the Oven Light on or off. A beep wiH .....
sound every time the Oven Light pad is pressed.
Oven Vent
The oven vent is Hocatedbdow the controHpand on your wall
oven.
When the oven is in use, the area near the oven vent may
become hot enough to cause burns. Do not block the vent
opening for best baking results.
Oven Fans
The cooling fan will automatically turn on during cleaning,
broiling and some baking operations. It is used to help keep
internal parts on the control panel cool. The fan will automati-
cally turn off when parts have cooled. The fan may continue
to operate after the oven has been turned off. This is normal.
A convection fan (select moddsD is used to circulate hot air
in the oven when the convection feature is selected. It
automatically turns on whenever a Convect pad is pressed
and will turn off when Convect is canceled.
i Note: The convection fan will automatically stop whenever
the oven door is opened.
Oven Racks
* DOnot attempt t° Changethe rack position Whenthe even
is hot,
Do not use the oven for storing food Orcookware,
Single and Doable Convect Ovens - two flat and one
offset rack were packaged for each oven.
Single and Doable Non=Convect Ovens - one flat and one
offset rack were packaged for each oven.
To remove:
1. Pull forward to the "stop"
position.
2. Lift up on the front of the
rack and pull out.
To replace:
1. Place rack on the rack
support in the oven.
2. Tilt the front end up slightly; slide rack back until it clears
the lock-stop position.
3. Lower front and slide into the oven.
Rack Positions
4 (fiat raekl
30 (offset rack}
1 (fiat rack}
Three=rack Convection Baking
(select models}
Rack Position #4:
Three-rack baking (models with convection only).
Rack Position #4o (offset rack on #4):
Most broiling.
Rack Position #3:
Most baked goods on a cookie sheet or jelly roll pan.
Rack Position #30 (offset rack on #3[):
Most baked goods, pies, layer cakes.
13
Rock Position #2:
Roasting small cuts of meat, cakes in tube or bundt pans,
casseroHes,
Rock Position #2o (offset on #2[):
Roasting, [oavesof bread, angd food cake.
Rock Position #1:
Large cuts of meat and turkey, custard pie, dessert souffle.
Multiple Rock Cooking:
Two rocks: Use #2o and #4=
Three rocks (convection cooking - sdect medals:):
Use #1, #30, #4=(See illustration on page 13=:)
The use of the offset rack is denoted in the [ist as an "o"
after the rack position number.
When baking on two or three racks, check foods at the
minimum suggested time to avoid over=browning or
over=cooking.
Do not cover an entire rack with aHuminumfoi[ or pHacefoi[
on the oven bottom. Baking resuHtswill be affected and
damage may occur to the oven bottom.
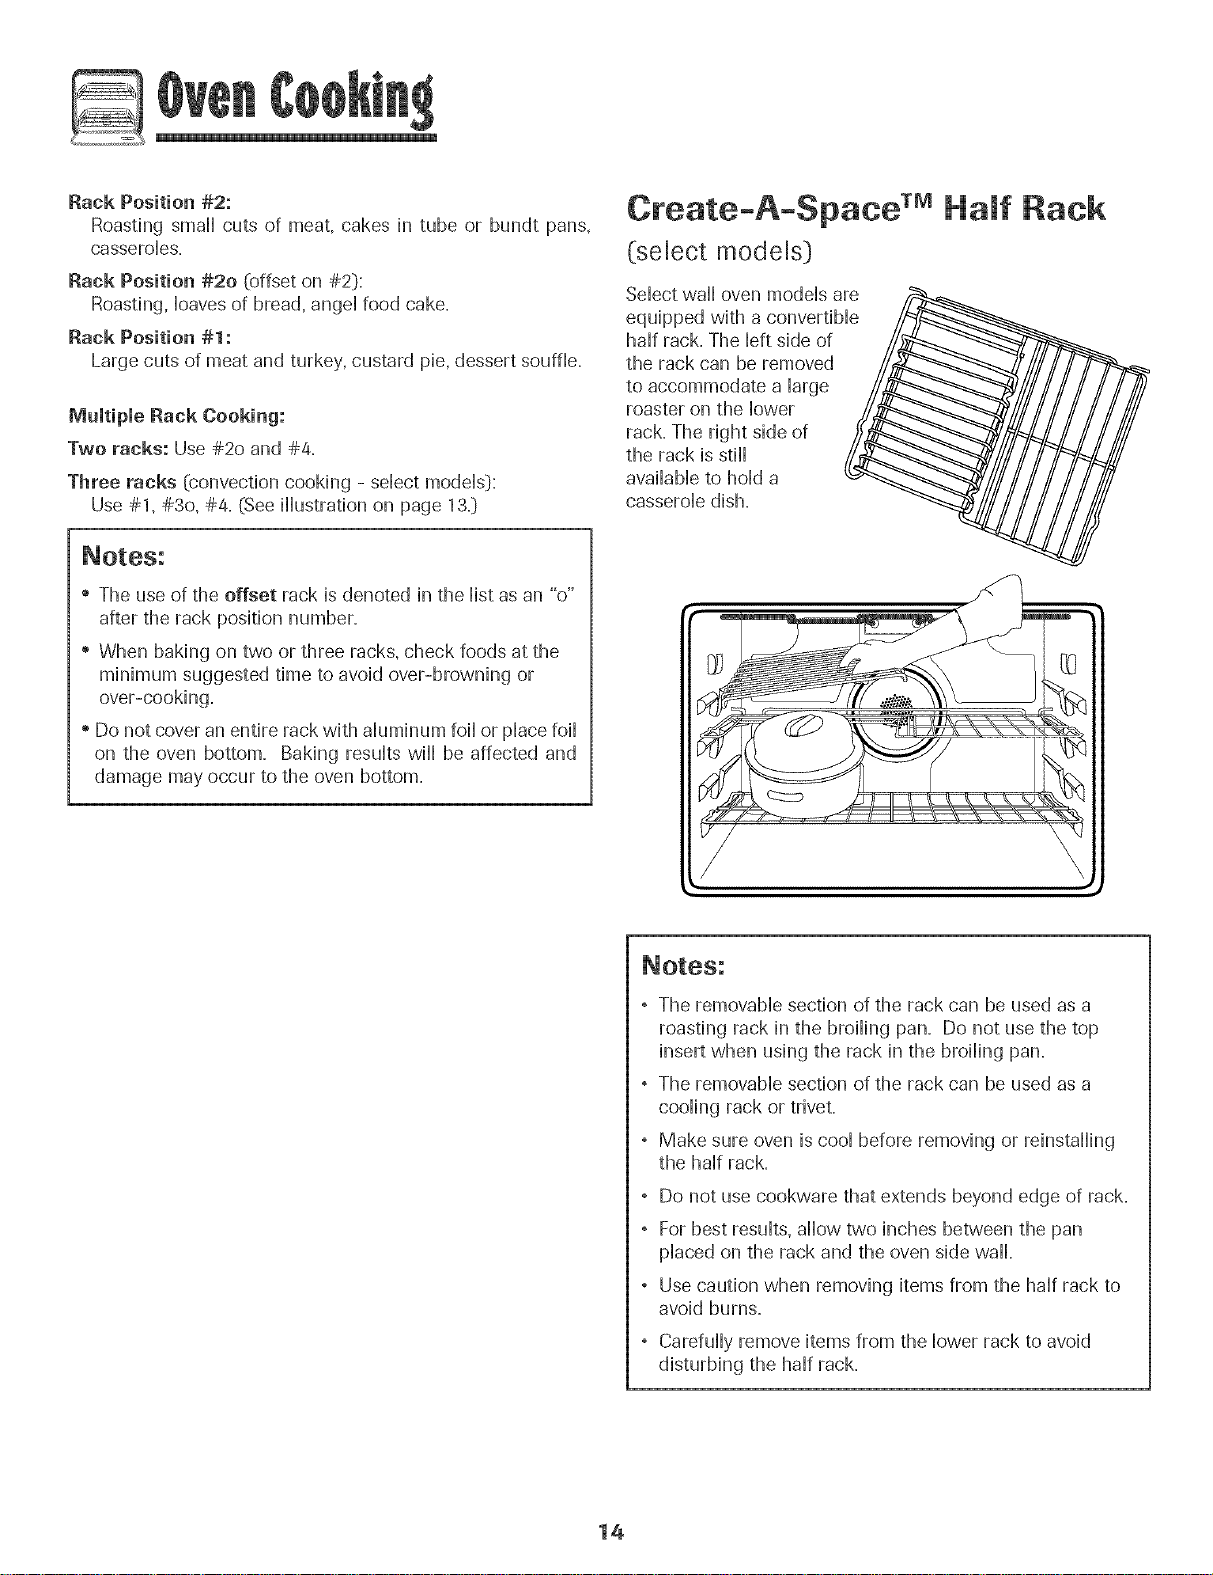
Create-A-Space TMHalf Rack
(select models)
Select wail oven models are /_
equipped with a convertib[e_
hail rack. The [eft side of
the rack can be removed
to accommodate a large
roaster on the lower
rack. The right side of
the rack is still
available to hold a _
casserole dish.
//
, The removable section of the rack can be used as a
roasting rack in the broiling pan. Do not use the top
insert when using the rack in the broiling pan.
, The removable section of the rack can be used as a
cooling rack or trivet.
, Make sure oven iscool before removing or reinstalling
the half rack.
, Do not use cookware that extends beyond edge of rack.
, Forbest results, allow two inches between the pan
placed on the rack and the oven side wall.
, Use caution when removing items from the half rack to
avoid burns.
Carefully remove items from the lower rack to avoid
disturbing the half rack.
14
Seff-C ean Oven
, it is normal for parts of the oven to become hot during a
° To prevent damage to oven door. do not attempt to open
the door when the LOCK icon is displayed.
, Avoid touching door, window or oven vent area during a
clean cycle.
° Do no_use corTmercJaioven cleaners on the oven finish
or around any part of the oven. They will damage the
finish o_ parts.
Theself-clean cycle usesabove-normal cooking temperatures to
automatically clean the oven interior.
It is normal for flare-ups, smoking, or flaming to occur during
cleaning if the oven isheavily soiled. It isbetter to clean the oven
regularly rather than to wait until there isa heavy build-up of soil
in the oven.
During the cleaning process, the kitchen should be well venti-
lated to get rid of normal odors associated with cleaning.
Before Seff-Cmeaning
1. Remove broiler pan, all pans, and oven racks from the oven.
The oven racks will discolor and may not slide easily after a
self-clean cycle if they are not removed.
2. Clean oven frame, door frame {area outside of gasket, and
around the opening in the door gasket} with a nonabrasive
cleaner such as Bon Ami* or detergent and water. The self-
cleaning process does not clean these areas. They should be
cleaned to prevent soilfrom baking on during the clean cycle.
(The gasket is the seal around the oven door and window}.
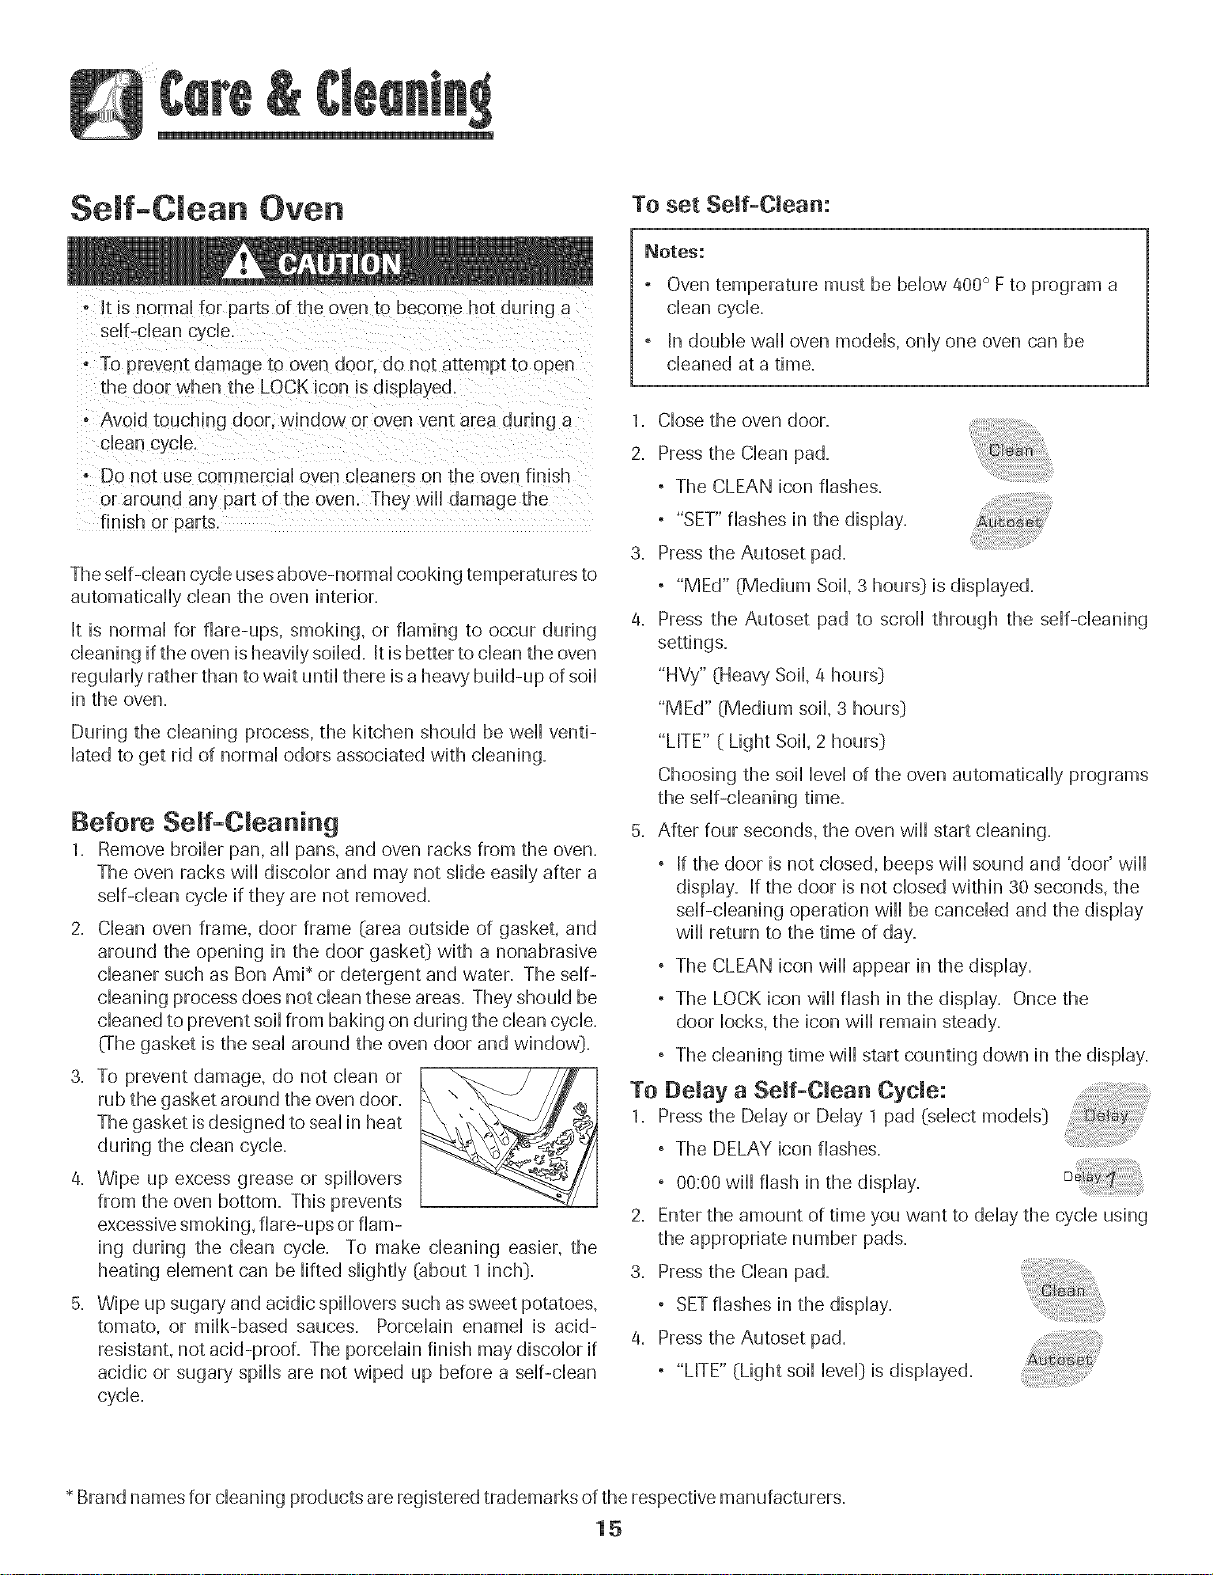
3. To prevent damage, do not clean or
rub the gasket around the oven door.
The gasket isdesigned to seal in heat
during the clean cycle.
4. Wipe up excess grease or spillovers
from the oven bottom. This prevents
excessive smoking, flare-ups or fiam-
ing during the clean cycle. To make cleaning easier, the
heating element can be lifted slightly {about 1inch}.
Wipe up sugary and acidic spillovers such as sweet potatoes,
tomato, or milk-based sauces. Porcelain enamel is acid-
resistant, not acid-proof. The porcelain finish may discolor if
acidic or sugary spills are not wiped up before a self-clean
cycle.
To set Self-Clean:
_otes:
Oven temperature must be below 400° Fto program a
clean cycle.
In double wall oven models, only one oven can be
cleaned at a time.
1. Close the oven door.
2. Press the Clean pad.
° The CLEAN icon flashes.
° "SET"flashes in the display.
3. Press the Autoset pad.
° "MEd" {Medium Soil, 3 hours} is displayed.
4. Press the Autoset pad to scroll through the self-cleaning
settings.
"HVy" {Heavy Soil, 4 hours}
"MEd" {Medium soil, 3 hours}
"LITE" { Light Soil, 2 hours}
Choosing the soil level of the oven automatically programs
the self-cleaning time.
5. After four seconds, the oven will start cleaning.
° If the door is not closed, beeps will sound and 'door' will
display. If the door is not closed within 30 seconds, the
self-cleaning operation will be canceled and the display
will return to the time of day.
° The CLEAN icon will appear in the display.
° The LOCK icon will flash in the display. Once the
door locks, the icon will remain steady.
° The cleaning time will start counting down in the display.
To Delay a Self-OJean Cycle:
1. Press the Delay or Delay 1 pad (select models}
° The DELAY icon flashes.
° 00:00will flash in the display.
2. Enter the amount of time you want to delay the cycle using
the appropriate number pads.
3. Press the Clean pad.
° SETflashes in the display.
4. Press the Autoset pad.
° "LITE" {Light soil level} is displayed.
Brand names for cleaning products are registered trademarks of the respective manufacturers.
15
5. Pressthe Autoset pad to scroll through the
sdf-cHeaning settings.
"HVy" (Heavy SoiH,4 hours:)
"MEd" (Medium Soil 3 hours:)
"LITE" (Light SoiL2 hours:)
Choosing the soiHHeveHof the oven automatically programs
the sdf-cHeaning time.
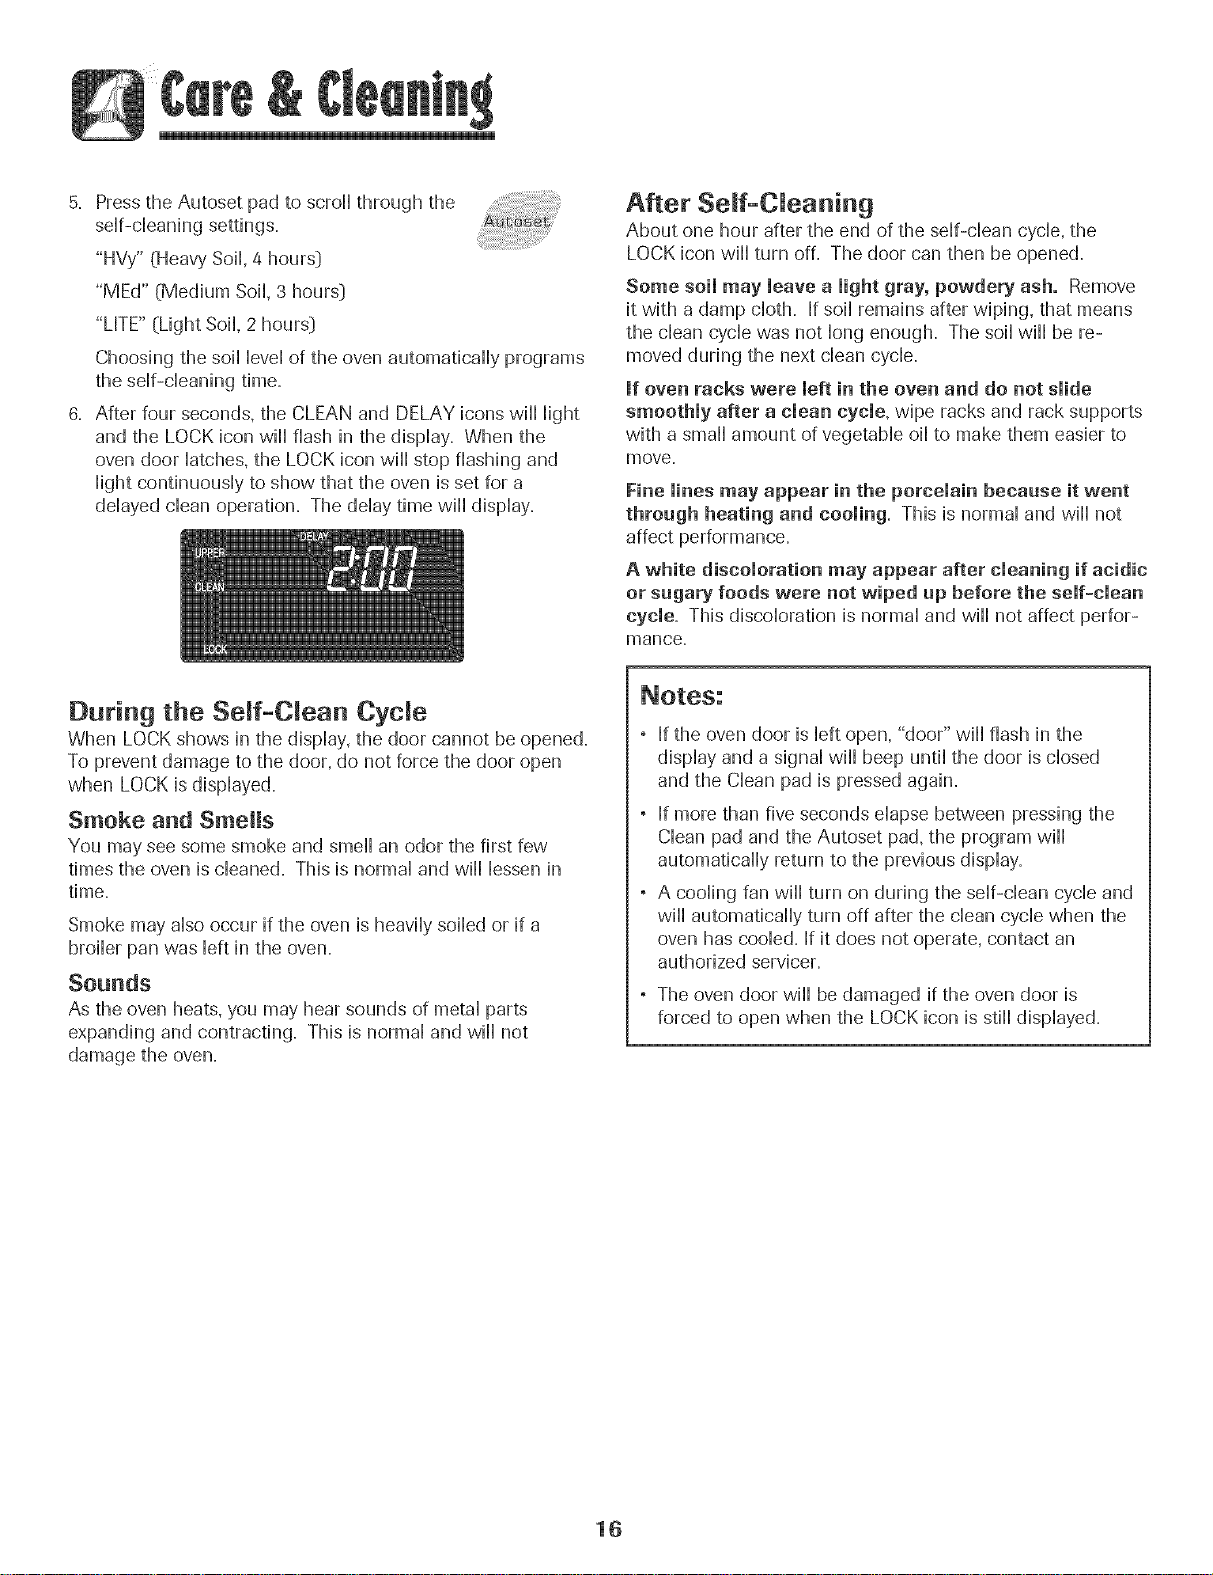
6. After four seconds, the CLEAN and DELAY icons will Hight
and the LOCK icon will flash in the dispHay. When the
oven door Hatches,the LOCK icon will stop flashing and
HightcontinuousHyto show that the oven is set for a
ddayed dean operation. The dday time will display.
After Serf-Cleaning
About one hour after the end of the self-clean cycle, the
LOCK icon will turn off. The door can then be opened.
Some soil may leave a light gray, powdery ash. Remove
it with a damp cloth. If soil remains after wiping, that means
the clean cycle was not long enough. The soil will be re-
moved during the next clean cycle.
if oven racks were left in the oven and do not slide
smoothly after a clean cycle, wipe racks and rack supports
with a small amount of vegetable oil to make them easier to
move.
Fine lines may appear in the porcelain becaase it went
throagh heating and cooling= This is normal and will not
affect performance.
A white discoloration may appear after cleaning if acidic
or sugary foods were not wiped up before the self-clean
cycle. This discoloration is normal and will not affect perfor-
mance.
During the Seff-C ean Cycle
When LOCK shows in the display, the door cannot be opened.
To prevent damage to the door, do not force the door open
when LOCK is displayed.
Smoke and Smells
You may see some smoke and smell an odor the first few
times the oven is cleaned. This is normal and will lessen in
time.
Smoke may also occur if the oven is heavily soiled or if a
broiler pan was left in the oven.
Sounds
As the oven heats, you may hear sounds of metal parts
expanding and contracting. This is normal and will not
damage the oven.
If the oven door is left open, "door" will flash in the
display and a signal will beep until the door is closed
and the Clean pad is pressed again.
If more than five seconds elapse between pressing the
Clean pad and the Autoset pad, the program will
automatically return to the previous display.
A cooling fan will turn on during the self-clean cycle and
will automatically turn off after the clean cycle when the
oven has cooled. If it does not operate, contact an
authorized servicer.
The oven door will be damaged if the oven door is
forced to open when the LOCKicon is still displayed.
16
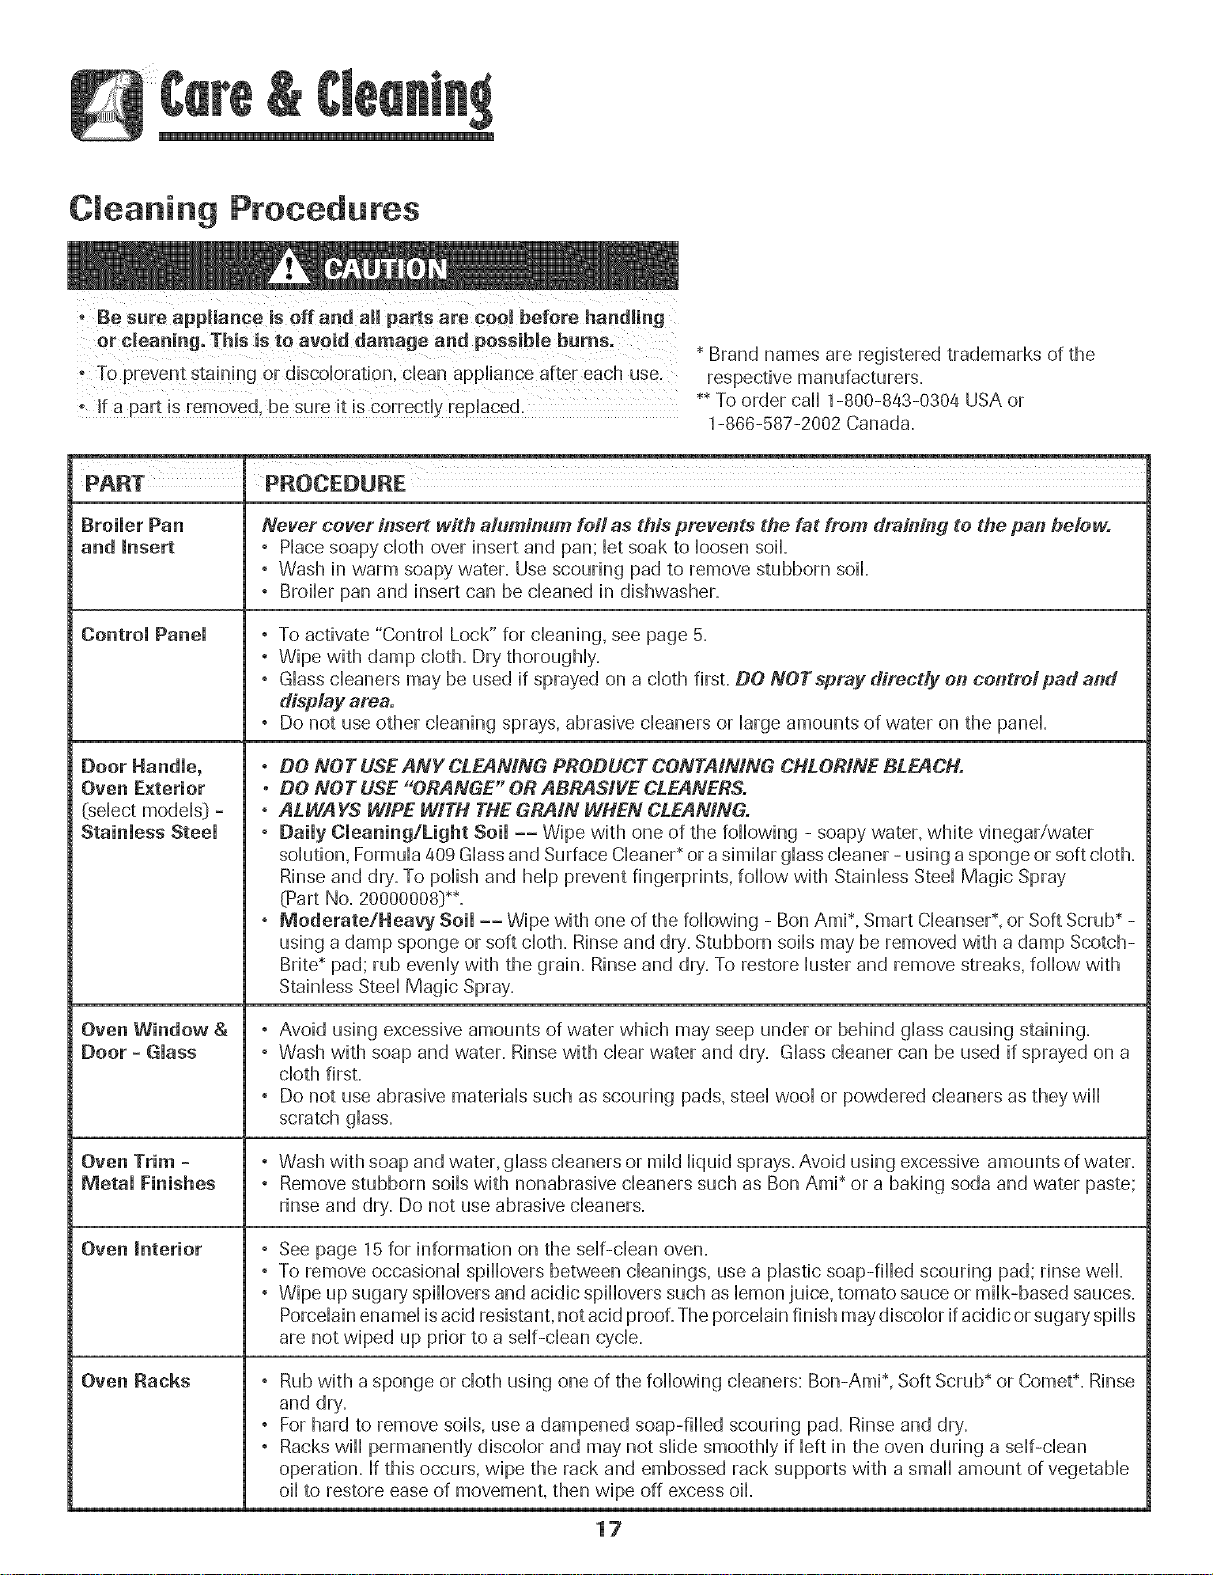
Cleaning Procedures
TOprevent staining or d!scol0ratJon, clean appUiance after each use,
![ a part is rem0ved, he sure it iscorrect!y rep!aced,
* Brand names are registered trademarks of the
respective manufacturers.
** To order call 1-800-843-0304 USA or
1-888-587-2002 Canada.
PART PROCEDURE
Broiler Pan Never cover h_sert with aluminum foil as this prevents the fat from draining to the pan below.
and Insert ,Piace soapy cloth over insert and pan; bt soak to bosen soil.
° Wash in warm soapy water. Use scouring pad to remove stubborn soil
° Broiler pan and insert can be cleaned in dishwasher.
Control Panel
Oven Exterior
(select modeb} =
Stainless Steel
Oven Window &
Door =Glass
Oven Trim =
Metal Finishes
Oven interior
Oven Backs
, To activate "Control Lock" for cleaning, see page 5.
° Wipe with damp cloth. Dry thoroughly.
° Glass cleaners may be used if sprayed on a cloth first. DO NOTspray direcdy on controlpad and
display area.
, Do not use other cbaning sprays, abrasive cbaners or large amounts of water on the panel
. DO NOT USEANY CLEANING PRODUCT CONTAiNiNG CHLORINE BLEACH.
• DO NOT USE "ORANGE" OR ABRASIVE CLEANERS.
. ALWAYS WIPE WiTH THE GRAIN WHEN CLEANING.
, Daily Cleaning/Light Soil J J Wipe with one of the following - soapy water, white vinegar/water
solution, Formula 409 Glass and Surface CbaneP or a similar glass cleaner - using a sponge or soft cloth.
Rinse and dry. To polish and help prevent fingerprints, follow with Stainless Steel Magic Spray
(Part No. 20000008]**.
° Moderate/Heavy Soil -- Wipe with one of the following - Bon Ami*, Smart CbanseP, or Soft Scrub_-
using a damp sponge or soft cloth. Rinse and dry'.Stubborn soils may be removed with a damp Scotch-
Brite* pad; rub evenly with the grain. Rinseand dry'.To restore luster and remove streaks, follow with
Stainless Steel Magic Spray.
, Avoid using excessive amounts of water which may seep under or behind glass causing staining.
° Wash with soap and water. Rinse with clear water and dry. Glass cleaner can be used if sprayed on a
cloth first.
° Do not use abrasive materials such as scouring pads, steel wool or powdered cleaners as they will
scratch glass.
, Wash with soap and water, glass cleaners or mild liquid sprays. Avoid using excessive amounts of water.
° Removestubborn soils with nonabrasive cleaners such as Ben Ami* or a baking soda and water paste;
rinse and dry. Do not use abrasive cleaners.
See page 15 for information on the self-dean oven.
To remove occasional spfllovers between cbanings, use a plastic soap-fflbd scouring pad; rinse well.
Wipe up sugary' spfllovers and acidic spfllovers such as lemon juice, tomato sauce or milk-based sauces.
Porcelain enamel isacid resistant, not acid proof. The porcelain finish may discolor ifacidic or sugary spills
are not wiped up prior to a self-dean cycle.
, Rubwith a sponge or cloth using one of the following cleaners: Bon-Ami*, Soft Scrub_or Comet*. Rinse
and dry.
, For hard to remove softs,use a dampened soap-filled scouring pad. Rinse and dry.
° Racks wiii permanently discoior and may not slide smoothly if ieft in the oven during a self-clean
operation. If this occurs, wipe the rack and embossed rack supports with a small amount of vegetable
oil to restore ease of movement, then wipe off excess oil
17

Oven Light
OVEN,
: Be sure buHbis CooH.
• DO not touch a hot buHbwith a damp cHothas the buHb
may breaL
To repmace oven light:
1= Use a dry pothoHderand very carefuHHyunscrew buHbcover
and buHb,
2. RepHacewith a 40 watt, oven-rated appHiancebuHb.BuHb
with a brass base is recommended to prevent fush)g of
buHbhto socket.
3. RepHacebuHbcover and reconnect power to oven.
4, Reset chock,
Oven Window
To protect the oven door window:
1. Do not use abrasive cHeaningagents such as steeHwooH
scouring pads or powdered cHeansersas they may scratch
the gHass.
2. Do not hit the gHasswith pots, pans, furniture, toys, or
other objects.
3. Do not chosethe oven door untiHthe oven racks are in
pHace.
Scratching, hitting, jarring or stressing the gHassmay weaken
its structure causing an increased risk of breakage at a Hater
date.
18
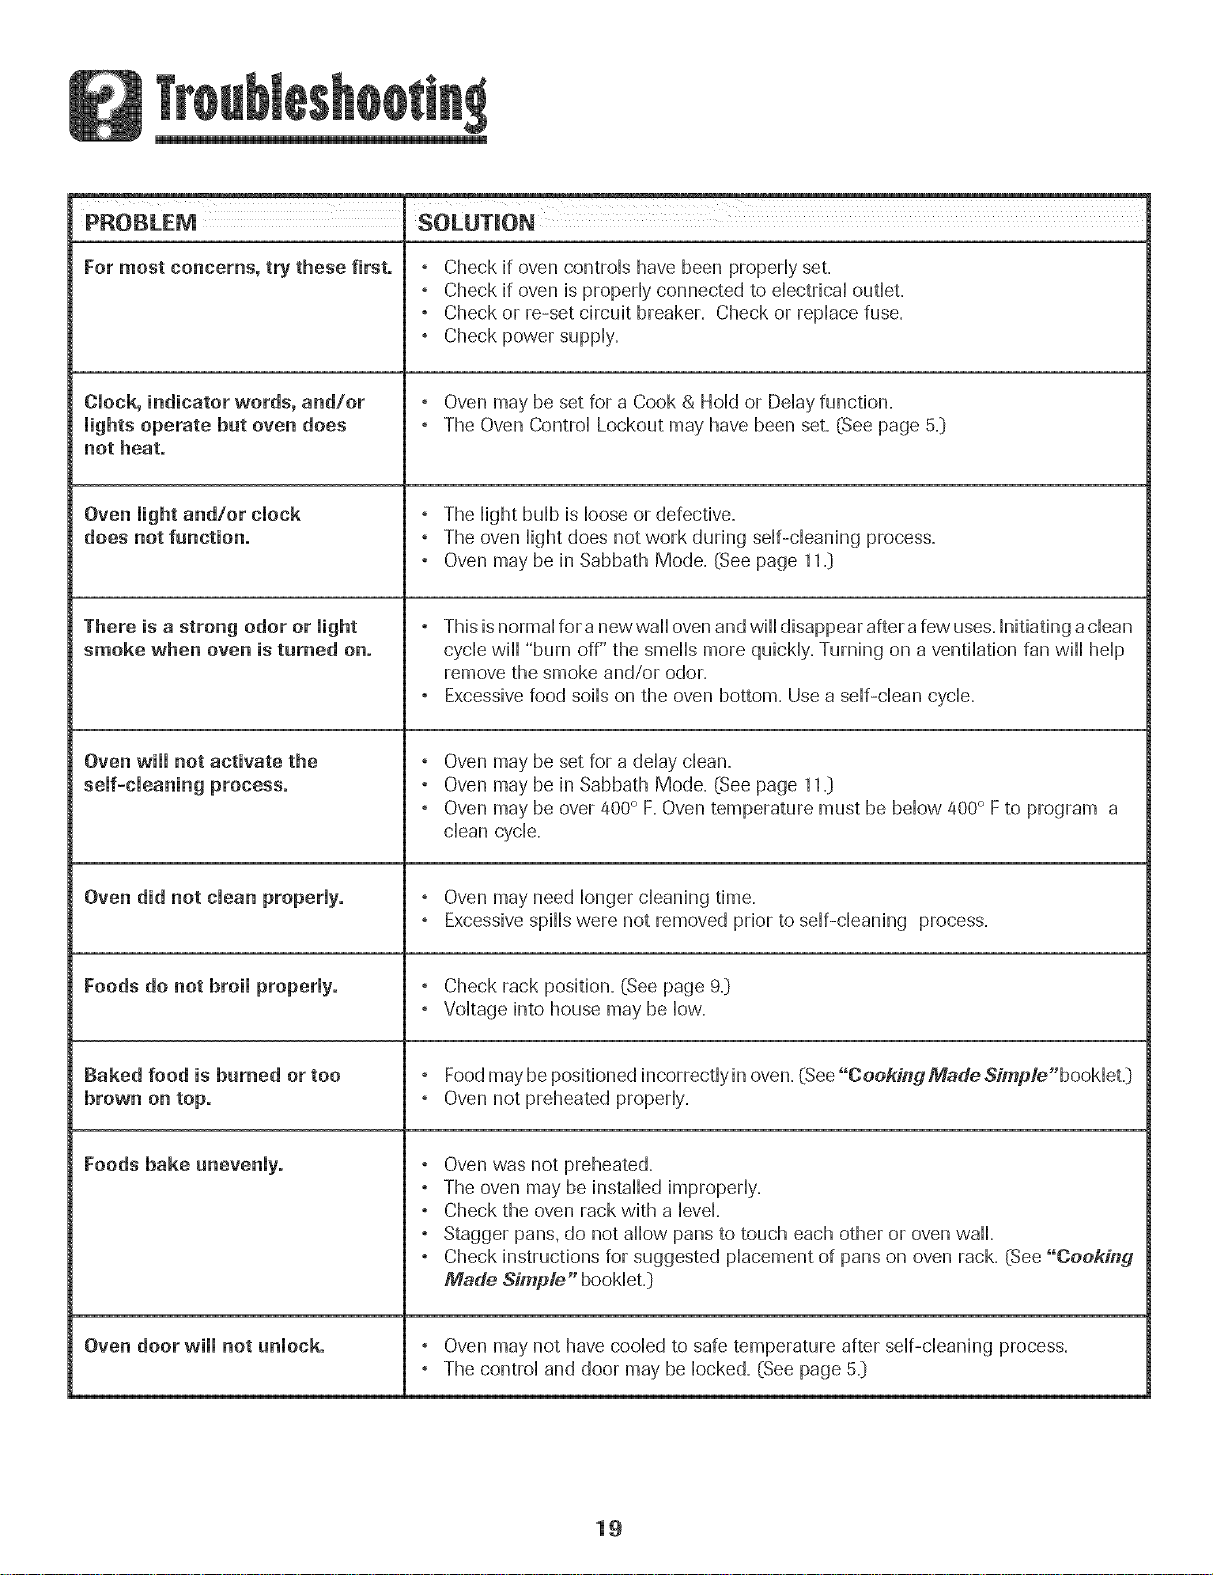
PROBLEM SOLUTION
For most concerns, try these first. , Check if oven controHshave been propedy set.
, Check if oven is propedy connected to dectricaU outHet.
, Check or re-set circuit breaker. Check or repHacefuse.
, Check power suppHy.
Clock, indicator words, and/or , Oven may be set for a Cook & HoHdor DeHayfunction.
lights operate but oven does , The Oven ControHLockout may have been set. (See page 5._)
not heat.
, The HightbuHbis Hooseor defective.
does not function. , The oven Hightdoes not work during stir-cleaning process.
, Oven may be in Sabbath Mode. (See page 11._)
There is a strong odor or light ° This isnormal for a newwaH ovenand will disappear after a few uses.Initiating adean
smoke when oven is turned on. cycle will "burn off" the smells more quickly. Turning on a ventilation fan will help
remove the smoke and/or odor.
, Excessivefood soils on the oven bottom. Use a self-clean cycle.
Oven will not activate the , Oven may be set for a delay clean.
, Oven may be in Sabbath Mode. (See page 11._)
, Oven may be over 400° F. Oven temperature must be below 400° Fto program a
clean cycle.
Oven did not clean properly. , Oven may need longer cleaning time.
, Excessivespills were not removed prior to self-cleaning process.
Foods do not broil properly. , Check rack position. (See page 9._)
, Voltage into house may be low.
Baked food is burned or too , Foodmay be positioned incorrectly in oven. (See"Cooking Made Simp/e"booMet.)
brown on top. , Oven not preheated properly.
Foods bake unevenly. , Oven was not preheated.
, The oven may be installed improperly.
, Check the oven rack with a level.
, Stagger pans. do not allow pans to touch each other or oven wall.
, Check instructions for suggested placement of pans on oven rack. (See "Cooking
Made Simp/e" booklet.]
Oven door will not unlock. , Oven may not have cooled to safe temperature after self-cleaning process.
, The control and door may be locked. (See page 5._)
19
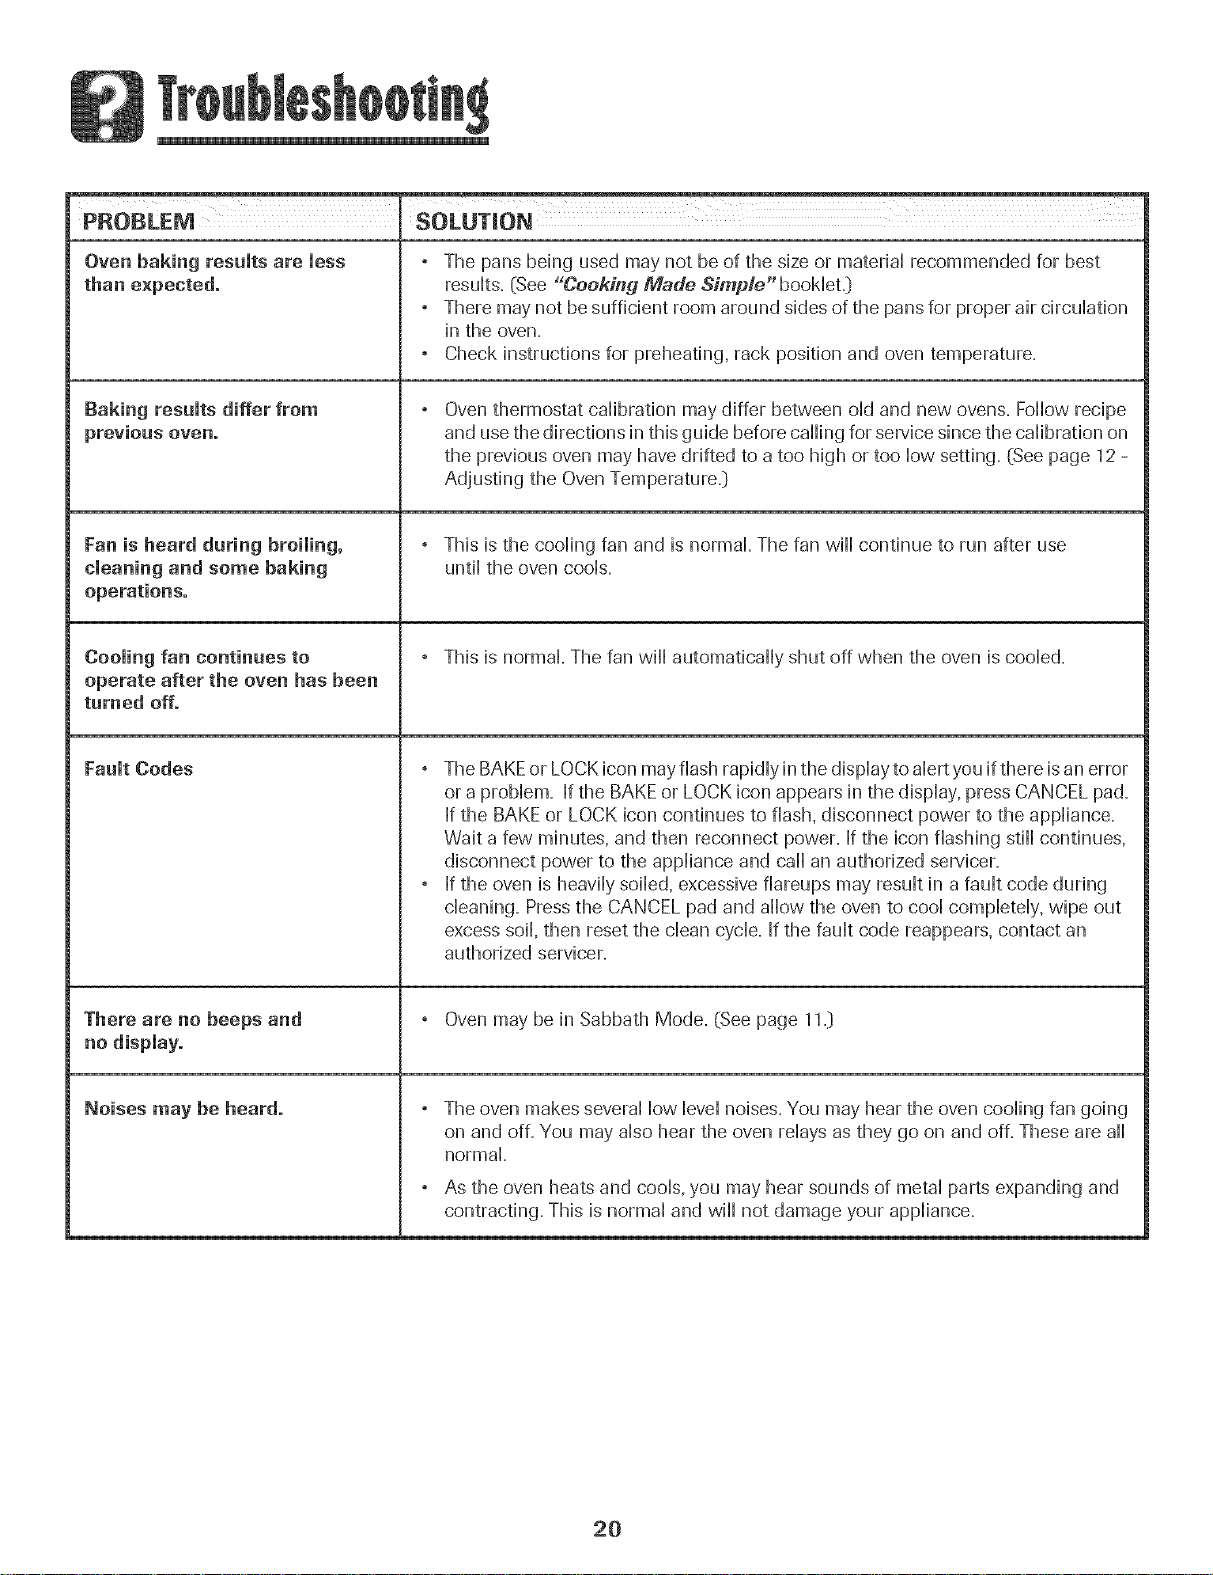
Oven baking results are less
than expected.
Baking results differ from
Fan is heard during broiling,
cleaning and some baking
operations.
Cooling fan continues to
operate after the oven has been
turned off.
Fault Codes
There are no beeps and
Noises may be heard.
° The pans being used may not be of the size or material recommended for best
resuHts=(See "Cooking Made Simple" booHet=_
° There may not be sufficient room around sides of the pansfor proper air circulation
in the oven=
° Check instructions for preheating, rack position and oven temperature.
Oven thermostat calibration may differ between old and new ovens. Follow recipe
and usethe directions in this guide before calling for service since the calibration on
the previous oven may have drifted to a too high or too low setting. (See page 12 -
Adjusting the OvenTemperature=]
° This is the cooling fan and is normal. The fan will continue to run after use
until the oven cools.
° This is normal. The fan will automatically shut off when the oven is cooled.
, TheBAKEor LOCKicon may flash rapidly in the display to alert you ifthere isan error
or a problem. If the BAKEor LOCK icon appears in the display, press CANCEL pad.
If the BAKEor LOCK icon continues to flash, disconnect power to the appliance.
Wait a few minutes, and then reconnect power. If the icon flashing still continues,
disconnect power to the appliance and call an authorized servicer.
° If the oven is heavily soiled, excessive fiareups may result in a fault code during
cleaning. Pressthe CANCEL pad and allow the oven to cool completely, wipe out
excess soil, then reset the clean cycle. If the fault code reappears, contact an
authorized servicer.
° Oven may be in Sabbath Mode. (See page 11=)
Theoven makes several low level noises. You may hear the oven cooling fan going
on and off. You may also hear the oven relays as they go on and off. These are all
normal=
As the oven heats and cools, you may hear sounds of metal parts expanding and
contracting. This is normal and will not damage your appliance.
2O

Warranty
What is Not Covered By These
Fuji One Year Warranty °
Parts and Labor
For one [1} year from the original retail
purchase date. any part which fails in normal
iome use will be repaired or replaced free of
charge.
Limited Warra nties - Parts Onty
Second Through Fifth Year = From the
original purchase date. parts listed below which
rail in normal home use will be repauredor
eplaced free of charge for the part itself, wuth
[he owner paying all other costs, including
tabor, mileage and transportation.
* Electreaic Coatrels
" Electric Heating Elements: Broil and bake
elements on electric cooking appliances.
Caaadian Residents
The above warranties only cover an appliance
nstalbd in Canada that has been certified or
listed by appropriate test agencies for compli-
ance to a NatioumalStandard of Canada unless
the appliance was brought into Canada due to
transfer of residence from the United States to
Canada.
Limited Warranty Outside the United
States and Canada - Parts Only
For two [2} years from the date of original retail
purchase, any par1which fails in normal home
use will be repaired or replaced free of charge
for the part itself, with [he owner paying al
other costs, including labor, mileage and
transportation.
Thespecific wafTanflesexpressed above are the
ONLY warranties prowded by zhemanufacturer
ThesewarTant/esgrveyou specific legal rights;
andyou may a/so have oZherddhts which vaJy
flora state to state.
1. Conditions and damages resulting from any of the following:
ao Improper installation, delivery, or maintenance.
be Any repair, modification, alteration, or adjustment not authorized
by the manufacturer or an authorized servicer.
co Misuse, abuse, accidents, or unreasonable use.
do Incorrect electric current, voltage, or supply.
eo Improper setting of any control
2 Warranties are void if the original serial numbers have been removed,
altered, or cannot be readily determined.
3o Light bulbs.
4o Products purchased for commercial or industrial use.
5. The cost of service or service call to:
ao Correct installation errors.
be Instruct the user on the proper use of the product.
co Transport the appliance to the servicer.
6o Consequential or incidental damages sustained by any person as a
result of any breach of these warranties. Some states do not allow
the exclusion or limitation of consequential or incidental damages, so
the above exclusion may not apply.
If You Need Service
* Call the dealer from whom your appliance was purchased or call
Maytag ServicessN,Amana Customer Assistance at 1-800-843-0304
U.S.A.or 1-866-587-2002 Canada to locate an authorized servicer.
* Be sure to retain proof of purchase to verify warranty status. Refer to
WARRANTY for further information on owner's responsibilities for
warranty' service.
If the dealer or service company cannot resolve the problem, write to
Maytag ServicessM,Attn: CAIR_ Center, P.O.Box 2370, Cleveland, TN
37320-2370, or call 1-800-843=0304 U.S.A. or 1-866-587-2002
Canada.
U.S. customers using TTY for deaf, hearing impaired or speech
impaired, call 1-800-688-2080=
User's guides, service manuals and parts information are available
from IVhytag Services s_J_,Amana Customer Assistance.
When writing or calling about a service problem, please include the
following information:
ao Your name, address and telephone number;
be Model number and serial number;
co Name and address of your dealer or servicer;
do A clear description of the problem you are having;
eo Proof of purchase {sales receipt}.
21
ge ................................................... 37-39
Four autonettoyant
M6thodes de nettoyage
Entretien ............................................................. 40
Lampe du four
HuMor du four
mnstaHateur:RemettreceguLdeaupropri6ta[re.
Consommateur:Lireleguide_econserverpourconsu_ta[ton
u[teneum.Conserverlatac[ured'achatoulechequeencamse
commeareuvede I'acha[
Numerode mod_le
Numerode ser[e
Dated'acna-[
Si ,.ous avez des questions, veuillez nous appemr :
Amana Customer Assistance
]-800-843-0304 aux E.-U,
]-866-587-2002 au Canada
Internet: http:/iwvwv.a mana.com
Dans b cadre de nos pratiques d'am@oration constante de la
quafit6 et de [a performance de nos pmduits de cuisson, aes
modifications de !'appareii qul ne sont pas mentionn@s duns c6
guide ont pu etre mtroduites.
Repertez-veus _ & page 43 pour plus d'infermadens
cencemailt le service apr_s-vente.
# #
iNSTRUCTiONS DE SECURITE
l M PO RTANTES
Los instructions de s@urite importantes et bs paragraphes
_mvertissemenb>de ceguide ne sont pasdestines acouvrir toutes
bs conditions et situations qui pourraient se presenter, II faut
faire preuve de bun sens, de prudence et de soin Iors de
Finstallation, de Fentretien ou du fonctionnement de Fapparefl,
Toujours prendre contact avec b detafllant, b distributeu r,Fagent
de service apres-vente ou b fabricant darts b cas de problemes
ou de conditions qui ne seraient pas comprises,
Reconna_tre los etiquettes, paragraphes
et symboles sur la securit_
POURRAIENTresulter en de graves blessuresou meme la mort,
ATTENTION . Dangers ou pratiques dangereuses qu!
POURRAIENTresulter en des blessures mineures,
Life toutes los instructions avant d'utiliser cot appareii;
observer toutes bs instructions pour eliminer bs risques
d'incendie, choc ebctrique, dommages materiels et corporeb
que pourrait susciter une utflisation incorrecte de Fapparefl,
Utfliser Fapparefl uniquement pour bs functions prevues,
decrites dans ce guide,
Pour une utiiisation adequate et en sdcuritd, il faut que
Fapparefl suit convenabbment installe par un technicien
qualifie, et relic a la term, Ne pas regbr, r@arer ni remphcer
un composant, a moins que cola ne suit sp@ifiquement
recommande dans ce guide, Toute autre reparation doit etre
effectuee par un technicien qudifi&
Toujours d@rancher Fapparefl avant d'y faire de Fentretien,
Pour 6viter un incendie ou des
dommages de fum6e
, S'assurer que tous bs materiaux de conditionnement sont
retires de Fapparefl avant de b mettre en marche,
, Garder bs materiaux combustibles, Fessenceet autres
matieres et vapeurs inflammables bien 61oignesde
Fapparefl,Ne pas ranger de matdriaux inflammables dans
un four,
, De nombreux types de piastique sont affectes par ia chaieur,
Garder ies piastiques eioignes des pieces de i'appareii
pouvant devenir chaudes,
, Pour emp@her qu'un feu de graisse nese declare, eviter
toute accumulation de graisse ou autres matieres
inflammables duns I'appareil ou au voisinage,
En cas d'incendie
Nejamais utfliser d'eau pour eteindre de la graisse
enfiammee, Utfliser du bicarbonate de soude ou un
extincteur _ poudre chimique ou _ mousse pour etouffer
bs flammes,
1. Interrompre I'alimentation electrique de I'appareil pour
minimiser la propagation des flammes.
2. NE JAMAm$ saisir ou deplacer un ustensile de cuisine
enfiamm&
3, Fermer la porte du four pour etouffer les flammes,
Securit6 pour los enfants
S'intdresser, Un enfant te_tant de grimper sur I'apparei! ou
gravement,
23

NE JAMAIS laisser des enfants seuls ou sans supervision
Iorsque I'appareil est en service ou encore chaud, Ne jamais
laisser un enfant s'asseoir ou se tenir sur une partie
quelconque de I'appareil, II pourrait se blesser ou se brQler,
• II est important d'enseigner aux enfants que I'appareil et les
ustensiles plac6s dedans peuvent 6tre chauds, Laisser
refroidir les ustensiles en un lieu sSr, hors d'atteinte des
enfants, IIest important d'enseigner aux enfants qu'un
appareil m6nager n'est pas un jouet, et qu'ils ne doivent
toucher aucune commande ou autre composant de
['apparel[,
Familiarisation avee l'appareil
porte et g[avement b!esser,
• Ne pas utiliser cet appareil pour chauffer ou pour garder
chaude une pi@e, sinon des dommages a i'appareii
pourraient s'ensuivre et ceia pourrait 6tre dangereux pour
i'utiiisateur. Aussi, ne pas utiiiser ie four pour ranger des
aliments ou des ustensiles de cuisine.
. Ne pas bloquer ou obstruer 1'6ventdu four.
• NE JAMAIS TOUCHERLESELEMENTSDECUISSON NI LES
PAROISINTERIEURESDU FOUR.Les 6i6ments de cuisson
peuvent 6tre brSlants m6me s'ils ne sont plus rouges. Les
surfaces int6rieures du four peuvent atteindre une
temp6rature suffisamment 6iev6e pour infliger des br0iures.
Pendant et apres usage, ne pas toucher les 616mentsde
cuisson ni ies parois int6rieures du four et 6viter bur contact
avec des v6tements ou autres mat6riaux inflammables avant
qu'ils n'aient eu le temps de refroidir suffisamment. D'autres
surfaces peuvent 6galement atteindre une temp6rature
suffisamment 6iev6e pour brQier : ies ouvertures d'6vent et
les surfaces avoisinantes, ainsi que les portes et les hublots
des fours.
• Ne pas toucher I'ampoule du four brQlante avec un chiffon
humide car eiie pourrait se briser. Si tel est ie cas,
d6brancher i'appareii avant de retirer i'ampouie pour 6viter
une @charge 6iectrique.
On dolt entendre le bruit du ventilateur de refroidissement
chaque foir que le four est en cours d'utilisation, Sinon,
appeler un r6parateur autoris6,
NE JAMAI$ garnir ia sob du four ou une grille du four avec
de la feuille d'aluminium, Ceci pourrait susciter un risque de
choc 61ectrique ou d'incendie, ou une d6terioration de
I'appareil, Utiliser de la feuille d'aluminium uniquement
selon les instructions de ce guide,
Cuisson et s6cw'it
• NE JAMAIS faire chauffer un r6cipient non ouvert dans le
four, L'accumuiation de pression darts ie r6cipient pourrait
provoquer son 6clatement et de graves dommages materiels
ou corporeis,
• Utiiiser des maniques robustes et seches, Des maniques
humides peuvent provoquer ia formation de vapeur brQiante,
Ne jamais utiliser un torchon a vaisselle ou autre article
textile a la place de maniques; un tel article pourrait trainer
sur un br0ieur et s'enflammer, ou accrocher un ustensiie ou
un composant de i'appareii,
. Porter un v6tement appropri6, Eviter de porter des
v6tements amples ou a Iongues manches pendant
I'utilisation de I'appareil, lls peuvent prendre feu si le
v6tement entre en contact avec un 616meritde cuisson
bn_iant,
• Placer toujours ies grilles a ia position appropri6e dans ie
four Iorsque le four est froid, Fairecoulisser la grille vers
I'ext6rieur avant d'ajouter ou enlever un plat; utiliser pour
cela une manique robuste et s@he, Eviter d'introduire la
main dans le four pour y placer ou retirer un plat, S'ii est
n6cessaire de d6placer une grille Iorsqu'elle est chaude,
utiliser une manique s@he, Ne pas toucher un 616ment
chaud avec une manique,
Ouvrir toujours la porte du four tres prudemment, Laisser
I'air chaud ou la vapeur s'6chapper avant de retirer ou
d'introduire un plat,
• AVERTISSEMENT - METS PREPARItS : Respecter ies
instructions du fabricant, Si le contenant ou le couvercle en
plastique d'un mets surgel6 se ddforme ou est endommag6
durant la cuisson, jeter imm6diatement le r6cipient et son
contenu, Lesaliments pourraient 6tre contamin6s,
24

# #
. Ne pas permettre [e contact de papier d'a[uminium ou de
sonde a viande avec les 616mentschauffants.
• Toujours 6teindre toutes les commandes une fois la cuisson
termin6e.
Ustensiles et s6curit
. Appliquer les instructions du fabricant Iors de I'emploi d'un
sachet pour cuisson au four.
. La securit6 de fonctionnement de cet appareil a 6t6 testee
[aide d'ustensiles de cuisine traditionnels. Ne pas utiliser un
ustensile ou accessoire qui n'est pas specifiquement
recommand6 darts ce guide. Ne pas utiliser de systeme de
convection additionnel. L'utilisation d'un dispositif ou
accessoire qui n'est pas expressement recommand6 dartsce
guide peut degrader la s6curit6 de I'appareil ousa perfor-
mance, ou reduire la Iongevit6 des composants.
• Seuls certains materiaux enverre, vitroceramique,
ceramique, terre cuite, ou certains ustensiles vitrifies/
6mailles peuvent 6tre utilises darts le four sans risque de
bris sous I'effet du choc thermique. Observer les instructions
du fabricant Iors de I'utilisation d'un ustensile en verre.
Nettoyage et s curit6
" Arreter toutes les commandes et attendre le refroidissement
de tous lescomposants avant de lestoucher ou
d'entreprendre le nettoyage. Nettoyer I'appareil avec
precaution. Travailler prudemment pour 6viter des brQlures
par la vapeur en cas d'utilisation d'un chiffon ou d'une
6ponge humide Iors de 1'61iminationd'un produit renvers6
sur une surface chaude. Certains produits de nettoyage
peuvent generer des vapeurs nocives Iorsqu'on les applique
sur une surface chaude.
. Nettoyer uniquement les pieces mentionnees darts ce guide.
Fow" autonettoyant
Ne laisser aucune nourriture, ustensi!e de CUisine,grille ou
[echefrite darts [e four[0rS d'une oPerat!on
d:autonettoyage.
. Ne pas nettoyer ie joint de porte; ie joint joue un rOie
essentiel quant a 1'etanch6it& Ne pas frotter, endommager
ou depiacer ie joint.
• Ne pas utiiiser de produit de nettoyage ou enduits de four
darts ie four autonettoyant ou sur ies zones voisines.
. Avant d'executer une operation d'autonettoyage, retirer la
lechefrite, les grilles du four et les autres ustensiles, et
6iiminer par essuyage tout exces de residus renvers6s pour
6viter la formation de fumee ou I'inflammation de ces
r6sidus.
Avertissement et avis
important pour la securit6
La Ioi cdifornienne <<SafeDrinking Water and Toxic Enforce-
ment Acb>de 1986 (proposition 65:}stipule la publication par le
gouvemeur de la Californie d'une liste de substances que
1'6tatde Californie considere comme cancerigenes ou
dangereuses pour le systeme reproducteur, et impose aux
entreprises commerciales I'obligation de signaler a leurs
clients les risques d'exposition a de telles substances.
Nous informons les utilisateurs de cet appareil que Iors d'une
operation d'autonettoyage, ils peuvent etre exposes a une
faible concentration de certaines substances figurant darts la
liste mentionnee ci-dessus, dont le monoxyde de carbone.
Pour minimiser I'exposition, veiller ace que la piece ouse
trouve le four soit convenablement aeree durant une operation
d'autonettoyage par I'ouverture d'une fenetre ou d'une porte.
AViS iMPORTANT - OISEAUX FAMILIERS : Les oiseaux ont
un systeme respiratoire tres sensible. Ne pas garder un oiseau
familier darts la cuisine ou darts une piece o_ il pourrait etre
expose aux fumees. Les fumees 6mises durant une operation
d'autonettoyage peuvent etre dangereuses ou mortelles pour
un oiseau, de meme que les fum6es 6mises Iors du chauffage
excessif de graisse, huile, margarine, par exemple darts un
ustensile a revetement antiadhesif.
Remarque : Le fonctionnement en mode micro-ondes
(certains modeles:}est indiqu6 darts le guide d'utilisation et
d'entretien emball6 avec le four a micro-ondes.
Conserver ces instructions pour consultation ult rieure
25
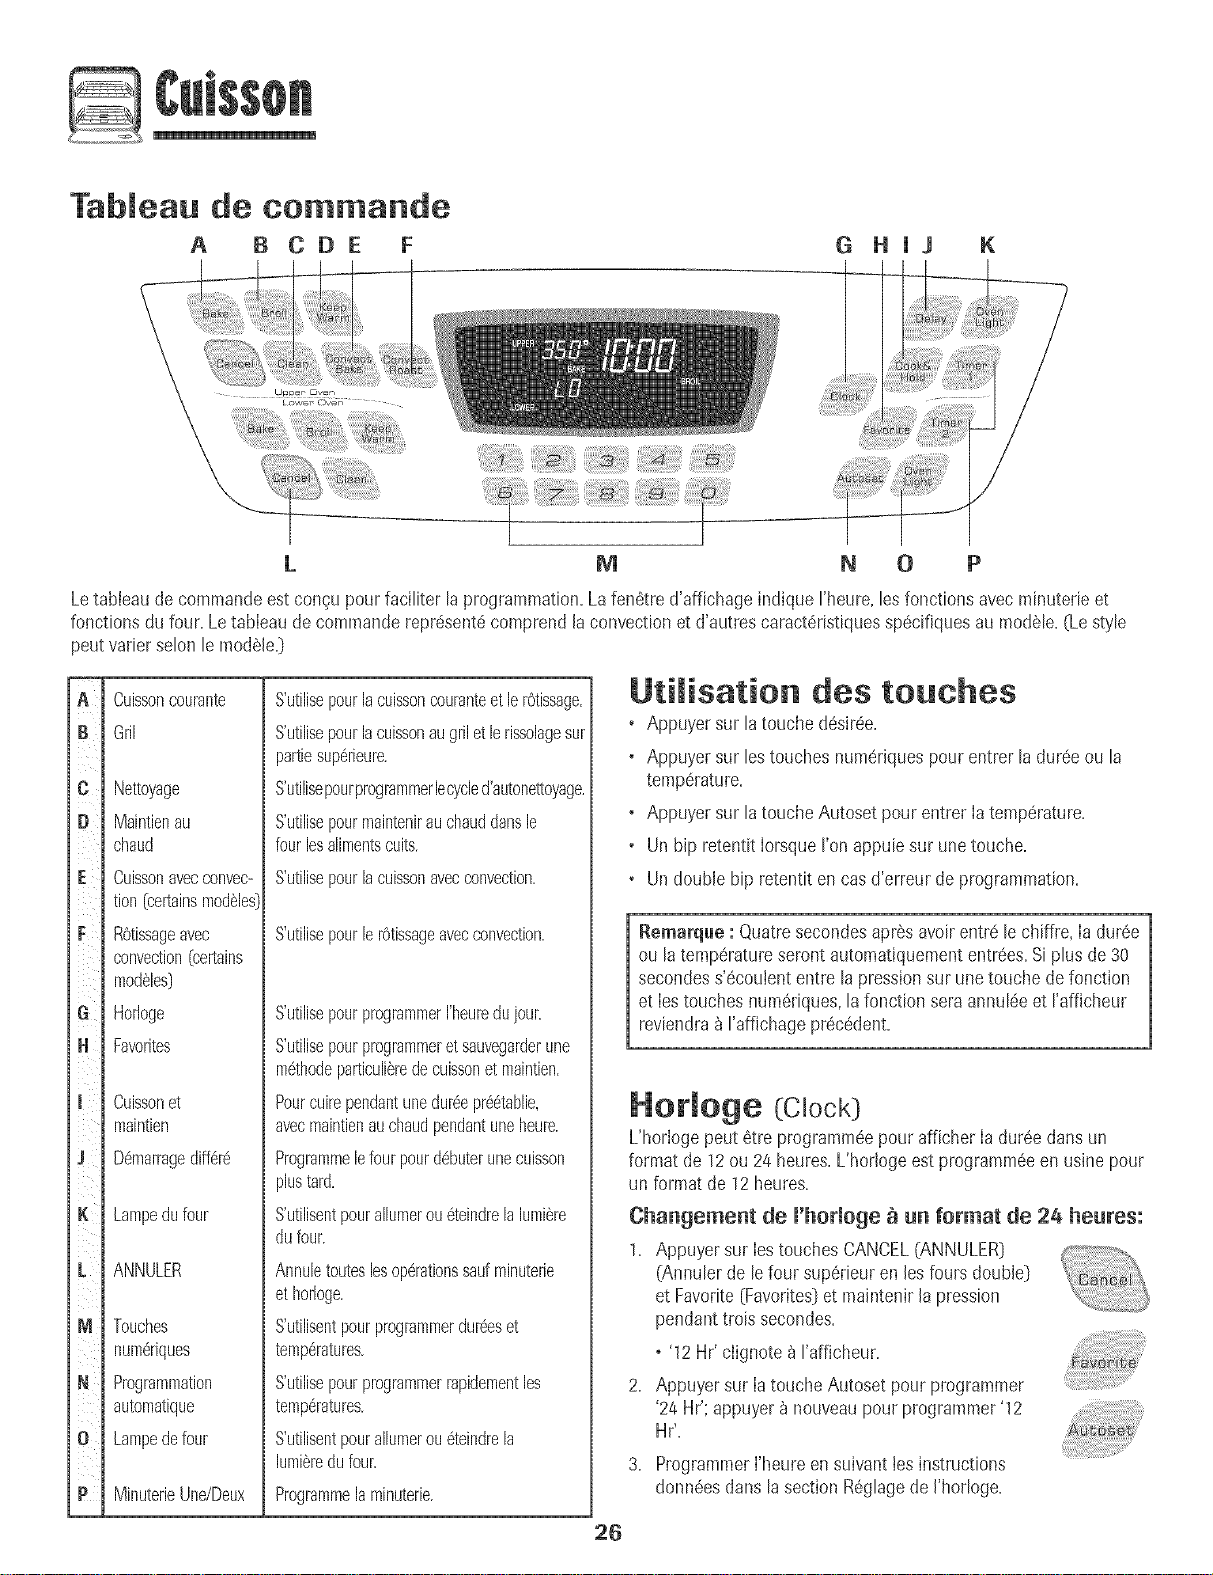
Tableau de. commande
A B CDE F G HJJ
K
i_::::i_iiiiiiiiiiiiiiii!ii_iliiiiiiiiiiiiiiii!_i,i,!_ii_i_!iiiiilili!ii'_iiii_!_'i'i_ilii_i!iii!iiiii!ii_ii!iiiii_i!!i_iiiii!i!i!_!i_ii_i'ii_!iiiiiiiiiii_iiiii!i',_iiiiiiiiiiiiiiiiiiiiiii_i!ii_i!ii!i!i_:i_!i
L M N 0 P
Letableaude commandoest con_upour faciliter laprogrammation.Lafenetred'affichageindiqueI'heure,lesfonctionsavecminuterieet
fonctionsdu four. Letableaude commandorepresentecomprendlaconvectionetd'autrescaracteristiquesspecifiquesau modele.(Le style
peutvariersolonle modele.]
JA
i
ic
iD
iF
i
iG
iH
ii
ii
i
ii
i
iM
iN
I
io
ill
I
ii
i
i
Cuissoncourante
Gril
Nettoyage
Maintienau
chaud
CuJsson avec convec-
tion (certainsmod61es
ROtissageavec
convection(celtains
mod61es]
Horloge
Favorites
Cuissonet
maintien
D6marragediff6r6
Lampedufour
ANNULER
Touches
num6riques
Programmation
automatique
Lampedefour
MinuterieUne/Deux
S'utilJsepourlacuissoncouranteetlerOtissage.
S'utilisepourlacuissonaugriletlerissolagesur
partiesup6rieul_.
S'utilisepourprogrammerlecycled'autonettoyage.
S'utilisepourmaintenirauchauddansle
fourlesalimentscults.
S'utilisepourlacuissonavecconvection.
S'utilJsepourle rOtissageavecconvection.
S'utilisepourprogrammerI'heui_dujoui:
S'utilJsepourprogrammeretsauvegarderune
m6thodeparticuli6redecuissonetmaintien.
Pourcuirependantunedmgepr_6tablie,
avecmaintienauchaudpendantuneheure.
Programmelefourpourd6buterunecuisson
plustard.
S'utilisentpouralhmerou6teindrelalumi@re
dufour.
Annuletouteslosop6rationssadmlnuterJe
ethorloge.
S'utilisentpourprogrammerdulgeset
temp6ratures.
S'utilisepourprogrammerrapidementles
temp6ratures.
S'utilisentpouralhmerou6teindrela
lumi@redufour.
Programmelaminuterie.
UtiJisation des touches
• Appuyersur latouche deskee.
• Appuyersur lestouchesnurnerJquespour entrerla dureeou la
temperature.
• Appuyersur latoucheAutosetpour entrerIatemperature.
• Unbip retentitIorsqueI'onappuiesur unetouche.
• Undouble bip retentiten casd'erreurde programmation.
Remarque : Quatresecondesapresavoirentrele chiffre, Iaduree
ou la temperatureseront automatiquemententrees.Siplusde 30
secondess'ecoulententrela pressionsurunetouche de fonction
et Iestouchesnumedques,lafonction seraannuleeet I'afficheur
reviendra_ I'affichageprecedent.
26
Hotloge (:Clock)
L'horlogepeutetreprogrammeepour afficherIadureedartsun
formatde 12ou 24 heures.L'horlogeestprograrnrneeen usinepour
un formatde 12heures.
ChaBgemeBt de l'horloge _ _ format de 24 heBres:
1. AppuyersurIestouchesCANCEL(ANNULER]
(Annulerde lefour superieuren Jesfours double)
et Favorite[Favorites)et maintenirJapression
pendanttrois secondes.
o'12 Hr'ciignote_ I'affJcheur.
2. AppuyersurIatoucheAutosetpour programmer
'24Hr':appuyer_ nouveaupour programmer'12
Hr',
3. Programmerl'heureensuivanttesinstructions
donneesdartslasectionReglagede J'horloge.
R6gmagede ['hormoge:
1. Appuyersurlatouche Clock[Hodoge].
o Heuredujour clignotent_ I'afficheur.
2. Appuyersurlostouchesnum6riquesappropri6espourprogrammer
I'heuredujour.
o Deuxpointsclignotent_ I'affJcheur.
3. Appuyer_ nouveausurlatoucheClockou attendrequatre
secondes.
o Lesdeuxpointsrestent.
Lorsque[ecourant6[ectriquearriveou aprSsuneinterruptionde
courant,[aderniSreheureavant['interruptionde courantvacIignoter.
PourrappeIer['heuredujour Iorsqu'uneautrefonctiondedur6e
s'affiche,appuyersur[atouche Clock.
Uheurede rhorIogene peut6trechang6eIorsquelefour a ate
programmepourunecuissonou unnettoyagediff6r6ou pourcuisson
et maintien.
AnnuJation de ['affichage de ['heure:
Si I'onnedSsirepas['affichagede I'heuredejour:
Appuyersur[estouchesCANCEL[ANNULER]et Clock
[Horioge)etlesmaintenirainsipendanttrois secondes.
Uheuredu jour disparattde rafficheur.
Lorsqueraffichagede['heureestannul&appuyersur la
toucheClockpourafficherbriSvementrheuredu jour.
O,uand ['affichagede rhorlogeestannul& aprSs15minutes,lerSgu-
lateurdufourse metenmode d'attente pour _conomiserde
I'6nergie.L'affichageseraaiorseffaceet [alampedu four nefonetion-
neraplus.PourreIancerler6guIateur_ partirdu moded'attente,
appuyersur rune destouches.Undoublehip seferaentendre.
Reaffichage de ['heure :
AppuyersurlostouchesCANCELet ClocketIesmaintenirainsi
pendanttroissecondes.L'heuredujour r6apparak_ rafficheur.
Minuterie (Timer)
Laminuteriepeut6trepmgramm6ede uneminute(00:01)jusqu'_99
heureset59secondes(99:59).
Laminuteriepeut6treutiJis6eind6pendammentdetoute autreactivit6
du four.EIJepeut6treaussiprogramm6ealorsqu'uneautrefonction
du fouresten coursd'utiiisation.
Laminuterienecommandepaslefour.Eilene sertqu'_6mettredes
bJps.
Programmation de [a minuterie :
1. AppuyersurlatoucheTimer(Minuterie).
o 00:00et['icOneTIMERcIignotent_ I'afficheur.
2. Appuyersurlostouchesnum6riquesappropri_esjusqu'_ceque
I'heurejuste paraisse_ I'affJcheur.
o Losdeuxpointset ricOneTIMERcontinuent&clignoter.
3. Appuyer_ nouveausurlatoucheTimerou attendrequatre
secondes.
• Losdeuxpointss'arr6tentdeclignoteret led6comptede la
dur6ecommence.
• Laderni6reminutedu d6compteseraaffich6esousformede
secondes.
4. A lafin de ladur6eprogramm6e,un bip longretentitet le motEnd
(Fin)seraaffich&
5. Appuyersur latoucheTimerpour d%ager I'afficheur.
AnnuJation de [a minuterie :
1. Appuyersurla toucheTimeretla maintenirainsJ
pendanttrois secondes.
OU
2. Appuyersurla toucheTimeret'0'_ I'aidedestouches
numSriques.
Verrouiiiage des commandos
et de [a porte few"
La portedu fouret lostouchespeuvent_treverrouJlI_espourdes
raisonsdesecurit&nettoyageou pour emp_chertoute utilisationnon
souhait_e.LestouchesnefonctionnerontpassielIessontverrouiIISes.
Si lefourest encoumd'utiIisation,lestouchesetla portenepeuvent
_treverrouiii_es.
L'heureactueliedujour restera_ I'afficheurIorsquelestoucheset[a
porteserontverrouiIISes.
Verrouiiiage :
1. AppuyersurlestouchesCANCELetCook& Hold
[Cuissonet maintien)etlesmaintenirainsipendant
trois secondes.
, OFF[ARRET)parait_ I'affJcheur.
• L'ic0neLOCK(VERROUILLAGE]dJgnoteIorsque
la porteesten coursde verrouiIIage.
Appuyersur[estouchesCANCELetCook& Holdet [esmaintenirainsi
pendanttroissecondes.OFFdisparaitde I'afficheur.
_emarqae : Laportedu four et testouchesne peuvent_tre [
verrouillSessila temperaturedu four estde 400°F(205° C[ ou phs.[
Codes d'aBomaJie
LesicOnesBAKE(CUISSONCOURANTE]ou LOCK
(VERROUILLAGE)peuventciignoter rapidementb ['afficheurpour
prSvenirencasd'erreur oude probI_me.Sitel est lecas, appuyer
sur latouche CANCEL.Siles icOnesBAKEou LOCKcontinuent
clignoter,d6brancherrappareiLAttendrequeIquesminutes,puis
rebrancherrappareiLSi ['ic6necontinue_ cIignoter,d_brancher
I'apparei]et prendrecontactavecun r_parateurautorJs_.
27
Cuisson courante au four
Programmation de Bake :
1. AppuyersurlatoucheBake(Cuissoncourante].
• L'icOneBAKE[CUISSONCOURANTE)cJignote.
• 000clignoteb Fafficheur.
2. SelectionnerIatemperaturedu four.AppuyersurIatoucheAutoset
pour350°F(175° C)ousurlestouchesnumeriquesapproprJees.
• Chaquepressionadditionne!lede latoucheAutosetaugmente
latemperaturede 25°F05 °C].
• Latemperaturepeutetreprogrammeede 170°b 550°.
3. Appuyerde nouveausurla toucheBakeouattendrequatre
secondes.
• L'icOneBAKEs'arretedeclignoterets'allume_ I'afficheur.
• L'icOnePREHEAT[PRECHAUFFAGE)s'ailume&I'afficheur.
• 100° [40°}ou istemperaturereettedu foursi latemperatureest
de plusde 1000F(40° C]seraaffichee.Elleaugmenterapar
intervallede5°F[3°C}jusqu'_ceque latemperature
pr@rogrammeesoitatteinte.
LaisserIefour prechaufferpendant8 _ 15minutes.
• LorsqueIatemperatureprogrammeepour Jefour estatteinte,
un hip long retentit.
• Latemperatureprogrammees'affiche.
• L'lcOnePREHEATs'eteint.
• PourmppelerIatemperatureprogrammeependantle
prechauffage,appuyersur latoucheBake.
Placerlanourrituredansle four.
Remarques sur Ja cuisson courante au
four :
• Pourchangeriatemperaturedu four pendantia cuisson,appuyer
surBake,puissuria toucheAutosetou lestouchesnumeriques
approprJeesjusqu'bcequelatemperaturedesireesoit affichee.
• Pourchangeriatemperaturedu four iorsdu prechauffage,
appuyersurla toucheBakedeuxfois,puissur latoucheAutoset
ousur iestouchesnumerJquesappropri_esiusqu'_ ceque la
temperaturedBsJreesoitaffichee.
• SiI'onoublied'arreterlefour, il s'arreteraautomatiquementapr_s
12heures.Si I'ondesiredesactivercettefonctJon,voirpage33.
• Pourdesconseilssupplementairessurla cuissoncouranteet le
r0tissage,voirla brochure<_LacuJssonsimplifiee>>.
6. VerifierI'avancementdelacuisson_ la dureemJnimaledecuisson.
CuireplusIongtempsau besoin.
7. Lorsquelacuissonestterminee,appuyersur la
toucheCANCEL(ANNULER}.
8. Retirerla nourdturedufour.
Biff@ences de cuisson entre U'ancien four et
Uenouveau
lJest normalde remarquerquelquesdifferencesdansladureede
cuissonentreunfour neufet unfeur ancien.VoirAjustementde la
temperaturedu four_ la page34.
Cuisson avec convection
(certains modeles)
PourIacuissonavecconvection,entrerlatemperaturede cuisson
normale.Lacommandereduitautomatiquementlatemperature
programmeede 25°F(15°C}.
Pregrammatien de Cenvect Bake :
1, AppuyersurIatoucheConvectBake[Cuisson
avecconvection)=
• LesicOnesBAKEetFAN{VENTILATEUR]
clignotent.
• 000clignote_ J'afficheur.
2. Selectionnerlatemperaturedu four.AppuyersurIatoucheAutoset
pour 350° F075°C}ou surlestouchesnumeriquesappropriees.
• ChaquepressionadditJonnellesur IatoucheAutosetaugmente
la temperaturede 25° F05 °C}.Latemperaturedu four peut
6treprogrammeede 170° b550°.
3. Appuyera nouveausur latoucheConvectBakeou attendrequatre
secondes.
• L'JcOneBAKEs'arretedecJignoterets'alIume_ FaffJcheur.
• L'icOnePREHEATciignotea I'afficheur.
• 100° [40°}ou iatemperaturereeiledu foursi latemperature
estde piusde 100°F(40° C}seraaffich_e.Elleaugmenterapar
intervallesde5°F[3° C}iusqu'_cequelatemperature
pr@rogrammeesoitatteinte.
• L'icOneventilateursemetbtourner.
Laisserlefourprechaufferpendant8 _ 15minutes.
• LorsqueIatemp@atureprogrammeepour lefour estatteinte,
un bip long retentit.
• L'JcOnePREHEATs'eteint.
• Latemp@atureprogrammees'affiche.
• Pourrappeierlatemperatureprogrammeependantle
prechauffage,appuyersur latoucheConvectBake.
s_ite
28
5. Placerlanourrituredartsle four.
6. VerifierI'avancementdeIacuissona ladur@ minimabde cuisson.
CuireplusIongtempsau besoin.
7. LorsqueB cuissonesttermh@, appuyersur la
toucheCANCEL(ANNULER}.
8. Retirerla nourrituredu four.
R6tissage avec convection
(certains modeles}
Pourb rOtissageavecconvection,entrerladur@ etIatemperaturede
rOtissagenormabs.Leregulateurindiqueautomatiquementdeverifier
lacuissonde la nourriturea 75% de la dureeprogrammee.
%bctionner latemperaturedu four. Appuyersur la
toucheAutosetpour 350° F075°C}ou sur les
touchesnumeriquesappropriees.
o ChaquepressionadditionnelIesurlatoucheAutosetaugmentela
temperaturede 25° F05° C}.
o Latemperaturedu four peut6treprogramm@de 170°_ 550°.
Appuyer_ nouveausurlatoucheConvectRoastouattendrequatre
secondes.
o L'icOneROASTs'arretedec%noter ets'aiIumea I'afficheur.
o 100° {@o)ouIatemperaturer@tIedu four si Iatemperatureest
de plusde 100° F{400C}seraaffichee.Elleaugmenterapar
intervalIesde 5° F{3° C}jusqu'aceque la temperature
pr@rogrammeesoitatteinte.
o L'icOneFANsemet8 tourner.
Remarques:
o Lorsdu rOtissageavecconvection,la dureede cuissondoit etre
programm@avantlatemperature.
o Si la recette n@essiteque le four soit pr@hauffe,ajouter 15
minutesa la dureede cuissonprogramm@.
o Les durees de rOtissagepeuvent varier selon les coupes de
viande.
o Sereporter_ labrochure<<LacuissonsJmplifi@>>pourconnaitre
Jesdureesettemperaturesde rOtissagesuggerees.
Programmation de Convect Roast :
1.Appuyersur Iatouche ConvectRoast{ROtissage
avecconvection).
• Lesbones ROAST{ROTISSAGE}etVentiJateurclignotent.
+ 00:00clignote_ I'afficheur.
+ 000s'aIIume_}_I'afficheur.
2.Entrerla dur@de rOtissagea I'aidedestouchesnumeriques.
+ Ladur@ peut6treregIeede 10minutes{00:10}_ 11heureset59
minutes{11:59}.
+ Appuyera nouveausurConvectRoastou attendre4 secondes.
+ 'ROAST'clignotea I'afficheur.
6.
7.
8.
9.
Laisserb four pr@haufferpendant8_ 15minutes.
, Lorsquelatemperatureprogramm@pour lefourestatteinte,un
hip long retentit.
• PourrappeterIatemperatureprogrammeependantle
pr@hauffage,appuyersur latouche ConvectRoast.
Placerla nourrituredansIefour.
LorsqueIestroisquartsdeIadureedecuissonprogramm@sesont
ecouIes,Iefour semeten marcheet 'Food'{Nourriture}clignote
rafficheur. Verifier ravancementde Iacuisson ace moment. La
lampedufourrestealIumeejusqu'_ceque ron@pub surIatouche
OvenLight {Lampedu fou0. CuirepIus Iongtempsau besoin.
• Appuyersur Iatouche ConvectRoastpour rappebr la dureede
cuissonrestante.
, Lorsquecettedur@ s'estecoulee,lefourmaintienttanournture
au chaudpendantuneheureau maximum+puiss'eteint
automatiquement.
LorsqueIacuissonestterrain@,appuyersur la
toucheCANCEL(ANNULER}.
Retirerla nourrituredu four.
29

Cuisson et maintien
LorsdeI'utilisationderoptionCook & HeM(Cuissonetmaintien],lefour
se met _ chauffer imm6diatementune lois que ta commandoa 6t6
programmee.Puis,lefourcuit pendantladur6especi%e.Lorsquecette
dur6es'est6coul6e,lefourmaintienttanourritureauchaudpendantune
heureau maximum,puiss'6telntautomatiquepaent.
Programmatio[i de Cook & Hold :
1=Appuyersur latoucheCook& Hold(Cuissonet
maintien].
o L'icOneHOLD(MAINTIEN)clignotepour indiquerque la
programmationdecuissonet maintienesten cours.
o %:00clignote_ I'afficheur.
2.%lectionner Ia dur6e d6sir6ede cuissonen utilisant les touches
num6riques.
o L'ic6neHOLDcontinue_ clignoter.
o Ladur6es'allume_ I'afficheur.
o Ladur6epout6trer6gleede00:108 11:59+
3. Appuyersur Rake,convect Rake ou Convect Roast ........
(certainsmodules)et s61ectionnerla temperaturedu
four.AppuyersurlatoucheAutosetpour350°F(175°C]
ousur Iestouchesnum6riquesappropri_es.
o L'icOnedu cycled6sir6clignote.
o Latemperaturedufour pout6treprogramm6ede 170°_ 550°+
4.Appuyer_ nouveausur latoucheducycled6sir60U attendrequatre
secondes.
o L'ic6nedu cycled6sir6resteallum6e.
o Ladur6edecuissonparait_ I'afficheur.
o L'icOnePREHEAT(PRECHAUFFAGE)parait_ I'afficheur.
o Latemp6raturer6elledufourseraaffich6ependantlepr6chauffage.
o Latemp6ratureprogramm6es'afficheIorsqueIefourestpr6chauff6.
Lorsq[ie la d[ir_e de c[iisso[i s'est _co[il6e :
o Quatrehipsretentissent.
o LosicOnesHOLDetWARM(CHAUD]s'allument.
+ 170° (75°] parait_ I'afficheur.
o L'heuredujour paratt_ I'affJcheur.
Apr@slille he[ire de MAINTIEN ETCHAUD :
+ Lefours'#teintautomatiquement,
o LosicOnesHOLDetWARMs'6teignent.
o Retirerla nourrituredu four.
Cuisson et maintien diff r s
Nepasutilise[ !acuissondiff_r6epou[desden[6estF_spc!rissabJes
comme losproduitslaitiers,le porc,[avolailleou losfruits de men
Avecla fonctionDelay (Diff6r6e],le four set met_ cuireplustard
dans[ajourn6e.Programmer[adur(!ed'attented@sir@eavantque [e
four nese mottoen marcheet [adurSede cuissond_s+r_e.Lefour
commence_ chauffer_ ['heures_lectionn_eet cuit pour [adur_e
sp#cifi#e.
Ladur_e d'attentepeut#tre programm_ede 10minutes[00:10)_ 11
heures,59 minutes(11:59].
Programmatio[i d'_[i cycle de c_isso[i et mai[itie[i
diff_r_s :
1. Appuyersur latouche Delayou Delay1 (eertainsmodSles].
o Pour[esmodeles_ deuxfours,appuyersur la
touche Delayou Delay1(certainsmodSies]une
fois pour programmerle foursupSrieurou deux
fois pour [efour inf_rieur.
o L'icOneDELAY[ATTENTE]c[ignote_ ['afficheur.
o 00:00clignote_ ['afficheur.
2. ,_,['aidedestouchesnum_,riquesappropriees,entrer[aduree
d'attenteavantque nedSbutele cyclede cuissonet maintien.
3. Appuyersur latouche Cook& Hold.
o L'icOneHOLDc[ignote.
o L'icOneDELAYc[ignote_ ['afficheur.
+ 00:00clignote.
4. Entrerladur_e d_sir_ede cuisson_ ['aidedestouches
num_riques.
5. Appuyersur Bake(Cuissoncourante),ConvectBake(Cuisson
avecconvection]ou ConvectRoast[ROtissageavecconvection]
(certainsmodules].
6. Programmerlatemperaturedu four d_sir_een
appuyantsurIatoucheAutosetou surlostouches
numSriquesapproprJ_es.
o 350° 075°] s'aIIumeIorsqueton appuiesur latouche Autoset.
o Apr_squatresecondes,la dureed'attenteentreeparait
rafficheur.
o L'Jc6neHOLDs'_teint.
+ LesicOnesBAKE(CUISSONCOURANTE]et DELAY[ATTENTE]
restentalIum_espour rappelerqu'un cycledecuissonet
maintiendiff6r6sa 6t6programm6.
A[i[i[lJatio[i de Cook & Hold _ to[it memo[it : +-+_+
Appuyersur latoucheCANCEL(ANNULER).Retirerla
nourr[turedufour. "+;+,+,++,+,)
:30
o Nepasutiliserlecycledecuissonetmaintiendiff_r6spourdes
articlesqui n6cessitentque lefoursoit pr6chauff&commeles
g_teaux,JespetJtsbiscuitset Jespains.
o NepasutiJiserlecycledecuissonetmaintiendiffer6ssile four
estd6j_chaud.
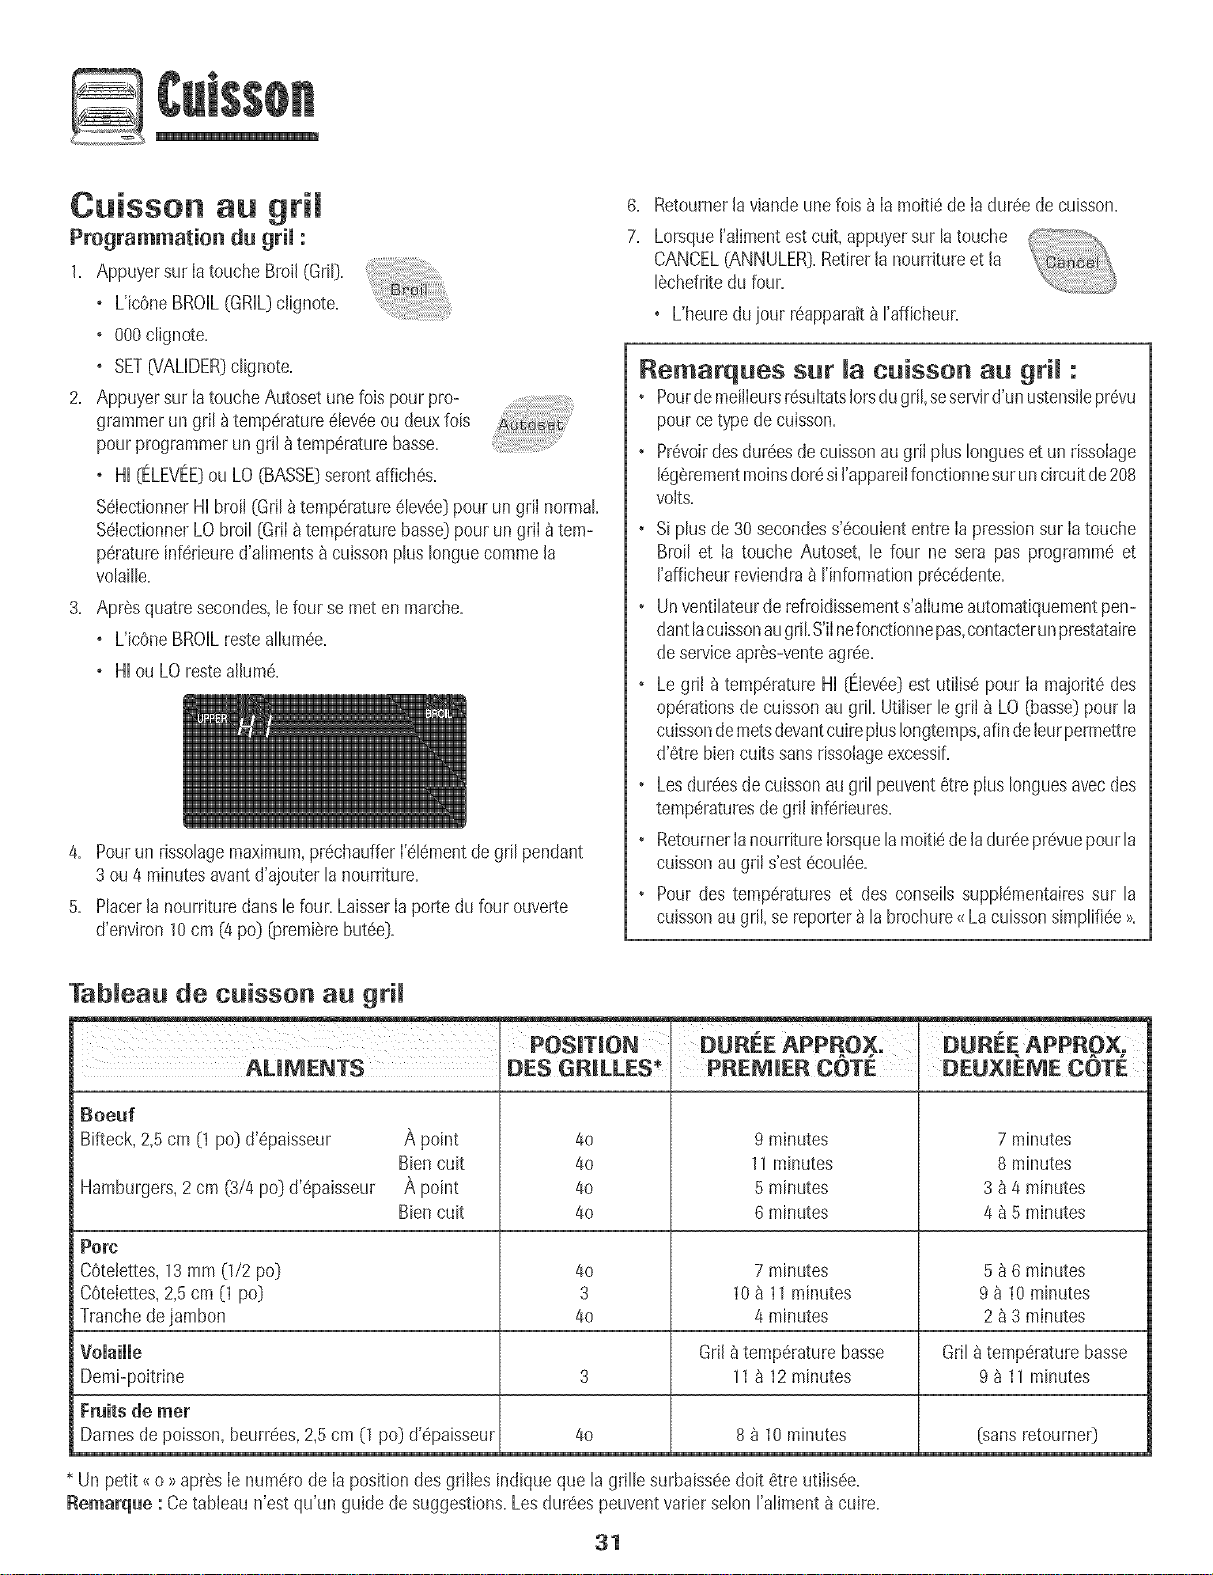
Cuisson au gri[
Programmation du grim:
1. Appuyersur[atoucheBroil (Gri[}.
o L'icOneBROIL(GRiL}clignote.
o 000dignote.
+ SET07ALiDER}c%note.
2. Appuyersur[atoucheAutosetuneloispour pro-
grammerun gril _temperature6leveeou deuxfois
pourprogrammerungril _ temperaturebasse.
o Hi {ELEVEE}ou LO(BASSE}serontaffiches.
%lectionner Hibroil (Gril_ temperatureelevee}pour un grii normal
%[ectionnerLObroil (Gri[_temperaturebasse}pourun gri[_ tem-
peratureinferieured'aIiments_cuissonplusIonguecommela
voIaiIIe.
3. Apr6squatresecondes,le foursemeten marche.
o L'icOneBROILresteaIIumee.
o Hiou LOrestea[[ume.
4. Pourun risso[agemaximum,prechauffer['elementde gri[pendant
3 ou4 minutesavantd'ajouterla nourriture.
5. Placerla nourrituredanslefour. Laisser[aportedu fourouverte
d'envJron10cm (4pc} [premierebutee].
G.
7.
Retoumer[aviandeunefois _ [amoitiede [adureede cu[sson.
LorsqueI'alimentestcult+appuyersur latouche
CANCEL(ANNULER].Retirerla nourritureet la
lechefritedu four.
• L'heuredujour reapparak_ I'afficheur.
Remarques sur [a cuisson au gr+[ :
• Pourdemeilleursresultats[orsdugril,sesewird'unustensileprevu
pourcetypede cuisson.
+ PrevoirdesdureesdecuissonaugriIplusIonguesetun rissolage
[egerementmoinsdoresi['appareilfonctionnesuruncircuitde208
volts.
+ Siplusde30 secondess'ecoulententrela pressionsurla touche
Broil et la touche Autoset,le four ne sera pas programmeet
['affJcheurreviendraa I'informationprecedente.
• Unventilateurdere%idissements'allumeautomatiquementpen-
dantlacuissonaugriLS'ilnefonctionnepas,contacterunprestataire
deserviceapres-venteagree.
+ Le gril _ temperatureHi (Elevee}est utilis6pour la majorit6des
operationsde cuissonau griLUtiliserle gril _ LO(basse}pourla
cuissondemetsdevantcuireplusIongtemps,afindeleurpermettre
d'etrebiencuitssansrissoiageexcessif.
+ Lesdureesde cuissonau gril peuventetreplusIonguesavecdes
temperaturesde grl[inferieures.
• Retournerlanourriturelorsquelamoitiede[adureeprevuepourla
cuJssonau gril s'estecoulee.
• Pour des temperatureset des conseilssupplementairessur la
cuissonau gril,sereporter_ la brochure<_Lacuissonsimplifiee>>.
TabJeau de cuisson au griJ
AUMENTS DES GP,[LLES+
Boeuf
Bifteck,2+5cm (1pc} d'epaisseur A point
Bien cuit
A point
Bien cuit
OUREEAPPROX, OUREE.APPRO×;
4o
4o
4o
4o
PP,EM [EP, COTE
9 minutes
11minutes
5 minutes
6 minutes
iDEUX[EMECOTE
7 minutes
8 minutes
3 _}_4 minutes
4 a 5 minutes
Hamburgers, 2 cm (3/4 pc} d'epaisseur
Porc
COtelettes, 13 mm 0/2 pc} 4o 7 minutes 5 _ 6 minutes
Cetelettes, 2,5 cm [1 pc} 3 10 a 11minutes 9 a 10 minutes
Tranche de jambon 40 4 minutes 2 a 3 minutes
Voiaiiie Gri[ _ temperature basse Gri[ _ temperature basse
Demi-poitrine 3 11 _ 12minutes 9 _ 11 minutes
Fruits de met
Darnes de poisson, beurrees, 2,5 cm (1 pc} d'epaisseur 4o 8_ 10 minutes [sans retourne0
* Unpetit <<o >>apres[enumerode [apositiondesgrilles indiqueque [agrillesurbaisseedoit etreut[iisee.
Remarque :Cetableaun'estqu'un guide de suggestions.LesdureespeuventvarierseIonraIiment_ cuire.
31
Maintien au ehaud
Pourmaintenirauchauddesalimentscultsetchaudsoupourr6chauffer
painsetassiettes.
Programmation du grim:
1. Appuyersurla toucheKeepWarm(Maintienau
chaud).
+ L'ic0neWARM [CHAUD)c@note.
+ 000clignote &I'afficheur.
2. %lectionner latemperaturede maintienauchaud.Appuyersur la
toucheAutosetou sur lestouchesnumedquesappropriees.
+ 170+(75°Ds'allumeIorsqueI'onappuiesurla toucheAutoset.
+ ChaquepressionsurlatoucheAutosetaugmentelatemperature
de 5°F [3°C].
Latemperaturede maintienau chaudpeut6tre programm6ede
145et 190° F(63et90°C].
L'icOneWARM[CHAUD]et la temperatureseront affich6espen-
dant que lafonction estactive.
Annumation du maintien au chaud :
1. Appuyersur latouche CANCEL[ANNULER:).
2. Retirerla nourrituredu four.
Remarques sur fonction de
maintien au ehaud :
+ Pourobtenirdesqualit6salimentaireset nutritivesoptimales,
lesalimentsnedoiventpas6tregard6sau chaudplusde 1ou
2 heures.
, Pouremp6cherlesalimentsdedessecher+lesrecouvrirde
papieraluminium+sansserrer,ou d'un couvercle.
+ Pourr_chaaffer des petits pains :
- recouvdrlespetitspainsde papieraluminiumsanslesserrer
etlesplaceraufour.
- appuyersur lestouchesKeepWarmet Autoset.
- r6chaufferpendant12_ 15minutes.
* Pourr6chaa_er des assiettes :
- placerdeuxpilesdequatreassiettesmaximumdans lefour.
- appuyersur lestouchesKeepWarmet Autoset.
- r6chaufferpendant5 minutes,arr6terle four et laisserles
assiettesau four pendantencore15minutes.
- n'ut+Iiserque desassiettespouvantaller aufour, _ verifier
aveclefabricant.
- nepasposerdesassiettestiedessur unesurfacefroide, les
changementsrapidesde temperaturepouvantcasser
rassietteou lafendiller.
32
Arr .t automatique/Mode
Lefour s'arr6teautomatiquementaprSs12heuress'iIa 6t6
accidentellementhiss6 en marche.Cettecaract6ristiquedes6curJt6
peut6trearr6t6e.
Pourannumerm'arr_t12 heureset faire fonetionner mefour en
eentinu pendant 72 heures:
1. Appuyersurla toucheClock(Horloge_et la
maintenirainsipendant3 secondes.
• SAbseraaffich6etclignoterapendantcinqsecondes.
• SAbseraensureaffich6en continujusqu'_ce qu'on I'arr6te
ou iusqu'_ ceque la dur6eIimitede 72heuressoit atteinte.
• L'ic6neBAKE(CUISSONCOUF_,NTE]seraaussiaffich6esiun
cyclede cuissoncouranteesten coursalorsque lefour est en
modesabbat.
• Touteslestouchessont inactivessaufCANCEL[ANNULER]et
Clock.ToutesIesautresfonctionssaul BAKE(Minuterie,
Maintienau chaud,Nettoyage,etc0sont verrouill6espendant
Jemodesabbat.
• Uncyclede cuissonet maintienpeut6trepmgramm6durant
lemodesabbat.Cependant,un cyclede cuissonet maintien
diff6r6sn'estpaspossible.
Annulation du mode sabbat:
1. Appuyersurla toucheCLOCKpendanttrois
secondes.
OU
2. Apr6s72 heures,JemodesabbatsetermJne.
• 'SAb'clignote pendant5 secondes.
• L'heuredu jour revient_ I'afficheur.
Remarques sur Je mode sabbat :
o Lemodesabbatpeut6tremisen marche_ tout moment,que
lefour soit en marcheou non.
o Lemodesabbatnepeut pas6tre misen marchesi lestouches
sont verrouill6esou la porteverrouilI6e.
o Lamajoritedesmessageset tous leshipssont d6sactiv6s
Iorsquele modesabbatest actif.
o Si le four esten modecuissonIorsqueIemodesabbatest
programm6,I'[c6neBAKE(CUISSONCOURANTE]s'6teint_ la
fin du cyclede cuisson.II n'y auraaucunsignalsonoreaudible.
o S[l'6clairagedufour est souhait(!pendantle modesabbat,la
lampedevra6treallum(!eavantque le modesabbatne d6bute.
o LorsqueIemodesabbata d6marr_,I'afficheurindique
imm6diatementIatemp6ratureprogramm@plutOtque la
temp6raturer6ellede Iacavit_du four. Aucun hipde
pr6chauffagene retentit.
o Lecycled'autonettoyageet leverrouillageautomatiquede la
portenefonctionnent paspendantle modesabbat.
o Si I'onappuiesur latouche CANCEL,un cyclede cuisson
couranteau four seraannul& Cependant,le r6gulateurrestera
en modesabbat.
o Apr6sune pannedecourant,le four revienten modesabbat
avec72 heuresrestantesetaucuncycleactif.
33
A uste ent de temperature
du four
La precisiondestemperaturesdufour aetesoigneusementverifiee
I'usine.IIest normalde remarquerquelquesdifferencesde cuisson
ou de la couleurdu rissoIageobtenuentre unfour neufetun four
ancien.Au fur et_ mesureque le four estmoins neuf,sa
temperaturepoutvarier.
II estpossibled'ajuster latemperaturedu four siI'on penseque le
four necuit pasou nerissolepascorrectement.Pourdeciderde
I'ajustement_apporter,reglerle four_ une temperaturede 15°C
(25°F}pluseleveeou plusbasseque Iatemperatureindiqueedans
la recette,puisfaire cuirela preparation.Lesresultatsdu premier
essaide cuissondoiventdonner uneidee du nombrede degres
duquel latemperaturedoit 6treajustee.
Ajustement de matemperature du four :
1. Appuyersur la touche Bake(Cuisson}.
2. Entrer550° F[285° C}enappuyantsurlostouches
numeriquesappropriees.
3. Appuyersur Iatouche BakeetIa maintenirainsipendant
plusieurssecondesou jusqu'_ ceque00° paraissea rafficheur.
Si Iatemperaturedu four a eteprecedemmentajustee,Ie
changementseraaffiche.Parexemple,si la temperaturedu four
a ete reduitede 15° F(8° C},I'afficheurindiquera-15°F(-8° C}.
4. Appuyersur IatoucheAutosetpour ajusterIatemperature.
A chaquefois que I'onappuiesur Iatouche Autoset,la
temperaturechangede 5° F(3°C}.Latemperaturedu four pout
6treaugmenteeou diminueede5 a 35° F(3 a 20°C}.
5. L'heuredu jour reapparakautomatiquement_ I'afficheur.
II n'estpasnecessairede reajusterlatemperaturedu four en casde
panneou d'interruptionde courant.L'ajustementde Iatemperature
s'appliqueseuIementauxfonctionsde cuisson,cuissonavec
convectionet retissageavecconvection(certainsmodeles}.
Latouche Favorite(Favorites}permetde sauvegarderla dureeet Ia
temperatured'un cyclede cuissonet maintiencuisson,cuissonavec
convectionou rOtissageavecconvection (certainsmodeles}.
Pourprogrammerun cycleFavorite,unefonction decuissonet
maintiendoit 6treactiveou tout juste programmee.
Programmation d'un nouveau cycle Favorite ou
sauvegarde d'une fonction en tours de cuisson et
maintien comme favorite :
1= Programmerun cyciede cuissonet maintiencommeil estdecrit
lasectionCuissonet maff_tien_ la page30=
2. AppuyersurIatouche Favoriteet la maintenirainsi
pendanttrois secondes.
o Lecyclecuissonetmaintien nouvellementprogrammeou en
cours defonctionnementserasauvegarde.
o Unbip seferaentendrepour indiquer que le regulateura
accepteJeregJageFaw_rite.
D6marrage d'un cycle programm_ darts Favorite :
1. AppuyersurIatouche Favorite.
o Ladureeet Iatemperaturedu cycleprogramme
de cuissonet maintienseront affichees(siaucun
cycJede cuissonet maintienn'aete programme, .....
_<none>>seraaffiche}.
2. AppuyersurIatouche Bake,ConvectBakeou CmwectRoast
(certainsmodeles}.
o LecycleFavoritecommenceimmediatement.
o L'icOnedu cycleselectionnes'allume_ I'afficheur.
o Ladureede cuissons'alJumea J'afficheur.
Lorsque maduree de cuisson s'est ecoulSe :
o L'icOnedu cycleseIectionnes'eteff_t,
o L'icOneHOLDWARM(MAINTIENAUCHAUD)s'alhme.
o 170° (75°}paratt8 J'afficheur.
Annumation d'un cycle Favorite en tours :
1. Appuyersurla toucheCANCEL(ANNULER}.
o LecycleFavoritesauvegardeneserapasaffecte.
2. RetirerJanourrituredu four.
34
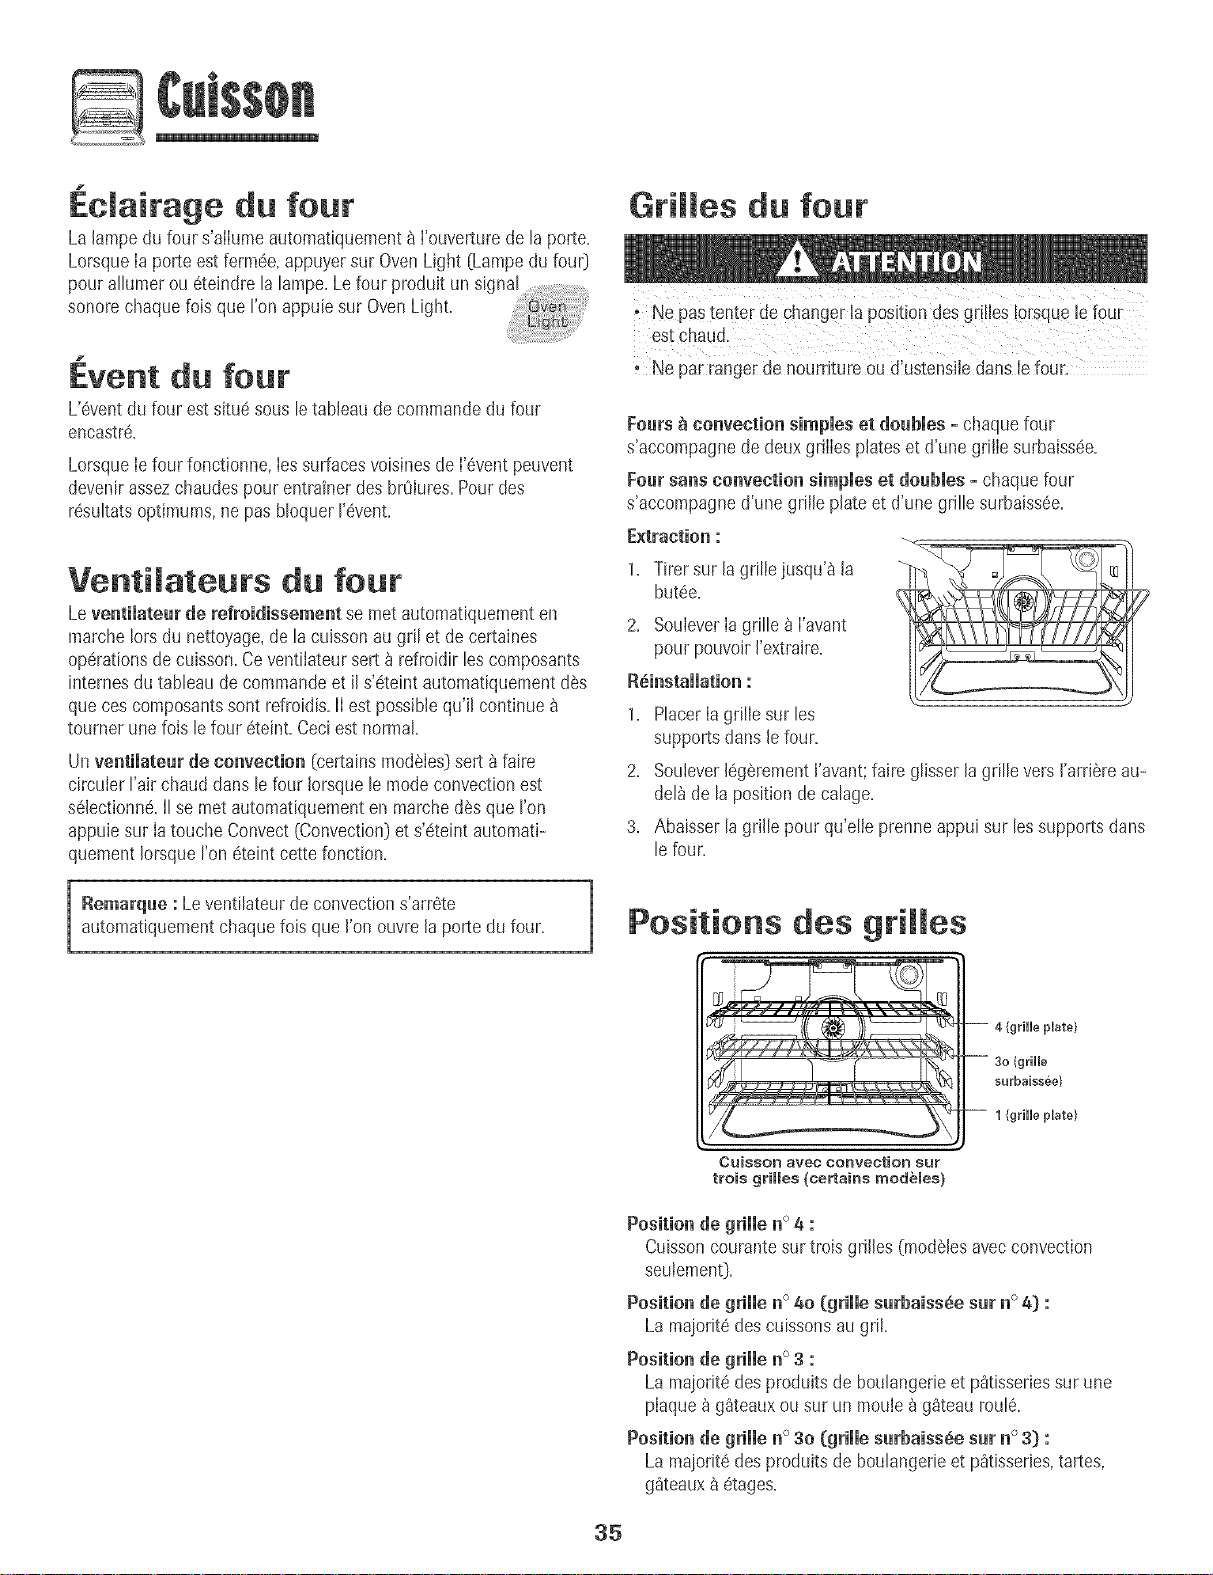
.clairage du four
La lampedu four s'alIumeautomatiquement_ I'ouverturedeB porte.
LorsqueIaporteestferm@+appuyersurOvenLight (Lampedu fou0
pour allumerou 6telndrela larnpe.Lefour produit un signal .....
sonorechaquefob que t'on appub surOvenLight.
i
Event du four
L'@entdu four estsitue sousb tableaude commandedu four
encastre.
LorsqueIefourfonctionne,Iessurfacesvoisinesde I'eventpeuvent
devenirassezchaudespour entrainerdes brhlures.Pourdes
r@uttatsoptimums,nepasbloquerI'@ent.
Ventimateurs du four
Leventilateur de refroidissement semetautomatiquementen
marchelots du nettoyage,de la cubson au gril et de certaines
operationsde cuisson.Ceventilateursert _ refroidirbs cornposants
internesdutableaude commandeet il s'eteintautomatiquementdes
queces composantssent refroidis.II est possiblequ'il continue
toumer unefois lefour eteint.Ceciest normal.
Unventimatearde convection (certainsmod6Ies]sert 8 faire
circuler Fairchauddansle four Jorsquele modeconvectionest
selectionne.II semetautomatiquementen marched@squeI'on
@pub surJatouche Convect(Convection]et s'eteintautomati-
quementIorsqueI'on eteintcettefonction.
i Remarqae : Leventilateurde convections'arrete
automatiquementchaquefois que I'onouvrela portedu four.
Grilles du four
; Ne pastenter de Changer!apostiondesgrilles!orsquele four
estchaud.
i ae par _arlgerde nOurritureou dlustensibdansb four:
Fears _ convection simpmeset doabmes- chaque four
s'accompagne de deux griIIes plates et d'une grilIe surbaiss@,
Fear sans convection simpmes et doabmes - chaque four
s'accompagne d'une grille plate et d'une grille surbaiss@,
E×traction :
I.Tirersur lagrille jusqu'_la
but@.
2. SouleverIagrille 8 I'avant
pour pouvoirI'extraire.
Reinstammation:
1. Racer Iagrilb sur les
supportsdanslefour.
2. SoubverlegSrementl'avant;faire glisserlagrille versI'arriereau-
deB de la positionde calage.
3. Abaisserla grille pour qu'elb prenneappuisur lessupportsdans
le four.
Positions des grilles
)late)
(grille
surbaissee)
1 (grille plate)
CuissoR avec ConveotioR $ur
trois grilles (certains modeles)
Position de grille n°4 :
Cuissoncourantesurtrois grilles (modSlesavecconvection
seubmen0.
Position de grille n°40 (grille sarbaiss_e sat n°4} :
La majoritedescuissonsaugriL
Position de grille n°3 :
La majoritedesprodu+tsde boulangerieet p_tisseriessurune
pIaque_ gSteauxou sur un moule_ g_teaufoul&
Position de grille n°30 (grille sarbaiss6e sat n°3} :
La majoritedesproduitsde boulangerb et p_tisserbs,tartes,
g_teaux&etages.
35
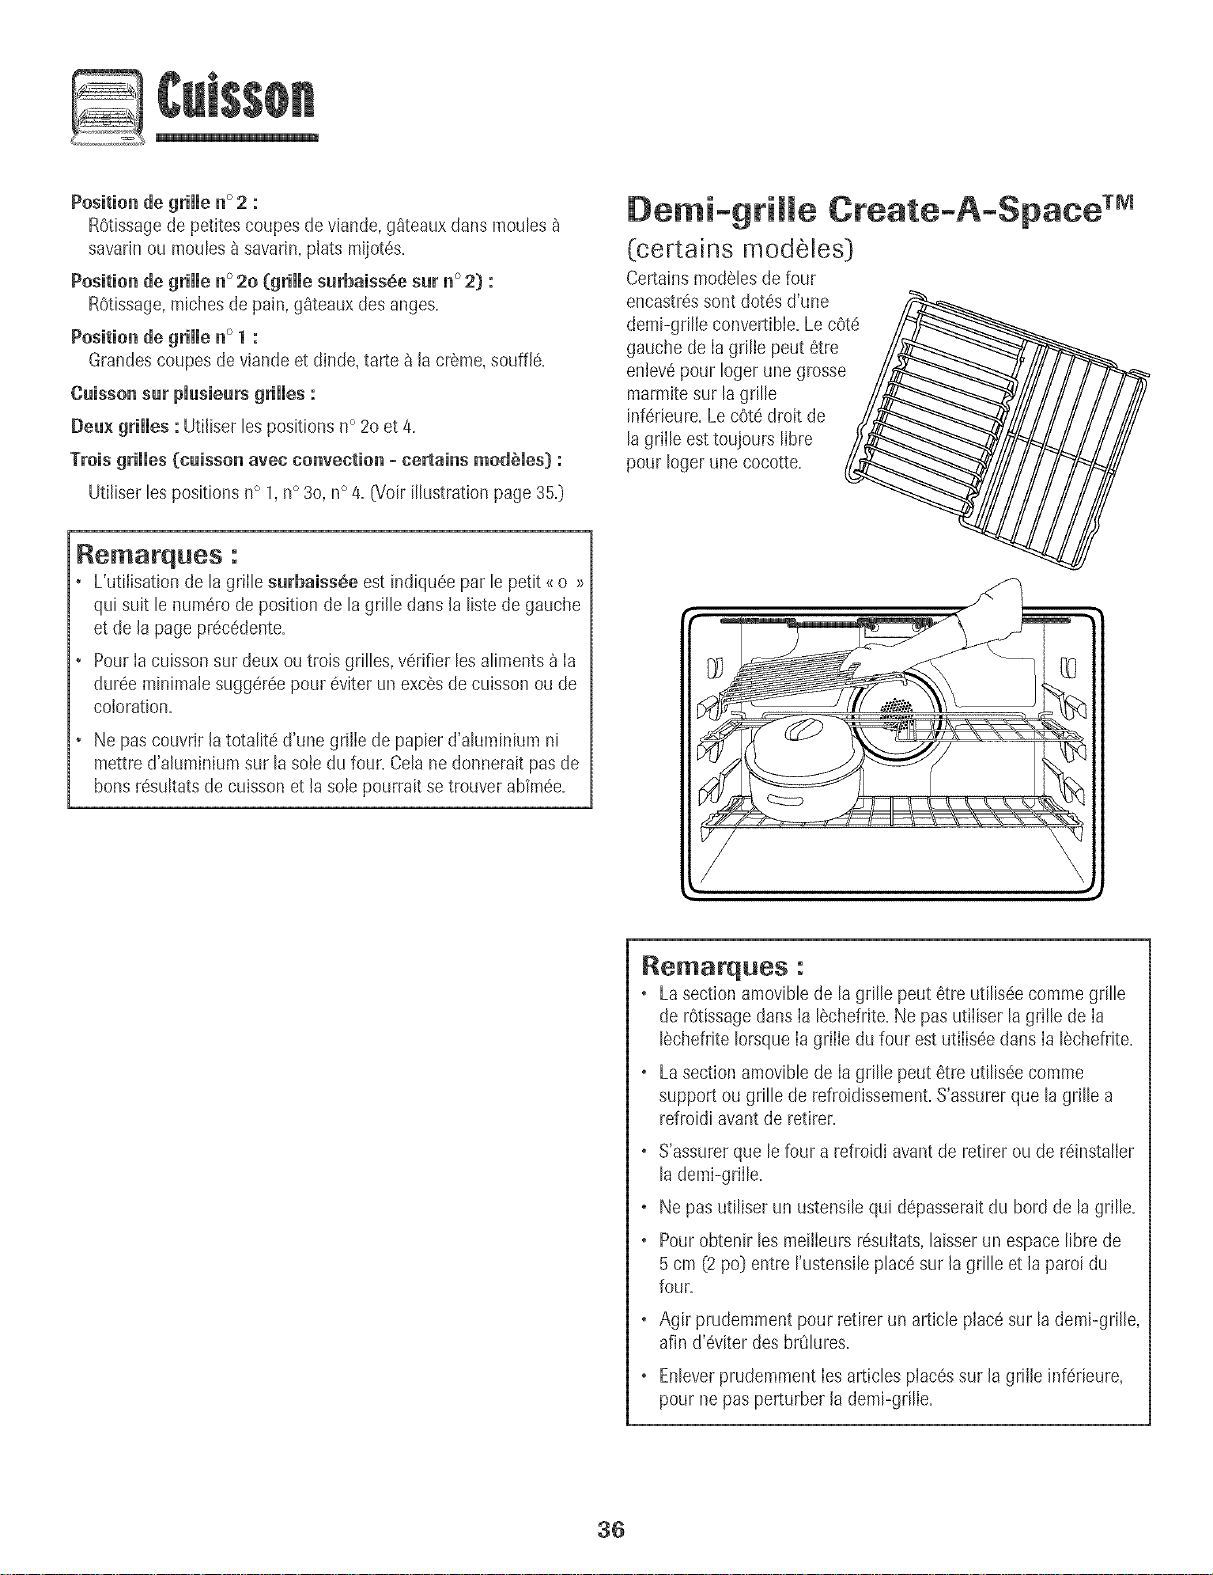
Position de grimmen°2 :
ROtissagede petitescoupesdeviande,g_teauxdansmoules
savarinou moules_ savarin,plats mijot6s.
Positionde grimmen°2o (grimmesurbaiss_.esur n°2) :
R0tissage,michesde pain,g_teauxdesanges.
Positionde grimmen° 1 :
Grandescoupesdeviandeetdinde,tarte_ lacr_me,souffle.
Cuissensur pmusieursgrimmes:
Deu× grilles : Utiliser[espositionsn° 20et 4_
Troisgrimmes{[cuissonavec convection - terrains modbmes):
Utiliserlespositionsn° 1,n°30,n°4, [Voirillustrationpage35,)
Rematques :
• L'utiiisationde la griIlesurbaiss6e est indiqu6epar le petit _o >>
qui suit le numerode positionde la grille dartslalistede gauche
et de lapageprecedente.
PourIacuissonsur deuxou trois grilles,verifierlesaliments_ Ia
duree minimalesuggereepour 6viterun excSsdecuissonou de
coloration.
Nepascouvrirlatotalite d'une grillede papier d'aluminiumni
mettred'aluminiumsur lasoledu four. Celane donneraitpasde
hensresultatsde cuissonettasolepourraitsetrouverabim6e.
Demi-gtiffe Create-A-Space TM
(certains modeles)
Certainsmod_lesdefour
encastr_ssent dot6sd'une /,_
demi-grilleconvertible.Lec0te__,_
gauchede Iagdlie peut6tre
entev6pour Iogerune grosse
marmitesur lagrille
inf6rieure.Le cotedroit de
la griile esttoujours libre
pour Iogerune cocotte.
//
Remarques :
, LasectionamovibJede lagrille peutetre utiJis6ecommegrille
de rOtissagedansIa 16chefrite.Nepasutiliserla grille de Ia
ISchefriteIorsqueIagrille du four estutiliseedansIaISchefrite.
. Lasectionamoviblede Iagrille peutetre utilis6ecomme
supportou grille de refroidissement.S'assurerquela grille a
refroidiavantde retirer.
. S'assurerque le foura refroidiavantde retireroude r6installer
lademi-grille.
. Nepasutiliser un ustensilequi depasseraitdu herd de la grille.
. Pourobtenir lesmeilIeursresultats,hisser un espacelibre de
5 cm (2po] entrerustensileplacesur Jagrille et laparoi du
four.
. Agir prudemmentpour retirerun article placesur la demi-griJie,
afin d'_viterdesbr_lures.
. EnleverprudemmentIesarticlesplacessurJagrille inf6rieure,
pour ne pasperturberJademi-grilJe.
36
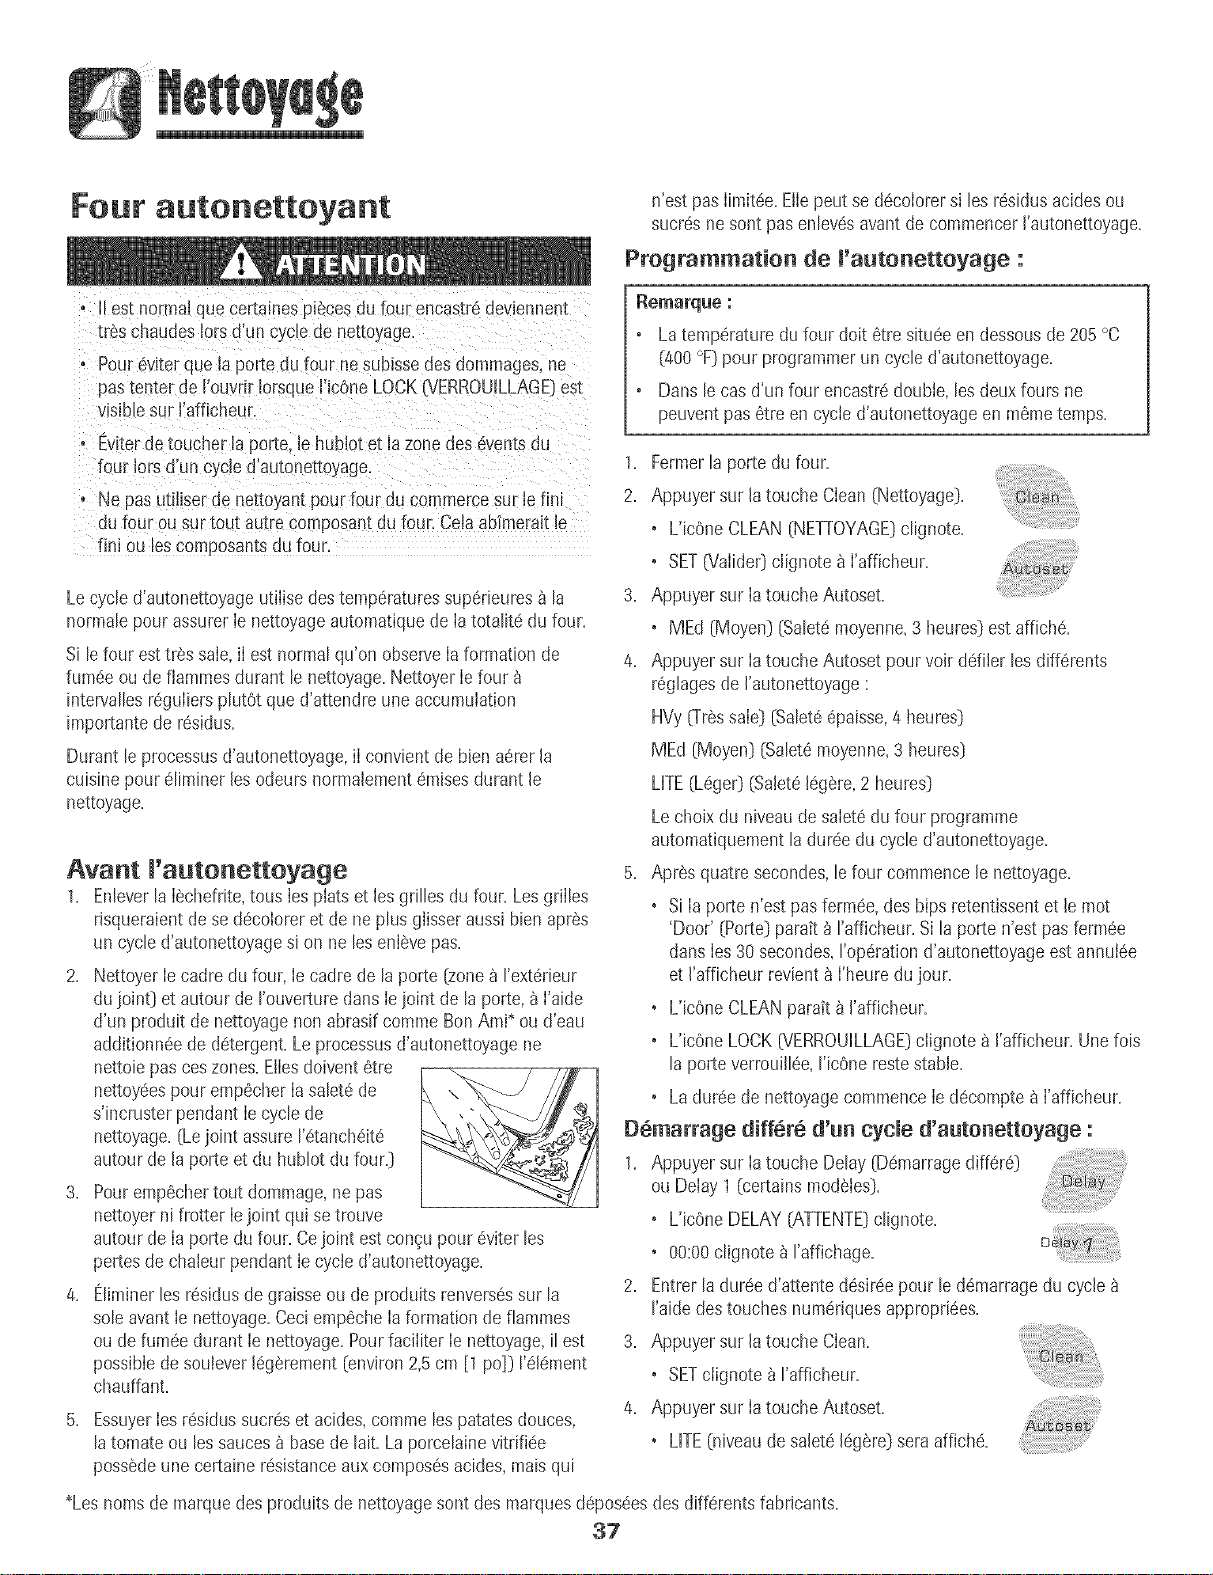
Four autonettoyant
n'estpas[imit6e.Eliepeutse d6coiorersi [esr6sidusacidesou
sucr6snesont pasenlev6savantde commencerI'autonettoyage.
Programmatien de ['autenetteyage :
o i[es[ norma_quecertamespJ6cesdu fourencastr6deviennent
[i _schaudes[orsd'uncycleae ne[_oyage.
o Pour6vJterque Japortedu four ne suDIssedesdommages,ne
pas[enter de Fouvrir[orsque['JcOneLOCK{VERROUiLLAGE}est
"![siblesur ['afficheur.
o Ewterdetoucher ia porte.[ehubiot etla zonedeseventsdu
four Jotsd'un cycled'autonettoyage.
° Nepasutiliserde net_oyan_pour fourdu commercesur[efin[
du four ou sur[ou[ au[recomposantdu foun CeJaabfmeraJt[e
finJou [escomposantsaufoun
Lecycled'autonettoyageutilise destemperaturessuperieures_ [a
normaIepour assurer[enettoyageautomatiquede[atotaIitedu four.
S[lefour esttras sale,i[ est normalqu'on observe[aformationde
fumeeou de flammesdurant le nettoyage.Nettoyer[efour
intervaIJesreguiierspIutOtque d'attendreune accumulation
importantede residus.
Durant le processusd'autonettoyage,i[convientde bienaererla
cuisinepour eIiminerlesodeursnormalementCruisesdurantle
nettoyage.
Avant I'autonettoyage
1. EnIeverla [echefrite,tous[es plats etlesgrillesdu four. LesgriiIes
rJsqueraientdesedecoloreret de ne plusgiisseraussi bienapr6s
un cycled'autonettoyagesi onne leseni6vepas.
2. Nettoyer[ecadredu four, [ecadrede la porte (zonea I'extedeur
du ioint} et autourde I'ouverturedarts[eioint de la porte,a ['aide
d'un produit denettoyagenon abrasifcommeBonAmi* ou d'eau
additionneede detergent.Le processusd'autonettoyagene
nettoiepasceszones.Eiiesdoivent6tre
nettoyeespour emp6cher[asaletede
s'incrusterpendant[ecyclede
nettoyage.(Lejoint assureI'etancheite
autourde la porteet du hubIot du four.}
3. Pouremp6chertout dommage,nepas
nettoyerni frotter [ejoint qui setrouve
autourde [aportedu four. Cejoint est congupour eviter les
pertesde chaleurpendant[ecycled'autonettoyage.
4. EJiminerlesresidusdegraisseou de produitsrenversessur la
soleavant[enettoyage.Ceciemp6che[aformationde fiammes
ou de fumeedurant [enettoyage.Pourfaciiiter[enettoyage,il est
possibledesouleverlegarement(environ2,5cm [1pc]} I'el6ment
chauffant.
5. Essuyer[esresidussucreset acides,commelespatatesdouces,
latomateou lessaucesa basede lait.La porceIainevitrifiee
possedeune certaineresistanceauxcomposesacides,maisqui
Latemperaturedu four dolt 6tresitueeendessousde205°C
Ca00°F}pour programmerun cycled'autonettoyage.
Dansle casd'un four encastredoubie,lesdeuxfours ne
peuventpas6treen cycied'autonettoyageen m6metemps.
1. Fermerla portedu four.
2. Appuyersur [atouche Clean(Nettoyage}.
• L'icOneCLEAN(NETrOYAGE}cIignote.
° SETO/alide0dignote a l'afficheur.
3. Appuyersur [atouche Autoset.
• MEd (Moyen}(SaIetemoyenne,3 heures}estaffiche.
4. Appuyersur [atouche Autosetpourvoirdefiler lesdifferents
regIagesde ['autonettoyage:
HVy_Tr6ssale}(SaIeteepaisse,4 heures}
MEd (Moyen)(SaIetemoyenne,3 heures)
LifE (Lege0 _Saleteleg_re,2 heures)
Lechoixdu niveaude saletedu four programme
automatiquementla dureedu cycled'autonettoyage.
5. Apresquatresecondes,lefour commencele nettoyage.
• Si [aporten'estpasferm6e,desbipsretentissentetle mot
'Door' (Porte)paratt_ I'afficheur.Sila porten'estpasfermee
darts[es30secondes,I'operationd'autonettoyageest annulee
et I'afficheurrevient8 ['heuredujour.
• L'icOneCLEANparait_ I'afficheur.
• L'icOneLOCK(VERROUILLAGE)ciignote_ I'afficheur.Unelois
la porteverrouiiIee,I'icOnerestestable.
• La dureede nettoyagecommence[edecompte&['afficheur.
D6marrage diff6r_ d'un cycle d'autonettoyage :
1. Appuyersur latouche Delay(Demarragediffere)
ou Delay 1(r-ertainsmodStes).
• L'icOneDELAY(ATTENTE)cIignote.
• 00:00cIignote_ I'affichage.
2. Entrerladureed'attente desireepour le demarragedu cycle
I'aidedestouchesnumerJquesappropriees.
3. Appuyersur latouche Clean.
• SETciignote_ I'affJcheur.
4. Appuyersur [atouche Autoset.
• LifE (niveaude salete[eg_re)seraaffJche.
*Lesnomsde marquedesproduits de nettoyagesont desmarquesdeposeesdesdifferentsfabrJcants.
37
5. Appuyersurla toucheAutosetpourvoir ddJJerles ....
diff@entsr6glagesde Fautonettoyage: .....
HVygr_s sale}(Saiet6@aisse,4 heures}
MEd (Moyen){SaIet6moyenne,3 heures}
LITE(L6ge0 (Salet616g_re,2 heures}
Lechoixdu niveaudesalet6du four programme
automatiquementIadur6edu cycied'autonettoyage.
6. Apr6squatresecondes,IesicOnesCLEAN[NETrOYAGE]et
DELAY[ATTENTE]s'allumerontetI'icOneLOCK
G/ERROUILLAGE}dignotera _ I'afficheur.LorsqueIaportedu
four severrouiIle,I'icOneLOCKs'arr_!tede clignoter et reste
allum6een continu pour indiquerque le four estprogramm6
pour une operationde nettoyagediffer6.Le d61aid'attentesera
affich&
Pendant Je cycJe d'autonettoyage
LorsqueLOCKparait_ I'afficheur,Iaportene peutetreouverte.Pour
6viterd'endommagerla porte,ne pasforcerJaportepour J'ouvrJr
IorsqueLOCKest affich&
[umSe et odeurs
La premierelois oQlefour est nettoye,iIpeutyavoirproduction
d'odeuretde rum@.Ceciest normalet disparaftra_ I'usage.
Si Iefour esttres saleou si la I_chefritea etelaisseedanslefour, il
peutyavoirproductionde fumee.
Bruits
Pendantque Iefour chauffe,iJpeutseproduiredesbruits de metal
en dilatationou en contraction.Ceciestnormalet n'indiquepasque
le fours'abtme.
Apr s cycle d'autonettoyage
Environune heureapr_sIafin du cycle,J'icOneLOCKs'eteint.Ace
moment,Japortepeutetre ouverte.
Lasamet8peut avoir laiss_ an r_sidu grispeudrea×. L'enlever
avecun IingehumJde.S'il restede Iasalete,celaindiqueque IecycJe
de nettoyagen'a pasete assezlong.Cettesaleterestantesera
enlev6eau prochaincycled'autonettoyage.
Si lesgrilles du four ent 6t_ laiss_es_ l'int6riear pendant le
cycle d'autenetteyage et qa'emmesgiissent roamsat meurs
supports, lesenduire,ainsique lessupports,d'unefine couche
d'huileveg6tale.
Defines mignespeuvent apparaitre darts mapercemaineparce
qa'eiie a subi nhaieur et refroidissemenL Ceciest normalet
n'affecterapasla performance.
Une d_nemerationblanche peut apparaitre apr_s le netteyage
si des aliments acides ou sacr6s n'ont pas 8t8 enlev6s avant
qae ne commence l'aatonettoyageo La d6colorationest normale
et n'affecterapasla performancedu four.
Remarques :
• Si la portedu four n'estpasfermee,le mot<<door>>(porte]
cJignote_ I'afficheuretie four _metdeshipsjusqu'_ce queJa
portesoitferm6eet que I'onappuie_ nouveausurClean.
• S'il s'6couleplusde cinqsecondesentrele momento_ Fen
appuiesur Cleanetcelui o_ I'on appuiesur JatoucheAutoset,
J'afficheurretourneautomatiquement_ J'affichagepr6cedent.
• Unvent[lateursemetautomatJquementen marchependantIe
cycled'autonettoyageet s'eteintautomatiquementunelois Je
cyclede nettoyagetermJneetle feur suffisammentrefroidi.Si
cevent[lateurnefonctionnepas,contacterun prestatairede
serviceaprSs-venteagr6e.
• Laportedu four setrouveraendommageesi J'onforceson
ouvertureaJorsque I'icOneLOCK(VERROUILLAGE)estencore
affichee.
38
MGthodes de nettoyage
° APE'Stout d_montagede coraPosants,veilierb dfectuer un remontagecorrect:
NE_OYAGE
LSchefrite
et sa grille
Nejamais ceuvrir la grille de papier d'aluminium; cela emp_cbe la graisse de ceuler dansla lbche#ite.
° Recouvrirla I_chefriteetsagrille d'un Iingesavonneux;Iaissertremperpour dGtacherIesr_sidus.
° Laveravecde I'emJsavonneusetilde. Utiliserun tampon_ rGcurerpour6Iiminerlessouilhres tenaces.
° On peutplacerIesdeuxcomposantsde laI_chefdteclansml Iave-vaisselle.
Poign_e de porte, •
ext_riear da fear •
(certainsmodeles)- •
Habiot et porte •
da fear - verre •
Gamitare da four- °
finis mGtaJJiqaes *
interleaf da fear •
Grillesda fear ,
Pourutiliser la fonction_{ControlLock_ [Verrouillagedescommandes)pour lenettoyage,voir page27.
Essuyeravecun linge humide.Biensecher.
On peututiliser un produitde nettoyageduverre,pulveris6d'abordsur un chiffon.NEPASprejeterle preduit
directeme_lt sur les touchesde eemma1_deeu sur Fafficheur.
Ne pasutiliserd'autresproduitsde nettoyage_ vaporiser,de nettoyantsabrasifs,ni degrandesquantitesd'eau.
NEPAS UTIUSERDEPRODUES DENETTOYAGECONTENANTDU JAVELUSANT.
NEPAS UTIUSERDENETTOYANTS_ ORANGE_ OUABRASIFS.
TOUJOURSESSUYERDANS LESENSDELA TEXTUREDEL'ACIER£ORSDU NETTOYAGE.
Netteyage joarnalier/salet6 i_g_re - Essuyeravecrun desproduitssuivants:eausavonneuse,vinaigreblanc/eau,
produitde nettoyagepour verreetsurface_Formula409ouun produitsembiablepourverre- avecun lingesoupJe
et uneeponge.Rinceretsecher.Pourpolir etenleverlesmarquesde doigts,fairesuivre parune vaporisationde
produit pouracier inoxydableMagic Spray[Piecen° 20000008_.
Saletd med_r_e/dpaisse - Essuyeravecfun desproduits suivants:BenAmP,SmartCIeanse¢ouSoftScrub_-
I'aided'un Iingesoupleou d'uneepongehumide.Rinceretsecher.LestachesrebeIIespeuvent8treenleveesavec
un tamponScotch-Brite_humidifie.Frotteruniformementdanslesensdumetal Rincerets_cher.Pourredonnerdu
hstre et retirerlesrayures,fairesuivrepar une pulverisationde produit pouracier inoxydableMagic Spray.
Eviterd'utilisertrop d'eau,qui dsqueraitdes'infiltrersousou derrierereverre.
Laverb ['eau etau savon.Rincer8 reau claireets@cher.Unproduitde nettoyagedu verrepeut@treutilise en le
vaporisantd'abordsurun linge.
Ne pasutiliserde nettoyantsabrasifscommetampons_ r@curer,[ained'acierou nettoyantsen poudrequi
risqueraientde rayer[everre.
Laver8 I'eauetau savon,avecun nettoyantdu verreou desproduitsdoux_ vapodser.Eviteld'utilisertrop d'eau.
EnteverIestachesrebelIesb I'aide d'un nettoyantnonabrasiftel que BenAmi_ou d'une p_tede bicarbonatede
soudeetd'eau;rinceret secher.Nepasutiliserde nettoyantsabrasifs.
Voir page37 lesrenseignementssurle four autonettoyant.
Pourenleverlesliquidesqui ontpu d_borderentrechaquenettoyage,utiliser un tampon_ recurersavonneuxen
plastique:bien rincer.
EssuyerIesresidussucresetacides,commeiusdecitron,sa{lcetomateousauces_basedeIait.Laporcelainevitrifiee
possedeunecertaineresistanceauxcomposesacides,maisqui n'estpaslimitee.EIIepeutsedecolorersilesresidus
sucresou acidesne sentpasenlev_savantde commencerI'autonettoyage.
Frotteravecune eponge/unlingeet fun de cesnettoyants:BenAmi_,SoftScrub_ou Comet_.Rinceretsecher.
PourIasaleterebelIe,utiliserun tampon_ recurersavonneuxhumide.Rinceretsecher.
Si lesgrillessentlaissQesdartslefour pendanttecycie d'autonettoyage,ellessedecolorentetpeuventneplustres
bien giisser.Sicelaseproduit,enduirelesgrillesetlessupportsintegresdanslespatoisdufour d'unefine couche
d'huile vegetale,puisessuyerI'exc_dent.
_Lesnomsde marquesent desmarquesd@poseesdescliff@rentsfabricants.
_ Pourcommanderdirectement,composerle 1-800-843-0304USAor 1-866-587-2002Canada.
39
Lampe du four
+ Avant de remplacerFampoule,DBRANCHERLEFOUR.
+ Ne Pastoucher uneampoulecbaudeayecunI!nge hum+de,
Iampoule isquedese brise_,
Rempmacement de m'ampoumedu four :
1+ Porterune maniques6cheet devissertressoigneusementle
cabochonet Fampoule+
2+ RemplacerI'ampouleparune ampoulepour four,de 40watts,II
est recommand6d'utiliserune ampouleavecun culot en laiton
pour6viter lafusion du cu+otclansla douille+
3+ Remettreen placele cabochonet rebrancherlefour,
4+ RemettreI'horloge_ I'heure+
Nubmot du four
Pour proteger mehubmotde maporte du four:
1+ Nepasutiliserde produks nettoyantsabrasifscommedes
tampons&r6cureren Iained'acier ou desproduitsde nettoyage
en poudrequi dsqueraientde rayerleverre+
2+ Nepasheurterle hubloten verreavecun ustensile,un articlede
mobilier,un jouet, etc+
3+ Nepasfermerla portedu four avantque lesgrilles nesoienten
placedansle four,
Touted6gradationdu hublotde verre- rayure,choc,tension,etc+-
peutaffaiblir sastructureet augmenterle risquede bris_ unedate
u+t_rieure+
40
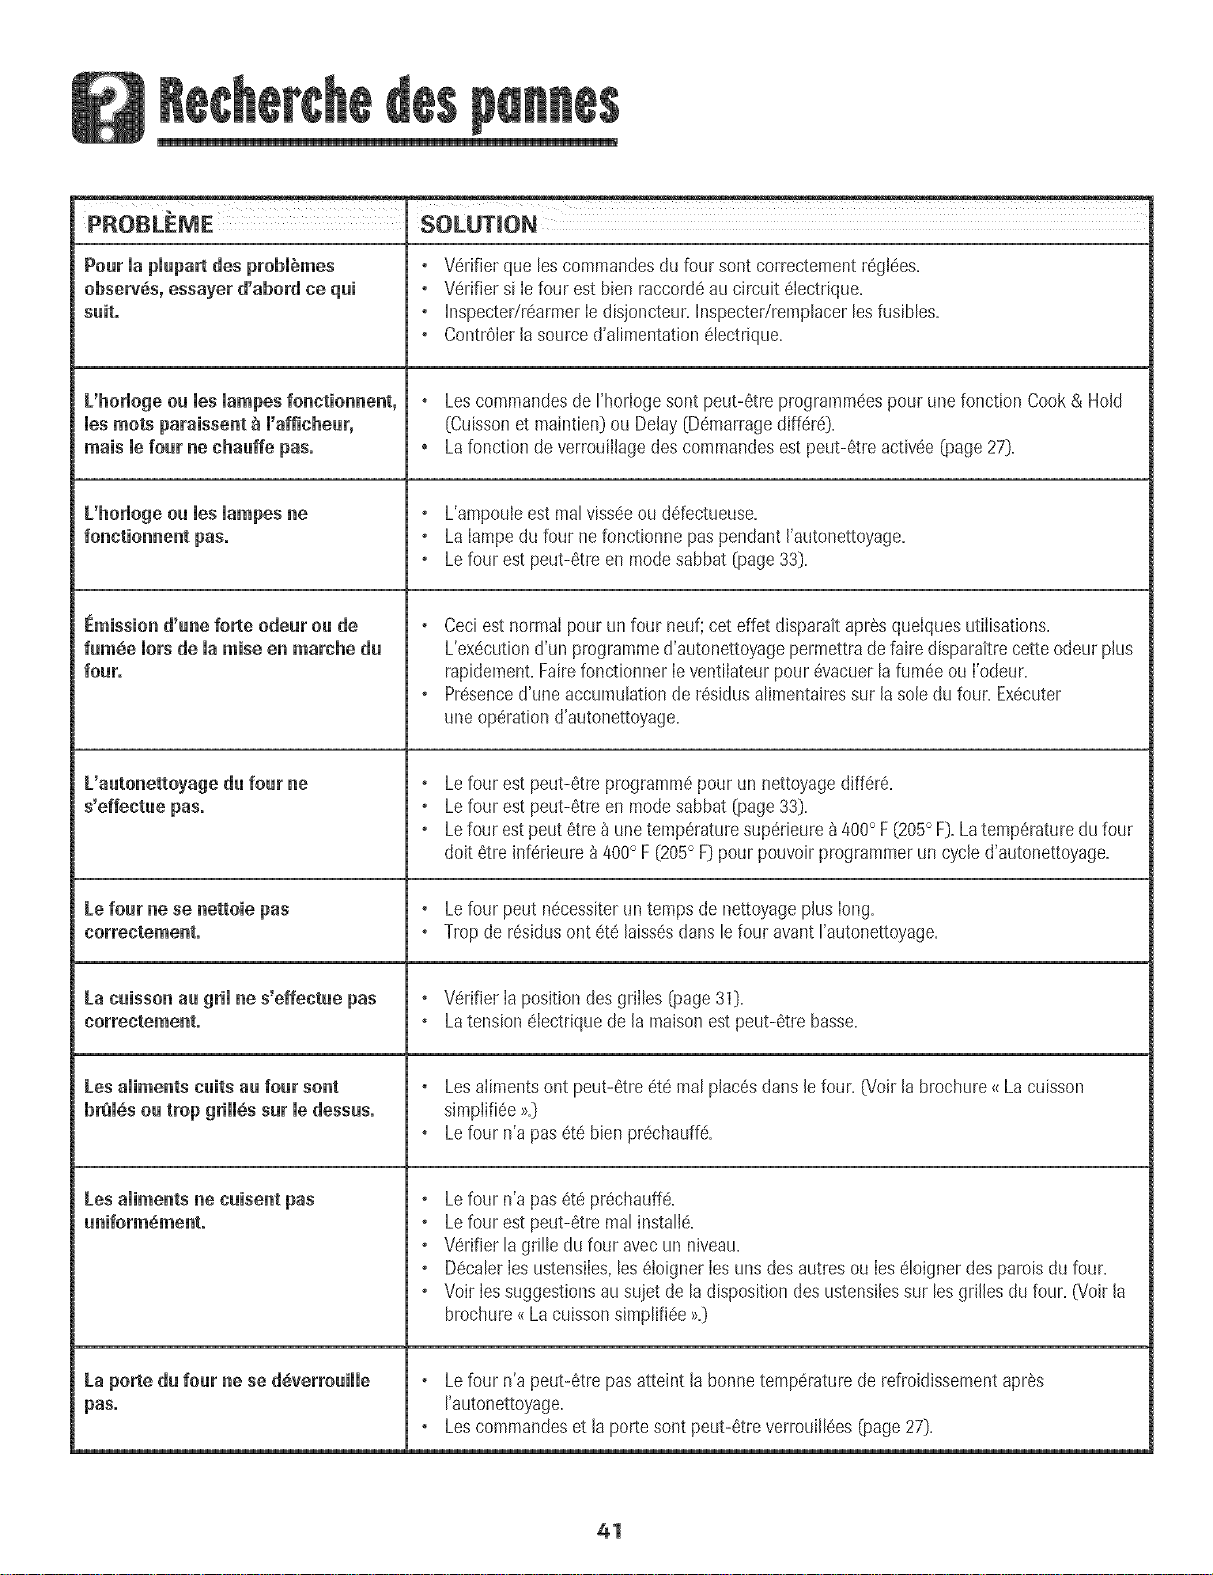
• V6rifierque lescommandesdu four sent correctementr6gl6es.
• V6rifiersi Iefour est bien raccord6au circuit 6Iectrique.
• InspectedrearmerIedisjoncteur.Inspectedremphcer lesfusibles.
• Contr61erlasourced'alimentation61ectrique.
+ Lescommandesde I'horlogesent peut-6tre prograrnpa6espour une fonctionCook& Hold
[Cuissonet maintien}ou Delay[D6marragediff6r6}.
+ Lafonctionde verrouillagedescommandesest peut-6treactiv6e(page27}.
• L'ampouleest realviss6eou ddectueuse.
• La Iampedu four nefonctionnepuspendantI'autonettoyage.
• Lefour est peut-6treen modesabbat (page33}.
+ Ceciestnormalpour un four neuf;cot effetdisparaitapr6squelquesutilisations.
L'ex6cutiond'un programmed'autonettoyagepermettradefairedisparaitrecetteodeurplus
rapidement.FairefonctionnerIeventilateurpour6vacuerlafum6e ou I'odeur.
• Pr6senced'uneaccumuhtion de r6sidusalimentairessur lasoledu four. Ex6cuter
une operationd'autonettoyage.
+ Lefour est peut-6treprogramm6pour un nettoyagediff6r6.
• Lefour est peut-6treen modesabbat (page33}.
• Lefour estpeut6tre_ unetemp6raturesup6rieurea400° F(205° F}.Latemp(_raturedufour
doit 6treinf6rieure_ 400°F(205° F}pour pouvoirprogrammerun cycled'autonettoyage.
• Lefour peut n6cessiterun tempsde nettoyageplus long.
• Tropde r6sidusont6t6 laiss6sdunslefour avantrautonettoyage.
+ Wrifier Iapositiondesgrilles @age31}.
+ Latension61ectriquede la maisonestpeut-6tre basse.
+ Lesalimentsont peut-6tre 6t6realplac6sdunsle four. (Voirla brochure<_Lacuisson
simplifi6e>_.}
+ Lefour n'a pas6t6bJenpr6chauffe.
• Lefour n'a pus6t_pr6chauff6.
+ Lefour est peut-6tremalinstalJ6.
• V6rifierla grille du four avecun niveau.
• D6calerIesustensiles,les(_JoignerIesunsdesautresou Ies61oignerdespatois du four.
• VoirIessuggestionsausujet de la dispositiondesustensJJessur lesgriJlesdu four. (VoirJa
brochure_<La cuissonsimplifi6e>>.}
+ Lefour n'a peut-6trepusatteint labonnetemp6raturede refroidissementapres
I'autonettoyage.
+Les commandoset laportesent peut-6treverreuill6es(page27}.
Pourmapmupurtdes prebiemes
observes, essayer d'abord ce qai
suit.
L'horlegeeu ruesmampesfonntionnent,
ruesroots paraissent_ m'afficheur,
mais le four ne nhauffe pus.
L'horlogeea los mampesne
fenntiennent pus.
i_mission d'une forte odeur ou de
fum6e Joinde Jaraise en marche du
four.
L'autonetteyage du four ne
s'effentue pus°
Le four nese nettoie pus
cerrectemento
Lacaisson uu grii ne s'effectae pus
norrentement.
Losailments cuits au fear sent
bremesoutropgrimm,ssat medessus.
Los aliments ne naisent pus
aniform_ment°
Laportedu four nese d_verrouiJJe
pas.
41
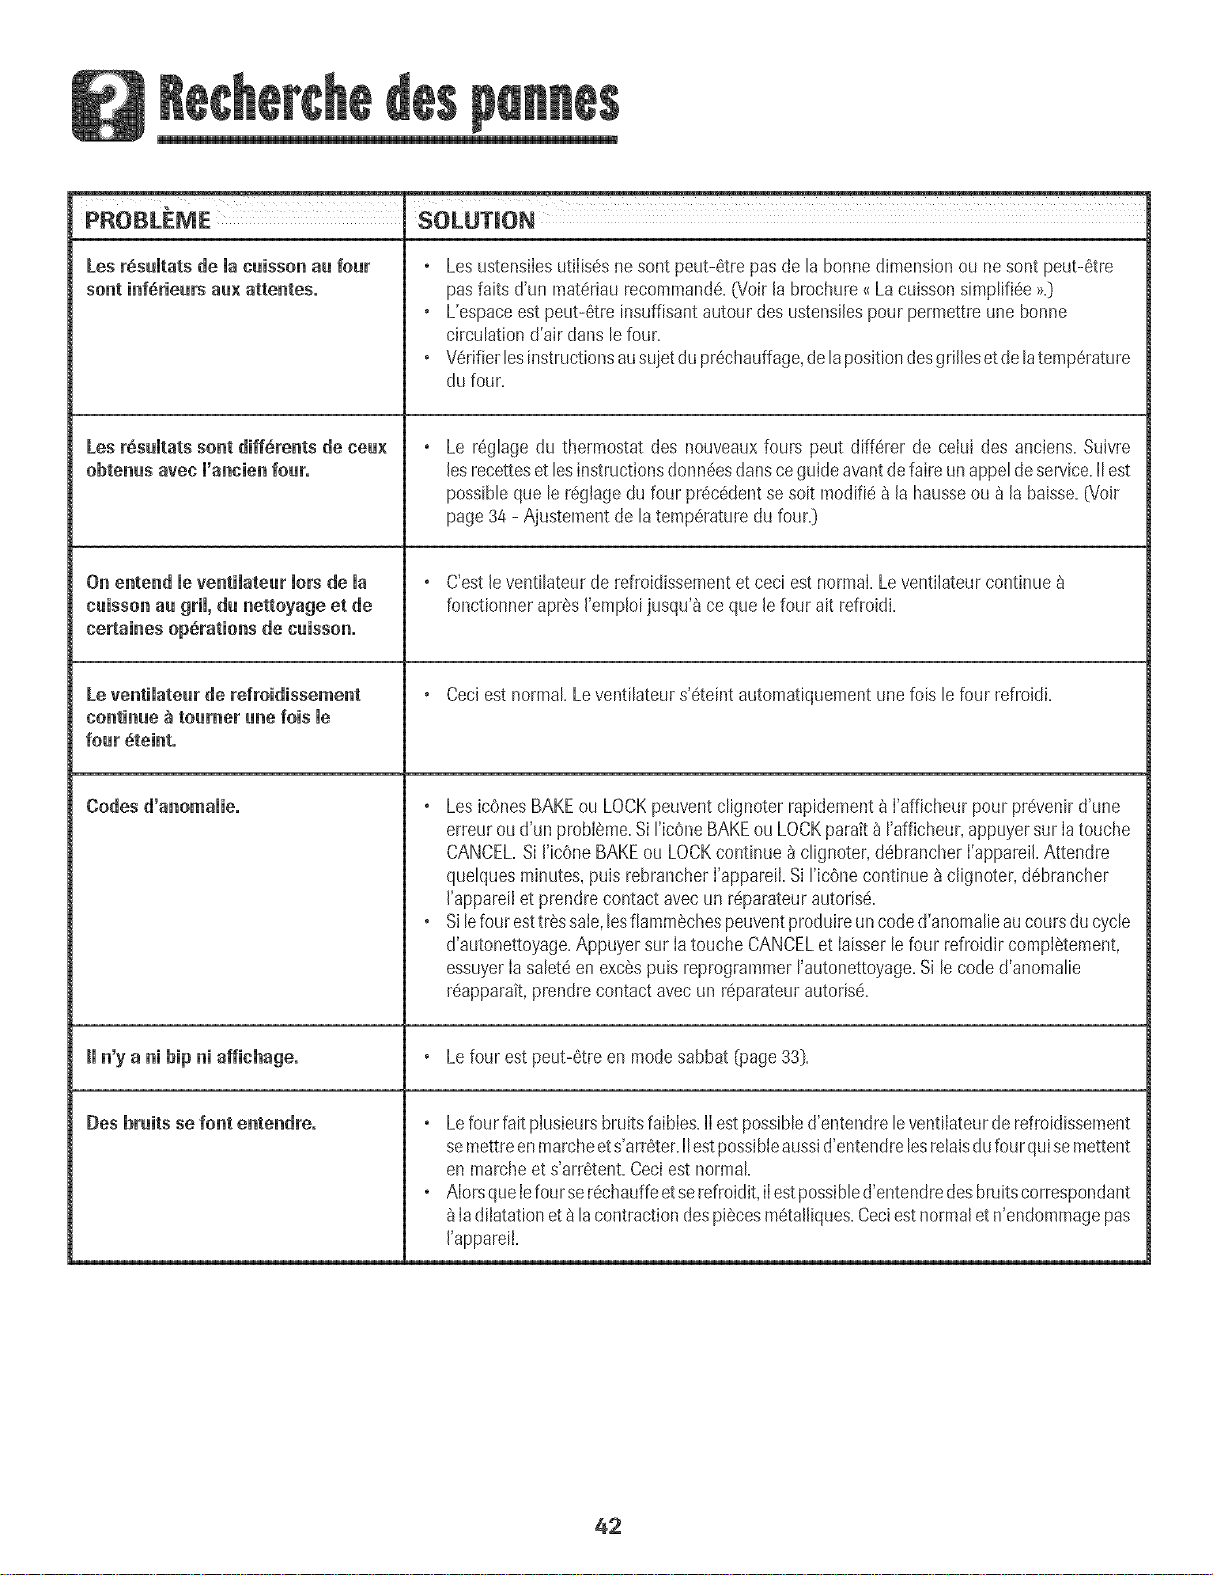
PROBLEME SOLUTION
[es r_sultats de la cuissonau four LesustensiIesutiIis_snesont peut-6trepasde la bonnedimensionou nesont peut-6tre
sont inf6rieurs au×attenteso pasfaits d'un mat6riaurecommand6.(Voirla brochure<{Lacuissonsimpli%e >>.}
L'espaceestpeut-6tre [nsuffisantautourdesustensilespourpermettreune bonne
circulationd'air clanslefour.
o V6rifierlesinstructionsausuietdu pr6chauffage,delapositiondesgrillesetdelatemp6rature
du four.
Lesr6sultats sent diff_rents de ceu× Le r6glagedu thermostatdes nouveauxfours peut diff6rer de celui des anciens.Suivre
obtenus avec l'ancien four° lesrecettesetlesinstructionsdonn6esdartsceguideavantdefaireunappeldeservice.IIest
possibleque le r6glagedu four pr6c6dentsesoit modifiea la hausseou a la baisse.(Voir
page34 - Ajustementde latemp6raturedu four.}
Oil entend le ventilateurlots de la C'estleventilateurde refroidissementet ceci estnormal.Leventilateurcontinue
cuissonau gril, du nettoyage et de fonctionnerapresI'emploijusqu'_ceque lefour ait refroidi.
cemtainesopSrutions de cuissono
Leventilateur de refroidissement Ceciest normal Leventilateurs'6teintautomatiquementunefois le four refrokJL
continue _ toumer une lois me
four _teinto
Codes d'anomulie. Lesic6nesBAKEou LOCKpeuventclignoter rapidement_ rafficheur pour pr_venird'une
erreuroud'un probleme.Si ricOneBAKEou LOCKparatt_ I'afficheur,appuyersurIatouche
CANCEL.Si I'icOneBAKEou LOCKcontinue _ clignoter,d6brancherI'appareiLAttendre
quelquesminutes,puis rebrancherI'appareiLSiI'ic6necontinue_ c@noter,d6brancher
I'appareiIetprendrecontact avecun r6parateurautoris6.
o Silefoul esttressale,lesflammechespeuventproduireuncoded'anomalieaucoursdu cycle
d'autonettoyage.AppuyersurIatouche CANCELet Iaisserle four refroidircomplStement,
essuyerIasalet6enexcSspuisreprogrammerI'autonettoyage.Si lecoded'anomalie
r6apparait,prendrecontactavecun r6parateurautoris_.
Hn'y u ni hipIllaffichugeo Lefour est peut-6treen modesabbat (page33}.
Des bruits se font entendreo Lefourfaitplusieursbruitsfaibles.IIestpossibled'entendreleventilateurde refroidissement
semettreenmarcheets'arr6ter.IIestpossibleaussid'entendrelesrelaisdufourquisemettent
en marcheet s'arr6tent.Ceciestnormal.
o Alorsqueiefourser6chauffeetserefroidit,iIestpossibled'entendredesbruitscorrespondant
Iadilatationet_ lacontractiondespiscesm6talliques.Ceciestnormaletn'endommagepas
['appareil.
42
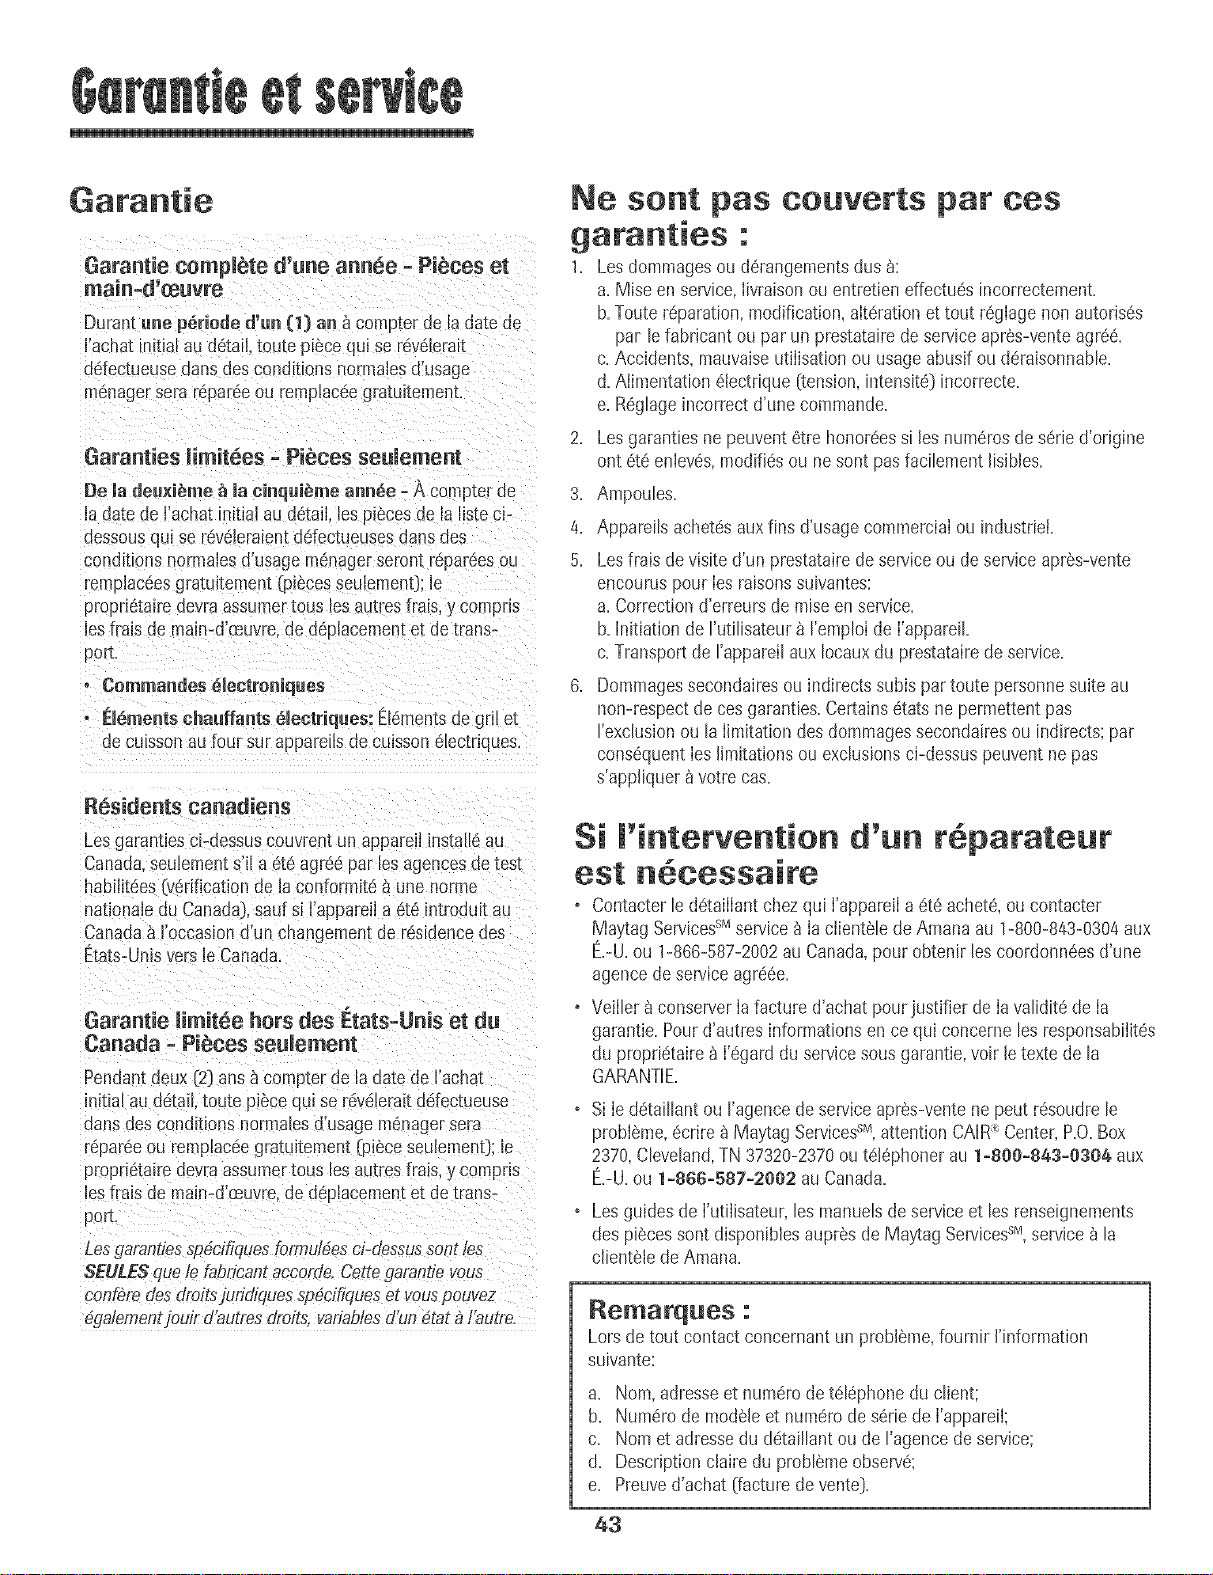
Gatantie
Garantie cemplbte d'une annee = Pi_.ces el
ma[n=d_(_uvre
Duran_une periede d'un (1} an ;_compterde la dacede
I'achatm_tiaLaudetail toute piecequi ser@elerat
ddectueusedansdesconditionsnorrnalesd'usage
menagerserarear@ ou rernpLaceegratuitement.
Garanties iimit6es - Pieces seulement
De la deu×i_me _ la einqui_n_e annee =A cornp_eroe
la datede I'achatinitialau detail,bs oi_cesde la listecP
uessousqui ser@elerabntdetectueusesdansdes
conditionsnorrnalesd'usagemenagerserontr@areesou
remplac@sgratuitement(piecesseulem9nt);le
proprietairedevraassumertousles autoes_rais,y cornpns
lesfrais de main-d'oeuvre,de d@lacementetde trans-
port.
o Commandes_meetroniques
• £mSmentsehauffants _meetriques:Elementsde gril et
de cuissonaufour surappareilsde cuissonelectriques.
Residents canadiens
Lesgarantlesc_-dessuscouvoemun appareilinstalleau
Canada seulements'il a eteagreepar bs agencesde test
habilit@s[verificationde ia conformite_ une nonne
natlonaledu Canada),saulsi I'appareJla eteintroduit au
Canada_ i'occasiond'un changementde residenceoes
Etats-UnisversJeCanada.
Garantie limit6e hers des Etats=Unis et du
Canada - PiSces seulement
Pendantdeux{2} arts_ compterde la datede I'achat
initialau detail,toute pl_cequi sereveleraitddectueuse
cansaesconditionsnormabs d'usagemenagersera
r@areeou rempiac@gratuitement(pieceseulement};le
proprietaioedevraassumer[ousles autrestras. y compris
Jesfrais de main-d'oeuvre,de @placementet detrans_
purr.
Lesgarantiessp@ifiquesfnrmd4esci_dessu_sentie_
SEULESqueb fabrieantaccorde.Cettegarantievous
conbre desdroitsjufidOuessp4citiquese[ vouspouvez
egalementjouird'autresdrdts, variablesd'un4tat al'autre.
Ne sent pas couverts par ces
garanties ."
1= Lesdommagesou derangementsdus_:
a=Mise en service,Iivraisonou entretieneffectu@incorrectement=
b=Toutereparation,modification,aIteratinnet tout reglagenon autoris@
par lefabricantou par un prestatairedeserviceapr_s-venteagree=
c=Accidents,rnauvaiseutiIisationou usageabusifou deraisonnable=
d.Aiimentationetectrique[tension,intensit@incorrecte=
e=Reglageincorrectd'une commande=
2= Lesgarantiesne peuventetre honor@ssi bs num@osdeseried'origine
ont eteenbv@,modifi@ou nesent pasfacibment lisibles=
a Ampoules.
4. Appareilsachet@auxfins d'usagecommercialou industdeL
5. Lesfrais de visited'un prestatairede serviceou deserviceapres-vente
encouruspour Iesraisonssuivantes:
a.Correctiond'erreursde raiseenservice.
b.initiation de I'utilisateur_ I'emploideI'appareil.
c. Transportde rappareilauxIocauxdu prestatairede service.
a Dommagessecondairesou indirectssubispartoute personnesuiteau
non-respectde cesgaranties.Certainsetatsne permettentpas
I'exclusionoula limitationdesdommagessecondairesou indirects;par
consequentIeslimitationsou exclusionsci-dessuspeuventnepas
s'appliquera votrecas.
Si l'intetvention d'un r parate r
est n cessaire
, Contacterle @taiIIantchezqui I'appareiIaeteachete,oucontacter
MaytagServicessMservice_ IaclienteledeAmanaau 1-800-843-0304aux
E=-U=ou 1-866-587-2002au Canada,pour obtenirlescoordnnn@sd'une
agencedeserviceagreee.
• VeiIler_ conserverIafacture d'achatpourjustifier de Iavaliditede Ia
garantie.Pourd'autresinformationsen cequi concernelesresponsabilit@
du proprietaire_ I'egarddu servicesousgarantie,voirle textede la
GARANTiE.
Si Ie detaillant ou I'agence de service apres-vente ne peut resoudre le
probI@r_e,ecrire _Maytag ServicessM,attention CAIR Center, P.O.Box
2370, Cleveland, TN 37320-2370 ou telephoner au 1°see°eas°esoa aux
E,-U, ou 1-866-587-2002 au Canada.
• Les guides de I'utiiisateur, les manuels de service et les renseignements
des pi_ces sent disponibles aupres de Maytag Servicess_,service _ la
clientele de Amana.
Remarq_es :
Lorsde tout contact concernantun prnbl@_e,fournir I'information
suivante:
a. Nora,adresseet numemde tel@honedu client;
b. Numerode modeJeet numerode seriede I'appareiI;
c. Noraetadressedu detaillantou de I'agencede service;
d. DescriptioncJairedu prnblemeobserve;
e. Preuved'achat (factuoede vent@.
43

y Limpieza .................................... 60-62
Homo AutoHimpiante
Procedimientos de Limpieza
Mantenimiento ................................................. 63
Luz dd Homo
Ventana dell Homo
Localizaci6n y Somuci6n
de Averias ..................................................... 64-65
Garant_a y Servicio .......................................... 67
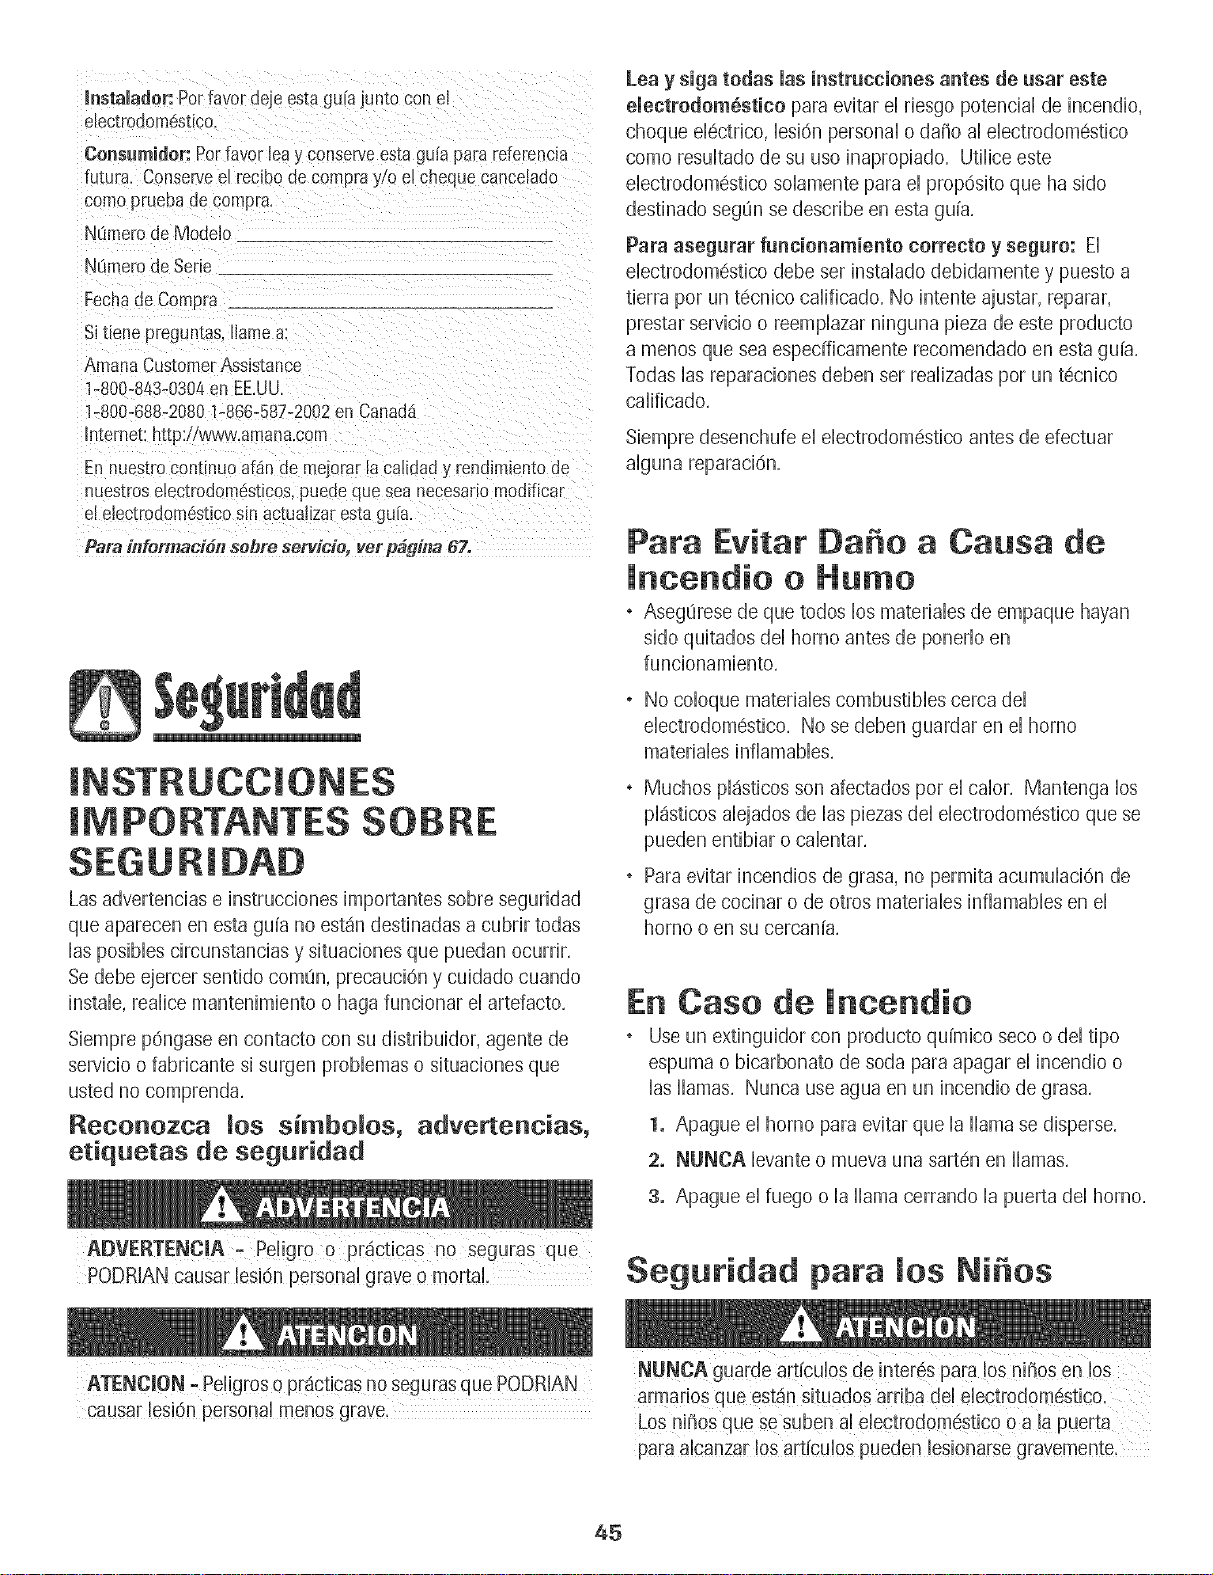
Instalador: Perraver deje esta guia ]un[o con el
e_ec[rodom6stico.
Consumider:Perfavor bay conservees[agulapara referenda
futura. Conserveel recibodecornpray/o eLchequecancelado
comepruebade compra.
N0merode Modelo
NOmerodeSerie
Fecna de Compra
Si tiene pregun[as, llame a:
Amana Customer Assistance
1-800-843@304 en EE.UU
]-800-688-2080 1-866-587-2002 en Canada
Interne[: http://v6Jvw.amana.com
En nuestro continue afdn de mejorar la calidad y rendlmlento de
nuestros electmdom@ticos, puede que sea necesario modifica[
el ebctrodom@tico sin actualizar es[a gu[a
Para infermad6n seflre servicie, vet pbgina 67.
INSTRUCCIONES
IMPORTANTES SOBRE
SEGURIDAD
Las advertencias e instrucciones importantes sobre seguridad
que aparecen en esta guia no est_indestinadas a cubrir todas
Bs posibbs circunstancias y situaciones que puedan ocurrir,
Se debe ejercer sentido comu3n,precauci6n y cuidado cuando
instab, realice mantenimiento o haga funcionar el artefacto,
Siempre p6ngase en contacto con su distribuidor, agente de
servicio o fabricante si surgen probbmas o situaciones que
usted no comprenda,
Reconozca {os simbo_os, advertencias,
etiquetas de seguridad
Lea y siga todas las instrucciones antes de usar este
electrodom_stico para evitar el riesgo potencial de incendio,
cheque el@trice, bsi6n personal o da_io al ebctrodom6stico
come resultado de su use inapropiado, Utflice este
ebctrodomestico soBmente para el prop6sito que ha side
destinado segLinse describe en esta guia,
Para asegurar funcionamiento correcto y seguro: El
ebctrodom6stico debe ser instalado debidamente y puesto a
tierra per un t@nico calificado, No intente ajustar, reparar,
prestar servicio o reemplazar ninguna pieza de este producto
a menos que sea espedficamente recomendado en esta guia,
Todas Bs reparaciones deben ser redizadas per un t@nico
calificado,
Siempre desenchufe el ebctrodom6stico antes de efectuar
alguna reparaci6n,
Para Evitar Da e a Causa de
lr|cer|die e Hume
. AseguJresede que todos los materiabs de empaque hayan
side quitados del homo antes de ponerlo en
funcionamiento,
No coloque materiales combustibles cerca del
electrodomestico, No se deben guardar en el homo
materiales inflamables,
* Muchos pl_sticos son afectados per el calor, Mantenga los
plasticos alejados de las piezas del electrodom6stico que se
pueden entibiar o calentar,
Para evitar incendios de grasa, no permita acumulaci6n de
grasa de cocinar o de otros materiales inflamables en el
homo o en su cercania,
En Case de lncendie
, Use un extinguidor con producto quimico seco o dei tipo
espuma o bicarbonate de soda para apagar el incendio o
ias llamas, Nunca use agua en un incendio de grasa,
1, Apague el homo para evitar que la llama se disperse,
2. NUNCA levante o mueva una sartdn en llamas,
3. Apague ei fuego o ia llama cerrando ia puerta dei homo,
£ODRtANcausa[[esicinpe[sonaigmveomo[taL Se_u['i_a_ pa['a los Ni_es
ATENCION -.Peligros o p[_ct!cas no seguras que PODRIAN
causar lesi(Snpe[sona! menos grave,
armarios que est_n situados arriba de! eiectr0d0m6stico.
para aicanza[ los art{cuios pueden lesionarse gravemente,
45
• NUNCAdejealosni_iossolososinsupervbi6ncuandoeI
homoesteenusoocuandoestecaibnte.Nosedebenunca
permitirquelosni_iossesbntenoseparenenninguna
pbzadeIebctrodom_sdcopuessepuedenbsionaro
quemar.
• Seiesdebeense_aralosni_iosqueeieiectrodom6sticoy
losutensiliosqueest_inenelpuedenestarcalientes.Deje
enfriarlosutensiiioscaiientesenuniugarseguro,fueradei
aicancedelosni_ios.Seiesdebeensdiaralosni_iosque
uneiectrodom6sticonoesunjugueteyquenodebenjugar
conloscontrolesuotraspiezasdelartefacto.
lnstrucciones Generates
aicanzar Uosarmanos supedores. E!uso !ncerrecto de Bs
causen lesiones graves,
• Para evitar posibles riesgos para el usuario y da_ioal
electrodomestico, no use este producto como una estufa
para calentar o entibiar una habitaci6n. Adem_s no use el
homo como un lugar para guardar alimentos o utensilios de
cocina.
. No obstruya la circulaci6n del aire bloqueando el respiradero
dei homo.
. NO TOQUE LOS ELEMENTOSCALEFACTORESNI LAS
SUPERFiCiESINTERIORESDELHORNO. Los eiementos
calefactores pueden estar calientes aOncuando su color sea
obscuro. Lassuperficies interiores de cuaiquier homo se
calientan Io suficiente como para causar quemaduras.
Durante y despu6s dei uso, no toque ni permita que ias ropas
u otros materiales inflamables entren en contacto con los
eiementos caiefactores o ias superficies interiores dei homo
hasta que no se hayan enfriado. Otras superficies dei
electrodomestico pueden estar Io suficientemente calientes
para causar quemaduras - entre estas superficies est_n las
aberturas dei respiradero dei homo y ias superficies cerca de
estas aberturas, ias puertas dei homo y ias ventanas de ias
puertas dei homo.
• No toque un foco caiiente dei homo con un patio humedo
pues ei foco se puede quebrar. Si ei foco se quiebra,
desenchufe el electrodom6stico antes de sacar el foco para
evitar sufrir un choque ei@trico.
46
Se debe dr el ruido de un ventilador cuando el homo este
en funcionamiento. Si usted no oye el ruido del ventilador,
llame a un t6cnico autorizado.
NUNCA use papei de aiuminio para cubrir ias parriiias dei
homo ni el panel inferior del homo. El uso incorrecto puede
resultar en un riesgo de choque el6ctrico, incendio o da_io
al electrodomestico. Use papel de aluminio solamente
como se indica en esta guia.
Seguridad amCocinar
• Nunca caliente un contenedor de alimento cerrado en el
homo, La acumuiaci6n de presi6n puede reventar ei
contenedor causando una lesi6n personal grave o daSo al
eiectrodom6stico.
Use tomaollas secos y gruesos. Los tomaollas h0medos
pueden causar quemaduras por vapor. No se deben usar
toallas de secar los platos ni otros sustitutos en vez de los
tomaollas porque ellos pueden pasar sobre los elementos
calientes y prenderse fuego o pueden quedar atrapados en
las piezas del electrodom6stico.
Usevestimentas apropiadas. Las ropas sueltas o ropas con
mangas largas sueltas no se deben usar cuando se est,1
cocinando. La ropa se puede prender fuego y causar
quemaduras si entra en contacto con los elementos
calefactores.
Siempre coioque ias parriiias dei homo en ias posiciones
deseadas cuando el homo est6 frio. Deslice la parrilla del
homo hacia afuera para agregar o retirar alimento usando
tomaollas secos y gruesos. Siempre evite colocar o retirar
alimento del homo sin sacar la parrilla hacia afuera. Si una
parrilla debe ser movida cuando est6 caliente, use un
tomaollas seco. No deje que el tomaolla entre en contacto
con el elemento caliente del homo.
Tenga cuidado cuando abra la puerta del homo. Primero
deje que saiga eiaire o vapor caiiente antes de sacar o
volver a colocar el alimento en el homo.
ADVERTENCmASOBRE ALIMENTOS PREPARADOS:
Siga las instrucciones del fabricante del alimento. Si un
contenedor de alimento congelado de pl_stico y/o su tapa
se deforma, comba o de otra manera se da_iadurante la
cocci6n, inmediatamente descarte el alimento y su
contenedor. El alimento puede estar contaminado.

, NopermitaqueeIpapeIdeaiuminioolasondadelacame
toqueeIebmentocabfactor,
, Sbmpre@aguetodosloscontrobscuandohayaterminado
decocinar,
Seguridad sobre Uso de
Utensi ios
. Siga las instrucdones deI fabrbante cuando use bobas para
cocinar en eI homo.
• Se ha comprobado eI rendimbnto y fundonamiento seguro
de este ebctrodomdsdco usando utensiiios de cocina
tradidonabs. No use ning_n dispositivo o accesorio que no
haya sido espedficamente recomendado en esta guia. No
use sistemas de convecci6n agregabbs a homos. EIuso de
dispositivos o accesorios que no sean expresamente
recomendados en esta guia puede crear peiigros graves de
seguridad, afectar el rendimiento y reducir la vida Litilde los
componentes de este ebctrodom6stico.
• SoBmente ciertos tipos de utensilios de vidrio,
vidrio/cerdmico, cerdmica, de gres u otros utensilios de vidrio
son convenientes para su uso en el homo sin quebrarse
debido al repentino cambio de temperatura. Siga Bs
instrucciones del fabricante del utensilio cuando use vidrio.
Seguridad en maLimpieza
• Apague todos los controbs y espere que se enfrien las
piezas del ebctrodomdstico antes de tocarBs o limpiarlas,
Limpie con cuidado, Tenga cuidado para evitar quemaduras
de vapor si usa una esponja o un patio mojado para limpiar
los derrames en una superficie caliente, Algunos
limpiadores pueden producir vapores nocivos cuando se
aplican a una superficie caliente,
, Limpie solamente las piezas indicadas en esta guia,
Homo Autolimpiante
No deje las parrillas, asadera, alimentos o utensilios
autol!mpiez&
No iimpie ia junta de ia puerta, La junta de ia puerta es
esencial para obtener un buen sello, Se debe tener cuidado
de no frotar, ddiar ni mover la junta,
No use limpiadores de homo ni forros de homo de ningun
tipo alrededor ni en ninguna parte del homo autolimpiante,
Antes del cicio de autolimpieza del homo, retire la asadera
las parrillas del homo y otros utensilios y limpie cualquier
derrame para evitar humo excesivo o llamaradas,
Arise y Advertencia
lmportante Sobre Seguridad
La Propuesta 65 de ia Ley de 1986 dei Estado de California
Sobre Seguridad y Contaminaci6n dei Agua Potable (California
Safe Drinking Water and Toxic Enforcement Act of 1986} exige
que ei Gobernador de California pubiique una iista de ias
sustancias que segun el estado de California causan @ncer o
da_ioai sistema reproductivo y exige que iasempresas
adviertan a sus clientes sobre la exposici6n potencial a tabs
sustancias,
Se advierte a los usuarios de este electrodomestico que
cuando el homo est_ funcionando en el cicio de autolimpieza,
puede haber exposici6n de bajo nivei a aigunas de ias
sustancias indicadas en la lista, incluyendo mon6xido de
carbono, La exposici6n a estas sustancias puede set reducida
a un minimo ventilando el homo al exterior en forma
adecuada, abriendo las ventanas y/o la puerta en la habitaci6n
en donde est_ ubicado el electrodom6stico durante el cicio de
autolimpieza,
AVISO IMPORTANTE RESPECTOA LOS PAJAROS
DOMESTmCOS: Nunca mantenga los p_jaros en la cocina o
en ias habitaciones donde puedan iiegar los humos de ia
cocina, Los p_ijarostienen un sistema respiratorio muy
sensitivo, Los humos producidos durante el cicio de
autolimpieza del homo pueden ser perjudiciales o mortales
para los p_ijaros, Los humos que despide ei aceite de cocina
recalentado, la grasa, margarina y los utensilios
antiadherentes recalentados pueden tambi6n ser periudiciales,
Nota: Parafuncionamiento de los Hornos de Microondas
(modeios seiectos}, consuite ia guia de uso y cuidado
inciuida con ei homo de microondas.
Conserve estas instrucciones #ara referencia futura
47
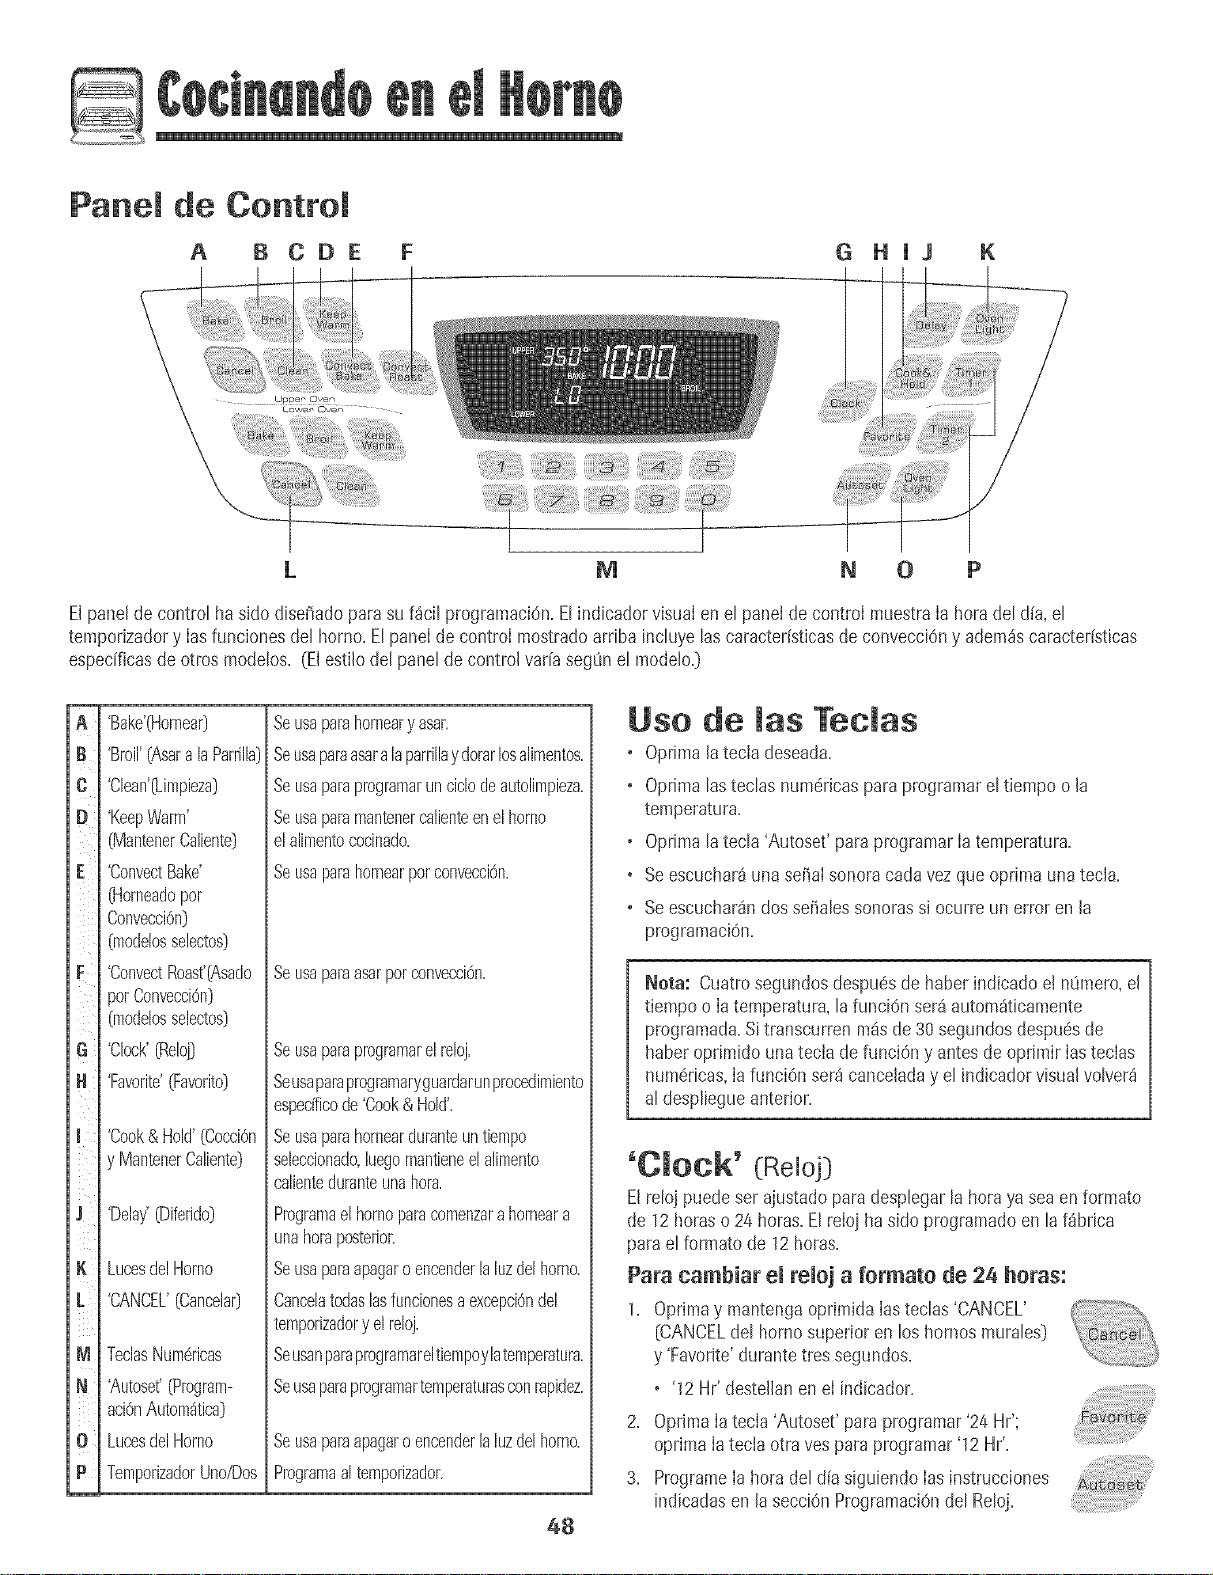
Panel de Control
A B CDE G Hi3 K
L M N 0 P
El parle[decontrotha sidodiseffadoparasuf_ci[programaci6n.Elindicadorvisualen el panelde control muestra[a horade[d{a,el
temporizadory [asfuncionesdethorno.Etpanel decontrol mostradoarriba inctuyetascaracteristicasde convecciOny adem_scaracteristicas
especificasde otros modelos.(Elesti[odel paneldecontro[var[asegOnel modeJo.)
B
C
D
iiilil
F
i i
G¸
N
J
K
M
N
0
m
'Bake'(HorneaO
'Broil'(Asara laParrilia)
'Clean'(Limpieza)
'KeepWarm'
(MantenerCaliente)
'ConvectBake'
(Horneadopot
Convecci6n)
(modelosselectos)
'ConvectRoast'(Asado
)orConvecci6n)
(modelosselecto9
'Clock'(Reloj)
'Favorite'O:avorito)
'Cook&Hold'(Cocci6n
yrvlantenerCaliente)
'Delay'(Diferido)
LucesdelHomo
'CANCEL'(Cancelar]
TeclasNum6ricas
'Autoset'(Program-
aci6nAutom4tica]
LucesdelHomo
TemporizadorUno/Dos
Beusaparehornearyasar.
Seusapareasara[aparrillaydorarlosalimentos.
Seusaparaprogramarunciclodeautolimpieza.
Seusaparamantenercalienteenelhomo
elalimentococinado.
Beusaparahornearpotconvecci6n.
SeusaparaasarporconvecciOn,
Beusapareprogramarelreloj.
Seusapareprogmmaryguatdarunprocedimiento
espedficode'Cook&Hold'.
Seusaparahornearduranteuntiempo
seleccionado,hegomantieneelalimento
calienteduranteunahora.
Programaelhomoparacomenzarahomeara
unahoraposteriol:
Seusaparaapagaroencenderlahzdelhomo.
Cancelatodaslasfuncionesaexcepci6ndel
temporizadoryelreloj.
Seusanparaprogramareltiempoylatemperatura.
Seusaparaprogramartemperaturasconrapidez.
Beusaparaapagaroencenderlahzdelhomo.
Programaa[temporizador.
48
Use de las Teclas
• Oprima[atecia deseada+
+ OprimalasteclasnumdrJcaspara programareltiempo o [a
temperatura+
+ Oprimalatecla 'Autoset'paraprogramar[atemperatura+
+ Seescuchar4una seha[sonoracadavezqueoprimaunatec[a+
• Seescuchar4ndossehalessonorassiocurreun error en [a
pmgramaciOn+
Nora: Cuatrosegundosdespuesde haberindicadoe!n_mero,e[
tiempoo [atemperatura,la funci6n set4autom4ticamente
programada+Sitranscurrenm4sde30 segundosdespu6sde
haberoprimidounatecia de funciOny antesde oprimir[astecias
num6ricas,[afunci6n ser_canceladay el indicadorvisua[volver_
al despliegueanterior.
'Cmock' (Re[oj]
El re[ojpuedeserajustadoparadesplegarla horayaseaen formato
de 12horaso 24 horas+Elreioj hasidoprogramadoen la f_brica
parael formatode 12horas+
Para cambiar el reioj a formate de 24 horas:
1+ Oprimay mantengaoprimida[asteclas'CANCEL'
[CANCELdel hornosuperioren loshornosmurales]
y 'Favorite'durantetres segundos+
+ '12Hr' desteJlanene[ indicador+
2. Optima[atecla'Autoset' parapmgramar'24Hr';
oprima[atecia otrayesparaprogramar'12 Hr'.
3. Programe[ahoradel d{asiguiendo[asinstrucciones
indicadasen [asecci6nProgramaci6ndel Reloj.
Programaci6n demRemoj:
1. Optima Hatech 'CHock'+
+ La horadelld[adesteHanen eHindicador+
2. Optima lastec[asnum6ricasapropiadasparaprogramar[ahora
del d[a.
+ LosdospuntoscontinOandesteHando+
3+ Optima [atec[a'Clock'nuevamenteo esperecuatrosegundos+
, Losdospuntospetmanecer_niHumHnados.
Cuandoseconectaenerg[aet6ctricaathornoo despu6sde una
interrupciOnde Iaenerg[ael6ctrica,laOItimahora del reioj previaa
la interrupciOndestellar_en eIindicador.
Paradesp[egarIahoradel d[acuandoeI indicadorest6mostrando
otrafunciOnde tiempo,oprima Iatecla 'Clock'.
Lahora de[reioj nopuedesercambiadacuandoethorno hasido
programadopara 'Delaycook'o 'clean'o 'Cook& Hold'.
Para cancemar emdespmiegue demremoj:
Si no deseaqueel indicadorvisualmuestre[ahoradel alia:
Oprimaymantengaoprimida[astecias'CANCEL'y
'Clock'durantetres segundos+La horadel d[a
desaparecer_del Hndicador+
Cuandosecancelaetdesplieguede[reloj,oprima[a .......................................
tec[a'Clock'para desp[egarbtevemente[ahora delalia.
Cuandosecancelae[despiieguedel reloj,despu6sde 15minutos,el
controlde[ barriopasar_a maria'Standby' paraahorrarenerg[a.El
indicadorvisualquedar_en b[ancoy [a[uzde[homo nofuncionar_.
Para"activar"el controly cancelarel modo'Standby',oprima
cualquiertec[a.Seescuchar_ndossd_a[essonoras.
Para restaurar emdespmiegue demremoj:
Optimaymantengaoprimida[astecias'CANCEL'y 'Clock'durante
tres segundos+La horadel dia reaparecer_de[ ind+cador+
'Timer' (Temporizador}
Eltempodzadorpuedesel programadode un minuto (00:01}hasta
99 horasy 59segundos(99:59}.
Eltemporizadorpuedeserusadoindependientementede cuaiquier
otraactividaddel homo.Adem_spuedeset programadocuandootra
funciOnde[ barrioest6en actividad.
Eltemporizadorno controlael homo.So[amentecontrolaunase[_a[
sonora.
Para programar emtemporizador:
1+Oprimala tecla'Timer'+
• Enel Hndicadorvisualdestetlar_00:00yel icono'TIMER'+
2+Optimalasteciasnum6ricasapropiadashastaque eltiempo
correctoaparezcaen el indicadorvisual
• Losdospuntosy el [cono'THMER'continuar_ndeste[lando.
3. OprHmanuevamente[atecJa'THiner'o esperecuatro segundos.
+ Losdospuntosdejande destellary el tiempocomienza[a
cuenta regresiva.
+ Elt_ltimominutode [acuentaregresivade[temporHzadorse
desplegar4en segundos.
4. A[final de[tiempoprogramado,seescuchar4unaseffa[sonora
largay el [cono'End'[Fin}sedesplegar4en el [ndicadorvisual.
5. Optima[atecJa'Timer'paraquitar el indicador.
Para cancemar emtemporizador:
1+ Optimay mantengaoprimidalatecla 'Timer'
durantetressegundos.
U
2. Optima[atecJa'Timer'y latecla '0' usandolasteclasnum6rHcas.
Bloqueo de los Conttoles y de
maPuerta del Homo
Elteclado yla puertadel homopuedenset bloqueadospara
seguridad,limpiezao evitarel usano autorHzado.Lasteclasno
funcionan cuandoest4nbJoqueadas.
Si seest4usandouna funci6ndel homo,el contro[y la puertano
puedenset bloqueados.
La horade[d[acontinuar_iniluminadosen e[indicadorcuandoel
control y [apuertaest4nbJoqueados.
Para bmoquear:
1+Oprimay mantengaoprimidas[asteclas'CANCEL'y
'Cook& HoW durantetres segundos+
<+++]+_.+.]_._,,J
+ Enel indicadorvHsualaparece'OFF'
+ El[cono'LOCK'destellacuando[apuertaseest_
bloqueando+
Para desbmoquear:
Opr+may mantengaoprimidaslastecias'CANCEL'y 'Cook& Hold'
durantetres segundos+El[cono'OFF'desaparecedel Hndicador
vHsuaL
Nora: Lasteclasy lapuertadel horno no puedebloquearsesi la
temperaturadel homoes400° F(205° C_)o superior+
C6digos de Ettotes
'BAKE'y 'LOCK'puedendesteIlarr_pidamenteparaadvertirIeque
hayun erroro un problema+Si 'BAKE'y 'LOCK'continOan
desteilando,desconectela corrienteel6ctricahaciael artefacto+
Espereunospocosminutosyvue[vaaconectar[acordenteei6ctrica+
Si [ass[mboioscontinOandesteiiando,desconectelacorriente
eI6ctricahaciae[ artefactoy [lamea unt6cnicode servic[o
autorizado+
49
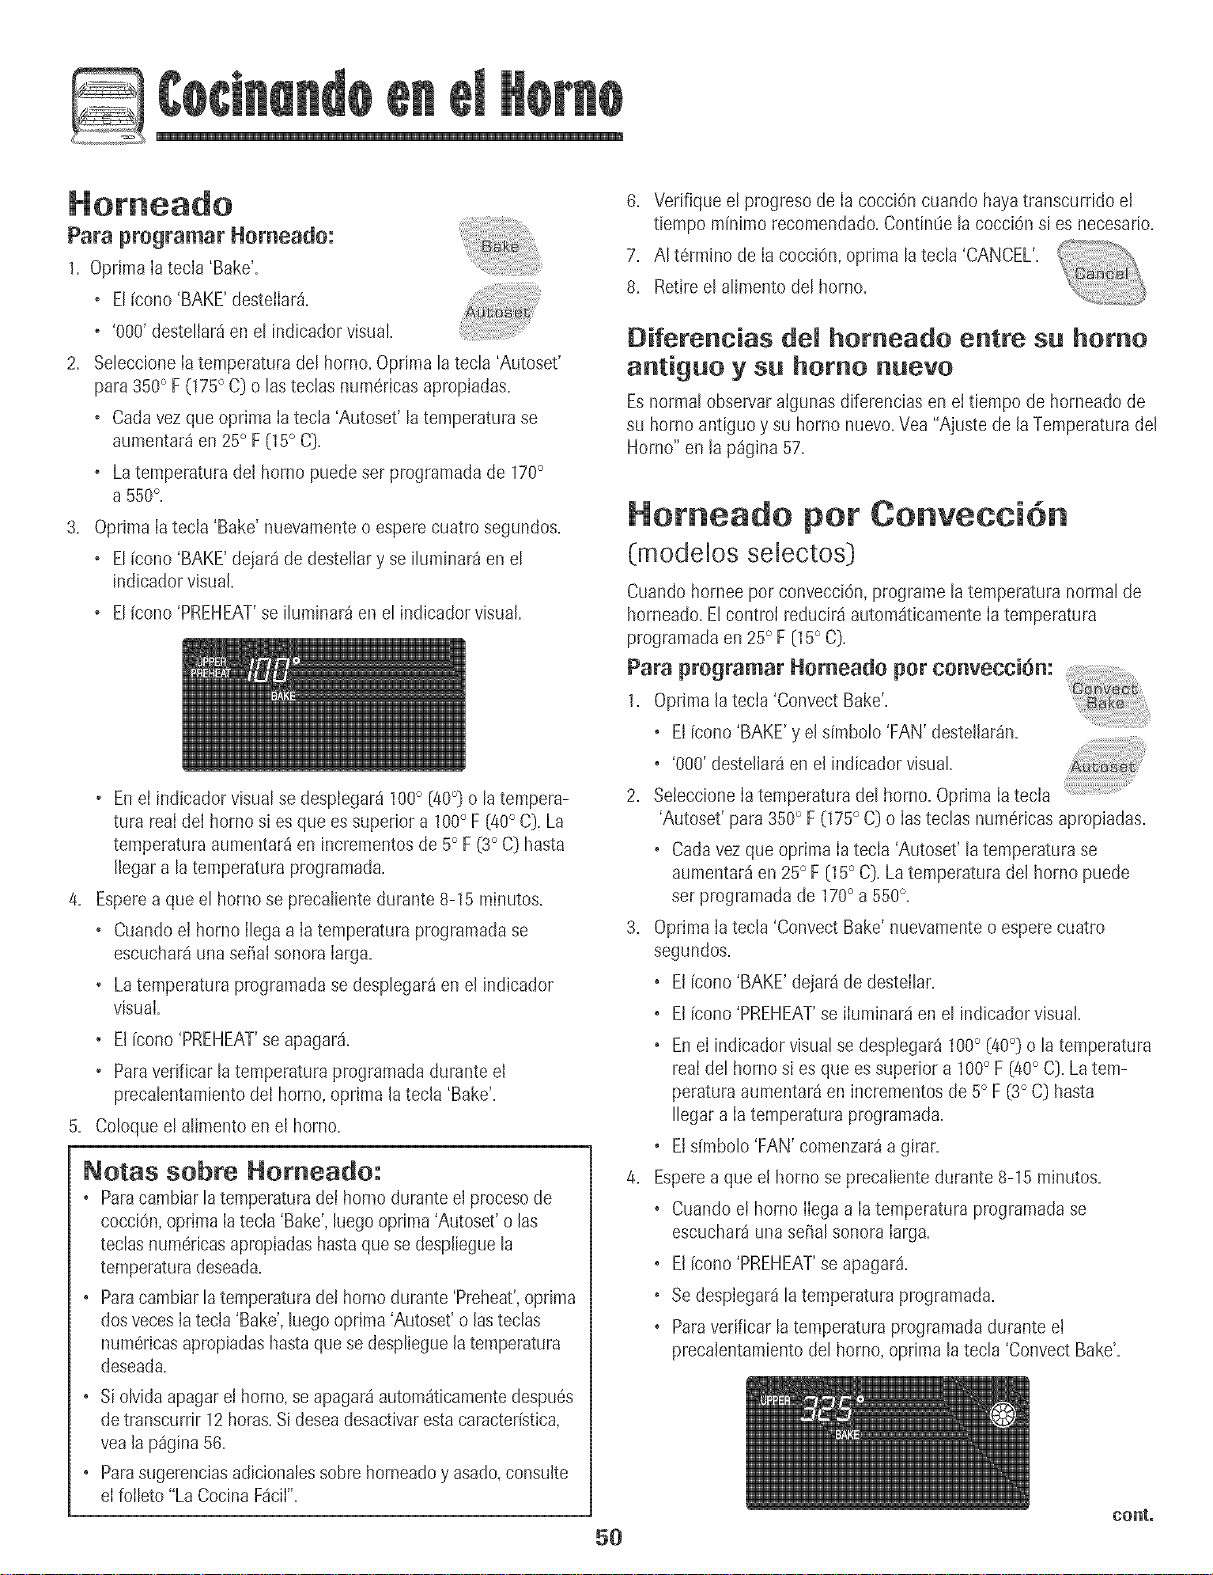
Para programar Homeado:
1. OprJmaIatecJa'Bake'.
o Et[cono'BAKE'desteilar_.
o '000'destetiar_en et indicadorvisuat.
2. SeteccioneIatemperaturadethomo.Optimatatecta'Autoset'
para350° F(175°C)o tastechs numericasapropiadas.
o CadavezqueoprimaIatec+a'Autoset' tatemperaturase
aumentar_en 25° F(15° C).
o Latemperaturadel homo puedeset programadade 170°
a 550°,
3. OprimaIatecla 'Bake'nuevamenteo esperecuatrosegundos.
o Et[cono'BAKE'dejar_de destellaryseiluminar_enel
indicadorvisual.
o El[cono'PREHEAT'seiluminar_enel indicadorvisual.
• Enei indicadorvisualsedesp+egar8100° (40°) o latempera-
tufa real deIhomosiesque essuperiora 100°F [40° C).La
temperaturaaumentar_en incrementosde 5° F(3° C)hasta
Ilegara la temperaturaprogramada.
4. Espereaque el homo seprecalientedurante8-15minutos.
+ Cuandoei hornoIlegaa Iatemperaturaprogramadase
escuchar_unase_alsonoraIarga.
• Latemperaturaprogramadasedesplegar_en el indicador
visual.
+ El[cono'PREHEAT'seapagar_.
• Paravedficarlatemperaturaprogramadaduranteel
precalentamientodei horno,oprimalatecia 'Bake'.
5. Coloqueel alimentoen el homo.
Notas sobre Horneado:
• Paracambiarla temperaturadethornoduranteel procesode
cocciOn,optimaIatecla 'Bake',luegooprima'Autoset'o las
teclasnum6ricasapropiadashastaquesedesplieguela
temperaturadeseada.
+ Paracambiarla temperaturade!hornodurante'Preheat',optima
dosvecesIatecia 'Bake',luegooptima'Autoset'olasteclas
num6ricasapropiadashastaque sedesplieguela temperatura
deseada=
+ Siolvidaapagarel homo.seapagar8autom_ticamentedespu6s
detranscurrir12horas.SideseadesactivarestacaracterBtica,
yeala p_gina56.
+ Parasugerenciasadicionalessobrehorneadoyasado,consults
eIfoileto"LaCocinaFSciI".
5O
6. Verifiquee[progmsode [acocci6ncuandohayatranscurddoel
tiempo minimorecomendado.ContinOela cocci6nsiesnecesario.
7. AIt6rmino de IacocciOn,optima latecla 'CANCEL'.
8. Retireel alimentodel homo. ++.,++,.++_
Diferencias del homeado entre su homo
antiguo y su homo nuevo
EsnormalobsewaraIgunasdiferenciasen el tiempode horneadode
su hornoantiguoy su hornonuevo.Vea"Ajustede laTemperaturadel
Homo"en la p_gina57.
Homeado por Conveeei6n
(modelos selectos)
Cuandohorneepor convecci6n,programelatemperaturanormalde
horneado.E!controIreducir_automSticamenteIatemperatura
programadaen 25° F(15°C).
Para programar Homeado por convecci6m ......................
1, Oprimala tecia'ConvectBake'+
• Elicono'BAKE'y elsimbolo 'FAN'destellar_n+
+ '000'destellaraen el indicadorvisual
2. SeieccioneIatemperaturadel homo. OptimaIatecia
'Autoset'para350° F(175°C)o Iasteclasnum_ricasapropiadas.
+ Cadavezque oprimaIatecla 'Autoset'la temperaturase
aumentar_ien25°F05 °C).Latemperaturadel horno puede
set programadade 170° a 550°,
3. OprimaIatecla'ConvectBake'nuevamenteo esperecuatro
segundos.
+ El[cono'BAKE'dejar_de destellar.
• El[cono'PREHEAT'seiluminar_en el indicadorvisual.
+ EneIindicadorvisualsedespiegar_100° (40°) ola temperatura
realdel homosi esque essuperiora 100° F(40°C).Latem-
peraturaaumentar_en incrementosde5° F(3°C) hasta
Ilegara Iatemperaturaprogramada.
• Els[mbolo'FAN'comenzar_a girar.
4. Esperea queel homo seprecalientedurante8-15minutos.
+ CuandoeIhornoIlegaa Iatemperaturaprogramadase
escuchar_unasei_alsonoraIarga.
• El[cono'PREHEAT'seapagar&
+ Sedespiegar_latemperaturaprogramada.
• ParaverificarlatemperaturaprogramadaduranteeI
precalentamientodel homo,optima latecla 'ConvectBake'.
cont°
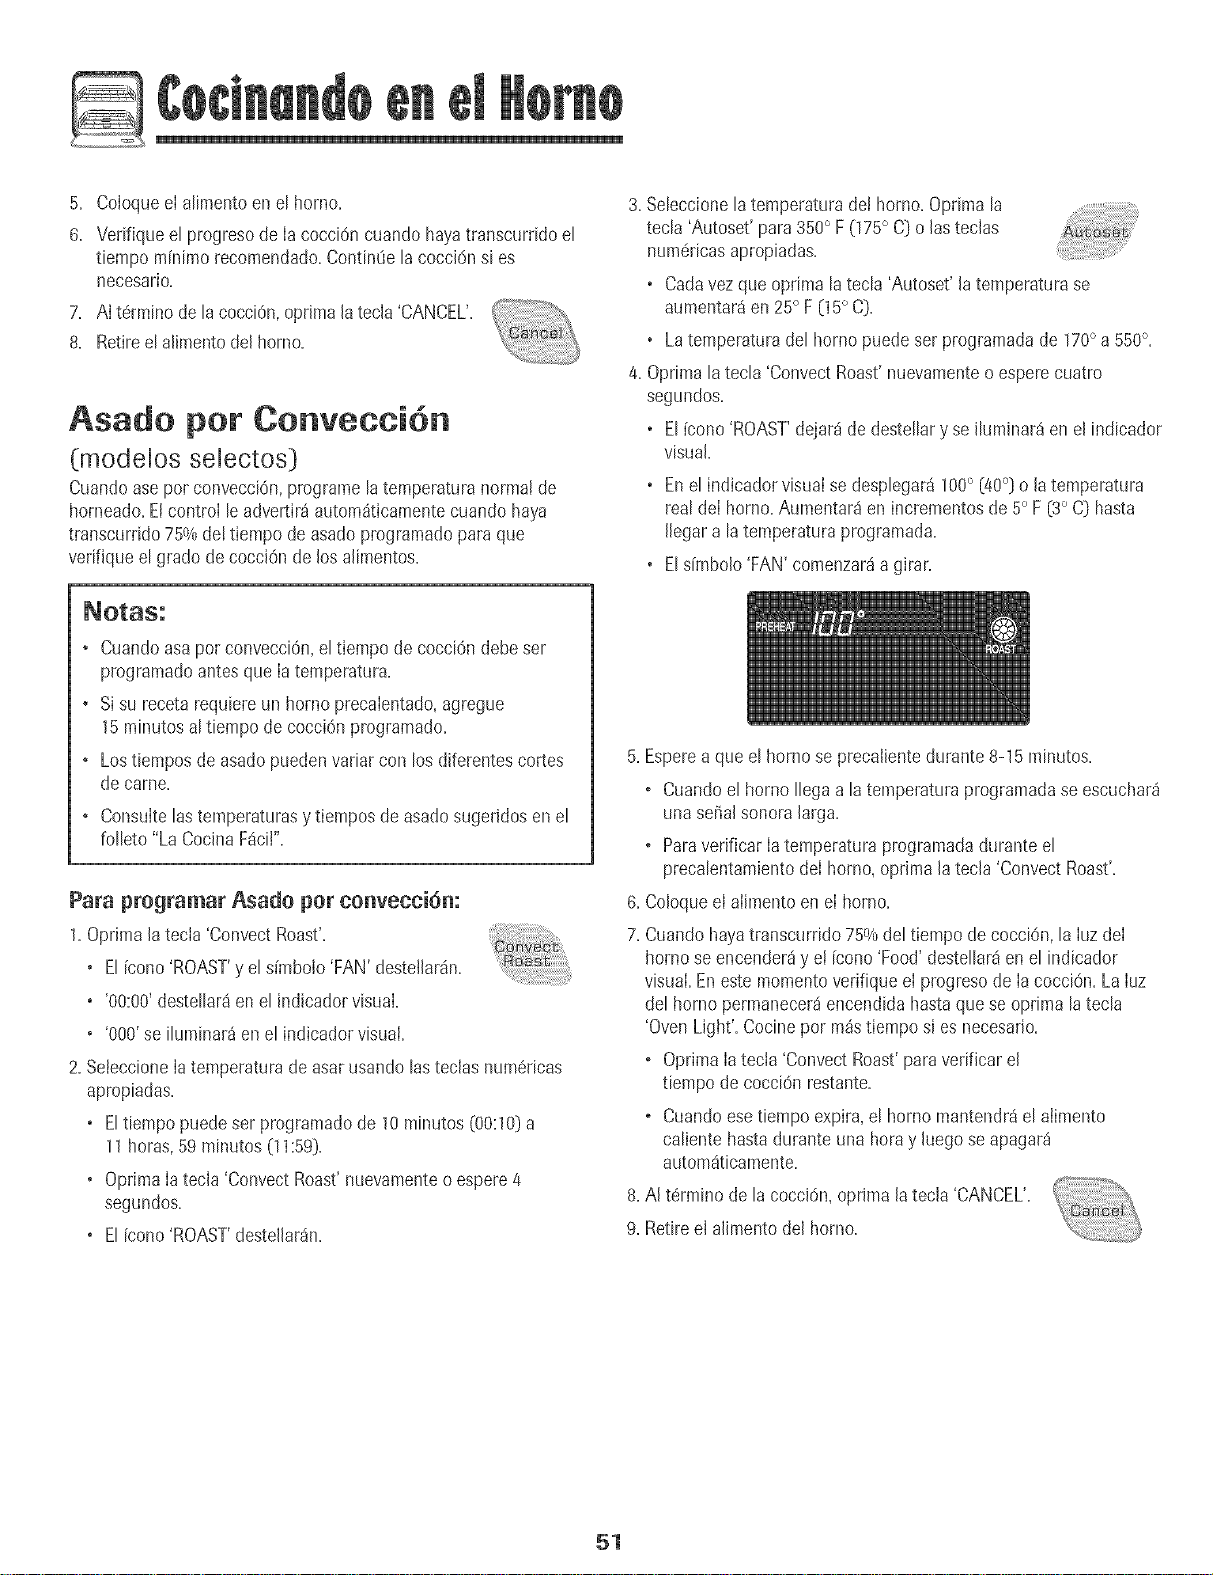
@
5. ColoqueeIatimentoenet homo.
6. Vedfiqueetprogresode IacocciOncuandohayatranscurddoet
tiempo mfnimorecomendado.Contin_etacocci6nsi es
necesario.
7. AIt6rminode tacocciOn,optimalatecla 'CANCEL'.
8. Retireetalimentodel horno.
Asado per Cenveeei6n
(modelos selectos )
CuandoasepotconvecciOn,pmgramelatemperaturanorma!de
horneado=EtcontroIleadvertir_automdticamentecuandohaya
transcurddo75%de!tiempo de asadoprogramadopara que
verifiqueel gradode cocciOnde losalimentos.
3.Se[eccione[atemperaturade!homo.Optima [a
tecla 'Autoset'para350°F(175° C[}o lasteclas
num6ricasapropiadas.
o Cadavezque oprimala tecla 'Autoset'latemperaturase
aumentar_en 25° F(15° C).
o Latemperaturadel horno puedeserprogramadade 170° a 550°,
4.Oprimala tecla 'ConvectRoast'nuevamenteoesperecuatro
segundos.
o El[cono'ROAST'dejardde destellary seiluminar_en el indicador
visual.
o Enel indicadorvisualsedesplegar4100° (40°)o Jatemperatura
real deIhorno.Aumentar4enincrementosde 5° F(3° C)hasta
Jlegara latemperaturaprogramada.
o Eldmbolo 'FAN'comenzar4a girar.
• Cuandoasapor convecci6n,el tiempode cocci6ndebeser
programadoantesque Iatemperatura.
• Sisu recetarequiereun hornoprecalentado,agregue
15minutosal tiempode cocci6nprogramado.
• Lostiemposde asadopuedenvariarcon losdiferentescortes
de came.
Consultelastemperaturasytiemposdeasadosugeridosenel
folleto "La CocinaFacil".
Para programar Asado per convecci6n:
1.Oprimalatecia 'ConvectRoast'.
o El icono'ROAST'y el simbolo'FAN'destellar_n.
o '00:00'destellar8en el indicadorvisual.
o '000'seiluminar_en el indicadorvisual.
2.SeteccioneIatemperaturade asarusandolasteclasnum6ricas
apropiadas.
o Eltiempo puedeserprogramadode 10minutos(00:10}a
11horas,59 minutos(11:59).
o Oprima[atec[a'ConvectRoast'nuevamenteo espere4
segundos.
o El fcono'ROAST'destei[ar_n.
5.Esperea que el homoseprecalientedurante8-15 minutos.
• Cuandoel homo Ilegaa la temperatulaprogiamadaseescuchar_
una se_alsonoralarga.
o ParaverificarIatemperaturaprogramadaduranteel
precalentamientodeIhomo, optimala tecla 'ConvectRoast'.
6.Coloqueel alimentoen el homo.
7.Cuandohayatranscurddo75%del tiempode cocciOn,la IuzdeI
homo seencender_ye! fcono'Food'destellar_en el indicador
visual.Enestemomentoverifiqueel progresode IacocciOn.La Iuz
del horno permanecer_encendidahastaque seoprimalatecla
'OvenLight'.Cocinepor m_stiempo si esnecesario.
o OprimaIatecla 'ConvectRoast'paraverificarel
tiempo decocci6nrestante.
o Cuandoesetiempo expira,el horno mantendr_el aIimento
calientehastaduranteuna horay hego seapagar_
automaticamente.
8.AIt6rmino de la coccidn,oprimaJatecla 'CANCEL'.
9.Retireel alimentodel homo.
51
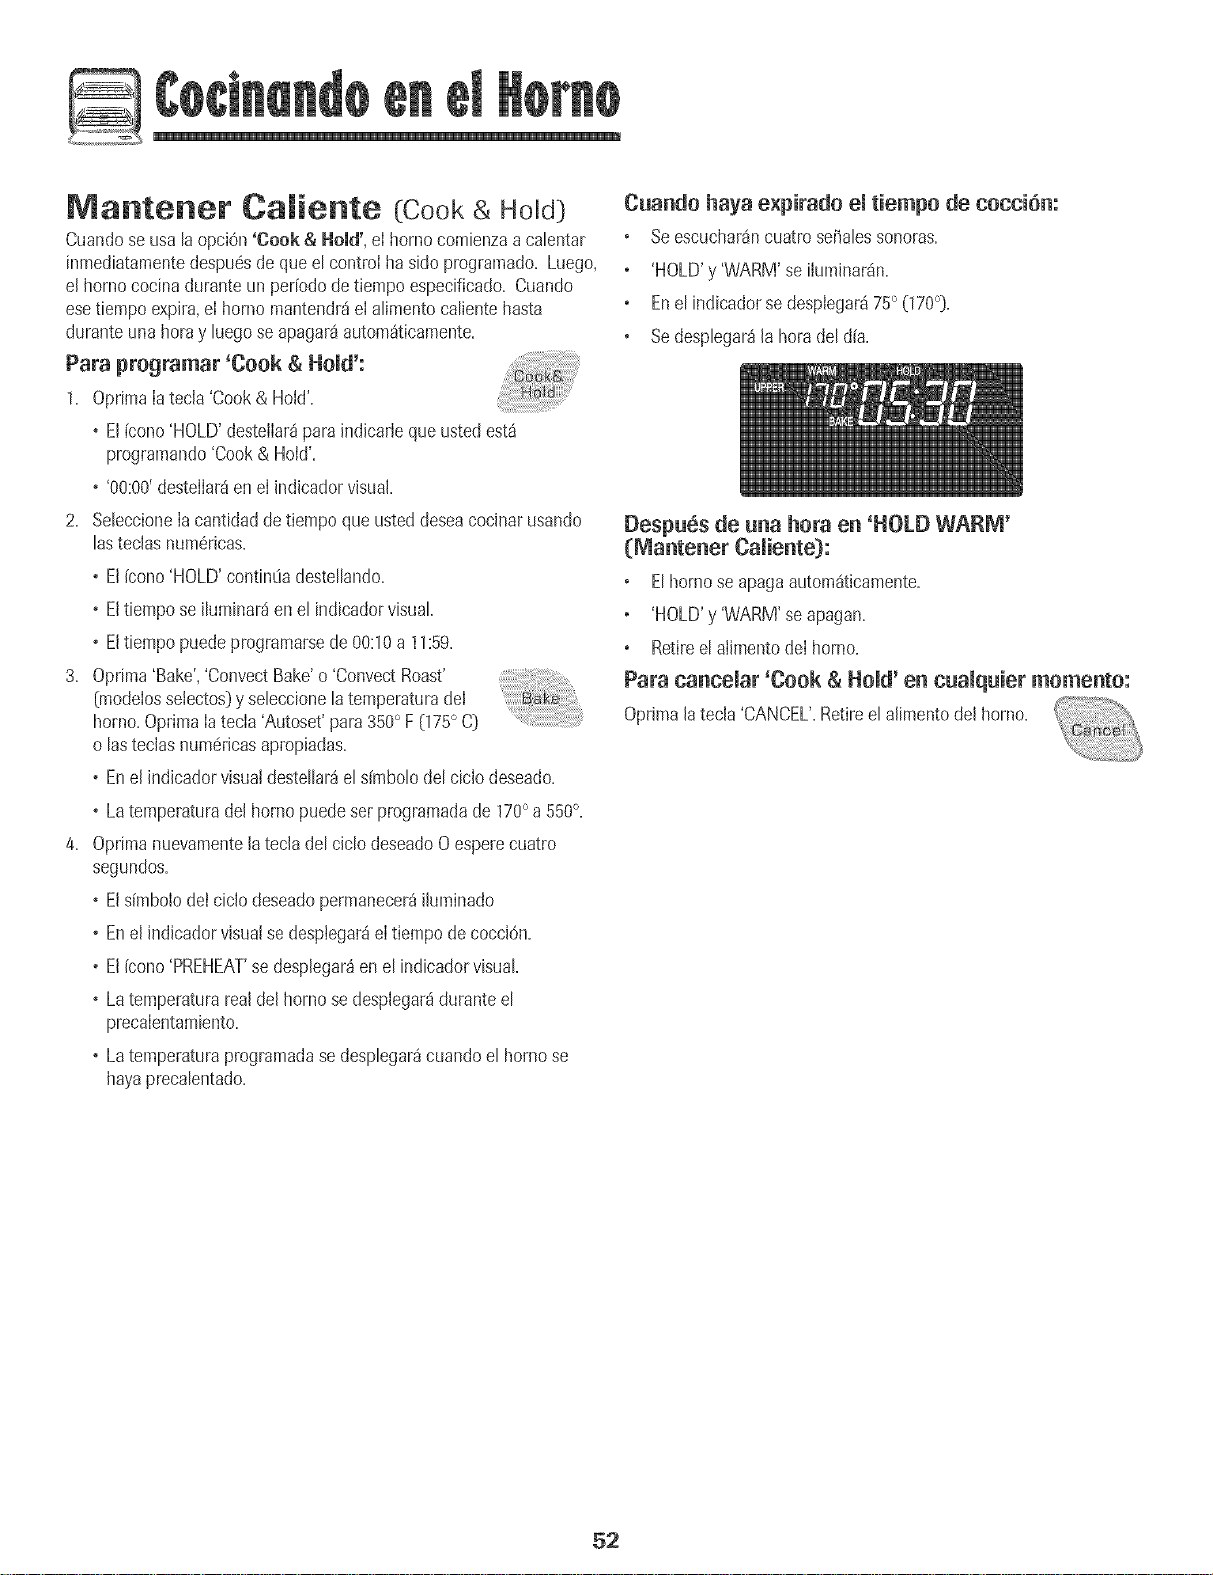
Matrtterter Ca_iertte (Cook & Hold)
Cuandoseusala opciOn'Cook & Hold', eIbornecomienzaacalentar
inmediatamentedespu6sdeque elcontrolha sideprogramado,Luego,
el hornococinaduranteun per[odedetiempo especificado,Cuando
esetiempoexpira,eIhornomantendr_ieIalimentocalientehasta
duranteunaherayluegoseapagar_autom_ticamente,
Para programar 'Cook & Hold':
1+ OprimaIatecla'Cook& Hold',
+El[cone'HOLD'desteiIar_paraindicarlequeustedest_
programando'Cook& Hold',
+'00:00+destelIar8en eIindicadorvisual,
2, SeleccioneIacantidaddetiempo queusteddeseacocinarusando
lasteclasnum6ricas,
+El[cone'HOLD'contin0adestellando,
+Eltiemposeiluminar_enel indicadorvisual
+Eltiempo puedeprogramarsede 00:10a 11:59,
3, Oprima'Bake','ConvectBake'o 'ConvectRoast'
(modelossetectos)y seleccionelatemperaturadeI
homo,OptimaIatecla'Autoset'para350°F(175°C)
o lasteciasnum6ricasapropiadas,
+Enel indicadorvisualdestellar_el dmbolodel ciclodeseado,
+Latemperaturadelhomopuedesetprogramadade 170°a 550°,
4, Oprimanuevamentelateciadel ciclodeseadoOesperecuatro
segundos,
+Els[mbolodeiciclo deseadopermanecer_iluminado
+Enel indicadorvisualsedesptegar_eItiempode cocciOn,
+El[cone'PREHEAT'sedesplegar_en el indicadorvisual
+Latemperaturarealdelhornosedesplegar_duranteel
precalentamiento,
+Latemperaturaprogramadasedesplegar_cuandoel bornese
hayaprecalentado,
Cuando haya e×pirado emtiempe de cecck_m
Seescuchar_ncuatroseSalessonoras+
'HOLD'y 'WARM'seiluminar_n+
Enel indicadorsedesplegar_75° (170°)+
Sedesplegar_la heradeld(a+
Despu6s de una hera en 'HOLD WARM'
(_antener Caiiente):
Elhomoseapagaautom_t+camente+
'HOLD'y 'WARM'seapagan+
Retireel alimentodei homo+
Para cancemar'Cook & Herod'en cuamquier memento:
Optimalatecla 'CANCEL',Retireelalimentodel homo+
52
Mantener Caliente Oiferido
(Delay Cook & Hold}
Nousehorneadodiferidoparaalimentosde cortaduraci6ntales
comoproductosI_cteos,cerdo,camede aveo mariscos,
Cuandousa'Delay', eIhomocombnzaa cocinarm_star@ enel alia.
ProgrameB cantidaddetiempoque usted@seadiferirantesqueel
homoseencbnday cuantotbmpo deseacocinareIaiimento.El
hornocombnzaa cabntar en lahorasebccionaday codnaduranteel
tbmpo especificado.
Eltiempodiferidopuedeprogramarsede 10minutos(00:10}hasta11
horas,59minutos(11:59}.
Para programar un cido de 'Cook & Hold' diferido:
1. Oprimalatecla'Delay'o 'Delay1'(modelosselectos}.
Enlosmodelosde hornosmuraiesdobbs,oprima
unavezIatecla 'Delay'o 'Delay1'(mode!osselectos}
paraprogramarel hornosuperioro dosvecespara
programarel horno inferior.
• El[cono'DELAY'combnzaadestellar.
• '00:00'apareceene!indicadorvisual.
2. UsandoIasteclasnum6ricasapropiadas,programelacantidadde
tbmpo queusteddeseadiferirel comienzodelchic 'Cook& Hold'.
3. Oprimalatecla'Cook&Hold'.
• El[cono'HOLD'desteIIaen el indicador.
• El[cono'DELAY'destellaenel indicador.
• '00:00'comienzaa destellar.
4.
5.
6.
Programelacantidadde tiempoque usted@seacodnar usando
lasteclasnum6ricas.
Oprima'Bake','ConvectBake'o 'ConvectRoast'(modelossebctos}.
Programelatemperaturadelhornodeseadaoprimiendolatecla
'Autoset'o lasteclasnum6ricasaplopiadas.
o 175°(,350°}seiluminar_cuandoseoprime'Autoset'.
o Despu@decuatrosegundos,eltiempo diferido
programaticaparecer_en el indbadorvisual.
o Elicono'HOLD'seapaga.
o Laspalabras'BAKE'y'DELAY'permanecenencendidasparare-
cordariequesehaprogramadoun ciclode 'Cook&Hold'
diferido.
Nota:
• No use'Cook& Hold'diferidoparaart[culosque requierenun
homoprecabntado,tabs comopastebs,galletasypanes.
• No use'Cook& Hold'diferidosiel homoyaest_caliente.
53
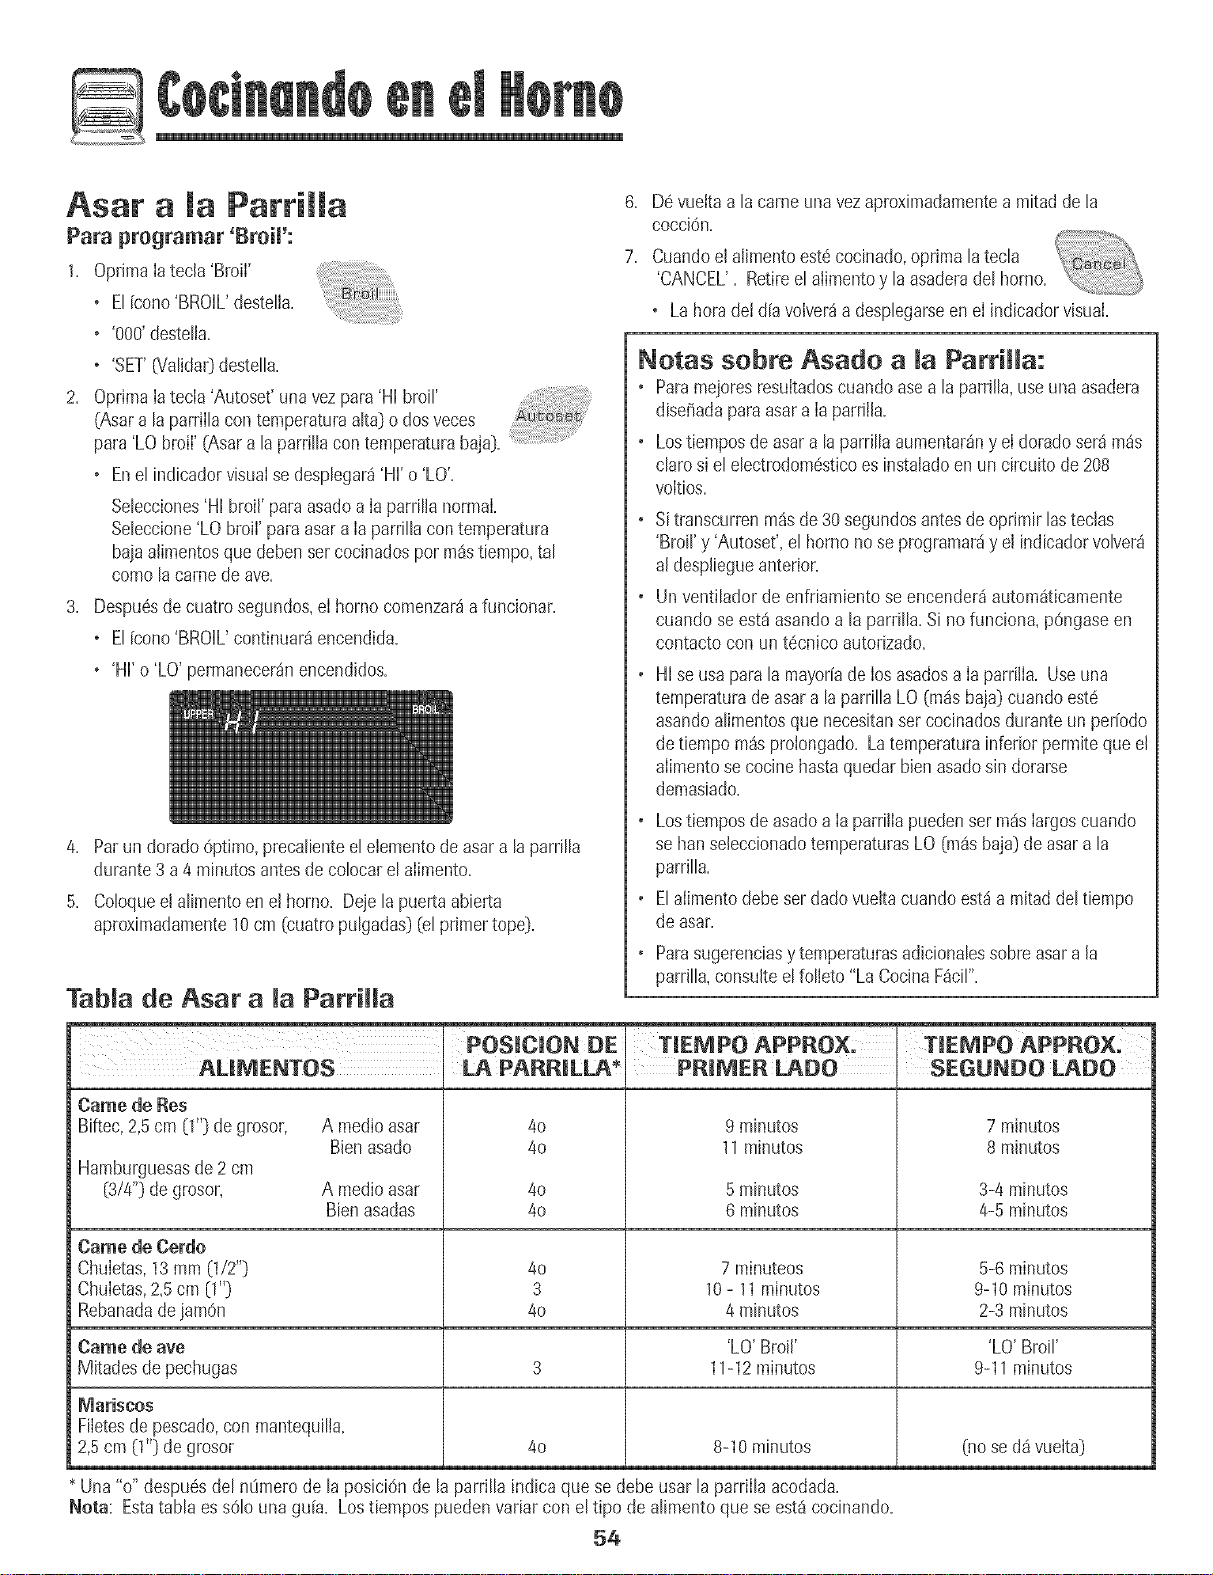
OptimaIatecla 'BmiI'
o ElFcono'BROIL'destelIa.
o '800'destella.
o 'SET'(Valida0desteIB.
6. Devuettaa lacame unavezaproximadamentea mitaddela
cocci@.
7. Cuandoel alimentoest6oocinado,oprimalateoB
'CANCEL'. Retireelalimentoy laasadera(Jelhomo. _'--"--''_X,,_.,_
o Lahoradei diavolverda despbgarseen el indbadorvisual.
2. Optima[atecla 'Autoset'unavezpara'Hibroil'
(Asara taparriltacontemperaturaatta}o dosveces
para'LObroil'(Asara laparrillacontemperaturabaja}.
o Enel indicadorvisualsedespbgar_'Hi' o 'LO'.
Selecciones'HHbroil'paraasadoa [aparrilianormal
Sebccione'LObroil'paraasara [aparrillacontemperatura
baiaa[imentosque@bensercocinadospor pa_stbmpo,tal
comolacarnede ave.
3. Despu6sde cuatrosegundos,el hornocomenzar_a funcionar.
o El[cono'BROIL'continuardencendida.
o 'Hi'o 'LO'permanecer_nencendidos.
4. Parun dorado6ptimo,preca[bntee[elementodeasara [aparrilla
durante3a 4 minutosantesde cobcar e[aiimento.
5. Cobqueelalimentoen el homo. Deje[apuertaabierta
aproximadamente10cm (cuatropuigadas}(el primertope}.
labia de Asar a la ParriHa
ALINENTOS LA PANNILLA_
Came de Res
Biftec, 2,5 cm 0"} de grosor,
Hamburguesasde2 cm
(3/4"}de grosor,
A medioasar
Bienasado
4o
40
Notas sobre Asado a ParriHa:
• ParamejoresresuItadoscuandoasea la parrilla,useunaasadera
diseiiadaparaasara Iaparriila.
• Lostiemposde asara laparrillaaumentar_nyel doradoseram_s
clarosiel ebctrodom@ticoesinstaladoen un circuitode288
voItios.
• Sitranscurrenm_sde30 segundosantesde oprimirlasteclas
'Broil'y 'Autoset',el hornonoseprogramar_yel indicadorvolver8
aldesplbgueanterior.
• Unventilador deenfdambnto seencender_autom_tbamente
cuandoseest_asandoa la parrilla.Si nofunciona,pOngaseen
contactoconun t6cnicoautorizado.
• Hiseusaparala mayor[ade Iosasadosa IaparrilIa. Useuna
temperaturade asara laparrillaLO(m_sbaia}cuandoest6
asandoalimentosquenecesitansercocinadosduranteun per[odo
detbmpo m_sproiongado.Latemperaturainferiorpermitequeel
aIimentosecocinehastaquedarbienasadosindorarse
demasiado.
• Lostbmposde asadoa IaparrilIapuedenset m@Iargoscuando
sebanseleccionadotemperaturasLO(roSsbaja}de asara la
parrilla.
• Elaiimentodebeserdadovueltacuandoest_a mitaddel tiempo
deasar.
• Parasugerenciasytemperaturasadicionabssobreasara la
parrilla,consulteelfolIeto"La CocinaF_cil'.
PRmMER LADO
9 minutos
11minutos
SEGUNDO LAE)O
7 m[nutos
8 minutos
A medio asar 40 5 minutos 3-4 minutos
Bien asadas 40 6 minutos 4-5 minutos
Came de Cerdo
Chuietas, 13mm 0/2"} 40 7 minuteos 5-6 minutos
Chuletas, 2,5 cm 0"} 3 10- 11minutos 9-10 minutos
Rebanada de iamOn 40 4 minutos 2-3 minutos
Came de ave 'LO' Broil' 'LO' Broil'
Mitades de pechugas 3 11-12 minutos 9-11 minutos
4o 8-10 minutos
Mariscos
Filetesde pescado,conmantequilla,
2,5cm (1"}de grosor (nosed_vuelta}
Una"o" despu@del nOmerode la posici6nde la parrillaindicaque sedebeusarla parrillaacodada.
Nota: EstatablaessOlouna guia. Lostbmpos puedenvariarconel tipo de alimentoqueseest_cocinando.
54

Mantenet camiente
Paramantenercatientesen formaseguraatimentoscalie+_tesopara
calentarpanesy ptatos+
Para programar 'Keep Warm':
1, Optima tatecta'KeepWarm',
+ El [cono'WARM'desteth,
+ '000'destelh en ei indicadorvisuat,
2, Seleccionetatemperaturade 'KeepWarm', Optima tatecta
'Autoset'o tastechs numQricasapropiadas,
+ 170° (75°) seiiuminar_icuandoseoptima latecla 'Autoset',
+ Cadavezqueoptima la tecla 'Autoset',latemperatura
aumentar_en 5° F(3°C),
Latemperaturade 'KeepWarm' puedeset programadade 145° a
190°F [63° a90°C),
El [cono'WARM'y la temperaturasedesplegarSnen el indicador
cuandola funciOnest_activa,
Para (_a_cdar +Keep Warm':
1, Opdmalatecla 'CANCEL',
2, Retireel alimentodel homo,
Notas sobre 'Keep Warm':
• Paracalidad6ptimade losalimentos,Iosalimentoscocinados
en el homodebensermantenidoscalientespor no m_sde 1a
2 horas,
+ Paraevitarque Iosalimentossesequen,c0braloslevemente
conpapel deahminio o una tapa,
+ ParacamentarpaneciHos:
- cubralevementeIospanecilloscon papelde aluminioy
colOquelosen el homo+
- optima Iasteclas'KeepWarm'y 'Autoset'+
- calientedurante12a 15 minutos+
• Paracalentar plates:
- coloque2 filas de cuatropIatoscadauna enel homo+
- optima Iasteclas'KeepWarm'y 'Autoset'+
- caHenteIosplatosdurantecinco minutos,apagueeIhomoy
dejeIosplatosen el homodurante15minutosross+
- usesoIamenteplatosresistentesal homo,verifiqueconel
fabricante+
- no co!oquelosplatoscaIientessobreunasuperficiefr[a
puesel cambio r_pidodetemperaturapuede causarfisuras
super[icialeso rotura+
55
Modo de Cierre Autom tico/
Elhomo seapagar_iautom_ticamentedespu6sde 12horassi usted
Iodeja accidentahTlenteencendido. Estacaracteristicade seguridad
puedeserdesactivada.
Para caacemarel cierre aatom_tico de 12 horas y dejar qae el
homofuacioae coatiauameate duruate 72 horus:
Optimay mantengaoprimidala tech 'Clock'
durantetres segundos+
+ 'SAb'sedesplegar8ydestellar_durantecinco
segundos+
+ 'SAb'sedesp+egar_continuamentehastaquesedesactiveo
hastaque transcurrael I[mitede 72horas+
+ El[cono'BAKE'tambi6nser_desp+egadas+seest_usandoun
cicIode horneadocuandoel horno est_en ModoSab_tico+
+ Todaslastec+asest_ninactivasexcepto'CANCEL'y 'Clock'.
TodaslasotrasfuncionesEXCEPTO'BAKE'('Timer','Keep
Warm','Clean',etc+)est_nbloqueadasduranteel Modo
Sab_tico+
+ Sepuedeprogramar'Cook& Hold'duranteel ModoSab_tico,
sin embargonose puedeprogramar'DelayCook& HoW.
Para cancemar emMode Sab_tico:
1+Optima latecla 'CLOCK'durantetres segundos+
O
2. Despu6sde72 horas,el Modo Sab_ticoterminar&
+ 'SAb'destellar_durante5 segundos.
+ Lahoradel dia reaparecer_en el indicadorvisual
Notas sobre el Mode Sab tico:
+ ElModo Sab_ticopuedeset activadoen cualquiermomento,
est6o noel homoencendido+
ElModo Sab_ticono puedeseractivadosi lasteclasest_n
bloqueadaso cuandola puertaest_bloqueada+
LamayorFade Iasadvertenciasy mensajesytodas lassefiales
sonorasest_ndesactivadascuandoel ModoSab_ticoest_
activo+
Siel hornoestahorneandocuandoel ModoSab_ticoes
programado,el [cono'BAKE'seapagar_al final del ciclo de
homeado+NoseemitirSnsefialessonora&
Sisedesea[a[uzdel horno duranteei ModoSab_tico,_sta
debeserencendidaantesde quecomienceel ModoSab_tico+
Cuandocomienzae[Modo Sab_tico,latemperaturaque se
despliegaser_latemperaturaprogramadaen vezde [a
temperaturatea[de la cavidadde[ homo+Noseemitir_la
sdial sonorade precalentamiento+
Elcic[ode autolimpiezay b[oqueoautom_ticode la puertano
funcionar_duranteel ModoSab_tico+
Sioprime [atecla 'CANCEL'secancelar_un cic[o'Bake',sin
embargoe[contro[permanecer_en ModoSab_tico+
Sifa[ia la corrienteei6ctrica,cuandovuelvala energ[ae[homo
seactivar_en ModeSab_ticocon72 horasrestantesy ning_in
ciclo activo+
56
Ajuste de temperatura
Laexactitudde [astemperaturasde[hornoescuidadosamente
probadaen Iaf_brica. Esnorrnainotaralgunadiferenciaentre la
temperaturade horneadoo en el dorado,entreun homo nuevoy un
borneantiguo. A medidaque el homoseusa,latemperaturadel
homopuedecambiar.
UstedpuedeajustarIatemperaturadel horno,si cons+doraque su
homono est_horneandoo dorandoen formacorrect& Paradecidir
cuanto debecambiarlatemperatura,programela temperaturadel
bornea 25° F(15° C}m_saltao m_sbaja que latemperatura
indicadaensus recetas,Iuegohornee. Losresultadosen eIprimer
horneadole dar_nuna ideade cuantodebeajustarIatemperatura.
Ajuste de matemperatura demhomo:
1. OprimaIatecla'Bake'.
2. Programe550°F(285° C}oprimiendolasteclasnum6ricas
apropiadas.
3. Oprimay mantengaopr+midaIatecla 'Bake'durantevaries
segundoso hastaqueO0°aparezcaen el indicadorvisual.
Sila temperaturadel homoha sidepreviamenteajustada,el
cambioaparecer_en el indicadorvisual. Perejemplo,s+la
temperaturadel homo fue reducidaen 15°F(8°C}el indicador
mostrar_- 15° (-89.
4. Optimala tecla'Autoset' paraajustarIatemperatura.
Cadavezque seoprimalatecla 'Autoset',la temperaturacambia
en 5° F(3° C}. Latemperaturadel horno puedesetaumentadao
disminuidaen 5° a35° F(3 °a 20° F}.
5. La heradel d[areaparecer_autom_ticamenteen el indicador
visual
Nonecesitareajustarla temperaturadeIhomosi hayuna falIao
interrupciOnde energiael6ctrica. Elajustede latemperaturaes
v_Iidopara'Bake','ConvectBake'y 'ConvectRoast'(modelos
selectos}solamente.
'Favorite' (Favorite)
Latech 'Favorite'Iepermiteguardaren memodaeltiempo y la
temperaturade un ciclo 'Cook& HoldBake','ConvectBake'o
'ConvectRoast'(modelosselectos}.
Paraprogramarun ciclofavorite,debeestaractivao recientemente
programadaunafunciOnde 'Cook& Hold'.
Para programar un nuevo cido Favorite o para
guardar come Favorite un cido 'Cook & Herod'que
este ea progreso:
1. Programeun ciclo de 'Cook& HoW comesedescribeen la
secciOn'Cook& Hold' en la p%ina 52.
2. Opr+may mantengaoprimidalatecla 'Favorite'
durantetres segundos.
o Elciclo "Cook& Hold'recientementeprogramatico en
pmgresoser_guardadoen memoria.
o Seescuchar_unasepalsonorapara ind+carqueel control
ha aceptadoel ajuste'Favorites'.
Para comenzar un cicmoprogramado come Favorite:
1. Oprimala tecia 'Favorite'.
o Sedesplegar_e!tiempo y latemperaturaparael ciclo 'Cook&
HoW programado(s+no hayciclo 'Cook& HoW programado,
en el indicadorvisualsedesplegar_'nonE'.}
2. OptimaIatecla 'Bake','ConvectBake'o 'ConvectRoast'(modelos
selectos}.
o Elciclo Favoritecomenzar_inmediatamente.
o Els[mbolodel cicloseleccionadose iluminar_enel indicador
visual
o Eltiempode cocciOnseiluminar_en el indicadorvisual.
Cuando ha expirado emtiempo de cocci6m
o Seapagar_el ciclo seieccionado+
o Seencender_e!simbolo'HOLDWARM'.
o Enel indicadorsedesplegar_170° (759.
Para caacemarua tide favorite eu progreso:
1+ OprJmaIatecla 'CANCEL'.
o Elciclo favoriteguardadoen memorianoser_
afectado.
2. Retireel alimentodel horno.
57
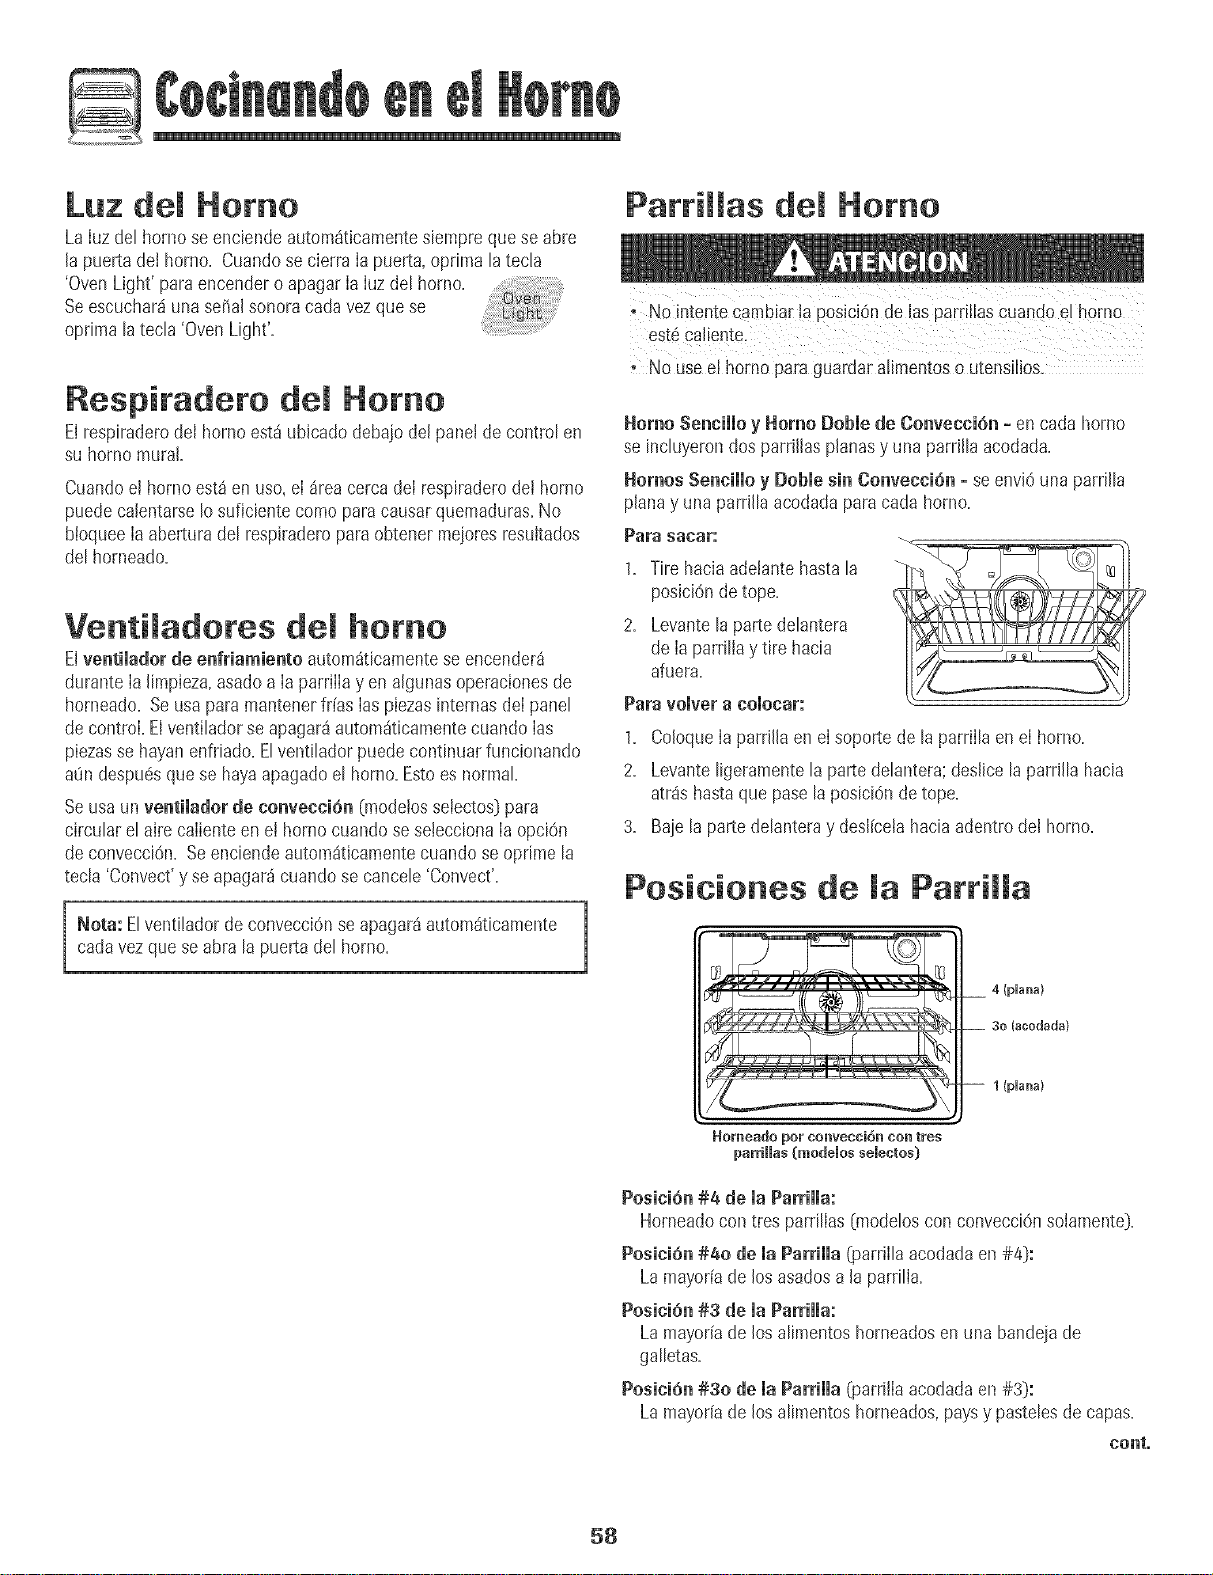
Luz del Homo
La IuzdethornoseenciendeautomSt+camentesiemprequeseabre
la puertadel homo+CuandosecierraIapuerta,oprimatatecla
'OvenLight' paraencendero apagarIaIuzdet homo+
Seescuchar_iuna sepalsonoracarlavezquese
optima tatecla 'OvenLight'+
Respiradero demHomo
El respiraderodel hornoest_ubicadodebajodel panelde controlen
su homomural+
Cuandoel homoest_ enuso,el _reacercade[respiraderode[horno
puedecalentarseIosuficientecomo paracausarquemaduras.No
bloqueeIaaberturadel respiraderoparaobtenermejoresresultados
del horneado.
Venti adores demhomo
Elventiladorde enfriamiento autom_ticamenteseencender_
duranteIalimpieza,asadoa IaparriIIayen algunasoperacionesde
homeado+Seusaparamantenerfr[asIaspiezasinternasdeIpanel
de control Elventiladorseapagar8autom_ticamentecuandoIas
piezassehayanenfriado+Elventiladorpuedecontinuar funcionando
at_ndespu6squese hayaapagadoel homo+Estoesnormal
Seusaun ventiladorde convecci6n 0Tlodelosselectos)para
circular el airecaIienteen el hornocuandoseseleccionaIaopciOn
de convecciOn=Seenciendeautom_t+camentecuandoseoprimela
tecla 'Convect'yseapagar_cuandosecancele'Convect'=
]
Nota: Elventiladorde convecci6nseapagar_autom_ticamente |
carlavezqueseabta la puertadel homo=
1
Parrillas del Homo
; No intenteCambiar!aposiciOnde laspard!lasCuandoeLhomo
est6Caliente.
+ No Useel homo pareguacdaralirnentoso utensilios.
HomoSennillo y Homo DoNe de Convncci6n =encadahorno
se incluyerondosparrillasplanasy una parrillaacodada=
Homes Sennillo y Doble sin Oonvecci6n=seenvi6una parrilla
planay una parrillaacodadaparacadahomo+
Parasacar:
1. Tirehaciaadetantehastala
posici6ndetope.
2. Levantela partedelantera
de Iaparrillay tirehacia
afuera.
Para vo]ver a Co]ocam',"
1+ Co[oquela parri[[aen el soportede [aparrii[aen el homo+
2+ Levanteligeramentela partedelantera;des[icela parri[lahacia
atrSshastaque pasela posici6ndetope.
3+ Bajela partedelanteray desl[celahaciaadentrode[ homo+
Posiciones de Parri a
Homeado pot convecci6n con tres
parriHas(modeBos selectos)
__ 4 (pUana)
__ 30 lacodada)
-- 1 (pUana)
Posici6n#4 de ia Parriiia:
Horneadocontres parri[ias(mode[osconconvecciOnsolamente).
Posici6n#40 de ia Parriiia _oarril[aacodadaen#4):
Lamayor[ade losasadosa[aparrilla.
Posici6n#3 de ia Parriiia:
Lamayoriade losalimentoshorneadosenuna bandejade
galletas.
Posici6n#30 de la Parrilla _}arrilIaacodadaen#3):
Lamayor[ade losalimentoshorneados,paysypastelesde capas.
nonto
58

PositiOn #2 de JaParriJJa:
Asadode cortespeque_osdecame,pastebsen moHesdetube,
caceroBs.
PositiOn#20 de ia Parrilla (parri[[aacodadaen#2):
Asados,baguetade pany paste[esponioso.
Posici6n #1 de maParriHa:
Cortesde came grandesypave,budinesysufi6 de postre.
Coccion en ParriHasMomtipmes:
Dosparrillas: Usetaposici6n#20 y#4.
Tres parrillas: (eocciOnperconvecci6n- modebsselectos}:
Use[aposiciOn#1, #30, #4. _/eri[ustraciOnen [ap%ina 58}.
. E[usede [aparrilB acodada seindicaen la Hstainduida a la
izquierdacobcando una "o"despu6sdel n0merode la
posiciOnde la parrilla.
. Cuandosehomeacondoso tres parrillas,reviselosaiimentos
en el tbmpo minimosugeridoparaevitarque queden
demasiadodoradoso demasiadococinados.
. No cubrauna parrillacompletacon papelde ahminio ni
co!oquepapeIde aluminioen el panel inferiorde!homo. Se
afectar_nlosresu[tadosdel horneadoysepuededa_arel
panel inferiordeIborne.
Media Patrimma
(modelos selectos)
Losmodelosde homomurales
sebctos est_nequipadoscon
unamediaparrillaconvertible.
ElIadoizquierdode la
parrilIapuedeserretirado
paraacomodaruna
asaderam_sgrandeen
la parrilIainferior. El
ladederechode Ia
parrillatodav[asepuede@jar
paracolocaruna cacerola.
• La parteremoviblede la parrillapuedeusarsecome una parrilla
de asaren la asaderade asara la parrilla.Nouseel inserto
superiorde laasaderacuandousela parrilla removibleen la
asaderade asara la parrilla.
• La porci@ removibb de la parrillapuedeserusa@comeuna
parrilla deenfriamientoo come un salvamantebs.Aseg0rese
de que la parrillaest6fr[a antesde retirarladel homo.
• Aseg0resede que el borne est6fr[oantesde retiraro reinstalar
la mediaparrilla.
• No useutensiliosque seextiendanpa_sall_ del bordede la
parrilla,
• Paramejoresresultados,de]edospu[gadasentreel utensilio
colocadoen la parnllay lapared lateraIdethomo,
• Tengacuidadocuandoretirearticulosqueestdnen la media
parrilla paraevitarquemaduras,
• SaqueconcuidadoIosalimentosde la parrilla inferiorpara
evitarmoverla mediaparrilla,
59
Homo AutoJi piante
To set Self-Clean:
o Esnormalque lasplezas{le la estufasecalientenduranteel
cLciodeautoJimpieza
. Paraevitarda_oa Japuer_a,no intente abrirlacuandola palabra
"Leek" aparezcaen el _ndicadorvisual.
° E'itetocar ia puer[a,lacubierta,iaven[anao e_areaue
ventiiaci6ndel homoduranteun cicJode JimpJeza.
* Nouselimpiadoresde hornoscomercialesen eJacaDadodel
norno ni airededorde ninguna piezade! homopuespuede
daf_arel acabadoo lasplezas
Elciclo de autolimpiezausatemperaturasde cocciOnsuperioresalas
normalespara limpiarautomdticamentetodoel interiordel horno.
Esnormalqueocurranllamaradas,humoo llamasdurantela limpieza
si el homo est_demasiadosucio.EsmejorIimpiarel horno
regularmenteenvezde esperarhastaquesehayaacumulado
demasiadasuciedad.
Duranteei procesode Iimpieza,lacocinadebe estarbienventilada
paraeliminarlosoloresnormalesasociadoscon la limpieza.
Antes de la Auto impieza
1. RetireIaasadera,todos losutensiliosy lasparriilasdel homo. Las
parrillasdeIhornosedescolorar_ny no sedeslizar_nf_cilmente
despuesde un ciclo de autolimpiezasi noson retiradasdel horno.
2. Limpieei marcodel horno,el marcode la puerta(eIdreafuerade
lajunta de la puerta_y atrededorde la aberturaen Iaiunta de la
puertacon un agentede Iimpiezano abrasivotal como'BonAmi'_
o condetergenteyagua.Elprocesode autolimpiezano Iimpia
est_sdreas. Biasdebenserlimpiadasparaevitarque Iasuciedad
se horneeduranteel ciclo deautolimpieza. (Laiunta esel sello
alrededorde la puertayventanadel horno_.
3. Paraevitardafiono [[mpieni frote [a
iunta situadaalrededorde [apuertade[ \ .
homo.Lajunta est_diset_adapara
selIarherm6ticamenteel calordurante
el ciclo de limpieza.
4. Limpieel excesode grasaoderrames
de la parteinferiordel homo. Esto
evita humoexcesivoo Ilamaradasduranteel ciclo de Iimpieza.
Parafacilitarla Iimpieza,eIetementocalefactordebeser
levantadoIevemente(aproximadamente2,5cm [1 pulgada]).
5. LimpieIosderramesazucaradoso _cidostalescomo papadulce
[camote),tomateso salsasa basede leche.La porcelana
esmaltadaesresistenteaI_cidopero no a pruebadedcidos. El
acabadode porcelanapuededescolorarsesi losderrames_cidos
o azucaradosno sonlimpiadosantesde un ciclo de autolimpieza.
_OtaS:
o Latemperaturadel homo debeset inferiora 400°F(205° C)
paraprogramarun ciclode limpieza.
• Amboshornosno puedenset autolimpiadosal mismotiempo
en losmodelosde hornosmuralesdobles.
1. Cierrela puertadel homo.
2. OptimaIatecla'Clean'.
• El[cono'CLEAN'destellaenel indicadorvisual.
° El[cono'SEt'destellaenel indicadorvisual.
3. Optimala tecia'Autoset'.
• 'MEd' (Suciedadmediana,3 horas)sedespiiegaen el indicador.
4. OptimaIatecia'Autoset' paradesplegarlosajustesde
autolimpieza.
'HVy'[Suciedadintensa,4 horas)
'MEd' (Suciedadmediana,3 horas)
'LITE'(Suciedadleve,2 horas)
AI seleccionarel nivelde suciedadde!homose programa
automdticamenteel tiempo de timpieza.
5. Despu6sde cuatrosegundos,el homocomenzarda Iimpiar.
• Si Iapuertano secierra,seoir_ una serialsonorayel [cono
'Door'sedesplegar_en eIindicadorvisual Si lapuertano
escerradadentrode 30 segundos,Iaoperacidndeauto-
limpiezaser_canceladay eIindicadorvolver_a desplegar
la horadel dia.
• El[cono'CLEAN'aparecer_en el indicadorvisual.
• El[cono'LOCK'destellarden el indicadorvisual. Unavezque
la puertase bloquea,el [conopermanecerdiluminadasin
destellar.
• Eltiempode limpiezacomenzardla cuentaregresivaen el
indicador.
Para diferir un ciclo de autolimpieza:
1. Optima'Delay'o la tecIa'Delay1' [modelosselectos).
• ElFcono'DELAY'desteila=
° '00:00'desteliar_enei indicadorvisual
2= ProgrameIacantidad detiempo que usteddeseadiferir el ciclo
usandolasteclasnum6ricasapropiadas=
3. Oprimala tecla'Clean'.
• El[cono'SET'destelIarS.
4. OptimaIatecla'Autoset'.
• 'MTE'(Nivelde suciedadleve)sedesplegar_.
cont,
_Losnombresde losproductossonmarcasregistradasde susrespectivosfabricantes=
6O
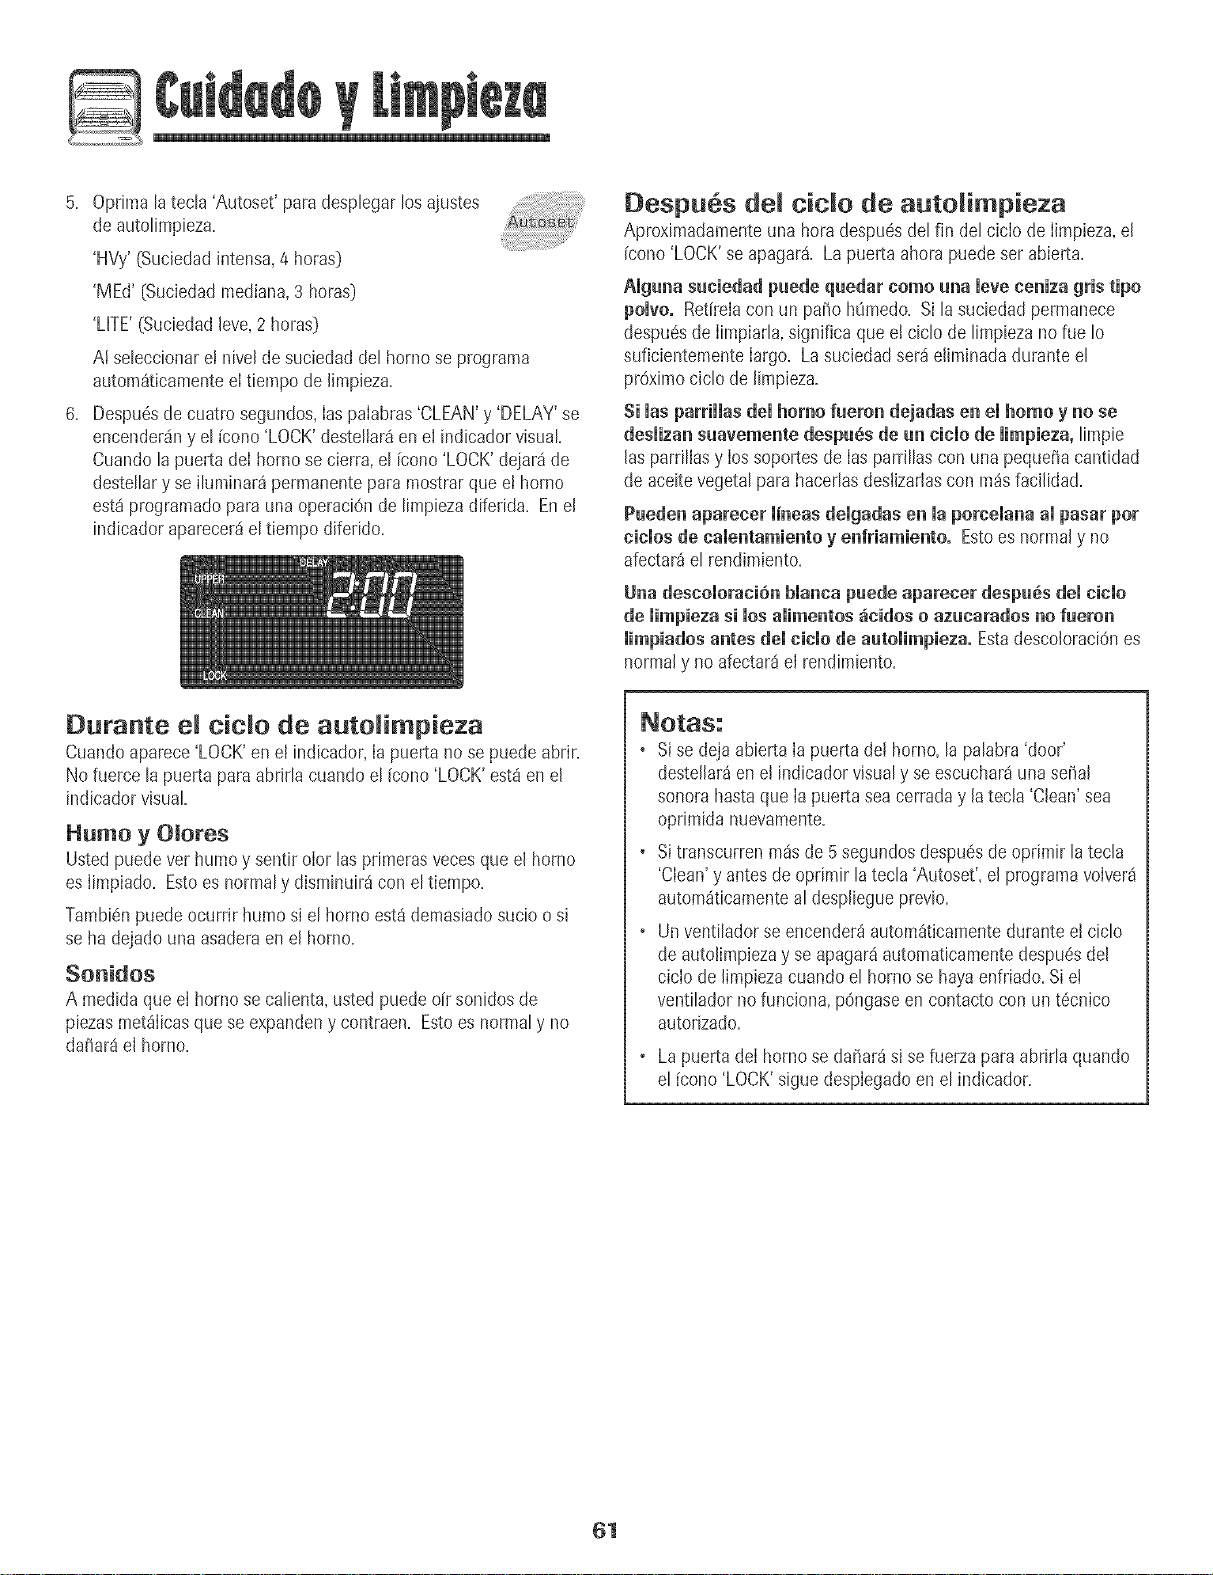
5+ Optima latec[a'Autoset'paradesplegarlosajustes
de autotimpieza+
'HVy'(Suciedadintensa,4 betas)
'MEd' [Suciedadmediana,3 horas)
'LITE'(Suciedadleve,2 horas)
A[seteccionare[niveldesuciedaddetborneseprograma
autom_ticamentee[tiempode [impieza+
6+ Despu6sde cuatro segundos,[aspaiabras'CLEAN'y 'DELAY'se
encender_nyet leone'LOCK'destetiar_en el indicadorvisual
Cuandotapuertade[homosecierra,el [cone'LOCK'dejar_de
destellary seiluminar_permanentepara mostrarqueet homo
est_programadoparauna operaciOnde limpiezadiferida+Enel
indicadoraparecer_el tiempodiferido+
Despu6s demc+do de auto impieza
Aproximadamenteuna heradespu_sdel fin del cicio de Iimpieza,el
icono'LOCK'seapagar& La puertaahorapuedeser abierta.
Aiguna suciedad puede quedar come una [eve eeniza gris ripe
polve. Retirelacon un paso h_medo+Si lasuciedadpermanece
despu6sde [impiarla,significaquee+ciclo de limpiezanorue [o
suficientementelargo. Lasuciedadser_e[iminadaduranteel
proximociclo de [impieza.
Si masparHHasdemhomo fueron dejadas en el homo y nose
deslizan suavemente despuSs de un cielo de [impieza, limpie
[aspardllasy [ossoportesde [asparrillascon unapequd_acantidad
de aceitevegetalparahacer[asdes[izadasconm_sfaci[idad+
Pueden aparecer [i'neasdelgadas en [a porcelana a[ pasar per
eielos de calentamiento y enfriamiento° Estoes normaly no
afectar_el rend+miento+
Una descoioraci6n bianca puedeapareeer despu_s dei eieio
de iimpieza si los aiimentos _ieidoso azuearados no fueron
mimpiadosantes demeiemode automimpieza.EstadescoloraciOnes
normaly no afectar_e[ rendimiento.
Durante el c+cmo de autoRimp+eTa
Cuandoaparece'LOCK'en e[indicador,[apuertanosepuedeabrir+
Nofuerce lapuertaparaabrirla cuandoel (cone'LOCK'est8en el
indicadorvisual
Humo y Oiores
Listedpuedevet humoy sentir olor lasprimerasvecesqueel borne
esIimpiado+Estoesnormaly dismintJir_con eltiempo+
Tambi6npuedeocurrir humosiel borneest_demasiadosucio o si
se hadejadouna asaderaen el homo+
Sonidos
A medidaque eIhornosecalienta,usted puedeoir sonidosde
piezasmetfilicasqueseexpandeny contraen. Estoes normaly no
dafiar8el homo+
+ S+sedejaabierta[apuertade[ borne,[apa[abra'door'
deste[lar_enel indicadorvisualy seescuchar_una se_al
sonorahastaque [apuertaseacerraday [atec[a'Clean'sea
oprimidanuevamente.
+ Si transcurrenm_sde 5segundosdespu6sde oprimir latecla
'Clean'y antesde oprirnir latecla 'Autoset',el programavelvet8
autom_ticamenteal despliegueprevio+
+ Unventiladorseencender_autom_ticamentedurantee!ciclo
de autolimpiezay seapagar_automaticamentedespu6sdel
ciclo de limp+ezacuandoel homose hayaenfriado+Si e!
ventiladorno funciona,pOngaseen contactoconun t6cnico
autorizado+
Lapuertade[homosedafiar_s+sefuerzaparaabrir[aquando
el [cone'LOCK'siguedespiegadoen el indicador.
61
Procedi ientos de Li pieza
antes de tocarla o mimpiaria,Coneste se evitarfi da_o y posiblesquemaduras.
i; Para evitar manchaS_ dec0[0raci6n!ffepie laeStufadespuesde cadauso,
; Si Seret!raa!g_mapieza,asegtiresedeq_JeSeareinstaladaen forma correcta:
*Los hombresde Iosproductossonmarcas
registradasdesus respectivosfabricantes.
** Parahacerpedidos,I[amear 1-880-843-8304
en EE.UU.o aJ1-866-587-2002en Canad&
PIEZAS PROCEDIM[ENTO DE LIt_PmEZA
Asadera e Nunca cubra ei inserte con papel de aluminio pliesesto evita que la grasa seescurra a la bandeja inferior.
_aserto , CoIoqueun patioeniabonadosobreetinse_oy Iabandeia;deie remo)arparaso[tarIasuciedad=
, Laveen agua]abonosatibia. Useuna esponjadefregar paraquitarIasuciedadpersistente.
, La bandejade asary el insertopuedenserlavadosen el lavavajilias.
Panel de Control , Paraactivar'ControlLock' (B[oqueodeloscontro[es)para[a[impieza,vet P%ina 49.
, Limpieconun pasoh_medo=Secarbien=
, SepuedenusarIimpiavidriossi serodan en el pasoprimero=No rode directamente en el panel.
• No useotros rociadoresde Iimpieza,Iimpiadoresabrasivoso muchacantidadde aguaen el paneide control
Manija de ia Puerta, , NO USEMNGUN PBODUCTODEUMPIEZA QUECONTENGABLANQUEADOBA BASEDECLORO.
E×teriordemhorao * NO USELIMPIADOBES "ORANGE"M LIMPtADOBESABBASIVOS.
Onodelosseiectos)- . SIEMPBEUMPtE LAS SUPEBFICIESDEACEBOA FAVORDELGBANO.
Acero Inoxidable , Limpieza Diada/Suciedad [eve - Limpieconunode lossiguientes- aguaconjab6n,unasoluciOndevinagre
blancoconagua,Iimpiadorparasuperficiesyvidrio 'Formula409'*o un limpiavidriossimilar- usandounaesponja
o unpa_osuave.Enjuagueyseque=Parapulir yevitarmarcasdelosdedos,useel producto'StainlessSteelMagic
Spray'[PiezaNo.20000008]_=
, SuciedadModerada/Intensa-Limpieconunodelossiguientes-'BonAmi'_ 'SmartCIeanser'_o'SoftScrub'*-
usandounaesponjah0medaoun pasosuave.Enjuagueyseque=Lasmanchasdificilespuedensetquitadascon
una espon]a'Scotch-Brite'_h0meda;frote a favordel grano=Enjuaguey seque=Pararestaurarelhstre y sacar
lasvetas,aplique'StainlessSteelMagic Spray'.
, Eviteusarcantidadesexcesivasde aguaque puedeescurrirsedetrdso debajodel vidriocausandomanchas=
dei Homo- Viddo , Laveconaguayjab6no [impiavidrios=Enjuagueconagualimpiay seque=Sepuedeusarlimpiavidriossi primero
Io rociaen un paso=
, NouseIimpiadoresabrasivostalescomoesponjasderestregar,lanadeaceroo limpiadoresenpo[vopuespueden
rayarelvidrio=
Moidura dei Homo - , Laveconaguay]abdn,Iimpiadoresdeviddoorociadoresliquidossuaves=Eviteusarcantidadesexcesivasdeagua=
Aeabados de Metal , Limpielasmanchaspersistentesconlimpiadoresnoabrasivostal como'BonAmi'_ouna pastadebicarbonatode
soday agua;en]uaguey seque=Nouselimpiadoresabrasivos=
_nterior demHomo , Veaen [aP%ina 59 informacidnsobree!homo autolimpiante.
, ParaIimpiarderramesocasionaIesentreIimpiezas,useuna esponjadepldsticoIIenadejab0n; enjuaguebien=
, LimpieIosderramesazucaradosylosderramesdcidostaIescomojugo deIim0n,salsadetomatoo saisasa base
de leche=Laporcelanaesmakadaesresistentealos_icidosperonoa pruebade dcidos=Etacabadode porcetana
sepuededescolorarsi losderrames_cidoso azucaradosno sonlimpiadosantesde un ciclo de autolimpieza=
Pa_diias dei Homo , Froteconunaesponjaoconun pasousandounodelossiguienteslimpiadores:'BonAmi'?'SoftScrub'*o'Comet'*.
Eniuagueyseque=
, ParaIasmanchaspersistentesuseunaesponjade fregarreIlenaconjab0n h0meda=Enjuagueyseque=
• LasparriIIassedescoIorar_npermanentementeypuedenno deslizarseconsuavidadsisondejadasene!horno
duranteunciclodeautoiimpieza=Siestosucede,frote laparriliaylossoportesconunapeque_acantidaddeaceite
vegetalpararestaurarlafaciiidad de movimiento,IuegoIimpieeIexcesode aceite=
62
Luz del Homo
o Notoqueun foco caEientecanun pasohOrrtedopuesel foco
puedequebrarse.
Pacacambiac mamuzdemhome:
1. Useun tomaoHassecoy con muchocuidadodestornillela
cubiertadetfocoy eIfoco.
2. Reemphcecon un foco parahomode etectrodomesticode 40
wats. Serecomiendantosfocosconbasede tatOnpara evitar
fusionderfoco en etcasquillo.
3. Reemphcetacubiertadetfoco yvuetvaa conectartacorriente
el6ctricaat homo.
4, Vuelva a programar el reloj.
Ventana Homo
Paca pcotegecmaventana demhomo:
1. No use agentes de limpieza abrasivos tales como esponjas
de lana de acero o limpiadores en polvopuespuedenrayarel
viddo.
2. Nogolpeeel vidrioconollas,sartenes,muebles,juguetesu otms
objetos.
3. NocierreIapuertadel hornohastaque JasparrillasdeJhomo no
est6nen su Jugar.
AI golpear,rayar,hacervibraro esforzarel vidrio puededebilitarsu
estructuracausandoun mayorriesgode roturaen unafecha
posterior.
63
ml
PROBLEMA
Parala mayoria de los problemas, + Revisesi loscontrolesdel homo est4ndebidamenteajustados+
verifiqueprimero 1osiguiente. + Vedfiquesiel hornoest_debidamenteenchufadoen un tomacorrienteel_ctrico.
, Veriflqueo vuelvaa reportere!disyuntor=Verifiqueoreemplaceetfusible=
, Verifiqueetsuministrodeenerg[ael6ctrica=
Emremoj,maspamabrasen el indicador + Loscontrolespuedenestar programadospara'Cook& Hold'o 'Delay'+
visuamy/o masmucesfuncionan pero + Puedeestaractivadalacaracter[sticade bloqueode loscontroles+(VetP%ina 49=)
emhomono se camienta.
Lamuzdemhomo y/o emremojno + Elfoco puedeestarsuettoo defectuoso+
funcionano , La luzdel hornono funcionaduranteun ciclo de autolimpieza+
+ Elhorno puedeestaren ModoSab_tico=(Verp%ina 56Y
[lay un olor fuerte o humo leve + Estoesnormalenunhomomuralnuevoydesaparecer_despu6sdeunospocosusos.Aliniciar
cuundo se eneiende el homo. un ciclo de autollmpiezase "quemarU' losoloresrossr_pidamente.Si seenciendeel
ventlladorayudaraa eliminaret humoy/o e!olor=
, Suciedadexcesivade alimentosenel panelinferiordel homo=Useunciclo deautolimpieza=
El homo no activa el proeesode + Elhorno puedeestar programadoparauna limpiezadiferlda=
+ Elhomo puedeestaren ModoSab_tlco=O,/erp_gina56=_)
, Elhorno puedeestara m_sde205° C(/_00° FD=Latemperaturadel homodebeser inferior
a205° C[400°FDparaprogramarun ciclo de limpieza=
El homo no limpia en formu debidao + Elhomo puedenecesitarun tiempo de Ilmpiezam_sprolongado=
+ Noselimpiaronlosderramesexcesivosantesdel procesode autolimpieza=
Los alimentos no se usun u la parrilla + VerlfiqueIaposici6nde Iaparrilla=(VerP%ina 5zQ
en formu debidao + Elvoltaje del hogarpuedeserbajo=
Losalimentos homeudos se quemun + Elalimentopuedeestarcolocadoen formaincorrectaen el homo=(Verelfolleto "LaCocina
o se dorun demasiudoo F_ciI"y
, Elhomo norue precalentadoenforma debida+
Los alimentos se homeun de , Elhorno nofue precalentado+
munera irregular. , Elhorno puedeestar +nstaladoen forum indebida+
, VerifiqueIaparrilladel homo conun nivel+
, Coloquelosutensiliosdehornearalternadamenteysinquesetoquenentresiosinquetoquen
la paredde!homo+
, VerifiqueIasinstruccionesparaIacorrectacolocaci6ndelosutensiliosenlaparrilladelhomo+
(Verel folleto "La CocinaFacil"y
Lapuertu del homo no se , Elhornopuedequenosehayaenfdadolo suficientedespu6sdeun procesodeautolimpieza+
, Elcontroly la puertapuedenestarbloqueados+(Verp%ina 49=)
nonto
64
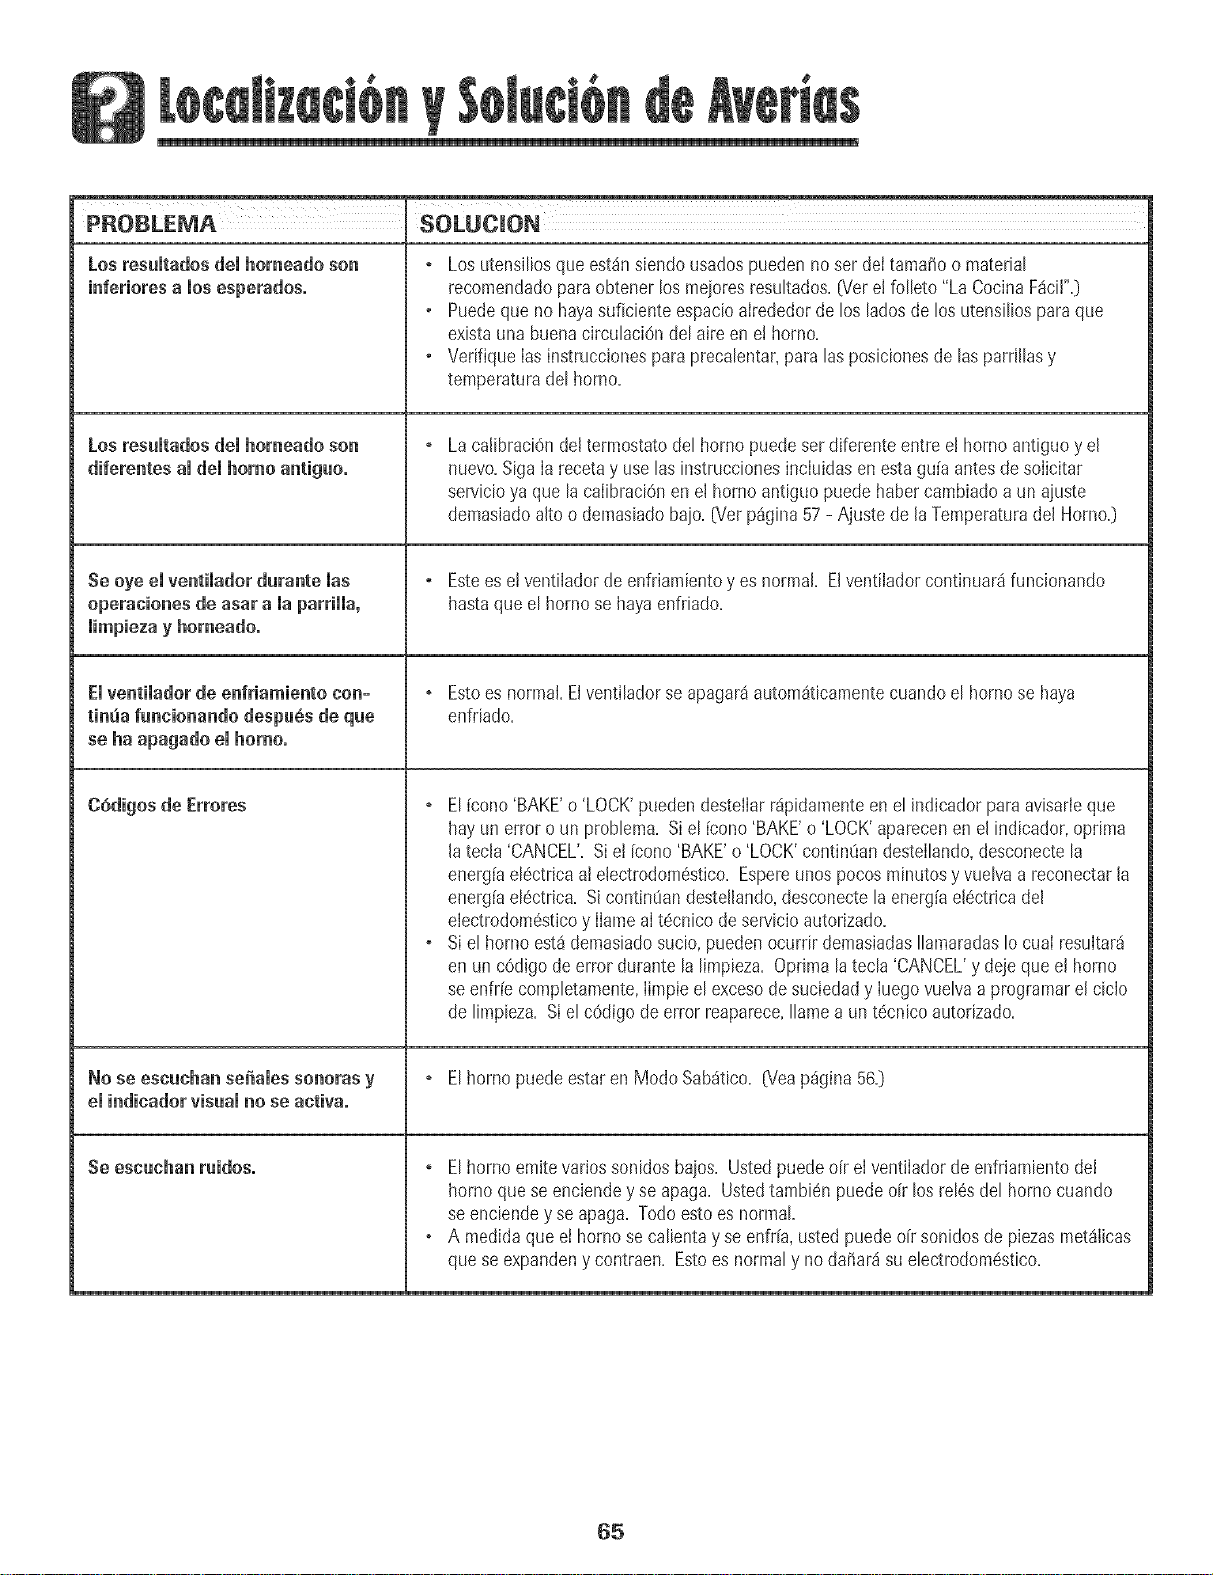
PROBLEMA SOLUCION
Losresumtadosdemhomeado son
inferiores a mosesperados.
Losresuitadosdeihomeadoson
diferentes amdemhomoantiguo.
se oye emventimadordurante mas
operaciones de asar a maparriHa,
mimpiezay homeado.
Emventimadorde enfriamiento con-
timia funcionando despu6s de que
se ha apagado emhomo°
G6digos de Errores
No se escuchan sdiaies sonoras y
eJindicadorvisuaJno se activao
Se eseuehan ruidos.
, Losutensiliosque estdnsiendousadospuedenno serdeitamai_oo material
recomendadoparsobtenerlosmejoresresukados.(Verei folleto "La CocinaF_ciI".)
• Puedeque no hayasuficiente espacioairededorde los ladosde losutensiliosparsque
existauna buenacirculaciOndel aireen e!homo.
• VerifiqueIasinstruccionesparaprecalentar,paralasposicionesde lasparrillasy
temperaturadel horno.
LacalibraciOndel termostatodel homopuedeserdiferenteentreel homo antiguoy el
nuevo.SigaIarecetay uselasinstruccionesincIuidasen estagu[aantesde soIicitar
servicioya que lacaiibraciOnen el homoantiguopuede habercambiadoa un aiuste
demasiadoaltoo demasiadobaio.[Verp%ina 57- Ajustede laTemperaturadel Homo.)
, Esteesei ventiladorde enfriamientoyes normal. Elventiladorcontinuar8funcionando
hastaqueel homosehayaenfriado.
, Estoesnormal.Elventiladorseapagarhautom_ticamentecuandoel hornose haya
enfdado.
, El[cono'BAKE'o 'LOCK'puedendestelIarr4pidamenteen el indicadorparaavisarleque
hayun erroro un problema. Siel [cono'BAKE'o 'LOCK'aparecenen el indicador,optima
JatecJa'CANCEL'.Si eJ[cono'BAKE'o 'LOCK'contin0andestellando,desconectela
energ[ael6ctricaaJeJectrodom6stico.Espereunospocosminutosyvuelvaa reconectarJa
energ[ael6ctrica. Sicontin0an desteJlando,desconectela energiaeJ6ctricadel
electrodom6sticoy IlameaIt6cnico deservicioautorizado.
* Siel horno est4demasiadosucio,puedenocurrir demasiadasIlamaradasIocualresultar4
en un c6digode errordurantela limpieza. Optimalatecla 'CANCEL'y dejeque el horno
seenfr[ecornpletamente,Iimpieel excesodesuciedady Iuegovuelvaa programareJciclo
de limpieza.Si el cOdigode error reaparece,Ilamea un t_cnicoautolizado.
, Elhomo puedeestaren ModoSab_tico. (Yeap%ina 56.)
, Elhomo emitevariossonidosbaios. Ustedpuededr el ventiladorde enfriamientodel
homoque seenciendeyseapaga. Ustedtambien puedeoFrlosrel6sdel horno cuando
seenciendey seapaga. Todoestoesnormal.
• A medidaque ethorno secalientay seenfrFa,ustedpuedeoFrsonidosde piezasmetSlicas
queseexpandeny contraen. Estoes normaly nodafiar_isuelectrodom6stico.
65

66
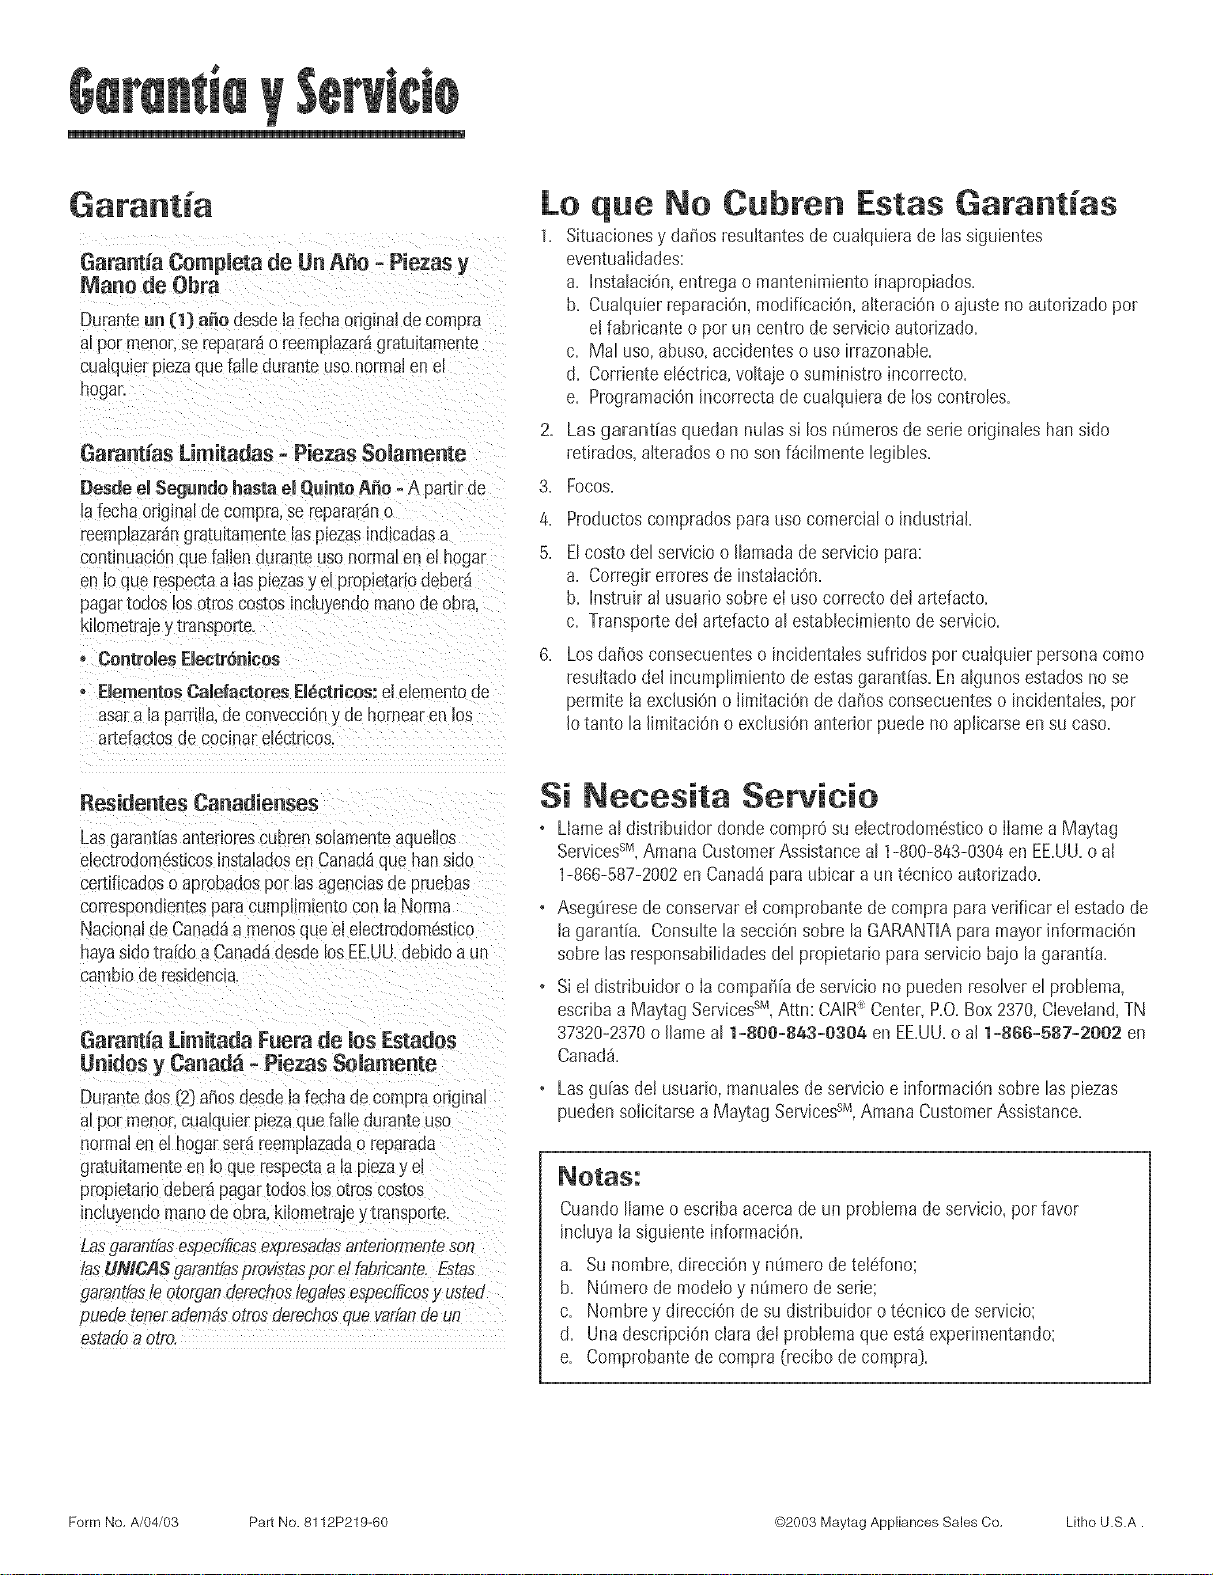
Garantia
Garant[a Compieta de Un A_o - Piezas y
Mano de Obra
Durameun (1) a_o desdelafechaodginaldecompra
alpor menor,serepararao reempiazar_gratuitamente
cumqulerp_ezaquefaiIeduranteusonormalene!
hogal
Garantias Limitadas = PiezasSeiamente
Desde emSegundo hasta ei QuintoAide=A partlrde
[afechaoriginalde compra,serepararano
reemptazarangra[uitamente[aspiezasind[cadasa
contmuaci6nquefai[enouran[eusonormmen el hogar
en1oquerespectaa [asp_ezasye[prop[etariodeberd
pagartodos[osotroscostosinc_uyendornanode obra=
k[[ome[rajeytranspor[e.
Controles Eieetrenicos
* ElementosCalefanteres El_ctriees: ele[ementode
asara [aparri[la,ueconvecciOny de hornearen los
ar_efactosde cocinar el6ctricos.
Lo que No Cubten Estas Garantias
1= Situacionesy daSosresuitantesde cualquierade lassiguientes
eventuaiidades:
a=Insta[aciOn,entregao mantenimientoinapropiados=
b=CualquierreparaciOn,modificaciOn,a[teraci6no ajusteno autorizadopot
e!fabricanteo par un centrode servicioautodzado=
c=Mal uso,abuso,accidenteso usoirrazonabie=
d=Corrienteel6ctrica,voltajeo suministroincorrecto=
e=ProgramaciOnincorrectade cualquierade [oscontroles=
2= Las garantias quedan nulassi losn0merosde serieoriginalesbansido
retirados,a[teradoso nosonfaci[mentelegibles=
3= Focos=
/L Productoscompradosparausocomercia[o industrial
5. E[costode[servicioo [[amadadeserviciopara:
a. Corregirerroresde instaiaciOn.
b. Instruira[usuariosobree[usocorrectodetartefacto.
c. Transportedetartefactoa[estab[ecimientode servicio.
6. Losdafios consecuenteso incidentatessufridospor cuaiquierpersonacomo
resukadodel incump[imientodeestasgarant[as.Ena[gunosestadosnose
permite[aexciusiOno [imitaciOnde dafios consecuenteso incidentaies,por
[otanto [a[[mitaciOno exc[us[Onanteriorpuedeno ap[[carseen sucaso.
Residentes Canadienses
Las gamntias anteriores oubren so[amente aqueflos
electrodomdstlcos instaIados en Canada que han sioo
cerfificados o aprobados por las agencias de pruebas
correspondientes para cumpiimiento con la Norma
National de Canad_ a rnenos que el dectrodom6stico
hayasido traido a Canad_ desde los EE.UU.debido a un
cambio de residencla.
Garant[a Limitada Fuera de los Estados
iJnides y Canad_ - Piezas Seiamente
Durantedos(2]afiosdesde[afechadecompraoriginal
a[por menoLcua[qulerpiezaquefa[[eduranteuso
normalen e[hogarserareemp[azadao reparada
gra_uitamenteen 1oque respec-[aa [apiezayel
propietafiodeber_ipagartodoslosotroscosmos
[nciuyendomanodeobra.kiiometrajey[ranspor[e
Lasgarantiasespecv2caseapresadasanteriorrnemeson
las[INICASgarantiasprovisraspot d fabric'ante.Estas
garanJas/eotorganderechoslegalesespecfficosyusted
puedeteneradembsotros'derechosquevaffandeun
estadoa otto.
Si Necesita Setvicio
• Llameal distribuidordondeeompr6su electrodom6sticoo flamea Maytag
ServicessM,AmanaCustomerAssistanceal 1-800-843-0304en EE.UU.o al
1-866-587-2002en Canad_para ubicara un t6cnicoautorizado=
• Aseg0resedeconservarel comprobantede compraparaverificarel estadode
iagarantia=Consultela secciOnsobrelaGARANTIAparamayorinformaciOn
sobrelasresponsabilidadesdel propietarioparaserviciobajo lagarant[a=
o Si ei distribuidoro Iacompafi[adeserviciono puedenresolverel problema,
escnbaa MaytagServicessM,Attn: CAIR Center,P=O=Box2370,CIeveiand,TN
37320-2370o Ilameal 1-800-843-0304 en EE=UU=o al 1-866-587-2002 en
Canada=
LasguiasdeIusuano,manuaJesdeservicioe informaci6nsobre[aspiezas
puedensolicitarsea MaytagServicessM,AmanaCustomerAssistance.
Cuandoliameo escribaacemade un problemadeservicio,por favor
inciuya[asiguiente informaciOn.
a. Suhombre,direcci6ny n0merodeteldono;
b. N0merode modeloy n0merode serie;
c. NombreydirecciOndesu distribuidoro t6cnicode servicio;
d. Unadescripci6nciaradeiprobiemaque est4experh4entando;
e. Comprobantede compra(recibode compra).
Form No, A/04/03 Part No. 8112P219-60 @}2003 Maytag Appliances Sales Co, Litho U.S.A.