Loading ...
Loading ...
Loading ...
Installation
Always choose a safe location for the fan, keeping in mind the safety precautions
outlined. Ensure all packaging has been removed from the unit before use.
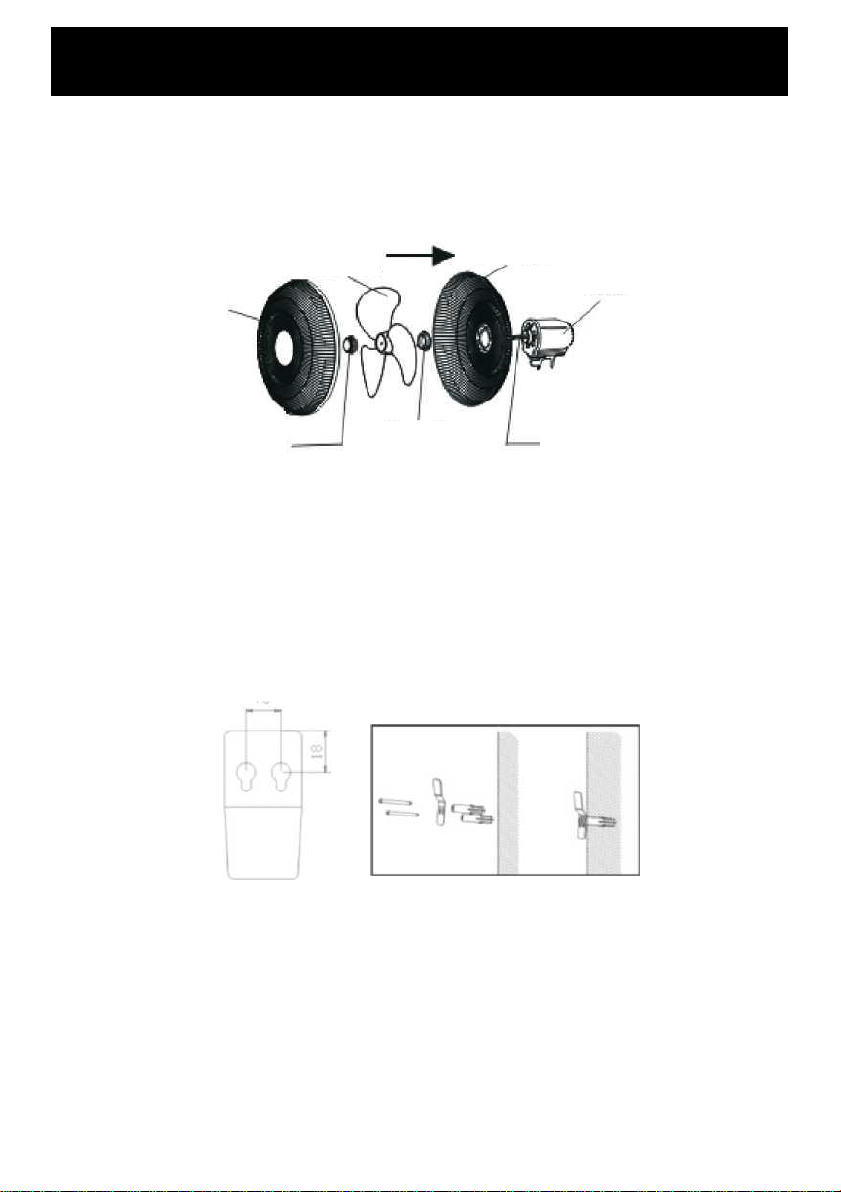
- Remove the fan blade nut (turn clockwise) and grill nut (turn anti-clockwise).
- Place the rear grill into the motor axis and secure it in place with the grill nut.
- Place the fan blade on to the motor axis and secure in place with the fan blade nut.
- Place the front grill and fit securely on to the rear grill. Fasten in place with the
screw.
Front grill
Fan Blade
Nut
Grill Nut Motor Axis
Fan Head
Rear Grill
Fan Blade
Assembling the fan head
Mounting to the wall
- Select an appropriate location and fix the wall mounting bracket onto a strong wall (or locate
a stud behind plaster boards) with two wall plugs and fixing screws supplied.
- Note: Consider a location within a distance of 0.8m from a wall power outlet to make sure
you can plug the unit into the power point easily.
- Mount the wall fan on the mounting bracket and plug in the unit.
- If the power cord is hanging loosely between the fan and the power outlet, make sure it will
not touch or obstruct fan blade rotation or fan oscillation in any way.
Loading ...
Loading ...
Loading ...