Loading ...
Loading ...
Loading ...
GENERALRECOMMENDATIONS
Thewarrantyonthisunitdoesnotcover
itemsthathavebeensubjectedtooper-
atorabuseornegligence.Toreceivefull
valuefromthewarranty,theoperator
mustmaintainunitasinstructedinthis
manual.Variousadjustmentswillneed
tobemadeperiodicallytoproperly
maintainyourunit.
• Onceayear,replacethesparkplug
andairfilterelement and check guide
bar and chain for wear. A new spark
plug and air filter element assures
proper air-fuel mixture and helps your
engine run better and last longer.
CHECK FOR DAMAGED OR
WORN PARTS
Contact Sears Service Center for re-
placement of damaged or worn parts.
NOTE: It is normal for a small amount
of oil to appear under the saw after en-
gine stops. Do not confuse this with a
leaking oil tank.
• ON/STOP Switch - Ensure ON/STOP
switch functions properly by moving
the switch to the STOP position.
Make sure engine stops; then restart
engine and continue.
• Fuel Tank - Do not use chain saw if
fuel tank shows signs of damage or
leaks.
• Oil Tank - Do not use chain saw if oil
tank shows signs of damage or
leaks.
CHECK FOR LOOSE
FASTENERS AND PARTS
• Chain Brake Nuts
• Chain
• Muffler
• Cylinder Shield
• Air Filter
• Handle Screws
• Vibration Mounts
• Starter Housing
• Front Hand Guard
CHECK CHAIN TENSION
_l_ WARNING: Wear protective
gloves when handling chain. The
chain is sharp and can cut you even
when it is not moving.
Chain tension is very important.
Chains stretch during use. This is es-
pecially true during the first few times
you use your saw. Always check
chain tension each time you use and
refuel your saw.
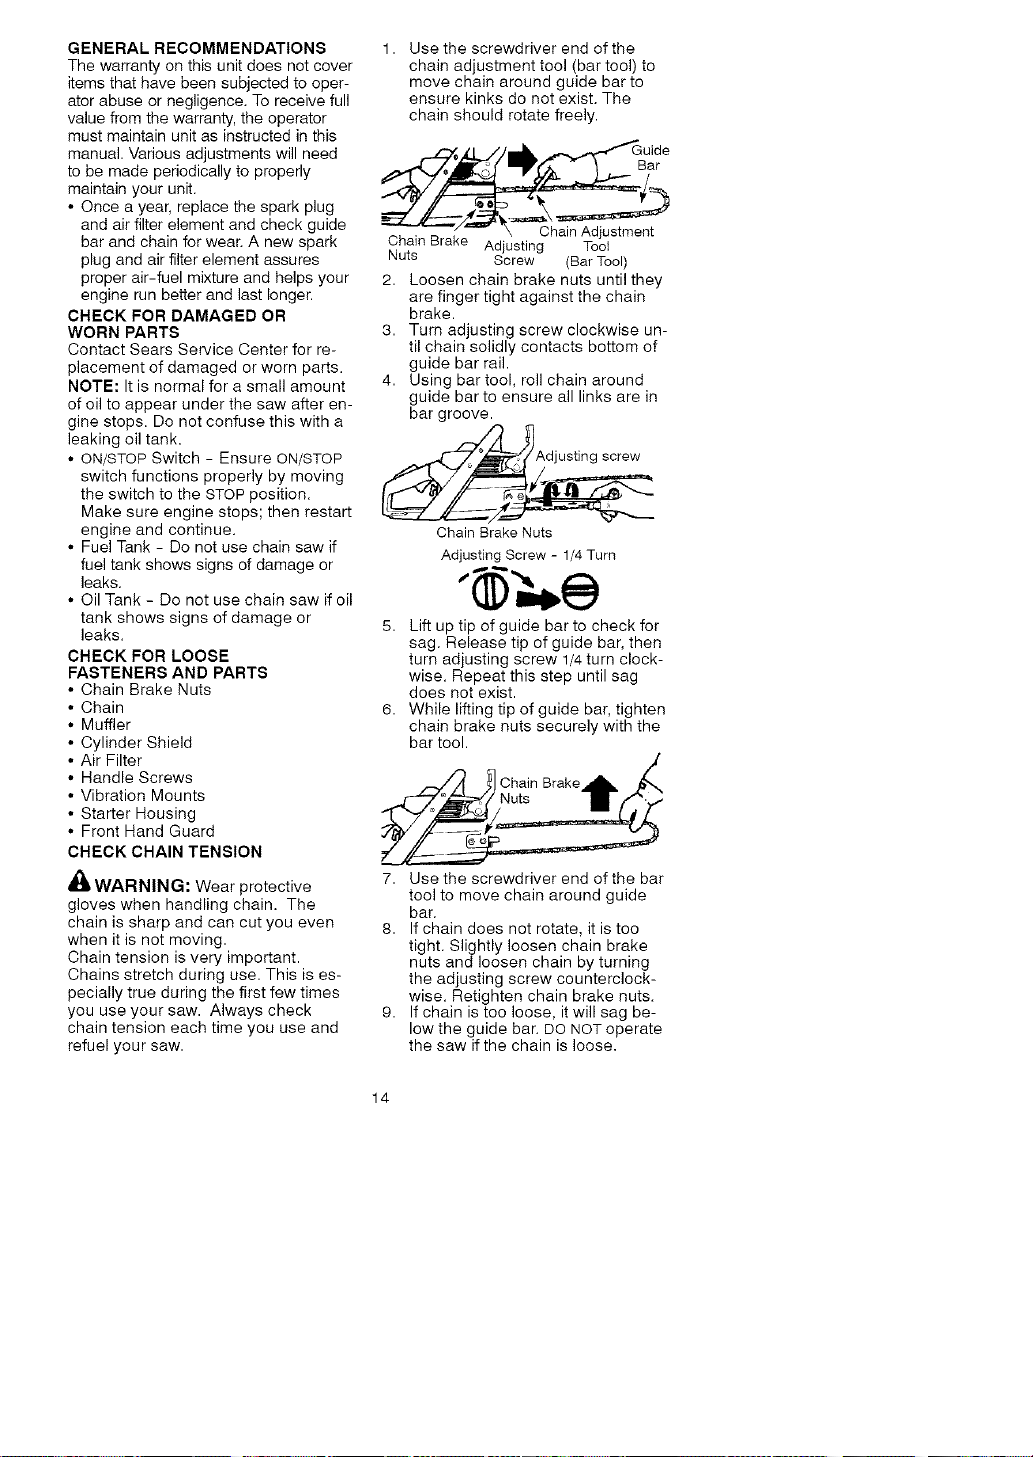
1. Use the screwdriver end of the
chain adjustment tool (bar tool) to
move chain around guide bar to
ensure kinks do not exist. The
chain should rotate freely.
,-z .zL_//mill uide
Chain Brake Adjusting Tool
Nuts Screw (Bar Tool)
2. Loosen chain brake nuts until they
are finger tight against the chain
brake.
3. Turn adjusting screw clockwise un-
til chain solidly contacts bottom of
guide bar rail.
4. Using bar tool, roll chain around
guide bar to ensure all links are in
bar groove.
screw
Chain Brake Nuts
Adjusting Screw - 1/4Turn
5. Lift up tip of guide bar to check for
sag. Release tip of guide bar, then
turn adjusting screw 1/4turn clock-
wise. Repeat this step until sag
does not exist.
6. While lifting tip of guide bar, tighten
chain brake nuts securely with the
bar tool.
t1"
7. Use the screwdriver end of the bar
tool to move chain around guide
bar.
8. If chain does not rotate, it is too
tight. Slightly loosen chain brake
nuts and loosen chain by turning
the adjusting screw counterclock-
wise. Retighten chain brake nuts.
9. If chain is too loose, it will sag be-
low the guide bar. DO NOT operate
the saw if the chain is loose.
14
Loading ...
Loading ...
Loading ...