Loading ...
Loading ...
Loading ...
ThisunitcanbestartedwithanoptionalSpeedStartTM accessory
(items sold separately). Please refer to the Speed Start TM accessory
operator's manual for the proper use of this feature.
Please contact your local Craftsman retailer, call 1-800-469-4663 or
visit www, craftsman,com for more information.
item No. Description
316.85951 .............................. Plug-In Power Start
316.85952 .................................. Power Bit Start
316.85953 ............................. Cordless Power Start
STARTING iNSTRUCTiONS
1. Check the oil level. Refer to Checking the Oil Level.
2. Fill the fuel tank. Refer to Fueling the Unit.
NOTE: There is no need to turn the unit on. The On/Off switch is in
the ON (I) position at all times (Fig. 8).
3. in cold weather only (below 50 ° F): Move the cold weather
start lever to the Closed position (Fig. 10).
4. Slowly press and release the primer bulb 10 times (Fig. 9).
5. Crouch in the starting position (Fig. 11).
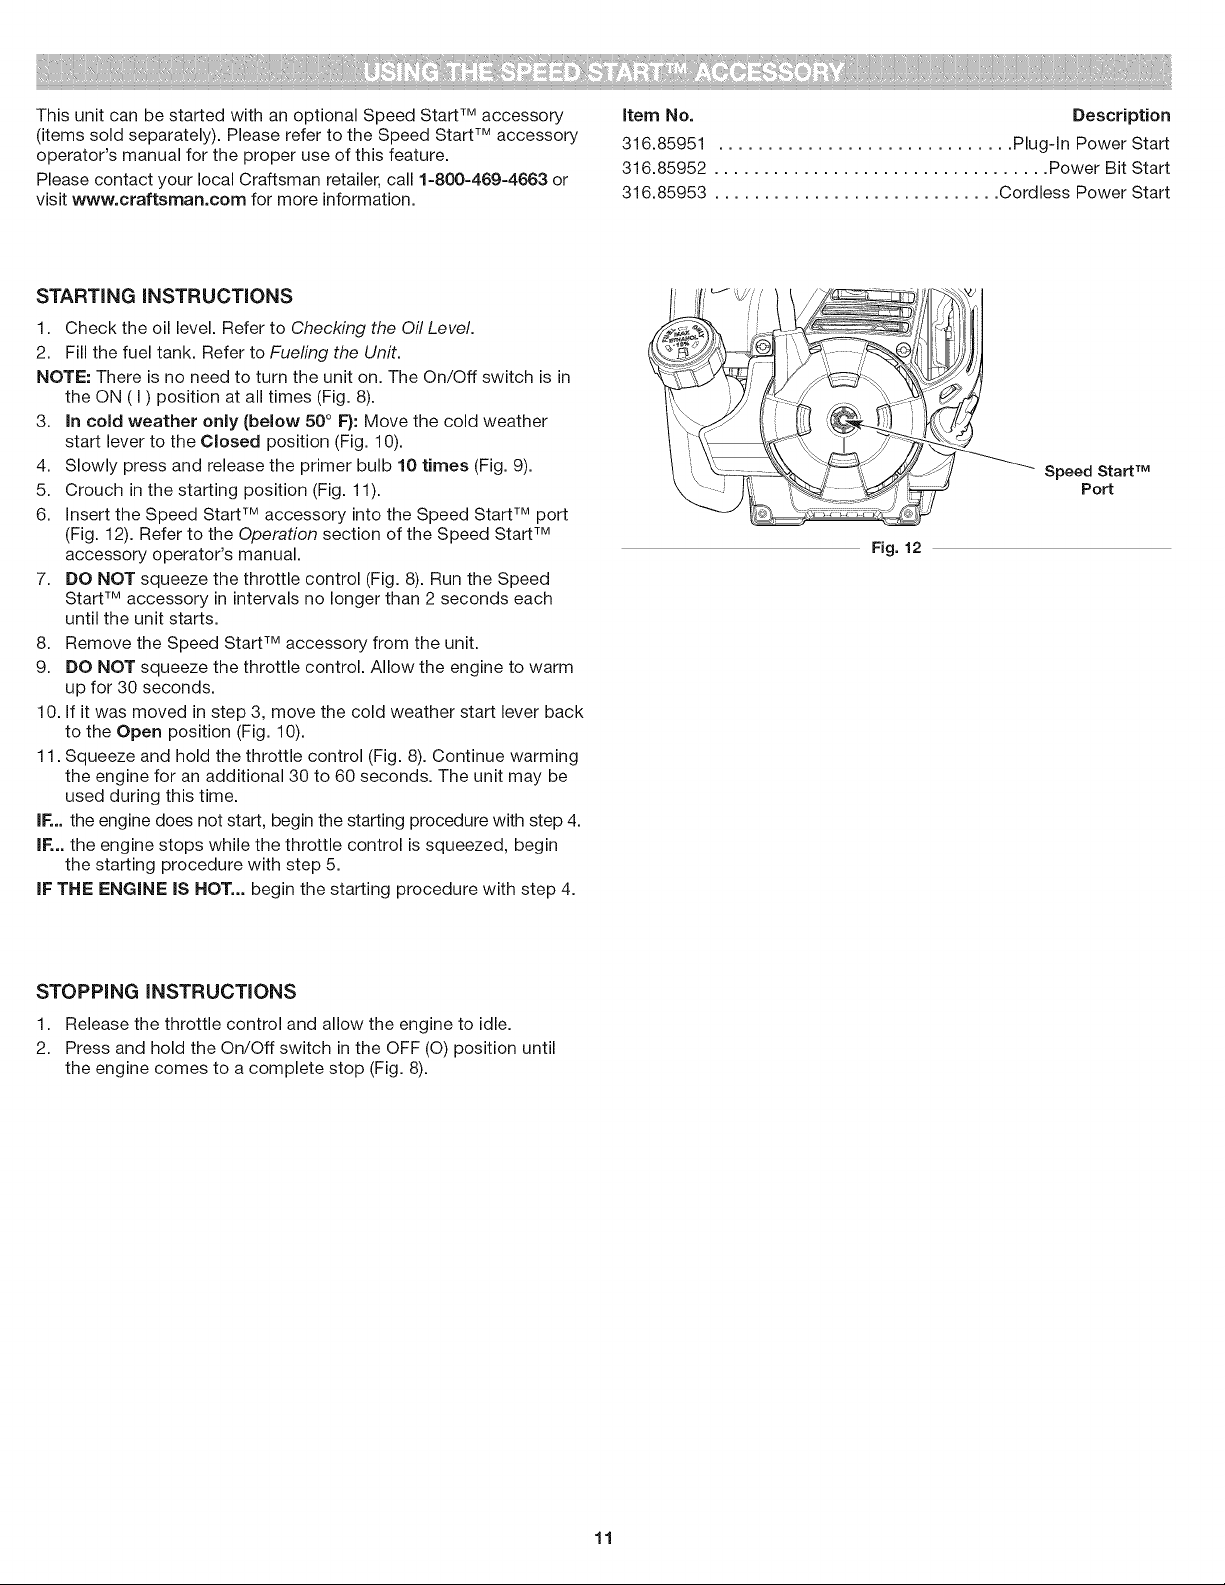
6. Insert the Speed Start TM accessory into the Speed Start TM port
(Fig. 12). Refer to the Operation section of the Speed Start TM
accessory operator's manual.
7. DO NOT squeeze the throttle control (Fig. 8). Run the Speed
Start TM accessory in intervals no longer than 2 seconds each
until the unit starts.
8. Remove the Speed Start TM accessory from the unit.
9. DO NOT squeeze the throttle control. Allow the engine to warm
up for 30 seconds.
10. If it was moved in step 3, move the cold weather start lever back
to the Open position (Fig. 10).
11. Squeeze and hold the throttle control (Fig. 8). Continue warming
the engine for an additional 30 to 60 seconds. The unit may be
used during this time.
iF... the engine does not start, begin the starting procedure with step 4.
iF... the engine stops while the throttle control is squeezed, begin
the starting procedure with step 5.
iF THE ENGINE iS HOT... begin the starting procedure with step 4.
Fig. 12
Speed Start TM
Port
STOPPING INSTRUCTIONS
1. Release the throttle control and allow the engine to idle.
2. Press and hold the On/Off switch in the OFF (O) position until
the engine comes to a complete stop (Fig. 8).
11
Loading ...
Loading ...
Loading ...