Loading ...
Loading ...
Loading ...
8
English
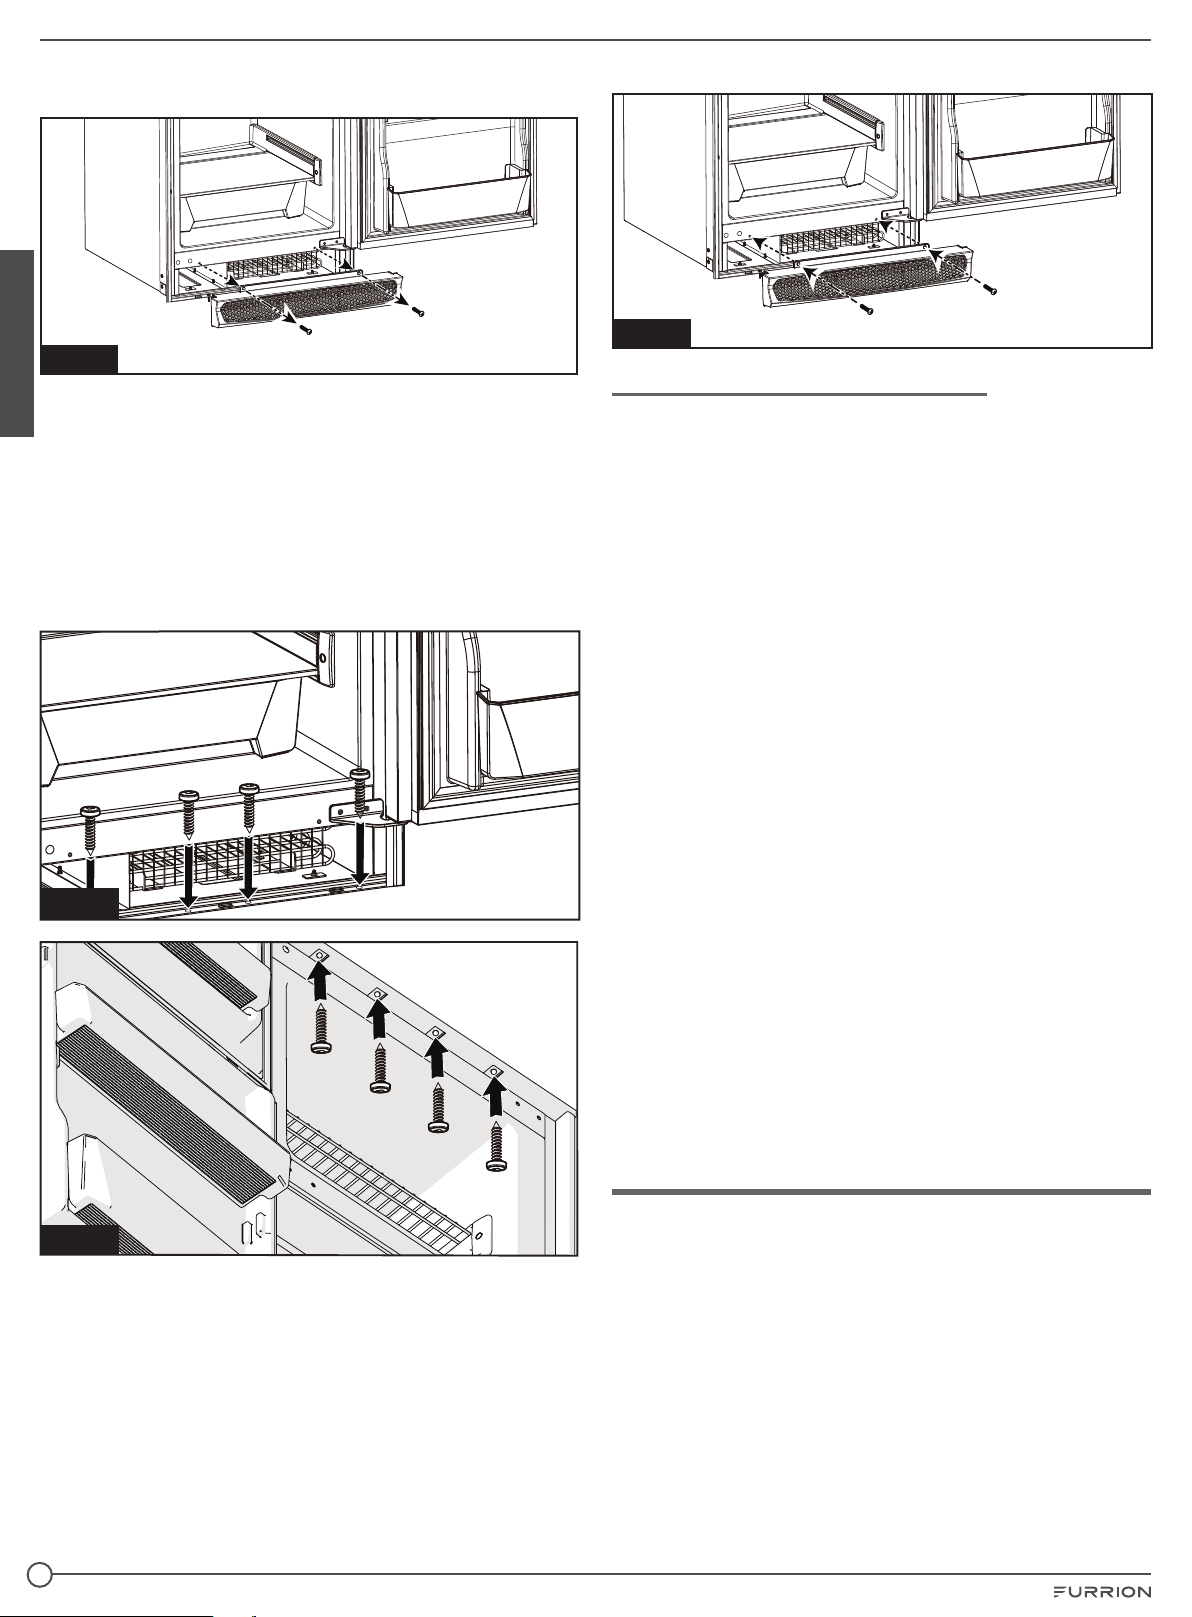
2. Unscrew the air vent fixing screws and remove the air
vent. (Fig. 5)
Fig. 5
3. Center the fridge in the opening to ensure the trim covers
all front gaps in the cabinet.
4. Affix the refrigerator into the enclosure on both the top
and bottom. (Fig. 6 and Fig. 7)
NOTE: Use the appropriate wood style screw to bite into
the softwood portion of the cabinet framing.
NOTE: Do not mount the top or bottom first, and push
the free end of the refrigerator cavity to square up in the
enclosure. Doing so will mis-align door the latches. If the
cabinet is out of square, shim appropriately.
Fig. 6
Fig. 7
5. Reinstall the air vent and tighten the screws. (Fig. 8)
Fig. 8
Installation with Sidewall Access
NOTE: Follow the below steps where a sidewall vent or
access panel is available, such as when replacing an existing
gas absorption refrigerator.
1. Place refrigerator in the enclosure, described in Fig. 4
from the "Installation without Sidewall Access" section.
Disregard any electrical connections at this step.
2. Remove the existing sidewall vent or open the sidewall
access panel, for access to the rear of the appliance.
3. Confirm location of the wire and that no interference with
the refrigerator chassis frame will cause an abrasion or
pinch on the wire. Relocate the wire if necessary, it should
be within the ¼" space between the back of the unit and
cabinet. Refer to "Electrical Preparation" of this manual
for further detail.
4. Inspect fit of the refrigerator to the cabinet. Push tight into
position.
NOTE: Sealing foam may be interfering in the rear and will
require removal of contact locations with a knife.
5. Affix the refrigerator to the cabinet following steps 2 - 5 in
section "Installation without Sidewall Access".
6. If applicable, cap and seal the gas line with a ⅜" flange
fitting plug. Turn the gas on and check for any gas leaks
using a non corrosive liquid leak detection solution.
7. Make the electrical connection as described in
"Electrical Connection" section.
8. If necessary re-seal any openings that were revealed from
cutting away the foam in step 3 that may prevent moisture
leakage/propagation.
NOTE: Foaming/sealing gaps along the perimeter of the
refrigerator sides and bottom is not necessary.
Reversing the Door Swing (Optional)
Your refrigerator is ordered as either a left or right open swing
from the factory, you may change the door swing direction as
required.
1. Disassamble the freezer door by removing the Hinge A
fixing screws. (Fig. 9) Remove the Hole Plastic Cover
Plugs from the left side of the refrigerator and set aside for
future use.
Loading ...
Loading ...
Loading ...