Loading ...
Loading ...
Loading ...
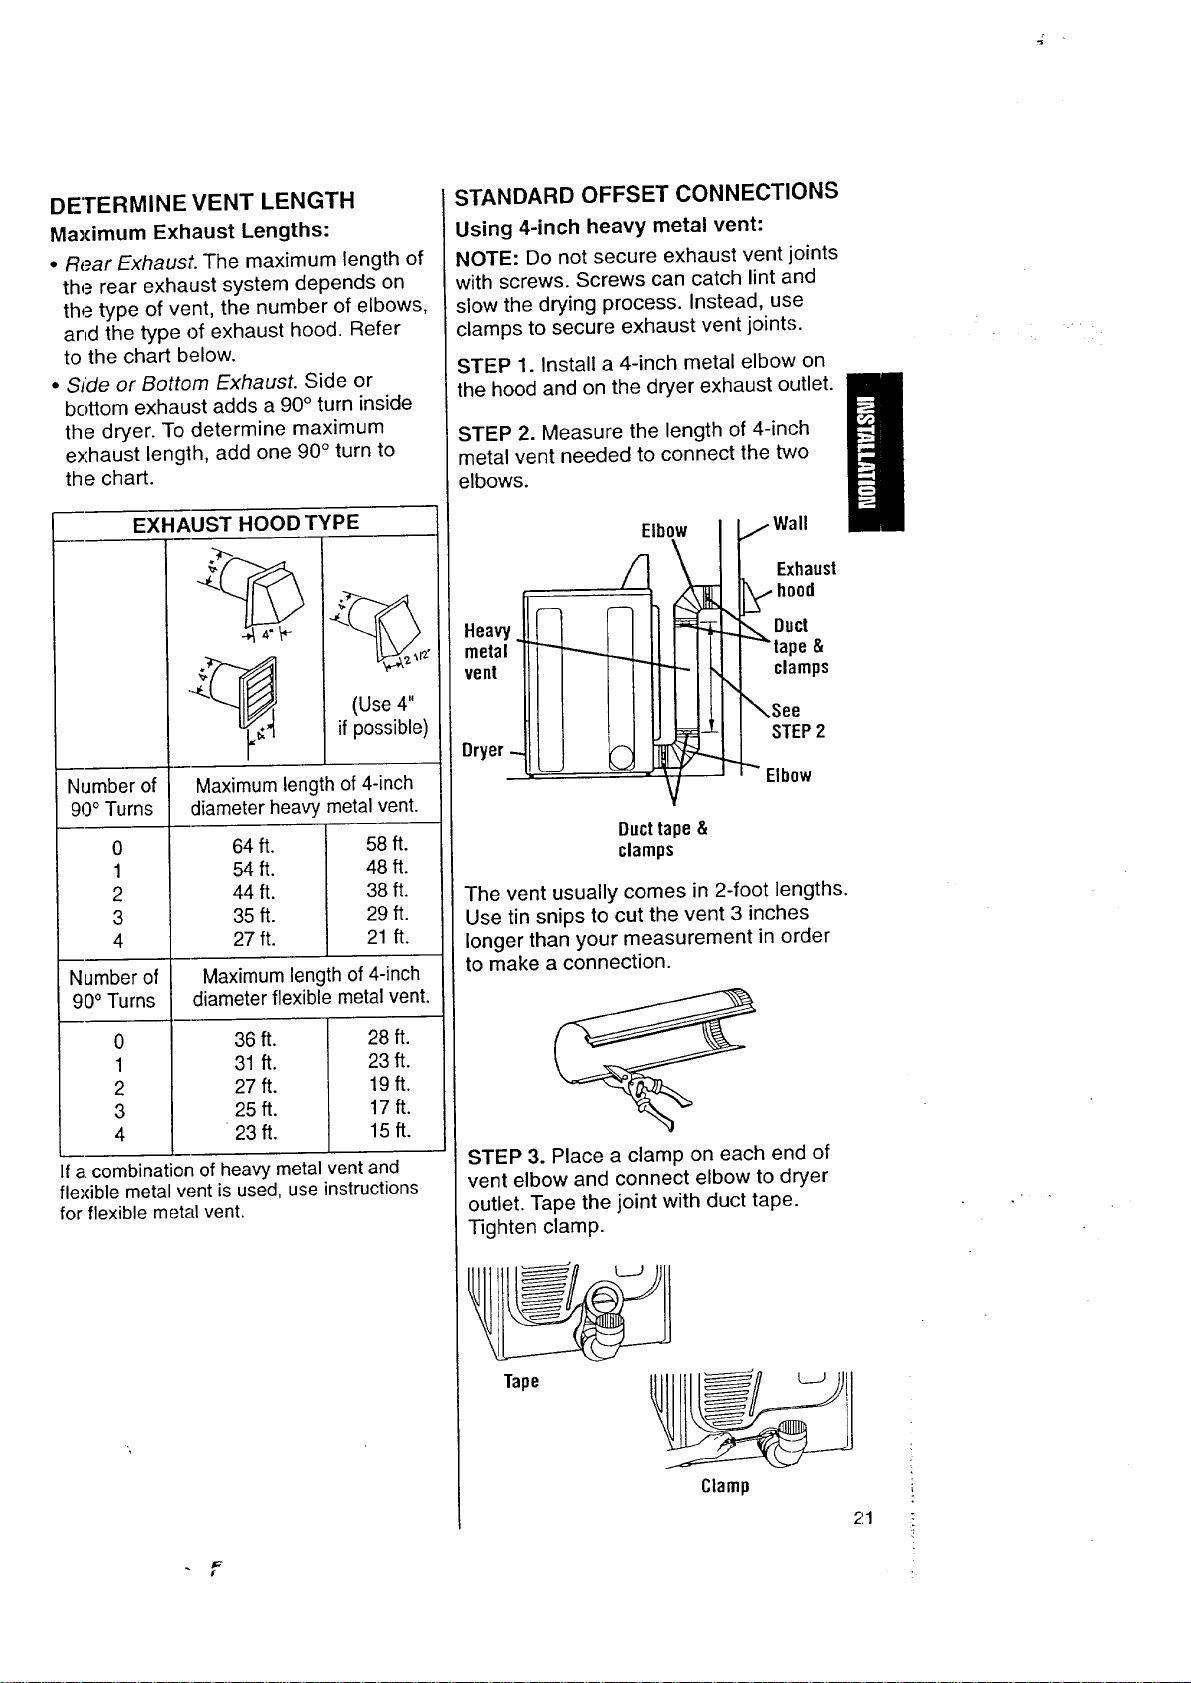
DETERMINE VENT LENGTH
Maximum Exhaust Lengths:
• Rear Exhaust. The maximum length of
the rear exhaust system depends on
the type of vent, the number of elbows,
and the type of exhaust hood. Refer
to the chart below.
• Sfde or Bottom Exhaust. Side or
bottom exhaust adds a 90 ° turn inside
the dryer. To determine maximum
exhaust length, add one 90 ° turn to
the chart.
Number of
9(:)° Turns
0
1
2
3
4
EXHAUST HOOD TYPE
(Use 4"
if possible)
Maximum length of 4-inch
diameter heavy metal vent.
64 ft. 58 ft.
54 ft. 48 ft.
44 ft. 38 ft.
35 ft. 29 ft.
27 ft. 21 ft.
Number of Maximum length of 4-inch
90° Turns diameter flexible metal vent.
36 ft. 28 ft.
31 ft. 23ft.
27 ft. 19ft.
25ft. 17 ft.
23ft. 15ft.
0
1
2
3
4
If a combination of heavy metal vent and
fle'dble metal vent is used, use instructions
for flexible metal vent.
/
STANDARD OFFSET CONNECTIONS
Using 4-inch heavy metal vent:
NOTE: Do not secure exhaust vent joints
with screws. Screws can catch lint and
slow the drying process. Instead, use
clamps to secure exhaust vent joints.
STEP 1. Install a 4-inch metal elbow on
the hood and on the dryer exhaust outlet.
STEP 2. Measure the length of 4-inch
metal vent needed to connect the two
elbows.
Heavy.
metal
vent
Dryer.-.
Elbow / Wall
Exhaust
_- hood
_. Duct
tape&
clamps
\
_See
STEP2
"""" Elbow
Duct tape &
clamps
The vent usually comes in 2-foot lengths.
Use tin snips to cut the vent 3 inches
longer than your measurement in order
to make a connection.
STEP 3. Place a clamp on each end of
vent elbow and connect elbow to dryer
outlet. Tape the joint with duct tape.
Tighten clamp.
Tape
Clamp
;'.1
Loading ...
Loading ...
Loading ...