Loading ...
Loading ...
Loading ...
A
REFRIGERATOR USE
ENGLISH
AIRFLOW
Ýòèñöøõèóõòóèõäìõĥòúìñöìçè÷ëèõèéõìêèõä÷òõçòñò÷ö÷òõè
items:
¿ Directly in front of the freezer fan tower vents
• Directly under the refrigerator vent
• Against the sides of the refrigerator compartment
NOTE: Place items toward the center of the shelves.
8
STEP 5 - MAKE ELECTRICAL
CONNECTION
1. Plug into a grounded 3 prong outlet.
2. Allow the refrigerator to cool for several hours before
adding food.
WARNING
Electrical Shock Hazard
Plug into a grounded 3 prong outlet.
Do not remove the ground prong from the power cord plug.
Do not use an adapter.
Do not use an extension cord.
Ïäìïøõè÷òçòöòæäñõèöøï÷ìñçèä÷ëĤõèòõèïèæ÷õìæäïöëòæî
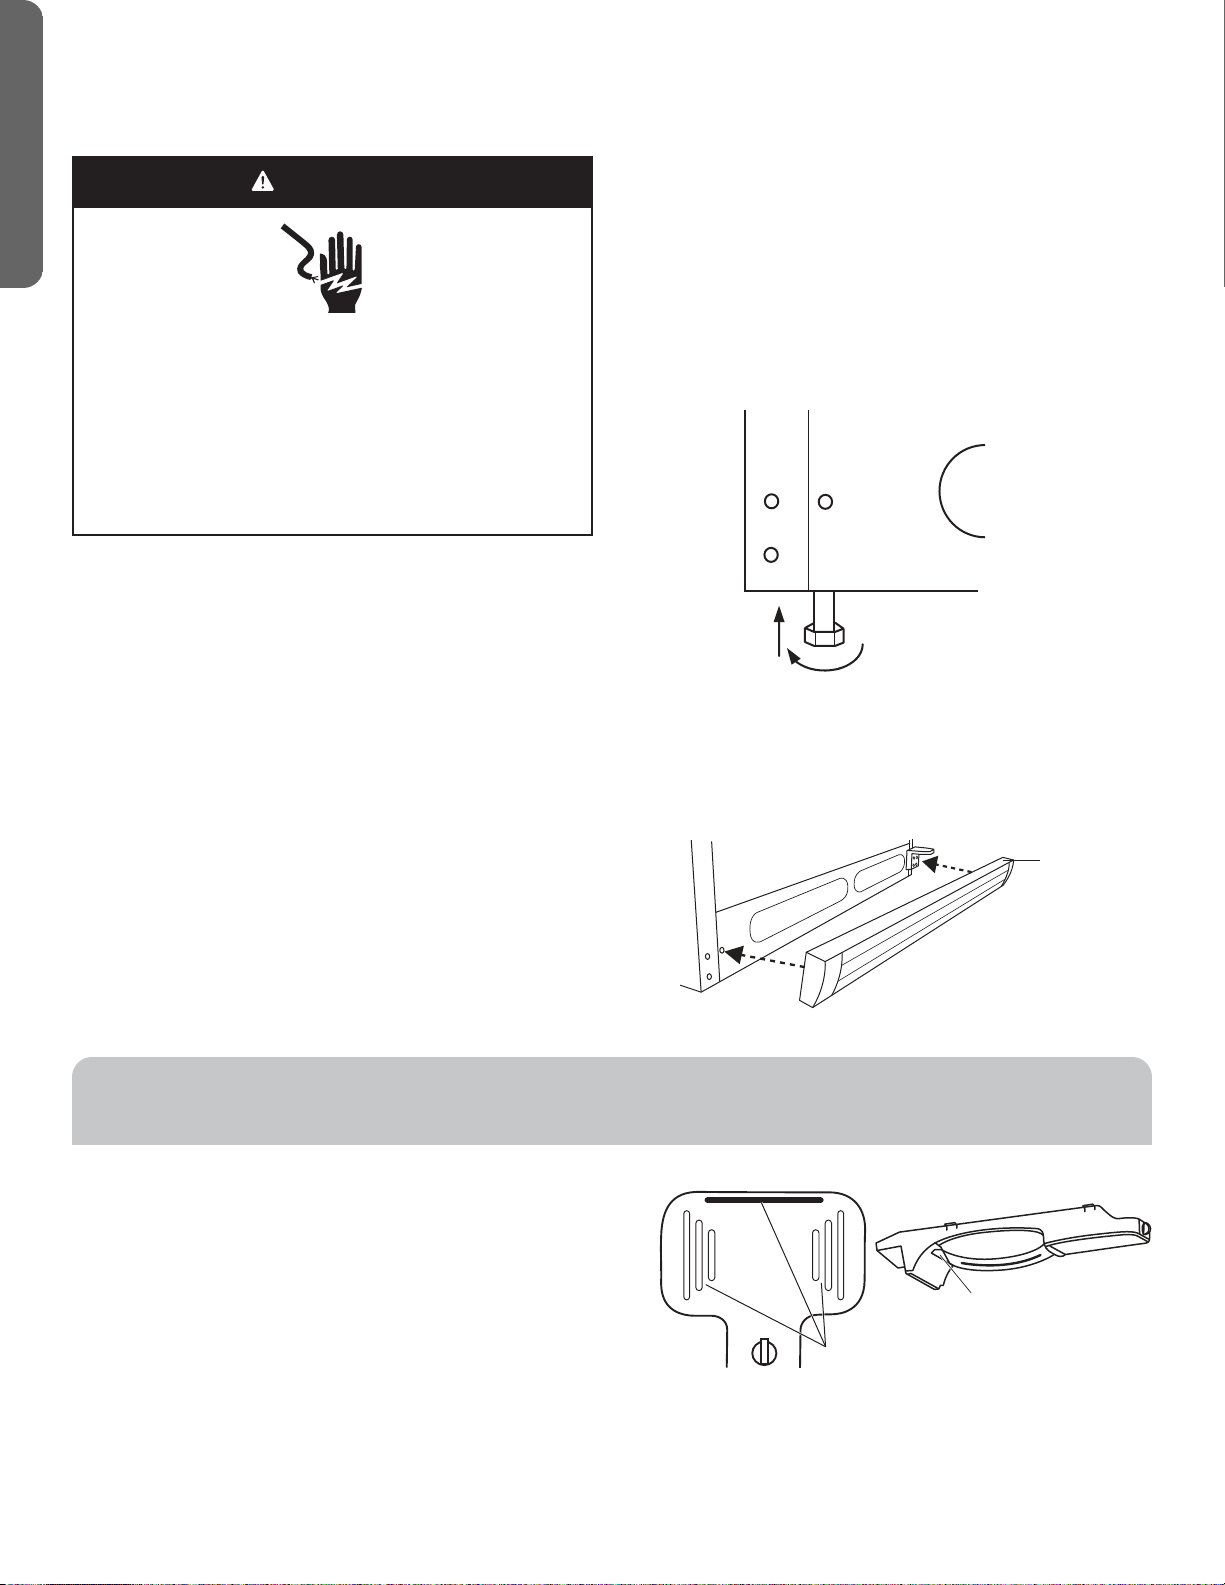
STEP 6 - LEVEL REFRIGERATOR
(If Needed)
The refrigerator must be level to maintain optimal
performance and appearance, and to avoid excess vibration
and noise.
! Öòùè÷ëèõèéõìêèõä÷òõ÷òì÷öĤñäïïòæä÷ìòñòñäĥä÷èùèñ
ĥòòõ
2. Turn the leveling leg at the bottom, front of the cabinet
to raise or lower that side of the refrigerator until the
refrigerator is level side-to-side.
NOTE: Having someone push against the top of the
refrigerator takes some weight o the leveling legs, which
makes it easier to turn the legs.
# Ýøõñåò÷ëéõòñ÷ïèêö÷ëèöäðèäðòøñ÷¤?\8Ĕ¨&ðð©¥÷ò
slightly raise the front of the refrigerator.
NOTE: Having the front of the refrigerator raised slightly
makes it easier for the doors to close and seal properly.
4. Install the base grille, as shown.
A
A - Base Grill
A
A - Vents
Loading ...
Loading ...
Loading ...