AFGE5440W, AFGE5470W, AFGE5470X,
AFGE6070W OPERATION MANUAL
APPLIANCES
FOR LIVING

Congratulations, you are now the proud owner of an ARTUSI cooking appliance.
Thank you for purchasing ARTUSI and welcome to the ARTUSI Family.
This instruction manual has been specially created to inform you of the
full range of features your ARTUSI appliance has to offer and serves as an
introduction to getting the very best out of your ARTUSI appliance.
We present detailed information on each of the features your ARTUSI appliance
consists of. Once you have read this section you will be able to choose the
most appropriate settings for your appliance when cooking different types of
food.
We ask you to read the instructions in this booklet very carefully as this
will allow you to get the best results from using your appliance. KEEP THE
DOCUMENTATION OF THIS PRODUCT FOR FUTURE REFERENCE.
TO REGISTER YOUR PRODUCT WITH ARTUSI, PLEASE FILL OUT THE WARRANTY CARD
AT THE END OF THIS BOOKLET AND POST IT TO: REPLY PAID 83617
LEICHHARDT NSW 2040
Dear Artusi Customer, please read this user manual carefully before using the
product and, keep it permanently at your disposal.
Note: This user manual is prepared for more than one model. Some of the
features specified in this Manual may not be available on your appliance.
All our appliances are only for domestic use, not for commercial use. Products
marked with (*) are optional.
“THIS APPLIANCE SHALL BE INSTALLED IN ACCORDANCE WITH THE
REGULA TIONS FORCE AND ONLY USED IN A WELL VENTILATED
SPACE. READ THE INSTRUCTIONS BEFORE INSTALLING OR USING THIS
APPLIANCE”
“Conforms with the WEEE Regulations.”


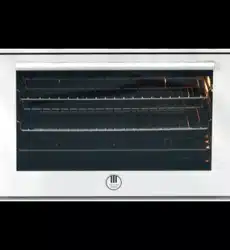
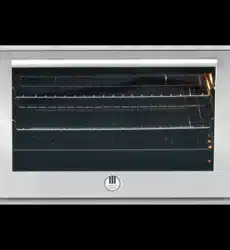
DESCRIPTION OF THE APPLIANCE
INSTALLATION
This appliance must be installed by an authorised person in accordance with
this instruction manual, AS/NZS 5601.1-Gas installations (installation and
pipe sizing), local gas fitting regulations, local electrical regulations,
Building Code of Australia and any other government authority.
8
9
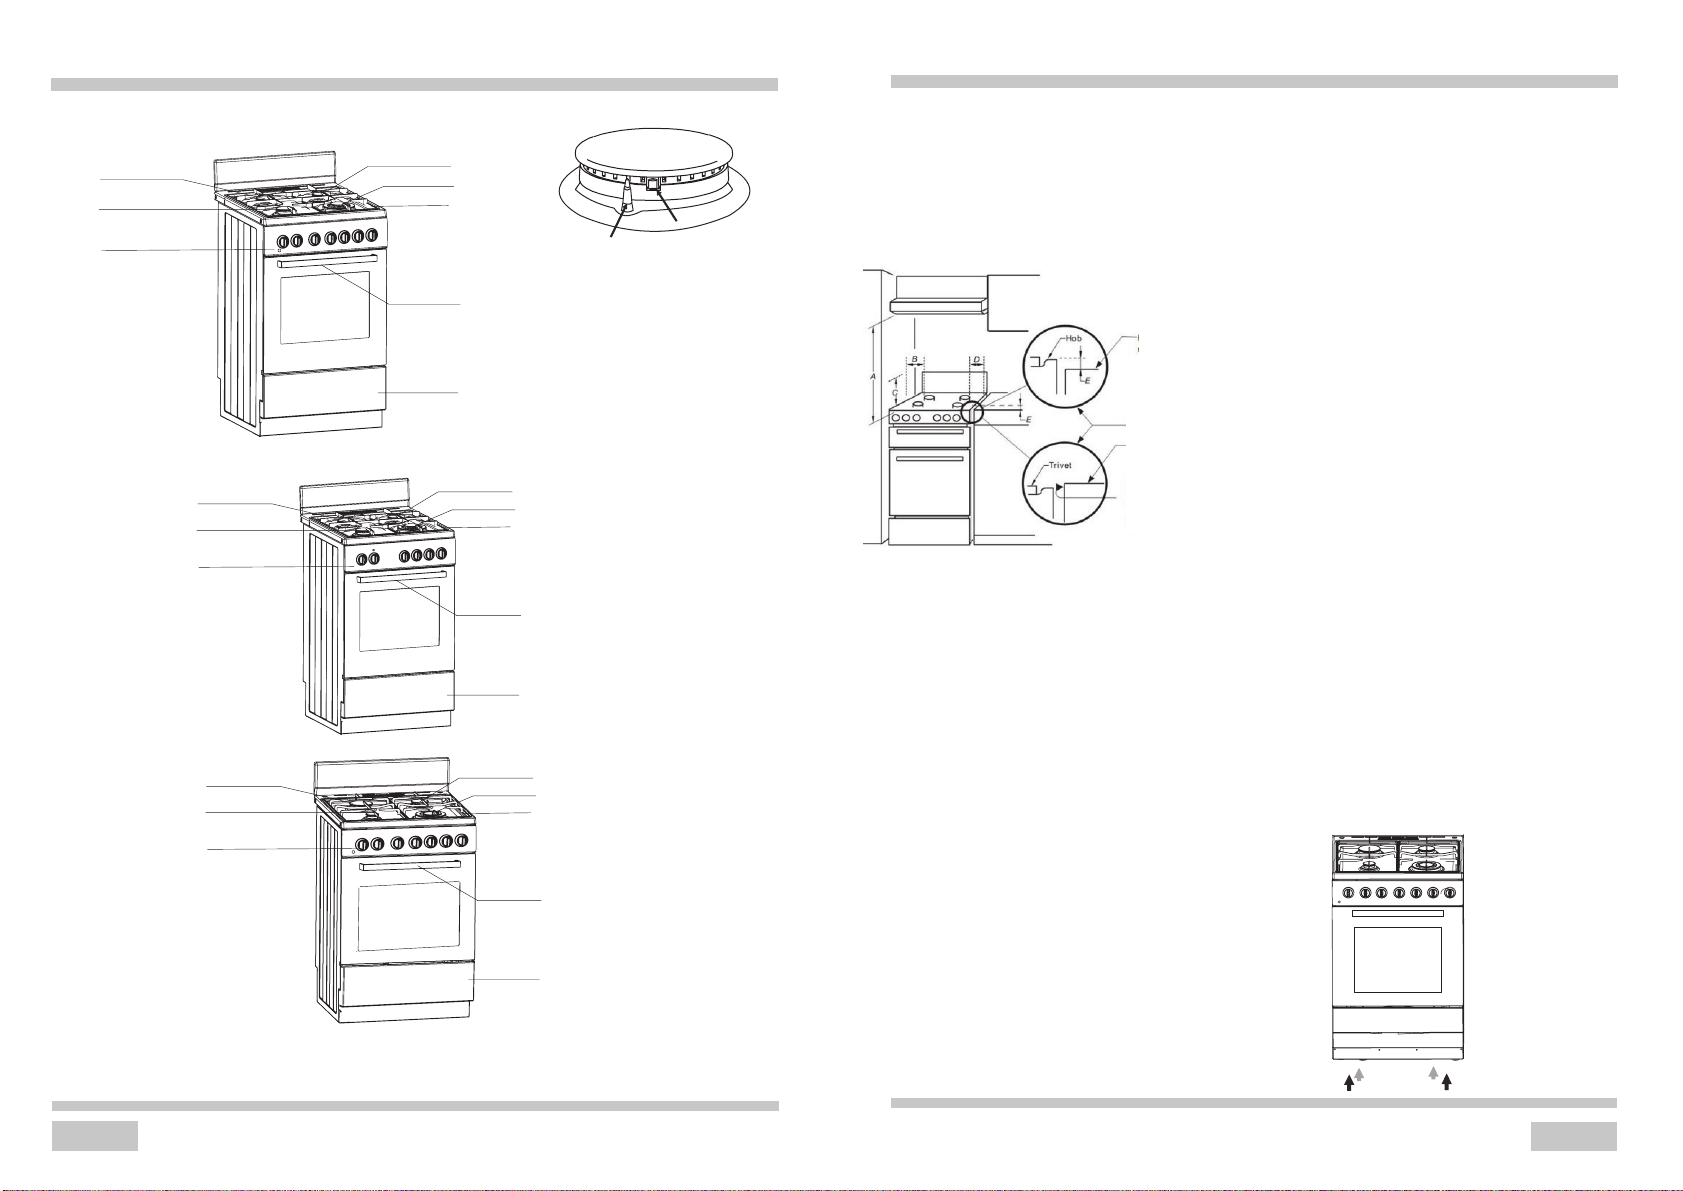
AFGE5470W/AFGE5470X
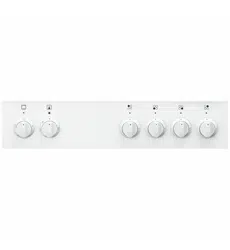
Control panel
Auxiliary burner
Grate
Oven door handle
Drawer
Semi-Rapid burner
Semi-Rapid burner
Semi-Rapid burner
Semi-Rapid burner
Control panel
Auxiliary burner
Wok burner
Wok burner
Wok burner
Grate
Oven door handle
Drawer
Rapid burner
Auxiliary burner
Control panel
Semi-Rapid burner
Grate
Oven door handle
Drawer
Burner safety valve
Spark ignitor
(optional)
AFGE6070W
AFGE5440W
Because we contiunally strive to improve our products.
We may change our specifications and designes without prior notice.
Overhead clearances-(Measurement A) Range
hoods and exhaust fans shall be installed in accordance
with the manufacturer’s
relevant instructions. However, in no case shall the
clearance between the highest part of the hob of the gas
cooking appliance and a range hood be less than 600
mm or, for an overhead exhaust fan, 750mm
Side clearances-(Measurements B,&C) Where B
any vertical combustible surface, or vertical combustible
surface. covered with toughened glass or sheet metal, is
measured from the periphery of the nearest burner to
less than 200mm, the surface shall be protected to a
height C of not less than 150 mm above the hob for the
full dimension (width or depth) of the cooking surface
area. Where the gas cooking appliance is fitted with a
splashback, protection of the rear wall is not required.
Additional requirements for freestanding and
elevated gas cooking appliances-(Measurements D
&E).Where D, the distance from the periphery of the
nearest burner to a horizontal combustible surface is
than 200mm, then E shall be 10 mm or more, or less
horizontal surface shall be above the trivet.the
The cooker should stand on a hard,
even floor (do not put it on a base).
Before you start using the cooker, it
should be leveled, which is particularly
pan. To this purpose, adjustable feet
can be found upon removing the utility
important for fat distribution in a frying
drawer. The adjustment range is +/-5mm.
If the appliance is used for extended
periods, it may be necessary to open
a window in order to boost ventilation.
The kitchen where the appliance is to
be installed must be dry and well
ventilated.
The room should be equipped with a
ventilation system that pipes away
exhaust fumes created during
consist of a ventilation grid or hood.
combustion. This system should
Hoods should be installed according
to the manufacturer’s instructions.
The cooker should be placed so as
to ensure free access to all control
elements.
Horizontal combustible
surface below hob
THE TWO INSETS RELATE TO
REQUIRENT 3 BELOW
OR
Horizontal combustible
surface above trivet
NOTE: In this case, any
vertical combustible
protected to conform with
surface needs to be
requirement 2 below
OPERATION
OPERATION
Ignition without an ignitor
Light a match.
Press in the knob to the end and turn
it left to the “large flame” position
Ignite gas with a match.
Set required flame size(e.g.
“economical”
)
Switch off the burner after finishing
cooking, turning the knob right (to the
off position ).
Knob ignition
Press in the knob to the end and turn
it left to the “large flame” position ,
Hold until gas is lit
After the flame is lighted release the
pressure on the knob and set a
required flame size.
Caution !
In cooker models equipped with a surface
burner safety valve, hold the knob pressed
down to the end when igniting for 10
seconds at the “large flame” position to
activate the safety device.
If the ignition device is out of order, either
due to power failure or humid ignition
device, use a match or a lighter to ignite
the gas.
Keep the button pressed for
approximately 10 second after ignition
to stabilize the flame.
If you failed to ignite the burner after
15 seconds. Shut the burner off and
wait for at least one minute before the
next attempt.
14
15
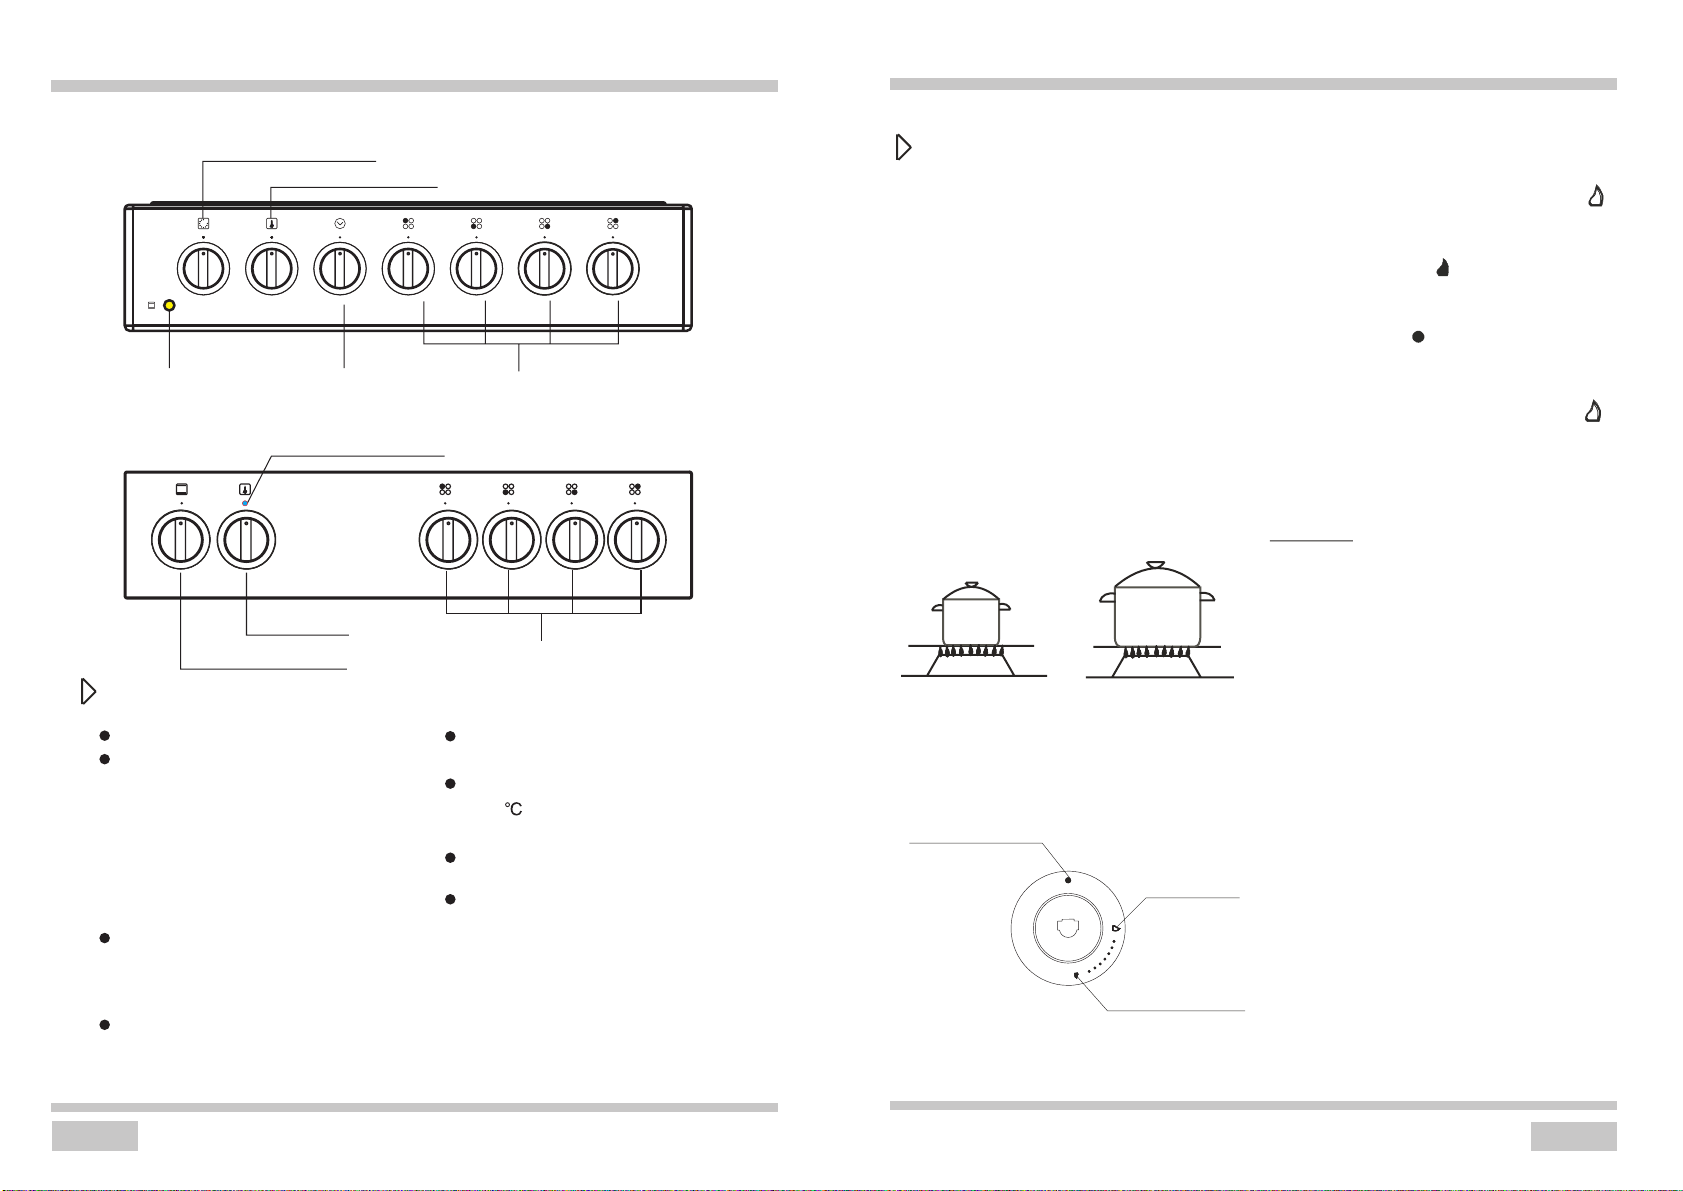
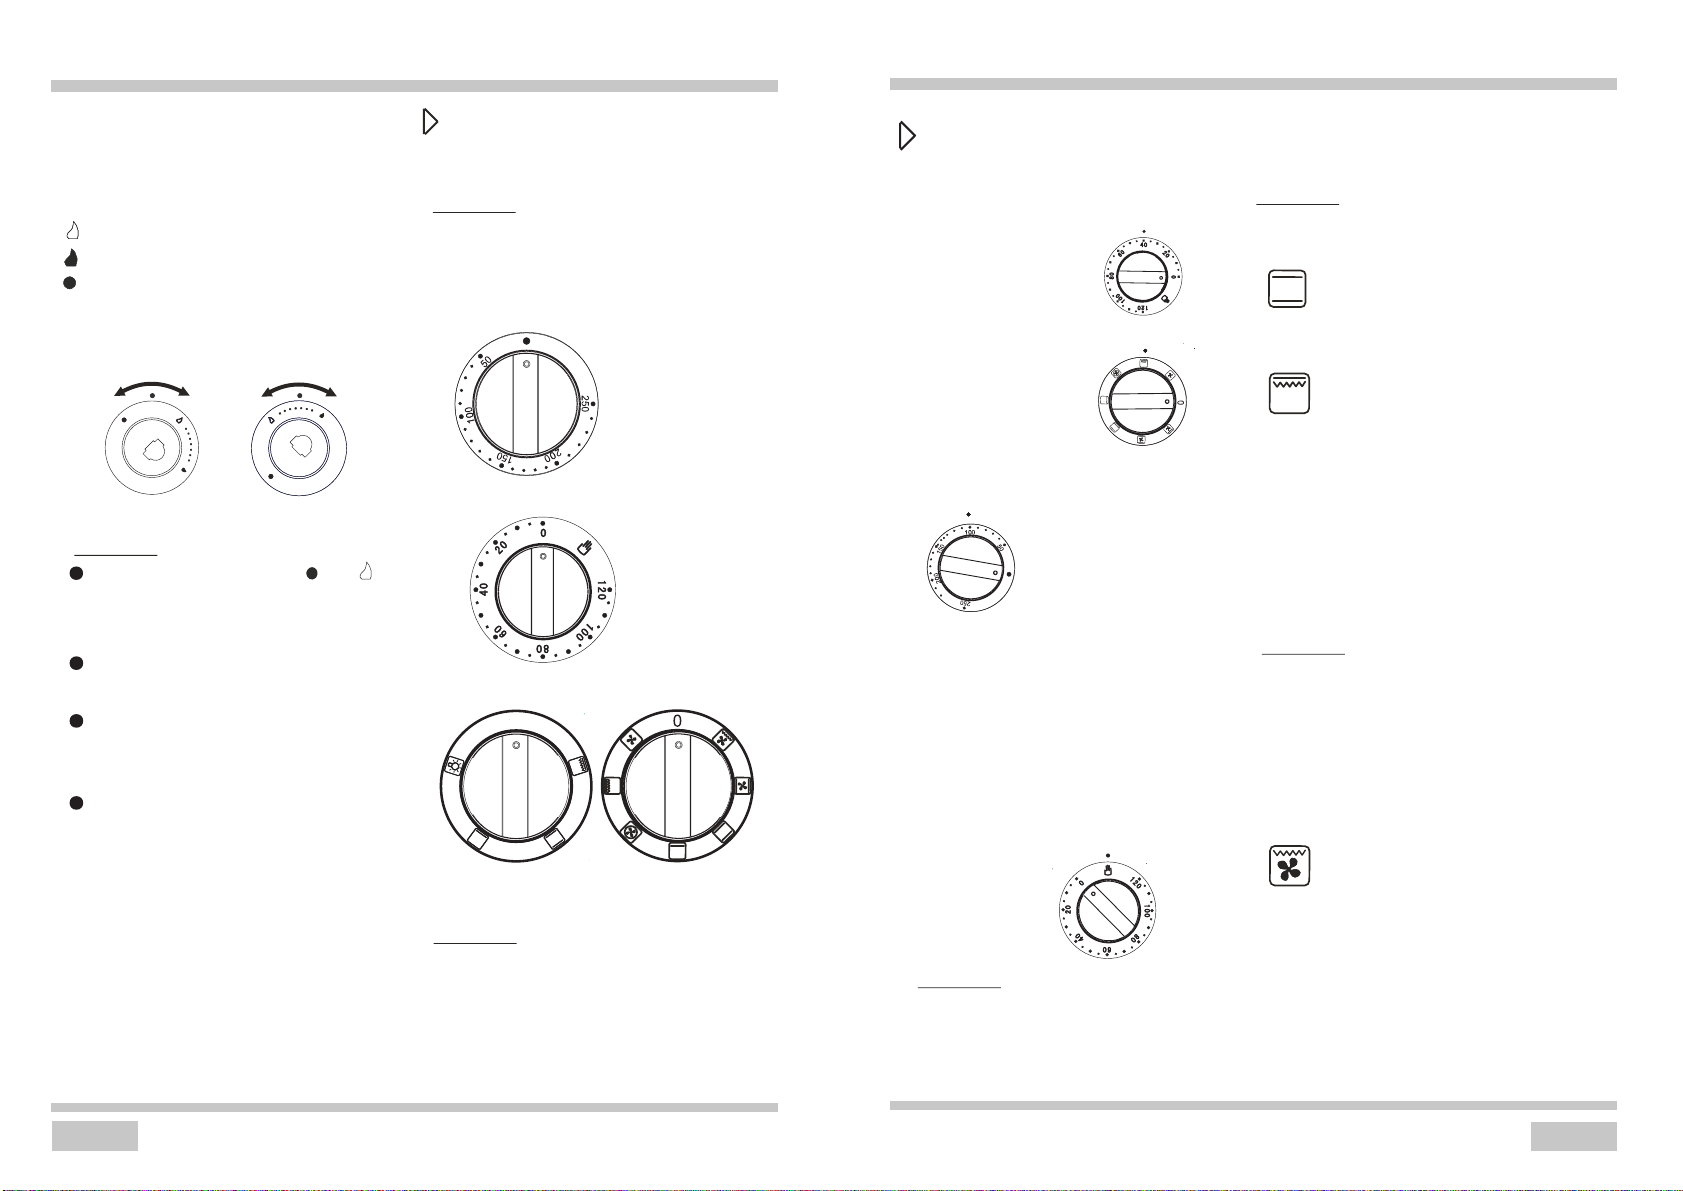
Oven function Control knobs
Oven temperture Control knobs
Oven function Control knobs
Oven temperture
Control knobs
Oven operation
signal light orange
Oven operation
signal light orange
Mechanical timer
Top burner control knobs
Top burner control knobs
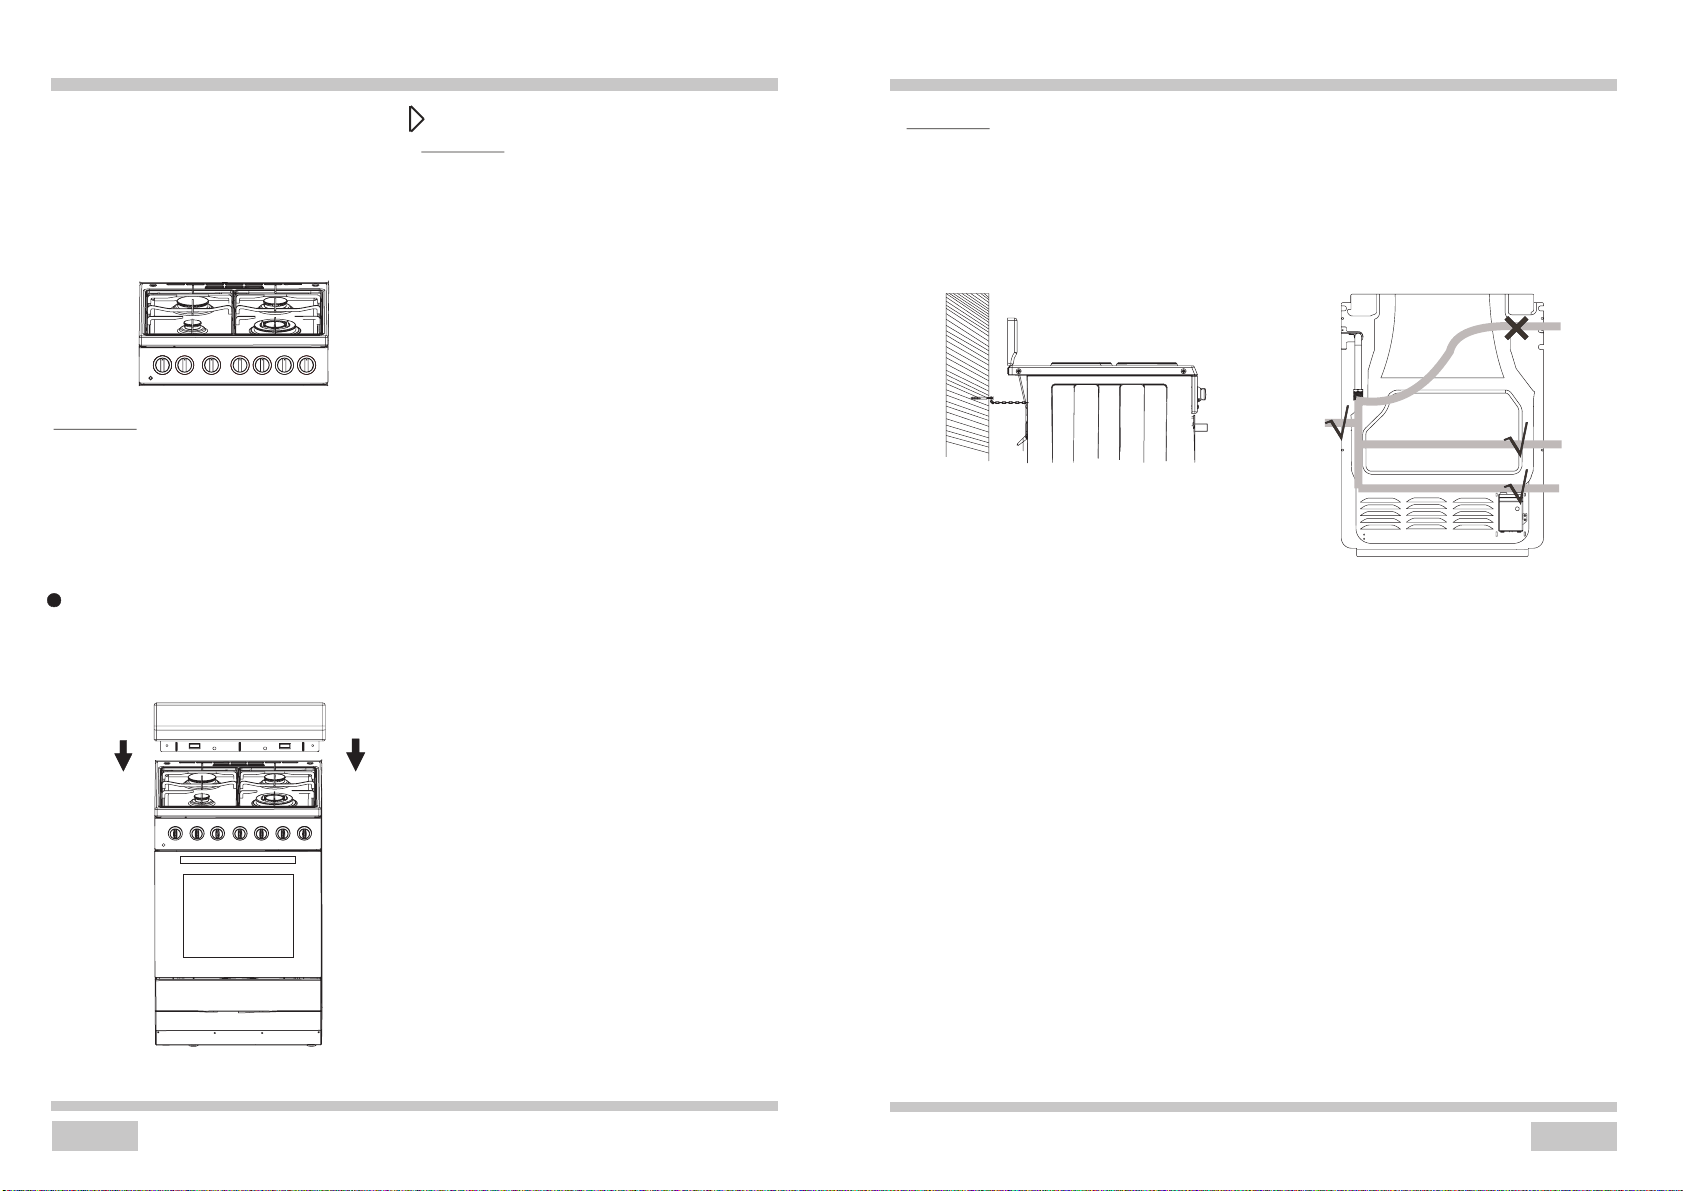
Before first use
Remove packaging elements,
Gently (slowly) remove labels from the
over door, trying not to break the glue
tape. If any visible trace is left on the
glass, warm up the oven chamber(see
below), spray the warmed-up glass with
a glass cleaner, and wipe off with a soft
cloth.
Empty the utility drawer, and clean off
factory preservatives from the oven
chamber with warm soapy water
Take out and wash the oven fittings with
warm water and a little washing-up liquid.
Switch on the ventilation in the room or
open a window,
Heat the oven(to a temperature of
250 , for approximately 30 min.),
remove any stains and wash carefully.
When heating the oven for the first time,
it is normal for it to give off smoke and
about 30 minutes later.
a peculiar smell. This will disappear
The oven chamber should only be
washed with water and a small amount
of washing-up liquid.
When handing the cooker, follow the
safety instructions carefully.
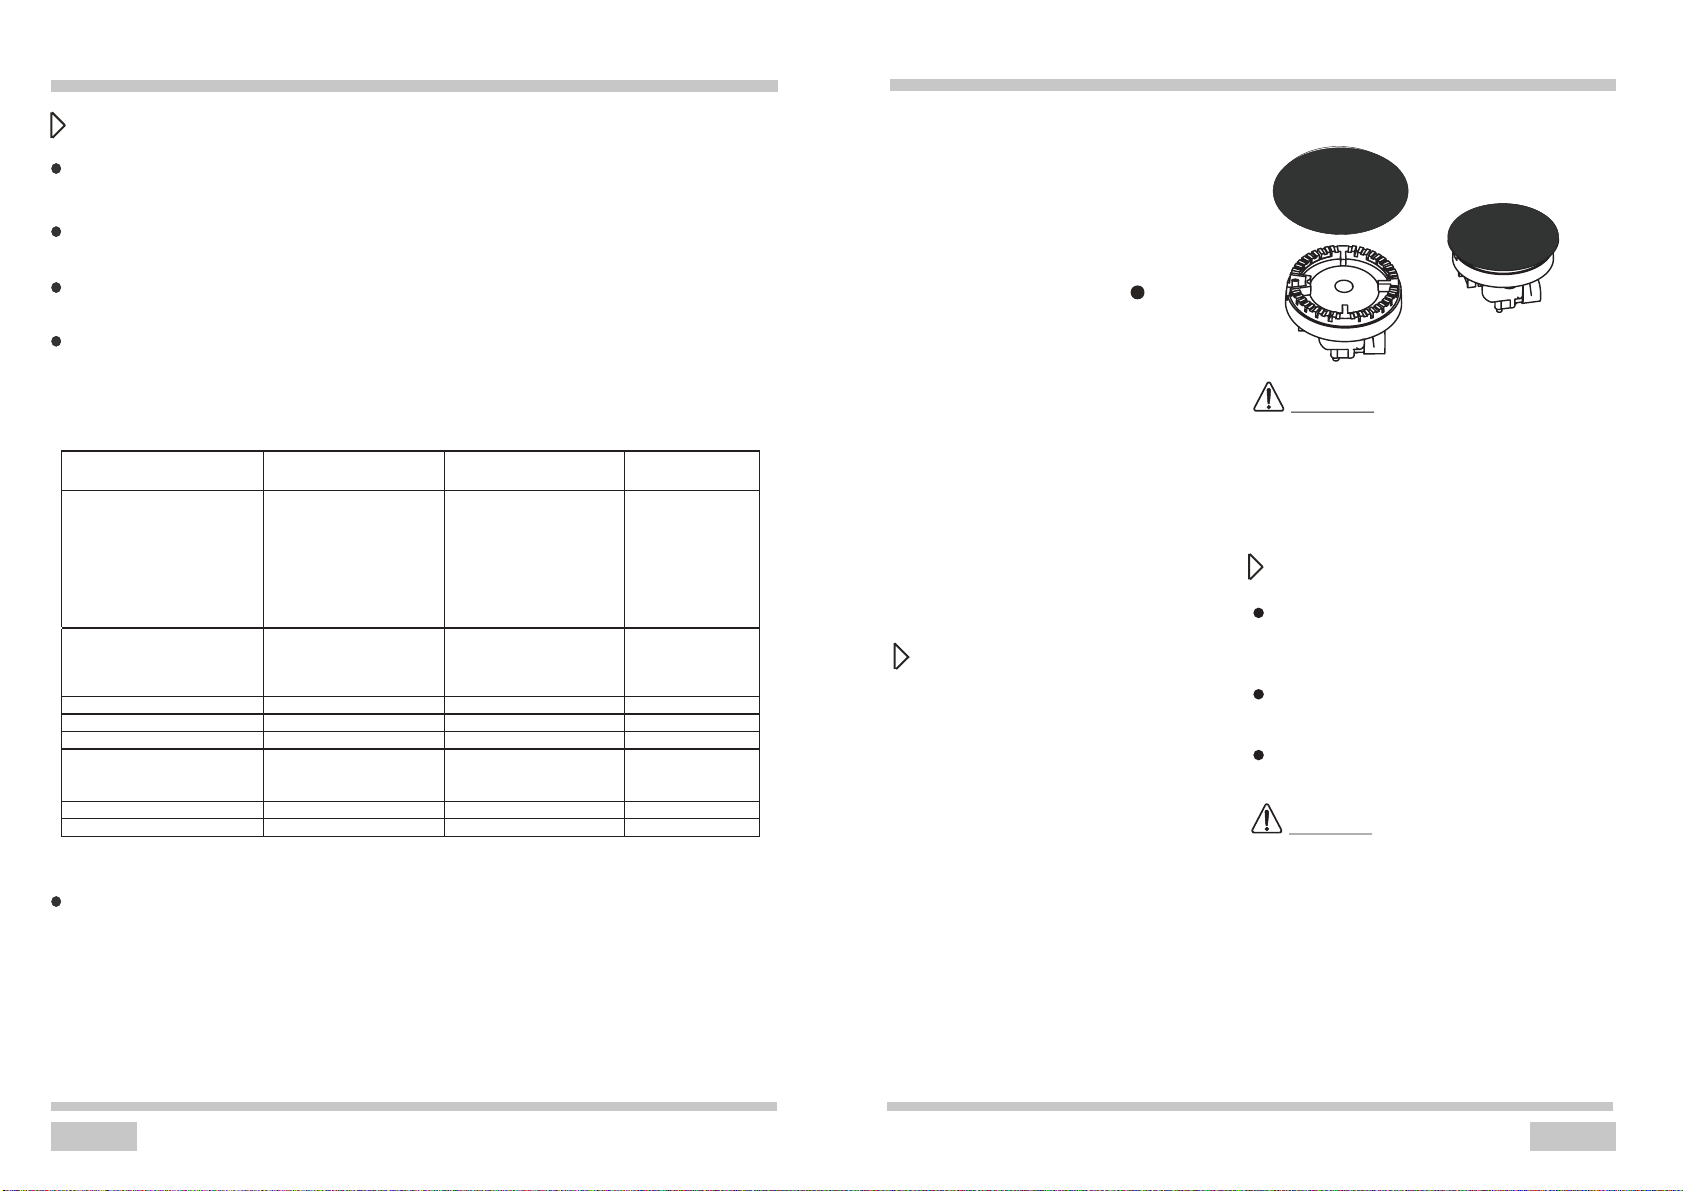
How to use gas burners
Choice of cookware
Mind that the diameter of a pan base is
always larger than the burner flame crown,
and that the pan itself is covered. The
recommended pan diameter is around 2.5
to 3 times larger than the burner diameter,
that is, for:
An auxiliary burner- a pan with a
diameter of 90 to 150 mm,
An medium burner- a pan with a
diameter of 160 to 220 mm,
A large burner - a pan with a diameter
of 200 to 240 mm, and the pan height
should not be greater than its
diameter.
WRONG
RIGHT
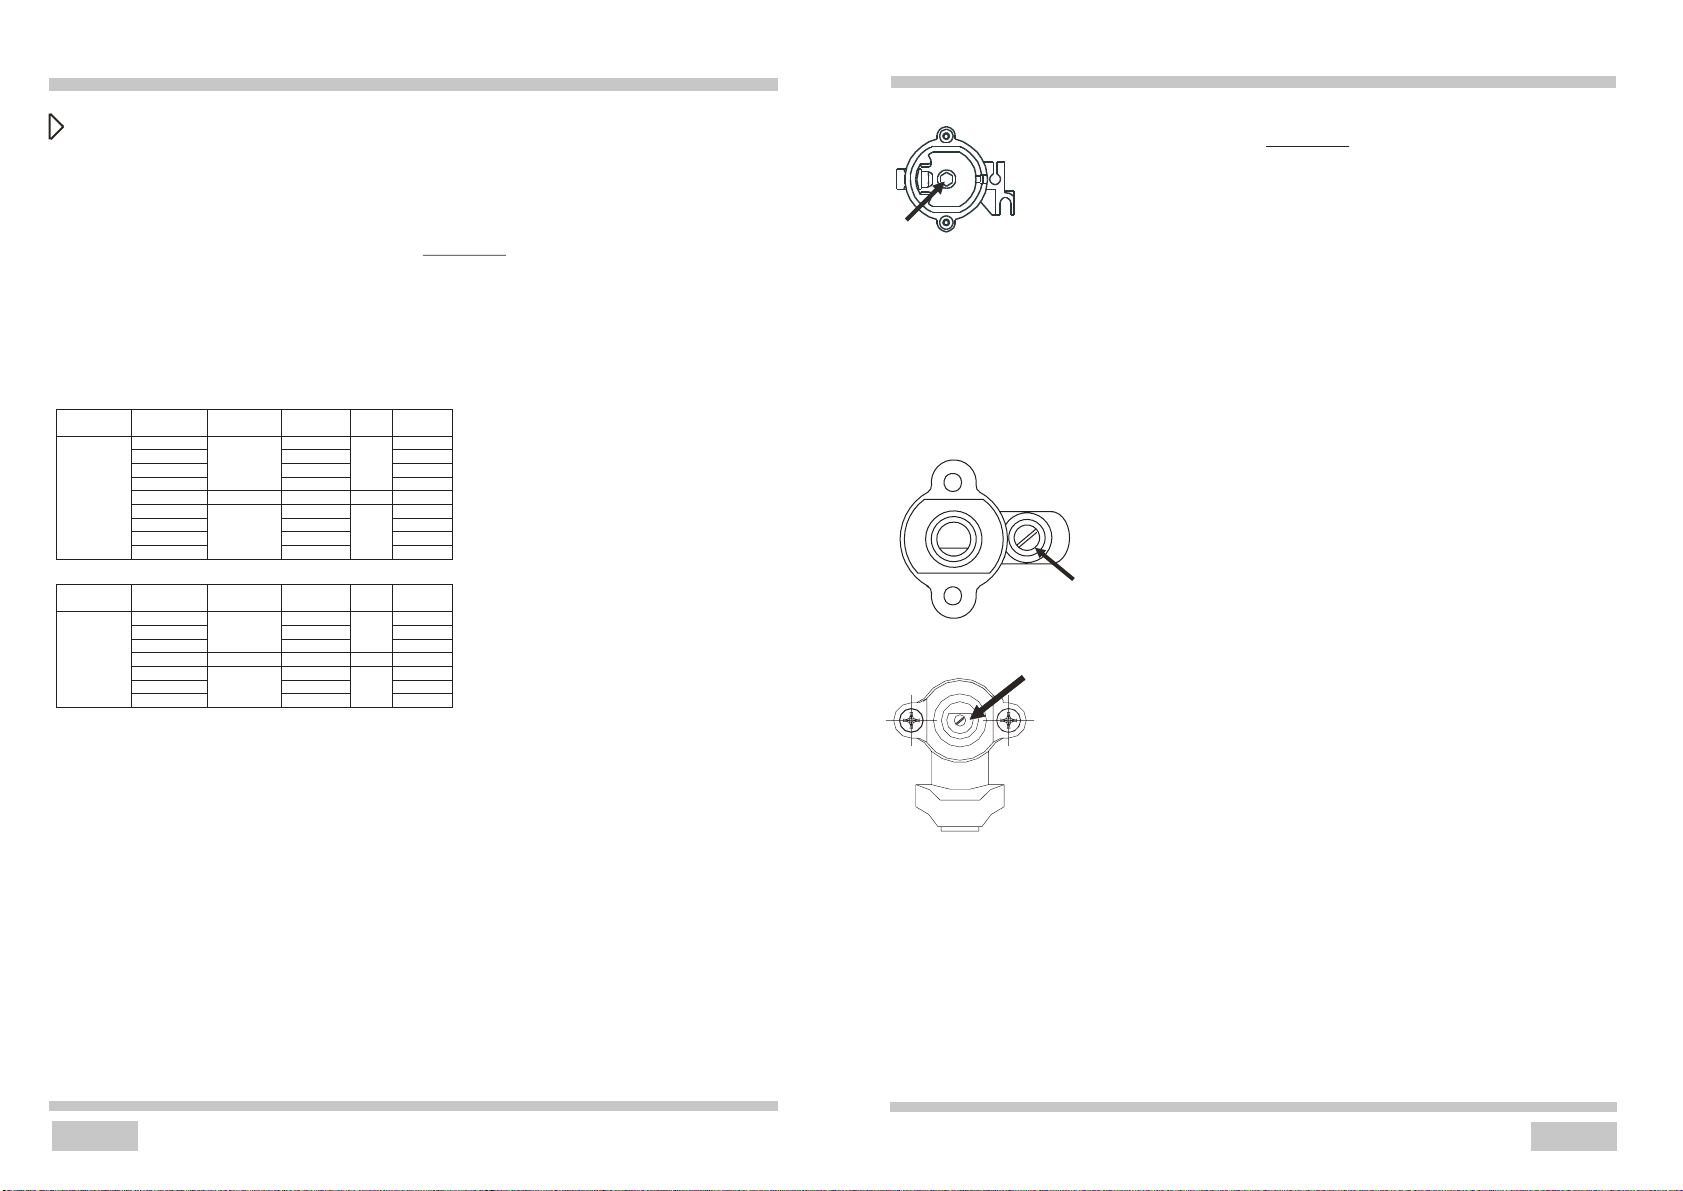
Gas burner control knobs
Postition
burner"switched off"
Position
"large flame"
Position
"economical flame"
Do not place anything, e.g. flame tamer or
griddle plate between pan and pan support.
the burner with a work stand, only use the
Do not remove the pan support and enclose
wok support supplied. Do not use large pots
or heavy weights which can bend the pan
Locate pan centrally over the burner so that
support or deflect flame onto the hotplate.
it is stable and does not overhang the
appliance.
AFGE5470W/AFGE5470X/AFGE6070W
AFGE5440W
OPERATION
Oven
Oven is controlled by the function knob
When selecting any oven function, the
oven will only be switched on after the
temperature has been set by the
temperature selection knob.
OPERATION
If you don’t want the oven work
At this oven function knob position.
The oven is not being warmed up.
Classic Convection
Setting the knob to this position allows
Caution!
it is best to keep children away from the
oven.
When the knob is turned to this position,
the oven activates the grill and fan funtion
In pratice, this function allows the grilling
process to be speeded and an improvement
16
17
Selection of the approprite flame
A correctly adjusted burner has a light blue
flame with a clearly visible internal cone.
Flame size depends on the position of the
Large flame
Small flame(“economical flame”)
Burner switched off (gas supply is cut
off)
Depending on requirements, flame size
can be set in a continuous manner.
WRONG
RIGHT
Caution !
Button positions between and are
not recommended. In these positions,
the flame is not stabilized and may be
extinguished.
If the flame goes out repeat the
procedure.
If the burner flame extinguishes,
shut the burner off and wait for at least
one minute before next attempt.
Before igniting the burners cover them
with appropriate cookware.
Operation of the burner protection
valve
Some models are equipped with an
automatic system that cuts off gas supply
to a burner when the flame has
disappeared.
This system protects the cooker against
gas leakage when the flame on a burner
goes out e.g. in case of spillage.
The user’s intervention is needed to
re-ignite the burner.
and the temperature control knob.
Temperature control knob
The mechanical timer knob
The Function knob
Caution !
When selecting any heating function
(switching a heater on etc.) the oven will
only be switched on after the temperature
has been set by the temperature regulator
knob.
Mechanical timer
When using the oven, you must set
food cooking time.
1.Tun mechanical timer to the time
position you want.
2.Tun function knob to the function
position you want.
3.Tun temperature knob to the
temperature position you want.
4.After above operation, oven knob
runs normally.
5.When oven works till pre-set time,
timer will have sound which means
the cooking is finished.
controlled by the mechanical timer,
you can turn the mechanical time to
the position
Caution !
When selecting any oven function, the
oven will only be switched on after the
temperature has been set by the
temperature selection knob.
Possible settings of the oven
function knob
Caution !
the oven to be heated conventionally.
Static Grill
When the “combined grill” is active it
enables grilling with the grill and with the
top heater switched on at the same time.
This function allows a higher temperature
at the top of the cooking area, which
cause more intense browning of the dish
and permits larger portions to be grilled.
Warning!
When using function grill it is recommended
that the oven door is closed.
When the grill is in use accessible parts
can become hot.
Half Fan Grill
in the taste of the dish, you should only
use the gill with the oven door shut.
burner knob which has been set:
0
OPERATION
18
BAKING IN THE OVEN
19
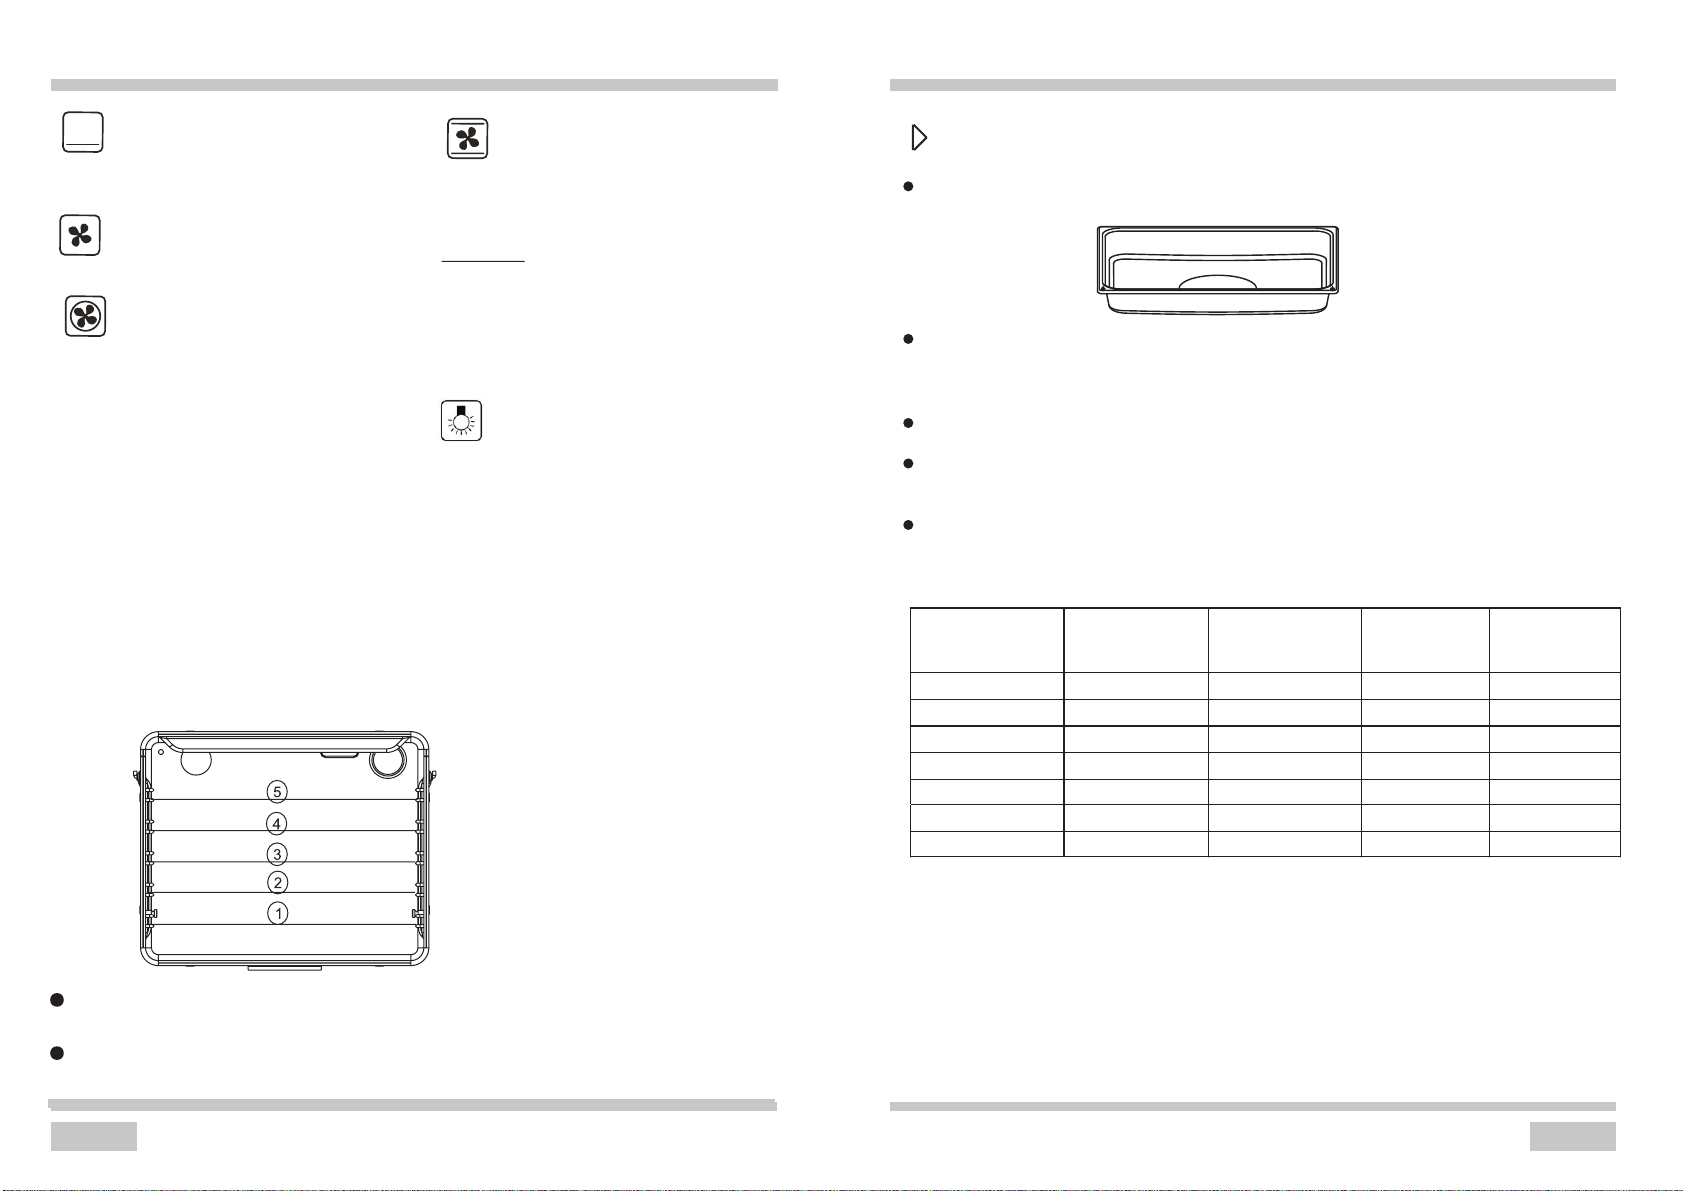
Oven guide levels
Baking pans and accessories (oven grid, baking tray, etc) may be inserted into the oven in
5 guiding levels.
Appropriate levels are indicated in the tables that follow.
Always count levels from the bottom upwards!
Caution: accessible appliance components might be extremely hot after the use of grill.
Prevent little children from approaching the appliance.
Grill heater is especially suitable or the preparation of low-fat sausages, meat and fish
fillets and steaks, and for browning and crisping the roast skin.
Baking
We recommend using the baking trays which were provided with your cooker which
should be put on the drying rack;
Before the cake is taken out of the oven, check if it is ready using a wooden stick(if
the cake is ready the stick should come out dry and clean after being inserted into the
cake);
After switching off the oven it is advisable to leave the cake inside for about 5 min.;
The baking parameters given in tables are approximate and can be corrected based
on your own experience and cooking preferences;
If information given in recipe books is significantly different from the values included
in this instruction manual, please apply the instructions from the manual.
CAKE TYPE
WARMED UP
()
TEMPERATURE
()
TEMPERATURE
BAKING TIME
IN MINUTES
LEVEL FROM
THE BOTTOM
Fruit cake
Victoria sponge
Sponge layer cake
Buns
Teac ak e
Cake(crispy base)
Puff pastry
170
170
170
180
180
200
230-250
160
150-160
150-160
170
180
180
200-220
2
2-3
2-3
3
3
3
3
60-70
20-40
20-30
30-50
40-50
40-60
15-20
At this oven function knob position, the
oven activates the bottom heater.
At this function, allows the oven to be
heating up in a forced way with the
thermofan, which is in the central part of
the oven heating method is:
Redution of oven heating-up time and
At this knob position the oven executes the
cake function. Conventional oven with a
Base Heat
Defrost
This function for defrosting
Fan Forced
of the initial heating stage.
Possibility to bake at two cooking levels
simultaneously.
Fan Assisted
fan.
Caution!
When the functions with fan have been
selected but the temperature knob is set to
zero only the fan will be on.
With this function you can cool the dish or
the oven chamber.
Separate oven lighting
By setting the knob to this position the
lighting inside the oven is switched on, e.g.
use when washing the oven chamber.
22
23
CLEANING AND MAINTENANCE
CLEANING AND MAINTENANCE
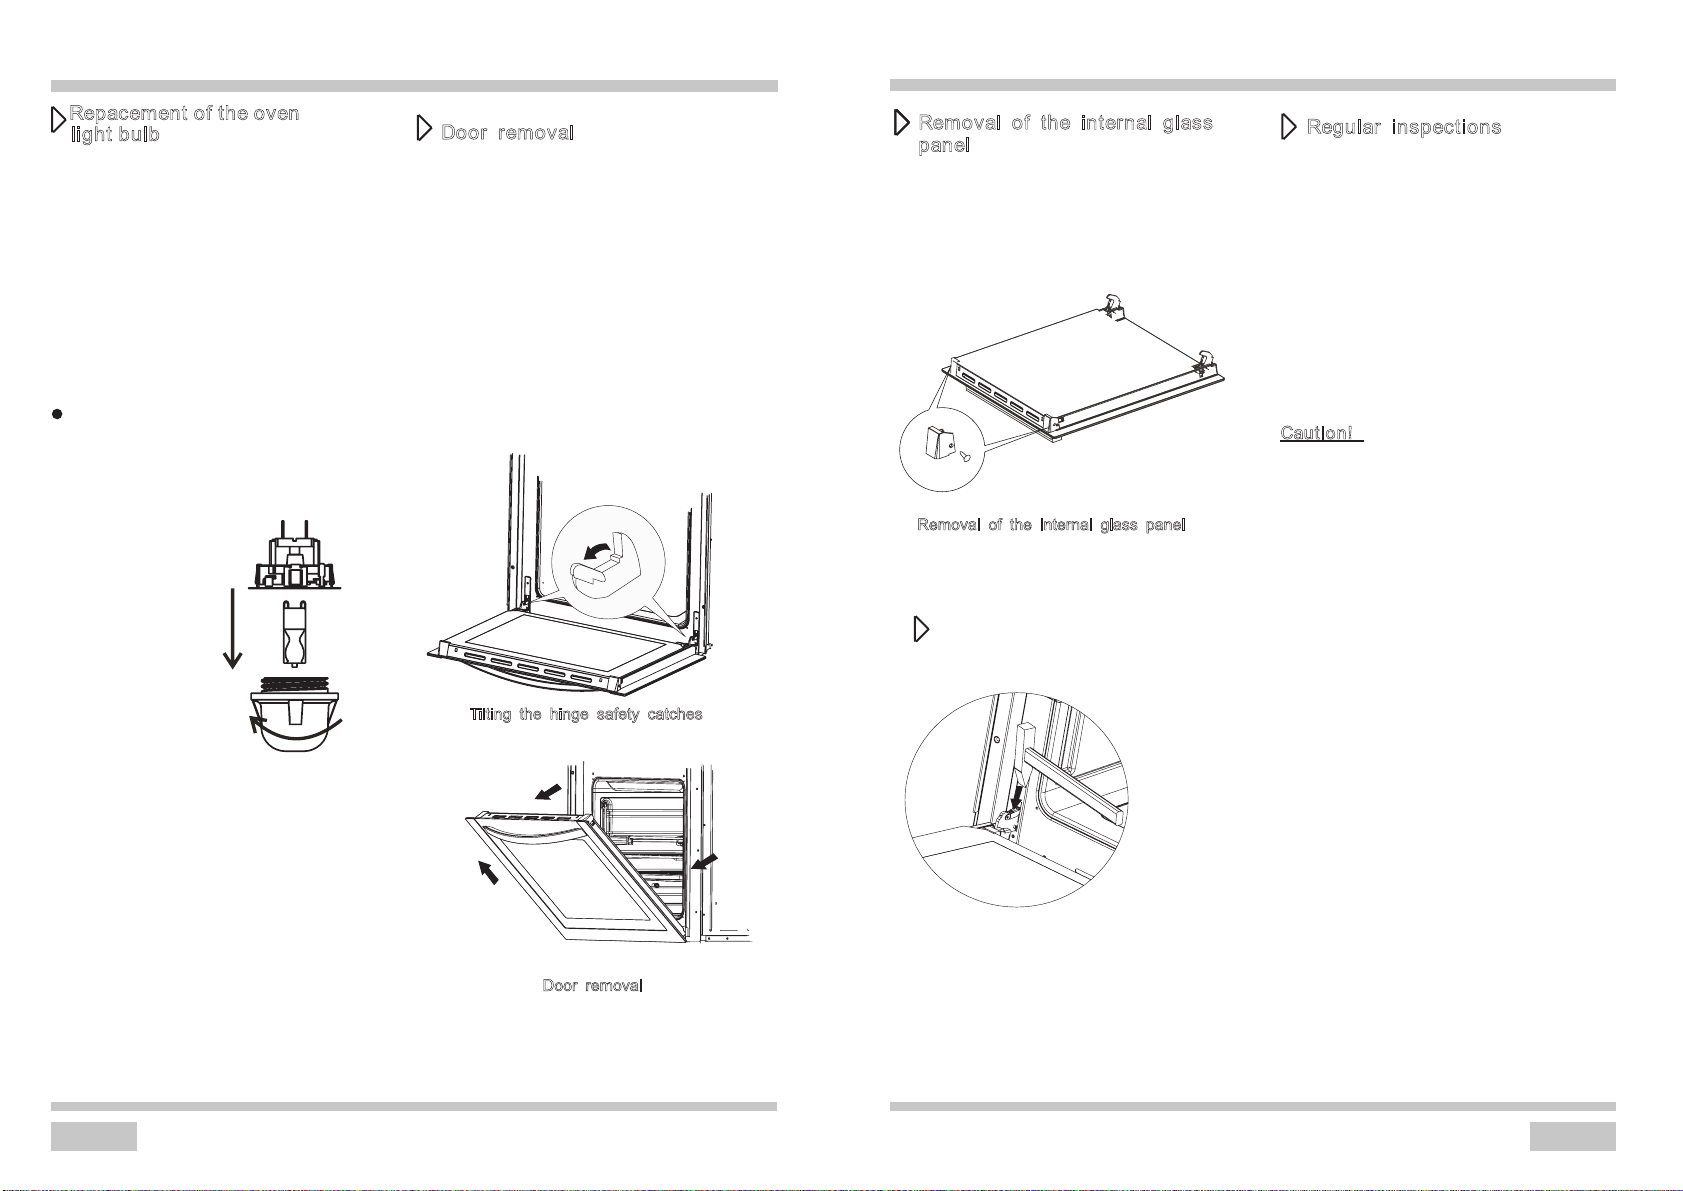
Door removal
In order to obtain easier access to the oven
chamber for cleaning , it is possible to
remove the door.
To do this, tilt the safety catch part of the
hinge upwards. Close the door lightly, lift
and pull it out towards you. In order to fit the
door back on to the cooker, do the reverse.
When fitting, ensure that the notch of the
hinge is correctly placed on the protrusion
of the hinge holder. After the door is fitted
to the oven, the safety catch should be
carefully lowered down again. If the safety
catch is not set it may cause damage to the
hinge when closing the door.
Tilting the hinge safety catches
Door removal
Before any maintenance is started
involving electrical parts, the
appliance must be disconnected
from the power supply.
If the oven has been in use, let the
oven cavity and the heating elements
cool down before attempting any
maintenance.
Changing the bulb
Unscrew the protective cover. We
recommend that you wash and dry the
glass cover at this point.
Carefully remove the old bulb and
insert the new bulb suitable for high
temperatures (300º) having the
following specifications: 220-240V,
50Hz, 25W, G9 fitting.
Refit the protective cover.
IMPORTANT
Never use screwdrivers or other
utensils to remove the light cover.
This could damage the enamel of the
oven or the lampholder. Remove only
by hand.
IMPORTANT
Never replace the bulb with bare
hands as contamination from your
fingers can cause premature failure.
Always use a clean cloth or gloves.
Please note:
The bulb replacement is not covered
by your guarantee
Removal of the internal glass
panel
Unscrew and unfasten the plastic latch that
is in the corner at the top of the door. Next
take out the glass from the second blocking
mechanism and remove. After cleaning,
sert and block the glass panel,and screw in
the blocking mechanism.
Removal of the internal glass panel
Regular inspections
Besides keeping the cooker clean, you
should:
Carry out periodic inspections of the
control elements and cooking units of the
cooker. After the guarantee has expired you
should have a technical inspection of the
cooker carried out at a service centre
at least once every two years.
Fix any operational faults.
Carry out periodical maintenance of the
cooking units of the cooker.
Caution!
All repairs and regulatory activities should
be carried out by the appropriate service
centre or by an appropriately authorized
fitter.
Install door
Repacement of the oven
l
ight bulb
24
25
CLEANING AND MAINTENANCE
TECHNICAL INFORMATION
In the event of an emergency, you should:
Switch off all working units of the cooker
Disconnect the mains plug
Call the service centre
Some minor faults can be fixed by referring to the instructions given in the table below.
Before calling the customer support centre or the service centre check the following
points that are presented in the table.
PROBLEM
REASON
ACTION
Burner flame suddenly changes Incorrect assembly of burner
components.
Assemble the burner components
correctly!
The flame goes off after ignition. Early release of control button.
Control button is not pushed in
firmly.
Keep the button pressed longer.
Before releasing the button, give it one
final solid push.
The color of the cooking zone
gas grid has changed.
Normal situation, caused by the
high temperature.
Clean the grid with metal cleaning
agents.
Electric operations are generally
disturbed.
Fuse is burned. Check the fuse in the fuse box, and
replace if required.
Electric ignition of burners does
not function.
Food residues or detergent block
the contact between the ignition
device and the burner.
Open and clean carefully the opening
between the ignition device and the
burner.
Burner crown caps look ugly. Usual staining. Clean the crown cap with metal cleaning
agents.
Dew forms at oven door glass
during heating up.
Normal situation, caused by the
temperature difference.
No remedy; it does not impede normal
operation.
Roasting temperature too high Reduce roasting temperature.…if you detect smoke during
roasting?
Thermostat failure. Experts should replace the thermostat.
Oven is excessively stained
during roasting.
Roasting temperature is too
high.
Grid rack and grease tray are
incorrectly placed.
Reduce the roasting temperature,
Place the grid above the grease tray and
insert them both in the guide.
Liquid or pastry dough is lifted to
on side.
The appliance is not leveled. Level the appliance into horizontal
position by setting the adjustable legs.
Baking results are disappointing. Wrong oven setting. Select correct oven setting according to
the instructions from the baking tables.
Flat cake is too light from below. Baking pan was placed in top of
roasting pan.
Place the baking tray upon the grid rack.
Pastry is too dry. Temperature is too low.
Baking time too long.
Set higher oven temperature duce
baking time.
Pastry is slippery, smeary and
mellow. Meat is rare in the
middle.
Baking temperature is too high.
Roasting time is too short.
Excessive quantity of liquid in
dough.
Reduce the temperature – baking time
may not be reduce d by setting higher
temperature (roasted from the outside,
raw from the inside) select longer baking
time, let the dough rise longer.
Add less liquid to the dough.
The appliance does not work. Break in power supply. Check the household fuse box; if there
is a blown fuse replace it with a new one
The programmer display is
flashing”0.00”.
The appliance was disconnected
from the mains or there was a
temporary power cut.
Set the current time (see ‘Use of the
programmer’ )
The oven lighting does not work. The bulb is loose or damaged. Tighten up or replace the blown bulb
(see ’Cleaning and Maintenance’)
Type
AFGE5470W AFGE5470X AFGE6070W
Dimensions:
height/width/depth(mm)
Gas inlet: right rear 150mm from top
900/540/600 900/540/600
AFGE5440W
AFGE5470W/AFGE5470X/AFGE6070W
AFGE5440W
900/540/600 900/600/600
Injector Table
Upright
Burner
Gas type
Injector
Size(mm)
TPP
(kPa)
NGC
(MJ/h)
540mm
Auxiliary
Semi-rapid
Rapid
Wok
Auxiliary
Semi-rapid
Rapid
Wok
Natural gas
Universal
LPG
0.87
1.13
1.45
1.65
0.51
0.67
0.87
0.95
1.0
2.75
3.6
6.3
10.8
12.6
3.3
6.2
10.8
12.6
Upright
Burner
Gas type
Injector
Size(mm)
TPP
(kPa)
NGC
(MJ/h)
Auxiliary
Semi-rapid
Wok
Auxiliary
Semi-rapid
Wok
Natural gas
Universal
LPG
0.87
1.13
1.65
0.51
0.67
0.95
1.0
2.75
3.6
6.3X2
12.6
3.3
6.2X2
12.6
Total Gas Consumption
600mm
Natural gas 33.3MJ/h - Universal LPG 32.9MJ/h
540mm
540mm
Natural gas 28.8MJ/h - Universal LPG 28.3MJ/h
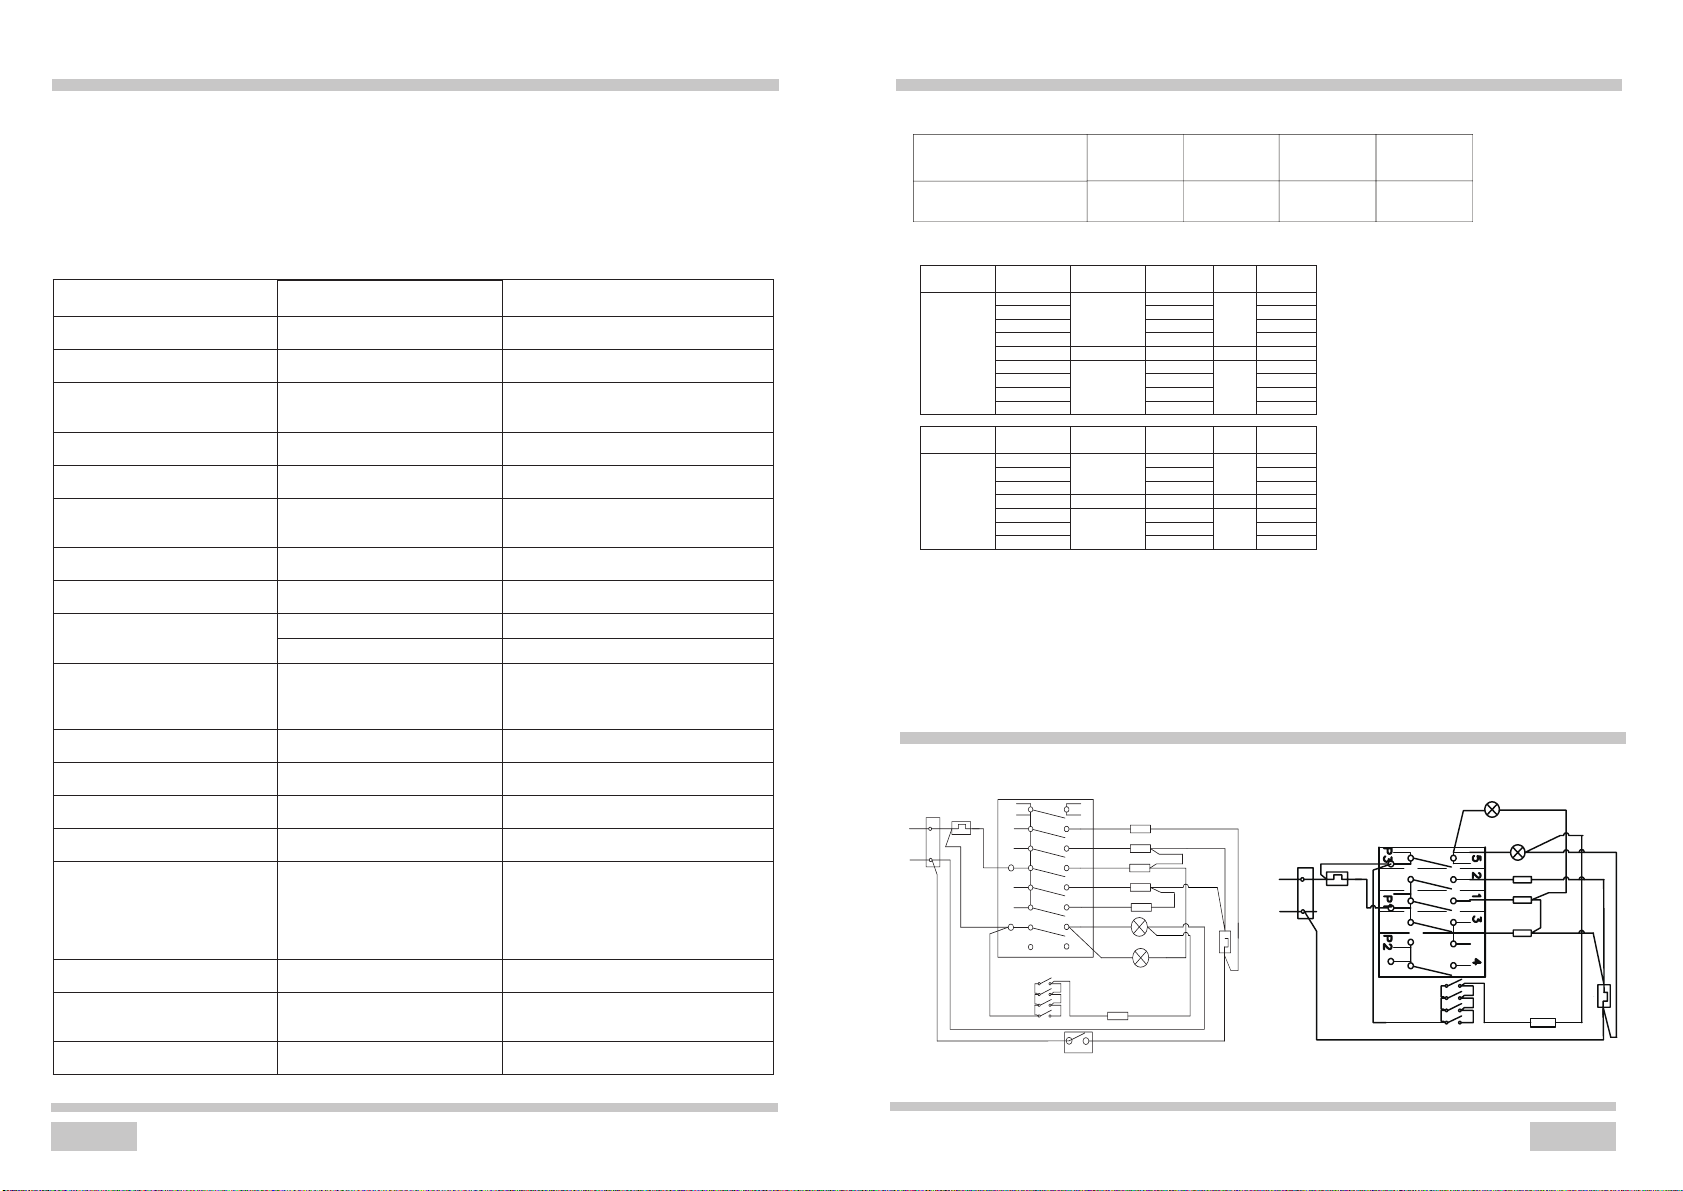
ELECTRIC ELEMENT CHART
thermal
cut out
L
N
220-240V
50Hz
P1
P2
P3
P4
P5
P6
P7
P8 8
7
6
5
4
3
2
1
fan(30W)
rear heater (2000W)
bottom heater (1150W)
grill heater (1100W)
top heater (850W)
lamp(25W)
orange light
pluse generator
mechanical timer
thermostat
or not stable
600mm
thermal
cut out
220-240V
~50Hz
L
N
Red light
Lamp(25W)
Bottom heater
(1150W)
Grill heater (1100W)
Top heater (850W)
Plus generator
thermostat

Worldwide Appliances Pty Limited
A.B.N. 45868077422
Oce:
48-50 Moore Street, Leichhardt N.S.W 2040
Post:
Locked Bag 3000, Annandale, N.S.W 2038
P: 1300 694 583
WARRANTY REGISTRATION
Your ongoing satisfaction with your artusi
product is important to us. We ask that you
complete the enclosed Warranty Registration
Card and return it to us so that we have a record
of the artusi product purchased by you.
PRIVACY
Worldwide Appliances respects your
privacy and is committed to handling your
personal information in accordance with the
National Privacy Principles and the Privacy
Act 1988 (Cth). A copy of the Worldwide
Appliances Privacy Policy is available at
www.artusi.com.au. Worldwide Appliances will
not disclose any personal information set out
in the Warranty Registration Card (“Personal
Information”) without your consent unless
required by:
1. law;
2. any Worldwide Appliances related company;
3. any service provider which provide services
to artusi or assist artusi in providing services
(including repair and warranty services) to
customers. Our purpose in collecting the
Personal Information is
to keep a record of the artusi product purchased
by you, in order to provide a better warranty
service to you in the unlikely event that there is
a problem with your artusi product. Worldwide
Appliances may contact you at any one or more
of the address, email address or telephone
numbers set out in the Warranty Registration
Card. Please contact artusi on 1300 694
583 should you not wish to be contacted by
Worldwide Appliances.
WARRANTY
1. Warranty
Worldwide Appliances warrants that each artusi
product will remain, for a period of either 12
months or 24 months of warranty. All Warranties
are valid from the original date of purchase, And
warranty claims must be accompanied by the
proof of purchase.
24 months warranty products:
All Built-in Appliances – Limited to Ovens,
Gas, Induction and Electric Cooktops, and All
Rangehoods
Freestanding Cookers - Gas and Electric Models
(900mm Width)
Dishwashers - Freestanding, Fully Integrated,
Semi Integrated and built-in
12 months warranty products:
Freestanding Cookers - Gas and Electric Models
in 50cm, 54cm and 60cm Widths
Portable Appliances* – Benchtop Models and
Portable Gas Models
2. What is not Covered by the Warranty.
The Warranty does not apply if an artusi product
is defective by a factor other than a defect
arising in the manufacture of the artusi product,
including but not limited to:
(a) damage through misuse (including failure
to maintain, service or use with proper care),
neglect, accident or ordinary wear and tear
(including deterioration of parts and accessories
and glass breakage);
(b) use for purpose for which the artusi product
was not sold or designed;
(c) use or installation which is not in accordance
with any specied instructions for use or
installation;
(d) use or operation after a defect has occurred
or been discovered;
(e) damage through freight, transportation or
handling in transit (other than when Worldwide
Appliances is responsible);
(f) damage through exposure to chemicals,
dusts, residues, excessive voltage, heat,
atmospheric conditions or other forces or
environmental factors outside the control or
Worldwide Appliances;
(g) repair, modication or tampering by the
purchaser or any person other than Worldwide
Appliances, an employee of Worldwide
Appliances or an authorised artusi service
contractor*;
(h) use of parts, components or accessories
which have not been supplied or specically
approved by artusi.
(i) damage to surface coatings caused by
cleaning or maintenance using products not
recommended in the artusi product handbook
provided to the purchaser upon purchase of the
artusi product;
(j) damage to the base of an electric oven due
to items having been placed on the base of
the oven cavity or covering the base, such as
aluminium foil (this impedes the transfer of heat
from the element to the oven cavity and can
result in irreparable damage); or
(k) damages, dents or other cosmetic
imperfections not aecting the performance
of the artusi in respect of an artusi product
purchased as a “factory second” or from display
The Warranty does not extend to light globes
used in artusi products.
3. Domestic Use
Each artusi product is made for domestic use.
This Warranty may not extend to artusi products
used for commercial purposes.
4. Time for Claim under the Warranty
You must make any claim under this Warranty
within twenty eight (28) days after the occurrence
of an event which gives rise to a claim pursuant
to the Warranty, by booking a service call on the
telephone number below.
Continued over...

Please complete and send to ARTUSI at: REPLY PAID 83617
LEICHHARDT NSW 2040
Last Name: First Name:
Address:
State: Postcode: Email:
Home Phone: Mobile:
Purchase Date: / / (Please attach proof of purchase to validate warranty)
MODEL NUMBER
SERIAL NUMBER
(if you cannot locate the serial number please call ARTUSI on 1300 694 583)
1
2
3
4
WARRANTY REGISTRATION CARD
01052013
01032014
5. Proof of Purchase
Customers must retain proof of purchase in order
to be eligible to make a warranty claim in respect
of an artusi product.
6. Claiming under the Warranty
Customers will bear the cost of claiming under
this Warranty unless Worldwide Appliances
determines the expenses are reasonable, in which
case the customer must claim those expenses
by providing written evidence of each expense
to Worldwide Appliances at the address on the
Warranty Registration Card.
7. Statutory Rights
(a) These terms and conditions do not aect your
statutory rights.
(b) The limitations on the Warranty set out in this
document do not exclude or limit the application
of the consumer guarantees set out in the Act or
any other equivalent or corresponding legislation
in the relevant jurisdiction where to do so would:
(i) contravene the law of the relevant jurisdiction;
or
(ii) cause any part of the Warranty to be void.
(c) Worldwide Appliances excludes indirect or
consequential loss of any kind (including, without
limitation, loss of use of the artusi product) and
(other than expressly provided for in these terms
and conditions) subject to all terms,
conditions and warranties implied by custom,
the general law, the Act or other statute.
(d) The liability of Worldwide Appliances to you
for a breach of any express or non-excludable
implied term, condition or warranty is limited at
the option of Worldwide Appliances to:
(i) replacing or repairing the defective part of the
artusi product;
(ii) paying the cost of replacing or repairing the
defective part of the artusi product;
(iii) replacing the artusi product; or
(iv) paying the cost of replacing the artusi
product.
(e) Our goods come with guarantees that cannot
be excluded under the Australian Consumer
Law. You are entitled to a replacement or refund
for a major failure and for compensation for any
other reasonably foreseeable loss or damage.
You are also entitled to have the goods repaired
or replaced if the goods fail to be of acceptable
quality and the failure does not amount to a
Warranty Card tear off
major failure.
8. Defects
Any part of an artusi product deemed to be
defective and replaced by Worldwide Appliances
is the property of Worldwide Appliances.
Worldwide Appliances reserves the right to
inspect and test artusi products in order to
determine the extent of any defect and the
validity of a claim under the Warranty.
*To locate your closest artusi authorised service
agent please contact us on 1300 652 100 or visit
www.artusi.com.au
ALL SERVICE CALLS MUST BE BOOKED THROUGH AN
AUTHORISED DEALER OR WARRANTY DEPARTMENT
ON 1300 652 100 OR stokesaps.com.au/artusi-
service
01032014


ARTUSI.COM.AUP: 1300 649 583
NSW & ACT (HEAD OFFICE)
48-50 MOORE STREET
LEICHHARDT
F 02 8569 4699
QLD
1/42 CAVENDISH ROAD
COORPAROO
F 07 3397 0850
VIC, TAS & SA
1211 TOORAK ROAD
CAMBERWELL
F 03 9809 2155
WA & NT
UNIT 10/55 HOWE STREET
OSBORNE PARK
F 08 9201 9188
NZ
PO BOX 11.160
SOCKBURN CHRISTCHURCH
F 03 344 5906
ARTUSI OFFICES ARE OPEN DAILY FROM 9AM–5PM AND SATURDAYS 10AM–4PM
DISCLAIMER
Worldwide Appliances PTY LTD, trading as ARTUSI, is continually seeking ways to improve the design specifications, aesthetics and production techniques of its products. As a result alterations to our products and
designs take place continually. Whilst every effort is made to produce information and literature that is up to date, this brochure should not be regarded as an infallible guide to the current specifications, nor does it
constitute an offer for the sale of any particular product. Product dimensions indicated in our literature is indicative only. Actual product only should be used to define dimension cutouts. Distributors, and retailers
are not agents of ARTUSI and are not authorised to bind ARTUSI by any express or implied undertaking or representation.