
1
42000 Rev E 08-20-18
Homeowner’s
Installation Instructions &
Operating Manual
ELECTRIC HEATER WITH REMOTE CONTROL
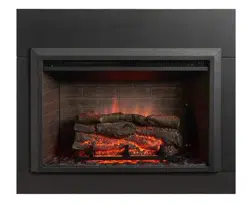
Model: GI-29 Gallery Insert
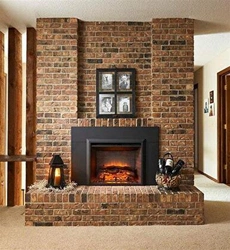
IS-36, IS-42 Insert surrounds
READ AND SAVE THESE INSTRUCTIONS
READ CAREFULLY BEFORE ATTEMPTING TO ASSEMBLE, INSTALL, OPERATE OR
MAINTAIN THIS PRODUCT.
PROTECT YOURSELF AND OTHERS BY OBSERVING ALL SAFETY INFORMATION.
FAILURE TO COMPLY WITH INSTRUCTIONS COULD RESULT IN PERSONAL INJURY
AND/OR PROPERTY DAMAGE.
WARNING! To reduce the risk of fire, electric shock, or personal
injury, read all the instructions before using this heater.

2
42000 Rev E 08-20-18
IMPORTANT INSTRUCTIONS
When using electrical appliances,basic precautions should always be followed to reduce the risk of
fire,electrical shock,and injury to persons including the following:
DANGER-High temperatures may be generated under certain abnormal conditions. Do not
partially or fully cover or obstruct the front of the heater.
1. Read all instructions before using this appliance.
2. Do not use outdoors.
3. This appliance is not intended for use by children or others, unless they have been given
supervision or instruction concerning use of the appliance by a person responsible for their safety.
4. Children should be supervised to ensure that they do not play with the appliance.
5. This heater is hot when in use. To avoid burns, do not let bare skin touch hot surfaces.
6. Extreme caution is necessary when any heater is used by or near children and whenever the
heater is left operating unattended.
7. Unplug power cord before servicing or moving the heater. Always unplug heater when not in
use.
8. Do not operate any heater with a damaged cord or after the heater malfunctions, has been
dropped or damaged in any manner. Return heater to authorized service facility for examination,
electrical or mechanical adjustment, or repair.
9. This heater is not intended for use in bathrooms, laundry areas and similar indoor locations.
Never locate heater where it may fall into a bathtub or other water container.
10. Do not run cord under carpeting. Do not cover cord with throw rugs, runners, or the like. Arrange
cord away from traffic area and where it will not be tripped over.
11. To disconnect heater, turn controls to off, then remove plug from outlet.
12. Connect to properly grounded outlets only.
13. Do not insert or allow fingers or foreign objects to enter any ventilation or exhaust opening as it
may cause an electric shock or fire or damage the heater. Do not block or tamper with the heater
in any manner while it is in operation.
14. To prevent a possible fire, do not block air intakes or exhaust in any manner. Do not use on soft
surfaces, like a bed, where openings may become blocked.
15. A heater has hot and arcing or sparking parts inside. Do not use it in areas where gasoline, paint,
or flammable liquids are used or stored.
16. Use this heater only as described in this manual. Any other use not recommended by the
manufacturer may cause fire, electrical shock, or injury to persons.
17. Where possible, avoid the use of extension cords because the extension cord may overheat
and cause a risk of fire.
18. This heater includes an overheat protection system that shuts off the heater when parts of the
heater are getting excessively hot. If the heater shuts off, immediately turn the heater OFF and
inspect for any objects, on or adjacent to the heater, which may cause high temperatures. DO
NOT OPERATE THE HEATER UNTIL IT IS RESET. To reset the heater, turn it OFF, unplug it from
the electrical outlet, and wait five to ten minutes for the unit to cool down before plugging it back
in and turning the heater on.
19. Make certain that the power source conforms to the electrical requirements of the heater.
20. To prevent a possible fire, do not block air intakes or exhaust in any manner. Do not place heater
on soft surfaces, like a bed, where openings may become blocked.
21. A heater has hot and arcing or sparking parts inside. It must NOT be used in potentially
dangerous locations such as flammable, explosive, chemical-laden or wet atmosphere. This
heater is intended for use in general use only.
WARNING: DO NOT DEPEND ON THE ON/OFF SWITCH AS THE SOLE MEANS OF
DISCONNECTING POWER WHEN SERVICING OR MOVING THE HEATER. ALWAYS UNPLUG
THE POWER CORD.
WARNING: REDUCE THE RISK OF FIRE OR ELECTRIC SHOCK---DO NOT USE THIS
HEATER WITH ANY SOLID STATE SPEED CONTROL DEVICES.
22. SAVE THESE INSTRUCTIONS.
3
42000 Rev E 08-20-18
INSTALLATION INSTRUCTIONS
TOOL REQUIRED
Magnetic Phillips Screw Driver
Unpacking the Electric Fireplace
WARNING! Do NOT use this Electric Fireplace if any part has been under water.
Immediately call a qualified service technician to inspect and to replace any part of
the electrical system if necessary. Keep plastic wrapping away from children.
● Open the packaging carefully and remove the foam.
● Remove and discard the plastic bag.
● Be responsible when handling the packing materials.
● Keep the original packaging for future transport and/or storage.
● Check all accessories are got before you keep the packing.
PARTS AND HARDWARE LIST
remote control 1pc
button cell battery 1pc
instruction manual 1pc
screw ST4×38 with nut 4pcs
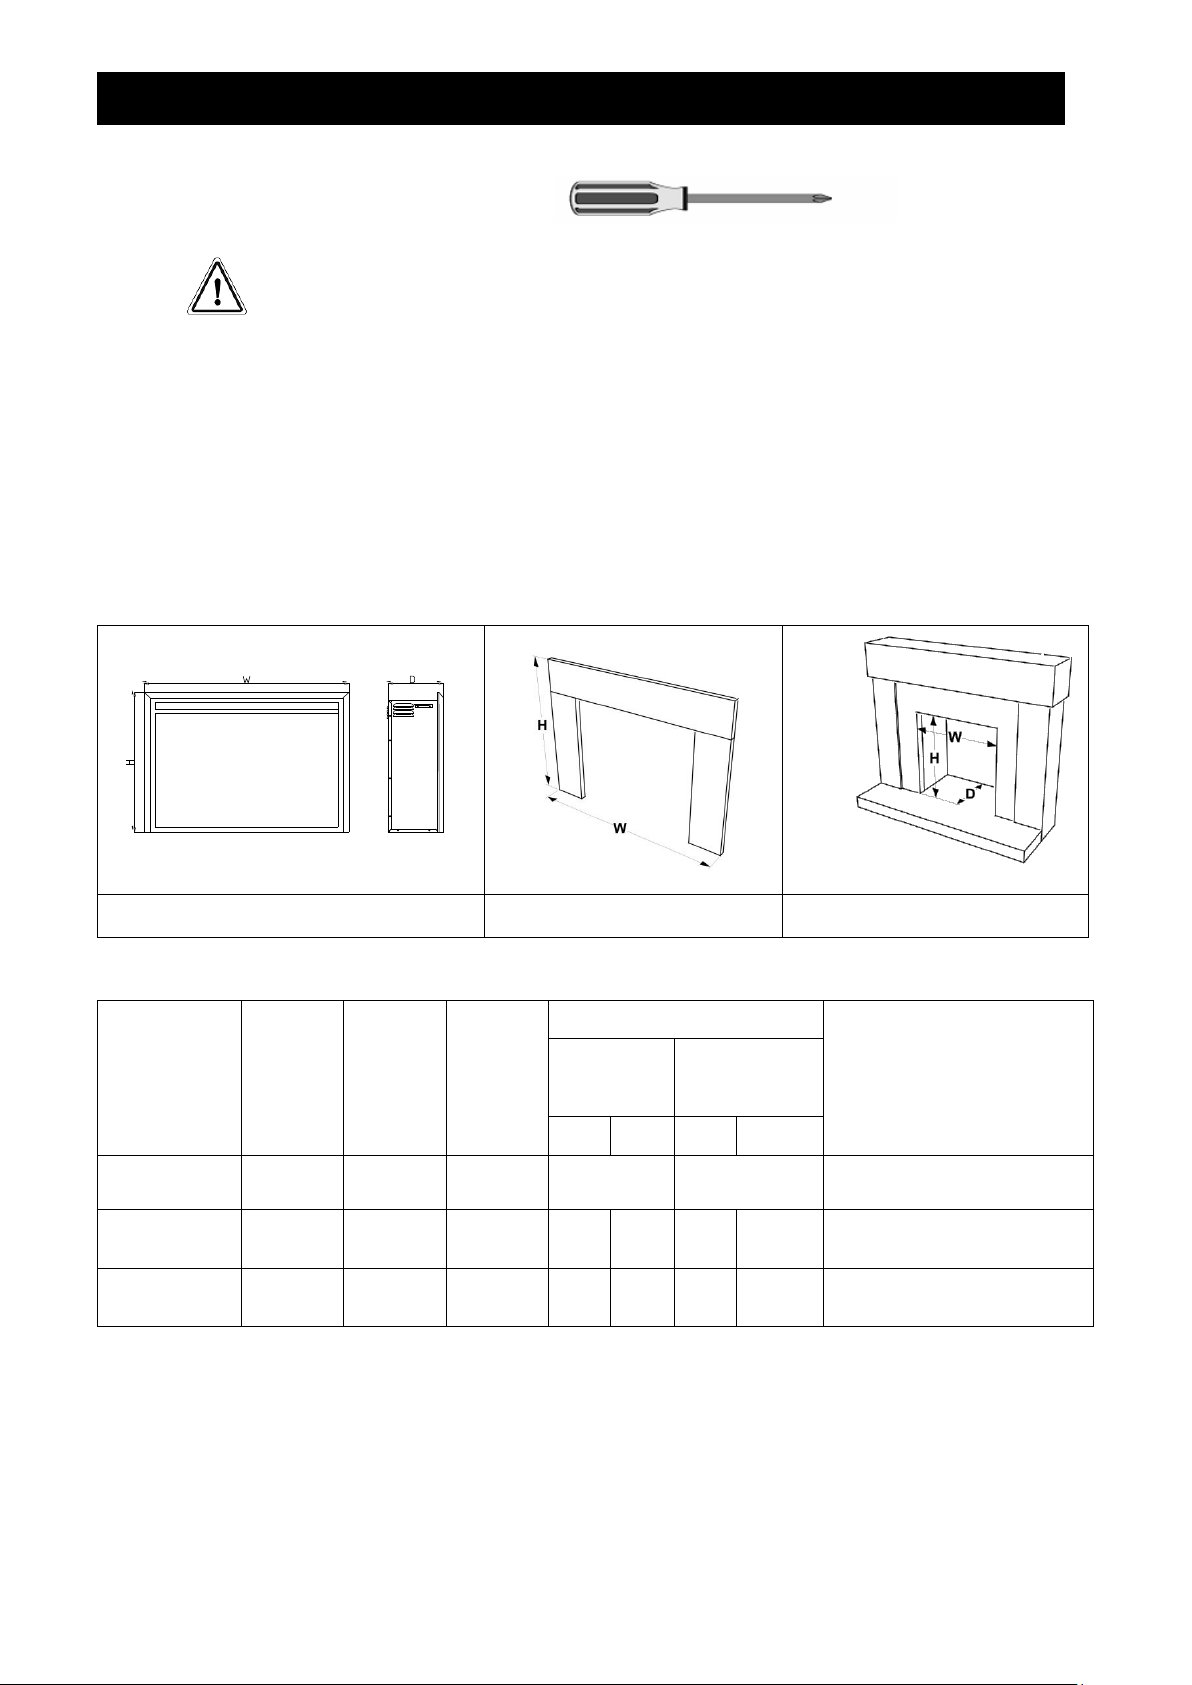
PRODUCT SIZE
Fireplace insert for front fix
Insert Surround
Existing Fireplace
units: in
Model
Width
(W)
Height
(H)
Depth
(D)
Fireplace opening size
Fireplace Minimum Depth
(OD)
Width
(OW)
Height
(OH)
Min
Max
Min
Max
GI-29
28.4
22.6
8.7
26.1
21.7
8.3
IS-36
36.25
27
1
29
36
22
26.8
9
IS-42
42.25
28.5
1
29
42
22
28.4
9
LOCATING YOUR ELECTRIC FIREPLACE INSERT
Your new electric fireplace may be installed virtually anywhere in your home. The GI-29 was designed
ideally for installation into existing fireplaces; however, when choosing a location ensure that the
general instructions are followed. For best results, install out of direct sunlight. Power supply service
must be either completed or placed within the electric fireplace prior to finishing to avoid
reconstruction.
DANGER-High temperatures may be generated under certain abnormal conditions. Do not partially or
fully cover or obstruct the front of the heater.
O
O
O
4
42000 Rev E 08-20-18
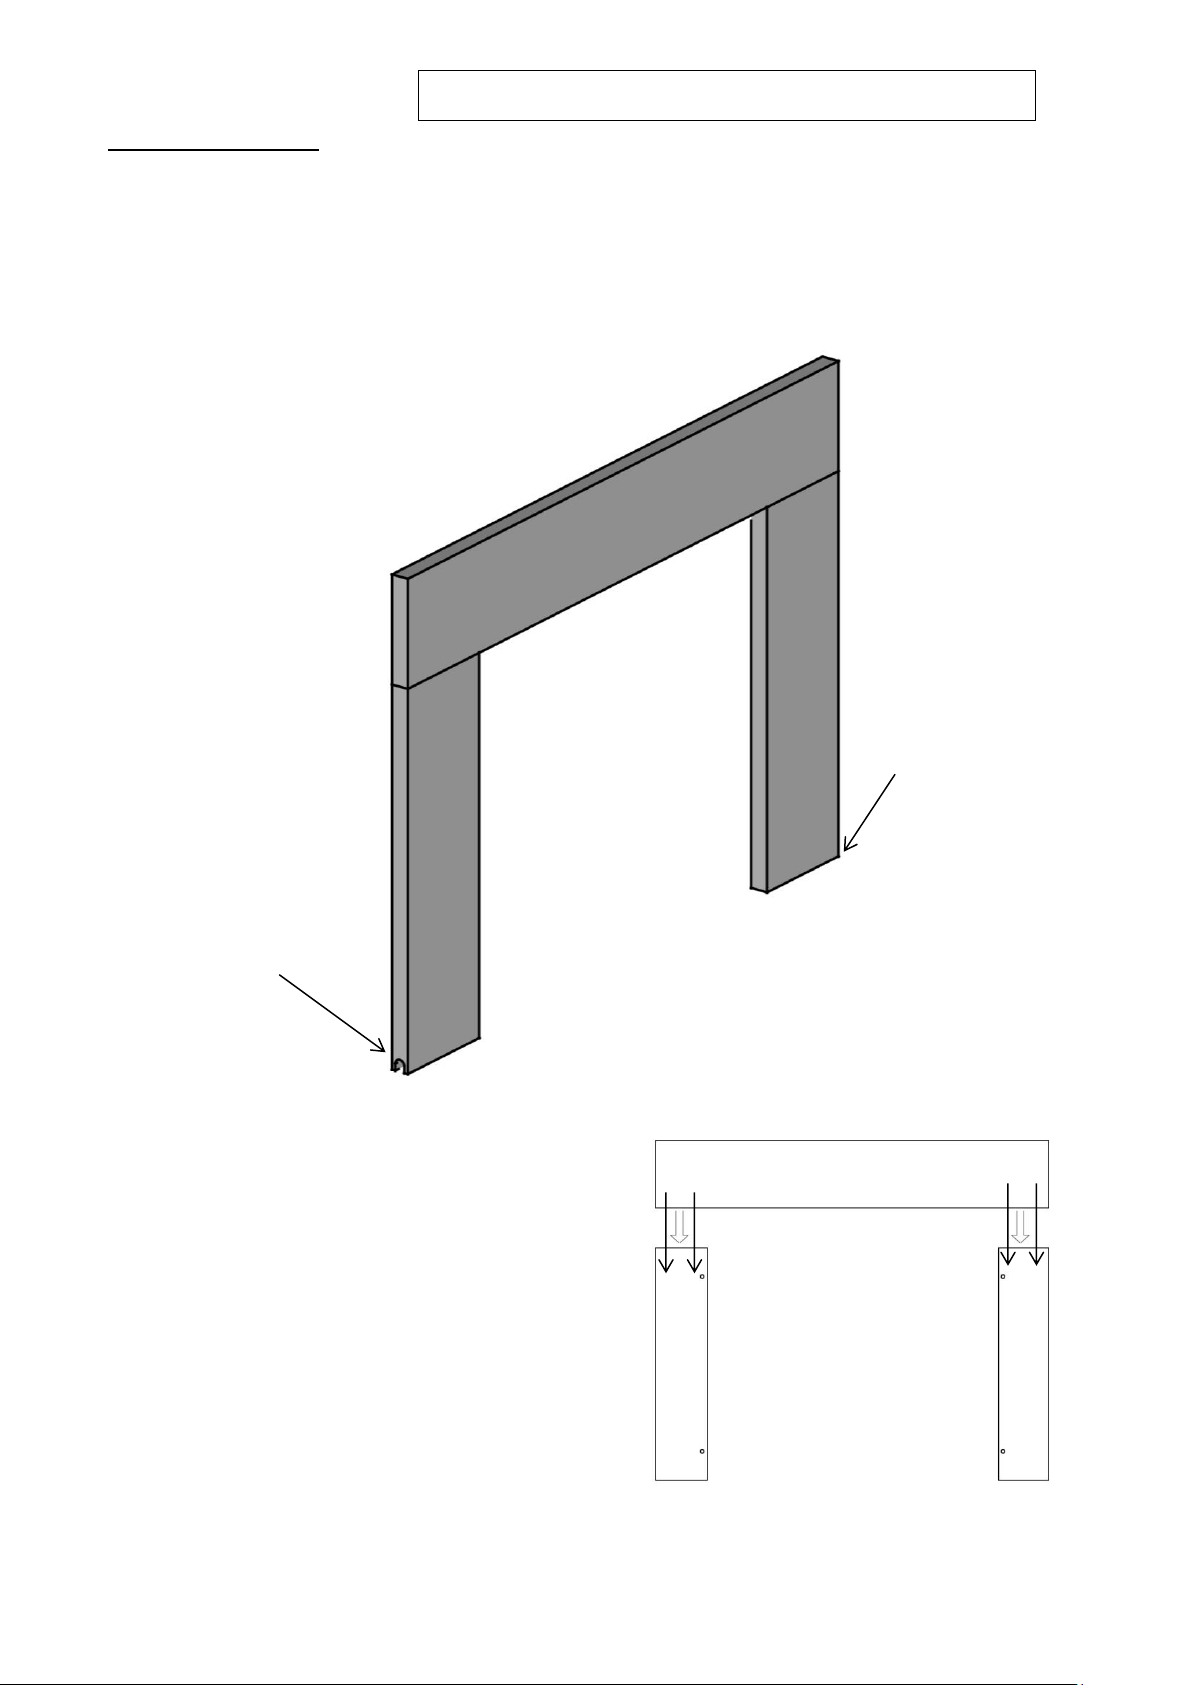
Clearance to Combustibles
Before you begin: If a power outlet is not located inside the existing fireplace (always
consult with local building codes before installing new outlets or modifying existing
electrical systems) , the insert surround pictured below has two openings for the power
cord to pass through if powering the unit from a nearby outlet outside the existing
fireplace.
Be sure to plan for this if utilizing one of these pass-through holes.
Clearances to sides, floor, top and back: 0 in (0mm)
Note: The fireplace can be installed in
one of two ways. Friction fit and
permanent install.
Choose whichever method works best
for your application.
Begin by assembling the insert surround
using the included screws and nuts in the
orientation shown.
Pass-through hole
Pass-through hole
5
42000 Rev E 08-20-18
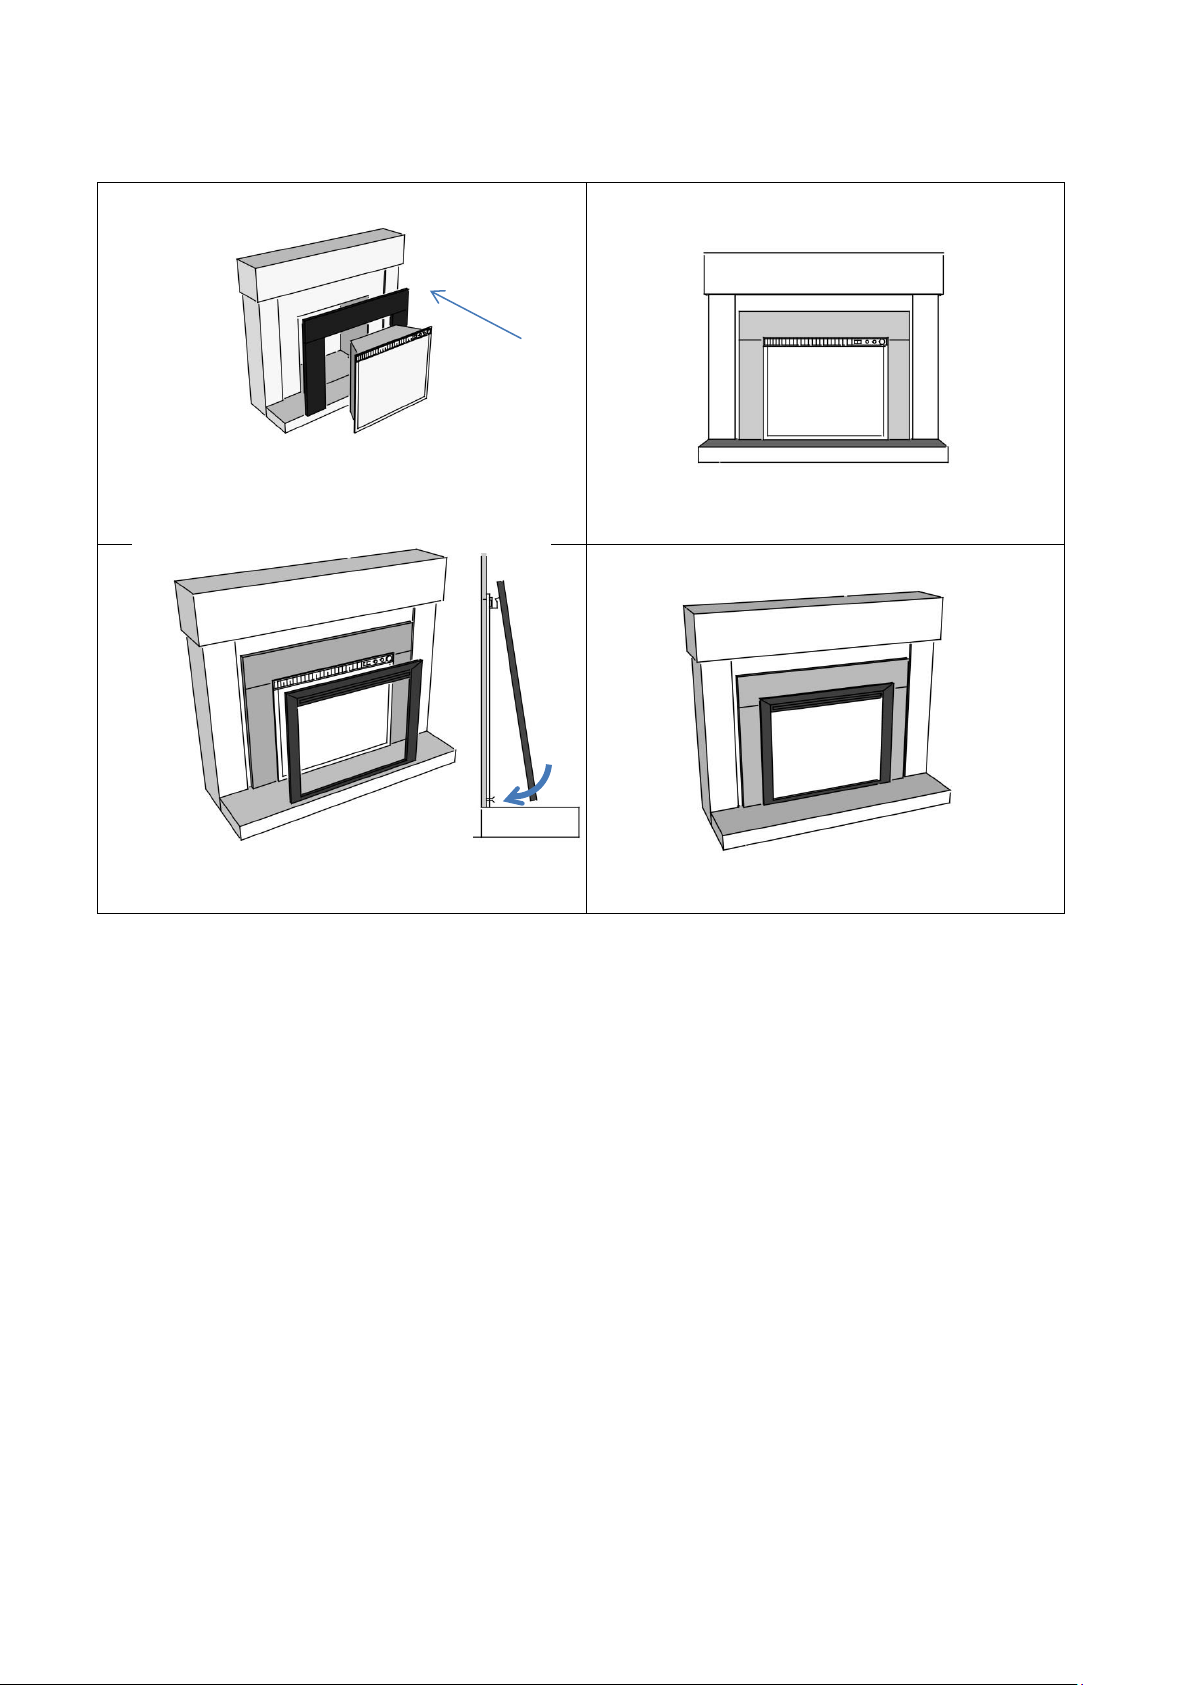
Method 1- Friction Fit
(1) Set Insert Surround into place, Slide in
fireplace unit. Run electrical cord through
pass-through hole if necessary
(2) Slide flush with front of fireplace
(3) Attach front face trim by hanging tabs on top,
then pressing lower pins into spring clips at
bottom.
(4) Completed assembly
6
42000 Rev E 08-20-18
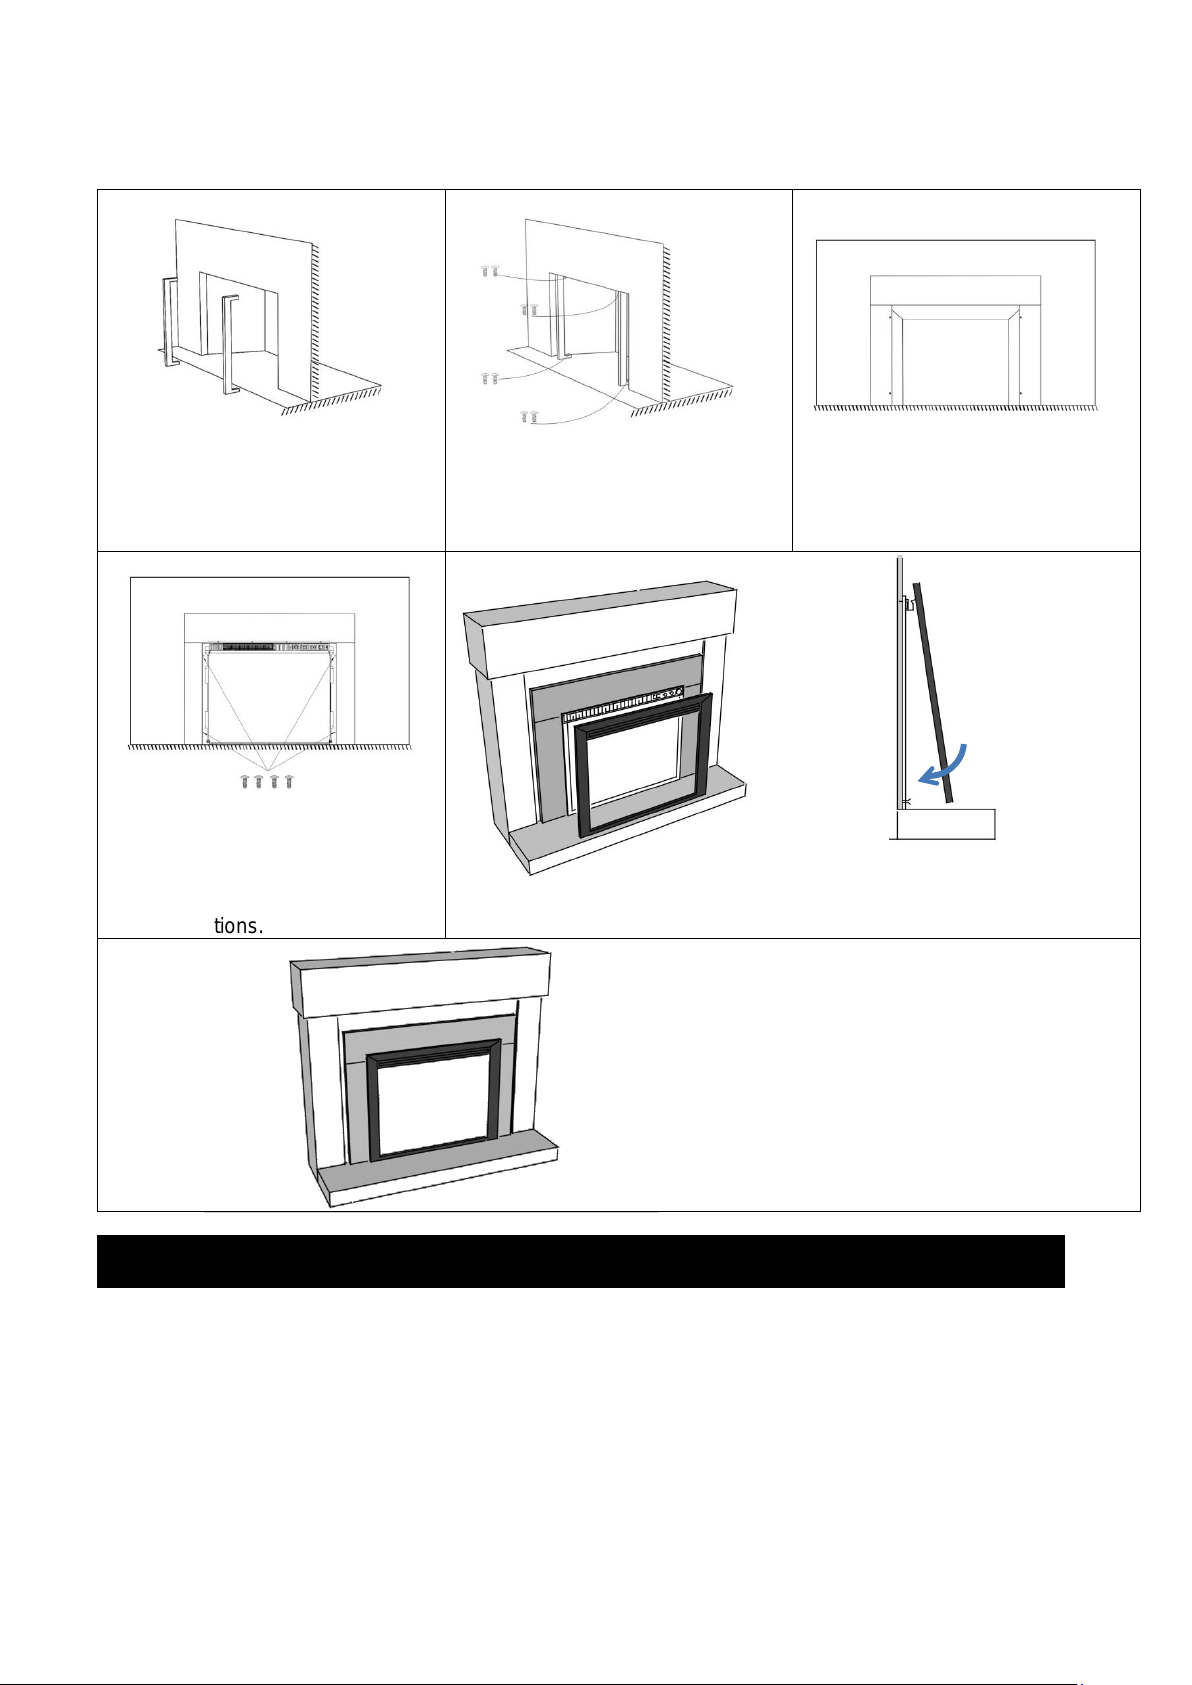
Method 2: Permanent Install
(1) Put 2 wood strips in existing
fireplace cut to fit the height of the
opening, and spaced 26.5” apart
(2) Fix the wood strips with
masonry screws or other
appropriate screws for the material
you’re attaching to.
(3) set insert surround into place.
Run cord through passthrough hole
if necessary .
(4) Put the fireplace insert into
place and using wood screws (not
included) attach the insert to the
surround and wood strips at
shown locations.
(5)Attach front face trim by hanging tabs on top, then pressing lower pins into spring
clips at bottom
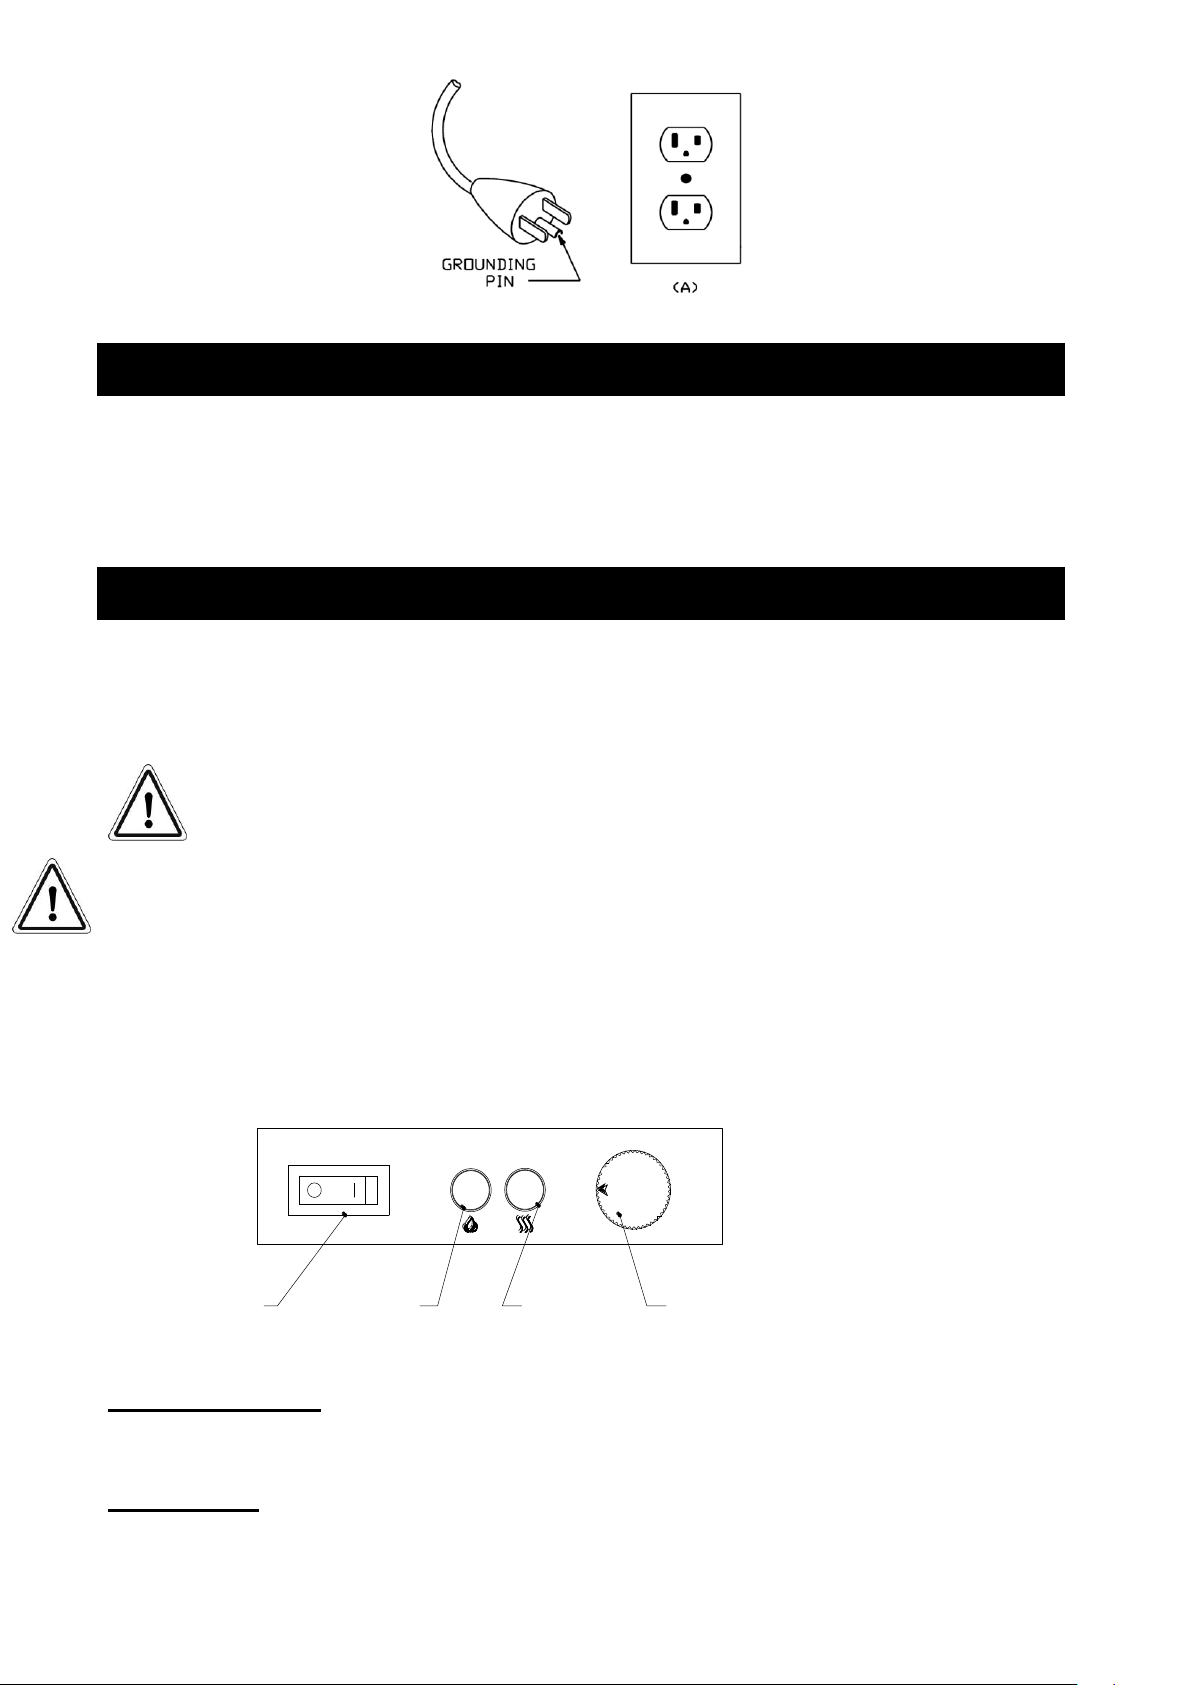
GROUNDING
Plug the power supply cord into a wall outlet (120Vac, 60Hz).The cord has a plug as shown at A.
You should follow as shown at the below:
Grounding methods
(6) Completed Assembly
7
42000 Rev E 08-20-18
ELECTRICAL CONNECTION
A 15 AMP, 120 Volt, The unit comes standard with 6 feet (1.8 m) three wire cord, exiting from the rear
of the fireplace. Plan the installation to avoid the use of an extension cord. Preferably, the fireplace will
be on a dedicated circuit as other appliances on the same circuit may cause the circuit breaker to trip
or the fuse to blow when the heater is in operation.
OPERATING INSTRUCTIONS
This appliance can be operated by both remote control and manual button controls on the fireplace.
Once the unit has been properly connected to a grounded electrical outlet, turn on the main power
switch located on the left hand side of the appliance. A beep should be heard when the power is first
applied.
CAUTION! The unit’s power cord must be connected to a properly grounded and protected
120V outlet. Always use ground fault protection where required by the electrical code.
WARNING! Do not operate the unit if it is damaged or has malfunctioned. If you suspect the unit is
damaged, please call a qualified service technician to inspect and to replace
any part of the electrical system if necessary.
NOTE! To use both remote and manual functions, the main power switch must be in “ON” position.
● Operating by Manual Button
NOTE! The manual button on the fireplace unit does not provide you with all function control, and it’s
purpose is to control some basic function in the event you lose the remote handset. Please use the
remote handset to carry out all functions.
NOTE:The lights will always be on when the appliance is on.
Main power switch
The POWER switch supplies power to all of the functions of the fireplace. This switch must be in the
“ON” position for any of the functions including the remote to work.
Flame button
By pressing the FLAME button, the unit will cycle through five flame effects. If you need more flame,
please use the remote handset.
Main power switch
Flame button Heater button Thermostat knob
5
4
3
2
1
9
6
7
8
8
42000 Rev E 08-20-18
Heater button
Press to turn on low heat setting. (Pilot lights illuminated ●○).
Press again for high heat setting. ( Pilot lights illuminated ●●)
Press a third time to turn heat off completely. ( Pilot lights illuminated ○○).
There are 3 levels you can cycle through including the OFF setting.
Thermostat control
Your unit contains a 9 Step thermostat-controlled heater ranging from 32-93 degrees F. If room
temperature is too high, turn the thermostat knob counter-clockwise direction; If you need to turn on
the heater, you can turn the thermostat knob clockwise.
To Reset the Heater
Your heater includes a protection system that shuts off the heater if it overheats for any reason:
1) Turn unit to the OFF position.
2) Unplug unit and wait 5 minutes.
3) Plug in again and turn on.
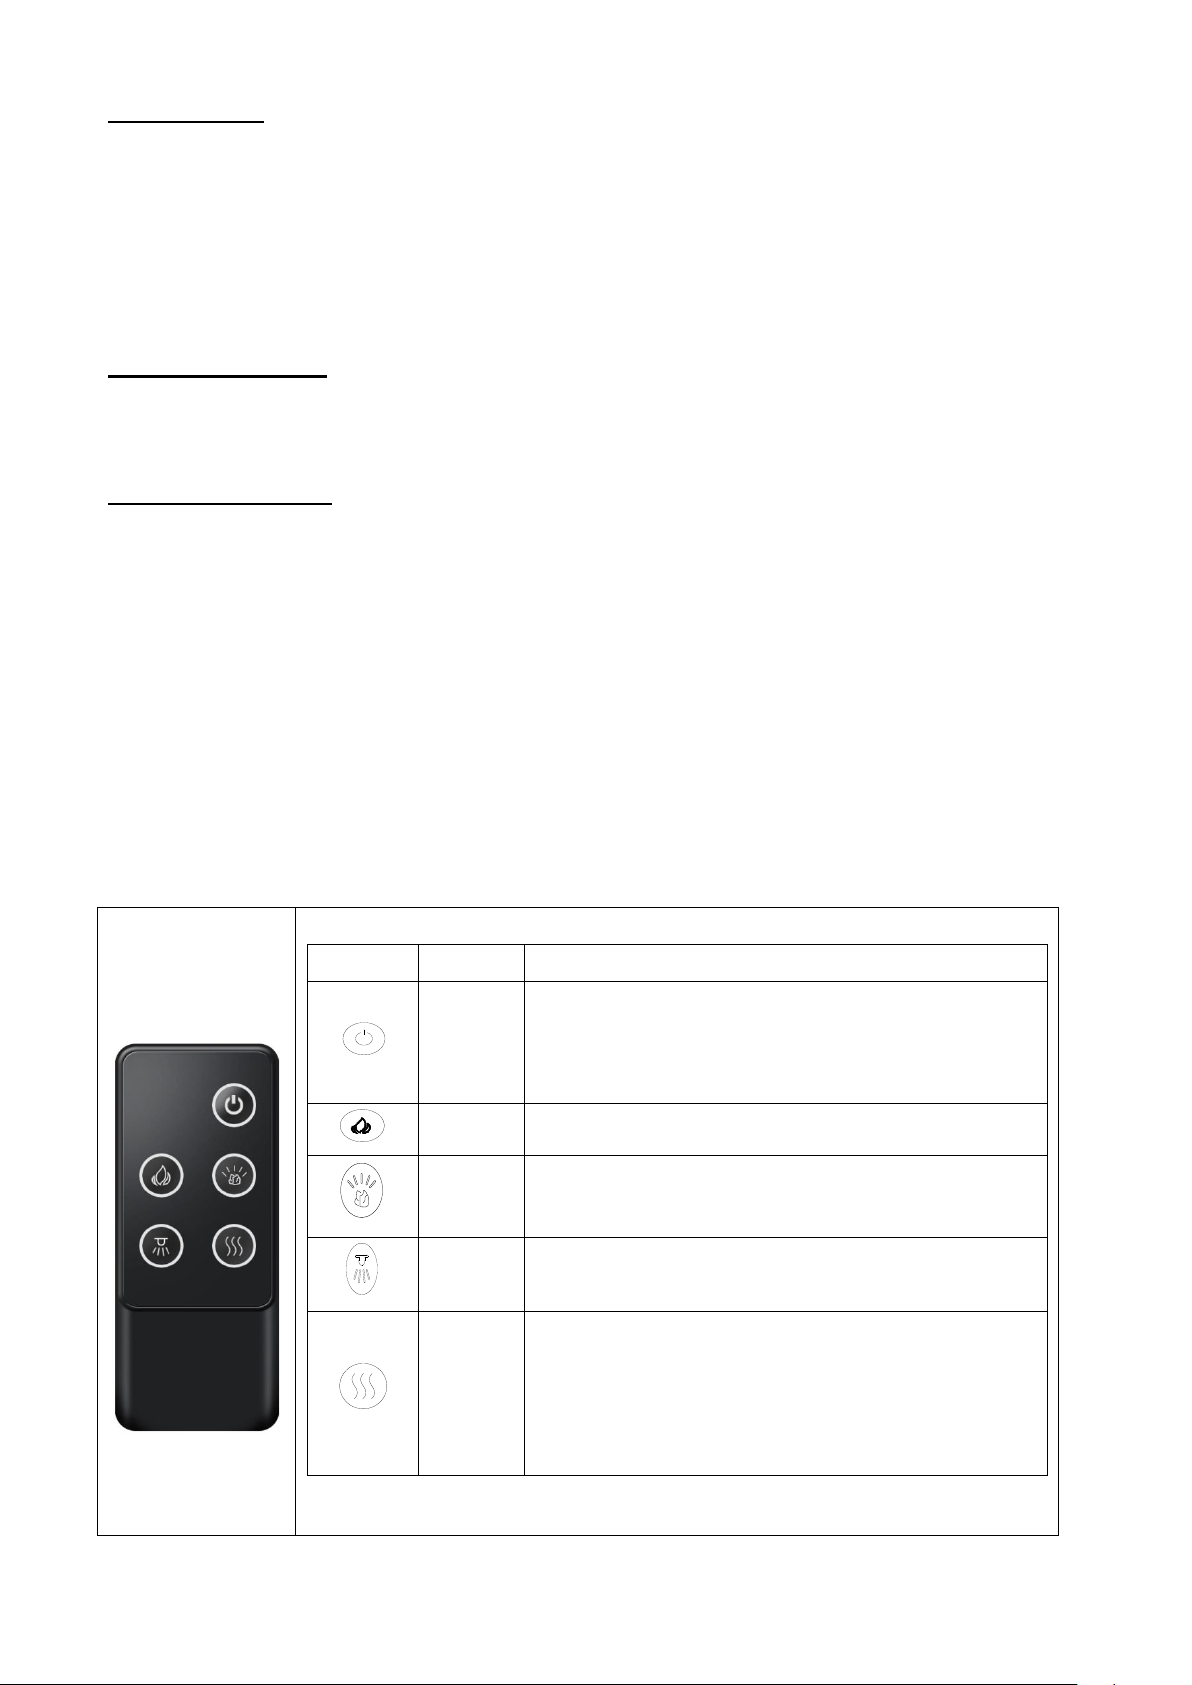
● Remote control functions
Note: The fireplace Main Power Switch must be switched ON in order for the Remote Control to
function.
Note:
If all light features are turned off and heater is turned on, the heater indicator light will remain lit. If other
light effects are turned on, the heater indicator light will turn off after a short period of time.
In order to protect the product from overheating, there is an 8 second delay when turning on the
heater; also there is 8s delay when turning off the heater fan.
SYMBOL
TITLE
FUNCTION
POWER
The Power button will put the fireplace in a standby
mode. This will turn off all functions at once but will hold
the settings in memory. Except Heater function, by
pressing the button again the unit will turn on at the
same settings.
FLAME
By pressing the FLAME button, the unit will cycle
through four flame effects.
EMBER
BED
By pressing the EMBER BED button, the unit will cycle
through five flame effects.
DOWN
LIGHT
By pressing the downlight button the unit will cycle
through two effects including OFF and ON setting.
HEATER
Press once for low heater setting (Pilot lights
illuminated ●○).
Press again for high setting. ( Pilot lights illuminated
●●)
Pressing a third time turns heat off. ( Pilot lights
illuminated ○○).
9
42000 Rev E 08-20-18
NOTE: This remote control uses 1 CR2032 Lithium lon button cell battery (Included). Never
dispose of batteries in fire, except under conditions of controlled incineration. (Failure to
observe this precaution may result in an explosion.)
NOTE: This equipment has been tested and found to comply with the limits for Class B digital device,
pursuant to part 15 of the FCC Rules. These limits are designed to provide reasonable protection
against
harmful interference in a residential installation. This equipment generates, uses, and can radiate radio
frequency energy and, if not installed and used in accordance with the instructions, may cause harmful
interference to radio or television reception, which can be determined by turning the equipment off and
on,
the user is encouraged to try to correct the interference by one or more of the following measures:
• Reorient or relocate the receiving antenna.
• Increase the separation between the equipment and the receiver.
• Connect the equipment into an outlet on a circuit different from that to which the receiver is
connected.
• Consult the dealer or an experienced radio/TV technician for help.
This device complies with Part 15 of the FCC Rules. Operation is subject to the following two
conditions:
(1) This device may not cause harmful interference, and
(2) this device must accept any interference received, including interference that may cause undesired
operation.
Modifications not approved by the party responsible for compliance could void user’s authority to
operate the equipment.
This Class B digital apparatus complies with Canadian ICES-003.
MAINTENANCE
WARNING: ALWAYS UNPLUG THE CORD BEFORE MOVING OR SERVICING.
DO NOT IMMERSE HEATER IN WATER!
Always turn OFF the heater and disconnect the cord from the electrical outlet before cleaning
your heater.
Light accumulated dust may be removed from the heater with a soft cloth or vacuum cleaner.
Wipe the exterior surfaces of the heater occasionally with a slightly damp cloth (not dripping
wet) using a solution of mild detergent and water. Dry the case thoroughly before operating
the heater.
Caution: Do not allow water to run into the interior of the heater as this could create a fire or electric
shock hazard.
The fan motor is factory lubricated for life and will not require further lubrication.
Store heater in a clean dry place when not in use.
Warning: Any other servicing needed must be performed by an authorized service representative.
Do not attempt to service the unit yourself.