Loading ...
Loading ...
Loading ...

11
INSTALLATION
NOTICE: This heater is intended for use as supplemental heat. Use this heater along with your
primary heating system. Do not install this heater as your primary heat source. If you have a
central heating system, you may run system’s circulating blower while using heater. This will
help circulate the heat throughout the house.
WARNING: A qualied technician must install heater. Follow all local codes.
WARNING: Never install the heater:
• in a bedroom or bathroom
• in a recreational vehicle
• where curtains, furniture, clothing, or other ammable objects are less than 42 in. from the
front, top or sides of the heater.
• in high trafc areas
• in windy or drafty areas
WARNING: Maintain the minimum clearances. If possible, provide greater clearances from the
oor, ceiling, and adjoining wall than required (shown in gure 6).
CAUTION: This heater creates warm air currents. These currents move heat to wall surfaces next
to heater. Installing heater next to vinyl or cloth wall coverings or operating heater where impurities
(such as tobacco smoke, aromatic candles, cleaning uids, oil or kerosene lamps, etc.) in the air
exist, may cause walls to discolor.
IMPORTANT: Vent-free heaters add moisture to the air. Although this is benecial, installing heater in
rooms without enough ventilation air may cause mildew to form from too much moisture. See Air for
Combustion and Ventilation, pages 9 through 11.
CHECK GAS TYPE
Be sure your gas supply is right for your heater.
CLEARANCES TO COMBUSTIBLES
Carefully follow the instructions below. This heater is a designed to sit directly on the mantel base.
IMPORTANT: Maintain the minimum clearances shown in Figure 6 on page 12. If you can, provide
greater clearances from oor, ceiling and joining wall.
UNPACKING
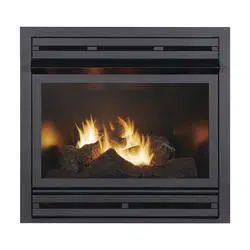
1. Remove replace cabinet and hood from carton. Log is wrapped and inside replace.
Do not remove at this time.
2. Remove all protective packaging applied to replace for shipment.
3. Make sure your replace includes one hardware packet.
4. Check replace for any shipping damage. If replace is damaged, call GHP Group, Inc., at 1-877-
447-4768. Please do not return it to the store.
Tools Required:
• Phillips screwdriver • scissors
Loading ...
Loading ...
Loading ...
