Loading ...

2
Please read and understand this entire manual before attempting to assemble, operate or install the product.
READ AND FOLLOW ALL SAFETY INSTRUCTIONS
WARNING:
• This product is not a toy and contains small parts. Close supervision is necessary when this unit is
used near children. The remote control contains a button battery. If swallowed, it could cause severe
injury or death in just 2 hours. Seek medical attention immediately.
• To reduce the risk of electrical shock, do not put the unit in water or other liquid. Do not place or
store unit where it can fall or be pulled into a tub or sink. Do not open battery compartment with wet
hands.
• Ensure mounting surface is sturdy. Do not mount pucks to moving or unstable surfaces.
• For cleaning, use a soft dry cloth. Do not use alcohol, benzene, thinner, or other caustic chemicals
to clean the puck light. Do not use the light in places which are extremely hot, cold, dusty, or humid.
SAVE THESE INSTRUCTIONS
Before beginning assembly, installation, or operation of product, make sure all parts are present. Compare
parts with package and hardware contents lists on page 1. If any part is missing or damaged, do not attempt
to assemble, install or operate the product. Contact customer service for replacement parts.
Helpful Tools (not included): Tape measure, pencil
Estimated assembly time: 15 minutes
WARNING
• Ensure mounting surface is sturdy. Do not mount pucks to moving or unstable surfaces.
SAFETY INFORMATION
PREPARATION
INSTALLATION INSTRUCTIONS
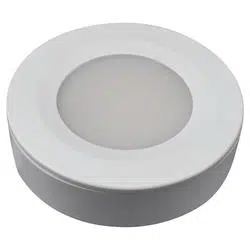
1. Separate the surface ring from
the LED puck light (A) by holding
the surface ring of the puck rmly
with your ngers while the lens is
facing away from you, pressing the
back of the puck light housing with
your thumbs outward.
5. Connect each puck light (A) to
one another by securely fastening
each connector on either end of
the puck light’s (A) lead wires,
starting at the last puck light (A) in
the series.
9. Use remote control (E) for
on/o control, dimming, and color
control. Remove plastic tab from
battery door before use.
10. To replace remote control’s
battery (F), follow directions on
the back of remote control (E) to
slide battery drawer out. Replace
battery (+ side up) and slide battery
drawers back in place.
1
5
9
10
2. Using the surface ring as a
template, mark the locations of the
mounting holes on the mounting
surface. Be sure to orient the side
openings according to where the
puck’s (A) lead wires will be routed
towards adjacent pucks and/or the
nearest power outlet.
6. Connect the in-line receiver
(B) to the rst puck light (A) in the
series by securely fastening each
clip connector on the lead wires.
7. Connect the 12V plug-in power
supply (C) to the receiver by
plugging the DC connection jack
into the input side of the receiver.
8. Plug the 12V plug-in power
supply (C) to an appropriate power
outlet.
3. Secure surface ring to a sturdy
mounting surface using mounting
screws (D) provided. Use an awl or
nail to start screw-holes if needed.
Ensure puck lights (A) are no
more than 23 inches apart and the
rst puck light (A) in the series is
no more than 72 inches from the
nearest power outlet. Repeat this
process for all 3 puck light surface
rings (A).
4. Route the lead wires through
the openings on either side of the
surface ring, then push the puck
light housing into the surface ring.
Repeat this process for all 3 puck
lights (A).
2
6
7
8
3
4
AAA
AAA
AAA
AAA
AAA
AAA
AAA
B
E
E
C
C
B
3
Loading ...
Loading ...
