
User Manual
Window Air Conditioner
Before using your TOSOT Window Air Conditioner
please read this user manual in its entirety.
MO DEL NUMBERS
8,000 BTU-GJC08BU-A6NRNJ2A

Welcome to the TOSOT Direct Family!
We’re extremely happy to welcome you as a new member of our family! Please read
the tips below before using your product for the first time.
1. Allow the unit to sit upright for at least 3-4 hours before powering on. Shipping
carriers may set the unit on its side, which causes the refrigerant to pool in certain
areas. Standing the unit upright for 3-4 hours allows the refrigerant to move freely
within the coils.
2. Run the unit continuously for 24 hours after letting the unit stand upright for 3-4
hours. This allows the unit to work out any “kinks’ that may have resulted during
shipping from our factory or to your doorstep.
3. For more details and quick start guide about installation, please contact
.
4. If you have any other questions, please email us at
before making a return request. Our support team typically replies within 24 hours,
usually sooner. If you haven’t received a reply, please check your spam or junk
folder as sometimes our replies get lost in customer’s inboxes!
Tips for First-Time Use
Warranty Information
1. All TOSOT products come with a 1-year warranty from the date of purchase.
2. You can get a 6-month warranty extension by registering your new product at
www.tosotdirect.com/extend
.

Table of Contents
Safety and Instructions
Installation and Setup
Operation
Electrical Information
Parts
Control Panel
Remote Control
Replacing the Batteries
Changing the Wind Direction
Installation
Tools Required List
Window Requirements
Installation Procedure
Adding Foam to Accordion Panels
Proposition 65 Notice
Cleaning
Maintenance Checklists
Troubleshooting
Malfunction Codes
01
01
02
03
04
05
07
09
10
11
11
12
12
16
17
17
19
20
21
-------------------------------------
-------------------------------------
---------------------------------------------------
-------------------------------------
-----------------------------------------------------------
------------------------------
-----------------------------------------------
--------------------------------------------
-----------------------------------
----------------------------------------------------
-------------------------------------------------------
------------------------------------
----------------------------------------------
-------------------------------------------
----------------------------------------
------------------------------------
------------------------------------
---------------------
-------------------------------------

Safety and Instructions
01
Installation and Setup
Please read all instructions before use and save this user manual for future reference.
A digital version can be obtained by emailing us at
.
Your safety and the safety of others are very important to us. We have provided many
important safety messages throughout this manual and on the appliance itself. Always
read and follow all posted safety messages. If you have any doubts, please contact
with any questions.
To reduce the risk of fire, electric shock, injury, or death to persons using or near this
appliance, please follow some basic safety precautions. These precautions include,
but are not limited to, the following:
Ɣ7KLVDSSOLDQFHLVQRWLQWHQGHGIRUXVHE\DQ\SHUVRQVLQFOXGLQJFKLOGUHQZLWK
reduced or restricted physical, mental, or sensory capabilities, or lack of experience
and knowledge, unless under direct supervision of a person responsible for their
safety.
Ɣ3OHDVHNHHSSODVWLFEDJVDQGVKHHWVRXWRIWKHUHDFKRIFKLOGUHQDVWKH\PLJKWEH
mistakenly used for play. Packaging materials can become airtight chambers and
may pose a risk of suffocation if not disposed of properly.
Ɣ7KLVSURGXFWVKRXOGEHSOXJJHGGLUHFWO\LQWRDSRZHURXWOHW3RZHURXWOHWVKRXOG
be properly rated, protected, and sized in order to avoid electrical overload.
Do not use a multiple-outlet power strip or extension cord with this window
air conditioner.
Failure to do so may result in short-circuit or electrical shock.
Ɣ'RQRWFXWRUUHPRYHWKHWKLUGJURXQGSURQJIURPWKHSRZHUFRUGXQGHUDQ\
circumstances.
ƔWhen installing or moving the appliance, be careful not to punch, crush, or damage
the power cord.
Ɣ1HYHUDWWHPSWWRRSHUDWHWKLVDSSOLDQFHLILWYLVLEO\GDPDJHGPDOIXQFWLRQLQJ
disassembled, or has missing or broken parts. This includes exposed wiring on a
damaged cord or electrical plugin.
Ɣ'RQRWDWWHPSWWRGLVDVVHPEOHRUUHSDLUDQGSDUWRIWKLVDSSOLDQFH$OOUHSDLUVDQG
services must be performed by qualified service personnel.

02
Ɣ8VHFDXWLRQZKHQXQSDFNLQJDQGLQVWDOOLQJDVWKHVKDUSHGJHVRIWKHXQLWPD\
cause personal injury.
Ɣ,WLVUHFRPPHQGHGWKDWWZRSHRSOHLQVWDOODQGVHWXSWKHDLUFRQGLWLRQHUWRDYRLGWKH
unit falling out of window.
Ɣ&KHPLFDOVDQGRWKHUVROYHQWVZKLFKDUHGLVVROYHGLQWKHDLUHJFOHDQLQJSURGXFWV
KDLUVSUD\DLUIUHVKHQHUVSHUIXPHVHWFPD\FDXVHWKHSURGXFWWRGHIRUPDQG
become damaged.
Ɣ,QVWDOODWLRQPXVWEHSHUIRUPHGLQDFFRUGDQFHZLWKQDWLRQDOZLULQJVWDQGDUGVE\
authorized and trained personnel only.
Ɣ7KHRXWGRRURSHUDWLQJWHPSHUDWXUHUDQJHIRUWKLVXQLWLV))&&
Operating this air conditioner outside of this temperature range may cause damage
to your air conditioner.
Operation
Ɣ7RDYRLGULVNRIHOHFWULFDOVKRFNGRQRWJUDVSWKHSRZHUFRUGRUWKHXQLWZLWKZHW
hands and avoid placing the product where it could be splashed with water.
Ɣ$YRLGSODFLQJWKHXQLWLWVHOIRUDQ\RWKHUREMHFWVRQWRSRIWKHSRZHUFRUGLQFOXGLQJ
rugs or carpeting.
Ɣ.HHSDLULQOHWRXWOHWVIUHHIURPREVWUXFWLRQDQGFOHDQWKHILOWHUUHJXODUO\WRHQVXUH
optimal and safe performance.
Ɣ'RQRWLQVHUWILQJHUVRURWKHUREMHFWVLQWRWKHDLULQOHWRXURXWOHW1RWRQO\LVWKH
internal fan running at high speeds, there is also an increased risk of deadly
electrical shock.
Ɣ5HPRYHWKHSRZHUSOXJIURPWKHZDOORXWOHWLIWKHSURGXFWZLOOQRWEHXVHGIRU
extended periods.
ƔIf the product makes a strange noise or emits a strange or smoky smell, immediately
remove the power plug and contact customer service for next steps.
Ɣ7XUQRIIWKHSURGXFWDQGUHPRYHWKHSRZHUSOXJEHIRUHFOHDQLQJRUPDLQWHQDQFH
Wait for the fan to stop moving.
Ɣ'RQRWDWWHPSWWRDFFHOHUDWHWKHGHIURVWLQJSURFHVVRWKHUWKDQXVLQJLQVWUXFWLRQV
contained in this user manual, as this may damage your unit.

03
Ɣ1RRSHQILUHHJHOHFWULFDOKHDWHURUJDVVWRYHVKRXOGEHXVHGRQRUQHDUWKH
appliance.
Ɣ'RQRWGLUHFWDLUIORZGLUHFWO\DWURRPRFFXSDQWVSHWVRUSODQWVDVWKLVPD\
negatively impact health.
Ɣ'RQRWXVHWKHDLUFRQGLWLRQHUIRUVSHFLDOXVHSXUSRVHVVXFKDVWKHSUHVHUYDWLRQ
of precision devices, food, plants, or other irreplaceable objects as it might cause
deterioration of quality.
Ɣ$OZD\VLQVHUWILOWHUVVHFXUHO\DQGFOHDQILOWHUVHYHU\ZHHNVIRURSWLPDOSHUIRUPDQFH
Ɣ'RQRWGULQNZDWHUGUDLQHGIURPWKHDLUFRQGLWLRQHUDVWKLVPD\FRQWDLQFRQWDPLQDQWV
which will make you ill.
Electrical Information
The power supply cord with this air conditioner contains a current detection device
designed to reduce the risk of fire. In the event that the power supply cord is damaged,
it cannot be repaired. The power supply cord must be replaced with a replacement
cord received from the manufacturer by a trained service technician. Please contact
for further details.
Ɣ3OHDVHHQVXUHWKDWWKHHOHFWULFDOVHUYLFHLQ\RXUKRPHLVDGHTXDWHIRUWKHPRGHO
you have chosen. This information can be found on the serial plate, which is located
on the side of the unit behind the air intake grille.
ƔYour air conditioner must be used in a properly grounded wall receptacle. If the
wall receptacle you intend to use is not adequately grounded or protected by a time
delay fuse or circuit breaker, have a qualified electrician install the proper wall power
receptacle before using this appliance.
Ɣ%HVXUHWKDWWKHDLUFRQGLWLRQHULVSURSHUO\JURXQGHG7RPLQLPL]HVKRFNDQGILUH
hazards, proper grounding is important. The power cord is equipped with a three-
prong grounding plug for protection against shock hazards.
Ɣ'RQRWUXQWKHDLUFRQGLWLRQHUZLWKRXWWKHZKLWHSODVWLFVKHOOLQSODFH7KLVFRXOG
result in mechanical damage within the air conditioner.
Ɣ'R
not
use an extension cord or adapter plug with this air conditioner
under any
circumstances
.
04
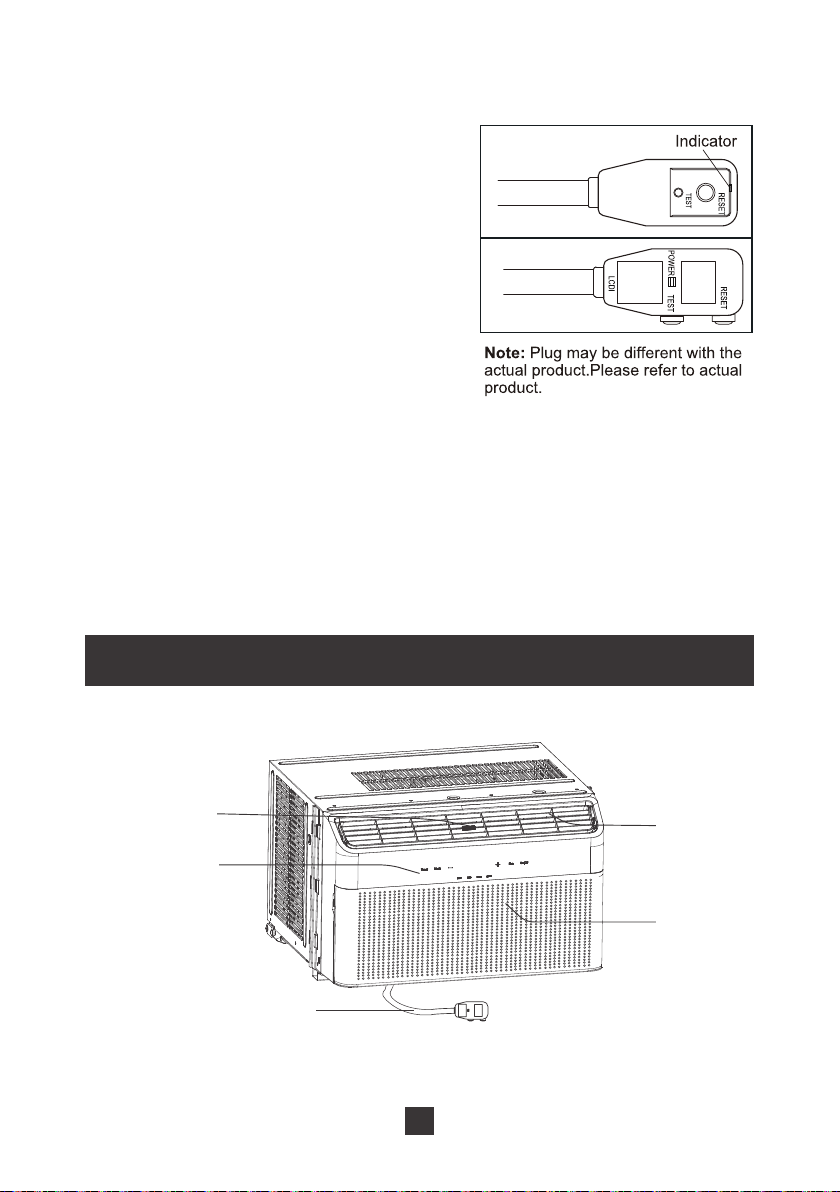
To test your power supply cord please do the following:
1. Plug in the air conditioner.
2. The power supply cord will have two buttons
on the plug head. If you press the
TEST
button you should notice a clicking noise as
the
RESET
button pops out.
3. Press the
RESET
button again, and you will
notice a clicking noise as the button engages.
4. The power supply cord is now supplying
electricity to the unit.
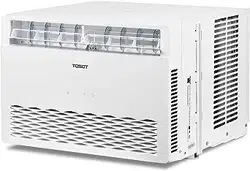
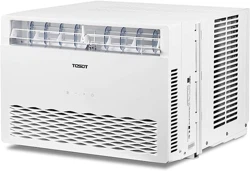
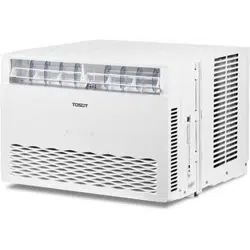
Parts
Ɣ'RQRWXVHWKHSRZHUVXSSO\FRUGWRWXUQWKHXQLWRQRURII
Ɣ$OZD\VPDNHVXUHWKH5(6(7EXWWRQLVSXVKHGLQIRUFRUUHFWRSHUDWLRQ
Ɣ7KHSRZHUVXSSO\PXVWEHUHSODFHGLILWIDLOVWRUHVHWZKHQHLWKHUWKH7(67EXWWRQ
is pushed, or it cannot be reset. Please contact
for
more information.
Air outlet
Air intake
Power cord
Fan direction
adjusting rod
Control panel
05
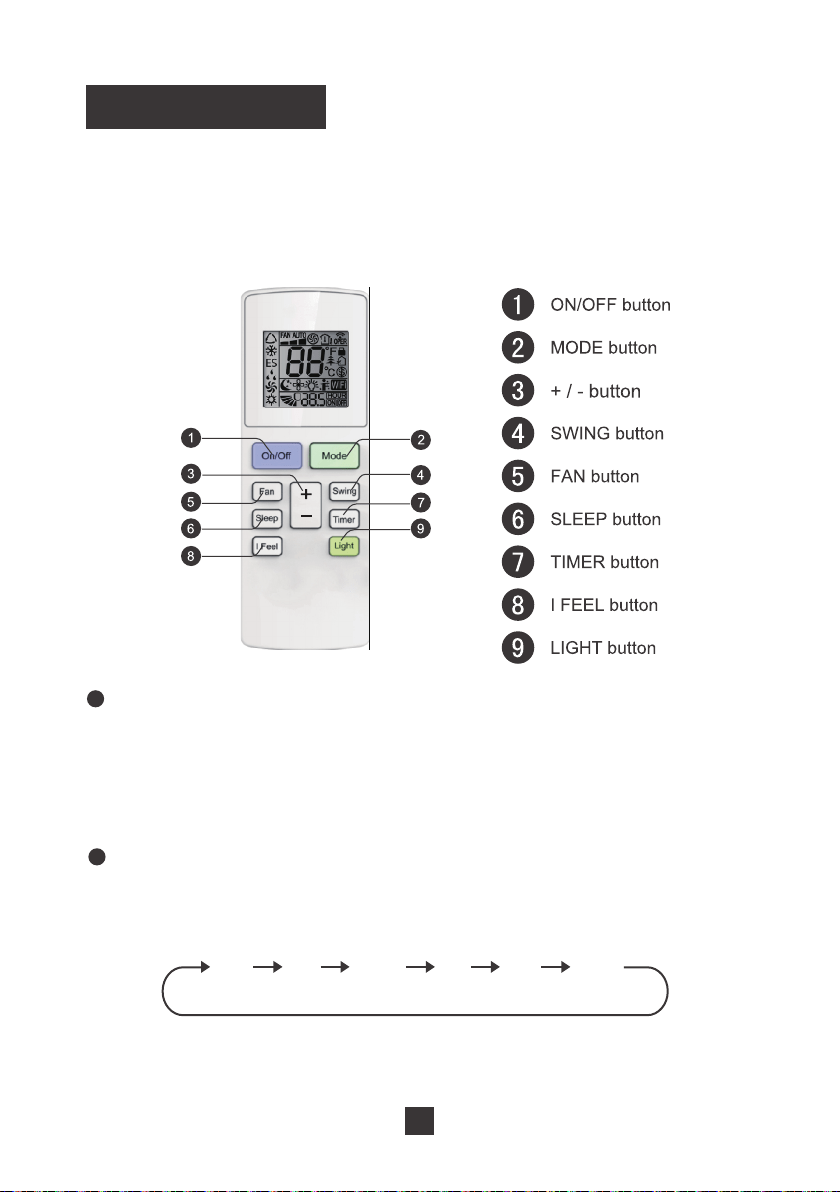
Control Panel
1
5 4 3 2 1
1
2Q2IIEXWWRQ
2
Fan button
3
+- button
4
Mode button
5
Timer button
Cool mode
'XDOGLVSOD\
Fahrenheit unit
'U\PRGH
(QHUJ\6DYH
mode
mode
Filter cleaning
mode
Fan Only mode
Auto mode
Low speed
indicator
Medium speed
indicator
High speed
indicator
Auto speed
indicator
NOTICE:
“ ” when fan has operated for 25h accumulatively, filter cleaning icon is on to remind user for
cleaning ILOWHU when filter cleaning icon is on IDQ has operated for K DFFXPXODWLYHO\ Press and
hold “Time” button and “-” button simultaneously for 3s to clear accumulative operation time of filter and
then filter cleaning icon is off.
Press to power the air conditioner
ON
or
OFF
. When turning the unit on via the
control panel, the unit will operate in
Energy Saving
mode until you change the
operating mode using the
Mode
button.
ON/OFF Button
06
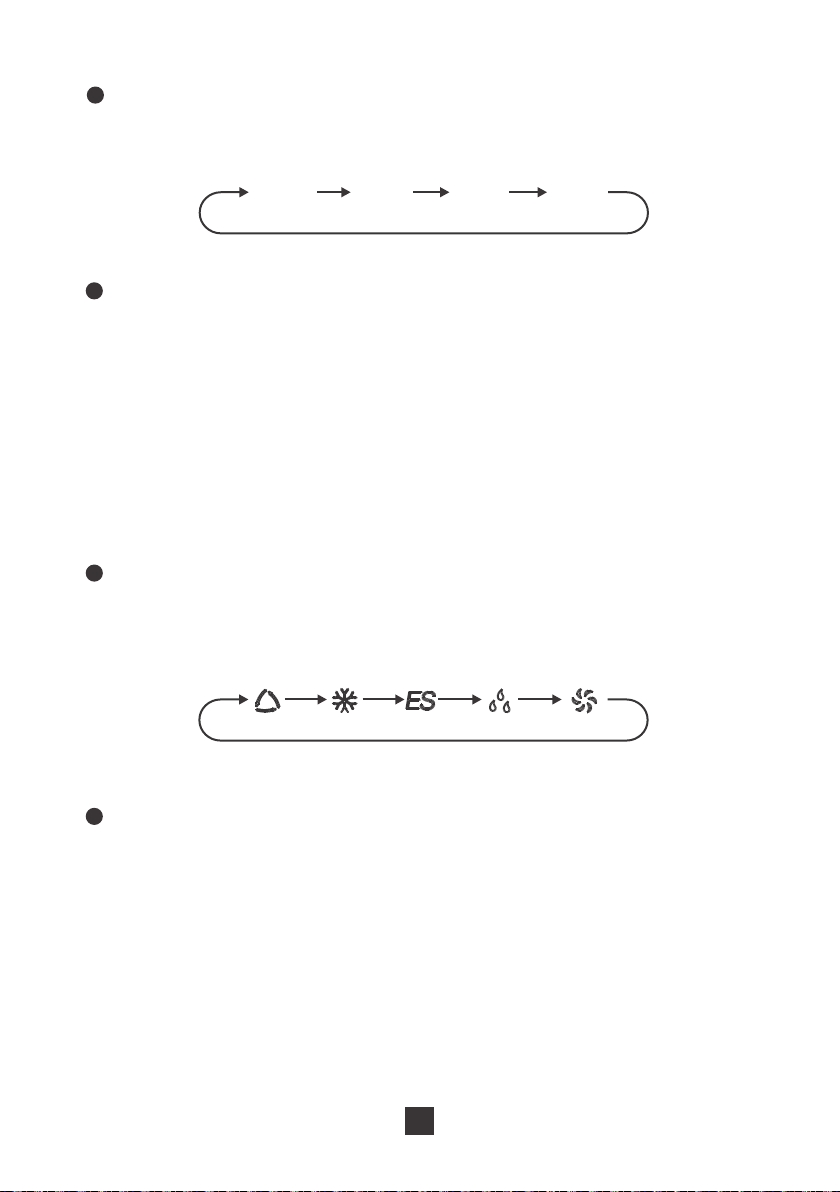
2
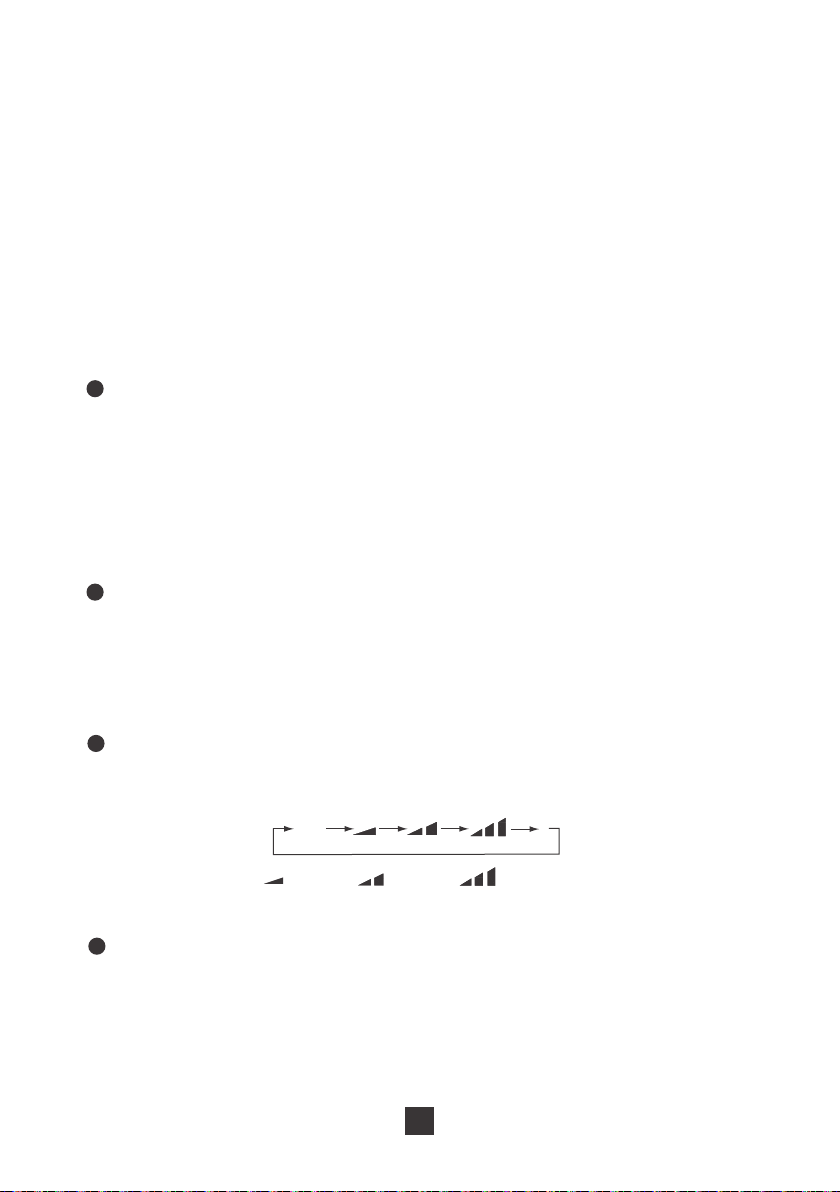
Pressing this button will cycle the fan speed through one of 4 fan modes, as shown
below:
Fan Button
4
Pressing this button will cycle through one of the 5 function modes, as shown below:
Mode Button
5
When the unit is running, press this button to schedule when the unit will power off
E\XVLQJWKHEXWWRQWRDGMXVWWKHOHQJWKRIWLPHEHIRUHSRZHULQJRII:KHQWKH
unit is not running, press this button to schedule when the unit will power on by using
WKHEXWWRQWRDGMXVWWKHOHQJWKRIWLPHEHIRUHSRZHULQJRQ
Timer Button
3
Ɣ3UHVVLQJWKLVEXWWRQZLOODOORZ\RXWRFKDQJHWKHWHPSHUDWXUHVHWWLQJ+ROGLQJ
either button will increase or decrease automatically. It will take 3 seconds for the
temperature settings to be confirmed by the machine.
Ɣ$IWHUSUHVVLQJWKHWLPHUEXWWRQWKHEXWWRQVZLOODGMXVWWKHWLPHUVHWWLQJIURP
KRXUVLQKRXULQFUHPHQWV$IWHUWKHKRXUPDUNWKHEXWWRQZLOO
adjust the timer setting in 1-hour increments. It will take 5 seconds for the timer
settings to be confirmed by the machine.
+/- Button
$872 LOW 0(' HIGH
Save
nergy
'5<)$1
$872&22/
(
07
1
Press to power the air conditioner
ON
or
OFF
7KHXQLWZLOOVWDUWLQ(QHUJ\6DYLQJ
mode after first being powered on. When the unit is powered off the set temperature
will be saved until the unit is powered back on. In the event of a power outage, the
unit will return to the last saved settings before the unit lost power.
ON/OFF Button
2
Press this button to cycle through the five operating modes. A corresponding logo
indicator on the left side of the remote will be shown.
Mode Button
Remote Control
This is a universal remote control for a variety of models. If your model does not
have a function listed on the remote control, there will be no changes in the operation
of your unit. The max range of the remote control is approx. 25 feet with no obstacles
or interference from other devices, such as wireless phones or fluorescent lamps.
Cool
'U\
Auto
(QHUJ\
Saver
Fan
Only
Heat
2QO\IRUPRGHOV
ZLWKKHDWLQJIXQFWLRQ
ƔAuto mode: the air conditioner will operate according to ex-factory setting. The set
temperature cannot be adjusted.
08
ƔCool mode: standard cooling mode. The set temperature and fan speed can both
be adjusted.
Ɣ Energy Saving mode: an automatic mode to save on energy costs. The set
temperature cannot be adjusted. The fan speed can be adjusted.
Ɣ Dry mode: the unit will run on low speed for dehumidification. The fan speed
cannot be adjusted.
Ɣ Fan Only mode: the air conditioner will not produce cool air, only blow air from the
outside. The fan speed can be adjusted, but you cannot use the “Auto” fan speed
setting.
6
Press this button to enter the sleep operation mode. While in sleep mode, you can
only use the Cool, Energy Saving, or Dry modes. When in sleep mode, the AC
WHPSHUDWXUHZLOODXWRPDWLFDOO\LQFUHDVHE\)SHUKRXUXSWR)
Sleep Button
3
Ɣ3UHVVLQJWKH“+” or “-”EXWWRQZLOOLQFUHDVHGHFUHDVHWKHVHWWHPSHUDWXUHE\)
Release the button once your desired temperature is reached.
ƔAfter pressing the Timer button, each press of the +/-EXWWRQZLOOLQFUHDVHGHFUHDVH
WKHWLPHE\KRXUVRelease the button once your desired time setting has been
reached.
+/- Button
4
Press this button to turn the swing feature on or off. When on, the air flow will swing
back and forth vertically.
Note: Swing button is not available for this model.
Swing Button
5
3UHVVWKLVEXWWRQWRF\FOHWKURXJKWKH$XWRPRGHDQGIDQVSHHGV/RZ0HGLXP
+LJK
Fan Button
Auto
Speed 1 Speed 2
Speed 3
09
7
When the unit is running, press this button to schedule when the unit will power off
E\XVLQJWKHEXWWRQWRDGMXVWWKHOHQJWKRIWLPHEHIRUHSRZHULQJRII:KHQWKHXQLW
is not running, press this button to schedule when the unit will power on by using the
EXWWRQWRDGMXVWWKHOHQJWKRIWLPHEHIRUHSRZHULQJRQPress the timer button a
second time to confirm the timer setting. If you have confirmed a time setting, you can
press this button again to cancel the timer mode.
Timer Button
8
Pressing this button will use a sensor located in the remote control to determine the
temperature setting of your air conditioner. The remote controller will send a
WHPSHUDWXUHXSGDWHWRWKHDLUFRQGLWLRQHUHYHU\PLQXWHVIRUEHWWHUDFFXUDF\LQ
your room. If the air conditioner does not receive an update from the remote control
after 11 minutes, it will revert to using a sensor on the air conditioner itself to adjust
the temperature settings. In the case of a power outage, this setting will not be saved.
You will need to manually reset the I Feel mode after a power outage.
“I Feel” Button
9
Press this button to turn off the lights on the display panel of your air conditioner.
Press the button again to turn the light back on.
Notice: Change Between °F and °C
With the remote powered off, press the Mode and “-“ buttons simultaneously to switch
between Fahrenheit and Celsius displays.
Light Button
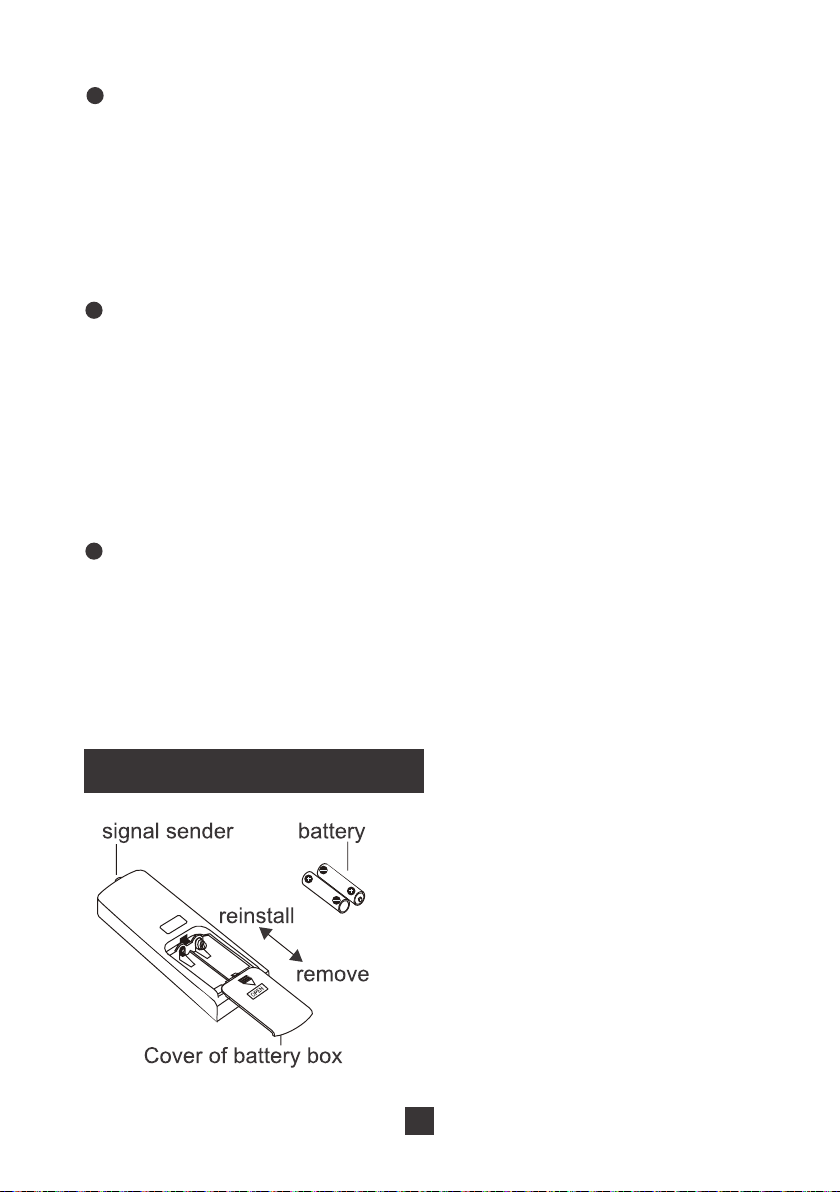
Replacing the Batteries
1. Press the back side of the remote
control battery cover and slide out
following the engraved arrow.
5HSODFHZLWKWZRQHZ$$$9
batteries of the same make and
model. Make sure the polarities
DUHDOLJQHGFRUUHFWO\
3. Reinstall the battery cover box.
10
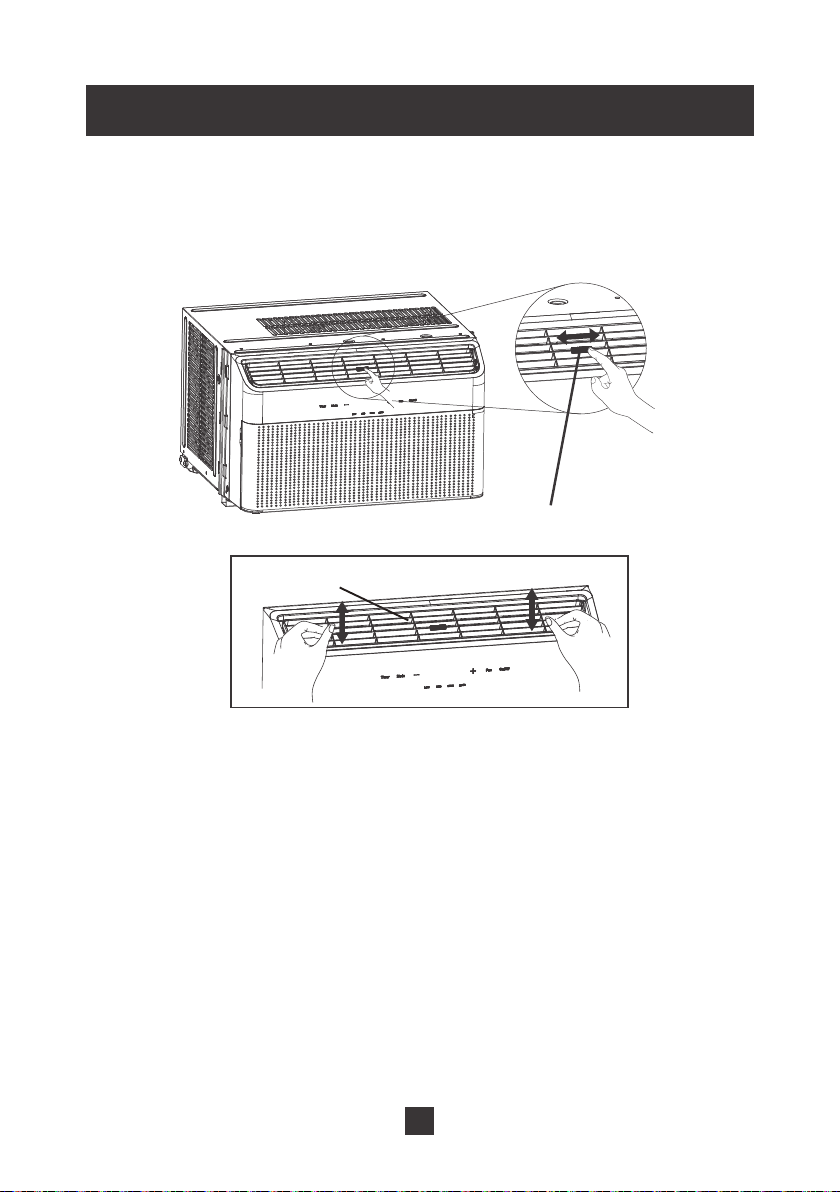
Changing the Wind Direction
Move the adjusting rod with your fingers to change the wind direction from left to right.
Move the adjusting air outlet frame to change the window direction from up to down.
Fan direction adjusting rod
Air outlet frame
11
Installation
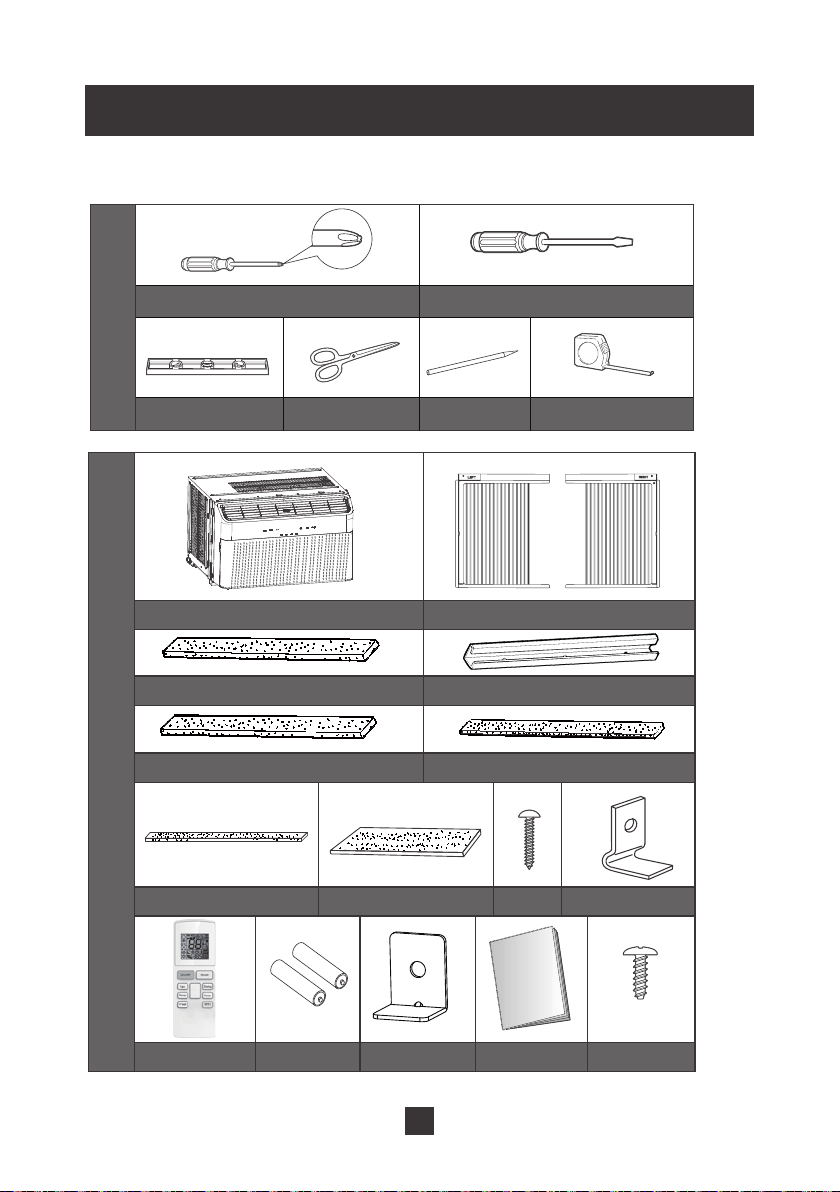
Tools Required
Phillips-head screwdriver Flat-blade screwdriver
Level
Scissors or knife
Pencil
Ruler or tape measure
Spare parts list
Tools
Air conditioner
Top mounting rail
:LQGRZVLOODQGVDVKVHDO
$FFRUGLRQSDQHOVHDO
Left and right accordion panel
Foam top window gasket
Top mounting rail seal strip
VFUHZV
Window locking
bracket
Remote controller
Batteries
8VHU0DQXDO
Type A
VFUHZV
Type B
Lock frame2
For wooden windows
)RDP,QVXODWLRQ
+
-
12
Window Requirements
The instructions outlined below are for standard, vertical-sliding windows. If you have
a different window type (e.g. horizontal-sliding window) you may need to choose a
different window or use a different installation procedure.
If you are installing this air conditioner in a smaller window, you may not need the
accordion subassembly. Please refer to the window size requirements for more details.
In some cases, you may need to put a small wooden block under the air conditioner
to ensure that the unit is not tilting towards the inside of your home. If the unit is tilted
towards the inside of your home, water may drain into your home and damage the
window frame, wall, or flooring. A slight angle of 5° is all it takes to ensure that water
does not drain into your home.
19”min
26
”
to 41
”
8,000 BTU minimum width: 26’’
8,000 BTU maximum width: 41”
8,000 BTU minimum height: 19”
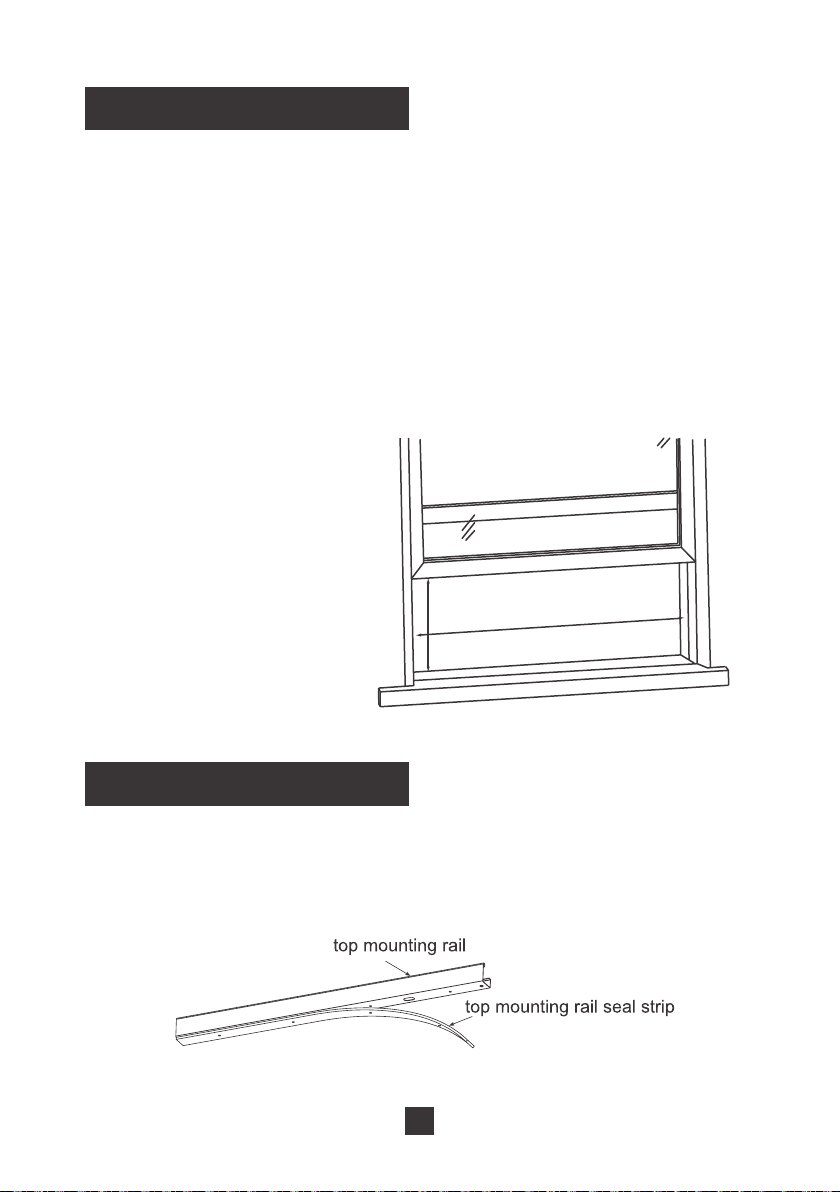
Installation Procedure
Step 1: Install the top mounting rail
1. Remove the adhesive from the top mounting rail seal strip. Align strip to the four (4)
holes and stick to the side of the mounting rail which attaches to your air conditioner.
13
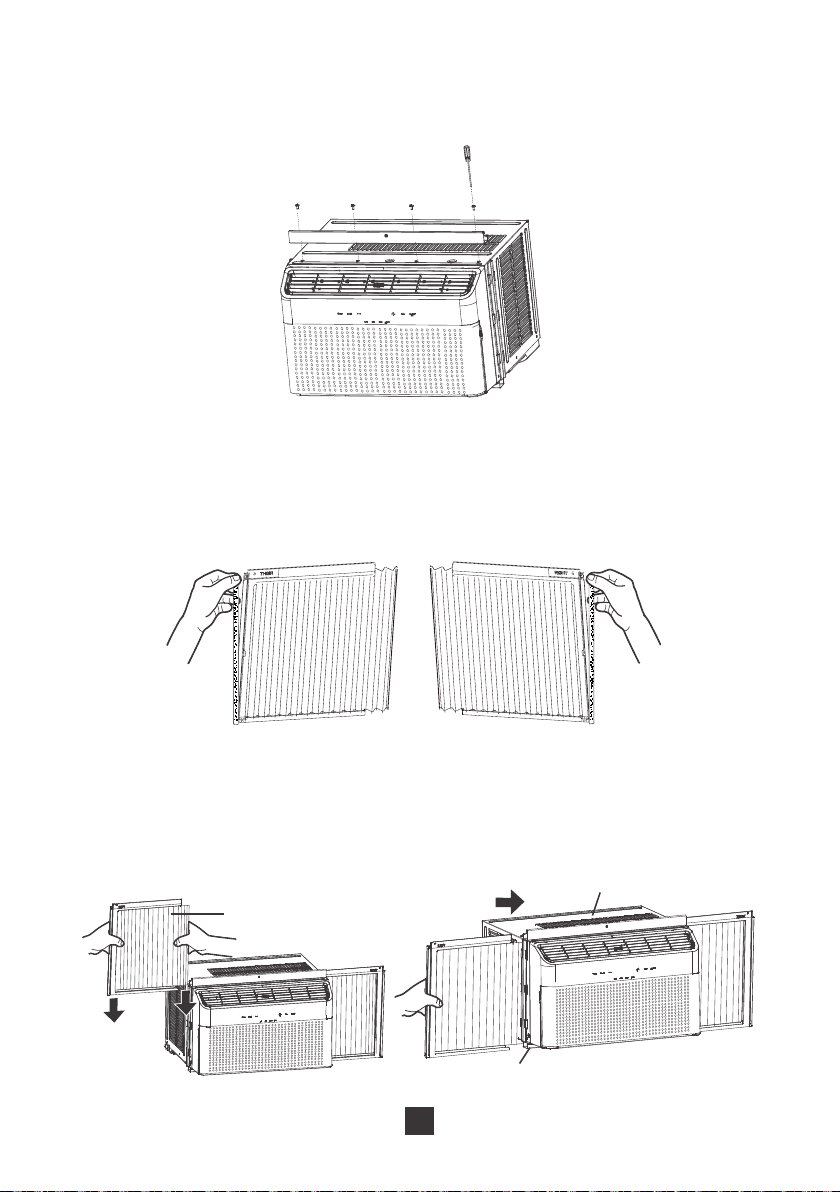
8VHIRXULQFOXGHG7\SH$VFUHZVWRIL[WKHWRSPRXQWLQJUDLOWRWKHRXWHUFDVH
of the air conditioner. The flat edge with a single hole in the middle should be
closest to you.
Step 2: Install accordion panels
5HPRYHWKHDFFRUGLRQSDQHOVHDOIURPWKHSDSHUEDFNLQJ:LWKWKH/()7DQG
RIGHT text visible, apply the panel seal as shown in the figure below.
2. :LWKWKH/()7DQG5,*+7WH[WIDFLQJWRZDUGV\RXSXOOWKHDFFRUGLRQSDQHOWRZDUGV
the unit. Align the end of the accordion panel with plastic groove on the unit and
slide to bottom. Slide the plastic framing of the accordion panel into the top mounting
rail and the lower guide rail.
top mounting rail
lower guide rails
accordion panel
14
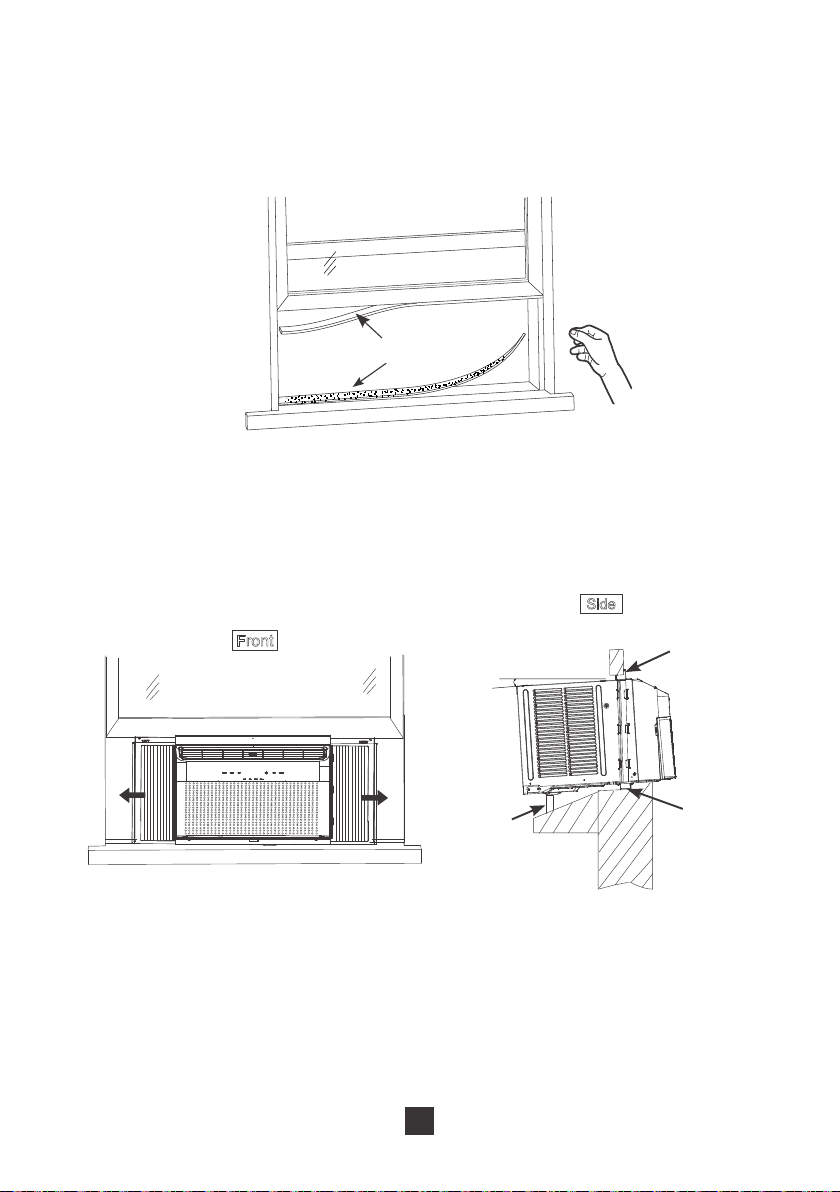
Step 3: Attach the window sill seal and sash seals
1. Cut the window sill and sash seal strips to proper length. Tear off the paper backing
and stick to the lowest part of the window sill. Repeat for the top of sliding window.
Window sill and sash seal
Step 4: Install the air conditioner unit
1. With two people, align the lower guide rail to the edge of the window sill. After
placing, close the window so that the top mounting rail is aligned with the inside
edge of the window.
Top mounting rail
Window
frame
Horizontal or inclined
DERXW
Lower
guide rail
8QIROGWKHDFFRUGLRQSDQHOVIURPERWKVLGHV8VHILYHLQFOXGHG7\SH%VFUHZV
to fix the frame of the accordion panel to the window frame and window sill. There
DUHWKUHHSUHGULOOHGKROHVRQWKHWRS8VHWKHWZRLQFOXGHGIUDPHORFNLQJ
brackets to secure the bottom of the accordion panel to the window sill.
15
Window frame
windowsill
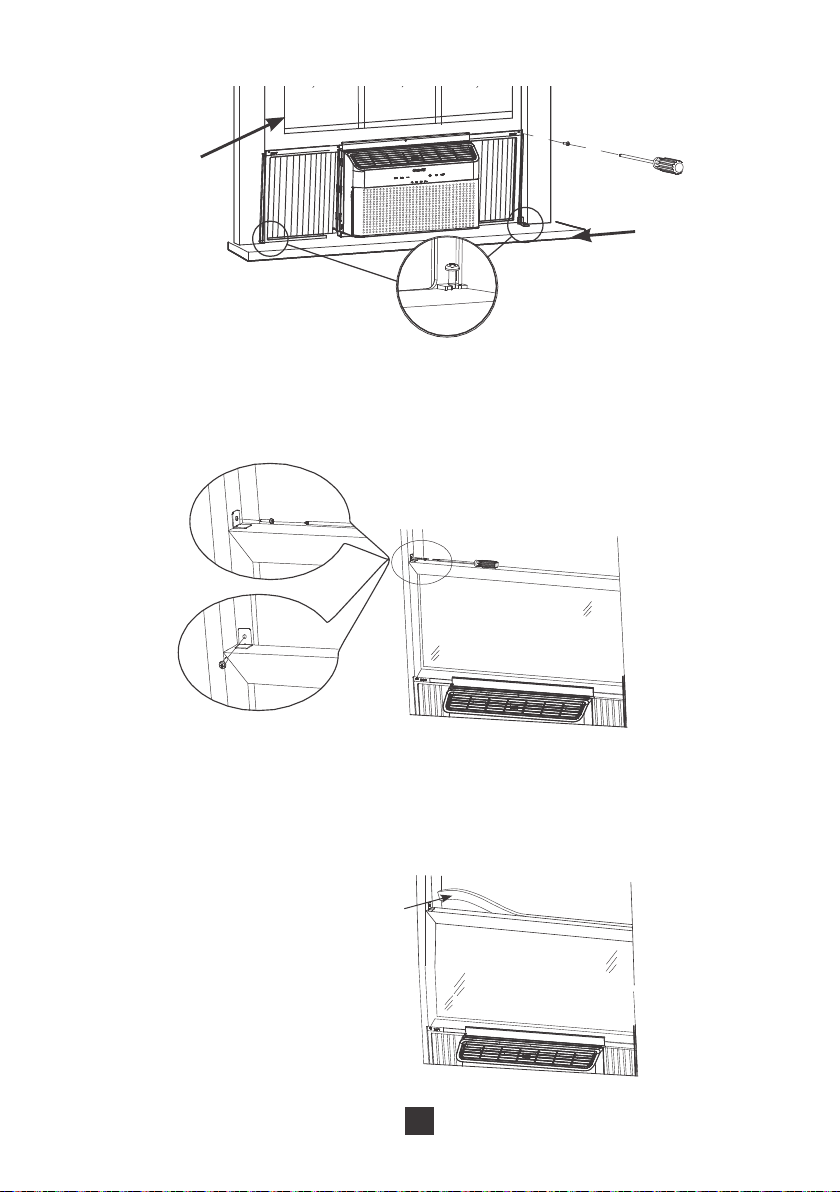
Step 5: Install the window locking bracket
1. To keep the unit from falling out the window, secure the window locking bracket
once the window is resting against the top mounting rail.
Plastic
window
window
Wooden
Step 6: Plug the gap of the top window with foam
1. Cut foam top window gasket WRWKHSURSHUOHQJWK8VHWKLVWRSOXJWKHJDSEHWZHHQ
the windows to prevent rain or insects from getting into the room.
Foam top
window gasket
16
Adding Foam to Accordion Panels
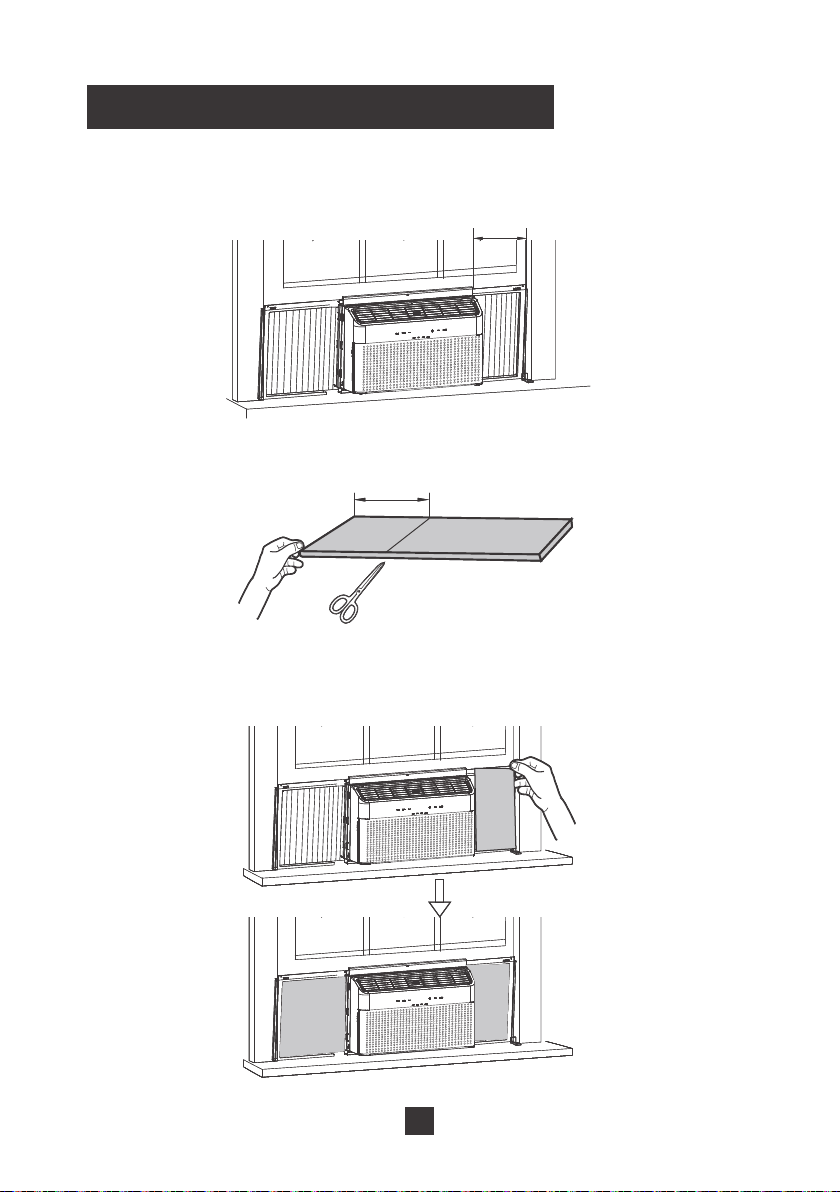
1. After completing installation of your unit, measure the length between the air
conditioner and the edge of the window frame.
LL
2. Cut the included foam insulation to length.
LL
3. Place the foam insulation along the accordion panel. If there is any excess foam,
it can be tucked into the frame or trimmed off with scissors.
17
Cleaning
Proposition 65 Notice
&DOLIRUQLD6DIH'ULQNLQJ:DWHUDQG7R[LF(QIRUFHPHQW$FWRIUHTXLUHVXVWR
notify customers that this product contains chemicals known to the State of California
to cause cancer and birth defects or other reproductive harm. Please wash your
hands after finishing installation of this product.
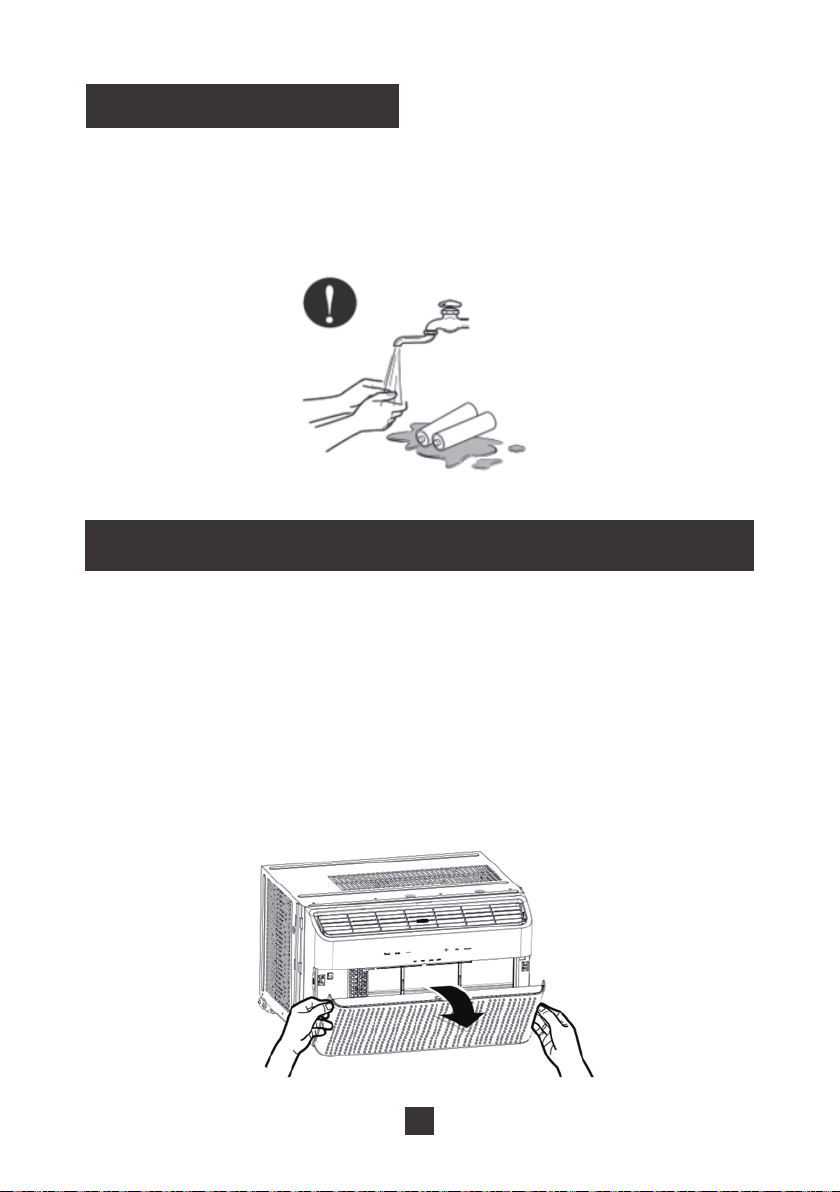
To avoid electric shock, turn off the air conditioner and disconnect from power before
FOHDQLQJ'RQRWZDVKRUGRXVHWKHDLUFRQGLWLRQHUZLWKZDWHU'RQRWXVHYRODWLOH
liquids to clean the air conditioner.
Cleaning the filter
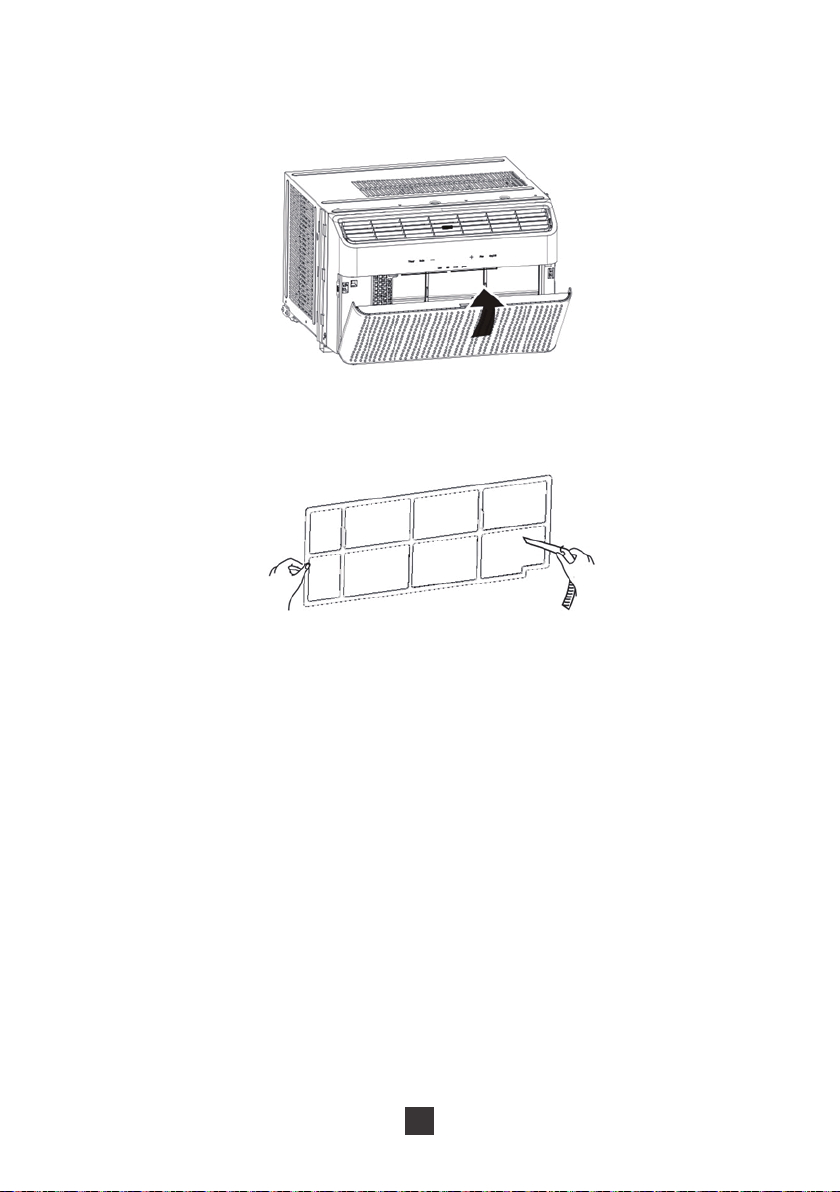
1. Open the front panel
Locate the groove on either side of the front panel and pull towards you as shown in
the figure on the right. Some force may be required.
18
2. Remove the filter
Locate the filter and remove from the air conditioner. You may need to move the filter
around to loosen.
3. Clean the filter
After removing, use the dust attachment of your vacuum or warm water mixed with a
mild detergent.
4. Reinstall the filter
After the filter has dried completely, reinstall back into the air conditioner.
Notes:
Ɣ&OHDQWKHILOWHUHYHU\WKUHHPRQWKVRURQFHWKHILOWHULQGLFDWRUOLJKWLOOXPLQDWHVRQ
your air conditioner
Ɣ'RQRWWRXFKWKHPHWDOILQVLQWKHDLUFRQGLWLRQHUDIWHUUHPRYLQJWKHILOWHUDVWKH\
may cause personal injury
Ɣ'RQRWDWWHPSWWRGU\WKHILOWHUZLWKKDLUGU\HURURWKHUKHDWLQJHOHPHQWDVWKLVPD\
deform or ignite the filter.
Ɣ'RQRWRSHUDWHWKHDLUFRQGLWLRQHULIWKHDLUILOWHULVPLVVLQJ
Cleaning the display panel
If the surface of the panel is dirty, please wipe with a soft cloth soaked in warm water
DQGDPLOGGHWHUJHQW'RQRWUHPRYHWKHSODVWLFSDQHOWRFOHDQ
19
Cleaning the outer case
We recommend that you check the outer case of the air conditioner once or twice
per year to look for rust or other damage. In order to reduce damage and prevent
rust during the off-month, you can cover the air conditioner with plastic or other
protective covering.
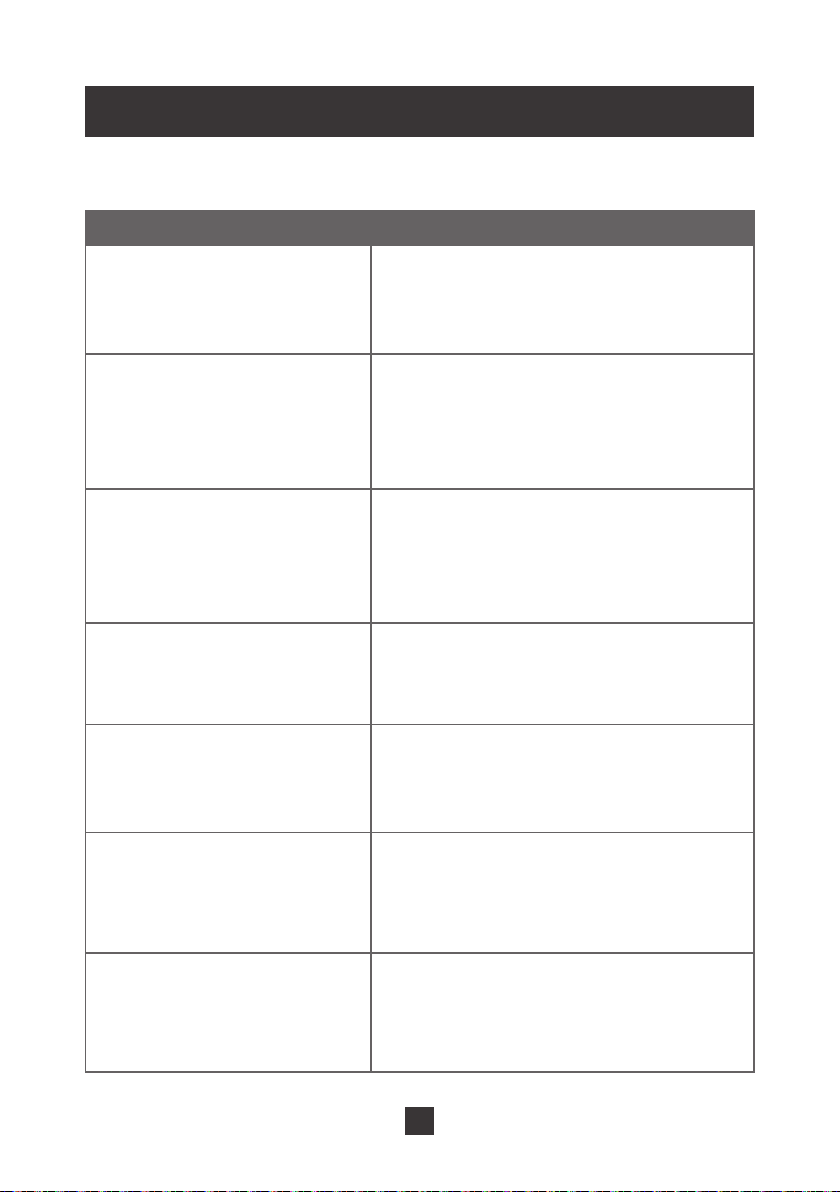
Maintenance Checklists
Pre-Season Maintenance Checklist
Check the power cord for any cuts or exposed wiring
Check the ground prong is still on your power plug
Clean the air filter
Check the outer air grille for damage
Post-Season Maintenance Checklist
'LVFRQQHFWXQLWIURPSRZHURXWOHW
Clean air filter and exterior case
If keeping in window during winter, wrap with protective cover
Long-Term Storage Checklist
'LVFRQQHFWXQLWIURPSRZHURXWOHW
Clean air filter and exterior case
:UDSDQGRUFRYHUWKHXQLWWRSUHYHQWWKHDFFXPXODWLRQRIGXVWZLWKLQWKHXQLW
20
Troubleshooting
Problem Possible Causes
1RWDOORIWKHIROORZLQJSUREOHPVDUHPDOIXQFWLRQV
Air conditioner is not operating.
Controls cannot be set
Temperature cannot be
changed
1RLVHVXGGHQO\ULVHVGXULQJ
operation.
Room temperature does not
drop
When first operating, the air
emitted has a strange odor
Air conditioner is giving off
some weird noises
Air conditioner cannot receive
signal from the remote control
Ɣ1RWDKLJKHQRXJKYROWDJHVXSSOLHGIURP
your wall power outlet
Ɣ3RZHUSOXJLVORRVHRULQ7(67PRGH
Ɣ7KHWHPSHUDWXUHFDQQRWEHDGMXVWHGZKLOH
in auto mode
Ɣ<RXDUHWU\LQJWRH[FHHGWKHWHPSHUDWXUH
UDQJHRI)
Ɣ0LJKWEHVRPHLQWHUIHUHQFHIURPVWRUPRU
radio
Ɣ&RPSUHVVRUKDVMXVWSRZHUHGRQ
Ɣ8QLWLVQRWILUPO\SODFHGLQ\RXUZLQGRZ
Ɣ$LUILOWHULVGLUW\
Ɣ&ORVHGRRUVDQGZLQGRZVLQWKHURRP
Ɣ7KLVLVQRUPDOZKHQWKHXQLWMXVWVWDUWV
operation. Give it some time and the
smell will disappear
Ɣ1RUPDOVRXQGVIURPWKHUHIULJHUDQWIORZLQJ
inside the air conditioner
Ɣ3DQHOPD\KDYHVKUXQNH[SDQGHGGXHWR
the temperate changing rapidly
Ɣ2XWRIWKHIRRWUDQJH
Ɣ,QWHUIHUHQFHIURPUDGLRIOXRUHVFHQWODPS
or other source
Ɣ%DWWHULHVDUHORZLQUHPRWHFRQWUROOHU
21
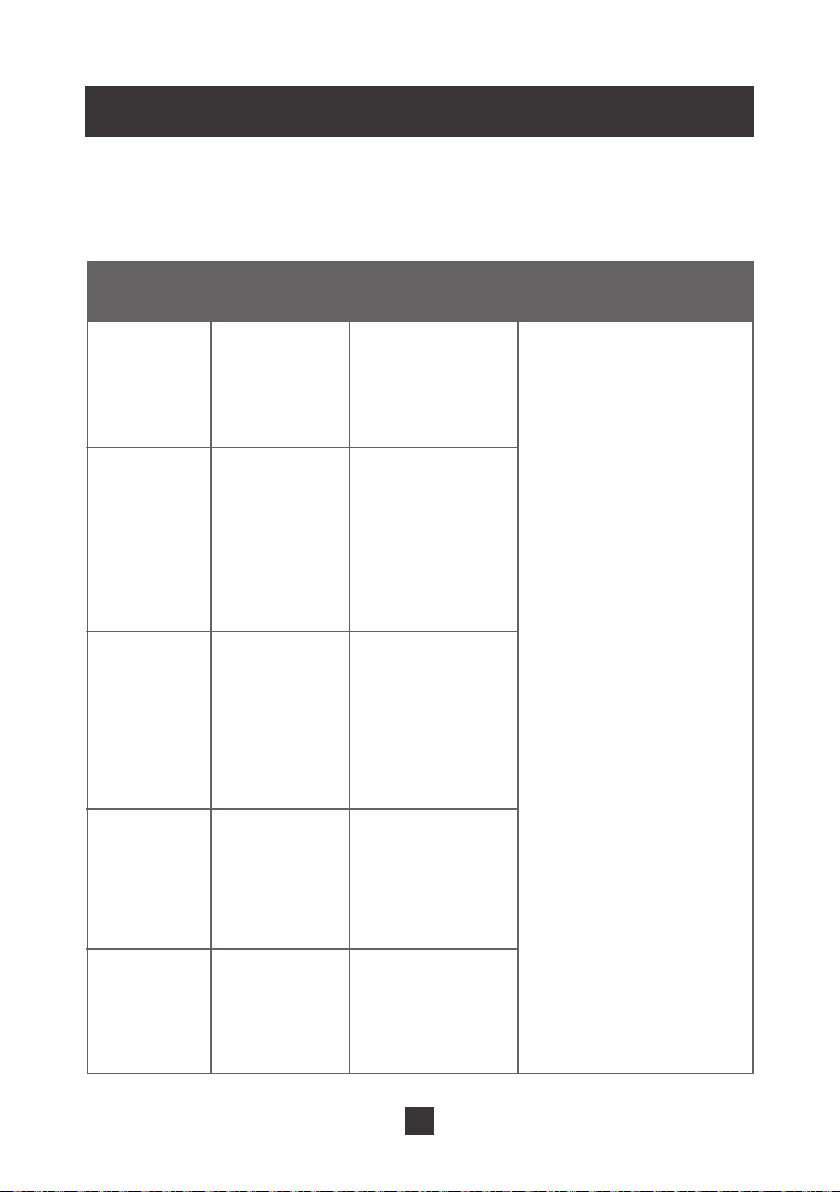
Malfunction Codes
If you unit displays one of the following codes, please contact
[email protected] and let us know your Malfunction Code from the display
screen. Please fill out the product registration form on our site for faster service.
Malfunction
Code on Unit
Malfunction
Name
Symptoms Solution
)))
(
(
H3
)
Refrigerant
Lacking
Protection
System
Overload
Protection
Overload
Malfunction
Antifreeze
Protection
Temperature
sensor
Compressor stops
operation, but the
fan continues to
operate
,Q&RRO(QHUJ\
6DYLQJRU'U\
modes: the
compressor stops
operating but fan
continues to run
Indoor fan operates
while compressor,
outdoor fan, and
water condensation
tray stop operation.
Compressor stops
operation, but the
fan continues to
operate
Compressor stops
operation, but the
fan continues to
operate
Remove from power
source for a few minutes
to reset the unit. Plug the
unit back in to determine
if the Malfunction Code
is still present.
If that doesn’t work,
contact TOSOT support
via email at

TOSOT Direct
Website: www.tosotdirect.com
Customer Service: [email protected]
Facebook: www.facebook.com/tosotdirect
Instagram: @tosotdirect
Twitter: @tosotdirect