Loading ...
Loading ...
Loading ...
6
2.4 INSTALLING YOUR DSH-680 WINDSHIELD BRACKET.
1. To install the Windscreen Bracket, clean your windscreen with an Alcohol Wipe
making sure there is no dust, moisture, or oil on the desired mounting point of the
windscreen. This is very important for correct adhesion.
2. Remove the protective ilm on the adhesive pad and with the open side of
the slot facing the driver’s side. Place the Windscreen Bracket in your desired
placement, ensuring that the open side of the mount is facing the driver’s side
of the vehicle, and allowing at least 4cm between the top of the bracket and the
top of your windscreen.
3. Firmly press and hold the windscreen bracket against your windscreen for 60
seconds to ensure that the adhesive sets.
4. Once the adhesive has set (allow 5 minutes), slide the barrel camera into the slot
by sliding the camera from right to left direction until it stops.
____________________________________________________________________________________________________________
NOTE:
It is recommended that the DSH680 is mounted behind your rear view mirror so that it is not
obstructing the drivers view.
Once installed it is not recommended that the Windshield Bracket is removed as it is not possible to
re-install once it has been removed.
____________________________________________________________________________________________________________
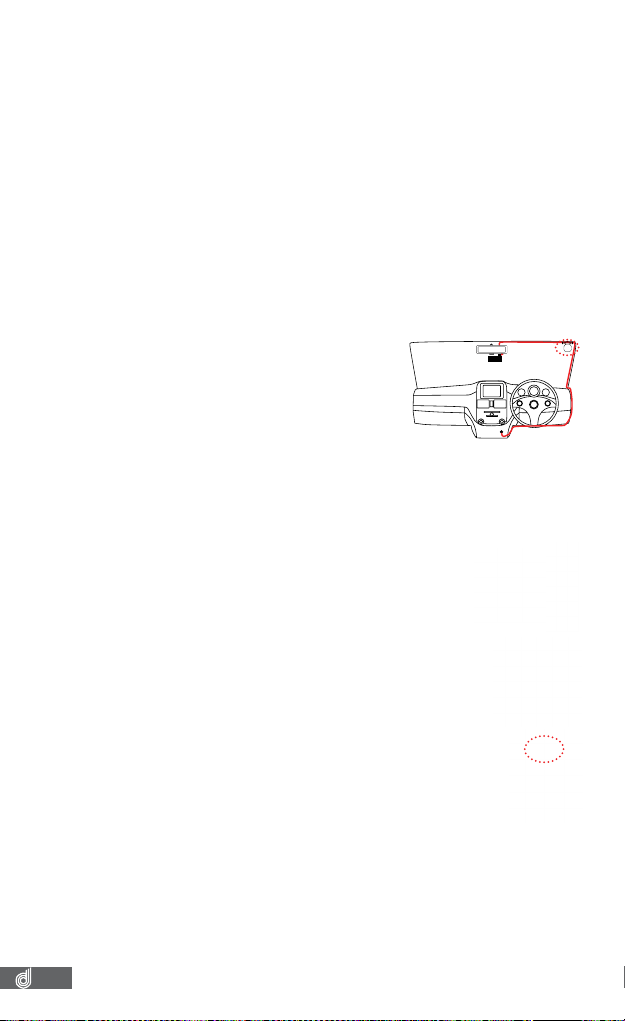
2.5 INSTALLING YOUR GPS RECEIVER
Using your preferred method, it is recommended
that you run the power cable around your windscreen
under your vehicles interior trim toward the driver’s
side. The 12V power cable is supplied with an in-
line GPS receiver that must be mounted onto the
windscreen with the supplied adhesive.
For best GPS reception, the GPS module should be placed as far away as possible
from the barrel camera.
____________________________________________________________________________________________________________
NOTE:
• It is advised that you run the cable beneath head liner trim and under the dash ensuring that the cable
does not interfere with the operation of your vehicle.
____________________________________________________________________________________________________________
2.6 CONNECTING POWER TO YOUR DSH-680
Your DSH-680 must be connected to a constant supply of
power from your vehicles electrical system via the 12V cigarette
or accessory port for continuous operation. Your DSH-680 does
not have an internal battery and will turn off when disconnected
from its power source.
Your unit is supplied with a dual USB output 12VDC charger that
will supply power to your unit, and offers a spare USB output to
connect to other USB powered devices such as a mobile phone.
1. To connect power to your DSH-680, plug the Dual Socket USB
Car Charger into your vehicles accessory power socket (cigarette
lighter port), and then connect the USB end of the supplied cable
to the USB port labelled 2.4A
(The spare 1A socket can be used to
charge any of your 1A USB devices capable of taking a 1A charge).
2. Connect the USB micro end of the cable into your DSH-680 Barrel
camera.
2.7 REMOVING THE DSH-680 FROM THE WINDSHIELD MOUNT
To remove your DSH-680
from your car, simply slide the unit
horizontally from left to right.
2.8 POWERING UP THE DSH-680
1. The DSH-680 will power up and begin recording automatically once it has been
correctly installed (micro SD card must be installed), and you start your vehicle.
2. A blinking RED LED (after approx. 30 seconds from start-up) indicates
recording.
3. There are no buttons to press on the device so recording will only stop when the
vehicle is turned off or if the micro USB cable is disconnected from the unit.
____________________________________________________________________________________________________________
NOTE:
Recording will stop whilst playing back footage from your DSH-680 to your app.
____________________________________________________________________________________________________________
Loading ...
Loading ...
Loading ...