Loading ...
Loading ...
Loading ...
5
1.6 GPS RECEIVER
The GPS receiver is embedded in-line with the USB power cable. When installing
the power cable in your vehicle please run the cable to the right of the interior of
your windscreen to ensure that the GPS receiver sits correctly. The GPS receiver
should not be adhered to any tint on your front windscreen as this may interfere
with the GPS signal or damage your vehicle’s tint.
____________________________________________________________________________________________________________
NOTE:
• GPS will be unavailable in covered or built up areas (e.g. tunnels, parking buildings, tall buildings, dense
forest). When in these conditions the GPS signal may be blocked.
• If you receive a memory card error, please ensure that you are using a class 10 Micro SD card that is up
to 64GB. Please also ensure that the Micro SD card is formatted in the FAT32 format.
____________________________________________________________________________________________________________
2. GETTING STARTED
2.1 INSERTING MEMORY CARD
Please note that the MicroSD card can only go into your device one way.
Attempting to install the card other than how it’s described below will cause
damage to either your card, device, or both.
Do not
force your card into the slot. If force is required, it is likely that your card is
in the wrong way. A correctly inserted card will require you to use your inger nail to
push the card into the slot until a click sound is heard/felt.
2.1.1 INSTRUCTIONS
Ensure that your DSH-680 is not connected to any power. Position the MicroSD
card with the gold contacts facing the small reset switch. The gold contact ends of
your memory card should always go into the slot irst. Use your ingernail to press
the card into the slot until a click is heard.
____________________________________________________________________________________________________________
NOTE:
• Do not insert or remove a Micro SD card while your DSH-680 is powered up or recording. This may
damage your Micro SD card.
• Please use Class 10 or higher rated Micro SD cards up to 64GB
• Please format the Micro SD card before initial use (in FAT 32 format if you are using a computer to
format your Micro SD card). The card can also be formatted using the app.
• To quickly delete all items on your Micro SD card you can format the card in the settings menu of the
App (Refer to page 9)
____________________________________________________________________________________________________________
2.2 REMOVING MEMORY CARD
Ensure that your DSH-680 is powered off. Using your ingernail press the SD card
until a click is heard and release. The card should eject from the slot. Please ensure
you always handle your Micro SD Card with care.
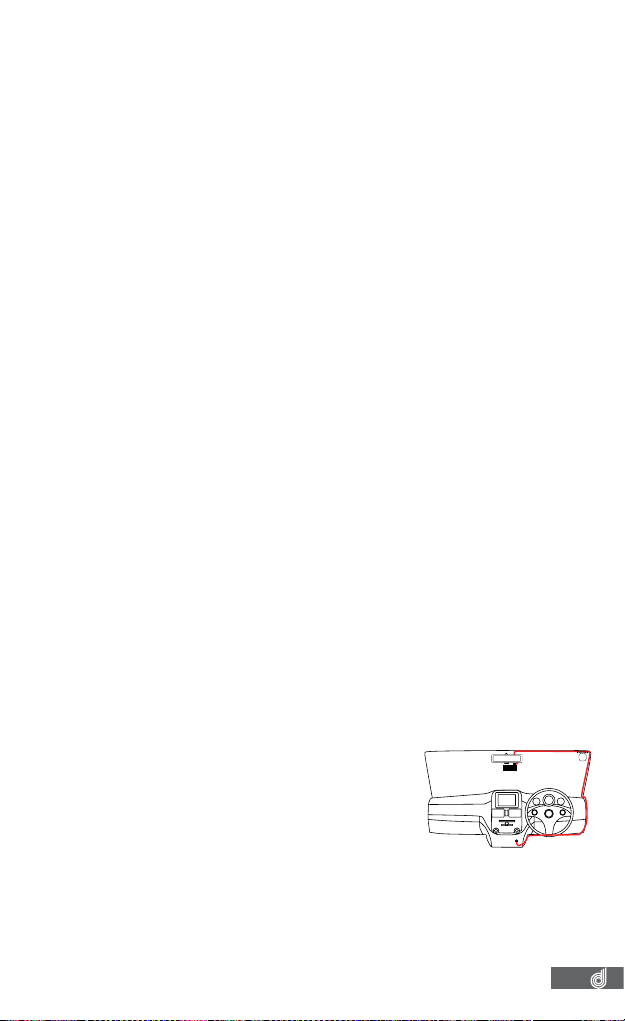
2.3 MOUNTING YOUR DSH-680
Please read through all mounting instructions before you
attempt to mount your DSH-680.
It is recommended that you install the DSH-680
in a
position behind your rear-view mirror, ensuring that
your front driving view is not obstructed. Once you have
mounted your camera using your preferred method it is
recommended that you run the power cable around your
windscreen under your vehicles interior trim in the driver’s side direction.
____________________________________________________________________________________________________________
NOTE:
If your car has side curtain air bags, please be very careful when running cables along your vehicles
windows. Please ensure that you do not run the cables past any of these airbags as this can prevent the
airbags from deploying in an emergency. If in any doubt, consult a professional installer.
_________________________________________________________________________________________________________
Step 1 Step 2 Step 3 Step 4
Loading ...
Loading ...
Loading ...