Loading ...
Loading ...
Loading ...
8. Tighten the clamping knobs.
9. Remove the straight edge or board.
10. Adjust the height of the bit so that it will cut the
complete thickness of the workpiece.
11. Place the workpiece on the router table.
12. if a feather board is being used, adjust it as
described in the section ROUTING USING
THE FEATHER BOARDS.
13. SECURELY TIGHTEN THE KNOBS ON THE
FEATHER BOARDS.
14. LOWERTHE GUARD.
15. With the workpiece away from the cutter, TURN
THE ROUTER ON.
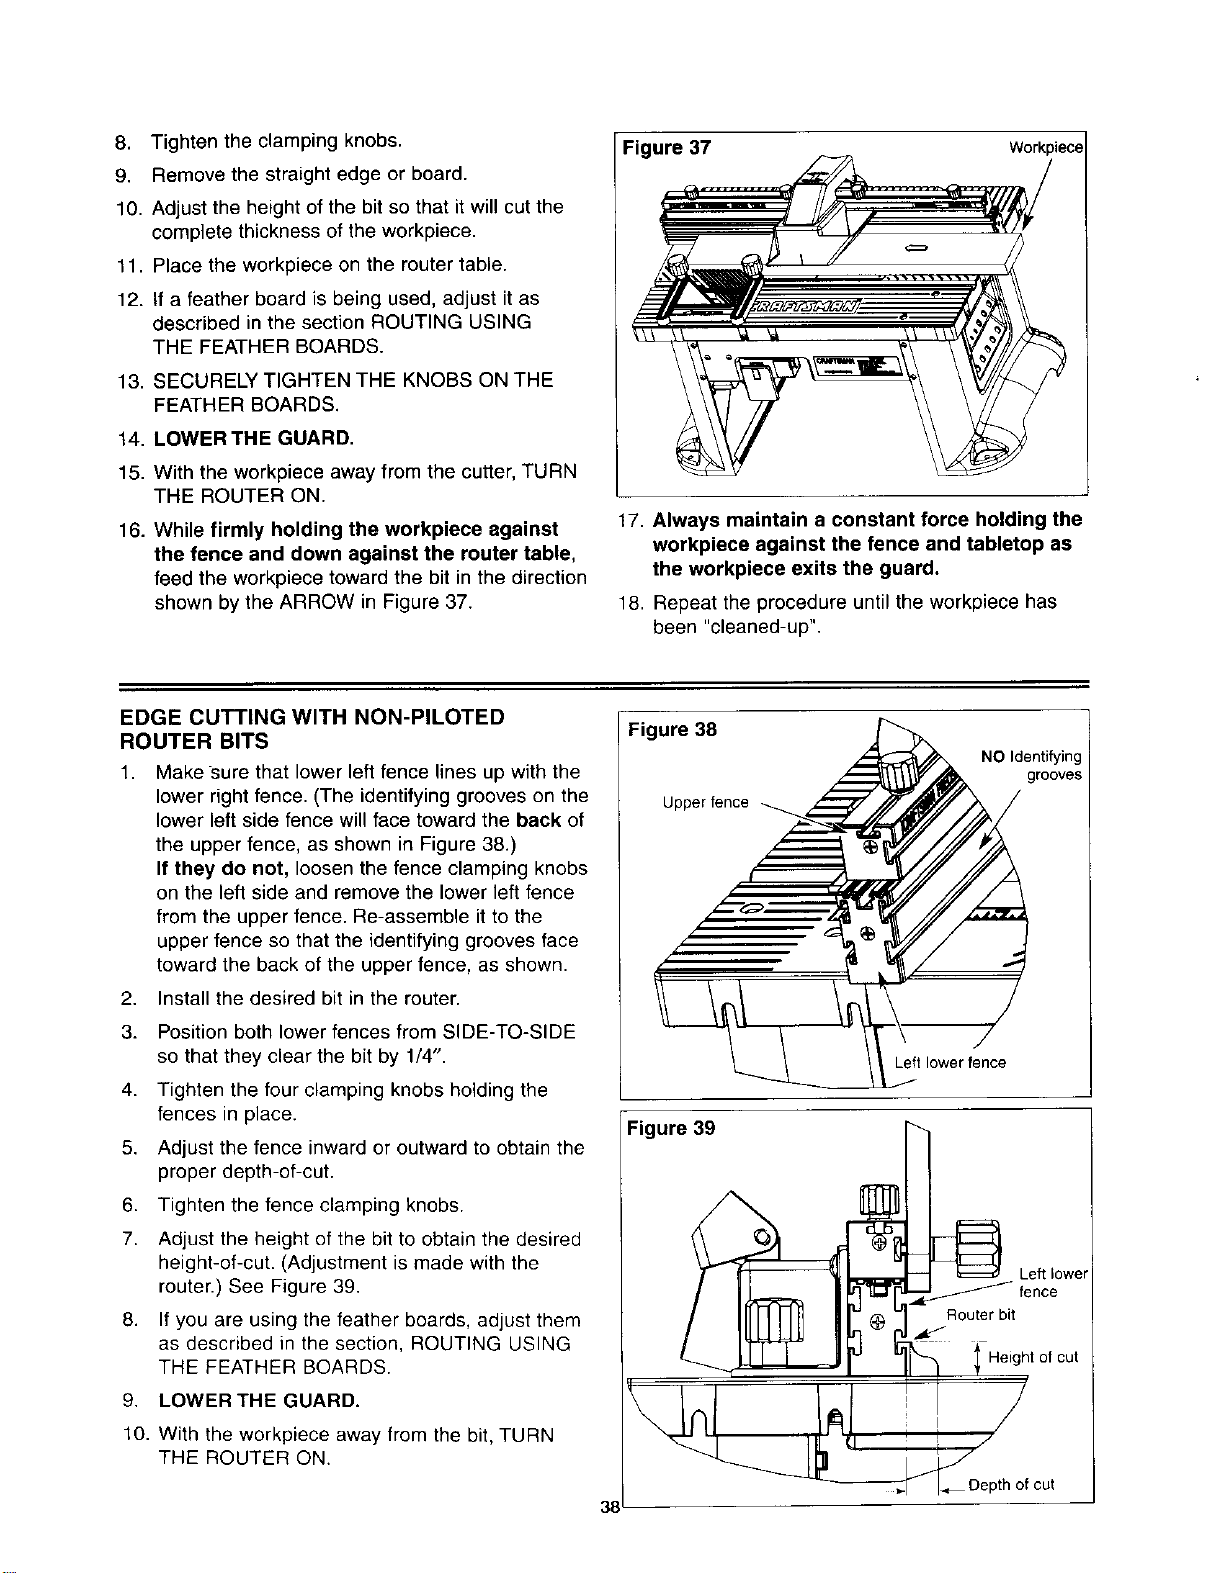
16. While firmly holding the workpiece against
the fence and down against the router table,
feed the workpiece toward the bit in the direction
shown by the ARROW in Figure 37.
Figure 37 Workpiece
17. Always maintain a constant force holding the
workpiece against the fence and tabletop as
the workpiece exits the guard.
18. Repeat the procedure until the workpiece has
been "cleaned-up".
EDGE CUTTING WITH NON-PILOTED
ROUTER BITS
1. Make sure that lower left fence lines up with the
lower right fence. (The identifying grooves on the
lower left side fence will face toward the back of
the upper fence, as shown in Figure 38.)
If they do not, loosen the fence clamping knobs
on the left side and remove the lower left fence
from the upper fence. Re-assemble it to the
upper fence so that the identifying grooves face
toward the back of the upper fence, as shown.
2. Install the desired bit in the router.
3. Position both lower fences from SIDE-TO-SIDE
so that they clear the bit by 1/4".
4. Tighten the four clamping knobs holding the
fences in place.
5. Adjust the fence inward or outward to obtain the
proper depth-of-cut.
6. Tighten the fence clamping knobs.
7. Adjust the height of the bit to obtain the desired
height-of-cut. (Adjustment is made with the
router.) See Figure 39.
8. If you are using the feather boards, adjust them
as described in the section, ROUTING USING
THE FEATHER BOARDS.
9, LOWER THE GUARD.
10. Withthe workpieceawayfromthebit, TURN
THE ROUTER ON.
I Figure 38 =_
NO Identifying
grooves
_t lower fence
Figure 39 "_-
t ne°er
_@_ Depth of cut
3E
Loading ...
Loading ...
Loading ...