Loading ...
Loading ...
Loading ...
- CARE OF YOUR REVERSE OSMOSIS SYSTEM -
TUBING CONNECTION (continued)
If tubing is used) other than supplied with the sys-
tem, be sure it is of high quality, exact size and round-
ness with a smooth surface.
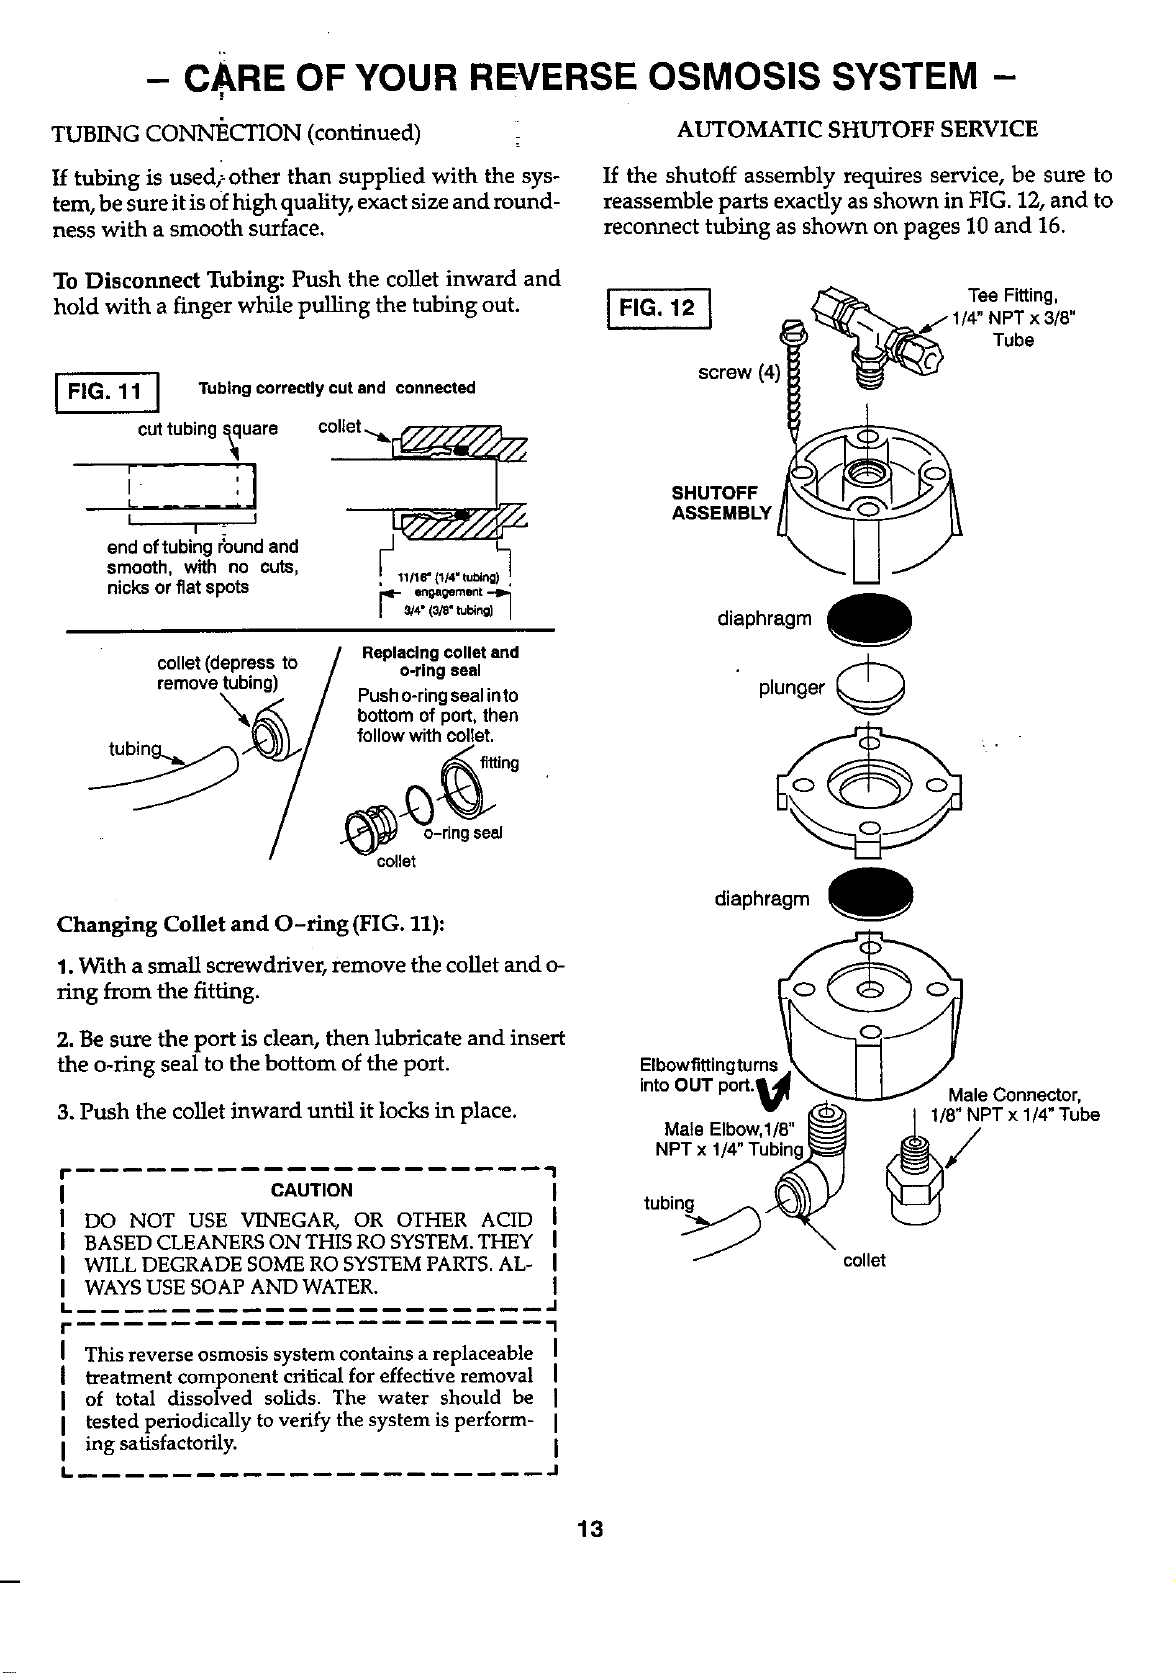
AUTOMATIC SHUTOFF SERVICE
If the shutoff assembly requires service, be sure to
reassemble parts exactly as shown in FIG. 12, and to
reconnect tubing as shown on pages 10 and 16.
To Disconnect Tubing: Push the co]let inward and
hold with a finger while pulling the tubing out.
I FIG. 11 ]
cuttubings_uare
I I
end oftubing round and
smooth, with no cuts,
nicksorflatspots
Tubing correctly cut and connected
collet .._
,_ 11/16" {1/4" tubing
engagement
r=l- 3/4. (3/_. ruling]
I,_ l_ / Replacingcolletand
co.e, \,,epress zo - • .
• / o-ring Seal
remove
,..k,,,,_,_,_,,l.,u_--/ Pusho-ringsealinto
"_,_---_k / bottomof port,then
• '_'_ / followwith collet.
tubm _ fitting
/ -g
Changing Collet and O-ring (FIG. 11):
1. With a small screwdriver, remove the coUet and o-
_ng from the fitting.
FIG. 12 I
screw (4)
1/T,eNFi._ing;8,,
__ Tube
SHUTOFF
ASSEMBLY
diaphragm O
plunger (_
@"
diaphragm 0
2. Be sure the port is clean, then lubricate and insert
the o-ring seal to the bottom of the port.
3. Push the co]let inward until it locks in place.
'1
CAUTION I
DO NOT USE VINEGAR, OR OTHER ACID
BASED CLEANERS ON THIS RO SYSTEM. THEY I
WILL DEGRADE SOME RO SYSTEM PARTS. AL- I
WAYS USE SOAP AND WATER. I
I" !
This reverse osmosis system contains a replaceable I
I treatment component critical for effective removal
of total dissolved solids. The water should be ]
I tested periodically to verify the system is perform- I
I ing satisfactorily. I
I.. ]
EIbowflttingturns
intoOUT
Mate Elbow,I/8"
NPT x 1
tubing
Male Connector,
/_iPT x 1/4"Tube
collet
13
Loading ...
Loading ...
Loading ...