Loading ...
Loading ...
Loading ...
,_ WARNING: Stop engine and be
sure the impeller blades have stopped
turning before opening the vacuum inlet
door or attempting to insert or remove
the vacuum or blower tubes. The rotat-
ing blades can cause serious injury. Al-
ways disconnect the spark plug before
performing maintenance or accessing
movable parts.
GENERAL RECOMMENDATIONS
The warranty on this unit does not cover
items that have been subjected to oper-
ator abuse or negligence. To receive full
value from the warranty, the operator
must maintain unit as instructed in this
manual. Various adjustments will need to
be made periodically to properly main-
tain your unit.
CHECK FOR LOOSE
FASTENERS AND PARTS
• Spark Plug Boot
• Air Filter
• Housing Screws
CHECK FOR DAMAGED OR
WORN PARTS
Contact Sears Service Center for re-
placement of damaged or worn parts.
• ON/STOP Switch - Ensure ON/STOP
switch functions properly by holding
the switch in the STOP position. Make
sure engine stops; then restart engine
and continue.
• Fuel Tank - Discontinue use of unit if
fuel tank shows signs of damage or
leaks.
• Vacuum Bag - Discontinue use of vac-
uum bag if it is torn or damaged.
CLEAN UNIT & LABELS
• Clean the unit using a damp cloth with
a mild detergent.
• Wipe off unit with a clean dry cloth.
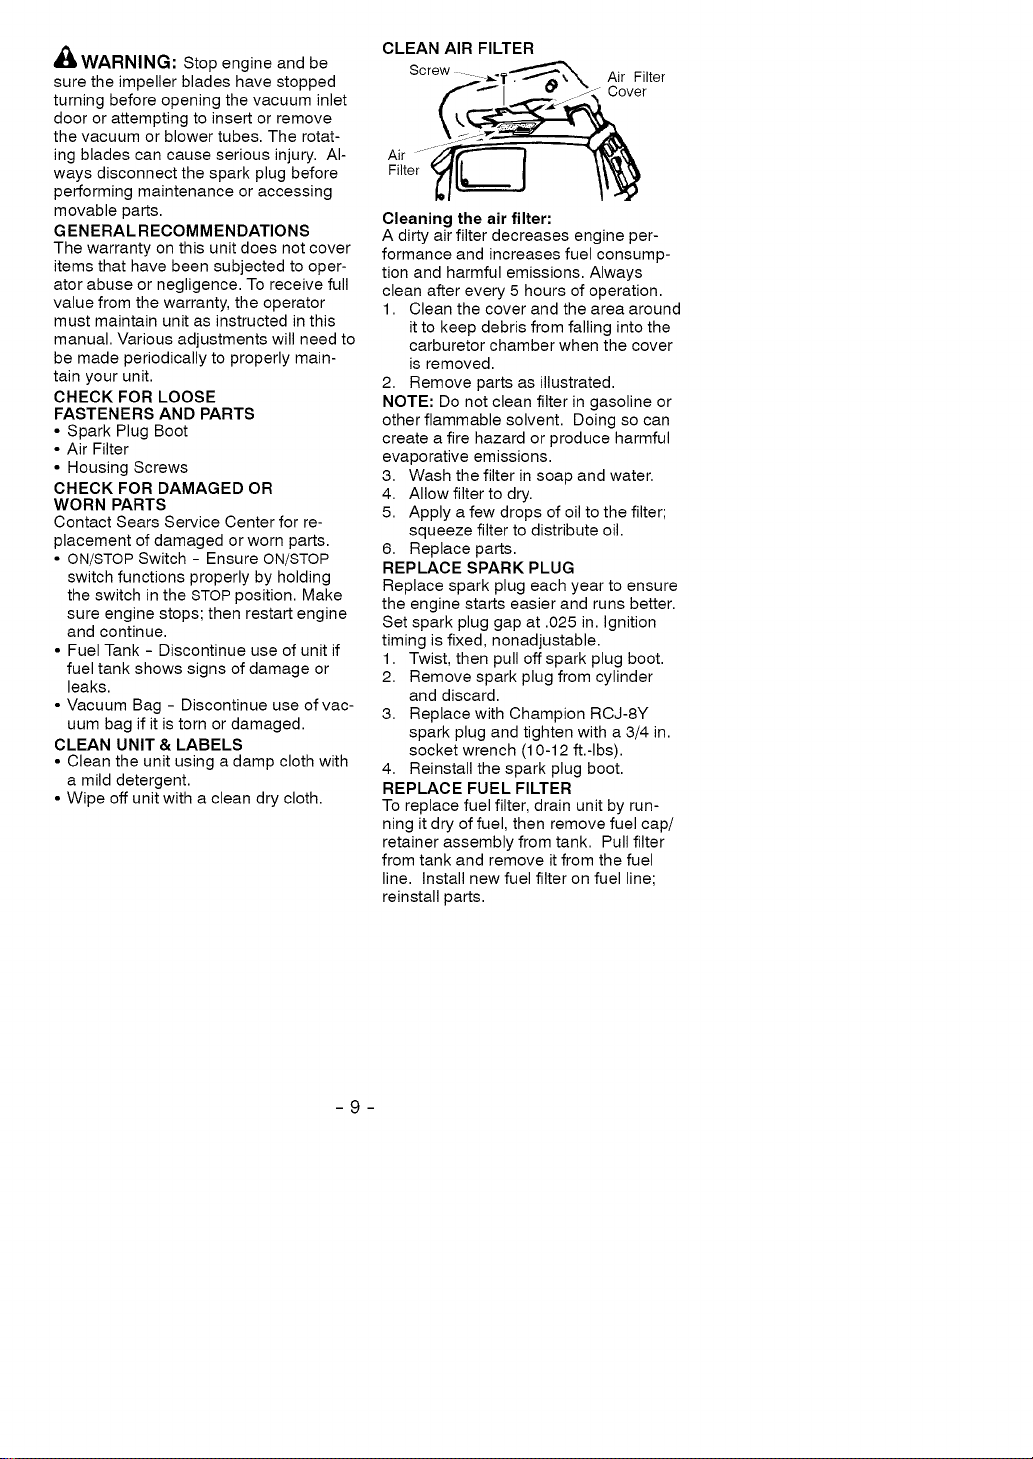
CLEAN AIR FILTER
Screw
Air Filter
Cover
Air
Filter
Cleaning the air filter:
A dirty air filter decreases engine per-
formance and increases fuel consump-
tion and harmful emissions. Always
clean after every 5 hours of operation.
1. Clean the cover and the area around
it to keep debris from falling into the
carburetor chamber when the cover
is removed.
2. Remove parts as illustrated.
NOTE: Do not clean filter in gasoline or
other flammable solvent. Doing so can
create a fire hazard or produce harmful
evaporative emissions.
3. Wash the filter in soap and water.
4. Allow filter to dry.
5. Apply a few drops of oil to the filter;
squeeze filter to distribute oil.
6. Replace parts.
REPLACE SPARK PLUG
Replace spark plug each year to ensure
the engine starts easier and runs better.
Set spark plug gap at .025 in. Ignition
timing is fixed, nonadjustable.
1. Twist, then pull off spark plug boot.
2. Remove spark plug from cylinder
and discard.
3. Replace with Champion RCJ-8Y
spark plug and tighten with a 3/4 in.
socket wrench (10-12 ft.-Ibs).
4. Reinstall the spark plug boot.
REPLACE FUEL FILTER
To replace fuel filter, drain unit by run-
ning it dry of fuel, then remove fuel cap/
retainer assembly from tank. Pull filter
from tank and remove it from the fuel
line. Install new fuel filter on fuel line;
reinstall parts.
-9-
Loading ...
Loading ...
Loading ...