Loading ...
Loading ...
Loading ...
VACUUM ASSEMBLY
VACUUM BAG ASSEMBLY
If you have already assembled your unit
for use as a blower, remove the blower
tube, nozzle and shoulder strap.
1. Open the zipper on the vacuum bag
and insert the elbow tube.
2. Push grooved end of the elbow tube
through the small opening in the bag.
ElbowTube
/ // _j Small.
Zipper Opening
NOTE: Make sure edge of the small
opening is flush against the rib on the
elbow tube.
3. Close the zipper on the bag. Make
sure the zipper is closed completely.
VACUUM TUBE ASSEMBLY
1. Insert a screwdriver under the tab in
the latch area on vacuum inlet cover.
Latch _ Iw 1 _ __ Blower
Area/,__ / _-Outlet
....Latch Area
_-_ Inlet Cover
2. Gently tilt the handle of the screw-
driver forward toward blower outlet
while pulling up on the vacuum inlet
cover with your other hand.
3. Hold the vacuum inlet cover open
until upper vacuum tube is installed.
4. Assemble upper vacuum tube to unit
by placing locking tabs (located in-
side vacuum inlet) in grooves on
tube; turn clockwise to tighten.
5. Align slanted end of lower vacuum
tube as shown. Firmly push lower
vacuum tube into upper vacuum
tube.
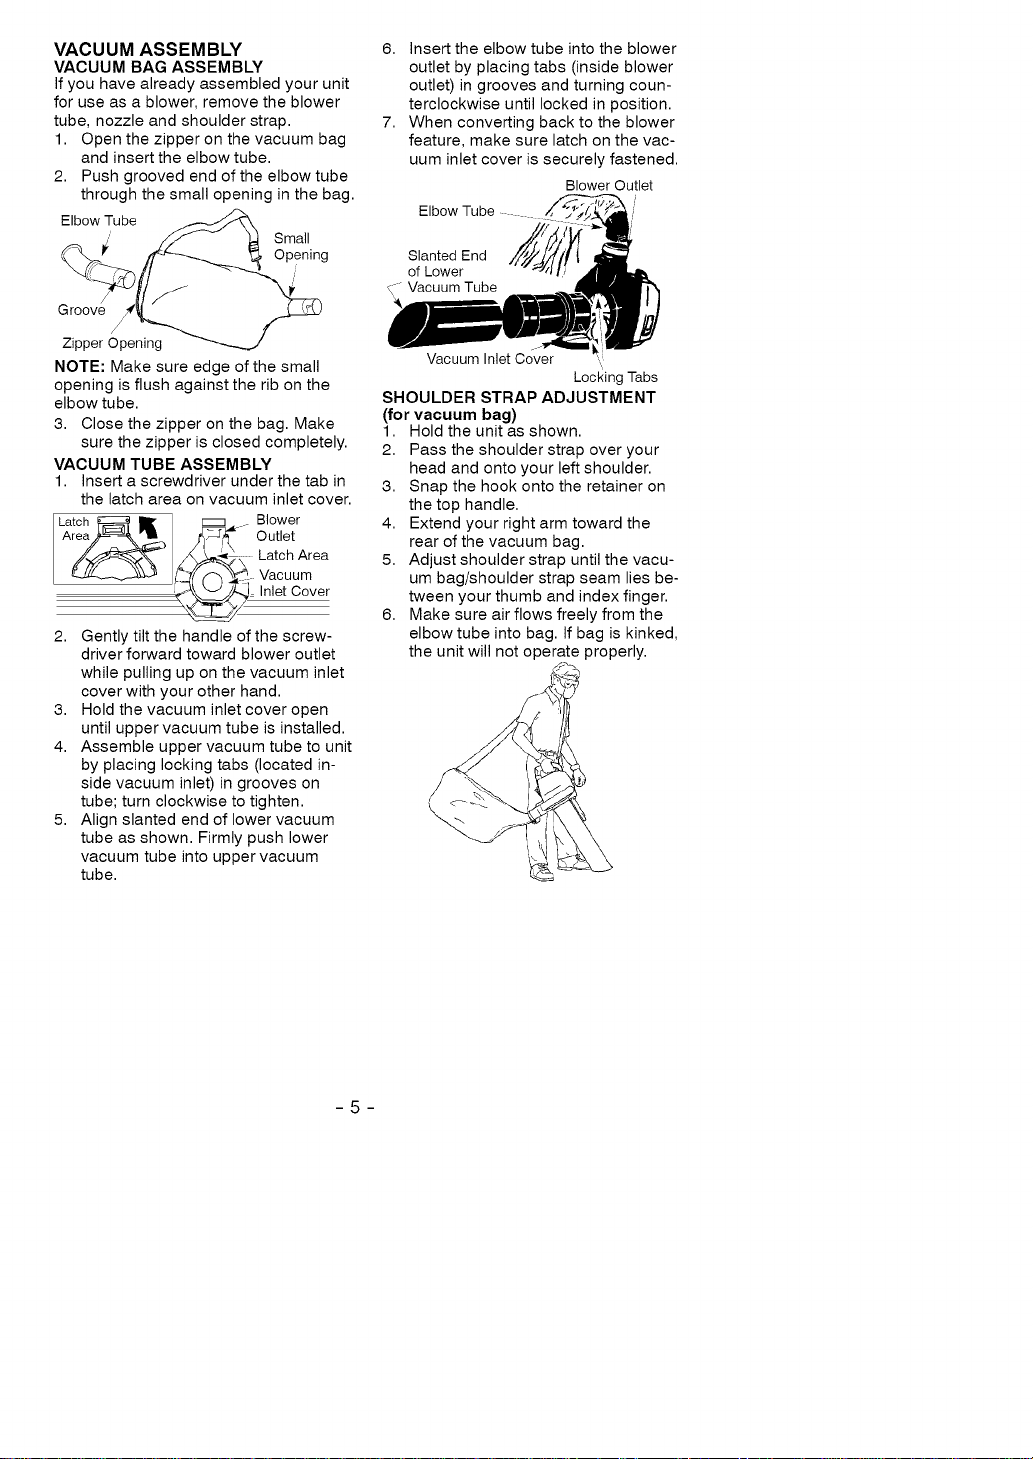
6. Insert the elbow tube into the blower
outlet by placing tabs (inside blower
outlet) in grooves and turning coun-
terclockwise until locked in position.
7. When converting back to the blower
feature, make sure latch on the vac-
uum inlet cover is securely fastened.
Blower Outlet
Elbow Tube
Slanted End
of Lower
_-- Vacuum Tube
Vacuum Inlet Cover
\
Locking Tabs
SHOULDER STRAP ADJUSTMENT
(for vacuum bag)
1. Hold the unit as shown.
2. Pass the shoulder strap over your
head and onto your left shoulder.
3. Snap the hook onto the retainer on
the top handle.
4. Extend your right arm toward the
rear of the vacuum bag.
5. Adjust shoulder strap until the vacu-
um bag/shoulder strap seam lies be-
tween your thumb and index finger.
6. Make sure air flows freely from the
elbow tube into bag. If bag is kinked,
the unit will not operate properly.
/
\
Loading ...
Loading ...
Loading ...