Loading ...
Loading ...
Loading ...
22
USING THE ROTISSERIE
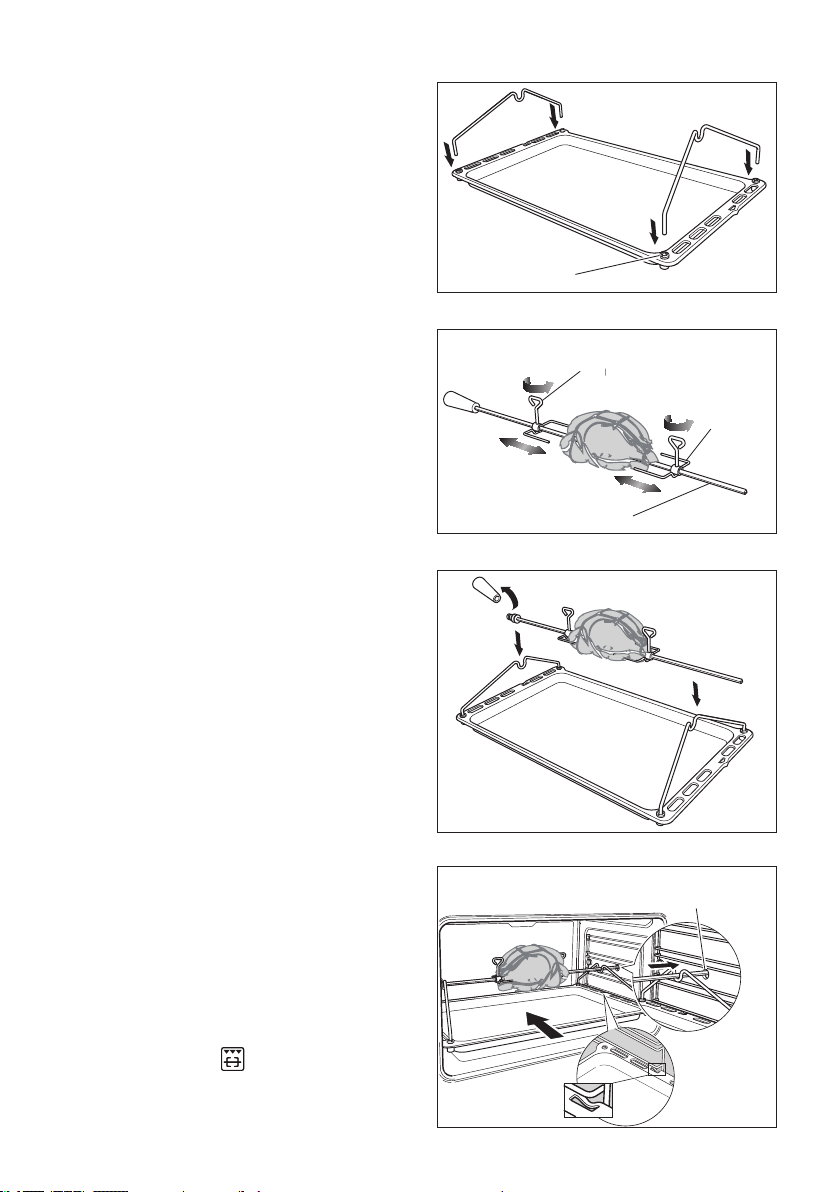
1. Prepare the rotisserie support (g. 20).
■ Place the grill tray on the
benchtop.
■ Insert the supports into the lock
studs.
■ Push the supports all the way
down to lock them in rmly.
2. Secure the meat (g. 21).
Important!
Take care, the forks are sharp!
When securing the meat, ensure that:
■ the skewer goes through the
centre of the meat;
■ the forks hold the meat rmly in
place;
■ the fork screws are tightened;
■ there are no loose or projecting
parts. Poultry should be trussed.
Note: the rotisserie can rotate up to 6
kg of meat.
3. Position the skewer on the support
(g. 22).
■ Place the skewer on the support,
and check that the meat does not
touch the grill tray.
■ Twist the handle off. It must not
be left in the oven.
4. Place the rotisserie assembly in the
oven (g. 23).
■ Slide the grill tray all the way to
the back on shelf position.
The tray must be tted so that the
safety notch, which stops it sliding
out, faces the inside of the oven.
IMPORTANT NOTE: DO NOT
place the grill tray on the sliding
shelf supports (if tted).
■ Push the skewer through the hole
cover on the right-hand wall of the
oven, then insert it fully into the
rotisserie drive hole.
5. Start the rotisserie
■ Check that the fat lter is in place.
■ Select the
function.
■ Set the temperature.
Lock stud
Skewer
Fork
Rotate the fork screws
to loosen and tighten
Rotisserie
drive hole
Stop
notch
Figure 23
Figure 20
Figure 22
Figure 21
Loading ...
Loading ...
Loading ...