Loading ...
Loading ...
Loading ...
3 Anchors
Minimum
Alternative
Method
Floor
mounted
Floor & skirting
mounted
Preferred
Method
5 Anchors
warning
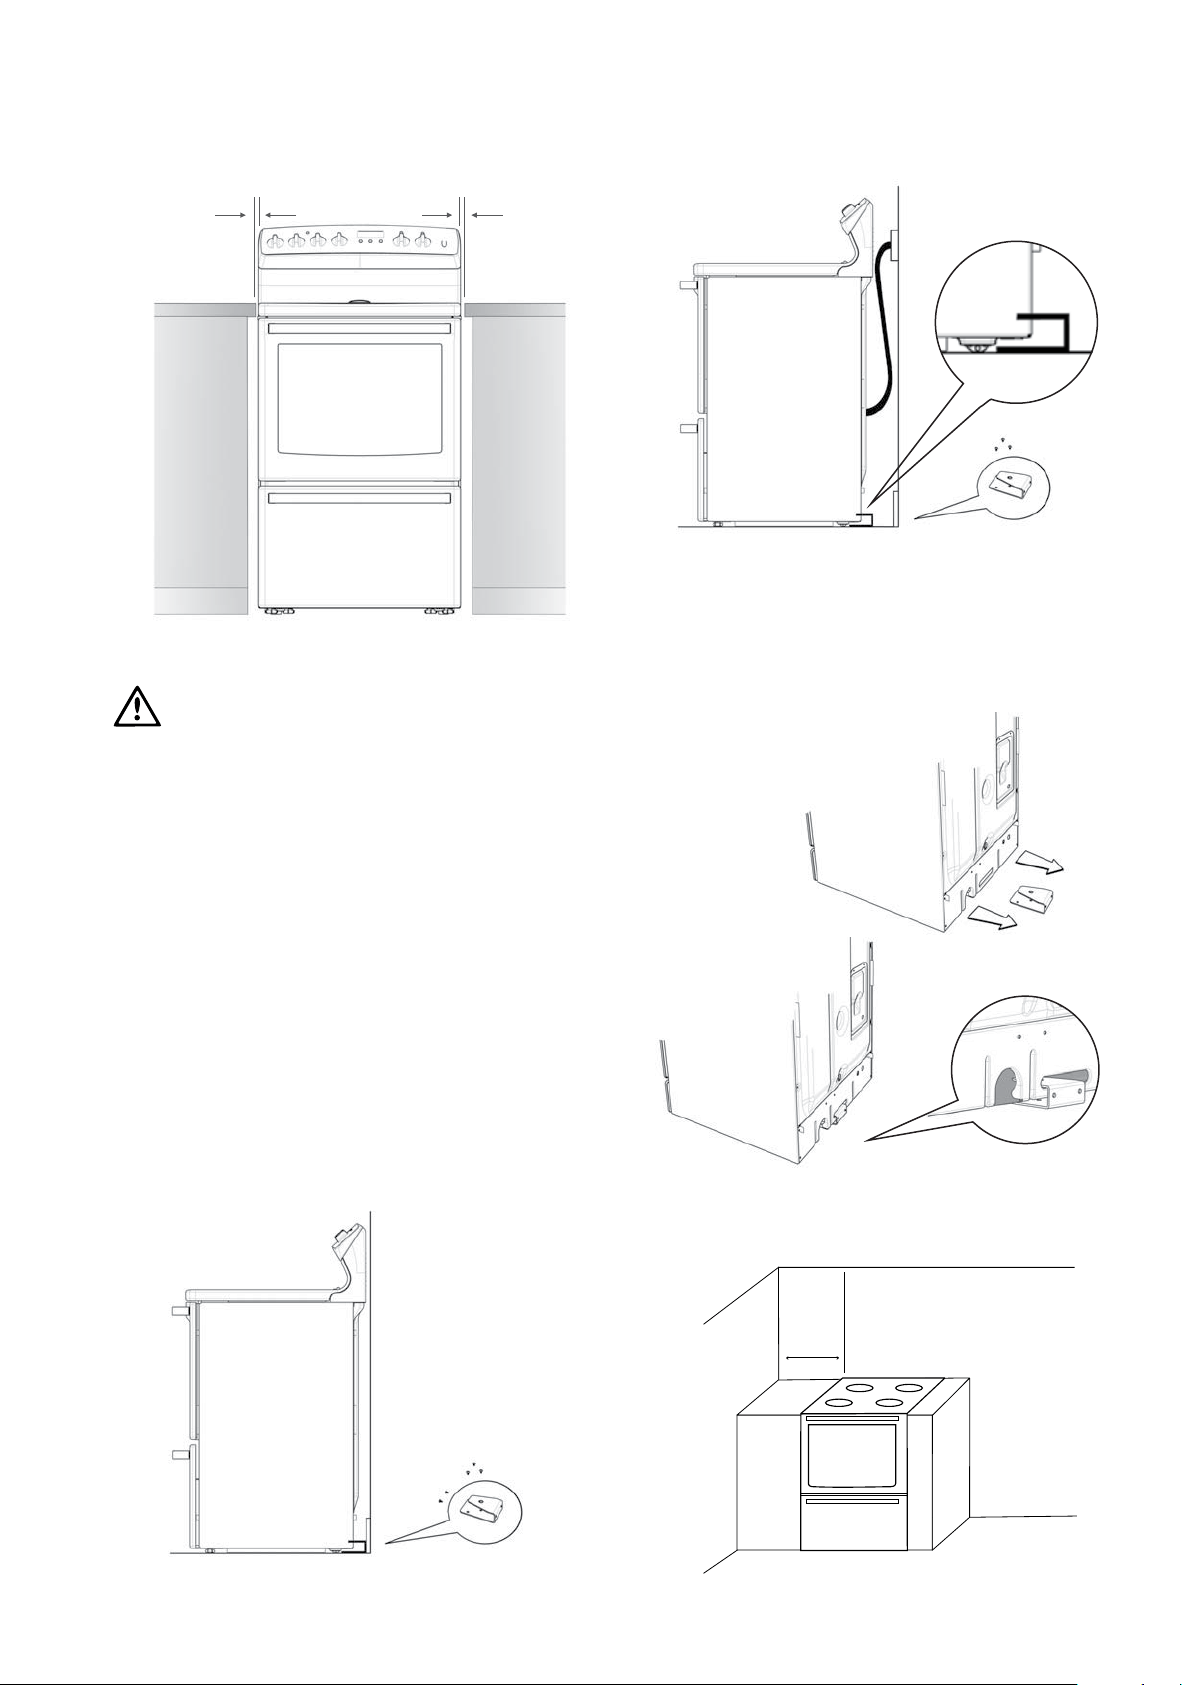
5mm Clearance min.5mm Clearance min. 596mm
100mm
Minimum
installation 5
Installation dimensions
IMPORTANT NOTICE
Installers responsibility
In ALL cases the anti-tilt bracket MUST be securely
anchored to the floor with suitable fasteners,
and the stability bolt fixed.
The anti-tilt bracket is a mandatory safety restraint.
In order to prevent accidental tipping of the appliance;
for example by a child climbing onto the open door,
the anti-tilt bracket supplied with the cooker MUST be
installed. ALWAYS ensure that the cooker is located so
that the anti-tilt bracket is engaged into the cooker.
Step 1: Positioning
Choose the most practical bracket mounting option
for your cooker.
The anti-tilt bracket can be floor mounted or floor and
skirting mounted depending on the location of the range
plug / socket / connection.
Step 2: Fixing anti-tilt bracket
Position the anti-tilt bracket so that it will fully
engage into the slot at the rear of the cooker. The
bracket is mounted centrally at the rear of the cooker.
Anchor the bracket into position using appropriate fasteners.
The appliance must not be installed in a corner. It
must be installed at least 100mm from the side wall.
Installation
Loading ...
Loading ...
Loading ...