BDC830W/271017.1522
Dryer
User Manual
EN
BDC830W
Please read this user manual first!
Dear Customer,
Thank you for prefering a Beko Euromed product. We hope that your product which has been
manufactured with high quality and technology will give you the best results. We advise you
to read through this manual and the other accompanying documentation carefully before
using your product and keep it for future reference. If you transfer the product to someone
else, give its manual as well. Pay attention to all details and warnings specified in the user
manual and follow the instructions given therein.
Use this user manual for the model indicated on the cover page.
Read the instructions.
Explanation of symbols
Throughout this user manual the following symbols are used:
C
Important information or useful hints about usage.
A
Warning for hazardous situations with regard to life and property.
B
Warning against electric shock.
Warning against hot surfaces.
Warning against fire hazard.
Warning against scalding hazard.
Packaging materials of the product are manufactured from recyclable materials in
accordance with our National Environment Regulations.
Do not dispose of the packaging wastes with the domestic waste or other wastes, discard
them to the dedicated collection points designated by the local authorities.
This product was manufactured using the latest technology in environmentally friendly conditions.

3 / EN
Dryer / User Manual
1 Important instructions for safety and
environment
Ths secton contans safety nstructons that wll help
protect from rsk of personal njury or property damage.
Falure to follow these nstructons shall vod any warranty.
1.1 General safety
• The dryer can be used by chldren at and above 8
years old and by persons whose physcal, sensory or
mental capabltes were not fully developed or who
lack experence and knowledge provded that they are
supervsed or traned on the safe usage of the product
and the rsks t brngs out. Chldren should not play wth
the product. Cleanng and mantenance works should not
be performed by chldren unless they are supervsed by
someone.
• Chldren of less than 3 years should be kept away unless
contnously supervsed.
• Adjustable feet should not be removed. The gap between
the dryer and the floor should not be reduced wth
materals such as carpet, wood and tape. Ths wll cause
problems wth the dryer.
• Always have the nstallaton and reparng procedures
carred out by the Authorzed Servce. Manufacturer
shall not be held lable for damages that may arse from
procedures carred out by unauthorzed persons.
• Never wash the dryer by sprayng or pourng water onto t!
There s the rsk of electrc shock!
For the products wth a steam functon:
• Use only dstlled water or water condensed n the water
tank of the machne n steam programs. Do not use mans
water or addtves. When usng condensed water n the
water tank, t should be fltered and cleared of fbres.
• Do not open the door when steam programs are runnng.
Hot water may be expelled.
• Before puttng laundry n a steam program, stans on t
should be removed.

4 / EN
Dryer / User Manual
Important instructions for safety and
environment
• You may only put laundry that s not drty or staned but
permeated wth unpleasant odour n steam (odour removal)
program.
• Do not use any dry cleanng sets or addtonal materals n a
steam program or n any program.
1.1.1 Electrcal safety
A
Electrcal safety nstructons should be followed
whle electrcal connecton s made durng the
nstallaton.
A
The applance must not be suppled through an
external swtchng devce, such as a tmer,or
connected to a crcut that s regularly swtched on
and off by utlty.
• Connect the dryer to a grounded outlet protected by a fuse
at the value specfed on the type label. Have the groundng
nstallaton performed by a qualfed electrcan. Our
company shall not be lable for any damages that wll arse
when the dryer s used wthout groundng n accordance
wth the local regulatons.
• The voltage and allowed fuse protecton s stated on the
type label plate.
• The voltage specfed on the type label must be equal to
your mans voltage.
• Unplug the dryer when t s not n use.
• Unplug the dryer from the mans durng nstallaton,
mantenance, cleanng and repar works.
• Do not touch the plug wth wet hands! Never unplug by
pullng on the cable, always pull out by grabbng the plug.
• Do not use extenson cords, mult-plugs or adaptors to
connect the dryer to power supply n order to decrease the
rsk of fre and electrc shock.
• Power cable plug must be easly accessble after
nstallaton.
5 / EN
Dryer / User Manual
Important instructions for safety and
environment
B
Damaged mans cable should be changed notfyng
the Authorzed Servce.
B
If the dryer s faulty, t must not be operated unless
t s repared by an authorzed servce agent! There s
the rsk of electrc shock!
1.1.2 Product safety
Superheatng of the clothes nsde of the dryer can
occur f you cancel the programme or n the event
of a power falure whlst the dryer s runnng, ths
concentraton of heat can cause self-combuston and
fre so always actvate the ventlaton programme
to cool down or quckly remove all laundry from the
dryer n order to hang them up and dsspate the
heat.
Ponts to be taken nto consderaton for fre
hazard:
Below specfed laundry or tems must not be dred n
the dryer consderng fre hazard.
• Unwashed laundry tems
• Items soled wth ol, acetone, alcohol, fuel ol,
kerosene, stan removers, turpentne, paraffn or
paraffn removers must be washed n hot water
wth plenty of detergent before beng dred n the
dryer.
For ths reason especally the tems contanng the
above specfed stans must be washed very well, to
do ths use adequate detergent and choose a hgh
washng temperature.
6 / EN
Dryer / User Manual
Important instructions for safety and
environment
Below specfed laundry or tems must not be
dred n the dryer due to the fre hazard:
• Garments or pllows bolstered wth rubber foam
(latex foam), shower bonnets, water resstant
textles, materals wth rubber renforcement and
rubber foam pads.
• Clothng cleaned wth ndustral chemcals.
Items such as lghter, match, cons, metal parts,
needle etc. may damage the drum set or may lead to
functonal problems. Therefore check all the laundry
that you wll load nto your dryer.
Never stop your dryer before the programme
completes. If you must do ths, remove all laundry
quckly and lay them out to dsspate the heat.
Clothes that are washed nadequately may gnte on
ther own and even may gnte after dryng ends.
Ol-affected tems can gnte spontaneously,
especally when exposed to heat sources such as n
a tumble dryer. The tems become warm, causng an
oxdaton reacton n the ol. Oxdaton creates heat.
If the heat cannot escape, the tems can become hot
enough to catch fre. Plng, stackng or storng ol-
affected tems can prevent heat from escapng and
so create a fre hazard.
If t s unavodable that fabrcs that contan vegetable
or cookng ol or have been contamnated by har care
products be placed n a tumble dryer they should frst
be washed n hot water wth extra detergent - ths
wll reduce, but not elmnate, the hazard.
• You must provde enough ventlaton n order to prevent
gases extng from devces operatng wth other types of
fuels ncludng the naked flame from accumulatng n the
room due to the back fre effect.

7 / EN
Dryer / User Manual
Important instructions for safety and
environment
A
Underwear that contans metal renforcements
should not be dred n the dryer. Dryer may be
damaged f metal renforcements come loose and
break off durng dryng.
C
Use softeners and smlar products n accordance
wth the nstructons of ther manufacturers.
C
Always clean the lnt flter before or after each
loadng. Never operate the dryer wthout the lnt
flter nstalled.
• Never attempt to repar the dryer by yourself. Do not
perform any repar or replacement procedures on the
product even f you know or have the ablty to perform
the requred procedure unless t s clearly suggested n the
operatng nstructons or the publshed servce manual.
Otherwse, you wll be puttng your lfe and others’ lves n
danger.
• There must not be a lockable, sldng or hnged door that
may block the openng of the loadng door n the place
where your dryer s to be nstalled.
• Install your dryer at places sutable for home use.
(Bathroom, closed balcony, garage etc.)
• Make sure that pets do not enter the dryer. Check the nsde
of the dryer before operatng t.
• Do not lean on the loadng door of your dryer when t s
open, otherwse t may fall over.
• The lnt must not be allowed to accumulate around the
tumble dryer
• The tumble dryer s not to be used f ndustral chemcals
have been used for cleanng.
• Fabrc softeners, or smlar products.should be used as
specfed by the fabrc softener nstructons.
8 / EN
Dryer / User Manual
Important instructions for safety and
environment
• Exhaust ar must not be dscharged nto a flue whch s used
for exhaustng fumes from applances burnng gas or other
fuels.
• The fnal step of the dryng cycle (cool-down cycle) occurs
wthout applyng heat to ensure that the tems are left at a
temperature that wll not damage them.
1.2 Mountng over a washng machne
• A fxng devce should be used between the two machnes
when nstallng the dryer above a washng machne. The
fttng devce must be nstalled by the authorzed servce
agent.
• Total weght of the washng machne and the dryer -wth
full load- when they are placed on top of each other
reaches to approx. 180 klograms. Place the products on a
sold floor that has suffcent load carryng capacty!
A
Washng machne cannot be placed on the dryer.
Pay attenton to the above warnngs durng the
nstallaton on your washng machne.
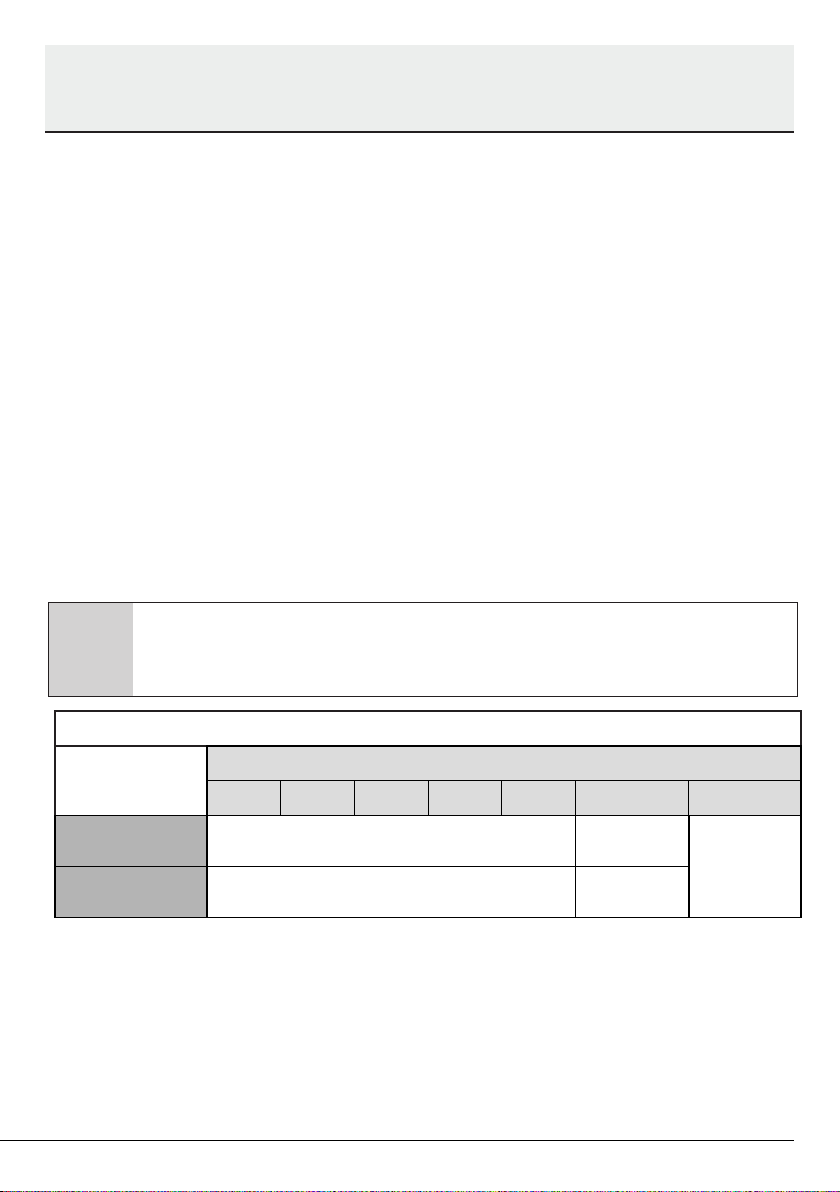
Installation Table for Washing Machine and Dryer
Dryer
Depth
Washing Machine Depth
62 cm 60 cm 54 cm 50 cm 49 cm 45 cm 40 cm
54 cm
Can be nstalled
Can be
nstalled
Cannot be
nstalled
60 cm
Can be nstalled
Cannot be
nstalled

9 / EN
Dryer / User Manual
Important instructions for safety and
environment
1.3 Intended use
• Dryer has been desgned for domestc use. It s not sutable
for commercal use and t must not be used out of ts
ntended use.
• Use the dryer only for dryng laundry that are marked
accordngly.
• The manufacturer waves any responsblty arsen from
ncorrect usage or transportaton.
• The servce lfe of the dryer that you purchased s 10 years.
Durng ths perod, orgnal spare parts wll be avalable to
operate the dryer properly.
1.4 Chld safety
• Packagng materals are dangerous for the chldren. Keep
packagng materals away from chldren.
• Electrcal products are dangerous for the chldren. Keep
chldren away from the product when t s operatng. Do not
let them tamper wth the dryer. Use the chld-proof lock n
order to prevent the chldren to tamper wth the dryer.
C
Chld-proof lock s on the control panel.
(See Chld lock)
• Keep loadng door closed even when the dryer s not n use.

10 / EN
Dryer / User Manual
Important instructions for safety and
environment
1.5 Complance wth the WEEE regulaton
and dsposng of the waste product
Ths product comples wth EU WEEE Drectve
(2012/19/EU). Ths product bears a classfcaton
symbol for waste electrcal and electronc equpment
(WEEE).
Ths product has been manufactured wth hgh
qualty parts and materals whch can be reused and are
sutable for recyclng. Do not dspose of the waste product
wth normal domestc and other wastes at the end of ts
servce lfe. Take t to the collecton center for the recyclng
of electrcal and electronc equpment. Please consult your
local authortes to learn about these collecton centers.
1.6 Complance wth RoHS Drectve:
The product you have purchased comples wth EU RoHS
Drectve (2011/65/EU). It does not contan harmful and
prohbted materals specfed n the Drectve.
1.7 Package nformaton
Packagng materals of the product are manufactured
from recyclable materals n accordance wth our Natonal
Envronment Regulatons. Do not dspose of the packagng
materals together wth the domestc or other wastes. Take
them to the packagng materal collecton ponts desgnated
by the local authortes.
11 / EN
Dryer / User Manual
Important instructions for safety and
environment
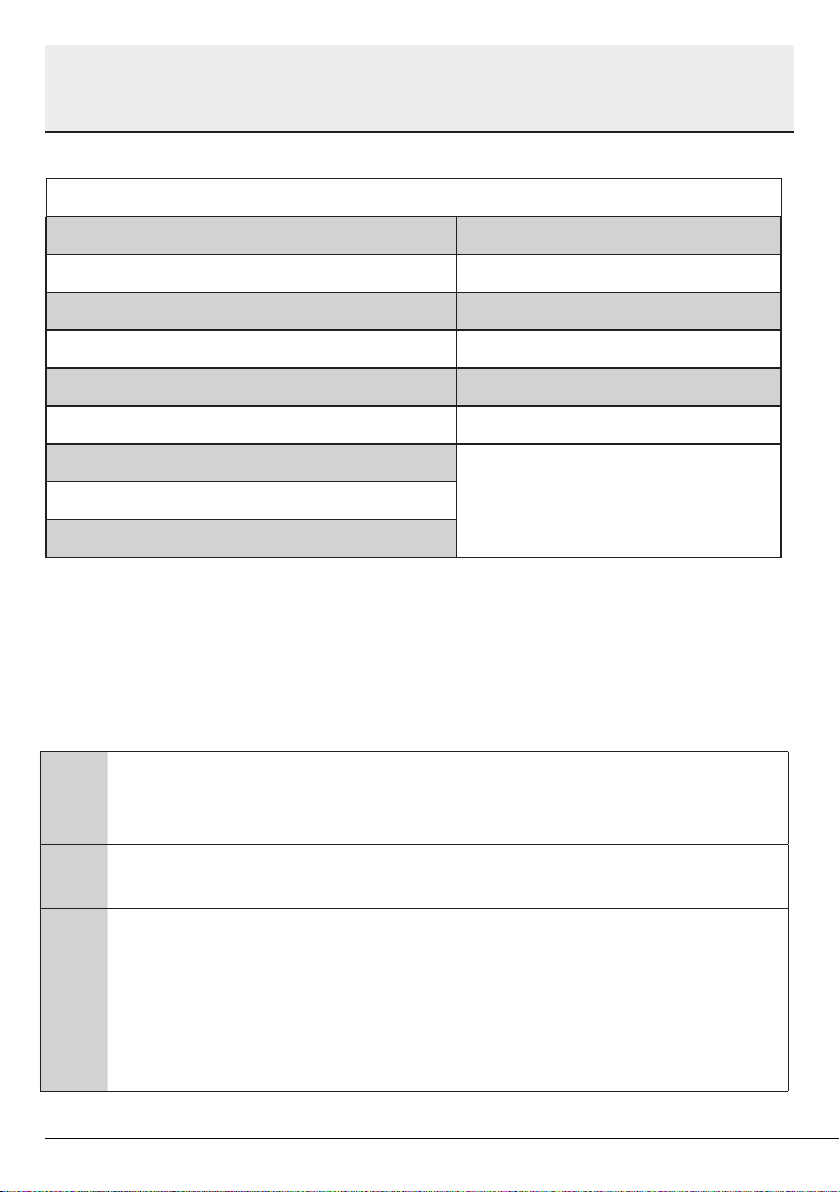
1.8 Techncal Specfcatons
* Mn. heght: Heght wth adjustable feet are closed.
Max. heght: Heght wth adjustable feet are opened
maxmum.
** Dry laundry weght before washng.
*** Type label s located behnd the loadng door.
EN
Height (min./max.) 84.6 cm / 86. cm*
Width 59.5 cm
Depth 60.9 cm
Laundry drying capacity (max.) 8 kg**
Net weight (use of plastic lid) 37 kg
Net weight (use of glass lid) 39,5 kg
Voltage
See type labels***Power
Main Model Code
C
Techncal specfcatons of the dryer are subject to
specfcaton wthout notce to mprove the qualty of
the product.
C
Fgures n ths manual are schematc and may not
match the product exactly.
C
Values stated on markers on the dryer or n the other
publshed documentaton accompanyng wth the
dryer are obtaned n laboratory n accordance wth
the relevant standards. Dependng on operatonal and
envronmental condtons of the dryer, these values
may vary.

12 / EN
Dryer / User Manual
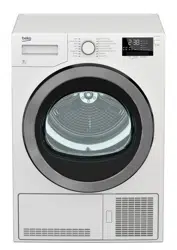
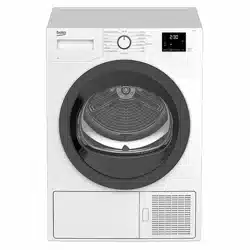
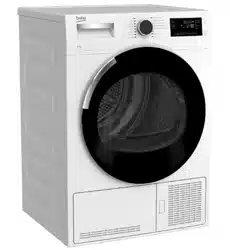
2 Your Dryer
2.1 Overview
11
10
1
2
3
4
5
6
7
8
9
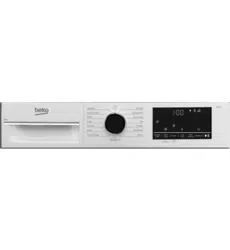
1. Top panel
2. Control panel
3. Loading door
4. Kick plate opening button
5. Ventilation grids
6. Adjustable legs
7. Kick plate
8. Type label
9. Lint filter
10. Water tank drawer
11. Power cord
2.2 Package Contents
1
2 3
5
6
4
7 8
1. Water drain hose *
2. Filter drawer spare sponge*
3. User Manual
4. Drying basket*
5. Drying basket user manual*
6. Water Filling Container*
7. Pure Water*
8. Fragrance Capsules Group*
*It can be supplied with your machine depending on its model.
13 / EN
Dryer / User Manual
3 Installaton
Before the calling the nearest Authorized
Service for the installation of the dryer, ensure
that electrical installation and water drain is
appropriate referring to the user’s manual.
If they are not suitable, contact a qualified
electrician and technician to make necessary
arrangements.
C
Preparation of the dryer's location
as well as the electrical and
waste water installations is under
customer's responsibility.
A
Prior to installation, visually check
if the dryer has any defects on
it. If the drier is damaged, do
not have it installed. Damaged
products cause risks for your
safety.
3.1 Appropriate installation
location
Install the dryer on a stable and level surface.
Dryer is heavy. Do not move it by yourself.
• Operate your dryer in a well ventilated,
dust-free environment.
• The gap between the dryer and the
surface should not be reduced by the
materials such as carpet, wood and tape.
• Do not cover the ventilation grills of the
dryer.
• There must not be a lockable, sliding or
hinged door that may block the opening
of the loading door in the place where
your dryer is to be installed.
• Once the dryer is installed, it should stay
at the same place where its connections
have been made. When installing the
dryer, make sure that its rear wall does
not touch anywhere (tap, socket, etc.).
• Place the dryer at least 1 cm away from
the edges of other furniture.
• Your dryer can be operated at
temperatures between +5°C and +35°C.
If the operating conditions fall outside
of this range, operation of the dryer
will be adversely affected and it can get
damaged.
• The rear surface of the tumble dryer shall
be placed against a wall.
B
Do not place the dryer on the
power cable.
3.2 Removing the transportation
safety assembly
A
Remove the transportation safety
assembly before using the dryer
for the first time.
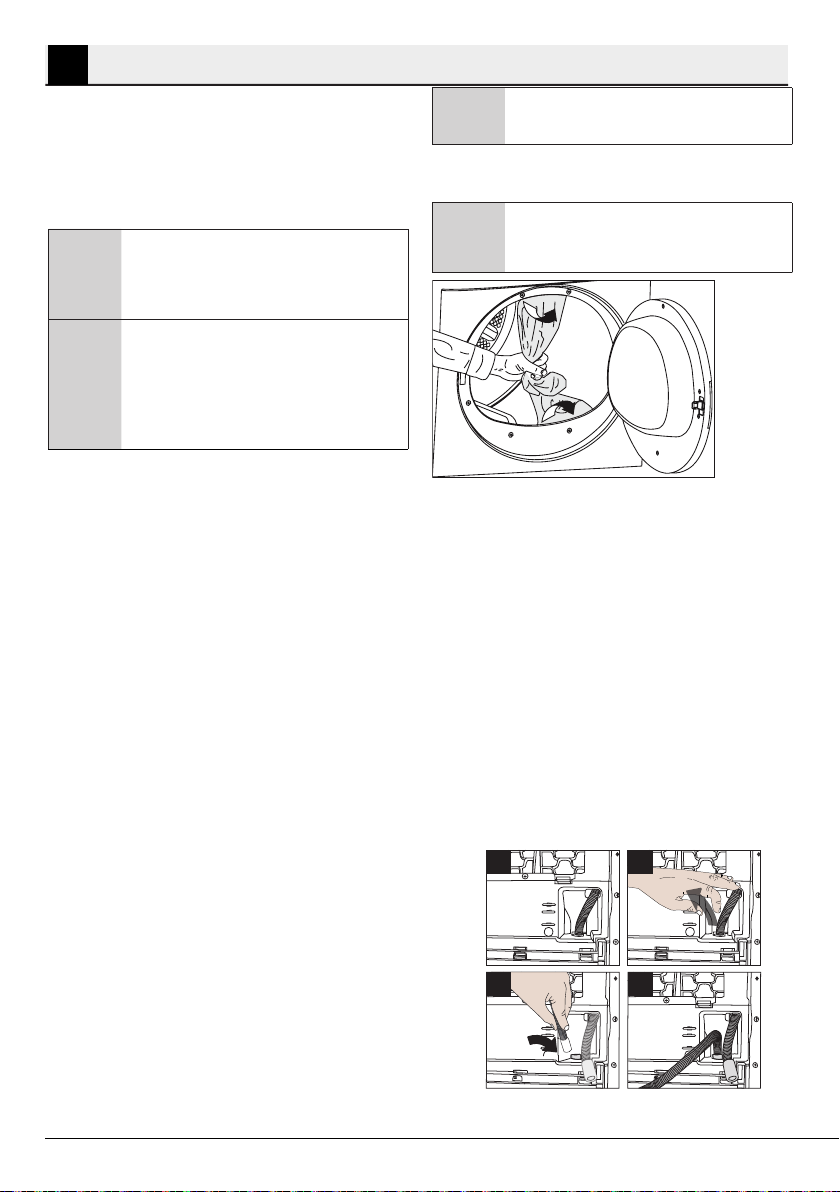
3.3 Connecting to the drain
You can directly drain accumulated water
through the water drain hose supplied with
the product instead of periodically draining the
water collected in the water tank.
Connecting the water drain hose
1-2 Pull hose at the behind of the dryer by hand
in order to disconnect it from where it is
connected. Do not use any tools to remove
the hose.
3 Connect one end of the drain hose
supplied with the dryer to the connection
point from where you removed the hose of
the product in previous step.
4 Connect the other end of the drain hose
directly to the wastewater drain or to the
washbasin.
1
3 4
2
14 / EN
Dryer / User Manual
Installation
3.6 Changing the illumination
lamp
In case an illumination lamp is used in your
laundry dryer.To change the Bulb/LED used
for illumination of your tumble dryer, call your
Authorized Service.The lamp(s) used in this
appliance is not suitable for household room
illumination. The intended purpose of this
lamp is to assist the user to place laundry
in the tumble dryer in a comfortable way.
The lamps used in this appliance have to
withstand extreme physical conditions such
as vibrations and temperatures above 50 °C
C
Water drain hose should be
attached to a height of maximum
80 cm.
C
Make sure that the water drain
hose is not stepped on and it is not
folded between the drain and the
machine.
C
If there is an accessories pack
supplied with your product, please
see the detailed description.
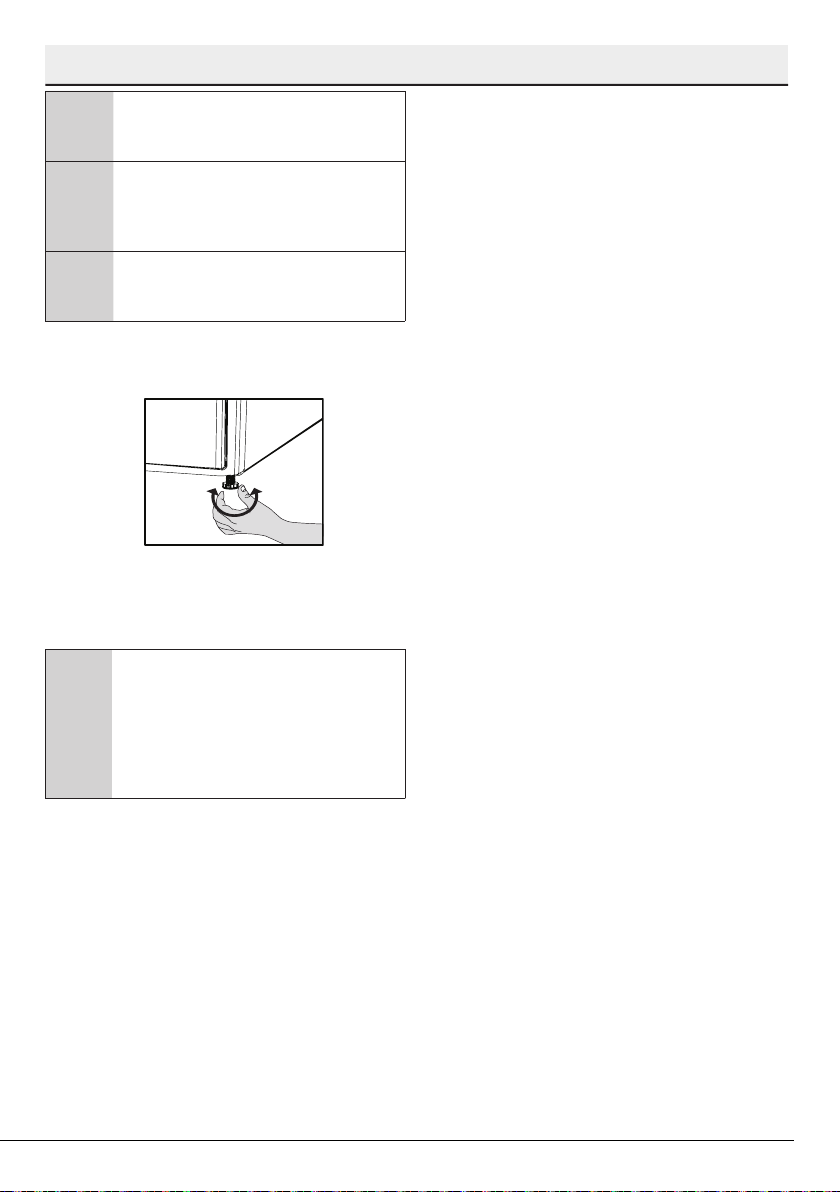
3.4 Adjusting the feet
• Turn the feet to left or right until the dryer
stands level and firmly.
3.5 Transportation of the dryer
Drain all water that has remained in the dryer.
If direct water drain connection is made, then
remove the hose connections.
A
We recommend carrying the
dryer in upright position. If it is
not possible to carry the machine
in the upright position, we
recommend carrying it by tilting
towards the right side when
looked from the front.
15 / EN
Dryer / User Manual
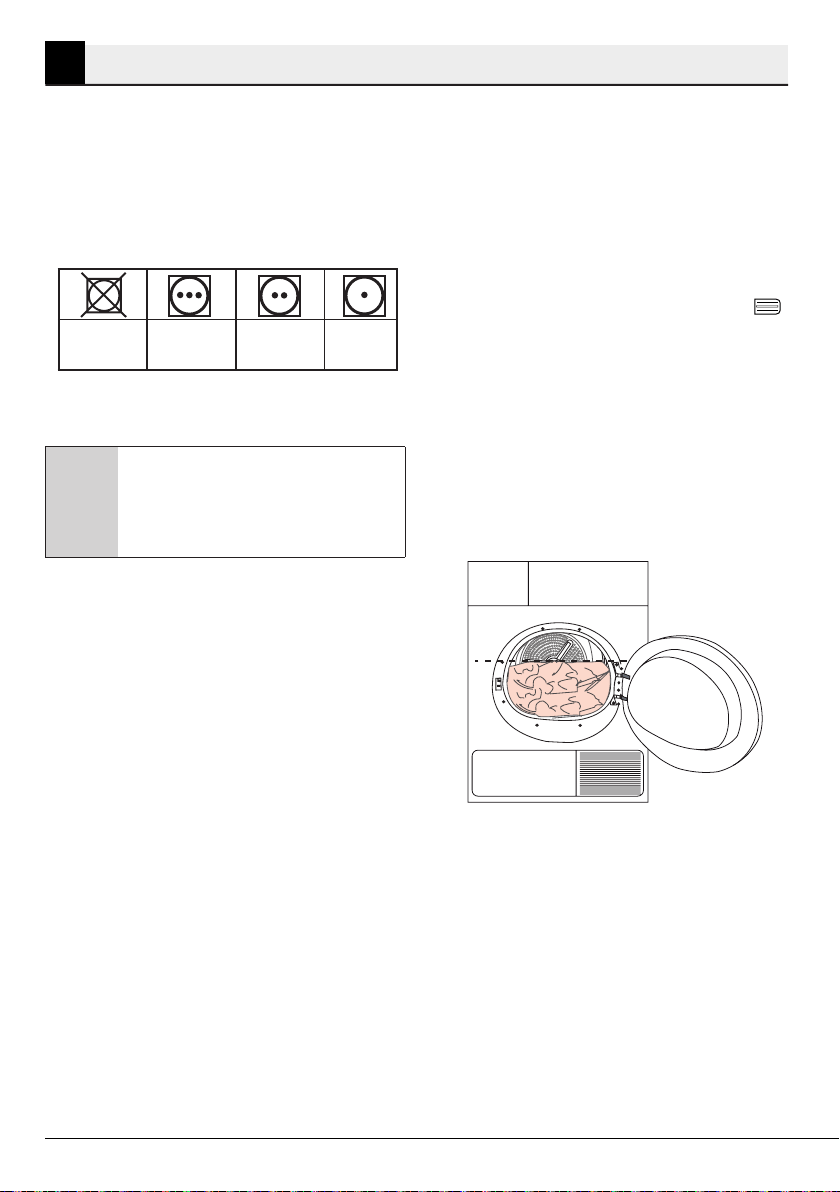
4.1 Laundry suitable for drying
in the dryer
Always obey the instructions given on the
garment tags. Dry only the laundry having a
label stating that they are suitable for drying
in a dryer and make sure that you select the
appropriate programme.
Do not dry with
dryer
At high
temperature
At medium
temperature
At low
temperature
4.2 Laundry not suitable for
drying in the dryer
C
Delicate embroidered fabrics,
woollen, silk garments, delicate
and valuable fabrics, airtight
items and tulle curtains are not
suitable for machine drying.
4.3 Preparing laundry for
drying
• Laundry may be tangled with each other
after washing. Separate the laundry
items before placing them into the dryer.
• Dry garments having metal accessories
such as zippers, inside out.
• Fasten the zippers, hooks and buckles
and button sheets.
4.4 Things to be done for
energy saving
• Spin your laundry at the highest speed
possible when washing them. Thus, the
drying time is shortened and energy
consumption is reduced.
• Sort out the laundry depending on their
type and thickness. Dry the same type
of laundry together. For example thin
kitchen towels and tableclothes dries
earlier than thick bathroom towels.
• Follow the instructions in the user
manual for programme selection.
• Do not open the loading door of the
machine during drying unless necessary.
If you must open the loading door, do not
4 Preparaton
keep it open for a long time.
• Do not add wet laundry while the dryer is
in operation
• For models with a condenser unit: clean
the condenser once in a month or after
every 30 operations regularly. .
• For models with heat pump unit: clean
the filter drawer periodically when there
is a visible accumulation of fluff or when
the filter drawer cleaning indicator « »
lights up.
• For models with flue unit: comply with the
flue connection instructions and clean
the flue.
• During the drying process, air the room
well where your tumble dryer is operating.
4.5 Correct load capacity
Follow the instructions in the “Programme
selection and consumption table”. Do not load
more than the capacity values stated in the
table.

16 / EN
Dryer / User Manual
Preparation
Following weights are given as examples.
Laundry
Approximate
weights (g)*
Cotton quilt covers
(double)
1500
Cotton quilt covers
(single)
1000
Bed sheets (double) 500
Bed sheets (single) 350
Large tablecloths 700
Small tablecloths 250
Tea napkins 100
Bath towels 700
Hand towels 350
Blouses 150
Cotton shirts 300
Shirts 250
Cotton dresses 500
Dresses 350
Jeans 700
Handkerchiefs (10
pieces)
100
T-Shirts 125
*Dry laundry weight before washing.
17 / EN
Dryer / User Manual
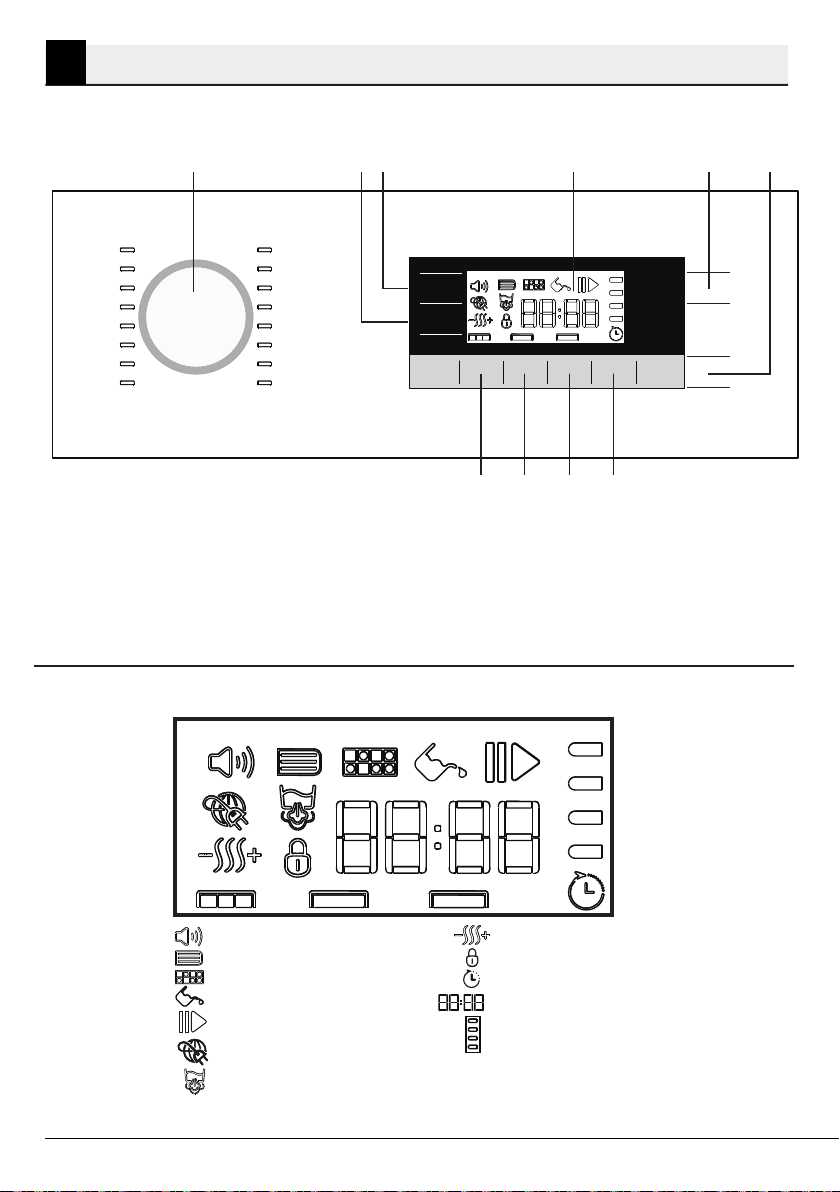
5 Operatng the product
1. Programme Selection knob
2. Dryness Level Adjustment button
3. Audio Warning Level button
4. Display
5. On /Off/Cancel button
6. Start/Pause button
7. End Time button
8. Favourite button
9. Timer Programmes Selection button
10. Anti-creasing button
5.1 Control panel
1 32 4 5 6
78910
5.2 Display symbols
Remaining time indicator*
Condenser cleaning warning symbol
Filter cleaning warning symbol
Smart grid symbol
Child lock warning symbol
Water tank warning symbol
End time symbol
Start / Pause symbol
Steam tank warning symbol
Dryness level
*Time that appears on display indicates the
remaining time until the end of the programme
and changes according to the dampness level
of the laundry and model of the dryer.
Programme progress bar
Audio warning Symbol

18 / EN
Dryer / User Manual
Operating the product
5.3 Preparing the machine
1. Plug in your machine.
2. Place the laundry in the machine.
3. Press the On/Off/Cancel button for 1
second (long).
4. When your machine is operated for the
first time, it starts with the declaration
programme (wardrobe dryness for
cottons.)
C
Pressing the On/Off/Cancel
button does not mean that the
programme has started. Press
Start / Pause button to start the
program.
5.4 Programme selection
1. Decide the appropriate programme from
the table below which includes drying
levels.
2. Select the desired programme with the
Programme Selection knob.
Extra Dry
Only the cotton laundry is
dried at normal temperature.
Thick and multi layered
laundry (towels, linens, jeans
and etc.) are dried in a way
that they do not require
ironing before being placed in
the wardrobe.
Cupboard
Dry
Normal laundry (tablecloths,
underwear and etc.) are dried
in a way that they do not
require ironing before being
placed in the wardrobe.
Iron Dry
Normal laundry (shirts,
dresses and etc.) are dried
ready to be ironed.
C
For further programme details,
see "Programme selection and
consumption table"..
5.5 Main programmes
Depending on the fabric type, the following
main programmes are available.
• Cottons
Dry durable laundry with this programme.
Dries at normal temperature. It is
recommended to use for your cotton items
(bed sheets, quilt covers, towels, bathrobes,
etc.).
• Synthetcs
Dry less durable laundry with this programme.
Recommended for synthetics.
5.6 Additional programmes
For special cases, following additional
programmes are available in the machine.
C
Additional programs may differ
according to the features of your
machine.
C
To obtain better results from
your dryer, your laundry must be
washed at suitable programmes
and spun at the recommended
spin speeds in the washing
machine..
• Jeans
Use this programme to dry your jeans that are
spun at high speeds in the washing machine.
• Mx
Use this programme to dry non-pigmenting
synthetic and cotton laundry items together.
• Sports
Use this programme to dry together the
synthetic and cotton laundry items and the
laundry items made of mixed fabrics.
• Wool Refresh
Use this programme to ventilate and soften
the woolen laundry that can be washed in
the washing machine. Do not use to dry the
laundry completely. Take out and ventilate
the laundry immediately after the programme
is over.
• Xpress
You can use this programme to dry your
cotton laundry that you have spun at high
speeds in your washing machine. This
programme dries 1 kg cotton laundry (3 Shirts
/ 3 T-shirts) in 35 minutes.

19 / EN
Dryer / User Manual
Operating the product
• BabyProtect
Ths programme s used for baby clothes that
bear machne dryable approval on ts label.
• Daly
This programme is used to dry cottons and
synthetics daily, and lasts for 72 minutes.
• Shrt
This programme dries the shirts more
sensitively and creases them less and thus,
helps to iron them more easily.
C
There may be a little moisture
on the shirts at the end of the
programme. We recommend
you not to leave the shirts in the
dryer.
• Delcates
You can dry your highly delicate laundry (silk
blouses, fine underwear, etc.) that are suitable
for drying or laundry which is advised to be
hand-washed at a lower temperature.
C
It is recommended to use a cloth
bag to avoid certain delicate
garments and laundry from
getting creased or damaged.
Take your laundry immediately
out of the dryer and hang them
after the programme ends in
order to prevent them being
creased.
• Freshen Up
Only ventilation is performed for 10 minutes
without blowing hot air. You can air the
clothes that have been kept at closed
environments for a long time and deodorize
unpleasant odors thanks to this programme.
• Tmer programmes
You can select one of the 10 min., 20 min., 30
min., 40 min., 50 min., 60 min., 80 min., 100
min.,
120 min., 140 min. and 160 min. timer
programmes to achieve the desired final
drying level at low temperatures.
C
With this programme, the
machine dries for the time
selected regardless of the
dryness level.
20 / EN
Dryer / User Manual
Operating the product
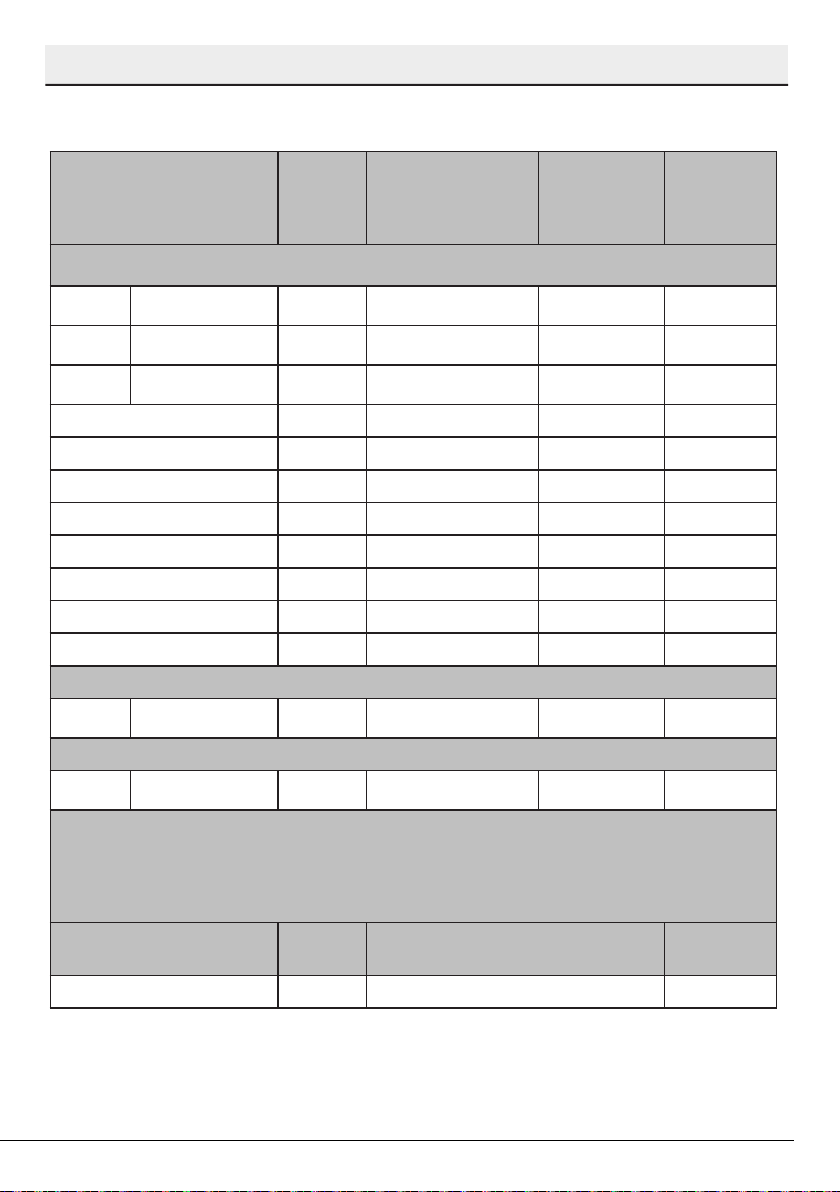
5.7 Programme selection and consumption table
* : Energy Label standard program (AS/NZS 2442)
All values given in the table have been fixed according to standard laboratory conditions.
These values may deviate from the table according to the laundry type, laundry spin speed,
environmental conditions and voltage fluctuations.
EN
Programs
Capacity
(kg)
Spin speed in
washing machine
(rpm)
Approximate
amount of
remaining
humidity
Drying
time
(minutes)
Cottons / Coloreds
A
Extra dry 8 1000 % 60 154
A
Cupboard dry 8
1000 % 60
142
A
Iron dry 8 1000 % 60 120
Xpress 35’ 1,5 1200 %50 35
Shirt 1,5 1200 %50 45
Jeans 4 1200 %50 90
Mixed 4 1000 %60 90
Sport 4 1000 %60 100
Wool Refresh 1,5 600 %50 6
Daily 4 1200 %50 72
BabyProtect 3 1000 %60 80
Synthetics
B
Cupboard dry 4 800 % 40 60
Delicates
B
Cupboard dry 2 600 % 40 45
Energy consumption values
Programs
Capacity
(kg)
Energy consumption value kWh
per year
Energy
rating star
Cottons-Extra Dry* 8 349 2
21 / EN
Dryer / User Manual
Operating the product
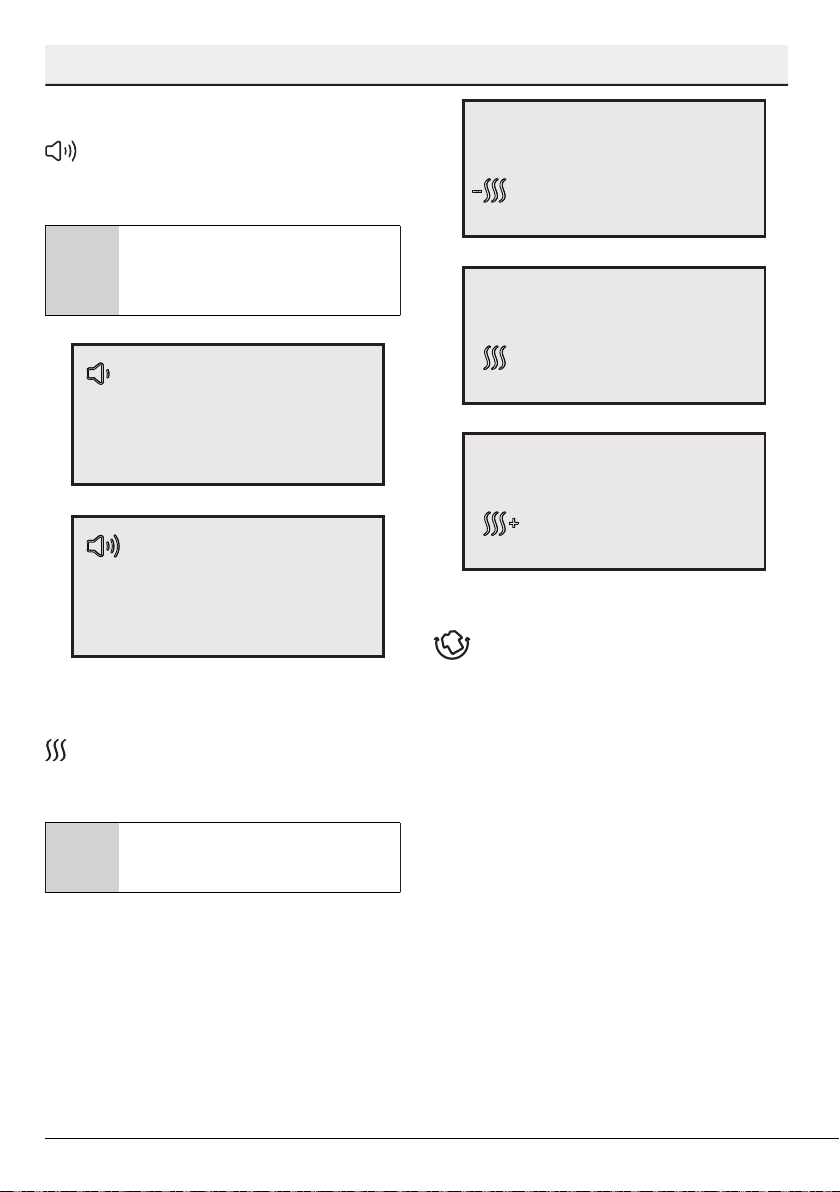
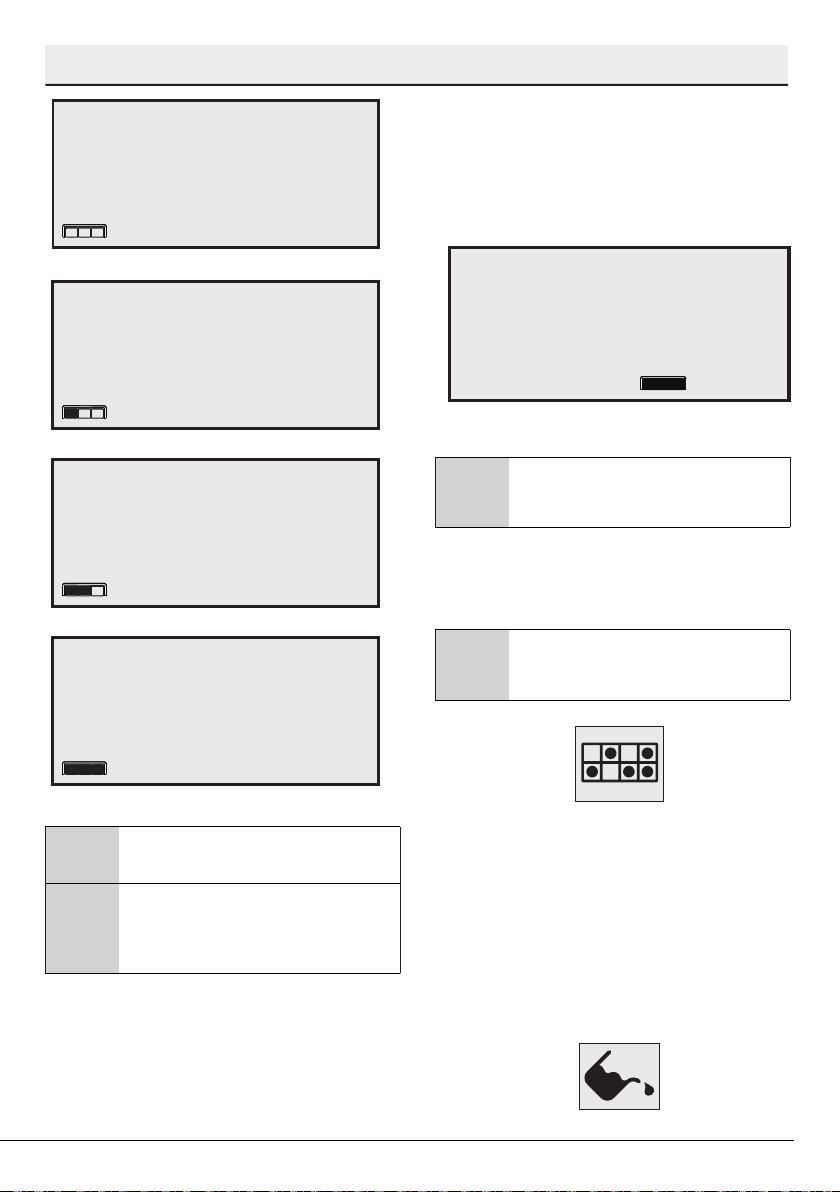
5.8 Auxiliary functions
Audio Warning
The machine will give an audio warning
when the programme comes to an end. Use
the Audio Warning Level button to adjust the
sound level.
C
You can change the sound level
either before the programme
starts or while the programme is
in progress.
Volume level low
Volume level high
Dryness level adjustment selection
Dryness level adjustment button is
used to adjust the required dryness level.
Programme duration can change depending
on the selection.
C
You can activate this function
only before the programme has
started.
Drying level damp
Drying level normal
Drying level extra
Anti-creasing
Anti-creasing programme duration may
be changed with the Anti-creasing selection
button. You can use Anti-creasing function to
prevent laundry from creasing if you will not
take the laundry out after the program has
come to an end. This programme rotates the
laundry in every 240 second for selected time
to prevent creasing.Following images identify
the level changes.
22 / EN
Dryer / User Manual
Operating the product
Anti-creasing 0 minute
Anti-creasing 30 minute
Anti-creasing 60 minute
Anti-creasing 120 minute
C
Press Anti-creasing button to
activate this function.
C
Anti-creasing symbol will
illuminate at the end of the
programme if Anti-creasing
function is activated.
Favourite selection button
A programme with the set auxiliary function is
saved with Favourite selection button.When
the product is switched on and off, features of
the saved programme is displayed by means
of Favourite selection button.
1. Select the programme with the
programme knob; select the auxiliary
functions such as Anti-creasing, Dryness
Level etc.
2. Press and hold the Favourite selection
button for about 3 seconds. Features of
set programme will be saved.
5.9 Warning symbols
C
Warning symbols may differ
according to the model of your
machine.
Lint filter cleaning
When the programme is completed, a warning
symbol will appear to remind that the filter
needs to be cleaned.
C
If the Filter Cleaning symbol
flashes continuously, refer to
“Troubleshooting” section.
Water tank
When the programme is completed, a warning
symbol will appear to remind that the water
tank needs to be drained.
If the water tank becomes full while the
programme is running, the warning symbol
will start to flash and machine will pause.
Drain the water in the water tank and
press Start / Pause button to resume the
programme. The warning symbol turns off and
the programme resumes operating.
23 / EN
Dryer / User Manual
Operating the product
Cleaning the condenser
Warning symbol flashes with certain intervals
to remind that the condenser needs to be
cleaned.
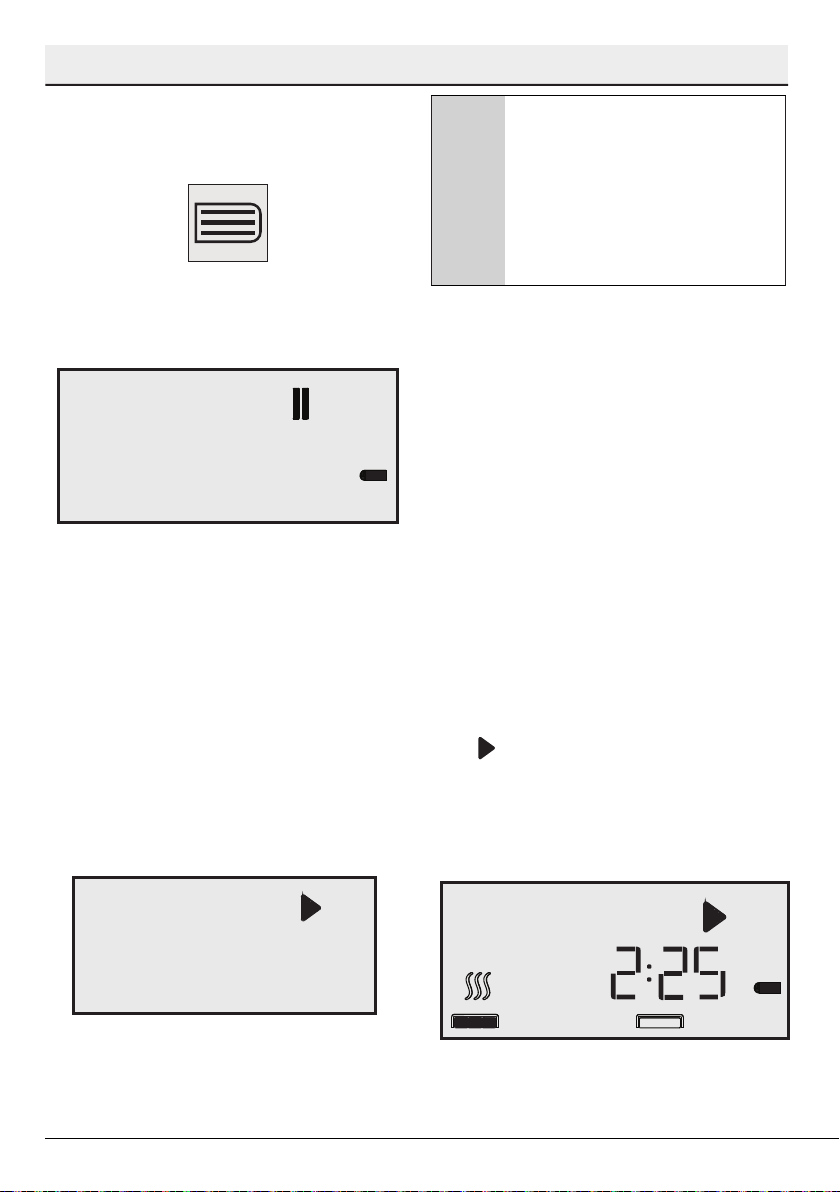
Loading door open
This warning symbol Pause appears and
programme progress symbol flashes when the
loading door of the dryer is open.
End time
With the End Time function, the end time
of the programme may be delayed up to 24
hours.
1. Open the loading door and put the
laundry in.
2. Select the drying programme, spin speed
and, if required, the auxiliary functions.
3. Press End time button to set the desired
time delay. End time symbol flashes on
the display. (When the button is pressed
on, End time proceeds continuously)
4. Press Start / Pause button. End time
starts countdown and Start symbol lights
up on the display. The “:” in the middle of
the displayed delay time flashes.
C
Additional laundry may be loaded
/ taken out during the End time.
At the end of the countdown
process, end time symbol
disappears, drying process starts
and the programme duration
is displayed. The time on the
display is the total of normal
drying time and end time.
Changing the End time
If you want to change the time during
countdown:
1. Press On/Off/Cancel button for 3
seconds to cancel the programme. Restart
the machine and repeat the Delay Setting
procedure for the desired time.
2. When your machine is operated for the
first time, it starts with the declaration
programme (wardrobe dryness for
cottons.
Cancelling the end time
If you want to cancel the End time countdown
and start the programme immediately:
1. Press On/Off/Cancel button for 3
seconds to cancel the programme.
2. Press On/Off/Cancel button to start the
programme you have previously selected.
5.10 Starting the programme
Press the Start/Pause button to start the
program.
Start symbol will light up to indicate that
the programme has started and ":" symbol in
the middle of the remaining time will keep
flashing. Progress of Programme Symbol
flashes on the screen.
5.11.Progress of programme
24 / EN
Dryer / User Manual
Operating the product
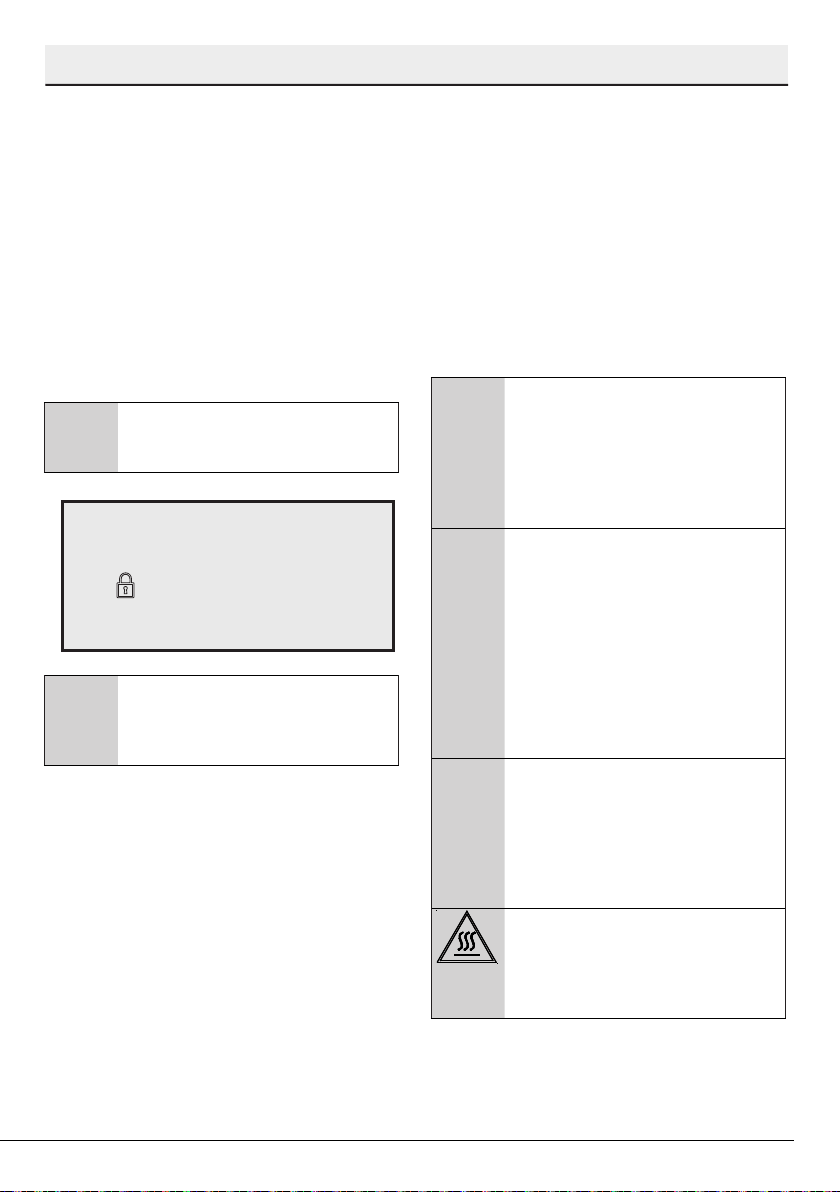
5.12 Child Lock
Machine is equipped with a Childproof Lock
which prevents interfering with the current
programme flow by pressing any button. All
buttons except the On/Off/Cancel button on
the control panel are deactivated when the
Child-proof Lock is active.
In order to activate the Childproof Lock,
press Anti-creasing button for 3 seconds.
To start a new programme after the current
programme is over or to interrupt the current
programme, the Child-proof Lock should be
deactivated. Press the same button for 3
seconds again to deactivate the Child-proof
Lock.
C
Lock symbol will appear on the
display when the Child-proof
Lock is activated.
C
Child-proof Lock is deactivated
when the machine is switched
off and on with On/Off/Cancel
button.
When the Child-proof Lock is activated:
Display symbols will not change even if the
position of Programme Selection knob is
changed while the machine is running or in
halt.
5.13 Changing the programme
after it has started
After the machine starts, you can change the
selected programme and dry your laundry in a
different programme.
1. If you want to select Extra Dry programme
instead of Iron Dry programme, press and
hold the Start / Pause button to stop the
programme.
2. Select Extra Dry programme by turning
the Programme Selection knob.
3. Press the Start/Pause button to start
the program.
Adding / removing laundry in Pause mode
In order to add or take out laundry after the
drying programme has started:
1.Press Start/Pause button to switch the
machine to Pause mode. Drying process
will stop.
2.While in Pause mode, open the loading
door, add or take out laundry and close
the loading door.
3.Press the Start/Pause button to start the
program.
C
Any laundry added after the
drying process has started
may cause the clothes that are
already dried in the machine
intermingle with wet clothes and
the result will be wet laundry
after the drying process is over.
C
You may repeat laundry adding
or removing process as many
times as you desire during
drying. However, this process
will increase the programme
time and energy consumption
since the drying process will
be interrupted repeatedly.
Therefore, it is recommended to
add laundry before the drying
programme has started.
C
If you select a new programme
by turning the Programme
Selection knob while your
machine is in Pause mode, then
the current program is aborted
and new programme information
is displayed.
CAUTION: Do not touch the
inner surface of the drum when
adding or taking out laundry
while a programme is running.
Surfaces of the drum are hot.
25 / EN
Dryer / User Manual
Operating the product
5.14 Canceling the programme
If you want to stop drying and cancel the
programme for any reason after the machine
has started to run, press and hold the On/
Off/Cancel button for 3 seconds.
A
CAUTION: As the inside of the
machine will be excessively hot
when you cancel the program
while the machine is running,
activate the ventilation program
to cool it down.
5.15 End of programme
Lint Filter Cleaning and Water Tank warning
symbols light up in the programme follow-up
indicator when the programme comes to an
end. The loading door can be opened and the
machine becomes ready for a second cycle.
Press On/Off/Cancel button to switch off
the machine.
C
If Anti-creasing function is
activated and the laundry is not
taken from the machine at the
end of the programme, 2-hours
(depends on selection) Anti-
creasing programme is activated.
C
Clean the lint filter after each
drying. (See "Lint Filter and
Loading Door Inner Surface")
C
Drain the water tank after each
drying cycle. (See "Draining the
water tank")
26 / EN
Dryer / User Manual
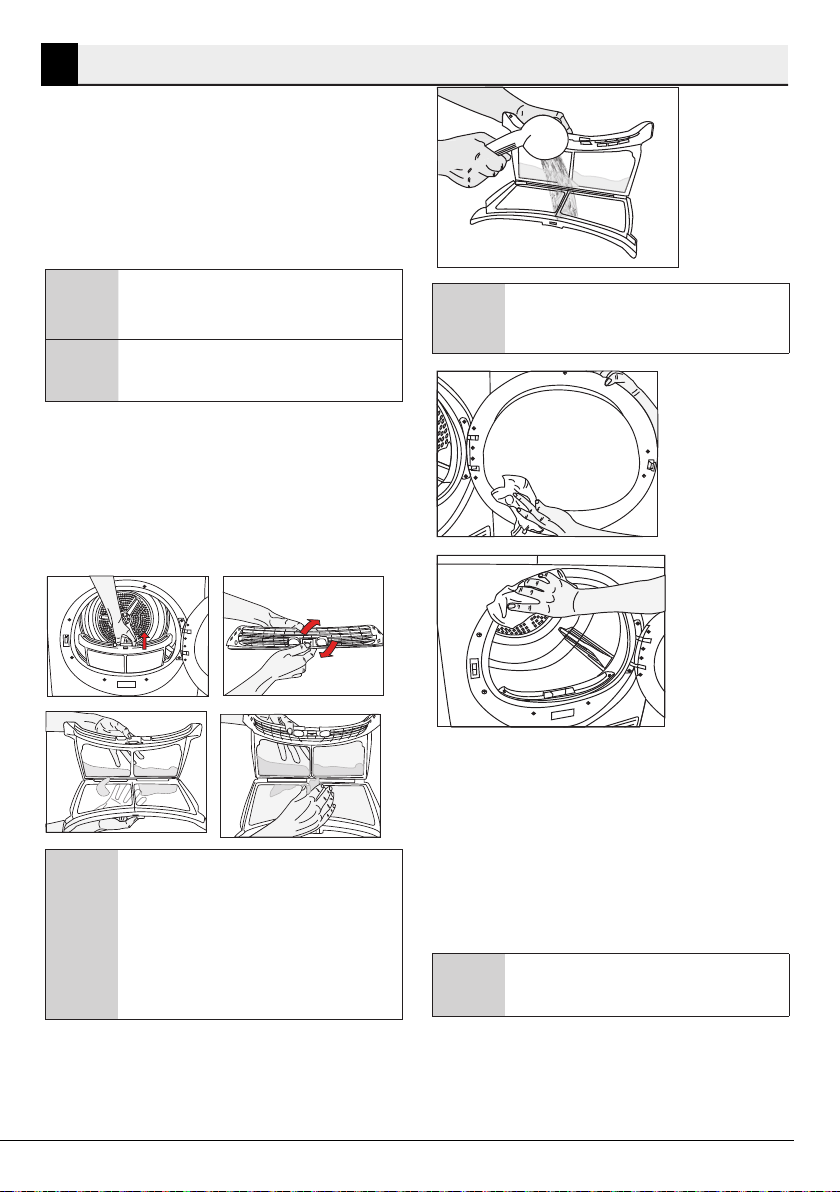
C
Clean the entire inner surface of
the loading door and loading door
gasket.
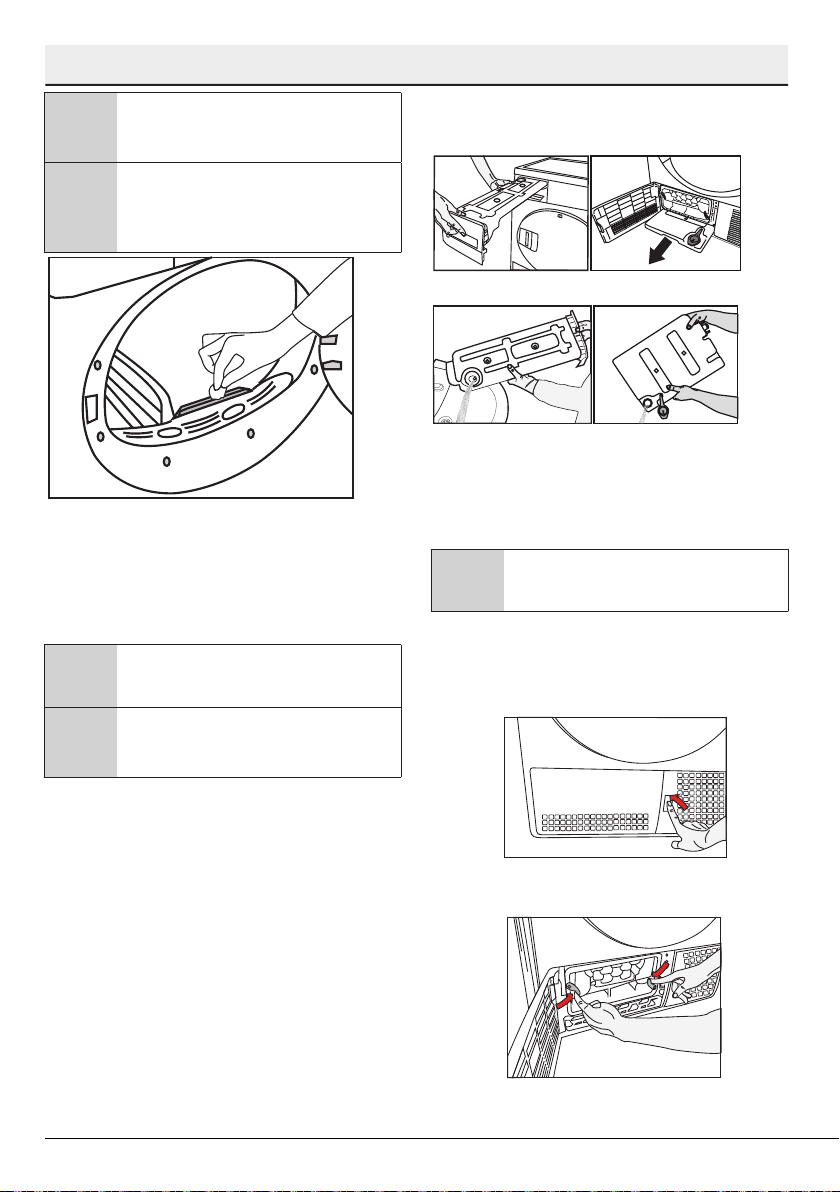
6.2 Cleaning the sensors
There are dampness sensors in the machine
that detect whether the laundry is dry or not.
To clean the sensors:
1. Open the loading door of the machine.
2. Allow the machine to cool down if it is still
hot due to the drying process.
3. Wipe the metal surfaces of the sensor
with a soft cloth, dampened with vinegar
and dry them.
C
Clean metal surfaces of the
sensors 4 times a year.
6 Mantenance and cleanng
Service life of the product extends and
frequently faced problems decrease if cleaned
at regular intervals.
6.1 Lint Filter / Loading Door
Inner Surface
Lint and fiber released from the laundry to the
air during the drying cycle are collected in the
Lint Filter.
A
Always clean the lint filter and
the inner surfaces of the loading
door after each drying process.
C
You can clean the lint filter
housing with a vacuum cleaner.
To clean the lint filter:
1. Open the loading door.
2. Remove the lint filter by pulling it up and
open the lint filter.
3. Clean lint, fiber, and cotton raveling by
hand or with a soft piece of cloth.
4. Close the lint filter and place it back into
its housing.
C
A layer can build up on the filter
pores that can cause clogging of
the filter after using the machine
for a while. Wash the lint filter
with warm water to remove the
layer that builds up on the lint
filter surface. Dry the lint filter
completely before reinstalling it.
27 / EN
Dryer / User Manual
Maintenance and cleaning
C
Do not use metal tools when
cleaning metal surfaces of the
sensors.
A
CAUTION: Never use solvents,
cleaning agents or similar
substances for cleaning due to
the risk of fire and explosion!
6.3 Draining the water tank
Dampness of the laundry is removed and
condensed during drying process and the
water that arise accumulates in the water
tank. Drain the water tank after each drying
cycle.
A
Condensed water is not drinkable!
A
CAUTION: Never remove the
water tank when the program is
running!
If you forget to drain the water tank, the
machine will stop during the subsequent
drying cycles when the water tank is full and
the Water Tank warning symbol will flash. If
this is the case, drain the water tank and press
Start / Pause button to resume the drying
cycle.
To drain the water tank:
1. Remove the water tank in the drawer or
container carefully.
2. Drain the water in the tank.
3. If there is lint accumulation in the funnel
of the water tank, clean it under running
water.
4. Place the water tank into its seat.
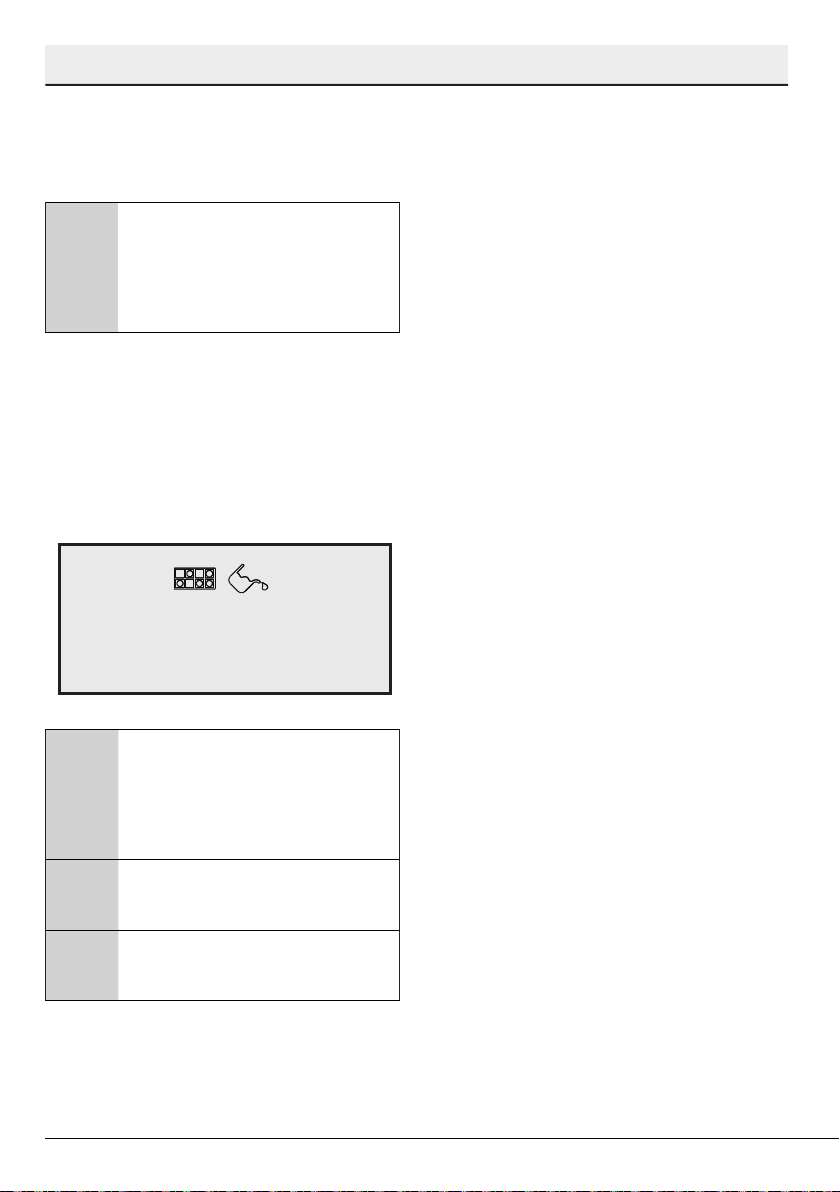
6.4 For the condenser;
C
Clean the condenser after every
30 drying cycles or once a month.
To clean the condenser:
1. If a drying process has been carried out,
open the door of the machine and wait
until it cools down.
2. Unlock the 2 condenser locks after
opening the kick plate.
28 / EN
Dryer / User Manual
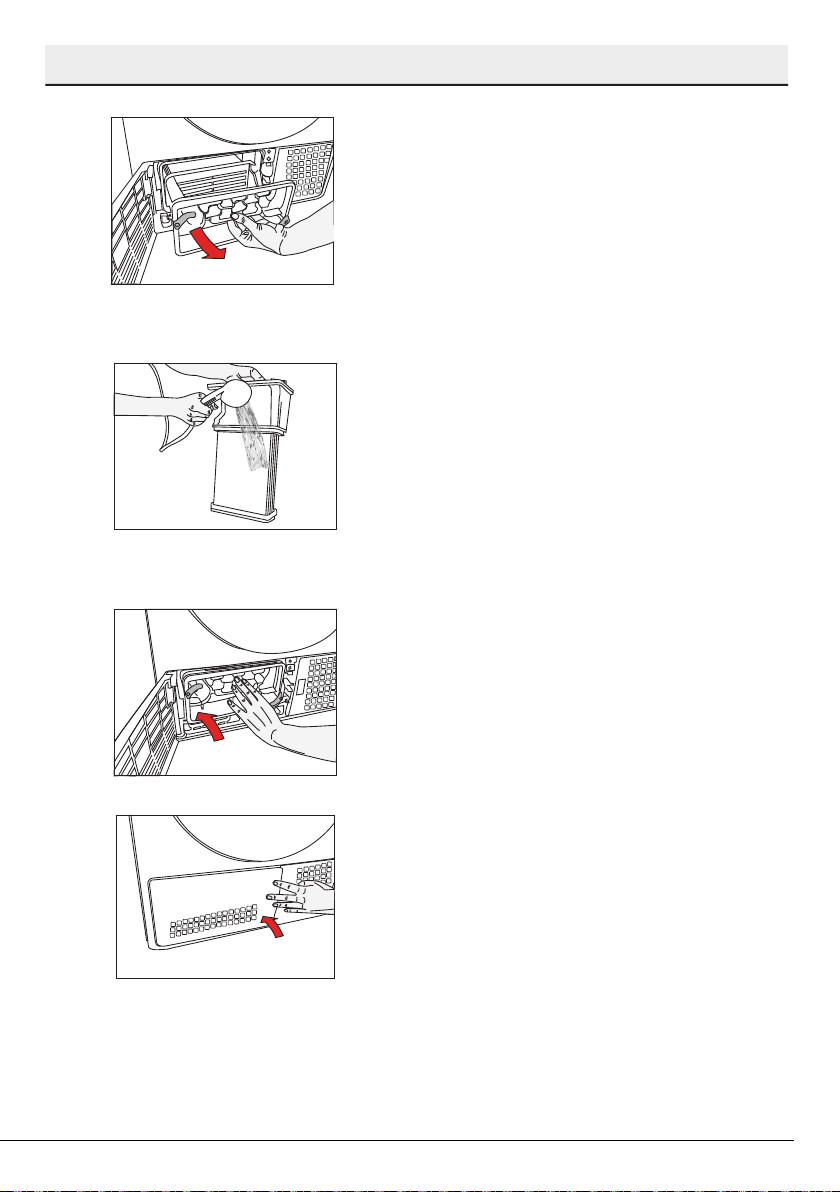
Maintenance and cleaning
3. Pull out the condenser.
4. Clean the condenser by applying
pressurized water with a shower
armature and wait until the water drains.
5. Place the condenser in its housing. Fasten
the 2 locks and make sure that they are
seated securely.
6. Close the kick plate cover.
29 / EN
Dryer / User Manual
7 Troubleshootng
Drying operation takes too long.
• Fibre filter pores might be clogged. >>> Wash the filter with warm water.
• Filter drawer might be clogged. >>> Clean the sponge and filter cloth (if any) in the
filter drawer. (for the products with a heat pump)
• The condenser might be blocked. >>> Wash the condenser.(for the products with a
condenser )
• The ventilation grills in front of the machine may be closed. >>> Remove any objects in
front of the ventilation grills that blocks air.
• Ventilation may be inadequate because the area the machine is installed in is too small.
>>> Open the door or windows to prevent the room temperature from rising very high.
• A lime layer may have accumulated on the humidity sensor. >>> Clean the humidity
sensor.
• Excessive amount of laundry might be loaded. >>> Do not load the drying machine
excessively.
• Laundry might not have been wrung adequately. >>> Perform a higher speed wringing
on the washing machine.
Clothes come out damp after drying.
• A program not suitable for the laundry type may have been used.>>> Check the
maintenance labels on the clothes and select a program suitable for the clothes’ type or
use time programs as extra.
• Fibre filter pores might be clogged. >>> Wash the filter with warm water.
• The condenser might be blocked. >>> Wash the condenser. (for the products with a
condenser)
• Filter drawer might be clogged. >>> Clean the sponge and filter cloth (if any) in the
filter drawer.(For the products with a heat pump)
• Excessive amount of laundry might be loaded. >>> Do not load the drying machine
excessively.
• Laundry might not have been wrung adequately. >>> Perform a higher speed wringing
on the washing machine.
Drying machine does not turn on or program cannot be started. Drying machine does not
run after it is configured.
• Power plug might be unplugged. >>> Make sure the power cord is plugged in.
• Loading door might be open. >>> Ensure that the loading door is properly closed.
• A program might not be set or Start/Stand-by button might not be pressed. >>> Check
that the program is set and it is not in Stand-by position.
• Child lock may be activated. >>> Turn off the child lock.
Program terminated prematurely for no reason.
• Loading door might not be closed completely. >>> Ensure that the loading door is
properly closed.
• There might be a power outage. >>> Press the Start/Stand-by button to start the
program.
• Water tank may be full. >>> Empty the water tank.
Clothes have shrunk, hardened or spoiled.
• A program not suitable with the laundry type might have been used. >>> Check the
maintenance labels on the clothes and select a program suitable for the clothes.
The lighting inside the drying machine does not turn on. (For models with a lamp)
• Drying machine might not be turned on with the On/Off button or program might not
be selected for machines without an On/Off button. >>> Make sure that the drying
machine is turned on.
• Lamp might be malfunctioning. >>> Contact Authorized Service to replace the lamp.
Filter cleaning warning symbol/LED is on/flashing.
• Fibre filter might not be cleaned. >>> Clean the filter.
• The filter slot might be clogged with lints. >>> Clean the filter slot.
• A layer of fluff might have accumulated clogging up the lint filter pores. >>> Wash the
filter with warm water.
• The condenser might be blocked. >>> Wash the condenser.
Water drips from the loading door.
• Fibres might have gathered on the inner sides of the loading door and the loading door
gasket. >>> Clean the inner surfaces of the loading door and the loading door gasket
surfaces.
Loading door opens by itself.
• Loading door might not be closed completely. >>> Push the loading door until the
closing sound is heard.
Water tank warning symbol / led is on/flashing.
• Water tank may be full. >>> Empty the water tank.
• Water discharge hose might have collapsed. >>> If the product is connected directly to
the water drain check the water discharge hose.
Steam symbol is flashing.(For the products with a steam function)
• Steam tank may be empty => Fill the steam tank with distilled or condensed water.
Steam programs do not start (For the products with a steam function)
• Steam tank may be empty, steam tank warning icon may light up on the screen => Fill
the steam tank until the steam icon goes off.
Wrinkles are not removed with wrinkle removing program. (For the products with a steam
function)
• Excess amount of laundry may have been placed => Place specified amount of laundry.
• Steam application time may be selected in low level => Choose a program with high
amount of steam.
• After completion of the program, the laundry may have stayed in the machine for a long
time => Take the laundry out as soon as the program finishes, and hang it out.
Laundry odour not lessened with the odour removal program.(For the products with an
odour removal program)
• Excess amount of laundry may have been placed => Place specified amount of laundry.
• Steam application time may be selected in low level => Choose a program with high
amount of steam.
A
If the problem persists after following the instructions in this section, contact your
vendor or an Authorized Service. Never try to repair your product yourself.