Loading ...
Loading ...
Loading ...
Readthese instructionsand this manual in
its entirety beforeyou attemptto assemble
or operateyour newtrimmer.
iMPORTANT: This trimmeris shipped
WITHOUTOIL OR GASOLINEin the
engine.
Yournew trimmerhas beenassembled
at the factorywith the exceptionof those
parts left unassembledfor shipping
purposes. All partssuch as nuts,wash-
ers, bolts,etc., necessaryto completethe
assemblyhavebeen placed in the parts
bag. Toensuresafeand properoperation
of your trimmer,all parts and hardwareyou
assemblemustbe tightenedsecurely. Use
the correcttools as necessaryto ensure
propertightness.
When right hand (RH) or left hand(LH) is
mentionedin this manual,it meanswhen
you are in the operatingposition(standing
behindthe handle).
LoosePartsPackedSeparately
20 oz.
Bottle of oH
Trimmer Lines
(2) Sets
(0.!55 diameter
x 18.75 inches long)
TO REMOVE TRmMMER FROM
CARTON
1. Remove loose parts included with trim-
mer.
2. Cut down two end corners of carton
and lay end panel down flat.
3. Remove all packing materials.
4. Roll trimmer out of carton and check
carton thoroughly for additional loose
parts.
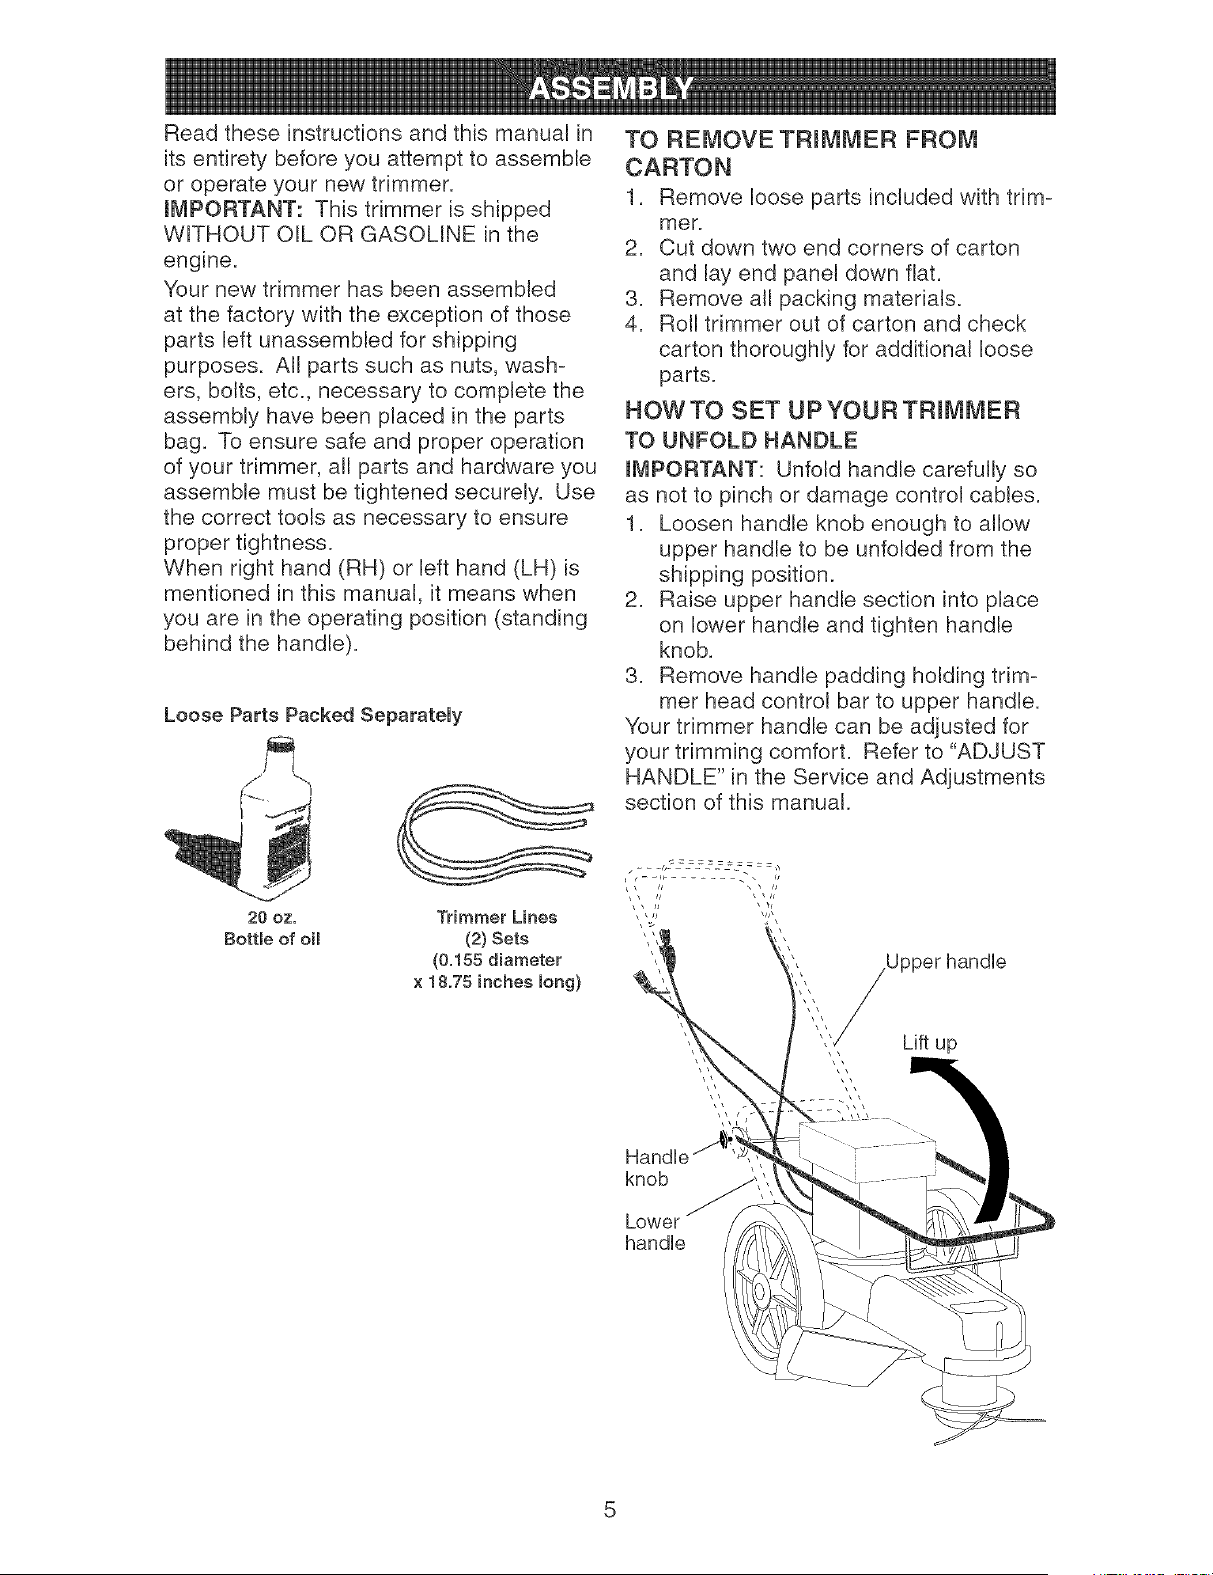
HOW TO SET UP YOUR TRmMMER
TO UNFOLD HANDLE
mMPORTANT: Unfold handle carefully so
as not to pinch or damage control cables.
1. Loosen handle knob enough to allow
upper handle to be unfolded from the
shipping position.
2. Raise upper handle section into place
on lower handle and tighten handle
knob.
3. Remove handle padding holding trim-
mer head control bar to upper handle.
Your trimmer handle can be adjusted for
your trimming comfort. Refer to "ADJUST
HANDLE" in the Service and Adjustments
section of this manual.
Upper handb
HandUe
knob
Lower
handle
Lift up
Loading ...
Loading ...
Loading ...