Loading ...
Loading ...
Loading ...
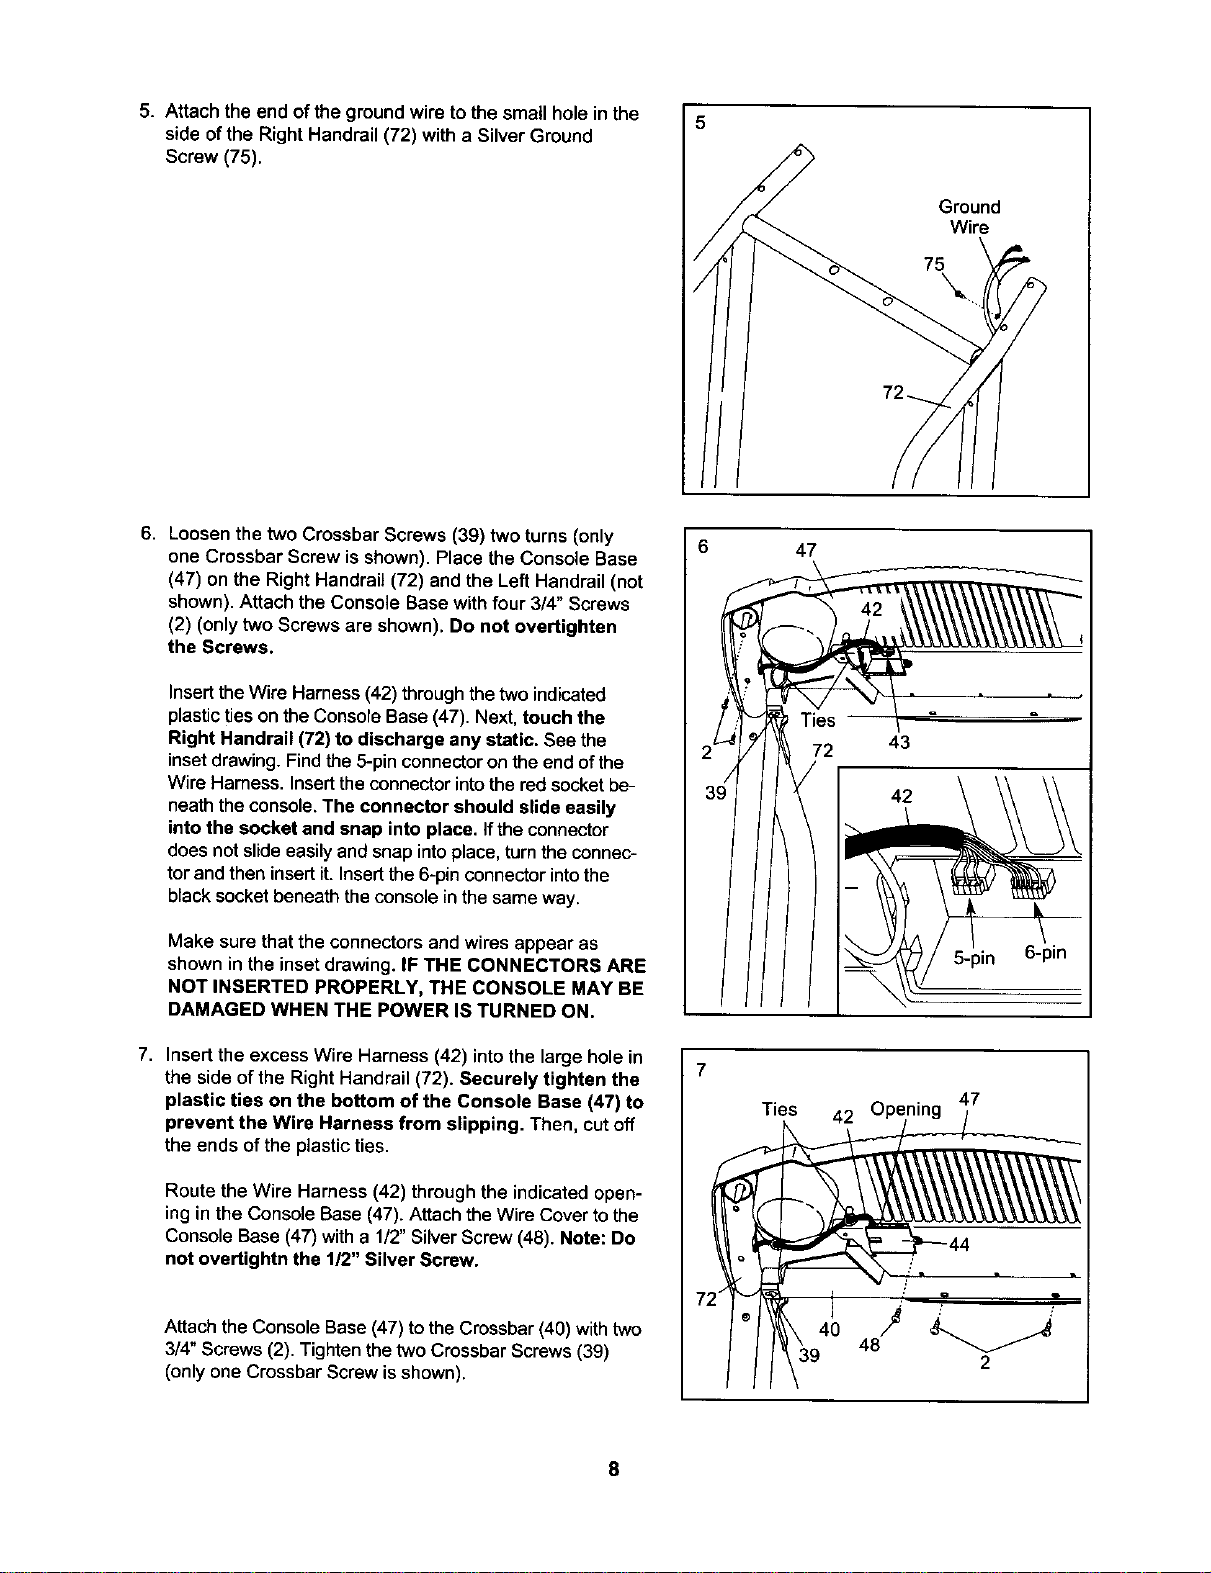
5. Attach the end ofthe groundwire tothe small hole in the
side of the Right Handrail(72) with a SilverGround
Screw (75).
5
Ground
Wire
\
6. Loosenthe two Crossbar Screws (39) two turns(only
one Crossbar Screwis shown). Place theConsole Base
(47) on the RightHandrail (72) and the LeftHandrail (not
shown).Attach the Console Basewithfour 3/4" Screws
(2) (onlytwo Screws are shown). Do not overtighten
the Screws.
Insert theWire Harness (42) through the two indicated
plasticties on theConsoleBase (47). Next, touch the
Right Handrail (72) to discharge any static. See the
insetdrawing.Findthe 5-pinconnectoronthe end ofthe
Wire Harness. Inserttheconnectorintothered socketbe-
neaththeconsole.The connector should slide easily
intothe socket and snap into place. Iftheconnector
does notslideeasilyand snapintoplace,turntheconnec-
torand then insertit.Insertthe6-pinconnectorintothe
blacksocketbeneaththeconsolein the sameway.
Make sure that the connectors and wires appear as
shown in the inset drawing. IF THE CONNECTORS ARE
NOT INSERTED PROPERLY, THE CONSOLE MAY BE
DAMAGED WHEN THE POWER IS TURNED ON.
7. Insert the excess Wire Harness (42) into the large hole in
the side of the Right Handrail (72). Securely tighten the
plastic ties on the bottom of the Console Base (47) to
prevent the Wire Harness from slipping. Then, cut off
the ends of the plastic ties.
Route the Wire Harness (42) throughthe indicatedopen-
ing in the Console Base (47). Attach the Wire Cover to the
Console Base (47) with a 1/2" Silver Screw (48). Note: Do
not overtightn the 1/2" Silver Screw.
Attach the Console Base (47) tothe Crossbar (40) withtwo
3/4" Screws (2). Tighten the two Crossbar Screws (39)
(only one Crossbar Screw is shown).
6 47
72 43
5-pin 6-pin
7
Ties 42
47
7;
® 40 48J :' "
I 2
8
Loading ...
Loading ...
Loading ...