KENMORE SUPER CAPACITY PLUS CLOTHES DRYER
SECADORA KENMORE DE CAPACIDAD SUPERIOR "PLUS"
AUTO
MOISTURE
SENSING
8O 70
TIMED DRY
FABRIC SIGNAL
TEMPERATURE END OF CYCLE
PUSH TO START
KNtT / NORMAL /
CASUAL PERM PRESS
_UM _E_UM HI_H
O O
DELICATE COTTON
LOW _ ® _E_H
LOW
O
f
Heavy Duty Super Capacltv Plus QuletPak l
90 Ser_es
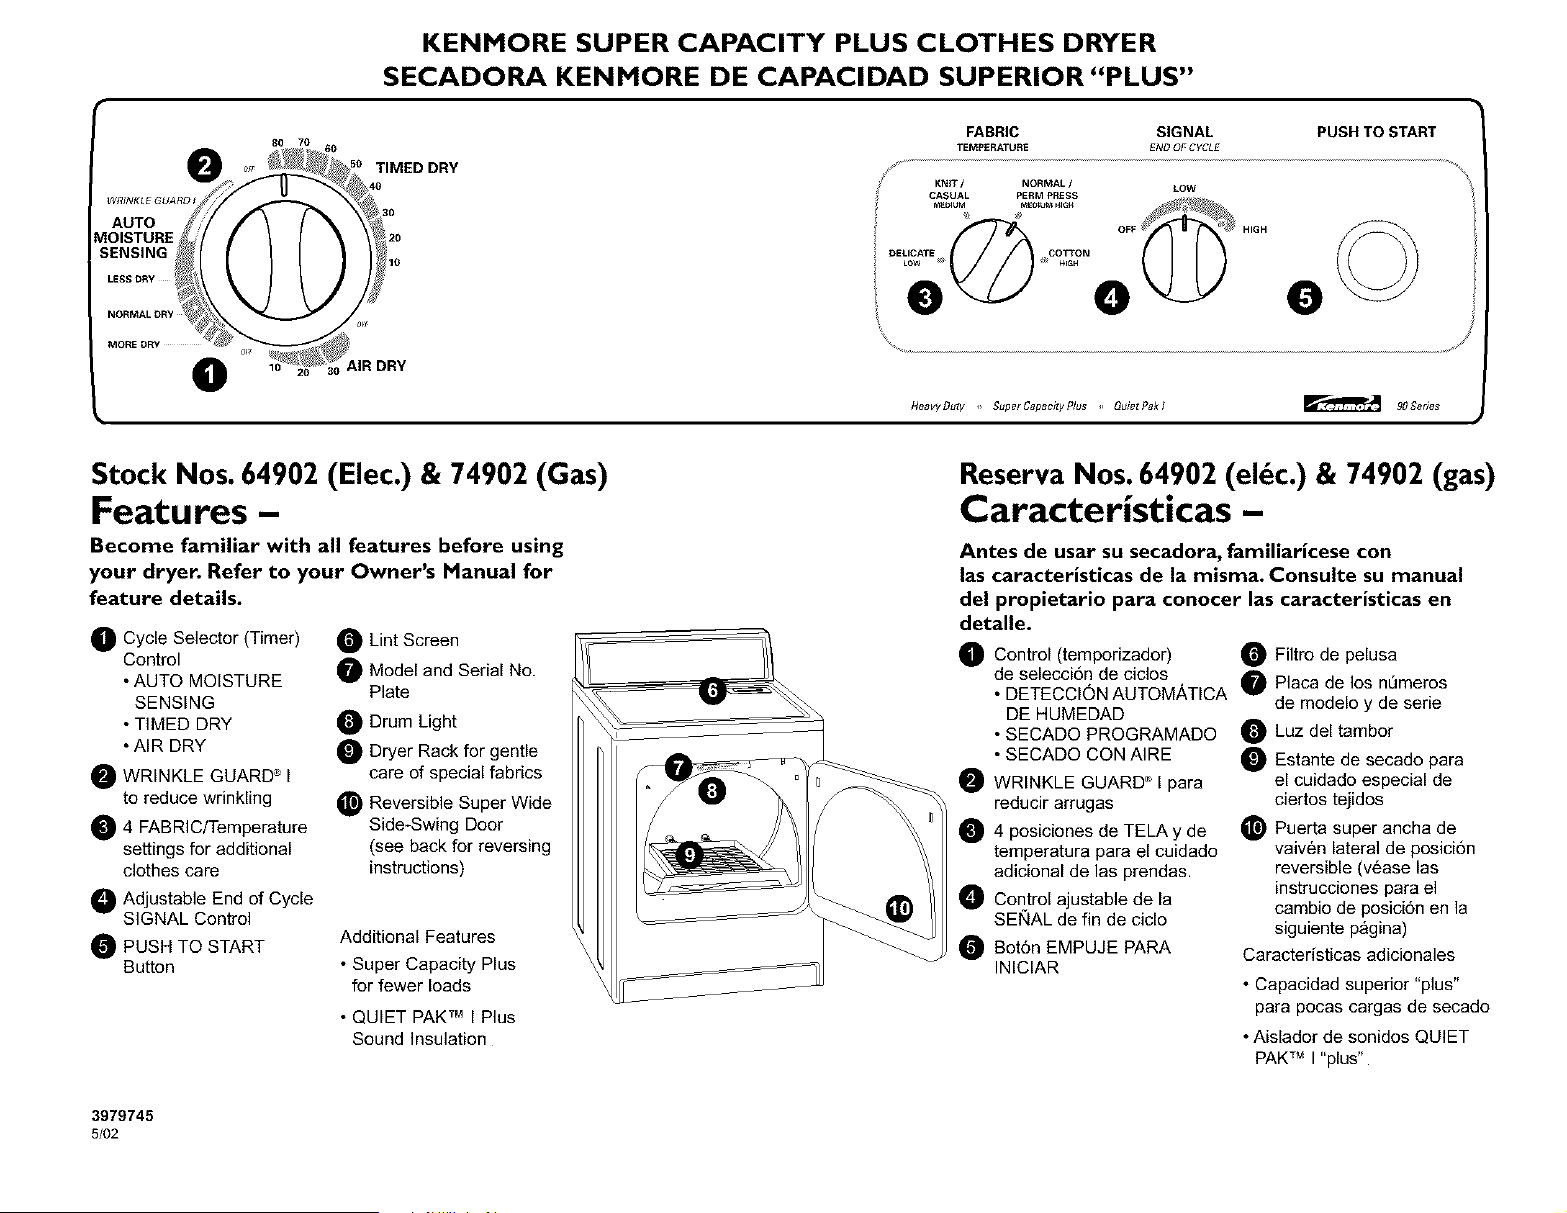
Stock Nos. 64902 (Elec.) & 74902 (Gas)
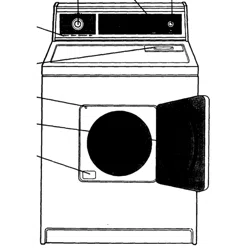
Features -
Become familiar with all features before using
your dryer. Refer to your Owner's Manual for
feature details.
O Cycle Selector (Timer)
Control
• AUTO MOISTURE
SENSING
• TIMED DRY
• AIR DRY
O WRINKLE GUARD _ I
to reduce wrinkling
4 FABRiC/Temperature
settings for additional
clothes care
_ Adjustable End of
Cycle
SIGNAL Control
PUSH TO START
Button
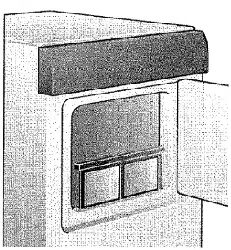
_Lint Screen
Model and Serial No.
Plate
O Drum Light
_ Dryer Rack for gentle
care of special fabrics
Reversible Super Wide
Side-Swing Door
(see back for reversing
instructions)
Additional Features
• Super Capacity Plus
for fewer loads
• QUIET PAK TM I Plus
Sound Insulation
Reserva Nos. 64902 (eldc.) & 74902 (gas)
Caracteristicas -
Antes de usar su secadora, familiaricese con
las caracteristicas de la misma. Consulte su manual
del propietario para conocer las caracteristicas en
detalle.
Control (temporizador)
O
_ Filtro de pelusa
de selecci6n de ciclos
• DETECCION AUTOMATICA O Placa de los nQmeros
DE HUMEDAD de modelo y de serie
• SECADO PROGRAMADO _ Luz del tambor
• SECADO CON AIRE _ Estante de secado para
WRINKLE GUARD _ I para el cuidado especial de
reducir arrugas ciertos tejidos
4 posiciones de TELA y de
temperatura para el cuidado
adicional de las prendas.
Control ajustable de la
_} Puerta super ancha de
vaiv6n lateral de posici6n
reversible (v6ase las
instrucciones para el
cambio de posici6n en la
siguiente p&gina)
Caracteristicas adicionales
• Capacidad superior "plus"
para pocas cargas de secado
SEi_IAL de fin de ciclo
_ Bot6n EMPUJE PARA
INICIAR
• Aislador de sonidos QUIET
PAKTM I "plus"
3979745
5/02
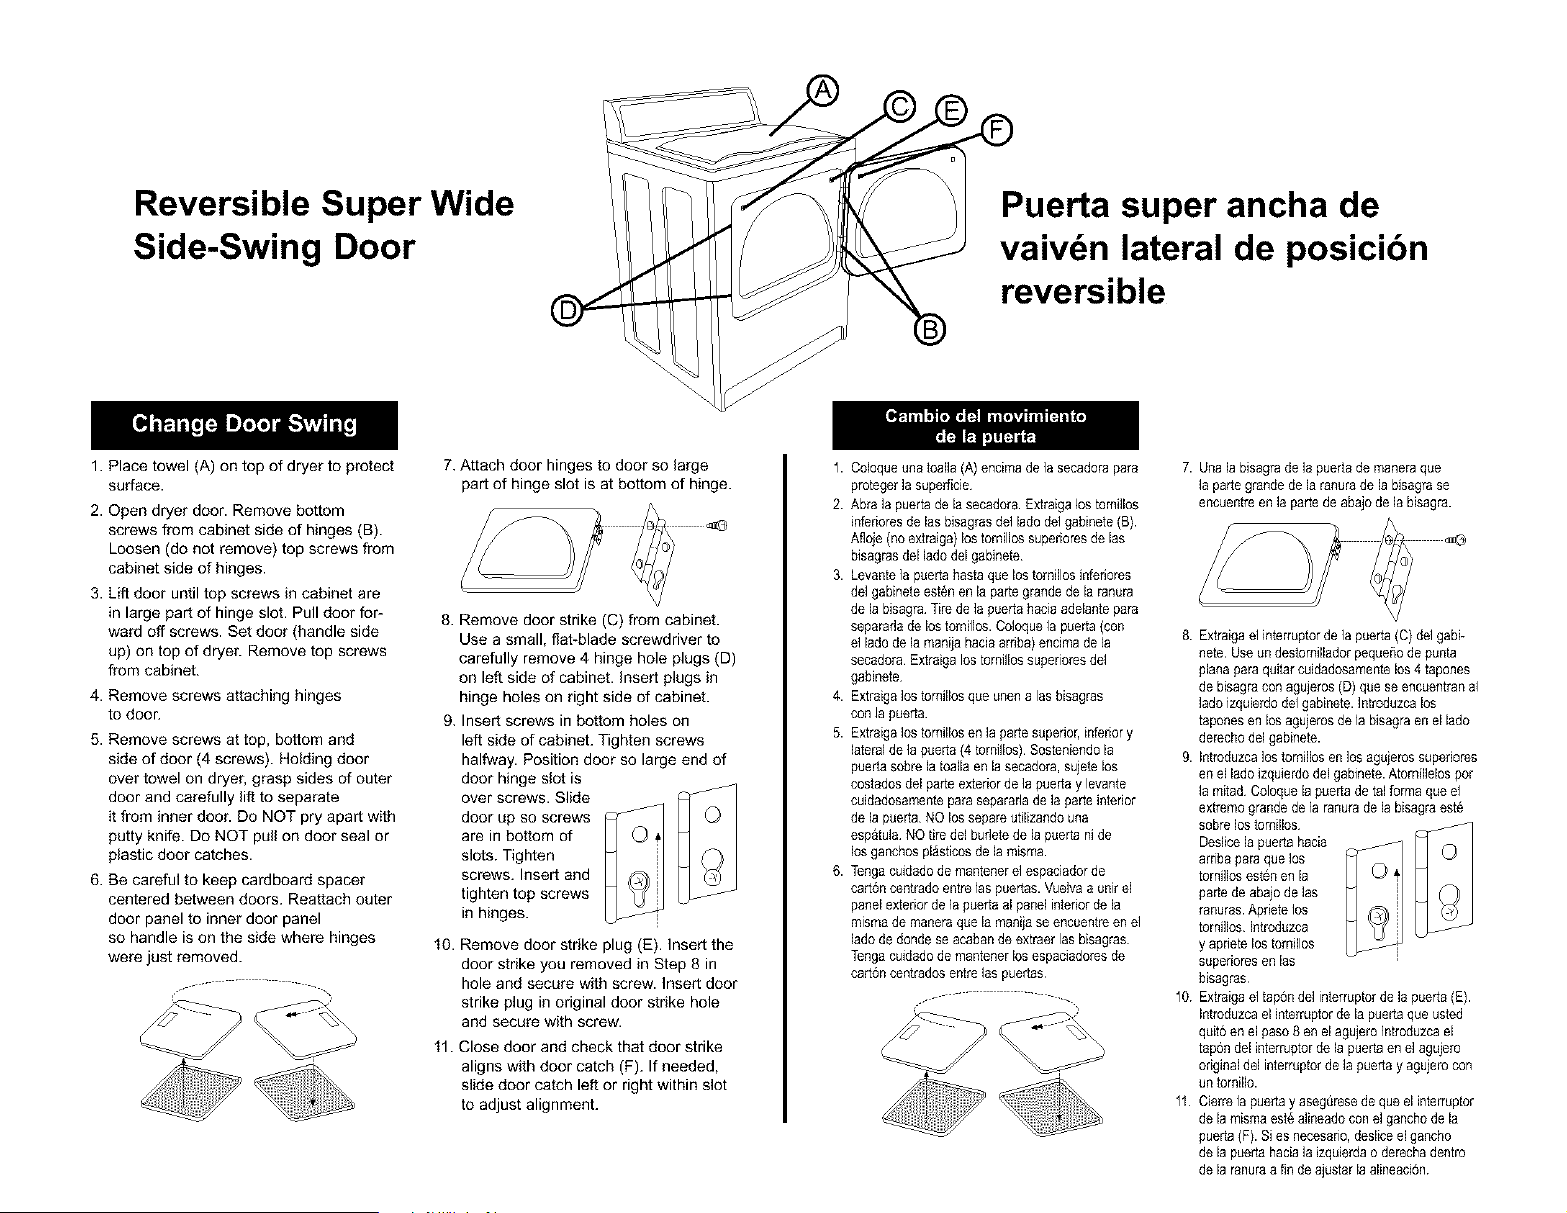
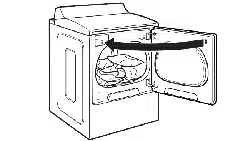
Reversible Super Wide
Side-Swing Door
Puerta super ancha de
vaiv n lateral de posicion
reversible
1. Place towel (A) on top of dryer to protect
surface.
2. Open dryer door. Remove bottom
screws from cabinet side of hinges (B).
Loosen (do not remove) top screws from
cabinet side of hinges.
3. Lift door until top screws in cabinet are
in large part of hinge slot. Pull door for-
ward off screws. Set door (handle side
up) on top of dryer. Remove top screws
from cabinet.
4. Remove screws attaching hinges
to door.
5. Remove screws at top, bottom and
side of door (4 screws). Holding door
over towel on dryer, grasp sides of outer
door and carefully lift to separate
it from inner door. Do NOT pry apart with
putty knife. Do NOT pull on door seal or
plastic door catches.
6. Be careful to keep cardboard spacer
centered between doors. Reattach outer
door panel to inner door panel
so handle is on the side where hinges
were just removed.
...- - . . ..
7. Attach door hinges to door so large
part of hinge slot is at bottom of hinge.
8. Remove door strike (C) from cabinet.
Use a small, flat-blade screwdriver to
carefully remove 4 hinge hole plugs (D)
on left side of cabinet, insert plugs in
hinge holes on right side of cabinet.
9. Insert screws in bottom holes on
left side of cabinet. Tighten screws
halfway. Position door so large end of
door hinge slot is
over screws. Slide
door up so screws
are in bottom of
slots. Tighten
screws. Insert and
tighten top screws
in hinges.
10.
Remove door stnke plug (E). Insert the
door strike you removed in Step 8 in
hole and secure with screw. Insert door
strike plug in original door strike hole
and secure with screw.
11. Close door and check that door strike
aligns with door catch (F). If needed,
slide door catch left or right within slot
to adjust alignment.
1. Coloqueunatoalla(A)encimade]asecadorapard
protegerlasuperficie
2. Abralapuertadela secadora.Extraigalostornillos
inferioresdelasbisagrasde1ladode1gabinete(B).
Afloje(noextraiga)lostornillossuperioresdelas
bisagrasdelladodel gabinete
3. Levante]apuertahastaquelos[ornillosinfefiores
de1gabineteestenenla partegrandedelaranura
dela bisagraTiredelapuertahaciaadelantepard
separadadelostornillos.Coloquelapuerta(con 8.
el lad0dela rnanijahaciaarriba)encimadela
secadoraExtraigalostornillossuperioresdel
gabinete
4. Extraigalostornillosqueunenalas bisagras
conla puerta
5. Extraigalostornillosenla partesuperior,inferiory
lateraldela puerta(4tornillos) S0steniendola 9.
puertasobrela[oallaenlasecadora,sujetelos
costadosdel parteexteriorde]apuertay levante
cuidadosamen[epardsepararladela parteinterior
dela puertaNO lossepareutilizandouna
esp_tula NOtiredelbudetedelapuertani de
losganchospl_sticosdela misrna.
6. Tengacuidadodernantenerelespaciadorde
cart6ncentradoentrelaspuertas.Vuelvaa unirel
panelexteriordelapuertaal panelinteriordela
mismademaneraquelamanijaseencuentreenel
ladodedondeseacabandeextraerlasbisagras
Tengacuidadodemantenerlosespadadoresde
cart6ncentradosentrelaspuertas
..--" ....... 10
. ""-.7
7. Unalabisagrade]apuertademaneraque
la partegrandedela ranuradelabisagrase
encuentreenla partedeabajodelabisagra.
11.
Extraigael interruptordelapuerta(C)de1gabi-
nete UseundestornilladorpequeSodepunta
planaparaquJtarcuJdadosamentelos4tapones
debisagraconagujeros(D)queseencuentranal
ladoizquierdode1gabinete.Introduzcalos
taponesen losagujerosdela bisagraenel lado
derechodelgabinete.
Introduzcalostornillosenlosagujerossupedores
enel ladoizquierdodel gabinete.Atornillelospor
la mitad Coloquelapuertadetalformaqueel
extremograndedela ranuradelabisagraeste
sobrelostornillos
Deslicela puertahacia
arribaparaquelos
tornillosestenenla
partedeabajodelas
ranuras.Aprietelos
tornillos.Introduzca
y apnetelostornillos
superioresenlas
bisagras
Extraigael tapondelinterruptordelapuerta(E).
IntroduzcaelJnterruptordela puertaqueusted
quit6enel paso8enel agujeroIntroduzeael
tapondelinterruptordela puertaenelagujero
originaldel interruptordela puertayagujerocon
untornillo.
Cierrela puertay asegQresedeque elinterruptor
dela mismaest6alineadoconel ganchodela
puerta(F).Si esnecesario,desliceel gancho
dela puertahaciala izquierdaoderechadentro
dela ranuraafin deajustarla alineacJ6n