Loading ...
Loading ...
Loading ...
7
Let’s get started!
Step 1: Testing
Before you install the AC, let’s test it to make sure it made it safely to your home and your outlet
has the proper power output to run your AC. Place it on a flat surface, plug it directly into a wall
outlet (do not use a power strip or other device), and turn it on. Next, use the Mode button on your
control panel to change the AC into Cool Mode and press the down arrow to set the temperature
to the lowest setting. After 3 minutes, the AC should be blowing cool air. If so, please continue to
the next step. If not, see detailed troubleshooting tips at support.tcl.com.
Step 2: Installation
UNIVERSAL WALL-SLEEVE DIMENSIONS
WARNING: High Voltage: Disconnect ALL power before servicing or installing this unit.
Multiple power may be present. Failure to do so many cause property damage, personal
injury, or death.
WARNING: During installation, it is the responsibility of the installer to make sure the
surrounding area, including directly under the unit, is free and clear of objects including but
not limited to persons (especially children), pets, and/or other valuable items.
1. Identify which brand your wall-sleeve is and ensure its dimensions match those in the
chart below.
Type
Wall-sleeve Dimension
Height Width Depth
Standard Dimension 15 3/4” 26” 20”
2. The wall sleeve used to mount the air conditioner must be in sound structural condition and
have a rear grill that is securely attached to the sleeve, or rear flange that serves as a stop for
the air conditioner.
3. Remove the old air conditioner from the wall sleeve.
4. Clean the interior of the wall sleeve, do not disturb the seals.
5. Make sure the sleeve is securely installed and in sound structural condition.
6. Measure the size of the sleeve to ensure the air conditioner will fit.
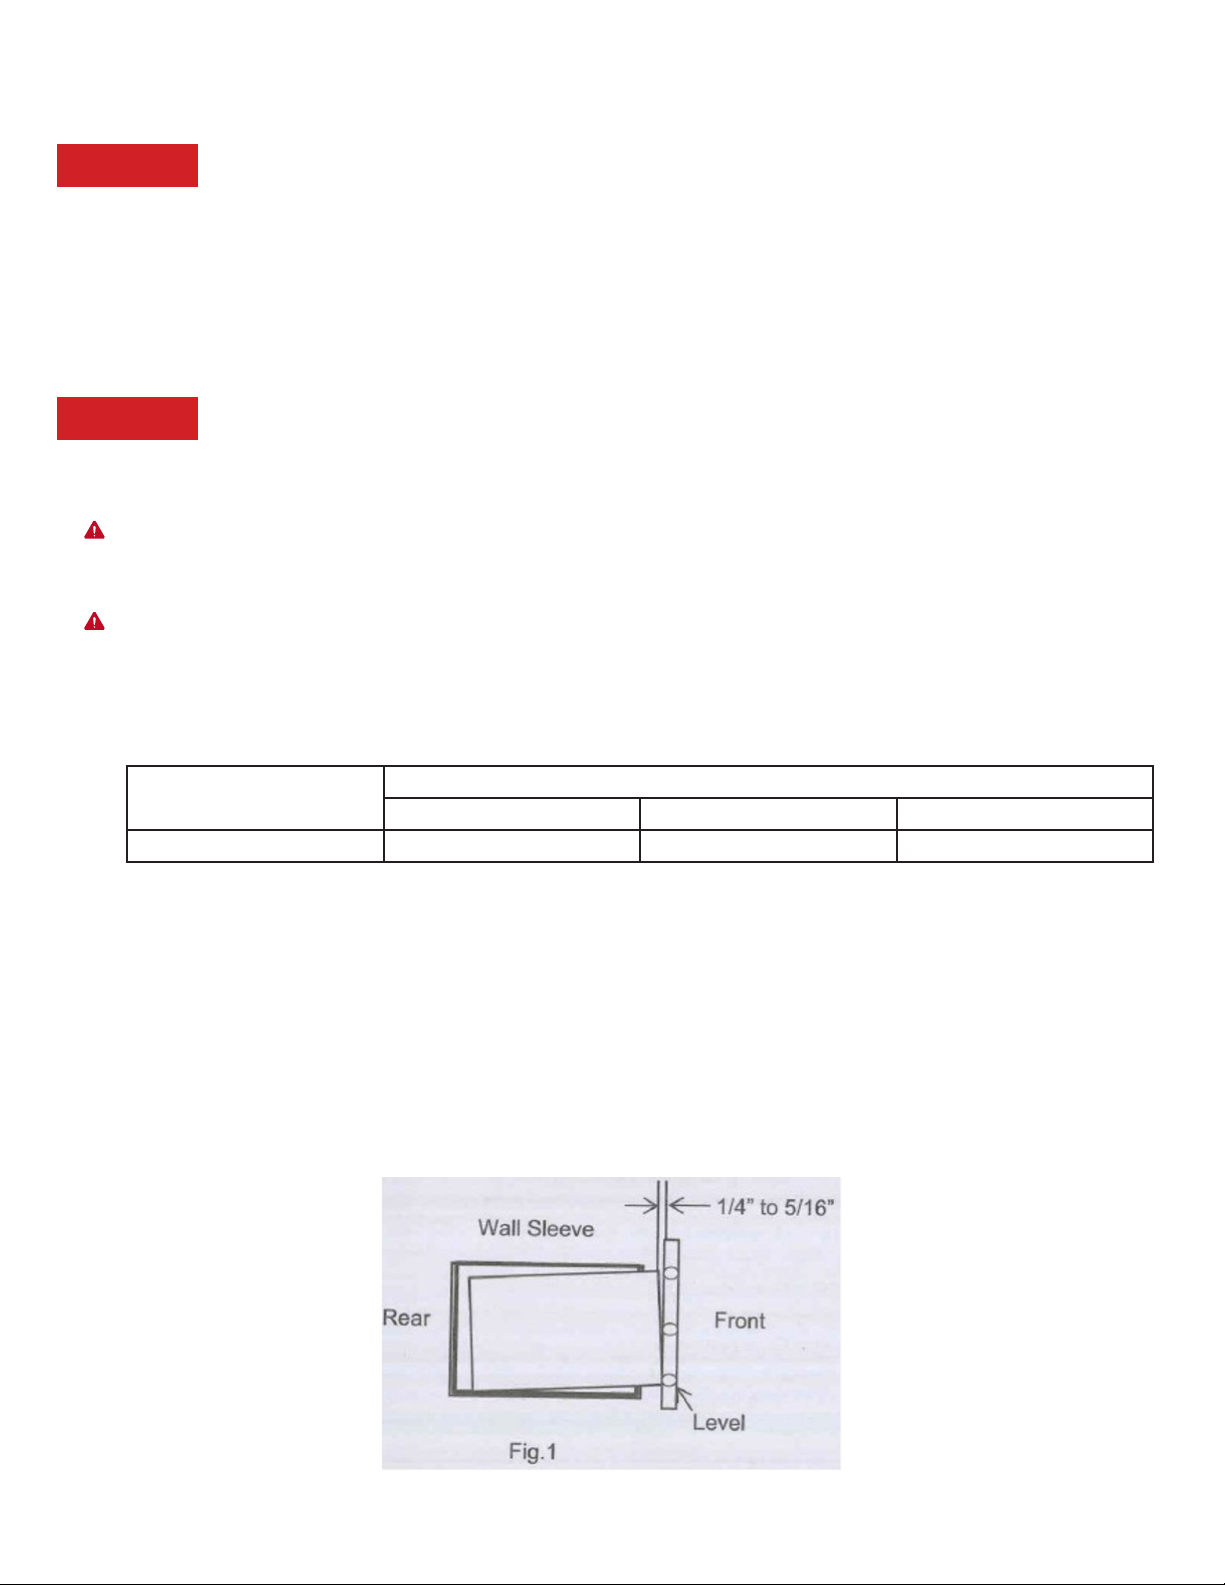
7. Slope – ensure your unit has a rearward slope to drain any accumulated condensation.
Loading ...
Loading ...
Loading ...