Loading ...
Loading ...
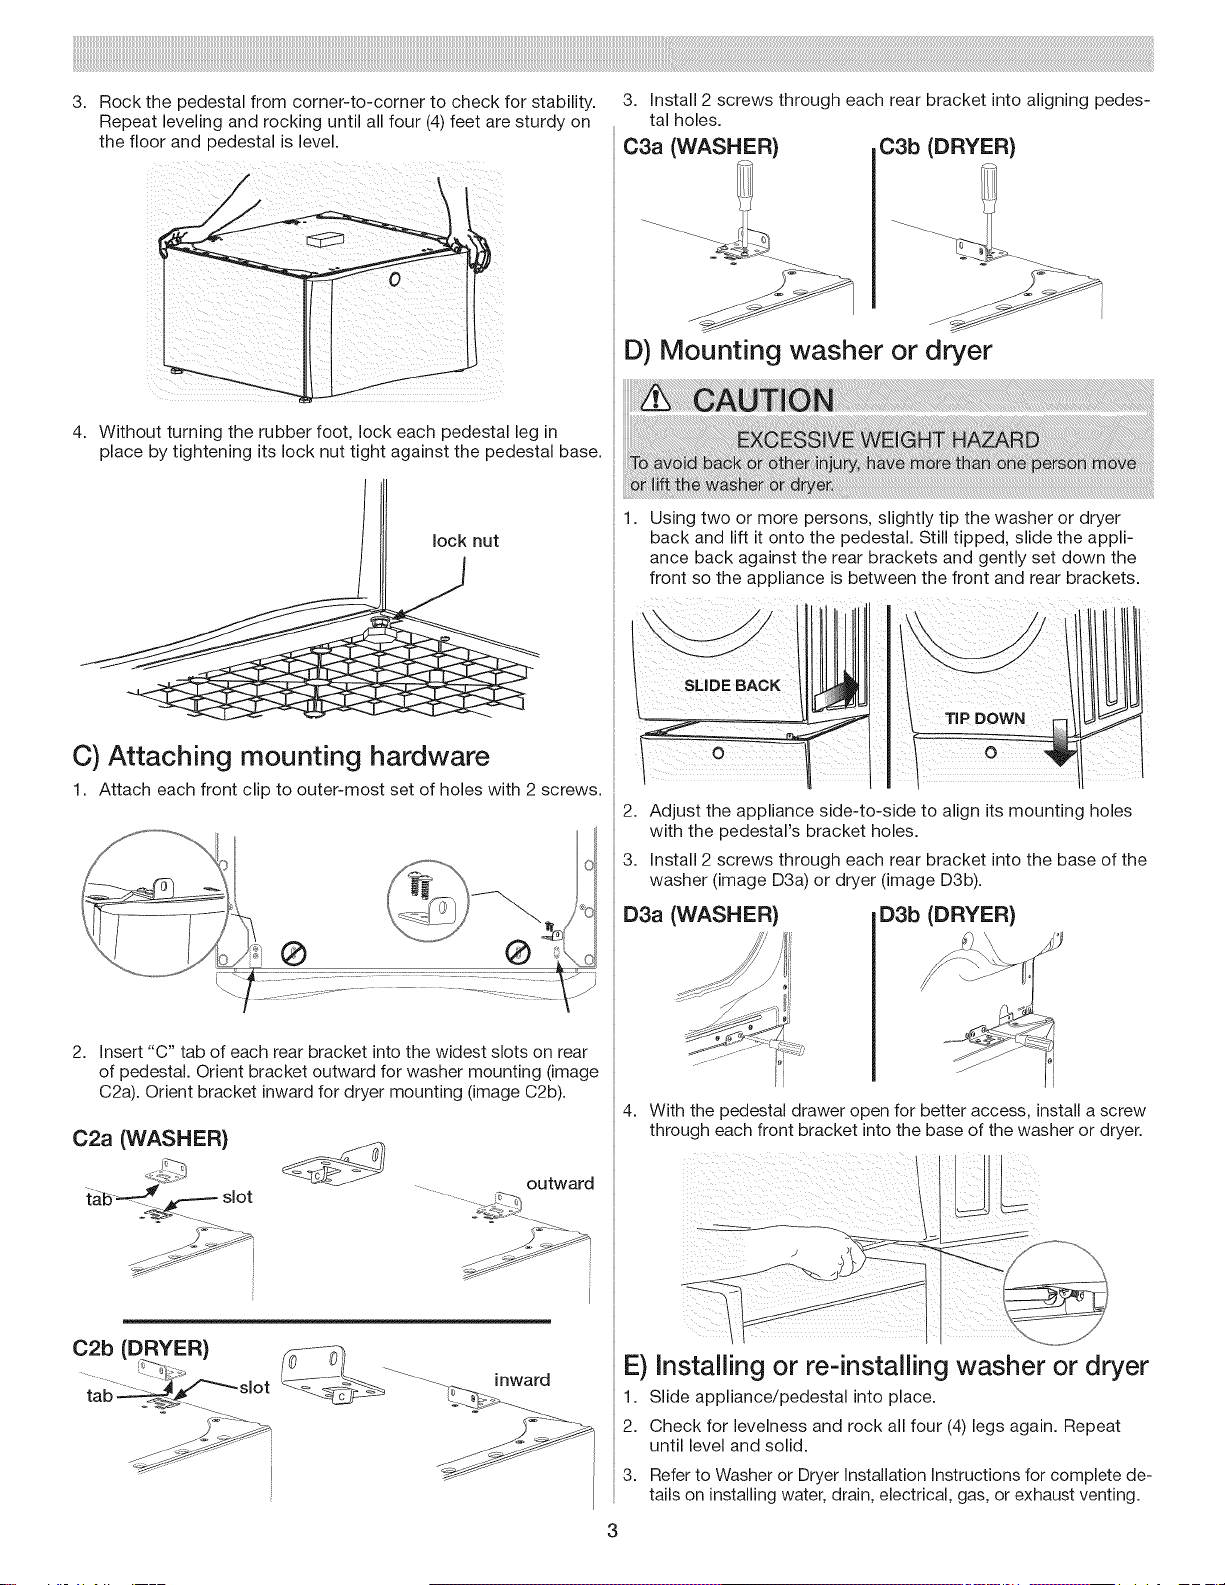
3. Rock the pedestal from corner-to-corner to check for stability.
Repeat leveling and rocking until all four (4)feet are sturdy on
the floor and pedestal is level.
4. Without turning the rubber foot, lock each pedestal leg in
place by tightening its lock nut tight against the pedestal base.
lock nut
C) Attaching mounting hardware
1. Attach each front clip to outer-most set of holes with 2 screws.
®
2. Insert "C" tab of each rear bracket into the widest slots on rear
of pedestal. Orient bracket outward for washer mounting (image
C2a). Orient bracket inward for dryer mounting (image C2b).
C2a (WASHER}
tab--_._.:>__---slot
outward
,owar
3. Install 2 screws through each rear bracket into aligning pedes-
tal holes.
C3a (WASHER} C3b (DRYER}
D) Mounting washer or dryer
Using two or more persons, slightly tip the washer or dryer
back and lift it onto the pedestal. Still tipped, slide the appli-
ance back against the rear brackets and gently set down the
front so the appliance is between the front and rear brackets.
2.
3.
D3a (WASHER}
Adjust the appliance side-to-side to align its mounting holes
with the pedestal's bracket holes.
Install 2 screws through each rear bracket into the base of the
washer (image D3a) or dryer (image D3b).
D3b (DRYER}
4. With the pedestal drawer open for better access, installa screw
through each front bracket intothe base of the washer or dryer.
E) Installing or re-installing washer or dryer
1. Slide appliance/pedestal into place.
2. Check for levelness and rock all four (4) legs again. Repeat
until level and solid.
3. Refer to Washer or Dryer Installation Instructions for complete de-
tails on installing water, drain, electrical, gas, or exhaust venting.
Loading ...
Loading ...
Loading ...