Loading ...
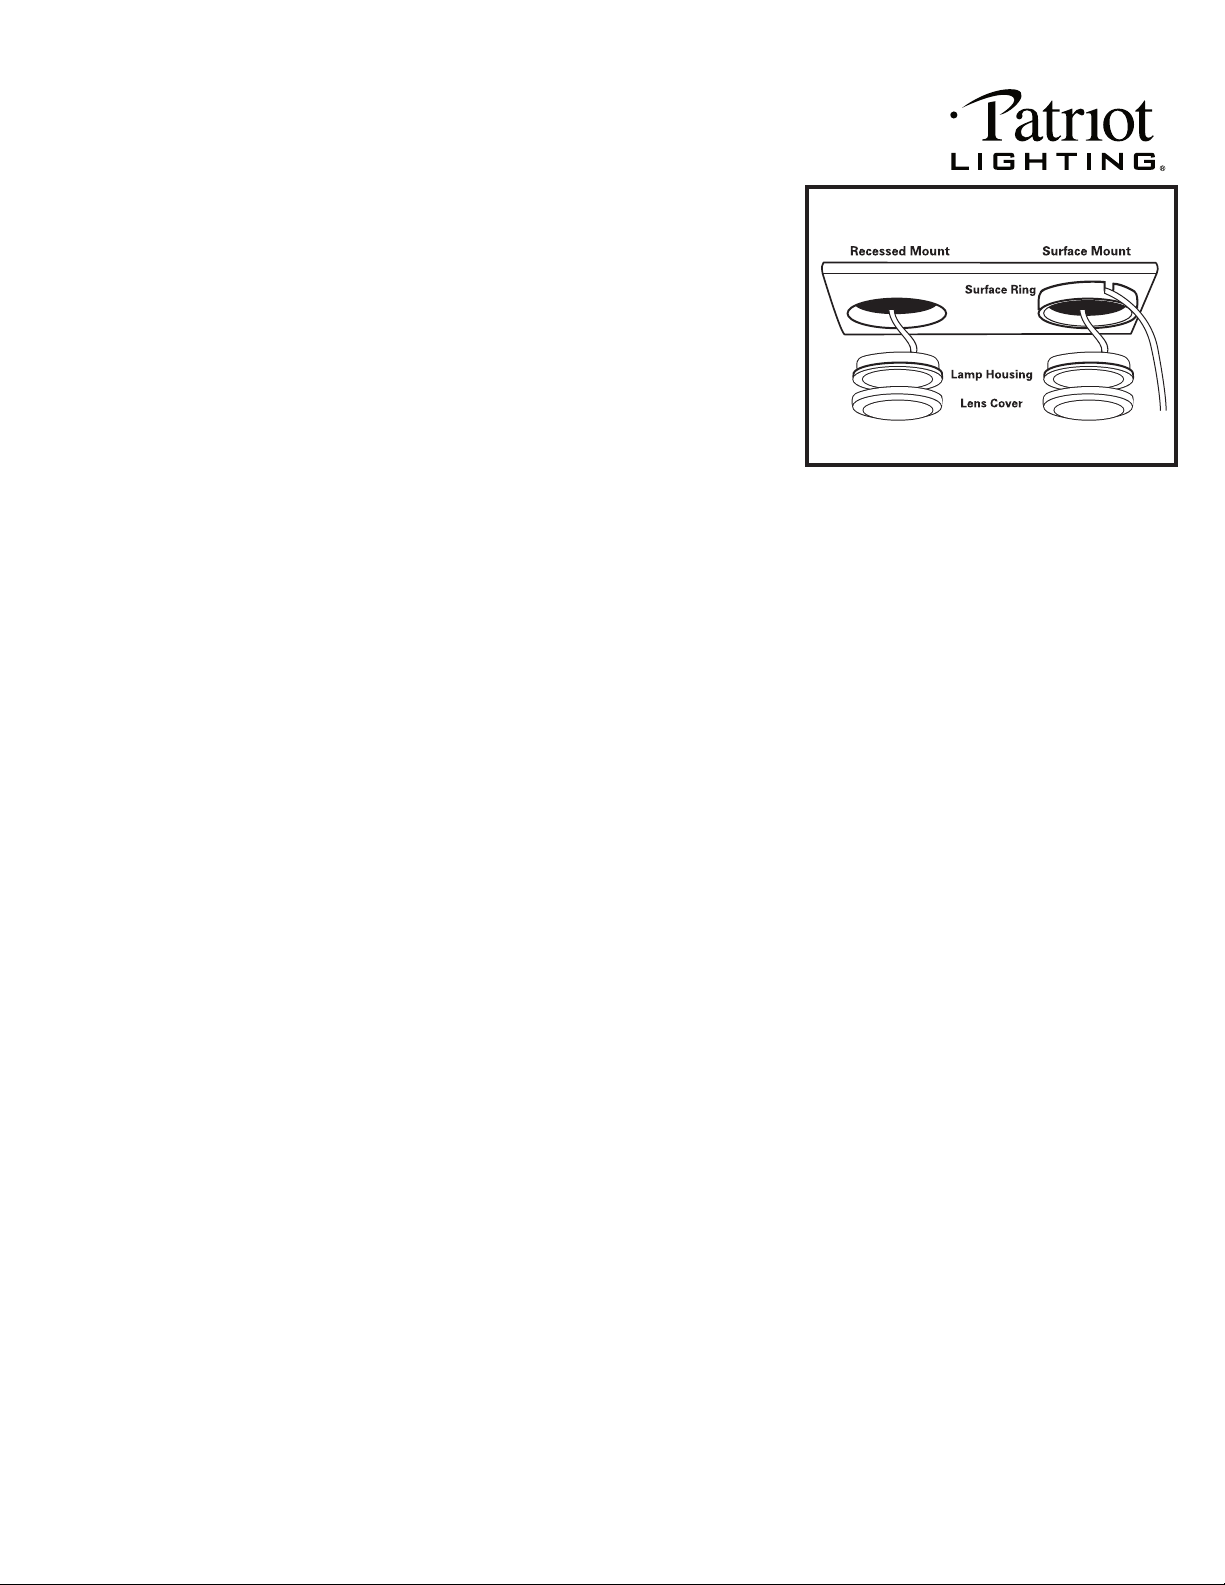
SURFACE MOUNTING: See Figure 1
1. Locate desired position for the cabinet light.
2. Remove the lens cover from housing by rotating counter-clockwise.
3. Route the wire through surface ring notch, or if desired drill a hole
through the mounting surface and route wires through hole. Be sure
to position the surface ring so the notch faces the rear of the cabinet.
4. Make sure there is no contact between the hot lamp, lampholder, or
reflector, and any combustible material such as plastic or paper goods,
or the wire insulation.
5. Mount surface ring and housing assembly with the two wood screws
provided.
6. Replace lens cover by rotating clockwise.
7. Route unit's wire to "Wire Plug". CAUTION: Do not route wires and
extension cords through walls. Use for external cabinet applications only.
8. Not intended for permanent hardwire installation inside built-in furnishings such as kitchen cabinets or trophy
cases without the use of the hardwire junction box sold separately (346-6472). Note: The hardwire junction
box has two output connection ports, one on each end. One box can support two separate runs, each up to
the puck light quantity sold in kits (or up to ten with multiple kits recombined as outlined on previous page).
Each run from the hardwire junction box will require an additional 12” or 24“ extension (sold separately) to
reach from junction box to the first puck light.
9. Route plug to nearest convenience outlet. Do not conceal power supply cord (or direct wire box) inside walls,
ceilings, or floors.
10. Multiple pucks can be linked together with 12" (included with kits) and 24" extensions (sold separately).
11. Use the puck light with no tail wire as the last puck in the series.
RECESSED MOUNTING: See Figure 1
CAUTION!
Risk of fire! Install as recessed only where top of cabinet is not enclosed.
1. Drill a 2-1/8" hole in the desired location.
2. Remove the lens cover from housing by rotating counter-clockwise.
3. The surface ring is not used for recessed applications. This can be discarded.
4. Feed wires through hole and push light housing into hole. Make sure there is no contact between the hot lamp,
lampholder, or reflector, and the wire or any combustible material such as plastic or paper goods. Using the
cord clips included, secure the light supply leads to avoid the likelihood of the leads contacting the cabinet light.
5. Replace lens cover by rotating clockwise.
6. Route power cord to nearest convenience outlet. CAUTION: Do not route wires and extension cords through
walls. Use for external cabinet applications only.
7. Not intended for permanent hardwire intallation inside built-in furnishings such as kitchen cabinets or trophy
cases without the use of the direct wire box sold separately (346-6472). Note: The hardwire junctionbox has
two output connection ports, one on each end. One box can support two separate runs, each up to the puck
light quantity sold in kits (or up to ten with multiple kits recombined as outlined on previous page). Each run
from the hardwire junction box will require an additional 12” or 24” extension (sold separately) to reach from
junction box to the first puck light.
8. Do not conceal power supply cord (or direct wire box) inside walls, ceilings, or floors.
9. Multiple pucks can be linked together with 12" (included with 3-pack sand 5-packs) and 24" extensions (sold
separately).
10. Use the puck light with no tail wire as the last puck in the series.
CONTINED ON NEXT PAGE
©2011 Distributed by Menard, Inc
Eau Clarie, WI 54703 Made in China
Figure 1
Loading ...