11
WATER
PURIFIER
온수
잠금

2
온수
잠금
Dear customers,
Thank you for purchasing CUCKOO Water Purier.
Please keep this manual (including the Warranty).
This manual will be of great help when you have any question or when the
functions do not work properly.
Product Benets
Characteristics and Merits of CUCKOO Water Purier
This manual includes the warranty.
Please read this User manual before using the product. After reading this manual, keep it in a place that is easily
accessible to the user for future reference.
Caution : This product is for household use, and other uses (industrial, experimental, etc.) are prohibited.
In order to use this product for a long time without malfunction, please read this User Manual.
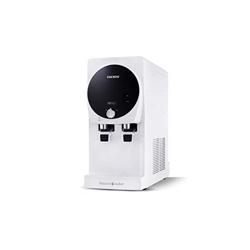
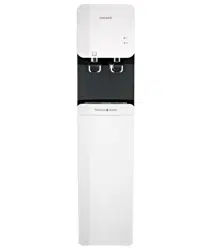
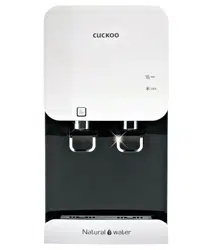
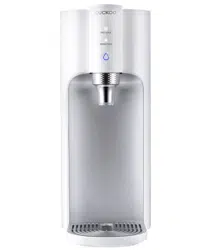
Nanopositive Filtering System
The Nanopositive ltering system provides clean and healthy mineral water.
Direct Flow Water Purier for Clean Water
This water purier does not contain a storage tank, instead it employs instantaneous heating and cooling methods to
provide hot, cold, or room temperature water immediately after the water has been ltered.
A Sophisticated Water Purier with Multiple Functions and Slim Design
The slim, compact and sophisticated design allows for efficient use of space without sacrificing the most important
functions of a water purier.
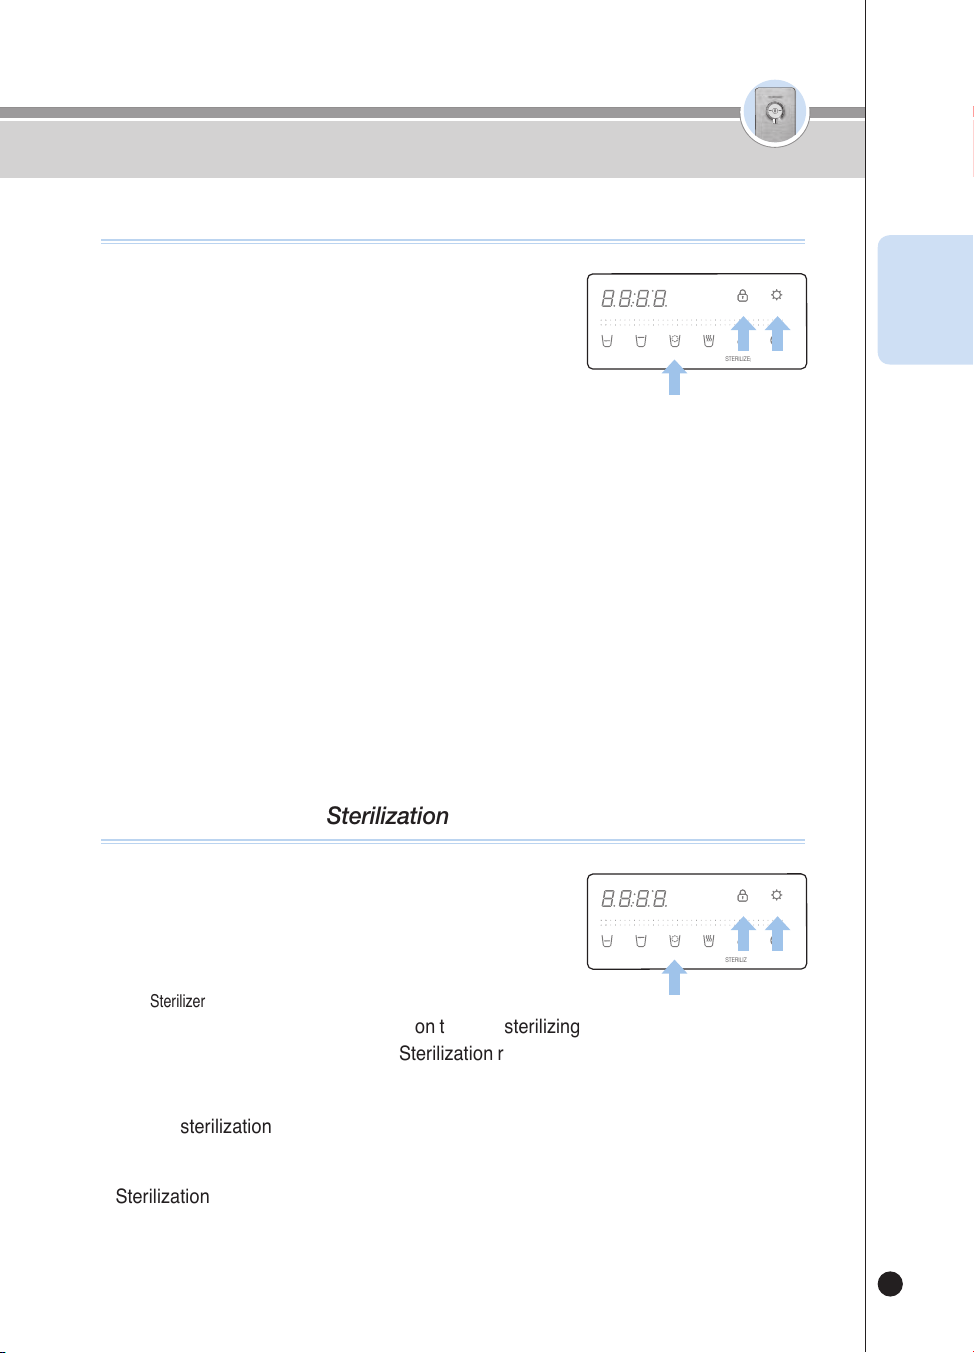
Electrolytic Sterilization System
This product employs an electrolytic sterilization system to ensure constant hygiene. You can sterilize the product
anytime you want.
Economical and Eco-Friendly Water Filtration System
By using the Nano Positive Filter we have created a highly economical, eco-friendly and zero waste water filtration
system.
Button Lock / Functional Lock
The product features a button lock and functional lock to prevent misuse by children or the elderly.
Water Leak Prevention System
The product is made to detect/block water leaks during use to ensure safe use of the Water Purier.
Non-Stop Flow Function
You can continuously dispense cold water, hot water, and room temperature water.
Fixed Quantity Dispensing
Highly Convenient function allowing you to dispense a xed quantity of a single cup (around 150cc(5.1oz)) or a half cup
(around 110cc(3.7oz)) of cold water, hot water or room temperature water.

온수
잠금
Characteristics and Merits of CUCKOO Electric
Water Purier
Safety Warnings
Cautions for Safe Use
Part Names/Accessories
Filtration Circuit / Water Filtration System
Details to Check before Use
How To Use
How To Clean Tray / How To Clean Main Body
How To Replace the Filters
Expected Filter Replacement Cycle /
Recommendations / Filter Arrangement
Please check before asking for Support
Product Specications
2
4 ~ 7
8 ~ 9
10 ~ 11
12
13
14 ~ 25
26 ~ 27
28
29
30 ~ 31
32
Before Use
During Use
Before Asking for
Support
Service Guide
CONTENTS
온수
잠금
온수
잠금
4
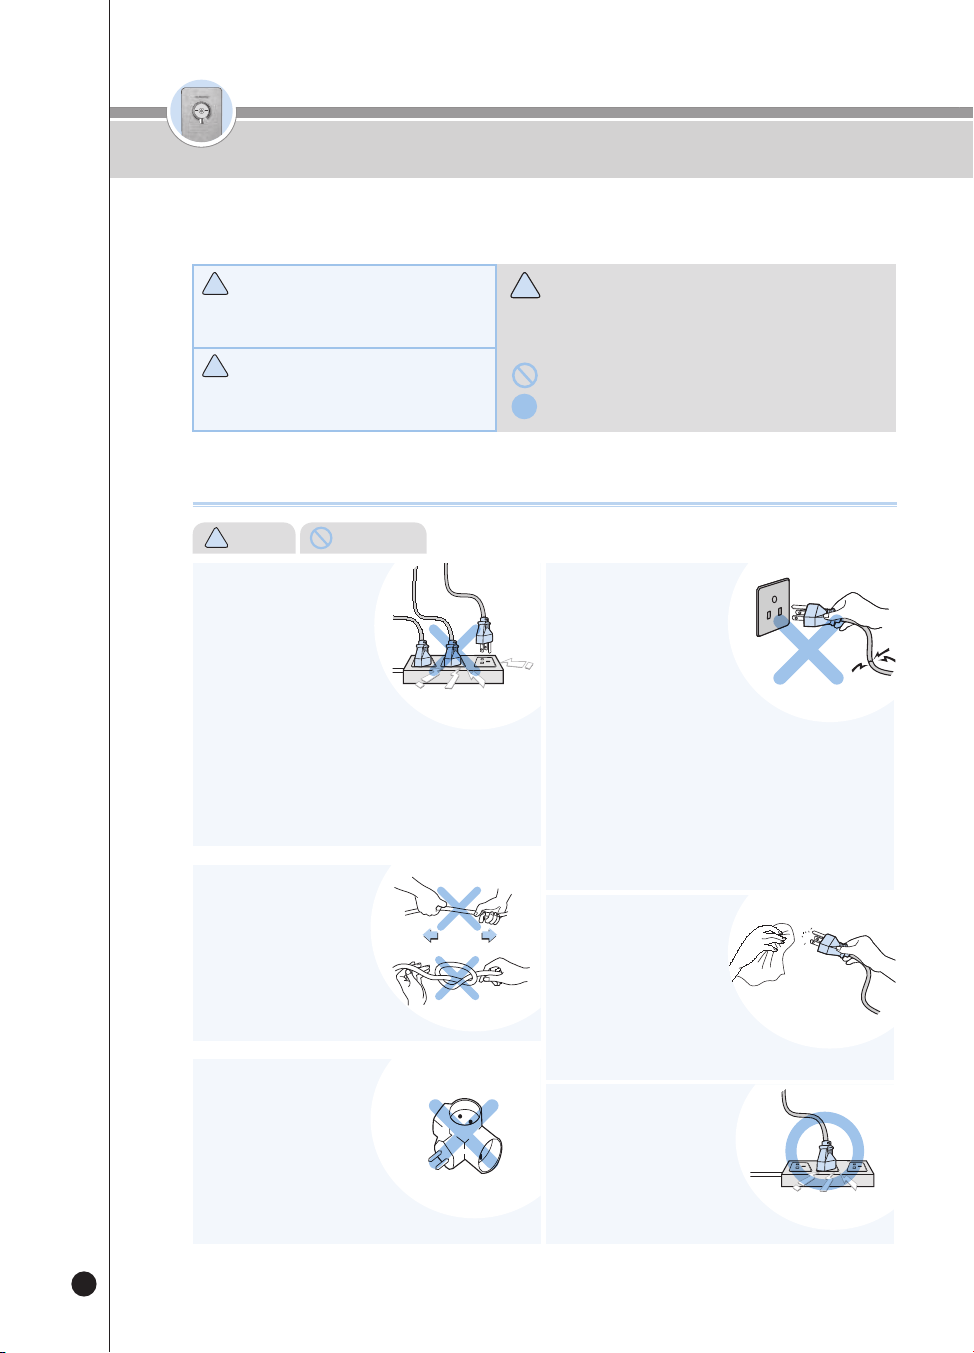
Do not use an attachable
multi-power outlet.
• It may cause a fire or electric shock.
About the Power Supply
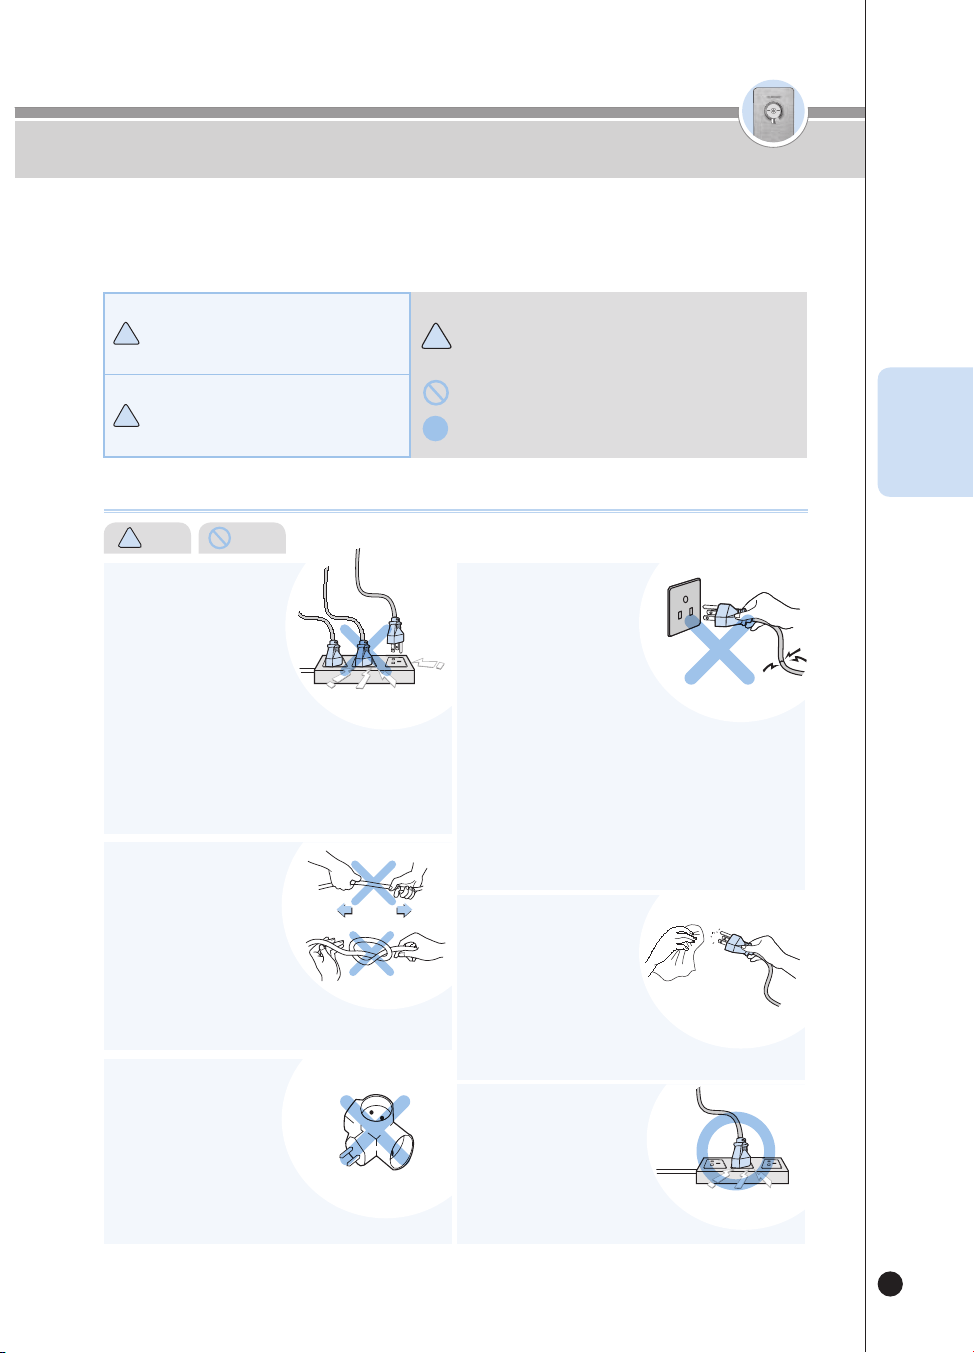
!
Warning (Prohibited)
Safety Warnings
Please comply with the ‘Warnings for Safe Use’ as they are provided to ensure safe and proper use of the device and
prevent accidents and dangerous situations.
● The ‘Warnings for Safe Use’ section is divided into ‘Warning’ and ‘Caution,’ which are defined as follows:
!
!
!
Warning
!
Caution
•
This symbol indicates a potentially dangerous situation under
specific circumstances.
•
Please read the details carefully and follow the instructions to
avoid dangerous situations.
•
This symbol is used to indicate actions that are 'prohibited'.
•
This symbol is used to indicate 'instructed' actions.
Potentially dangerous situation that can cause
serious injuries or death if not avoided.
Potentially dangerous situation that can cause
minor injuries if not avoided.
• If you use it with a lot of products, it may cause a fire or an electric
shock.
• Please check the power outlet regularly.
• If it is not properly grounded, it may cause electric shock due to short
circuit.
• If there is a foreign substance or moisture on the Power Plug, wipe it
thoroughly before use.
Please use the product
only with a Power Outlet
exclusively for 120V with
at least a rating of 15A and
when properly grounded.
Do not plug multiple devices
into the same Power Outlet
simultaneously.
• If the sheath of the Power Cord is peeled off or chopped during use
due to negligence, it may cause a fire or electric shock. Thus, please
check the state of the Power Cord, Power Plug and Power Outlet
frequently.
• To prevent dangerous situations arising from the damage of the
Power Cord or the Power Plug, please contact the manufacturer,
distributor or certified technician (servicemen) for replacement.
• We strongly recommend that the damaged parts be repaired at a
designated service center.
• It may cause electric shock, short circuit, and fire.
If a Power Cord or a Power
Plug is damaged or when
the Power Outlet is shaky,
stop using the product
and contact our Customer
Service Center.
• It may cause electric shock or fire.
Please check the Power Plug frequently.
If there is any moisture, dust,
or foreign substances on the
Power Plug, remove them
with a dry cloth.
• It may cause a fire or electric shock.
If you use a movable
extension cord, use only
a single product for an
extension cord of 15A of
current capacity and ensure
that it is properly grounded.
Do not bend, tie or pull the
Power Cord by force.
• Due to electric shock or short
circuit,
it may cause electric shock or fire.
Please check the Power Plug frequently.
온수
잠금
온수
잠금
5
About the Power Supply
!
Warning (Prohibited)
ENG
Safety Warnings
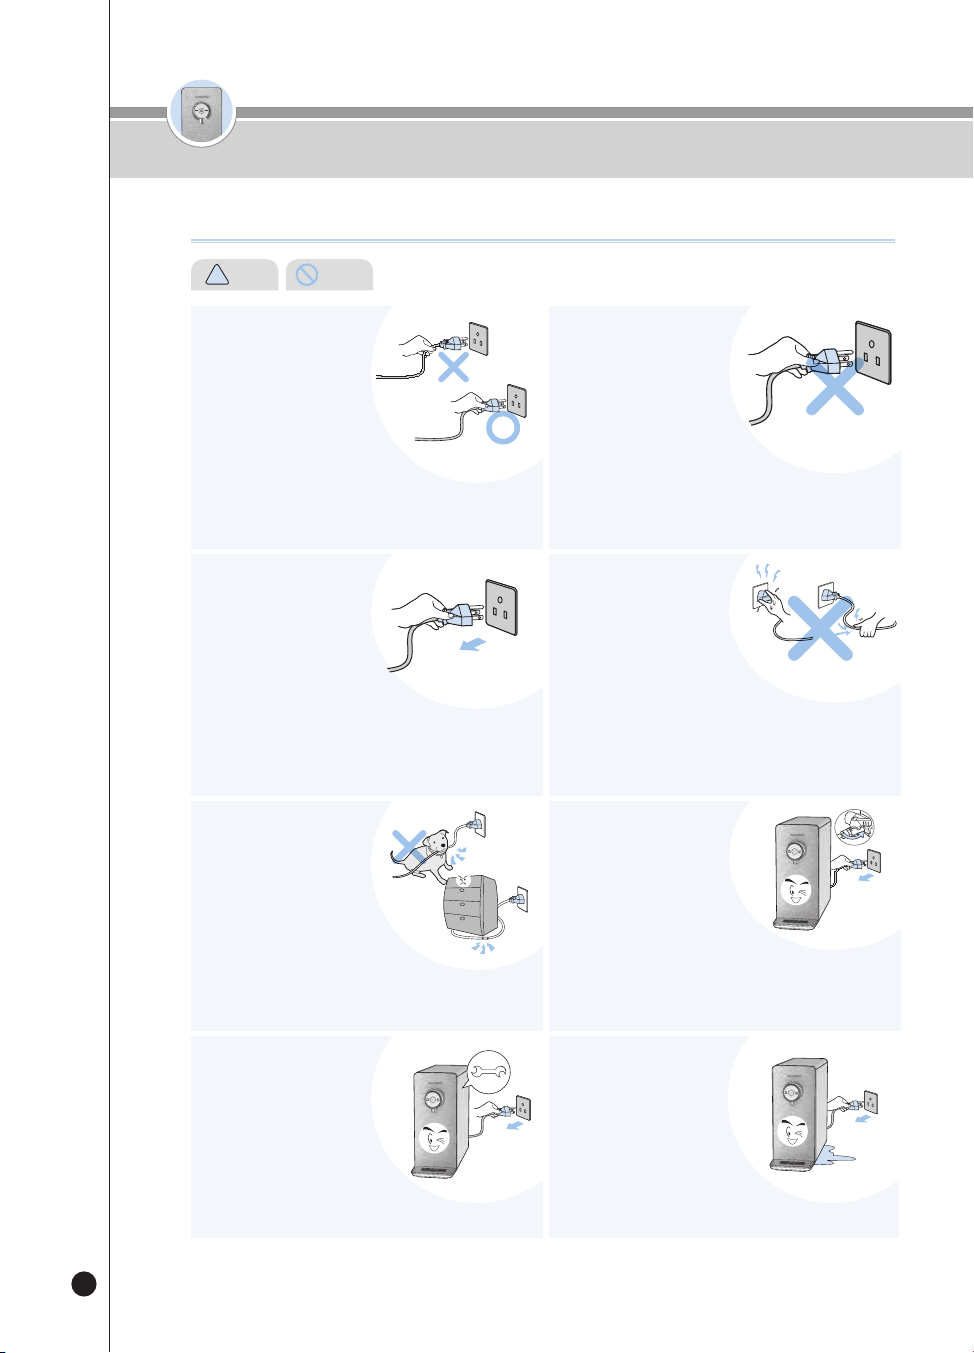
When unplugging the
product, make sure to hold
the Power Plug, not the
Power Cord.
• Applying force to the Power Cord may cause electric shock or fire.
Please check the Power Plug and the Power Cord frequently.
Use only one for the
altemating current voltage
of 120V.
• It may cause electric shock or fire.
• The product will not work properly.
• Please check the Power Plug and the Power Cord frequently.
When inserting or pulling
out the Power Plug to and
from the Power Outlet, first
remove any moisture on
your hands and then put in
or pull out the Power Plug by
holding the Power Plug.
• Pulling out the Power Plug with wet hands can cause electric shock.
• Pulling the power cord by excessive force can damage the Power
Cord, causing a short circuit or electric shock.
• Please check the Power Plug and the Power Cord frequently.
When you do not intend to
use the product for a long
time, first close the Tap
Water Supply Valve, and
pull out the Power Plug.
• To reuse, first operate the Immediate Sterilization function and then
use the product.(Refer to page 18)
• Before reuse, refer to the 'Details To Check before Use.' (page 13)
If water enters the power
supply area, unplug
the product and dry it
completely before use.
• It may cause electric shock or fire.
Please check the Power Plug and the Power Cord frequently.
In case of water leaks or
cleaning, first close the Tap
Water Supply Valve, and
then pull out the Power
Plug.
• There is a risk of electric shock or malfunction.
Please check the Power Plug and the Power Cord frequently.
Make sure the Power Cord
is not under a heavy object
or near sharp objects.
Take special caution to
ensure that it is not easily
damaged by your pet.
• If you do not do so, it may cause damage to the Cord, leading to
electric shock or fire.
Please check the Power Cord frequently.
Please also unplug the
product before inspection,
repair or replacement of its
parts.
• There is a risk of malfunction
or electric shock.
Please check the Power Plug and the Power Cord frequently.
온수
잠금
온수
잠금
6
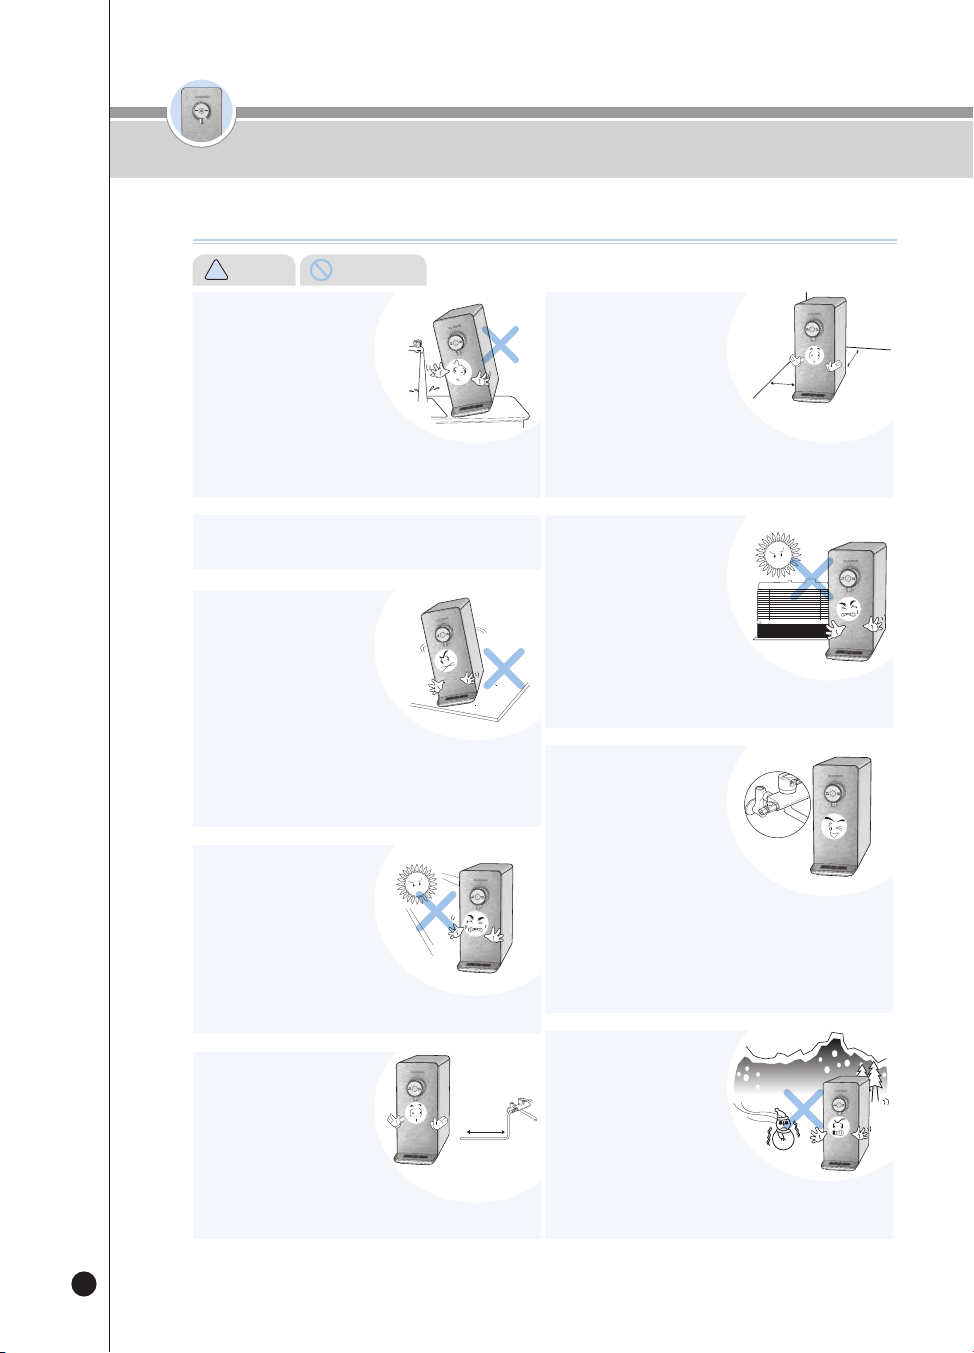
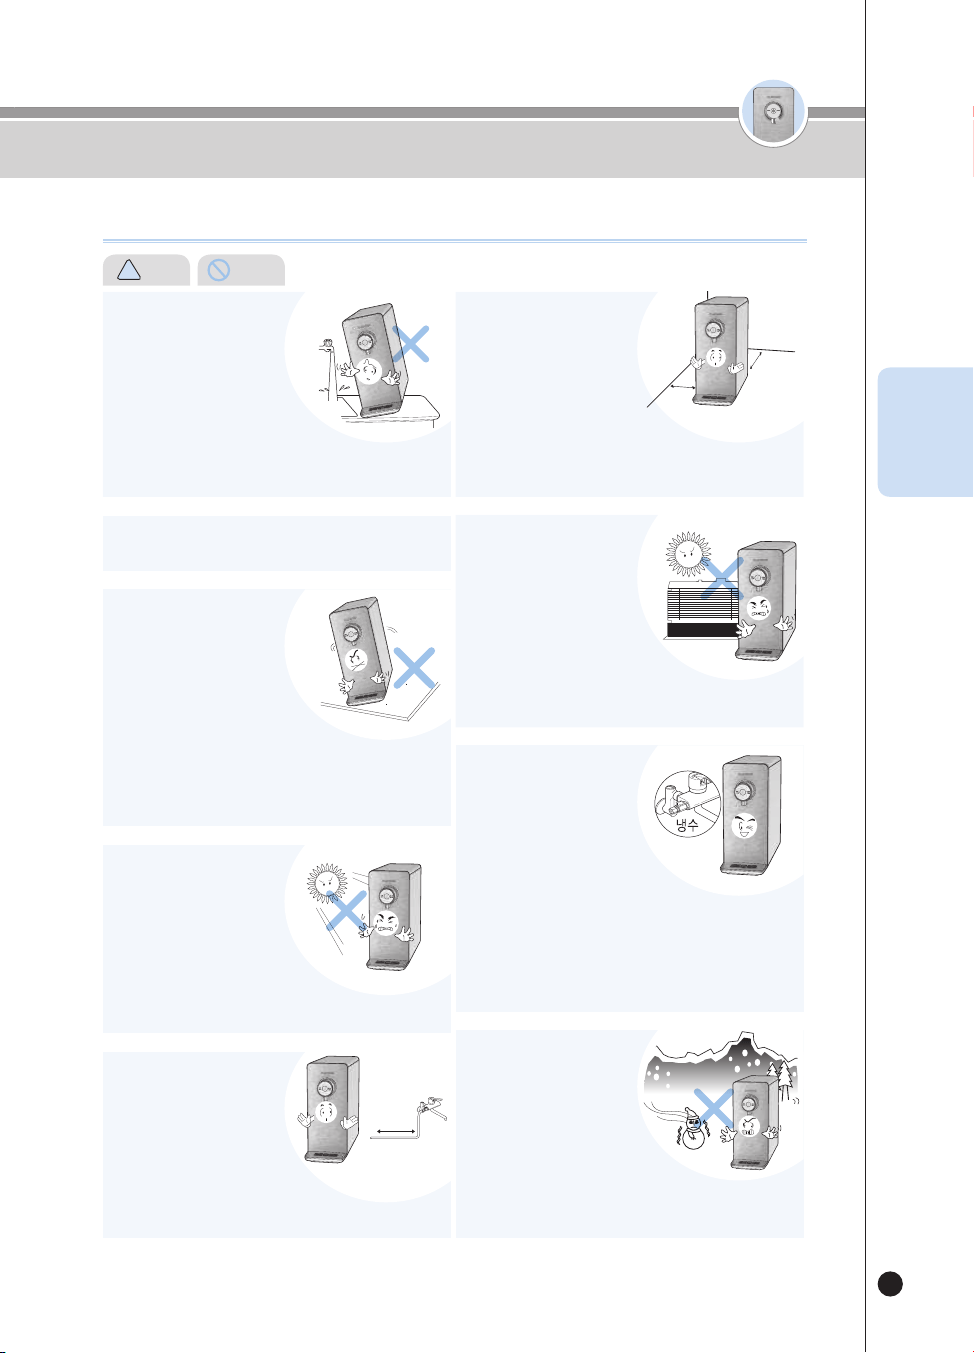
Do not install the product near the bathroom.
Do not place it in an uneven
or slanted area. Please avoid
placing it on a rug, cushion or
laminated floor.
• It may cause malfunction, unwanted noise or injury.
Please check the product regularly if it is working properly.
• It may cause product damage and fire.
• The Purifier is a fixed product, so please use it fixed.
Cooling
Water
16.4 feet or less
8” or longer
8” or longer
Avoid direct sunlight and high
temperature.
• It may cause color changes or
discoloration.
• Please check the Power Cord frequently.
Cooling
Water
16.4 feet or less
8” or longer
8” or longer
Cooling
Water
16.4 feet or less
8” or longer
8” or longer
Cooling
Water
16.4 feet or less
8” or longer
8” or longer
Cooling
Water
16.4 feet or less
8” or longer
8” or longer
Make sure that the length of
Tap Water Supply Tube
doesn’t exceed 16.4 feet
from the Tap Water Supply
Valve.
• If the tube is longer than 16.4 feet,
it may cause poor performance of the product.
Cooling
Water
16.4 feet or less
8” or longer
8” or longer
Install the product on a firm
and flat floor with a distance
of 8 inch or longer from the
wall.
Do not place it in an area
where there’s a risk of a gas
leak or near a heating device.
Always use the installed
plumbing for the tap water
and install the Tap Water
Supply Valve near the
Cooling Water Pipe.
Avoid places where the
temperature goes below 41℉
and the outdoors.
Cooling
Water
16.4 feet or less
8” or longer
8” or longer
Do not install where it may
be exposed to moisture,
excessive dust, and
splashing water.
• Install the product in a clean environment.
• It may cause a malfunction, electric shock or fire. • If you do not do so, it may cause poor performance of the product.
• There is a risk of explosion or fire.
• Do not use water sources other than the tap water, such as ground
water.
• Filter change cycle can vary according to the region and capacity of
water use.
• Connecting the valve to the hot water pipe may cause damage to the
filter or breakdown of the product.
• It may cause the filter, tubing or any other
components to freeze, causing malfunction of the product.
• The temperature of environment for using the product should be
41~104℉.
Cooling
Water
16.4 feet or less
8” or longer
8” or longer
Installation Guide
Safety Warnings
!
Warning (Prohibited)
온수
잠금
온수
잠금
7
• It may cause a water leak.
Close the Tap Water Supply
Valve when replacing the filters.
(Tap Water Supply Valve is
normally under a sink)
잠금
원수차단밸브
Please be careful when
dispensing the hot water.
• Do not allow hot water
to come in contact
with the hands, and supervision
is required when the appliance
is being used by children or the
elderly.
고객상담실
고객상담실
고객상담실
고객상담실
Safety Warnings
During Use
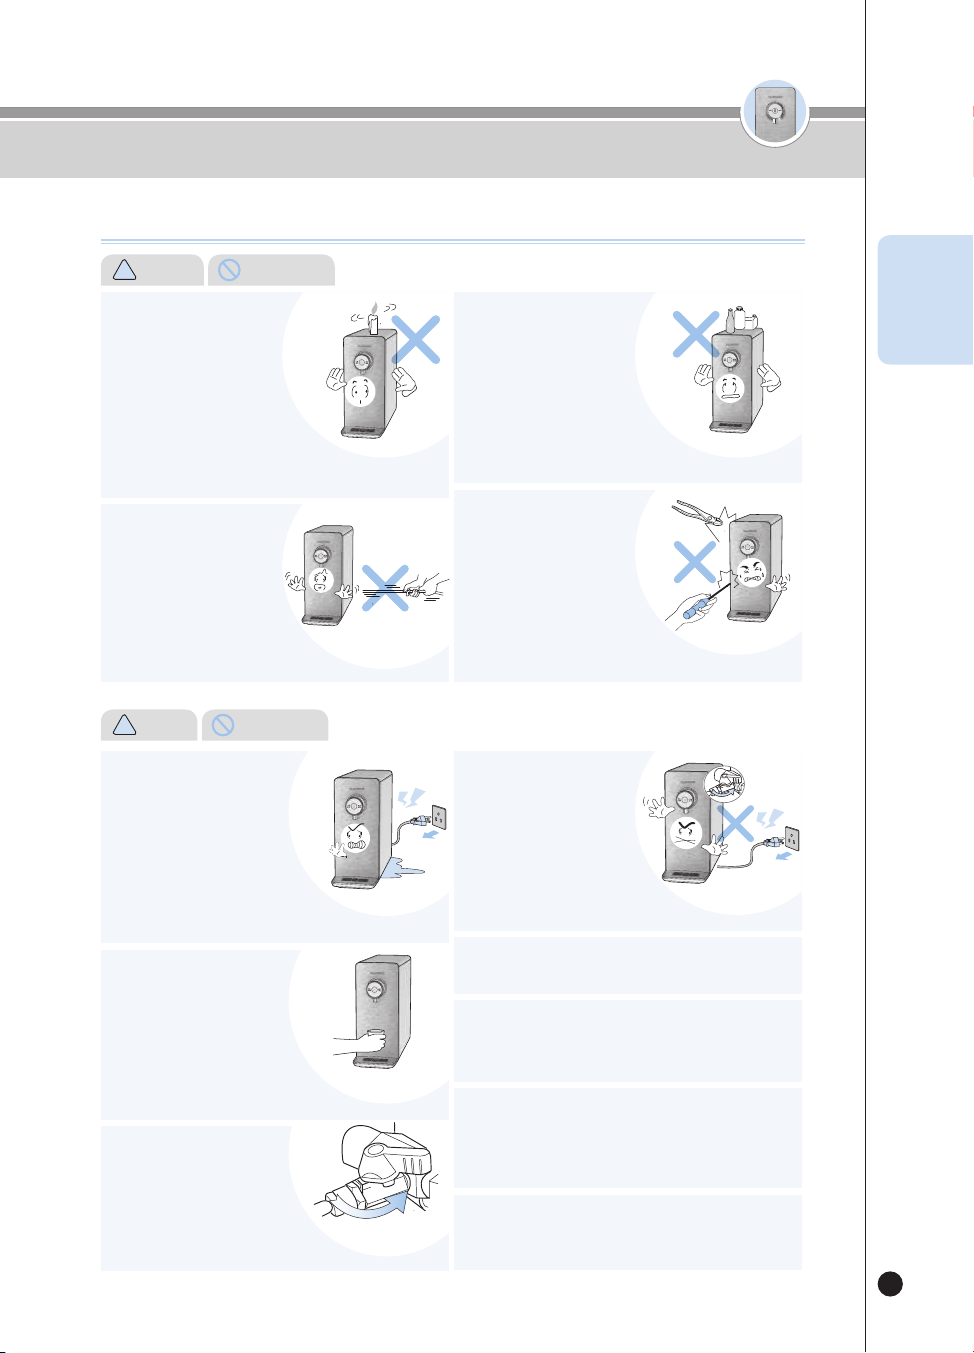
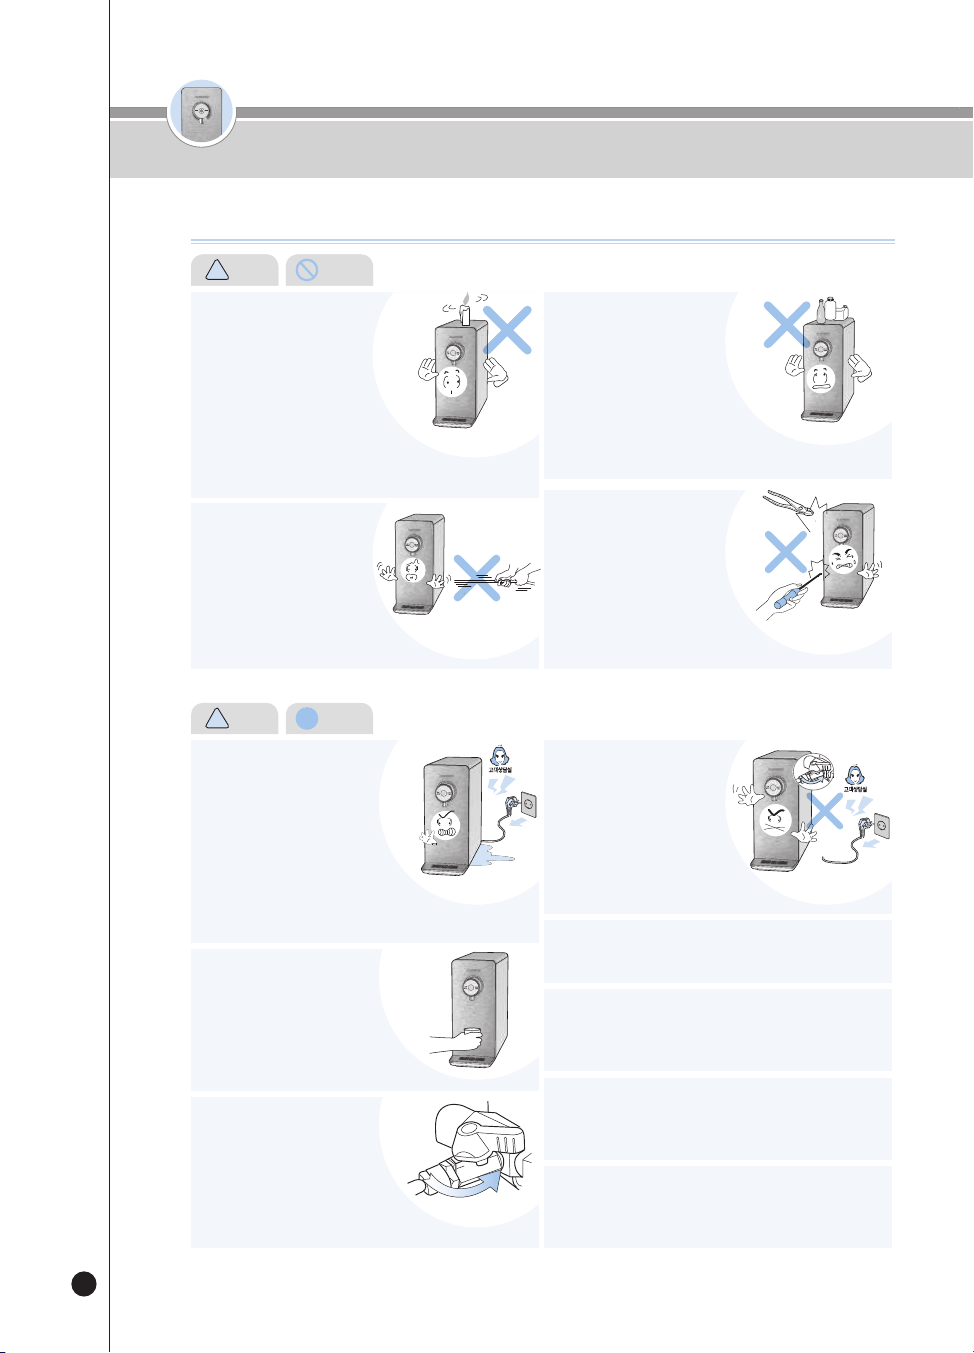
Do not place any heating
devices such as a microwave
oven, electric oven or toaster,
or other inflammables such
as candles, gas containers,
and lighters on top of the
product.
Do not pull the Power Cord
or hose, nor grab the Faucet
when moving the product.
• There is a risk of fire, electric shock or accidents.
• It may cause damage to the product.
Do not place chemicals,
water bottles or small
metal materials on top of
the product.
Do not disassemble or
remodel the product.
• They could fall into the product and
potentially cause a fire or damage the product.
• It may cause a fire or electric shock.
• Do not let anyone else other than
our service technicians to disassemble or collect the product.
!
Warning (Prohibited)
고객상담실
고객상담실
If water leaks from the inside
of the product or water has
gathered around the product,
close the Tap Water Supply
Valve, turn off the power
supply, pull out the Power
Plug, and then contact our
Customer Service Center
If you smell burning or see
smoke arising from the
product, unplug it immediately
and close the Tap Water
Supply Valve. After that,
please contact our Customer
Service Center
The product should be installed and removed by our
service technicians through the Customer Service Center.
Prevent the air intake hole, air discharge hole, and other
gaps from being blocked or having foreign substances
such as a needle, cleaning pin and metals stuck inside.
• If you do not do so, it may cause an electric shock or fire.
If you rub the veggie water valve with a brush
or scrubber, the plating may be damaged and
it may cause mineral adherence.
• There is a risk of electric shock.
• It may cause a fire.
!
Caution (Instruction)
Pay attention to children or anyone who controls the
Control Panel, make sure they don’t use it improperly.
• It may cause a disorder of the product and accidents.
Close
ENG
온수
잠금
8
온수
잠금
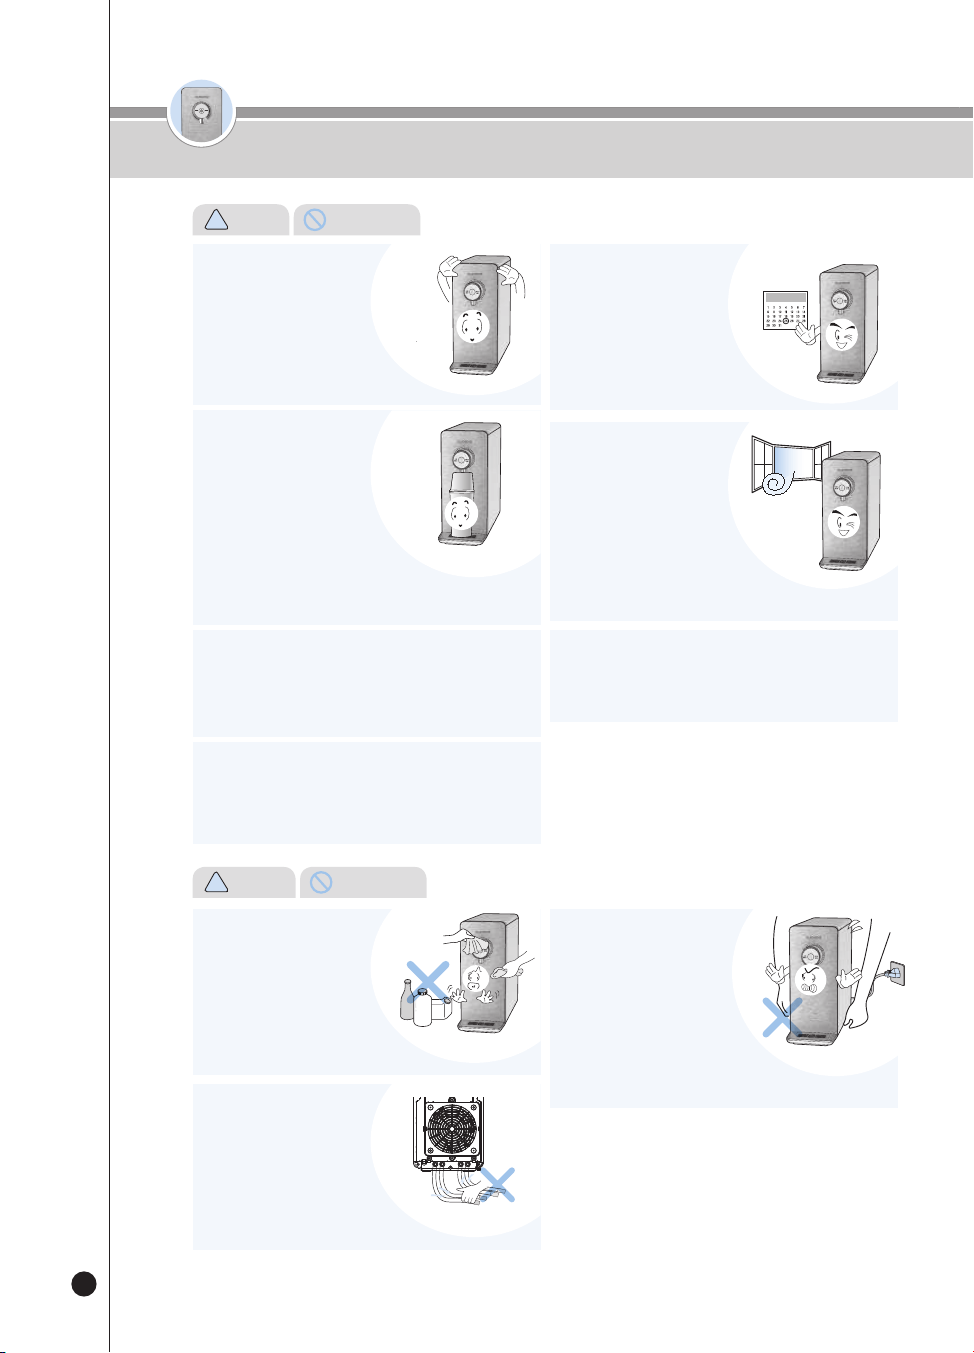
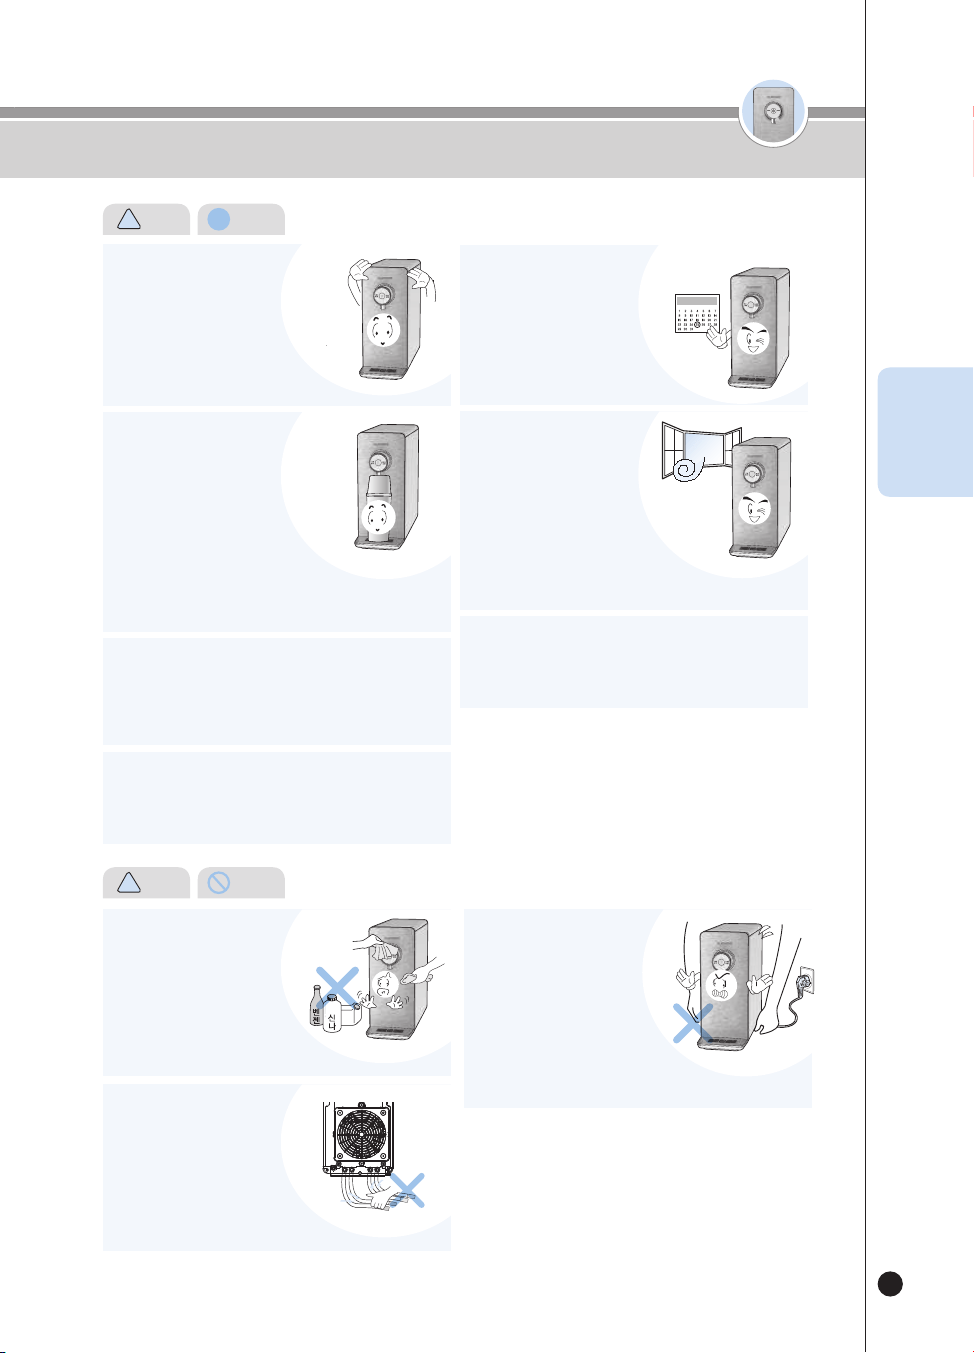
If you have not used the
product for a long time, first
operate the Immediate
Sterilization Function once
before use.
• You can conveniently clean the
ducts and the cooling water tank by using the Immediate Sterilization
Function. (Refer to page 18)
Replace the Filters according
to the replacement cycle.
• If you do not do so, it may cause
poor filter performance or bad odor.
• Refer to page 29 for the filter
replacement cycle.
When gas or propane leaks,
do not pull out the Power
Cord of the product but
immediately open the
windows to ventilate.
• It may cause a fire or electric shock.
Make sure the Cooling Water
Tank Cover inside the
product and the Top Cover
are completely closed
before use.
• It’s also to keep foreign material away.
Please avoid using the dispensed water for filling a fish
bowl or an aquarium.
• The room water may not be suitable for breeding fish.
They could die depending on the circumstances.
Do not clean the product
using benzene or thinner.
• There is a risk of damage to the product.
During use, do not pull out
the Hose on a rear side of
the product.
• It may cause a water leak, leading
to a malfunction of the product.
Do not move the product while
operating the product.
• Do not move or shake the product
when it’s turned on. It may cause the
connecting tube to be separated, leading
to a malfunction of the product and water leak.
Do not lean the product at a 30-degree angle or more
when moving the product.
• It may cause poor performance of the product.
Must not use NON-Cuckoo Water Purifier filters.
• If you use a filter other than an authentic CUCKOO filter, it may cause
a lowered water-purifying performance, abnormal taste of water,
water leak, and malfunction of the product.
Cautions for Safe Use
!
Caution (Instruction)
!
Warnings
(Prohibited)
온수
잠금
온수
잠금
9
ON
OFF
식수
ON
OFF
Drinking
Water
ON
OFF
식수
ON
OFF
식수
ON
OFF
식수
ON
OFF
식수
This product is exclusively for 120V, so always use a Power Outlet exclusively for 120V while being properly
grounded.
When you use an extension cord (such as a multi-power outlet), do not simultaneously connect any other product.
Failure to ground may cause electric shock due to short circuit. Be sure to only use the product after grounding.
❶
In case of a power outlet with a grounding terminal
When there is a grounding terminal, you can immediately use the power outlet without any extra work.
❷
In case of a power outlet with no grounding terminal
First, check if an earth leakage breaker is installed. If there is no earth leakage breaker, install one before using the
product. If there is no earth leakage breaker, it may cause a fire.
During Use
Cautions for Safe Use
Keep packing materials such
as Styrofoam and vinyl away
from children's reach.
Do not connect to anything
other than the Tap Water
(Drinking Water) Supply
Pipe.
Avoid damaging the
Refrigerant Circuit.
Do not randomly connect an apparatus to reduce a
pressure to the Hot Water Apparatus Pipe.
• It may cause a malfunction of the product.
Prevent children from
climbing or hanging on the
product.
Do not install the product in
places listed below:
Do not repeatedly operate
the Hot Water Outflow and
the Stop functions.
• It may cause suffocation.
• Water other than the tap water
(drinking water) may cause diseases.
• It may cause a malfunction or
a reduced lifespan of the product.
• It may cause a malfunction of the product.
• It may cause the product to fall down,
leading to injury of the children.
• Outdoors
• A place exposed to direct sunlight
• Near a bathroom
• In front of a cooler or a heater
• A slanted place
• It may cause a malfunction of the product. In particular, it may cause
steam.
!
Caution (Instruction)
ENG

온수
잠금
온수
잠금
10
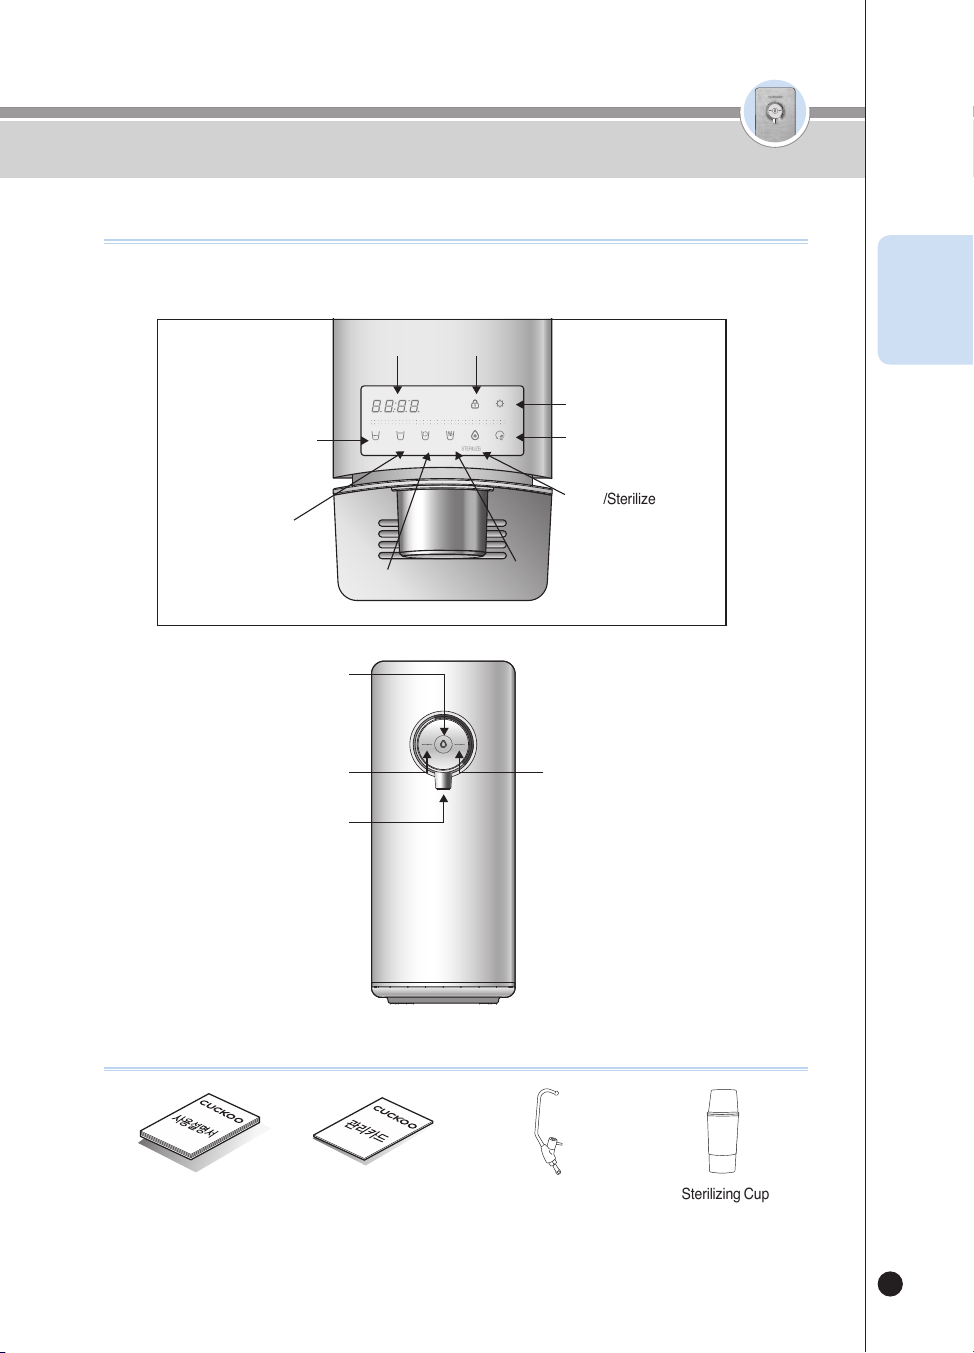
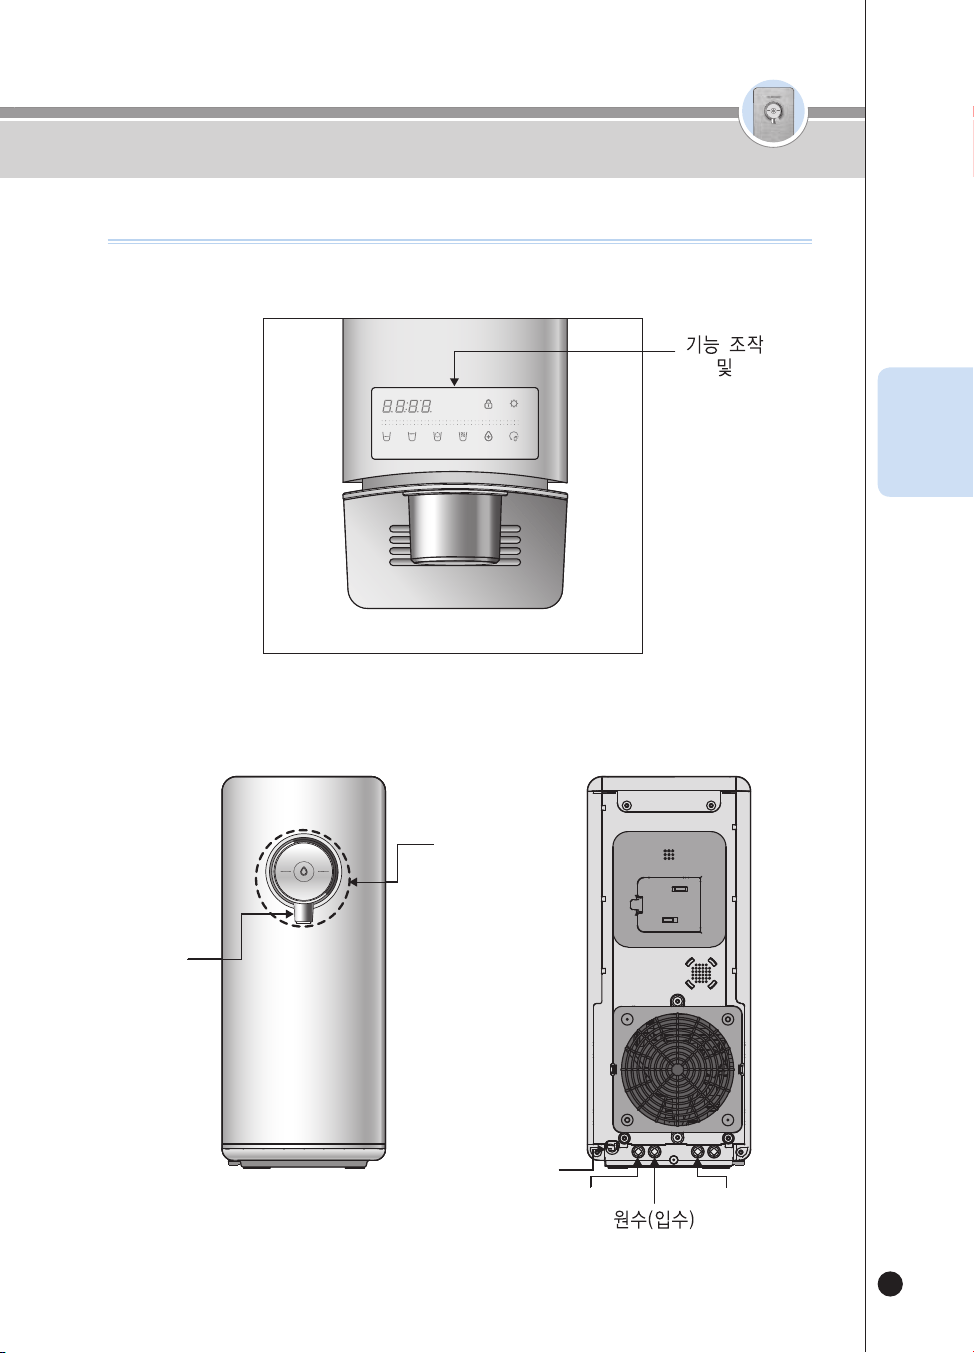
< Front & Back >
Part Names
Part names
<Top Side>
(3)
(3)
.
(3)
(3)
Function Operation
and Display
Cold Water /
Hot Water /
Room Water Select
and Outflow button
External Faucet end plug
Power Cord
Drain
Tap Water Supply
Faucet
온수
잠금
온수
잠금
11
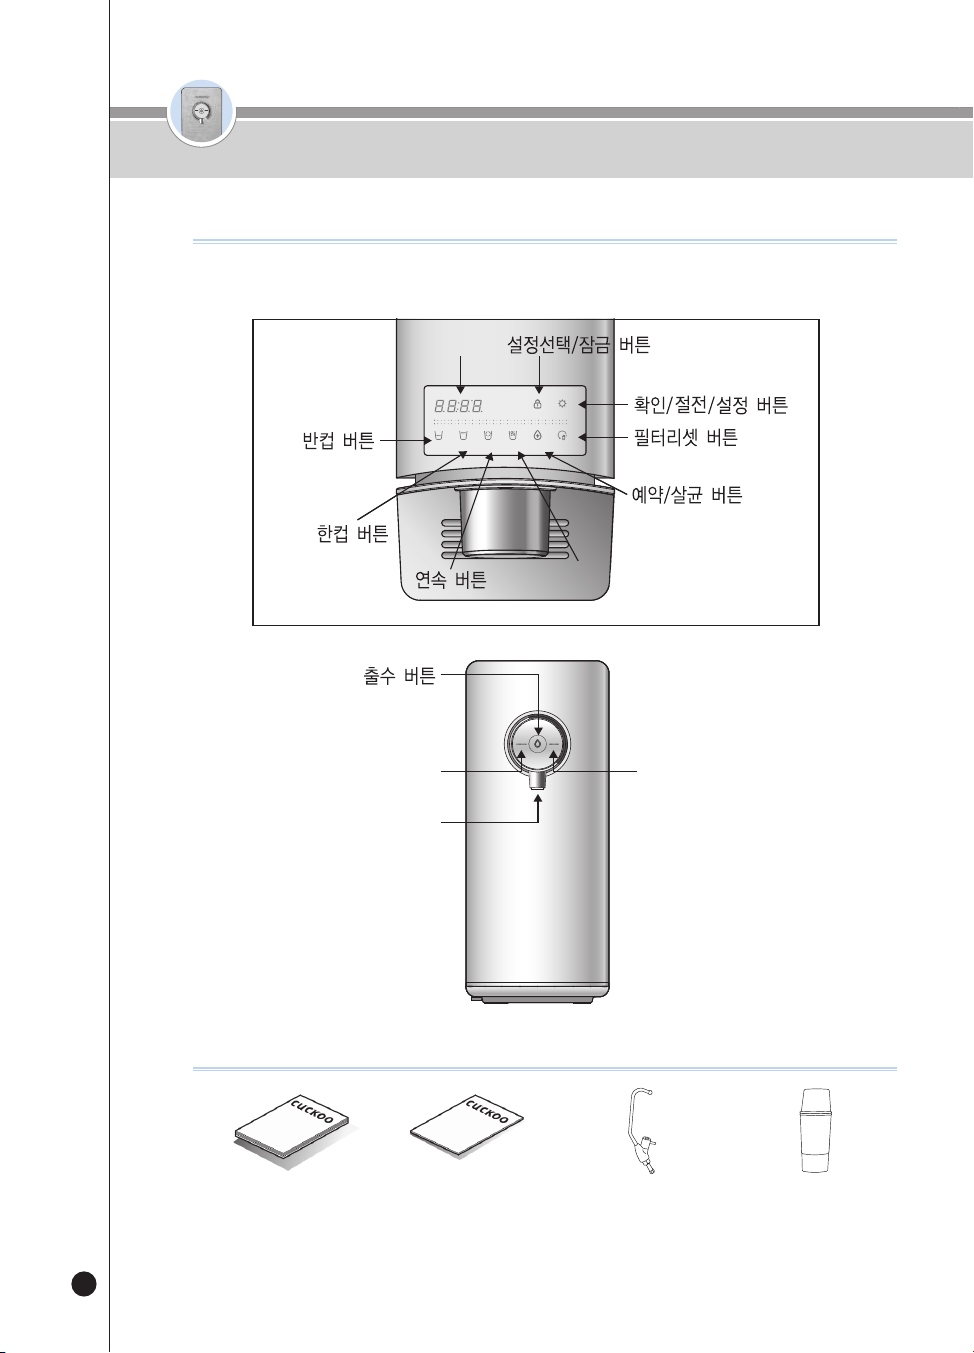
Name of Parts
Accessories
<Details of Display Panel>
Water Purifying
SELECT MODESELECT
LOC
(3SEC)
ENERG SAVE/
SETTING
(3SEC)
HALF
CUP
ONE
CUP
NON-
STOP
HOT
TEMP.
TIME/
STERILIZE
(3SEC)
FILTER
RESET
(3SEC)
HOT
LOC
ROOM
COLD
User Manual Service Card External Valve (Optional) Sterilizing Cup
(If it is lost, contact to Customer
Service Center to purchase a
new one.)
Room Water (Outflow Light : WHITE) &
Cold Water (Outflow Light : BLUE)
Select Button
Outflow button
Hot Water (Outflow Light : RED)
Select Button
Faucet
Time Display
Half Cup Button
One Cup
Button
Non-Stop button
Hot Temp Button
Select/Energy Save/
Setting Button
Filter Reset button
Time/Sterilize Button
Select Mode/Lock button
ENG

온수
잠금
온수
잠금
12
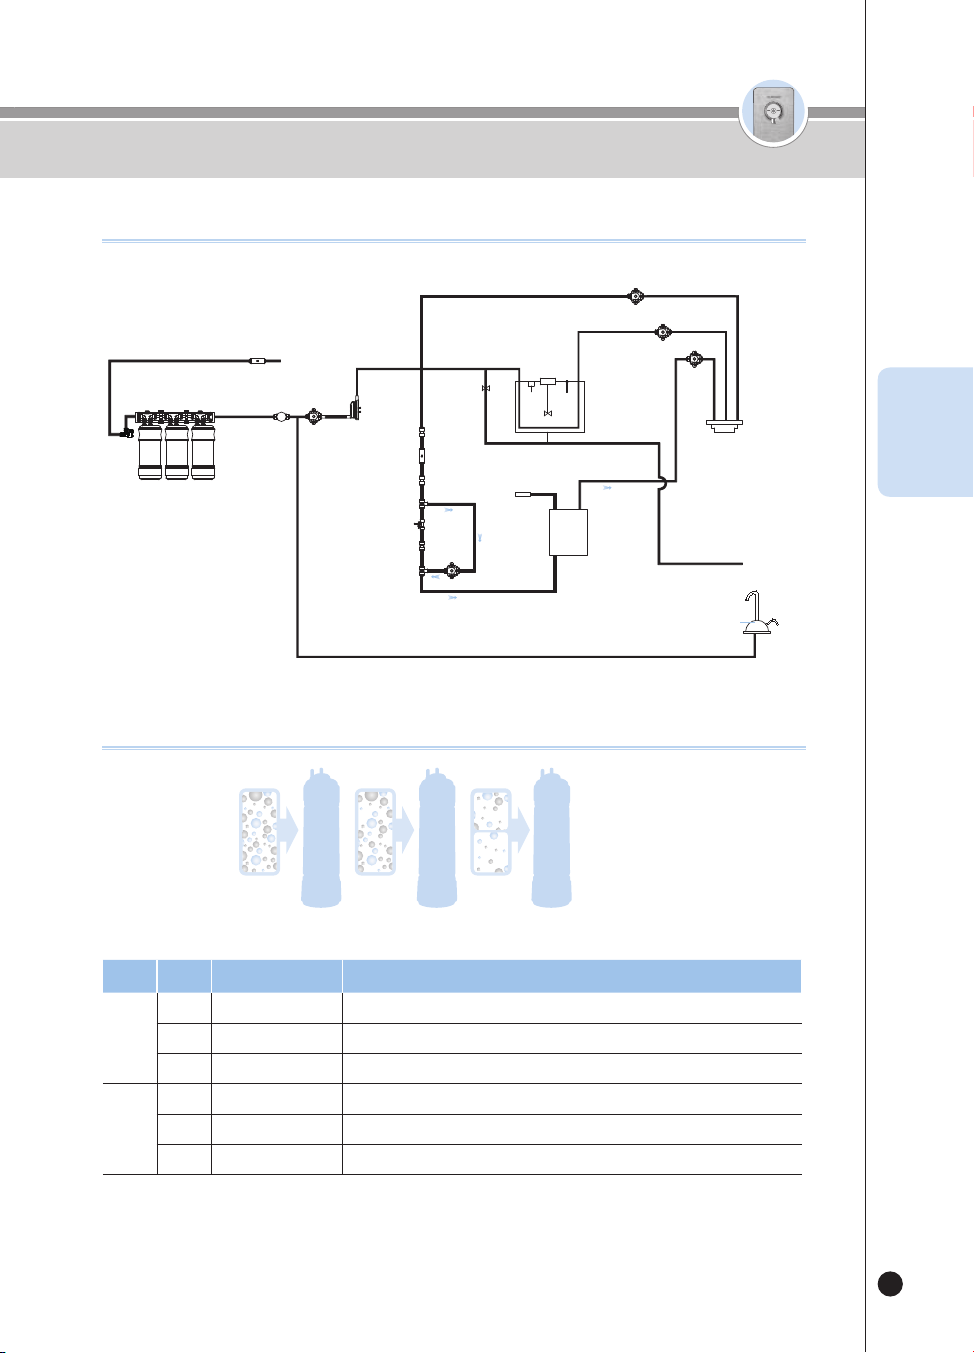
Filtration Circuit / Filtration System
Filtration Circuit
Electrolytic
Sterilization
Module
Water
Supply
Valve
Water
Sensor
Motor
Sensor
Cold
Water
Tank
Cooling
Water
Supply Ball
Valve
Film
Heater
Hot Outlet Valve
tank Drain External Valve
External
Faucet
Room Water Outflow Valve
Cold Water Outflow Valve
Level Stir
Temperature Sensor
Tap Water
External
Valve
4INCH 4INCH 4INCH
①
②
③
Flow
Meter
Filter Door Lock Lever
Set Step Name Filter Function
1
1
Sedi Carbon Composite Removes rust, floating matter, residual chlorine and heavy metals (lead)
2 Natural Plus
Removes fine particles, general germs, residual heavy metals
(mercury, iron, aluminum), and norovirus.
3 Nano Positive Provides a mineral infusion to create a healthy alkaline water.
2
1
Pre Carbon 2.0 Removes particulate matter and residual chlorine
2 Nano Positive Provides a mineral infusion to create a healthy alkaline water.
3
Alkali-Mineralizer Generates alkali and mineral water, improve water taste
※ Using a NON-Cuckoo filter or other unauthorized filter for a long time may result in diminished filter performance.
Step 1 Step 2 Step 3
Filtration System
온수
잠금
온수
잠금
13
❺
❹
Empty the tray on a regular basis.
❶
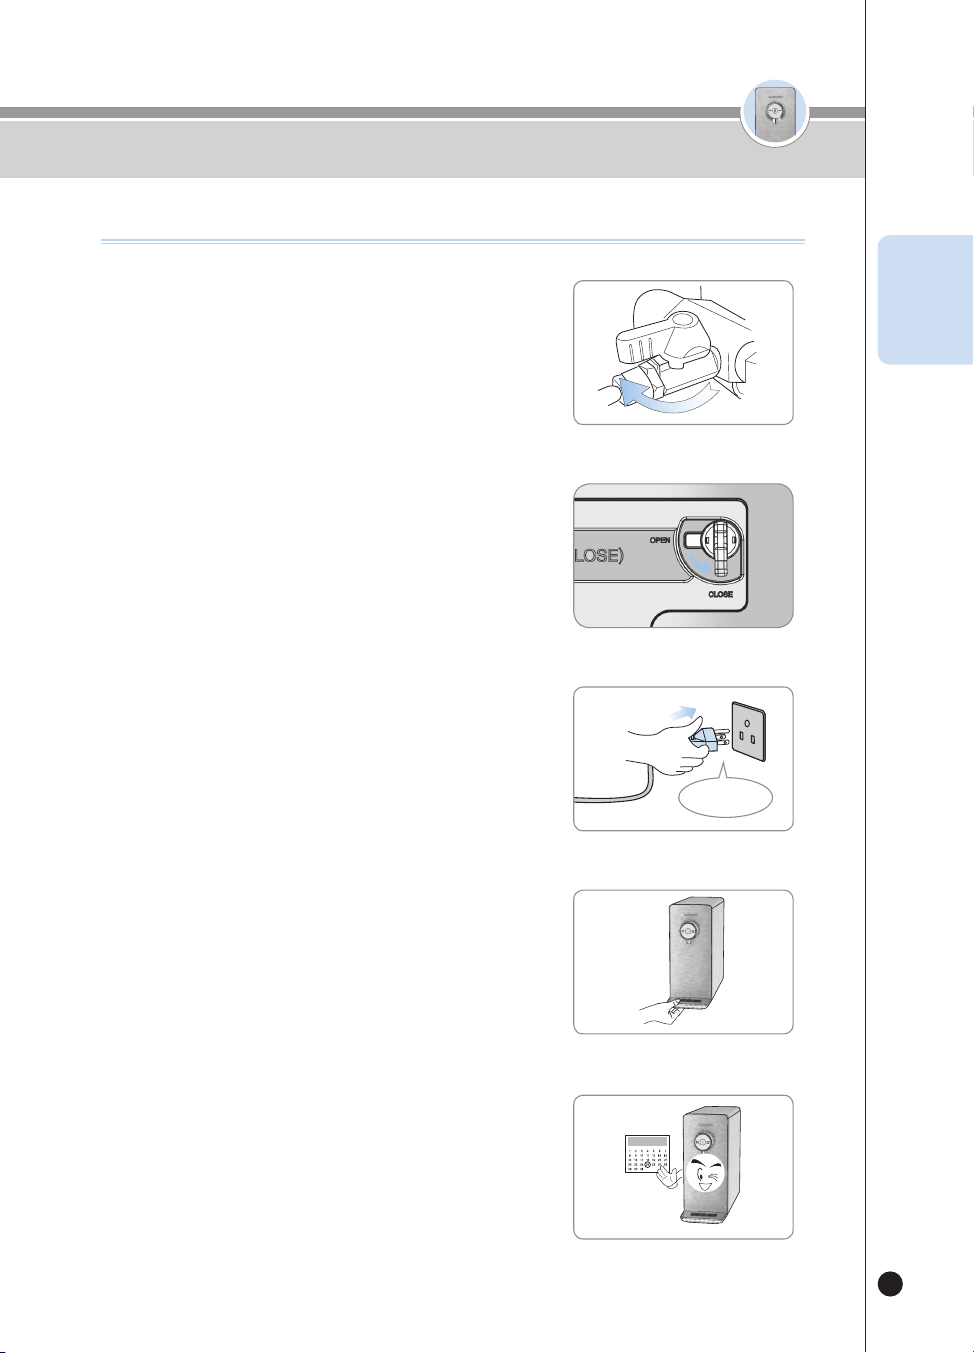
Open the Tap Water Supply Valve.
▶
Open the Tap Water Supply Valve, and check if there is water leak
on each connection part.
• Tap Water Supply Valve and the Tap Water Input and the Exterior of the
product.
Open
Details to Check before Use
Details to Check before Use
Plug in the product.
▶
This product exclusively uses 120V 60Hz. Please make sure to
plug it into the proper power outlet.
❸
AC 120V
Switch the Filter Door Lock on the left of the product
towards the close sign. (to let the tap water flow
internally)
• When the Filter door lock is closed, water is supplied to the product.
❷
Filter
Door
Lock
Lever
Close
Please clean and replace the Filters on a regular
basis.
▶
Please clean and replace the filters regularly so that you can
always enjoy pure and clean water.
▶
Refer to page 29 for the filter replacement cycle.
ENG
온수
잠금
온수
잠금
14
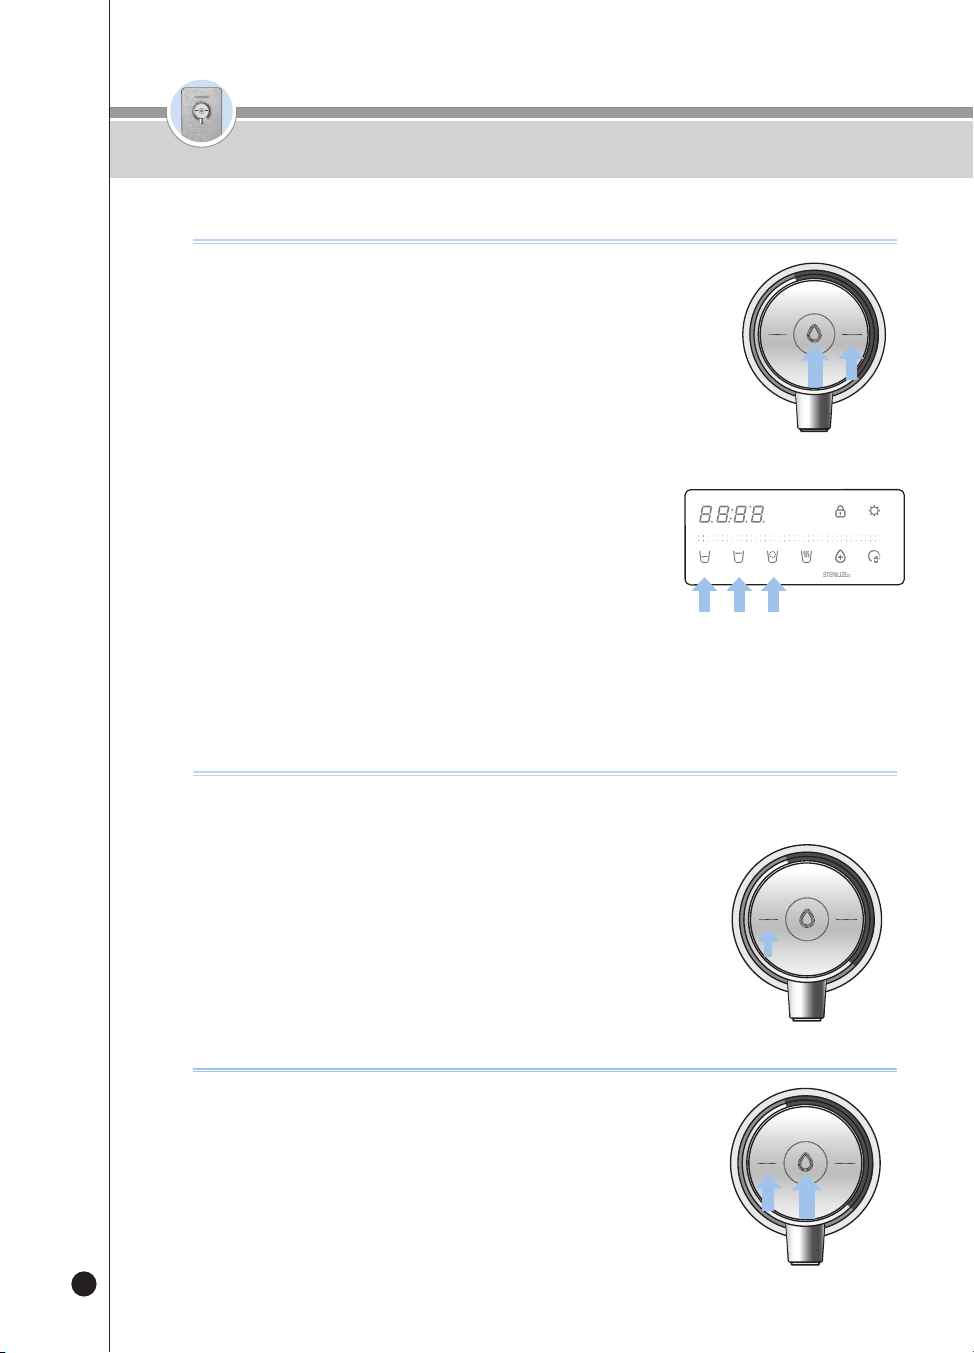
❶
Waiting Mode
▶
It is an Outflow Waiting mode to dispense cold water, room temperature water, and hot water. The Display
on the front are turned ON according to the selected function such as either cold water or room temperature
water.
❷
User Setting Mode
▶
You can set the function by pressing the [Energy Save/Setting] button for three seconds While in the waiting
status.
User Setting Mode
When pressing [Select Mode/Lock] once Filter replacement alarm setting
When pressing [Select Mode/Lock] twice Sterilization alarm setting
When pressing [Select Mode/Lock] three times Single Cup Outflow Setting Function
When pressing [Select Mode/Lock] four times Half Cup Outflow Setting Function
When pressing [Select Mode/Lock] five times Voice Volume Setting Function
When pressing [Select Mode/Lock] six times Mood Lamp ON/OFF Function
When pressing [Select Mode/Lock] seven times Automatic Filter Cleaning Function
When pressing [Select Mode/Lock] eight times Current Time Setting Function
When pressing [Select Mode/Lock] nine times Language Setting Function
❸
Fixed Quantity Outflow
▶
Press the [Outflow] button once and then the water of the selected fixed quantity will be dispensed.
▶
Select the [Half Cup] button and press the [Outflow] button for 110cc(3.7oz) of water to be dispensed.
▶
Select the [One Cup] button and press the [Outflow] button for 150cc(5.1oz) of water to be dispensed.
▶
Select the [Non-Stop] Flow button and press the [Outflow] button for the water to be dispensed continuously.
❹
Manual Outflow
▶
The water is dispensed while you are pressing the [Outflow] button.
▶
Press the [Outflow] button for two seconds, and the product will be converted into the Manual Outflow
status. And the water will be dispensed while you are pressing the [Outflow] button.
How To Use
How to Set Functions
온수
잠금
온수
잠금
15
How To Use
How to Set Cold Water Function
HOT
LOCK
ROOM
COLD
※ You can dispense the cold water in about one hour after you have turned ON the Cold Water function.
※ The function is set to be ON as the default setting of the product.
❶
If the Cold Water function is turned OFF, press the [Room/
Cold]button for three seconds to turn ON the Cold Water
function.
▶
While you are pressing the [Room/Cold] button, the Voice Guide will say
“Selecting Cold water function.”
▶
When the Cold Water function is turned ON, the word “ON” will be
displayed, and the Voice Guide will say “Cold water function selected.”
❷
If you do not want to use the cold water, turn OFF the Cold
Water function by pressing the [Room/Cold] button for three
seconds while the Cold Water function is ON.
▶
While you are pressing the [Room/Cold] button, the Voice Guide will say “Canceling
Cold water function.”
▶
When the Cold Water function is turned OFF, the word “OFF” will be displayed, and the Voice Guide will
say “Cold water function Cancelled.”
▶
If you press the [Room/Cold] button while the Cold Water function is turned OFF, the Voice Guide will say
“Cold water function off,” “Please turn on cold water function before use.”
ENG
How To Dispense Cold Water
❶
Press the [Room/Cold] button to select cold water.
▶
The Voice Guide will say "Cold Water."
❷
In order to use the fixed quantity outflow,
▶
Select the desired quantity from among the buttons of [Half Cup], [One Cup] and
[Non-Stop].
▶
Press the [Outflow] button once. The cold water will be dispensed.
▶
When the selected quantity of water is completely dispensed, the water dispensing will end.
▶
If you press the [Outflow] button or any other button while the product is dispensing the selected quantity of
water, the water dispensing process will end.
❸
If you want to operate the Manual Outflow,
▶
Press the [Outflow] button. The cold water will be dispensed.
▶
If you press the [Outflow] button for two seconds or longer, the status of
the product will be changed into the Manual Outflow status.
▶
The Voice Guide will say "Water dispensing during pressing."
▶
If you stop pressing the [Outflow] button during the Manual Outflow, the water dispensing will end.
❹
While the cold water is being dispensed, the Blue Mood light on the Faucet will be turned
ON. (When the Mood function is turned OFF, the light will not be turned ON.)
HOT
HOLD
SELECT MODE SELECT
LOCK(3SEC) ENERGY SAVE/
SETTING(3SEC)
HALF
CUP
ONE
CUP
NON-
STOP
HOT
TEMP.
TIME/
STERILIZE(3SEC)
FILTER
RESET(3SEC)
ROOM
COLD
HOT
LOCK
ROOM
COLD
온수
잠금
온수
잠금
16
How To Use
How To Dispense Room Water
How to Set Hot Water Lock Function
This function prevents children from randomly operating the product and
getting burnt. If this function is selected, the [Hot/Lock] button won't work.
❶
If you press the [Hot/Lock] button for three seconds in the Waiting
status, the Hot Water Lock will be selected.
▶
If you press the [Hot/Lock] button in the Hot Water Lock status, “Loc_” will be
displayed and the Voice Guide will say “Child lock on.”
▶
If you press the [Hot/Lock] button for three seconds in the Hot Water Lock
status, “Un_Loc_” will be displayed and the Hot Water Lock will be released.
HOT
LOCK
ROOM
COLD
❶
Press the [Room/Cold] button to select room water.
▶
The Voice Guide will say “Room Temperature Water.”
❷
In order to use the fixed quantity outflow,
▶
Select the desired quantity from among the buttons of [Half Cup], [One Cup] and
[Non-Stop].
▶
Press the [Outflow] button once. The room water will be dispensed.
▶
When the selected quantity of water is completely dispensed, the water dispensing will end.
▶
If you press the [Outflow] button or the selected fixed quantity button again while the product is dispensing
the fixed quantity of water, the water dispensing will be ended.
❸
If you want to operate the Manual Outflow,
▶
Press the [Outflow] button. The room water will be dispensed.
▶
If you keep pressing the [Outflow] button for two seconds or longer,
the product will be changed into the Manual Outflow status.
▶
The Voice Guide will say “Water dispensing during pressing.”
▶
If you stop pressing the [Outflow] button during the Manual Outflow, the water dispensing will end.
❹
While the room water is being dispensed, the Green Mood Light on the Faucet will be
turned ON. (When the Mood function is turned OFF, the light will not be turned ON.)
HOT
HOLD
SELECT MODE SELECT
LOCK(3SEC) ENERGY SAVE/
SETTING(3SEC)
HALF
CUP
ONE
CUP
NON-
STOP
HOT
TEMP.
TIME/
STERILIZE(3SEC)
FILTER
RESET(3SEC)
ROOM
COLD
HOT
LOCK
ROOM
COLD
To use hot water after installation
❶
Press the [Hot/Lock] water button and press the [Outflow] button.
▶
“Start water input installation check” voice will follow
▶
Water outflow will stop when product check is done
▶
“Product installed successfully” voice will follow
❷
Hot water can be used after product installation is completed.
HOT
LOCK
ROOM
COLD

온수
잠금
온수
잠금
17
How To Use
How to Use Hot Water
❶
Select the hot water function by pressing the [Hot/Lock] button.
▶
The Voice Guide will say “Hot Water.”
❷
In order to use the fixed quantity outflow,
▶
Select the desired quantity from among the buttons of [Half Cup], [One Cup] and
[Non-Stop]
▶
Press the [Outflow] button once. After preheating, the hot water will be dispensed.
▶
When the selected quantity of water is completely dispensed, the water dispensing will end.
▶
If you press the [Outflow] button or any other button while the product is dispensing the chosen quantity of
water, the water dispensing will end.
❸
If you want to operate the Manual Outflow,
▶
Press the [Outflow] button. Hot water will be dispensed.
▶
If you press the [Outflow] button for two seconds or longer, the
product will be set to Manual Outflow status.
▶
The Voice Guide will say “Water dispensing during pressing.”
▶
If you stop pressing the [Outflow] button during the Manual Outflow, the water dispensing will be ended.
❹
While the hot water is being dispensed, the Red Mood Light on the Faucet will be
turned ON. (When the Mood function is turned OFF, the light will not be turned ON.)
※ There is risk of burns due to spattering of water from the product. Thus, please put the cup near the Faucet.
※ After the product is installed and you dispense the first cup of hot water, lukewarm water will be dispensed.
(After the first cup, hot water will be dispensed.)
HOT
HOLD
SELECT MODE SELECT
LOCK
(3SEC)
ENERGY SAVE/
SETTING
(3SEC)
HALF
CUP
ONE
CUP
NON-
STOP
HOT
TEMP.
TIME/
STERILIZE
(3SEC)
FILTER
RESET
(3SEC)
ROOM
COLD
HOT
LOCK
ROOM
COLD
How To Set Hot Water Temperature (Custom Hot Water)
▶
Each time you press the [Hot Temp] button, the temperature of hot water will be
changed by around 18℉.
104℉
→
122℉
→
140℉
→
158℉
→
HOT (Maximum Temperature)…
[40℃
→
50℃
→
60℃
→
70℃
→
HOT (Maximum Temperature) …]
▶
Select the [Non-Stop] button and press the [Outflow] button,
and then the selected temperature of hot water will be dispensed.
▶
If you press the [Outflow] button or any other button while the product is
dispensing hot water, the water dispensing will end.
❶
HOT
HOLD
SELECT MODE SELECT
LOCK
(3SEC)
ENERGY SAVE/
SETTING
(3SEC)
HALF
CUP
ONE
CUP
NON-
STOP
HOT
TEMP.
TIME/
STERILIZE
(3SEC)
FILTER
RESET
(3SEC)
ROOM
COLD
HOT
LOCK
ROOM
COLD
ENG
온수
잠금
온수
잠금
18
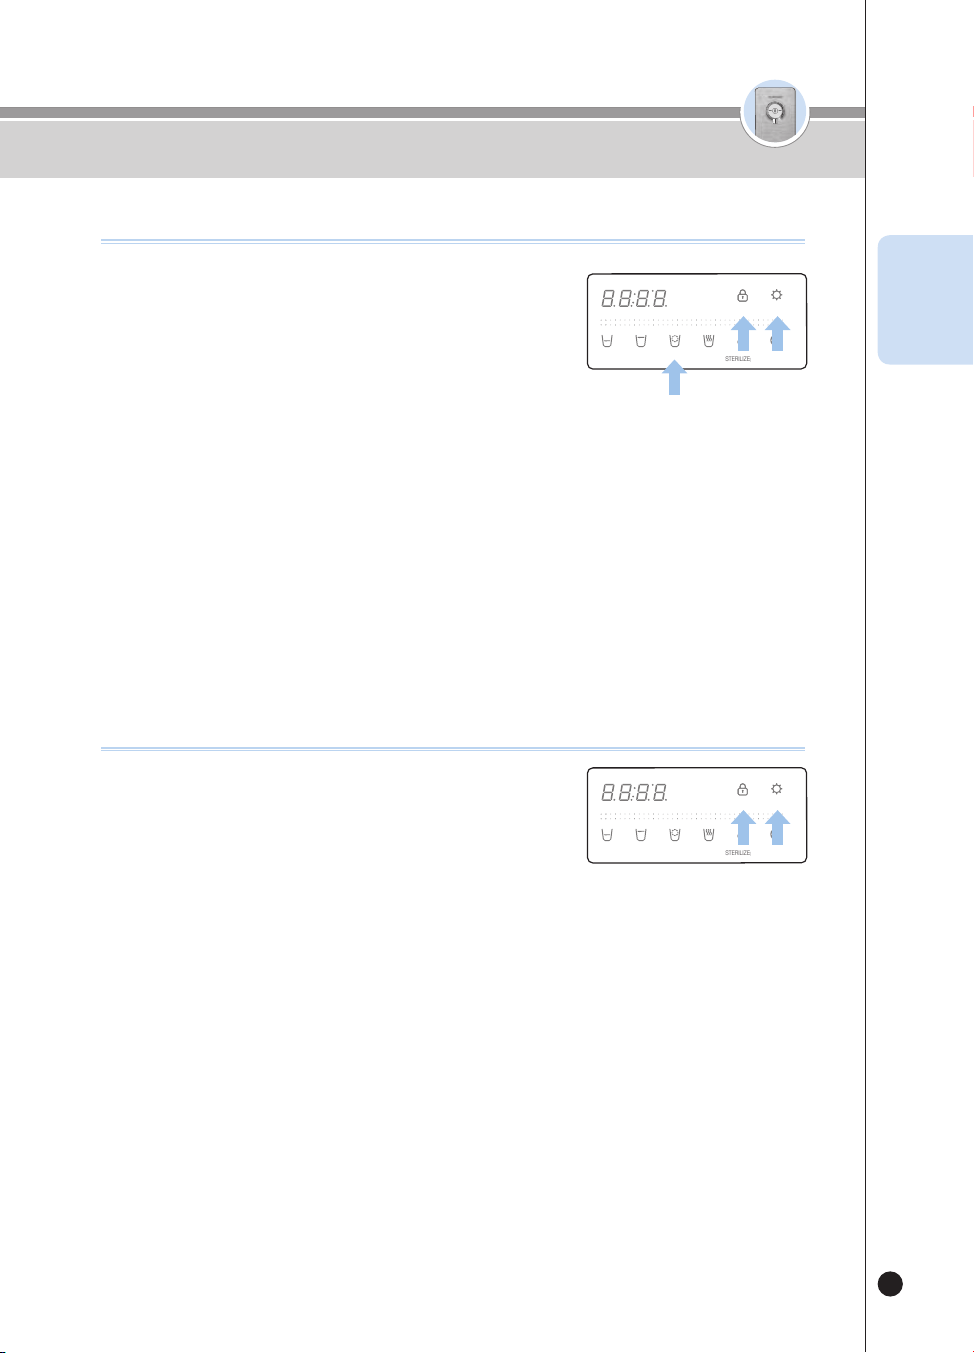
❶
If the [Time/Sterilize] Button Display Light is turned
ON in the Waiting status, the Sterilization Preset
function is set to be used.
❷
Press the [Time/Sterilize] Button while the [Time/
Sterilize] Button Display Light is turned OFF.
▶
The Voice Guide will say “Auto Sterilization Reservation Set-up Completed.”
▶
The Sterilization/Preset Button Display Light will be turned ON.
❸
Select the desired preset time by pressing the [Time/Sterilize] Button.
▶
Each time you press the [Time/Sterilize] Button, the preset time will be changed by one hour.
(After one hour
→
After two hours
→
…
→
After 10 hours
→
After one hour
→
…)
❹
After selecting the desired Sterilization Preset time, save the preset time by pressing
the [Energy Save/Setting] button.
(When you use the Sterilization Preset function, always mount the Sterilizing Cup.)
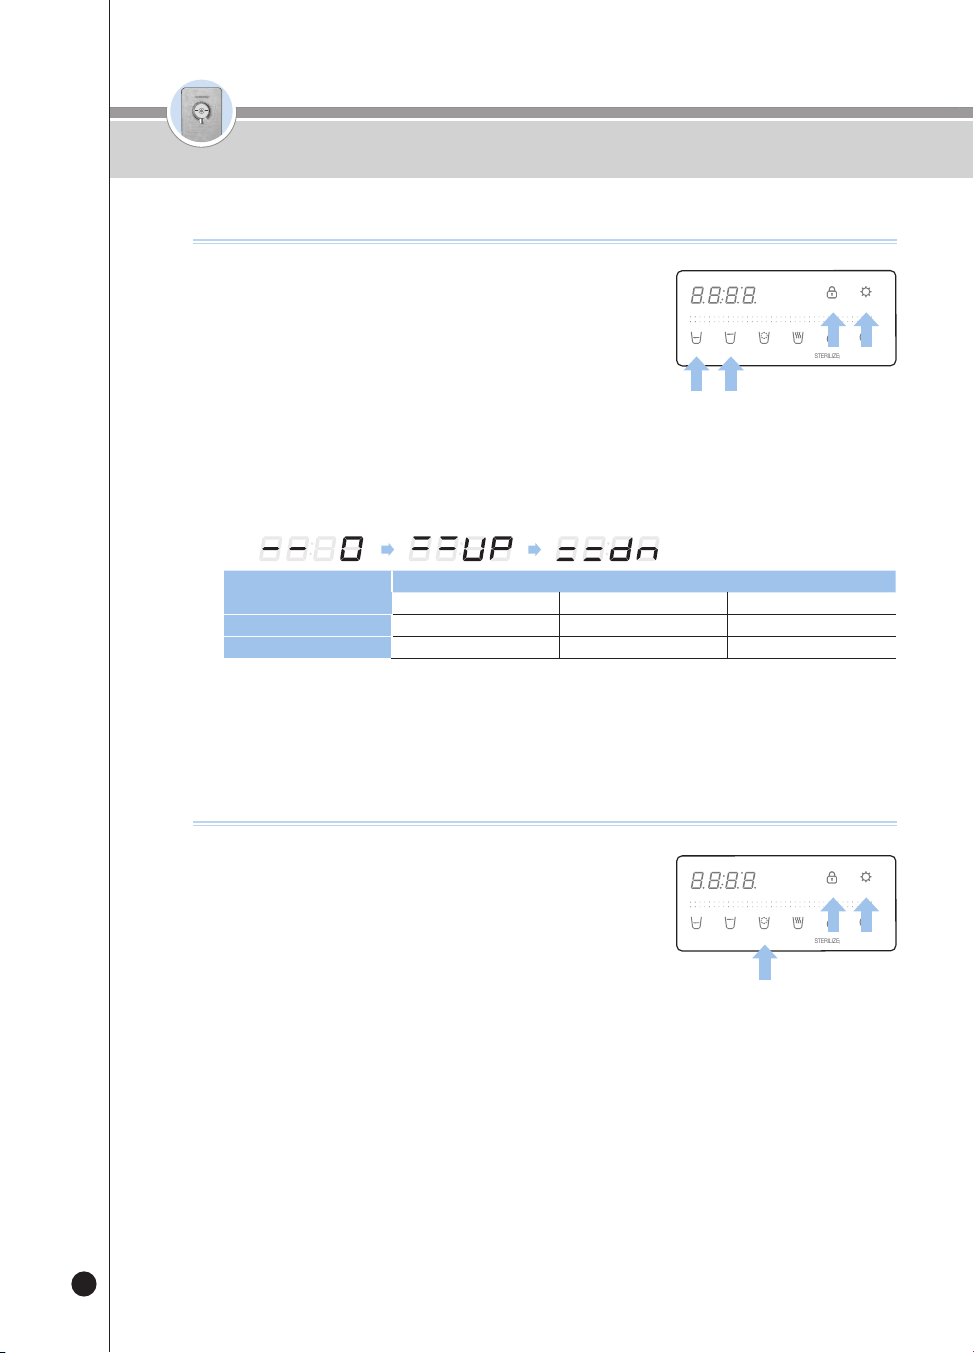
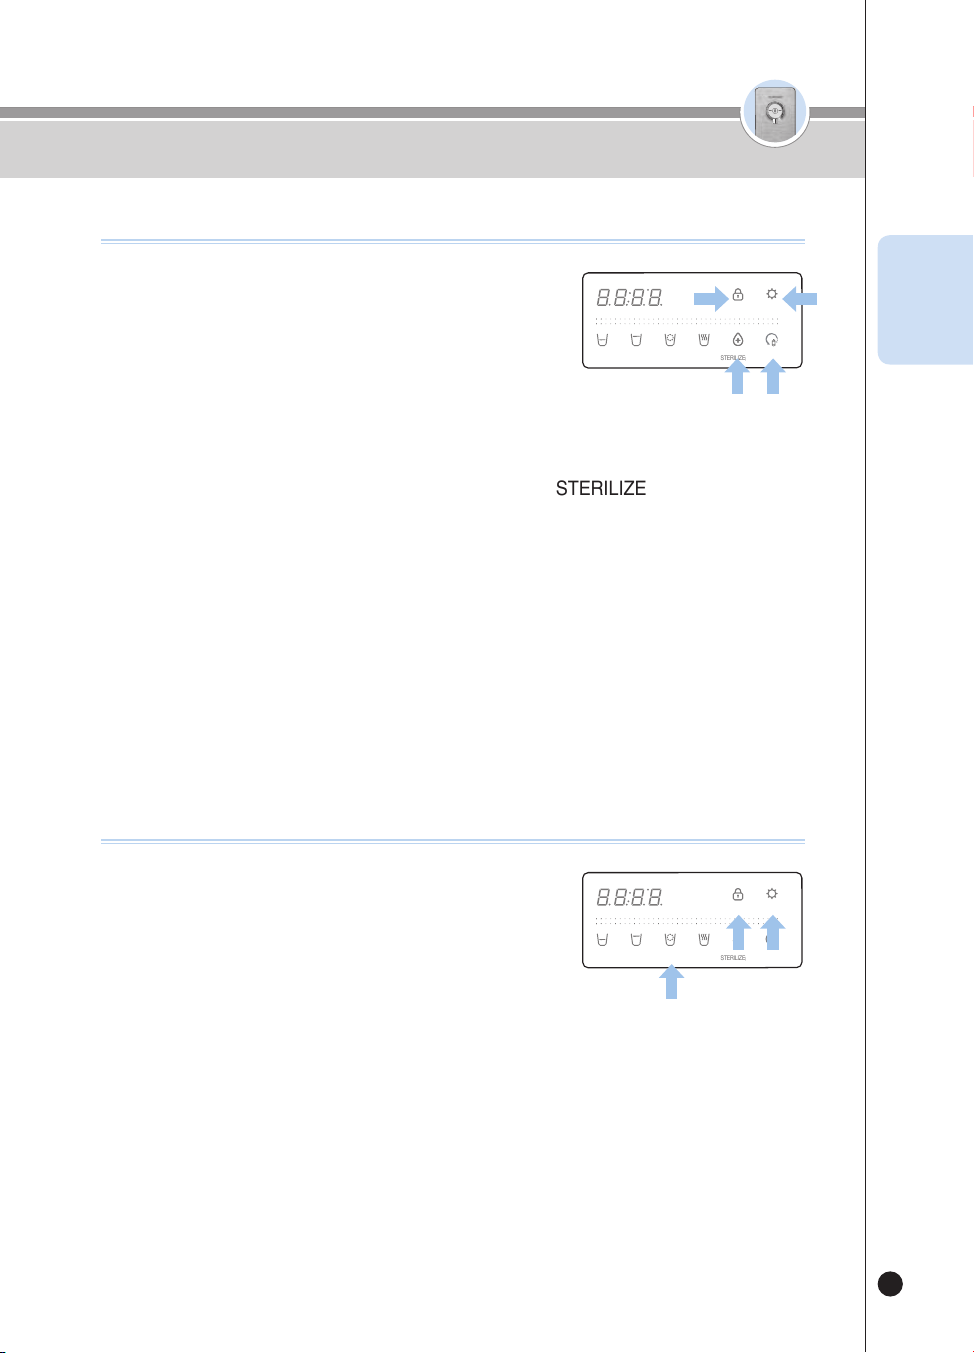
How To Use the Sterilization Preset function
HOT
HOLD
SELECT MODE SELECT
LOCK(3SEC) ENERGY SAVE/
SETTING(3SEC)
HALF
CUP
ONE
CUP
NON-
STOP
HOT
TEMP.
TIME/
STERILIZE(3SEC)
FILTER
RESET(3SEC)
ROOM
COLD
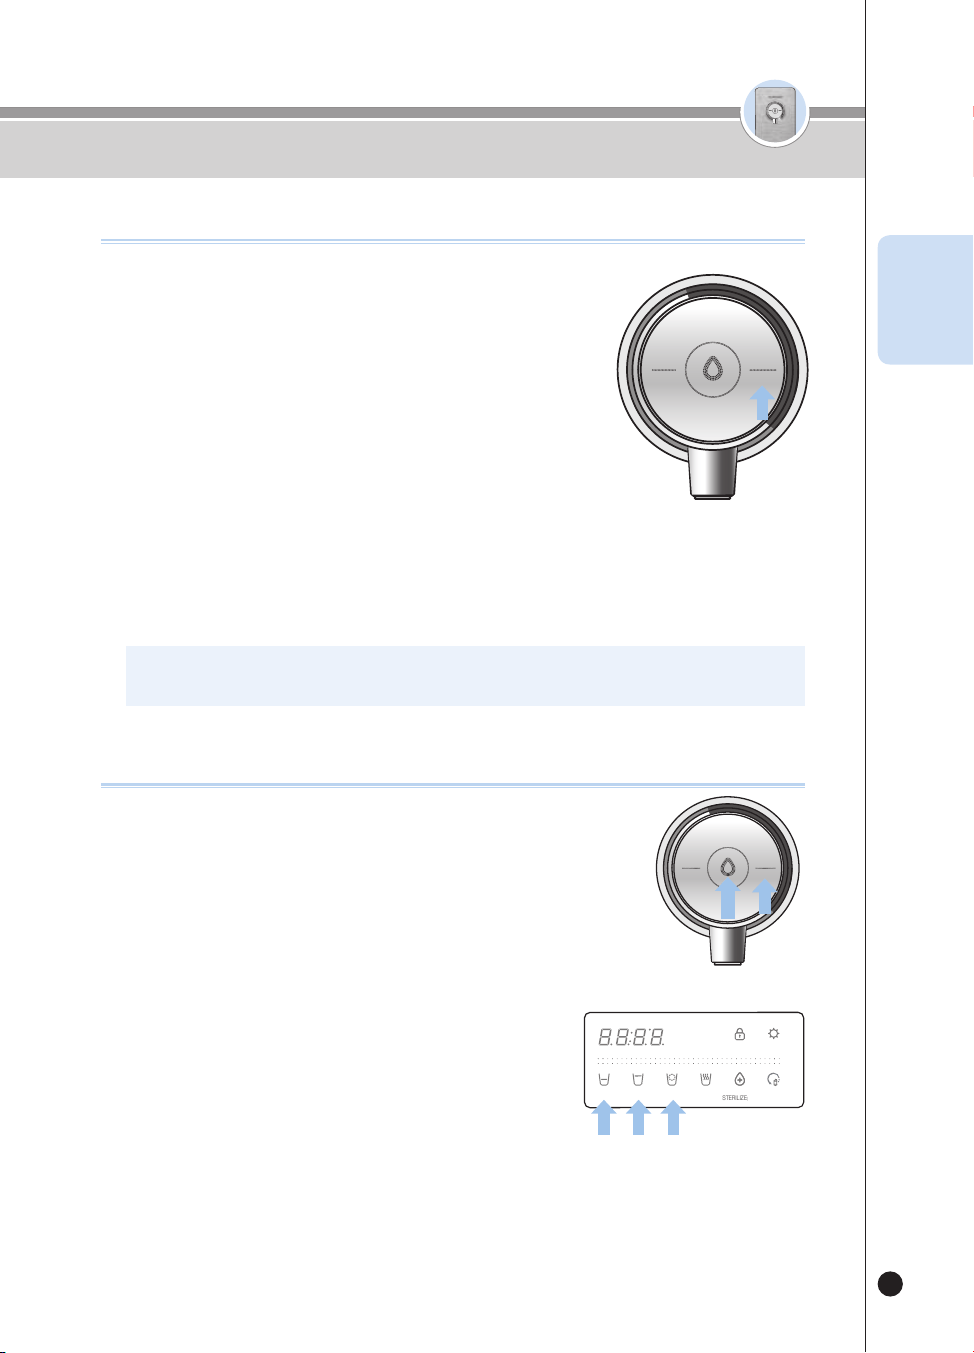
❶
Place the Sterilizing Cup.
❷
Press the [Time/Sterilize] Button for about three
seconds in the Waiting status.
▶
The product will immediately start the sterilization, and the Voice
Guide will say “Start Auto Sterilization.”
▶
The [Time/Sterilize] Button Display Light will be turned ON, and the sterilization progress will be displayed.
❸
In order to cancel the sterilization operation, press the [Time/Sterilize] Button while
the product is operating the sterilization.
▶
The Voice Guide will say “Auto Sterilization Cancelled” and the sterilization cancellation will be operated.
▶
The Display Panel will show the sterilization cancellation status.
※ After the operation is completed. remove the Sterilizing Cup.
※ Sterilizing water is not drinking water. Prevent anyone from drinking the sterilizing water.
How To Use the Immediate Sterilization function
HOT
HOLD
SELECT MODE SELECT
LOCK(3SEC) ENERGY SAVE/
SETTING(3SEC)
HALF
CUP
ONE
CUP
NON-
STOP
HOT
TEMP.
TIME/
STERILIZE(3SEC)
FILTER
RESET(3SEC)
ROOM
COLD
How To Use
When Sterilization Recommended Alarm is prolonged.
❶
Sterilization function unused for a prolonged amount of time will indicate condition
via [Time / Sterilize] button indicator.
▶
If you do not use sterilization for a long time, The button indicator flashes three times.
온수
잠금
온수
잠금
19
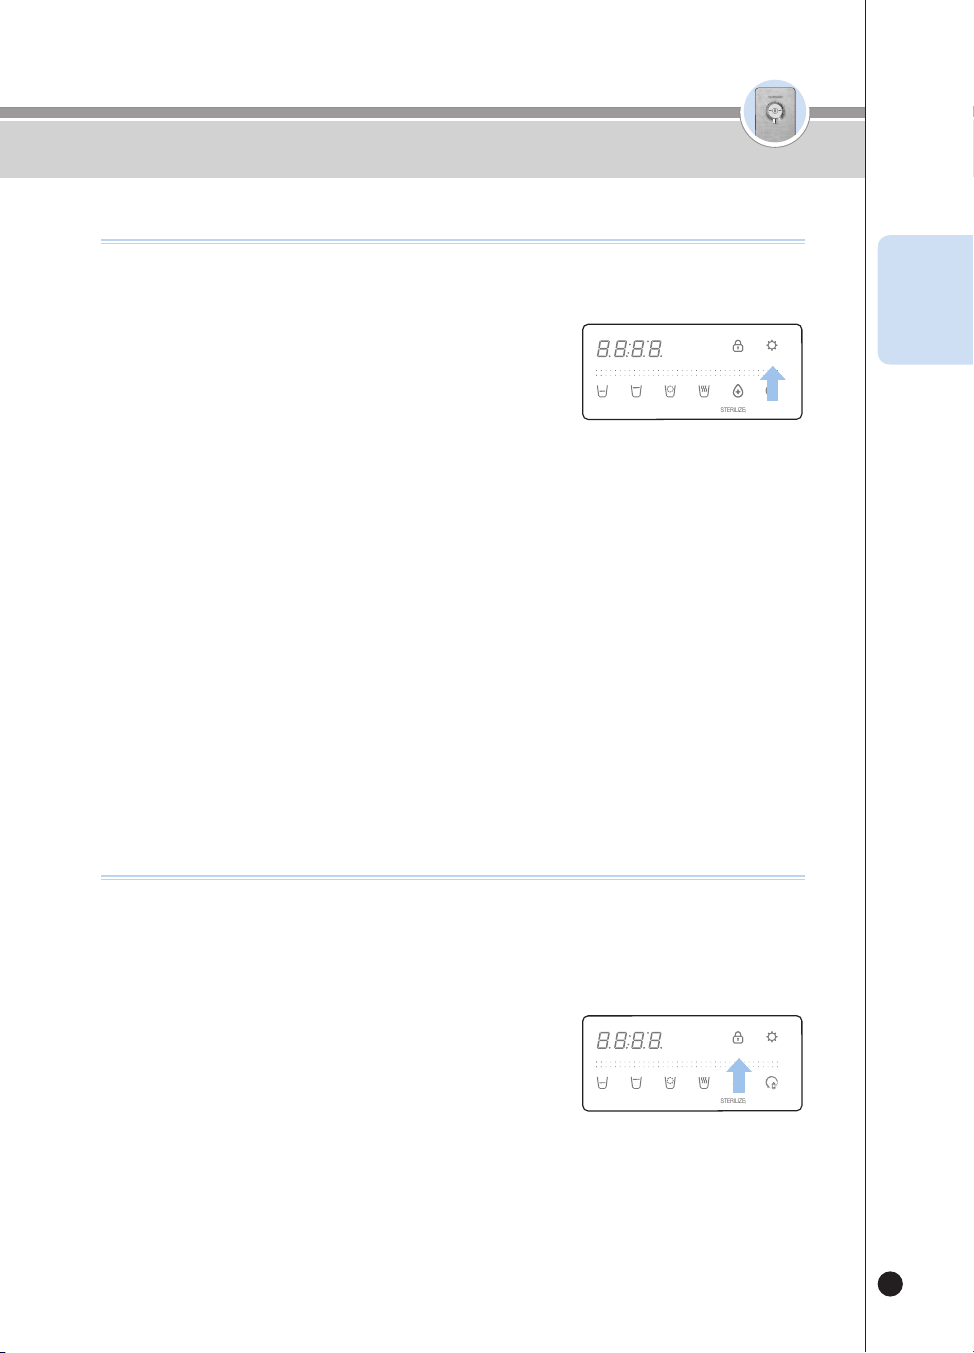
How To Use the Energy Save function
This is a function to save energy by reducing the brightness of the Display
Lights.
❶
Press the [Energy Save/Setting] button while the
[Energy Save/Setting] Display Light is turned OFF.
▶
The [Energy Save/Setting] Display Light will be turned ON, and in
one second, all Display Lights will be dark.
▶
The Voice Guide will say “Energy-Eye Function Selected.”
▶
While the Energy Save function is working, if you press the button, the Display Lights will be bright. (if the
button is not pressed for a certain time, the Display Lights will be dark again.)
❷
If you press the [Energy Save/Setting] button while the [Energy Save/Setting] Display
Light is turned ON, the Energy Save function will be canceled.
▶
The [Energy Save/Setting] Display Light will be turned OFF, and in one second, all Display Lights will be
bright.
▶
The Voice Guide will say “Energy-Eye Function Cancelled.”
How To Use the Button Lock function
This is a function to prevent the random control by children, etc. and to clean
the product.
If this function is selected, the input of all the buttons will be blocked.
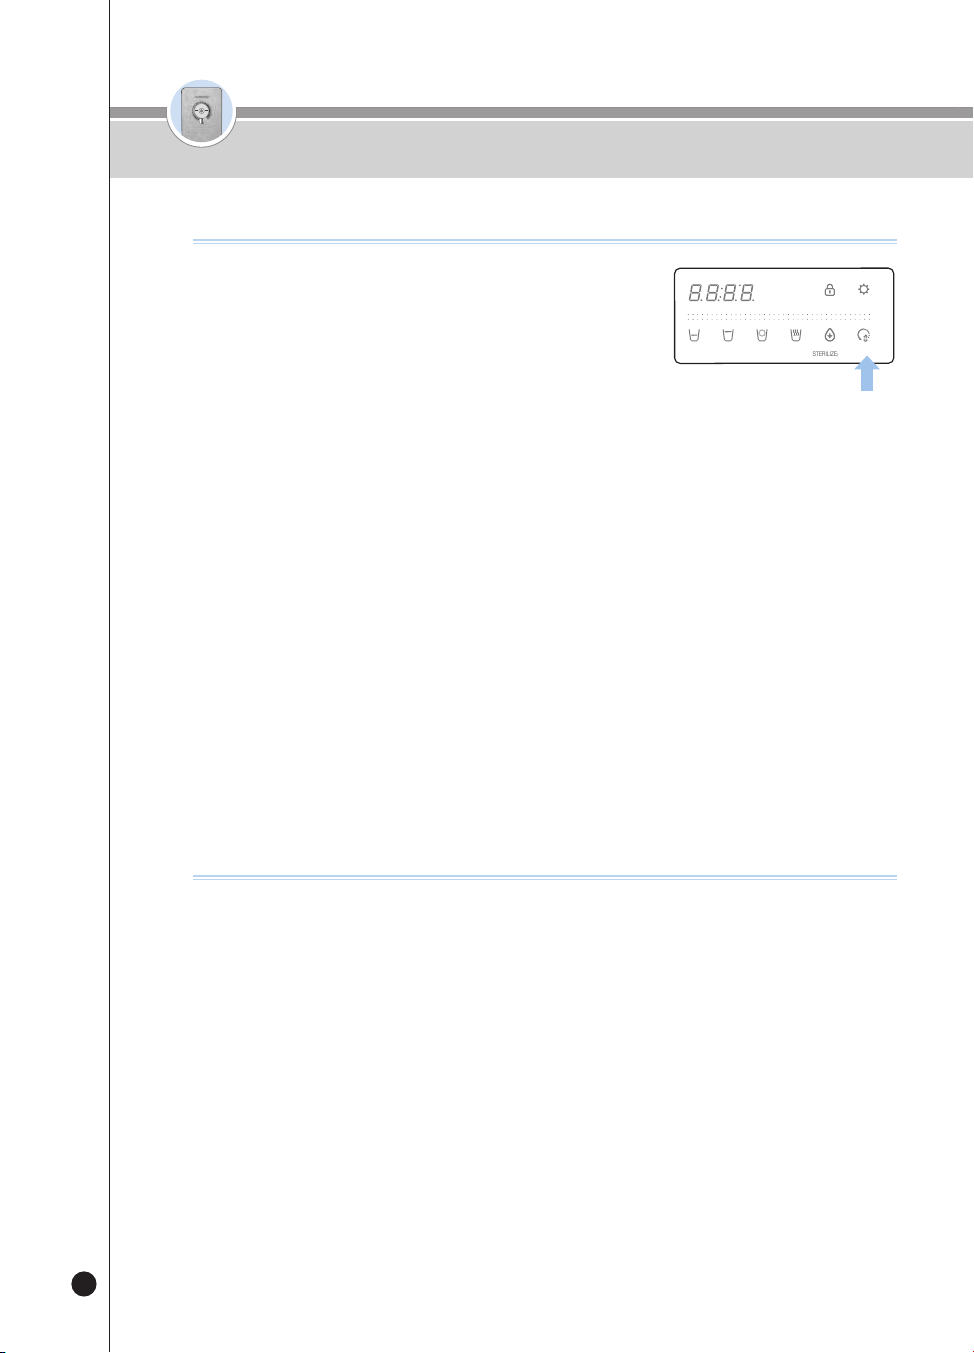
❶
If you press the [Lock] button for three seconds in the
Waiting status, the Button Lock will be selected.
▶
If you press a button in the Button Lock status, “Loc_” will be
displayed and the Voice Guide will say“Button is being locked.”
▶
If you press the [Lock] button for three seconds in the Button
Lock status, “Un_Loc_” will be displayed and the Button Lock will
be released.
HOT
HOLD
SELECT MODE SELECT
LOCK(3SEC) ENERGY SAVE/
SETTING(3SEC)
HALF
CUP
ONE
CUP
NON-
STOP
HOT
TEMP.
TIME/
STERILIZE(3SEC)
FILTER
RESET(3SEC)
ROOM
COLD
HOT
HOLD
SELECT MODE SELECT
LOCK(3SEC) ENERGY SAVE/
SETTING(3SEC)
HALF
CUP
ONE
CUP
NON-
STOP
HOT
TEMP.
TIME/
STERILIZE(3SEC)
FILTER
RESET(3SEC)
ROOM
COLD
How To Use
ENG
온수
잠금
온수
잠금
20
❶
Notification of Time to Replace Filters through Three-Colored LEDs (Mood lights) on
the Faucet
▶
LED OFF
→
Sky-Blue
→
Yellow
→
Purple
(As the use volume of filters increases, the color changes consecutively.)
❷
Notification of Time to Replace Filters through the [Filter Reset] button Display Light
▶
When you press the [Filter Reset] button while the [Filter Reset] button Display Light is ON, the Voice Guide
will say, “Filter replacement is required.”
❸
Notification of Time to Replace Through Voice in Case of Outflow
▶
When water is being dispensed, the Voice Guide will say, “Filter replacement is required.”
e.g.) In case of the first outflow, the Voice Guide will say so only once a day.
※ When the Voice for replacing a filter is emitted, contact our Natural Manager to replace the filter.
How to check lter usage level
❶
Press the [Filter Reset] button for three seconds
While in the Waiting status.
▶
The Voice Guide will say, “Start reset.”
❷
After the Reset is completed, the Voice Guide
will say, “Reset completed,” and “Start auto filter
cleaning,” and the product will clean the filters.
▶
The Display Panel will show the cleaning time.
▶
Manually open the water valve or ball valve. If the water valve does not open “Please open the Veggie water
lever.” voice guide will follow.
▶
Filter cleaning in progress “Please lock the Veggie water lever”. Voice guide will function Manually close
the water valve or the ball valve.(See How to clean the filter, page 24)
❸
When the cleaning process is done, the voice guidance “Auto filter cleaning
completed” will follow, the products will be ready for water outflow.
❹
To cancel the filter cleaning function, press the [Outflow] button during filter cleaning.
▶
“Auto filter cleaning stopped” voice guide will function.
❺
The time required for filter cleaning depends on the water pressure of the raw water, it
takes about 10~15 minutes.
▶
When cleaning filters, Open the water lever and the Voice Guide will sound
“Please open the Veggie water lever.” then Switch the Filter Door Lock lever towards the “Close” direction.
To Use the Filter Reset Function
HOT
HOLD
SELECT MODE SELECT
LOCK(3SEC) ENERGY SAVE/
SETTING(3SEC)
HALF
CUP
ONE
CUP
NON-
STOP
HOT
TEMP.
TIME/
STERILIZE(3SEC)
FILTER
RESET(3SEC)
ROOM
COLD
How To Use
온수
잠금
온수
잠금
21
❶
In standby mode, press the [Energy Save/Setting]
button for 3 seconds.
▶
Enter the user setting mode.
❷
After entering user setting mode, press the [Lock]
button once.
▶
“Filter replacement alarm setting mode” voice guide will function
❸
Press the [Energy Save/Setting] button to enter the filter replacement notification
setting mode.
❹
Press the [Non-Stop] button to set the filter replacement alarm function.
▶
Repeats ON / OFF every time button is pressed.
Ex) ON
→
OFF
→
ON
→
OFF
→
...
❺
Select filter change notification ON / OFF and press [Energy Save/Setting] button to
save.
▶
“Set-up completed” voice guide will function
※ When the function is turned OFF, the filter replacement alarm does not operate.
When using lter alarm
HOT
HOLD
SELECT MODE SELECT
LOCK(3SEC) ENERGY SAVE/
SETTING(3SEC)
HALF
CUP
ONE
CUP
NON-
STOP
HOT
TEMP.
TIME/
STERILIZE(3SEC)
FILTER
RESET(3SEC)
ROOM
COLD
❶
In standby mode, press the [Energy Save/Setting]
button for 3 seconds.
▶
Enter the user setting mode.
❷
After entering user setting mode, press the [Lock]
button twice.
▶
“Sterilizer Kit Module” voice will function
❸
Press the [Energy Save/Setting] button to enter sterilizing notification setting mode.
❹
Press [Non-Stop] button to cancel Sterilization recommended alarm notification.
▶
Repeat ON / OFF every time button is pressed.
Ex) ON
→
OFF
→
ON
→
OFF
→
...
❺
Select sterilization recommended alarm ON / OFF and press [Energy Save/Setting]
button to save.
▶
“Set-up completed” voice will function.
※ Sterilization recommended alarm will not function when turned OFF.
When wanting to use Sterilization recommended alarm
HOT
HOLD
SELECT MODE SELECT
LOCK(3SEC) ENERGY SAVE/
SETTING(3SEC)
HALF
CUP
ONE
CUP
NON-
STOP
HOT
TEMP.
TIME/
STERILIZE(3SEC)
FILTER
RESET(3SEC)
ROOM
COLD
How To Use
ENG
온수
잠금
온수
잠금
22
❶
Press the [Energy Save/Setting] button for three
seconds in the Waiting status.
▶
The product will enter the User Setting mode.
❷
After the product enters the User Setting mode, press
the [Lock] button three times [One cup volume] or
four times [Half cup volume].
▶
The Voice Guide will say, “Half cup, 1cup dispensing volume setting mode.”
❸
Press the [Energy Save/Setting] button to enter the Outflow Volume Setting mode.
❹
Press the [One-Cup] or [Non-Stop] button to set a desired outflow volume.
▶
Each time you press the button, the Display will repeat changing from 0 (Standard) to Up and Down.
ex)
Fixed Amount
Quantity of Outflow (cc)
Down Standard Up
Half Cup About 95 cc(3.2oz) About 110 cc(3.7oz) About 125 cc(4.2oz)
One Cup About 130 cc(4.4oz) About 150 cc(5.1oz) About 170 cc(5.7oz)
❺
Select a desired outflow volume, and save the information by pressing the [Energy
Save/Setting] button.
▶
The Voice Guide will say “Set-up completed.”
How To Change Fixed Amount of Outow
HOT
HOLD
SELECT MODE SELECT
LOCK(3SEC) ENERGY SAVE/
SETTING(3SEC)
HALF
CUP
ONE
CUP
NON-
STOP
HOT
TEMP.
TIME/
STERILIZE(3SEC)
FILTER
RESET(3SEC)
ROOM
COLD
❶
Press the [Energy Save/Setting] button for three
seconds in the Waiting status.
▶
The product will enter the User Setting mode.
❷
After the product has entered the User Setting Mode,
press the [Lock] button five times.
▶
The Voice Guide will say “Voice volume setting mode.”
❸
Press the [Energy Save/Setting] button to enter the Voice Volume Setting mode.
❹
Set the Voice Volume Step by pressing the [Non-Stop] button.
▶
Each time you press the button, the step will be changed by one step from the previously set voice level.
e.g.) Step 4
Step 5
→
OFF
→
Step 1
→
Step 2
→
…
▶
In order to set the maximum volume, select the set value to be 5.
▶
If you do not want to use the Voice Guide, select the set value to be OFF.
❺
Select a desired voice volume, and save the information by pressing the [Energy
Save/Setting] button.
▶
The Voice Guide will say “Set-up completed.”
How to Change Voice Volume
HOT
HOLD
SELECT MODE SELECT
LOCK(3SEC) ENERGY SAVE/
SETTING(3SEC)
HALF
CUP
ONE
CUP
NON-
STOP
HOT
TEMP.
TIME/
STERILIZE(3SEC)
FILTER
RESET(3SEC)
ROOM
COLD
How To Use
온수
잠금
온수
잠금
23
❶
Press the [Energy Save/Setting] button for three
seconds in the Waiting status.
▶
The product will enter the User Setting mode.
❷
After the product has entered the User Setting Mode,
press the [Lock] button six times.
▶
The Voice Guide will say “Mood lamp setting mode.”
❸
Press the [Energy Save/Setting] button to enter the Mood Lamp Setting mode.
❹
Select the Mood Lamp function by pressing the [Non-Stop] button.
▶
Each time you press the button, the Display will repeat showing ON and OFF.
e.g.) On
OFF
→
ON
→
OFF
→
…
❺
Select ON or OFF of the Mood Lamp and save it by pressing the [Energy Save/Setting]
button.
▶
The Voice Guide will say “Set-up completed.”
How To Use the Mood Lamp Function
HOT
HOLD
SELECT MODE SELECT
LOCK(3SEC) ENERGY SAVE/
SETTING(3SEC)
HALF
CUP
ONE
CUP
NON-
STOP
HOT
TEMP.
TIME/
STERILIZE(3SEC)
FILTER
RESET(3SEC)
ROOM
COLD
❶
Press the [Energy Save/Setting] button for three
seconds in the Waiting status.
▶
The product will enter the User Setting mode.
▶
After the product has entered the User Setting Mode, press the
[Lock] button seven times.
▶
The Voice Guide will say, “Automatic filter flushing function.”
❷
Press the [Energy Save/Setting] button.
▶
The Voice Guide will say, “Start auto filter cleaning,” and the product will clean the filters.
▶
The Display Panel will show the cleaning time.
▶
Manually open the water valve or ball valve. If the water valve does not open “Please open the Veggie
water lever.” voice guide will function.
▶
Filter cleaning in progress “Please lock the Veggie water lever”. Voice guide will function Manually close
the water valve or the ball valve. (See How to clean the filter, page 24)
❸
When the filter is cleaned, the voice guidance “Auto filter cleaning completed” will
function, will be ready for water outflow.
❹
To cancel the filter cleaning function, press the [Outflow] button during filter cleaning.
▶
“Auto filter cleaning stopped” voice guide will function.
❺
The time required for filter cleaning depends on the water pressure of the raw water, it
takes about 10~15 minutes.
How To Use the Filter Cleaning Function
HOT
HOLD
SELECT MODE SELECT
LOCK(3SEC) ENERGY SAVE/
SETTING(3SEC)
HALF
CUP
ONE
CUP
NON-
STOP
HOT
TEMP.
TIME/
STERILIZE(3SEC)
FILTER
RESET(3SEC)
ROOM
COLD
How To Use
ENG
온수
잠금
온수
잠금
24
How To Use
How To Use the Filter Cleaning Function(When External Valve is installed)
❶
Manually open the water valve. If the water valve
does not open “Please open the Veggie water lever.”
voice guide will function.
❷
Filter cleaning in progress “Please lock the Veggie
water lever.” Voice guide will function Manually close
the water valve.
OPEN
CLOSE
How To Use the Filter Cleaning Function(When External Valve is not installed)
❶
Manually open the water valve. If the water valve
does not open “Please open the Veggie water lever.”
voice guide will function.
❷
Filter cleaning in progress “Please lock the Veggie
water lever.” Voice guide will function Manually close
the ball valve.
OPEN
CLOSE
온수
잠금
온수
잠금
25
How To Set Language
❶
Press the [Energy Save/Setting] button for three
seconds in the Waiting status.
▶
The product will enter the User Setting mode.
❷
After the product has entered the User Setting Mode,
press the [Lock] button nine times.
▶
The Voice Guide will say, “Voice selection mode.”
❸
Press the [Energy Save/Setting] button to enter the Language Setting mode.
❹
Press the [Non-Stop] button to select a language.
▶
Each time you press the button, the language will change.
e.g.) 1(English)
→
2(Korean)
→
3(Spanish)
→
…
❺
Select the desired language and save it by pressing the [Energy Save/Setting] button.
▶
The Voice Guide will say “Set-up completed.”
HOT
HOLD
SELECT MODE SELECT
LOCK(3SEC) ENERGY SAVE/
SETTING(3SEC)
HALF
CUP
ONE
CUP
NON-
STOP
HOT
TEMP.
TIME/
STERILIZE(3SEC)
FILTER
RESET(3SEC)
ROOM
COLD
How To Set Current Time
❶
Press the [Energy Save/Setting] button for three
seconds in the Waiting status.
▶
The product will enter the User Setting mode.
❷
After the product has entered the User Setting Mode,
press the [Lock] button eight times.
▶
The Voice Guide will say “Present time display and setting mode.”
❸
Press the [Energy Save/Setting] button to enter the Time Setting mode.
❹
Set the hour of the current time by pressing the [TIME/STERILIZE] Button.
❺
Set the minute of the current time by pressing the [Filter Reset] button.
❻
Save the current time by pressing the [Energy Save/Setting] button.
▶
The Voice Guide will say “Set-up completed.”
HOT
HOLD
SELECT MODE SELECT
LOCK(3SEC) ENERGY SAVE/
SETTING(3SEC)
HALF
CUP
ONE
CUP
NON-
STOP
HOT
TEMP.
TIME/
STERILIZE(3SEC)
FILTER
RESET(3SEC)
ROOM
COLD
How To Use
ENG

온수
잠금
온수
잠금
26
How to Clean the Tray
How to Clean Main Body
● Wipe off with a soft dry cloth.
▶
Before wiping off, set the Button Lock function to prevent an incorrect
operation during cleaning.
▶
When the product becomes severely polluted, wipe it off with a cloth
with a little moisture.
(Do not clean the product by using benzene, thinner, or abrasive.)
● Pull the Pre-Filter on a floor surface of the product to separate,
wash it under running water, and then reassemble it.
▶
If it is not cleaned for a long time, the cool water performance may be
lowered.
❶
Remove the Tray
▶
Hold and pull the Tray out of the front side of the product to separate
it from the product.
※ When you pull the Tray, pull it slowly with both hands.
If you strongly pull it, the water may pour out.
❷
Remove the Tray Grille
▶
Then detach the Tray Grille from the Tray by taking hold of
and uplift the hole at the Grille.
❸
Clean the Tray
▶
Dispose of the stagnant water, and
completely wipe it out with a soft cloth.
❹
Reassemble the Tray
▶
After cleaning the Tray, place the Tray back
in reserve order.
How To Clean Tray / How To Clean Main Body
온수
잠금
온수
잠금
27
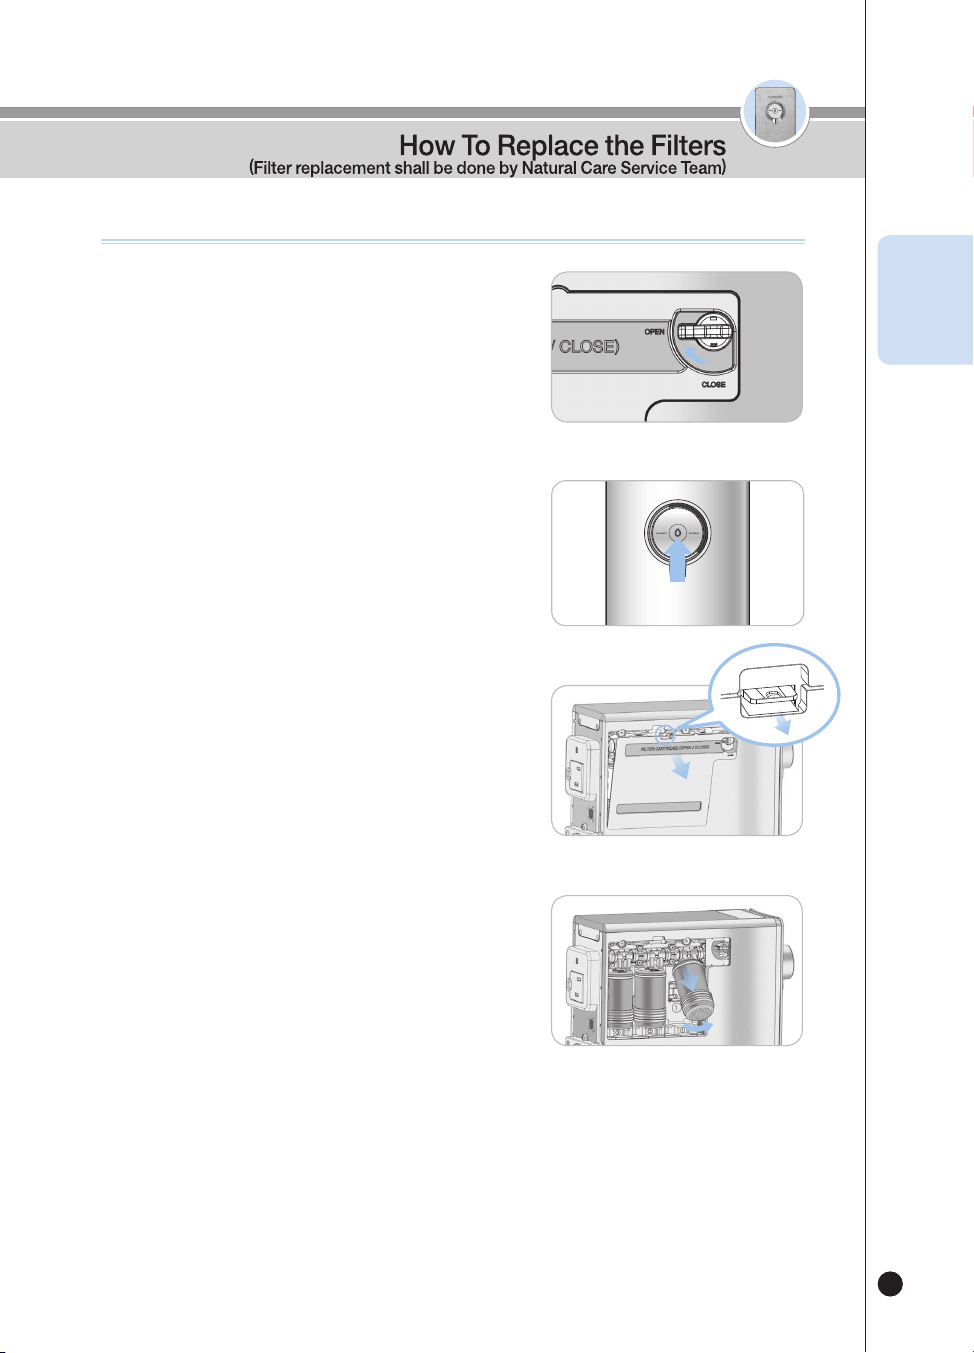
How To Replace the Filters (Must not use non-CUCKOO Water Purier lters.)
❶
Switch the Filter Door Lock on the left of the
product towards the open sign.
• It stops the tap water flow internally when the replacing the
filter by shutting off the water supply.
❷
Dispense room water completely until there is no
water left in the product.
•
When dispense water, please use a cup or a container, etc
❸
Press the hook and Disassemble the filter door
• Do not turn the filter door lock by force, It may cause damage to the
product
• If the filter door cannot be opened, Please Switch the Filter Door Lock
lever towards the “Open” direction.
❹
Remove the filter by lifting and pulling it.
• When you remove the filter, water gathered in the Filter Fastening Unit
may leak. When water leaks, wipe it out by using a cloth, etc.
HOT
LOCK
ROOM
COLD
Filter
Door
Lock
Lever
OPEN
ENG
온수
잠금
온수
잠금
28
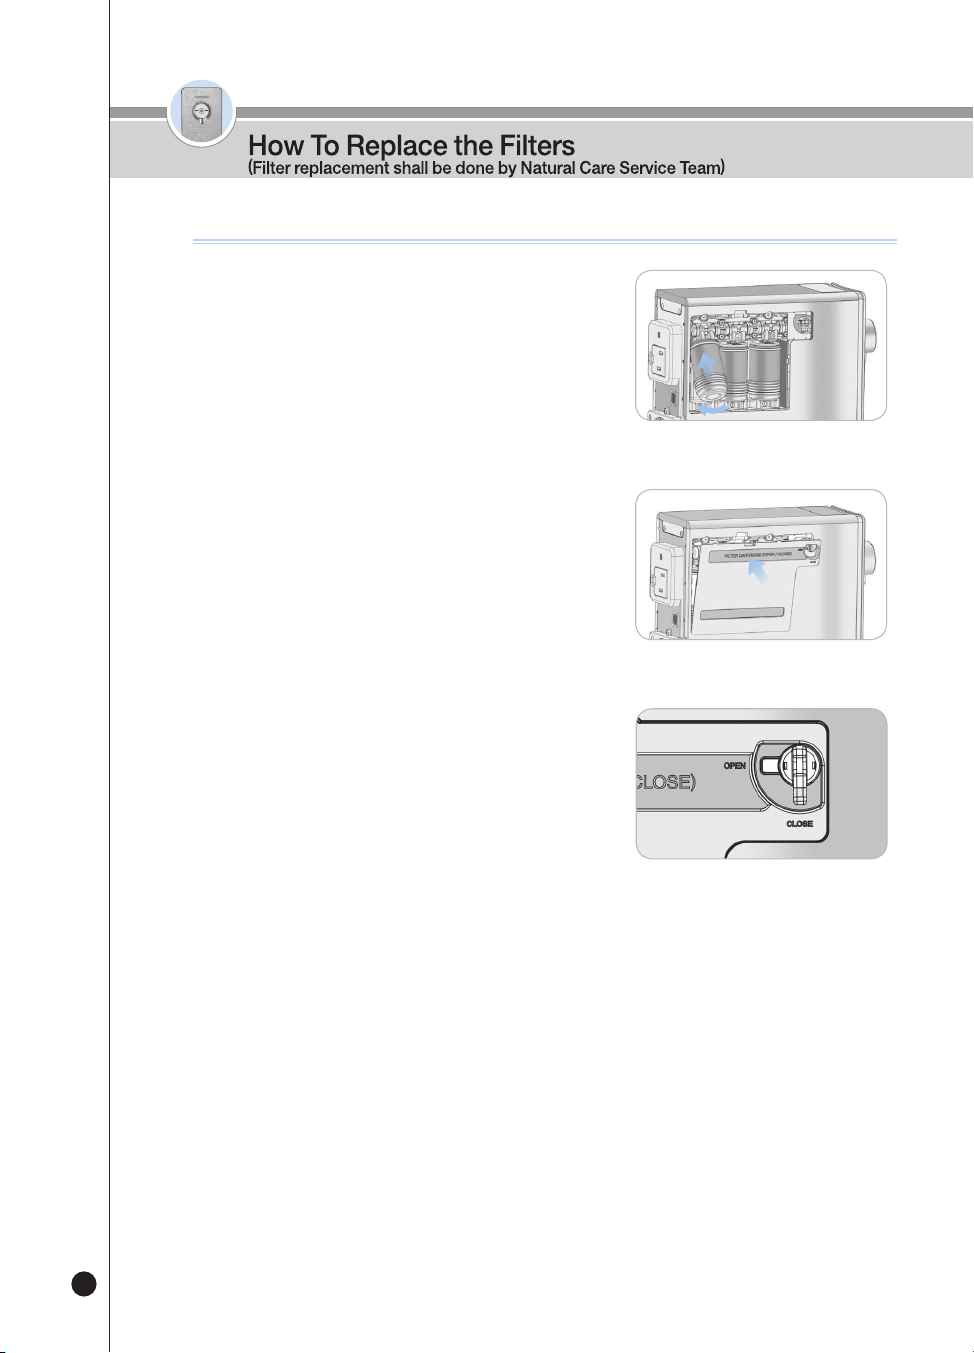
❺
Insert the filter as in the figure, and push it into
the Filter Case to connect it.
• The filters are the Sedi Carbon Composite Filter, the Natural Plus Filter,
and the Nano Positive Filter from the right side to the left side.(or the
Pre Carbon 2.0 Filter, the Nano Positive Filter, and the Alkali-Mineralizer
Filter from the right side to the left side.). Please be careful about the
order.
• Please check if the filter is properly settled on the Filter Case.
❻
Fasten the Filter Door as in the figure.
• Fit it properly on the grooves on a bottom end to smoothen installation.
❼
Switch the Filter Door Lock on the left of the
product towards the close sign.
(to let the tap water flow internally)
• When the Filter door lock is closed, water is supplied to the product.
How To Replace the Filters (Must not use non-CUCKOO Water Purier lters.)
CLOSE
❽
If the product is in the standby state, refer to page 20 to perform the filter reset
function.
※ If you did not reset the filter, the filter replacement alarm may go off.
※ When cleaning filters, Open the water lever and the Voice Guide will sound
“Please open the Veggie water lever.” then Switch the Filter Door Lock lever
towards the “Close” direction.
Filter
Door
Lock
Lever
온수
잠금
온수
잠금
29
Step 1
Step 2
Step 3
3 2 1
▶
The filter replacement cycle is set based on the amount of water filtered at home (10L(338.1oz) per day), and the
status of water supply may affect the cycle.
Step
1 2
3
Filter Name
Sedi Carbon Composite Natural Plus
Nano Positive
Replacement Cycle
4month
[1,200L(40576.8oz)]
4month
[1,200L(40576.8oz)]
8month
[2,400L(81153.6oz)]
Filter Name
Pre Carbon 2.0 Nano Positive
Alkali-Mineralizer
Replacement Cycle
4month
[1,200L(40576.8oz)]
8month
[2,400L(81153.6oz)]
8month
[2,400L(81153.6oz)]
Expected Filter Replacement Cycle
▶
Filter Replacement Cycle
• The expected filter replacement cycle is estimated by a close review of the filters for each filter to display its proper
performance. This is determined based on the amount of tap water filtered for drinking (10L(338.1oz) per day for four
persons). Thus the cycle shortens as the amount used goes up.
Recommendations
Filter Arrangement
Expected Filter Replacement Cycle / Recommendations / Filter Arrangement
ENG
30
Please check before asking for Support
Problem Checklist Recommended Actions
The water has bad taste
and/or odor.
• Was the product left idle for a long time?
• Do you need to replace the filters?
• Operate the Filter Cleaning function.
(Refer to page 23)
• Contact Customer Service for filter replacement.
It fails to dispense water.
• Is the Power Cord connected?
• Is the tap water supplied properly?
• Have you pressed the [Outflow] button
properly?
• Is there water under the product?
• Do you need to replace the filters?
• Is the Filter Door lock opened?
• Connect the Power Cord.
• Open the Tap Water Supply Valve.
• Check if the water supply tube is folded.
• Check if water is cut off.
• Press the [Outflow] button properly.
• Close the Tap Water Supply Valve, unplug the
product, and contact our Customer Service Center.
• Contact Customer Service for filter replacement.
• Close the Filter Door lock at left side in the product.
(Water is supplied to the product )
It fails to dispense cold
water.
• Have you dispensed a lot of cold water?
• Did you close the Tap Water Supply Valve?
• Is the ventilation at the back of the product
good?
• If a lot of cold water is dispensed, the product needs
some time to recool the water.
• Check the Tap Water Supply Valve.
• Check if the radiator at the back of the product is
blocked. Remove any objects blocking the radiator.
• Move the product to a place with good ventilation.
(Please contact our Customer Service Center
whenever you move and reinstall the product.)
• If there is excess dust in the air vents, contact our
Customer Service Center.
The hot water is lukewarm.
• Is it the first cup of hot water? • When you first operate the Instantaneous Hot Water
function, the temperature of the first cup may be low.
• Check if the temperature of the hot water is normal
from the second cup.
▼
If you do not comply with this User Manual, the product may not work properly even if there is no malfunction.
Please take the following measures accordingly if there is a problem with the product. If there is still a problem, please
contact our Customer Service Center.

31
Please check before asking for Support
Problem Checklist Recommended Actions
It does not dispense
enough water.
• Have you closed the Tap Water Supply
Valve?
• Do you need to replace the filters?
• Is the Filter Door lock opened?
• Open the Tap Water Supply Valve.
• Replace the Filter with a genuine CUCKOO Filter.
• Close the Filter Door lock at left side in the product.
(Water is supplied to the product )
There is a loud noise
coming from the product.
• Please check if it’s installed on firm, even
ground.
• Does it touch any other objects?
• Is the Tray assembled properly?
• Are the back surface and the side surfaces
of the product in contact with the wall?
• Are there items such as a flowerpot, books,
or clock on the product?
• Install the product on a flat and solid floor.
• Make sure it does not touch any other objects.
• If the Tray is not properly mounted, an abnormal
noise can be made. Check the state of assembly of
the Tray.
• Reinstall the product with a proper distance (20 cm)
from the wall.
• Remove the items on the product.
There are floating matters
in the dispensed water.
• Do you need to replace the filters? • Replace the Filter. (Do not use a Non-Cuckoo filter.)
There are fine particles in
the room water.
• Are there bubbles? • If there are still fine particles in the water after five
minutes, immediately contact our Customer Service
Center.
Water is leaking from the
purifier.
• Is the assembled (connecting) part
defective?
• Is your home or the external environment
humid?
• Close the Tap Water Supply Valve and unplug the
product. After that, contact our Customer Service
Center for service.
• Dew condensation may occur when a cold part of
the water purifier meets moisture, which is the same
as if a water droplet forms on a water cup.
▼
If you do not comply with this User Manual, the product may not work properly even if there is no malfunction.
Please take the following measures accordingly if there is a problem with the product. If there is still a problem, please
contact our Customer Service Center.
ENG

32
Product Name
Electric Water Cooler (Instantaneous Water Heater) / CUCKOO Cold & Hot Water Purifier
Model Name
CP-P011T(White, Titan Silver), CP-P011G(White, Peach Gold)
Rated Voltage
Single-Phase AC 120V / 60Hz
Power Consumption
Total : 1440W(12A) [Cold Water : 90W(0.75A). Hot Water : 1350W(11.25A)]
Water Filtration Method
Nano Positive Filtrating System
Filter Types
Step 1
Sedi Carbon Composite
Pre Carbon 2.0
Step 2 Natural Plus Nano Positive
Step 3 Nano Positive Alkali-Mineralizer
Capacity
Room Water
Direct Dispensing
Cold Water
Direct Chill
Hot Water
Instant Heating
Types of Refrigerants
R-134a, 1.06oz
The high and low-side design
pressure
High-side : 186psig, Low-side : 88psig
Climate Rating N(For temperate climate regions)
Product
Weight
Around 23.2lb(10.5kg)
Size (W×D×H)
6.7″ x 18.4″ x 16.1″ (170mm x 468mm x 408mm)
Used Tap
Water
Pressure
Under
0.049MPa(0.49bar)
No Installation Allowable
0.049MPa~0.196MPa
(0.49bar~1.96bar)
Allowed to install
0.196MPa(1.96bar)
or higher
Proper Water Pressure
Used Environment Temperature
41℉ - 104℉ (5℃ - 40℃)
Used Tap Water Temperature
41℉ - 95℉ (5℃ - 35℃)
※ Specifications and other details may be subject to change without prior notice for product improvement.
Product Specications
33
가족 여러분!
저희 쿠쿠 인앤아웃 직수 정수기를 이용해 주셔서 감사합니다.
이 사용설명서(보증서 포함)는 잘 보관하여 주십시오.
사용중에 모르는 사항이 있을 때나 기능이 제대로 발휘되지
않을 때 많은 도움이 될 것입니다.
쿠쿠 인앤아웃 직수 정수기의 특징과 장점
온수
잠금
사용자 설명서에 제품보증서가 포함되어 있습니다.
제품 사용 전 ‘사용설명서’를 반드시 읽고 정확하게 사용하십시오. 읽고 난 뒤에는 제품을 사용하는 사람이 항상 볼 수 있는 곳에 보관
해 주십시오.
주의 : 본 제품은 가정용으로 다른 용도(상업용, 실험용 등)로의 사용을 금합니다. 제품을 고장 없이 오래 사용하시려면 사용설명서를 꼭 읽어주십시오.
나노포지티브 필터링 시스템
쿠쿠 정수기의 나노포지티브 필터링 시스템을 적용하여 미네랄이 포함된 깨끗하고 건강한 물을 만들어 줍니다.
건강한 직수 정수기
물 저장부 없이, 순간 냉각 및 순간 가열, 직수 정수 방식으로 필터를 통과한 물을 곧바로 냉수, 온수, 정수로 음용할 수 있습
니다.
초슬림형 디자인 속에 다기능성을 갖춘 세련된 정수기
냉수, 온수, 정수를 하나의 정수기에서 이용 가능하며, 슬림하고 세련된 디자인으로 공간을 더욱 효율적으로 사용할 수 있습
니다.
전기분해 살균시스템
전기분해 살균시스템을 적용하여 위생적인 정수기 이용이 가능하며, 고객이 원할 때마다 언제나 안심살균할 수 있습니다.
경제적인 친환경 정수 시스템
나노포지티브 필터를 통해 물이 걸러지는 과정에서 버려지는 물이 없는 매우 경제적이고 친환경적인 정수 시스템을 채택하였
습니다.
버튼 잠금/기능 잠금
어린이나 노약자의 제품 오사용에 의한 사고를 방지하기 위하여 버튼 잠금 및 기능잠금(온수)를 추가하였습니다.
누수 방지 시스템
제품 사용 중에 발생할 수 있는 누수를 감지/차단하여 안전한 정수기 이용이 가능하도록 하였습니다.
연속 출수 기능
냉수, 온수, 정수를 연속으로 출수할 수 있어 편리합니다.
정량 출수 기능
냉수, 온수, 정수를 한컵(약 150cc(5.1oz)), 반컵(약 110cc(3.7oz)) 정량으로 출수할 수 있어 편리합니다.
이런 점이 좋습니다.

34
쿠쿠 인앤아웃 직수 정수기의 특징과 장점
33
안전상의 경고
35 ~ 38
안전상의 주의
39 ~ 40
각 부분의 명칭 / 부속품 안내
41 ~ 42
정수 배관도 / 정수 처리 시스템
43
사용 전 확인 사항
44
사용하기
45 ~ 56
물받이 청소 방법 / 제품 본체 청소 방법
57
필터 교체 방법
58 ~ 59
필터 예상 교체 주기 / 권고사항 / 필터 배열도
60
고장신고 전에 확인하십시오.
61 ~ 62
제품규격
63
사용하기전에
사용할때
고장신고전에
서비스안내
CONTENTS
(목차)
온수
잠금
35
온수
잠금
안전상의 경고
KOR
부착형 멀티 콘센트를
사용하지 마십시오.
• 화재 및 감전의 원인이 됩니다.
전원 코드를 무리하게
구부리거나 묶거나
잡아당기지 마십시오.
• 감전이나 쇼트로 인해
화재의 원인이 될 수 있습니다.
수시로 전원 코드 상태를 꼭 확인하십시오.
이동형 연장코드 사용 시
전류 용량이 15A의
접지가 되는 연장코드에
단일 제품만 사용하십시오.
• 화재 및 감전의 원인이 됩니다.
• 여러 제품과 사용 시 화재 및 감전의 원인이 됩니다.
수시로 콘센트 상태를 꼭 확인하십시오.
• 접지가 제대로 되지 않으면 누전으로 인한 감전의 원인이 됩니다.
• 접지플러그에 이물질이나 물기가 묻어 있는 경우에는
잘 닦은 다음 사용하십시오.
반드시 접지가 되는 정격
15A 이상의 교류 120V
전용 콘센트에서만
사용해 주시고 한 콘센트에
여러 제품의 전원 플러그를
동시에 꽂아 사용하지 마십시오.
• 제품 사용 중 사용상의 부주의로 전원 코드의 피복이 벗겨지거나
찍힐 경우 화재 및 감전의 원인이 될 수 있으니, 수시로 전원 코드
와 전원 플러그, 콘센트의 상태를 꼭 확인 하십시오.
• 전원 코드나 전원 플러그가 파손된 경우에는 위험이 생기지 않도
록 하기 위하여 제조자나 그 판매점 또는 유자격 기술자(서비스
기사)에 의해 코드 교환을 하십시오.
• 반드시 지정된 서비스센터에서 수리하시기 바랍니다.
• 감전 및 누전, 화재의 원인이 됩니다.
전원 코드나 전원
플러그가 파손되었거나
콘센트가 흔들릴 때는
사용을 중지하고, 고객
상담실로 문의 바랍니다.
• 감전, 쇼크, 발화의 원인이 될 수 있습니다.
수시로 전원 플러그의 상태를 꼭 확인하십시오.
전원 플러그에 물, 먼지,
이물질 등이 묻은 경우,
물기가 없는 천으로
깨끗이 제거하여 주십시오.
전원 관련
!
경고(금지)
● ‘안전상의 경고’는 제품을 안전하고 올바르게 사용하여 사고나 위험을 미리 막기 위한 것이므로 반드시 지켜 주십시오.
● ‘안전상의 경고’는 ‘경고’와 ‘주의’의 두 가지로 구분되어 있으며 ‘경고’와 ‘주의’의 의미는 다음과 같습니다.
• 이 기호는 특정 조건에서 위험을 끼칠 우려가 있는 사항에 대하여
주의를 환기시키는 표시입니다.
• 위험 발생을 피하기 위해 주의 깊게 읽고 지시에 따라 사용하십시오.
• 이 기호는 어떤 행위를 ‘금지’ 하는 표시입니다.
• 이 기호는 어떤 행위를 ‘지시’ 하는 표시입니다.
!
!
피하지 않을 경우 사망이나 중상을
초래할 수 있는 잠재적인 위험상황
!
경고
피하지 않을 경우 경상을 초래할 수
있는 잠재적인 위험상황
!
주의
36
온수
잠금
안전상의 경고
온수
잠금
전원 부분에 물이 들어간
경우, 플러그를 빼고,
완전히 건조시킨 뒤
사용하십시오.
• 감전 및 화재의 원인이 될 수
있습니다. 수시로 전원 플러그 및
전원 코드의 상태를 꼭 확인하십시오.
제품 수리, 점검 및
부품 교환 중에는
반드시 전원 플러그를
빼주십시오.
• 고장이나 감전의 위험이 있습니다.
수시로 전원 플러그 및 전원 코드의
상태를 꼭 확인하십시오.
전원 플러그를 뽑을
때에는 전원 코드를
잡지 마시고 꼭
전원 플러그를 잡고
뽑아주십시오.
• 전원 코드에 충격이 가면 감전 및 화재의
원인이 될 수도 있습니다.
수시로 전원 플러그 및 전원 코드의 상태를 확인하십시오.
누수 및 세척(청소) 시에
는 반드시 원수 공급
밸브를 잠근 후, 플러그를
뽑아주십시오.
• 감전 및 고장의 우려가 있습니다.
수시로 전원 플러그 및 전원 코드의 상태를 확인하십시오.
전원 코드가 무거운 것에
눌리거나 날카로운 부위
에 닿지 않도록 하시고
애완동물들에 의해
손상을 입지 않도록
주의하십시오.
• 코드 손상으로 인한 감전이나 화재의 원인이 됩니다.
수시로 전원 코드 상태를 꼭 확인하십시오.
전원 플러그를 콘센트에
꽂거나 뺄 때는 손의
물기를 반드시 제거한
후 전원 플러그를 잡고 꽂
거나 뽑아 주십시오.
• 젖은 손으로 전원 플러그를 뽑으면 감전
의 원인이 될 수 있습니다.
• 무리하게 당겨 뽑으면 전원 코드에 이상이 발생하여 누전 및 감전이 될
수 있습니다.
수시로 전원 플러그 및 전원 코드의 상태를 꼭 확인하십시오.
• 감전, 화재의 원인이 될 수 있습니다.
• 제품이 정상적으로 작동을 하지
않습니다.
• 수시로 전원 플러그 및 전원 코드의 상태를 꼭 확인하십시오.
교류 120V 이외에는
사용하지 마십시오.
전원 관련
!
경고(금지)
오랫동안 제품을 사용
하지 않을 때는 원수
공급 밸브를 잠그고,
전원 플러그를 뽑아
주세요.
• 재사용 시, 즉시살균 기능을 동작 시킨 후 이용해 주십시오.(49페이지
참조)
• 재사용 시 “사용 전 확인사항”을 참조하십시오.(44페이지)
37
온수
잠금
온수
잠금
안전상의 경고
KOR
설치 관련
!
경고(금지)
화장실과 가까운 장소에 설치하지 마십시오.
울퉁불퉁하거나 경사진
곳에 설치하거나 깔판,
방석, 장판 위에 설치하지
마십시오.
• 고장 및 소음의 원인이 될 수 있으며,
상해를 입을 수 있습니다.
수시로 제품 상태를 꼭 확인하십시오.
• 화재 및 제품 파손이 발생할 수 있습니다.
• 본 제품은 고정형 제품으로 고정하여 사용하시기 바랍니다.
이상
1. 이하
이상
직사광선과 고온을 피해
설치해 주십시오.
• 변색, 탈색의 원인이 될 수
있습니다.
• 수시로 전원 코드의 상태를
꼭 확인하십시오.
이상
1. 이하
이상
가스가 누출될 수 있거나
냉, 난방기와 가까운 곳에
설치하지 마십시오.
• 폭발이나 화재의 위험이 있습니다.
원수는 반드시 상수도를
사용하시고, 원수 공급
밸브는 냉수배관 쪽으로
설치하십시오.
• 상수도 외의 지하수 등을 원수로
사용하지 마세요.
• 필터의 교환 시기는 지역별, 물 사용 용량별로
차이가 날 수 있습니다.
• 온수배관에 설치 시 필터 손상 및 제품 고장의 원인이 될 수 있습니
다.
이상
1. 이하
이상
주위 온도가 41℉ 이하로
내려가는 곳이나 실외를
피해 설치하여 주십시오.
• 필터 및 튜빙선, 제품 내부의
결빙으로 제품 고장이나 누수의
원인이 됩니다.
• 제품의 사용환경온도는 41~104
℉
입니다.
이상
1. 이하
이상
제품에 연결되는 원수
공급 호스의 길이는 원수
공급 밸브에서 16.4' 이하로
설치해 주십시오.
• 제품 성능 저하의 원인이 될 수
있습니다.
이상
1. 이하
이상
벽면에서 8" 이상
거리를 두고,
바닥은 견고하고 평평한
곳에 설치해 주세요.
• 제품 성능 저하의 원인이
될 수 있습니다.
이상
1. 이하
이상
습기, 먼지가 많은 곳,
물이 직접 튀는 곳에는
설치 하지 마십시오.
• 제품을 위생적인 환경에 설치
하십시오.
• 제품 고장, 감전 및 화재의 원인이
될 수 있습니다.
이상
1. 이하
이상
이상
1. 이하
이상
38
온수
잠금
온수
잠금
안전상의 경고
사용 중에
!
경고(금지)
!
경고(금지)
제품 위에 전자레인지,
전기 오븐 토스트기 등의
전열기구를 올려두거나
사용하지 마시고 촛불,
가스통, 라이터 등의
인화성 물질을 올려 놓지
마십시오.
• 화재 및 감전, 안전사고의 위험이 있습니다.
제품을 옮길 때, 전원 코드
및 연결호스를 당기거나
출수구 부위를 잡지
마십시오.
• 제품 파손의 원인이 됩니다.
제품 위에 약품, 물통, 작은
금속류 등을 올려 놓지
마십시오.
• 제품 내부로 들어갈 경우 화재의
위험 및 제품이 손상 될 수 있습니다.
제품을 분해하거나 개조
하지 마십시오.
• 화재 및 감전의 원인이 됩니다.
• 서비스 기사 이외의 사람이
분해하거나 수거하지 마십시오.
제품에서 타는 냄새나
연기가 나면 즉시 전원
플러그를 뺀 뒤 원수
공급 밸브를 잠근 후
고객상담실로
연락 주십시오.
• 화재의 위험이 있습니다.
제품 설치 및 해체 시에는 고객상담실을 통해
서비스 기사가 설치 및 해체하도록 하십시오.
어린이 등이 기능 조작부를 너무 자주 동작시키지
않도록 주의하십시오.
• 제품
고장 및 안전사고의 원인이 됩니다.
흡·배기구 또는 틈 사이에 바늘, 청소용 핀, 금속물 등
이물질이 들어가거나 막히지 않도록 하십시오.
• 감전 및 화재의 원인이 됩니다.
조리수 밸브를 솔, 수세미 등으로 문지를 경우
도금이 손상될 수 있으며, 미네랄 고착 등의 원인이
될 수 있습니다.
!
경고(지시)
!
제품 안쪽에서 물이 흘러
나오거나 주변에 물이 고여
있으면 원수 공급 밸브를
잠그고, 전원 버튼을 끈 후
전원 플러그를 뽑은 뒤
고객상담실로
연락 주십시오.
• 감전의 위험이 있습니다.
온수 사용시 주의해
주십시오.
필터 교체 시 원수 공급
밸브(아답터)를 잠가
주십시오.(원수 공급 밸브는
보통 싱크대 아래 혹은
수전구에 있습니다.)
• 온수는 매우 뜨거워 화상의
위험이 있으므로 손이 닿지
않게 하고, 특히 노약자 및
어린이의 사용에 주의 하십시오.
• 누수의 원인이 됩니다.
잠금
원수차단밸브
39
온수
잠금
온수
잠금
안전상의 주의
KOR
• 전원이 연결된 상태에서 제품을
움직이거나 흔들지 말아 주세요.
연결호스 빠짐 등으로 인한 제품
고장 및 누수의 원인이 됩니다.
가동 중에는 제품을 이
동하지 마십시오.
장시간 사용하지 않을
경우에는 즉시 살균
기능을 1회 실시 후
사용해주십시오.
• 즉시살균 기능을 사용하여 관로를 간편하게 세척할 수 있습니
다.(49페이지 참조)
벤젠, 신나 등을
이용하여 제품을
청소하지 마십시오.
• 제품 손상의 위험이 있습니다.
제품 사용 중에 제품
뒷면의 호스를 뽑지
마십시오.
• 누수로 인한 제품 고장의 원인이
됩니다.
제품 내부의 냉각수
탱크 덮개 및 제품 윗면
덮개를 완전히 닫은 후
사용하십시오.
• 이물질이 들어갈 수 있습니다.
정수기 물을 어항 또는 수족관 등에 물갈이 용도
로 사용하지 마십시오.
• 정수된 물은 물고기 환경에 적합하지 않을 수 있습니다.
경우에 따라 물고기가 죽을 수도 있습니다.
제품 이동 시 30° 이상 기울이지 마십시오.
• 제품 성능 저하의 원이 될 수 있습니다.
필터는 반드시 쿠쿠 정품필터를 사용하십시오.
• 쿠쿠 정품필터 이외의 필터사용 시 정수성능저하, 물맛 이상 및
누수, 제품 고장의 원인이 됩니다.
도시가스, 프로판 등
가스가 샐 때에는
제품의 전원코드를
빼지 마시고 즉시
창문을 열어 환기하여
주십시오.
• 화재 및 감전의 원인이 됩니다.
!
주의(지시)
!
!
주의(금지)
필터는 교체 주기에
맞춰 교체해 주십시오.
• 정수 성능 저하 및 냄새 발생의
원인이 될 수 있습니다.
• 필터 교체 주기는 60페이지를
참조하십시오.
40
온수
잠금
온수
잠금
안전상의 주의
스티로폼, 비닐 등
포장재는 어린이가
손대지 않도록
하십시오.
• 질식의 원인이 됩니다.
원수입수관에는
상수도(식수) 외에는
연결하지마십시오.
• 상수도(식수) 외의 물은 질병의
원인이 됩니다.
• 고장의 원인이 되고 제품의 수명이
단축됩니다.
냉매 회로에 손상을
가하지 마십시오.
• 제품 고장의 원인이 됩니다.
온수장치 배관에 압력을 낮추는 장치를 임의로
연결하지 마십시오.
• 제품 고장의 원인이 됩니다.
어린이가 제품에
올라가거나 매달리지 못
하게 하십시오.
• 제품 넘어짐에 의한 상해의 원인이 됩니다.
아래와 같은 장소에는
제품을 설치하지
마십시오.
• 실외
• 직사광선에 노출되는 곳
• 화장실 근처
• 냉방기 및 난방기 앞
• 경사진 곳
온수 출수, 멈춤
동작을 반복적으로
작동 시키지 마십시오.
• 제품 고장의 원인이 됩니다. 특히, 스팀이 발생할 수 있습니다.
본 제품은 120V 전용 제품으로 반드시 접지가 가능한 120V 전용 콘센트를 사용하십시오.
연장코드(멀티 콘센트 등) 사용 시 다른 제품들과 동시에 연결하여 사용하지 마십시오.
접지 불량 시 누전으로 인한 감전사고가 발생할 수 있습니다. 반드시 접지 후 제품을 사용하십시오.
❶
접지 단자가 있는 콘센트의 경우
접지 단자가 있을 경우 별도의 작업 없이 바로 사용할 수 있습니다.
❷
접지 단자가 없는 콘센트의 경우
누전 차단기 설치여부를 확인하시고 누전 차단기가 없다면 누전 차단기를 설치하고 제품을 사용하
십시오. 누전 차단기가 없을 시 화재의 원인이 됩니다.
사용 중에
!
주의
(지시)
!
41
온수
잠금
온수
잠금
각 부분의 명칭
KOR
표시부
및
출수버튼
냉/온/정수 선택
전원코드
배수
조리수
출수구
(3)
(3)
.
(3)
(3)
각 부분의 명칭
<상부>
< 전면 & 후면 >
42
온수
잠금
온수
잠금
각 부분의 명칭
사용설명서관리카드
온수온도 버튼
출수구
정수(출수램프 : WHITE) &
온수(출수램프 : RED) 선택 버튼
사용설명서
관리카드
조리수밸브(별매품)
냉수(출수램프 : LUE) 선택 버튼
살균컵
(분실시 고객상담실로
문의 바랍니다)
SELECT MODESELECT
LOC
(3SEC)
ENERG SAVE/
SETTING
(3SEC)
HALF
CUP
ONE
CUP
NON-
STOP
HOT
TEMP.
TIME/
STERILIZE
(3SEC)
FILTER
RESET
(3SEC)
HOT
LOC
ROOM
COLD
온수온도 버튼
디스플레이부
각 부분의 명칭
부속품 안내
<표시부 상세>
43
온수
잠금
온수
잠금
정수 배관도 / 정수 처리 시스템
KOR
정수 배관도
유량센서
전해살균 모듈
입수
밸브
수위
센서
온도
센서
냉각수
탱크
필터 도어
잠금 레버
필름
히터
온수 출수밸브
냉각수 배수
(배수시만 수동으로 OPEN)
조리수
(설치 선택)
출수구
정수 출수밸브
냉수 출수밸브
교반
모터
온수유량
조절밸브
감압밸브 3
원수
조리수
밸브
4INCH
4INCH
4INCH
구성단계
이름
기능
1
1
세디카본복합 필터
녹찌꺼기, 부유물 제거, 잔류 염소 제거
2내추럴 플러스 필터잔류염소, 유기물질 제거, 항균 기능, 미네랄 성분 함유
3나노포지티브 필터미립자, 일반세균, 중금속 제거(수은, 철, 알루미늄), 노로바이러스 제거
2
1
프리 카본 2.0 필터
입자상 물질 제거, 잔류 염소 제거
2
나노포지티브 필터
미립자, 일반세균, 중금속 제거(수은, 철, 알루미늄), 노로바이러스 제거
3알칼리 미네랄 필터알칼리 및 미네랄 수 생성, 물맛 개선
※ 정품 필터가 아니거나 정품 필터라도 너무 오래 사용하면 필터의 성능이 저하 될 수 있습니다.
단계 1단계 2단계 3
정수 처리 시스템
44
온수
잠금
온수
잠금
사용 전 확인 사항
전원을 연결해 주십시오.
▶ 본제품은 120V 60Hz 전용입니다.
반드시 전용 콘센트에 연결해 주십시오.
❸
12
제품 좌측면의 필터도어 잠금 레버를
CLOSE 방향으로 돌려주십시오.
·
정수기에 물이 공급됩니다.
❷
❹
물받이를 주기적으로 비워주십시오.
정기적으로 필터 교체 및 관리를 해주십시오.
▶ 항상 깨끗한 물을 마시기 위해서는 정기적으로 필터 교체 및
청소가 필요합니다.
▶ 필터 교체 주기는 60페이지를 참고하세요.
❺
원수 공급 밸브를 열어 주십시오.
▶ 원수 공급 밸브를 연후, 각 연결부의 누수 여부를 확인하십시오.
·
원수 공급 밸브부 및 제품의 원수(입수), 조리수
❶
열림
사용 전 확인 사항
필터도어
잠금 레버
잠금

45
온수
잠금
온수
잠금
사용하기
KOR
❶
대기상태
▶ 냉수, 온수, 정수 출수가 가능한 출수 대기 모드입니다.
전면부 표시등은 선택된 기능에 따라 켜지며, 냉수 또는 정수를 표시합니다.
❷
사용자 설정 모드
▶ 대기상태에서 [Energy Save/Setting] 버튼을 3초간 눌러 사용자가 기능을 설정할 수 있습니다.
사용자 설정모드
[Select Mode/Lock] 1회 입력 시필터 교체 알림 설정 기능
[Select Mode/Lock] 2회 입력 시살균 미사용 알림 설정 기능
[Select Mode/Lock] 3회 입력 시한컵 출수량 설정 기능
[Select Mode/Lock] 4회 입력 시반컵 출수량 설정 기능
[Select Mode/Lock] 5회 입력 시음성볼륨 설정 기능
[Select Mode/Lock] 6회 입력 시무드램프 설정 기능
[Select Mode/Lock] 7회 입력 시자동필터 세척 기능
[Select Mode/Lock] 8회 입력 시현재시간 설정 기능
[Select Mode/Lock] 9회 입력 시
음성언어 설정 기능
❸
정량 출수
▶ [Outflow] 버튼을 한번 누르면 선택된 정량 만큼 출수합니다.
▶ [Half Cup]을 선택 후 [Outflow] 버튼을 누르면 약 110cc(3.7oz) 출수됩니다.
▶ [One Cup]을 선택 후 [Outflow] 버튼을 누르면 약 150cc(5.1oz) 출수됩니다.
▶ [Non-Stop] 버튼 선택 후 [Outflow] 버튼을 누르면 연속으로 출수됩니다.
❹
수동 출수
▶ [Outflow] 버튼을 누르고 있는 동안 출수합니다.
▶ [Outflow] 버튼을 2초 동안 누르면 수동 출수로 전환되어 버튼을 누르고 있는 동안 출수합니다.
기능을 설정하려면
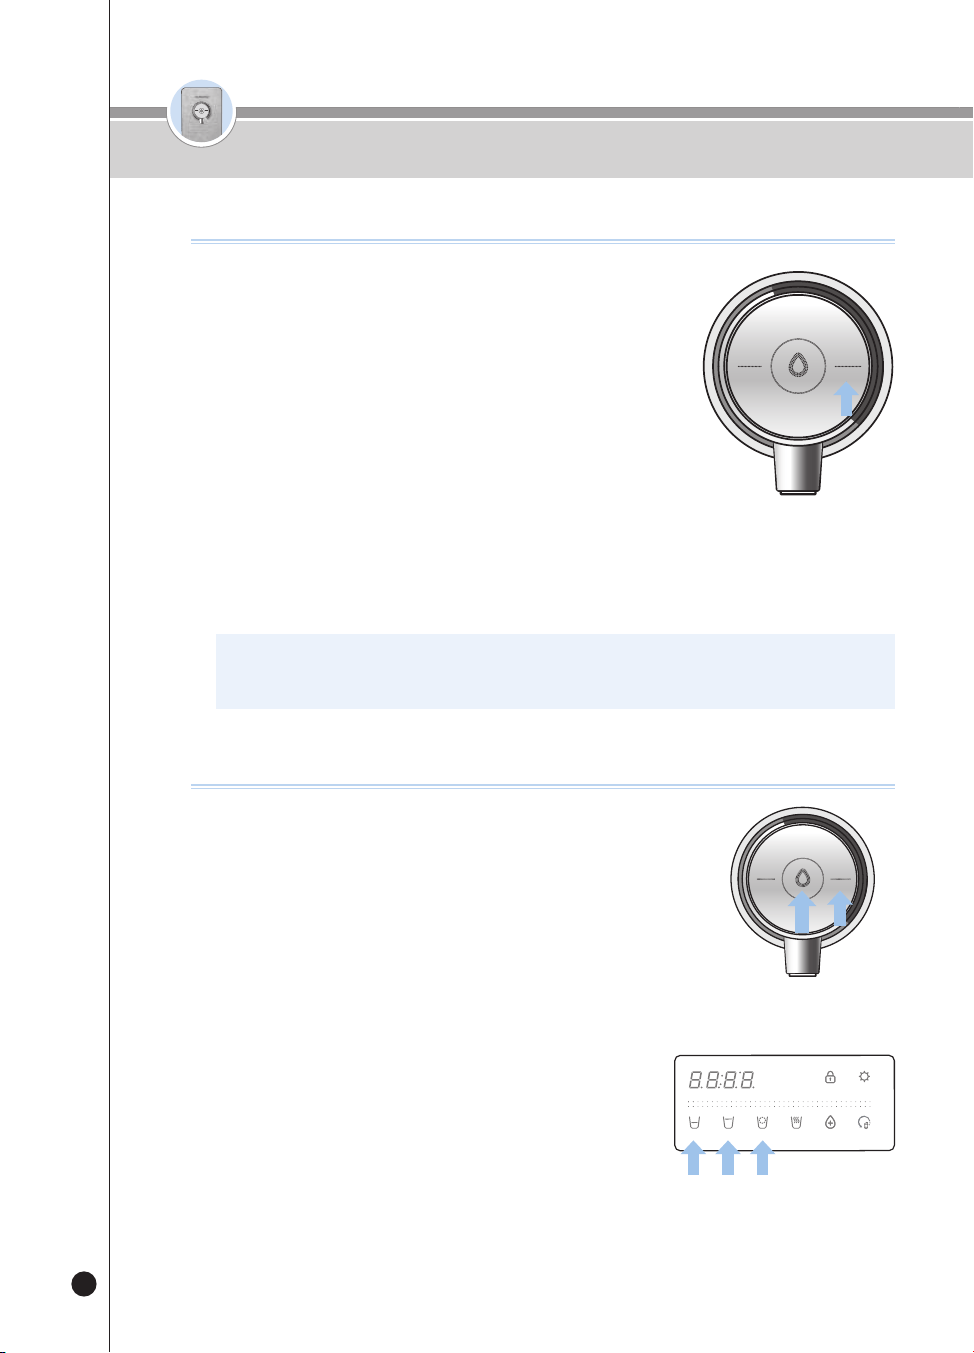
46
온수
잠금
온수
잠금
사용하기
❶
냉수 기능이 OFF 되어 있으면 [Room/Cold] 버튼을 3초간 눌러
냉수 기능을 ON 시켜주세요.
▶ [Room/Cold] 버튼을 누르고 있는 동안 “냉수 기능을 선택 중입니다.”
음성 안내합니다.
▶ 냉수 기능이 ON되면 “ON” 문구를 표시하며, “냉수 기능이 설정
되었습니다.” 음성 안내합니다.
❷
냉수를 사용하지 않으려면, 냉수 기능 ON 상태에서
[Room/Cold] 버튼을 3초간 눌러 냉수 기능을 OFF 시켜주세요.
▶ [Room/Cold] 버튼을 누르고 있는 동안 “냉수 기능을 해제 중입니다.”
음성 안내합니다.
▶ 냉수 기능이 OFF 되면 “OFF” 문구 표시하며, “냉수 기능이
해제 되었습니다.” 음성 안내합니다.
▶ 냉수 기능이 OFF 상태에서 [Room/Cold] 버튼을 누르면 “냉수 기능이
꺼져 있습니다.”, “냉수 기능을 켜고 사용하세요.” 음성 안내합니다.
냉수기능을 설정하려면
※ 냉수는 냉수 기능을 켜고 약 1시간 후 안정적으로 출수 가능합니다.
※ 제품 초기 기능은 ON으로 설정되어 있습니다.
(3)
(3)
.
(3)
(3)
냉수를 사용하려면
(3)
(3)
.
(3)
(3)
(3)
(3)
.
(3)
(3)
❶
[Room/Cold] 버튼을 눌러 냉수를 선택해주세요.
▶ “냉수” 음성 안내합니다.
❷
정량 출수를 하려면
▶ [Half Cup], [One Cup], [Non-Stop] 버튼 중 원하는 출수량을 선택합니다.
▶ [Outflow] 버튼을 한번 눌러주세요. 냉수가 출수됩니다.
▶ 선택된 정량이 출수되면 출수가 종료됩니다.
▶ 정량 출수 중 [Outflow]버튼 또는 그 외 모든 버튼을 누르면 출수가 종료됩니다.
❸
수동 출수를 하려면
▶ [Outflow] 버튼을 눌러주세요. 냉수가 출수됩니다.
▶ [Outflow] 버튼을 2초 이상 누르고 있으면 수동 출수로 변경됩니다.
▶ “누르고 있는 동안 출수됩니다.” 음성 안내합니다.
▶ 수동 출수 중 [Outflow] 버튼을 떼면 출수가 종료됩니다.
❹
냉수 출수 중 출수구에 파란색 조명이 켜집니다.
(무드기능이 OFF되어 있으면 켜지지 않습니다.)
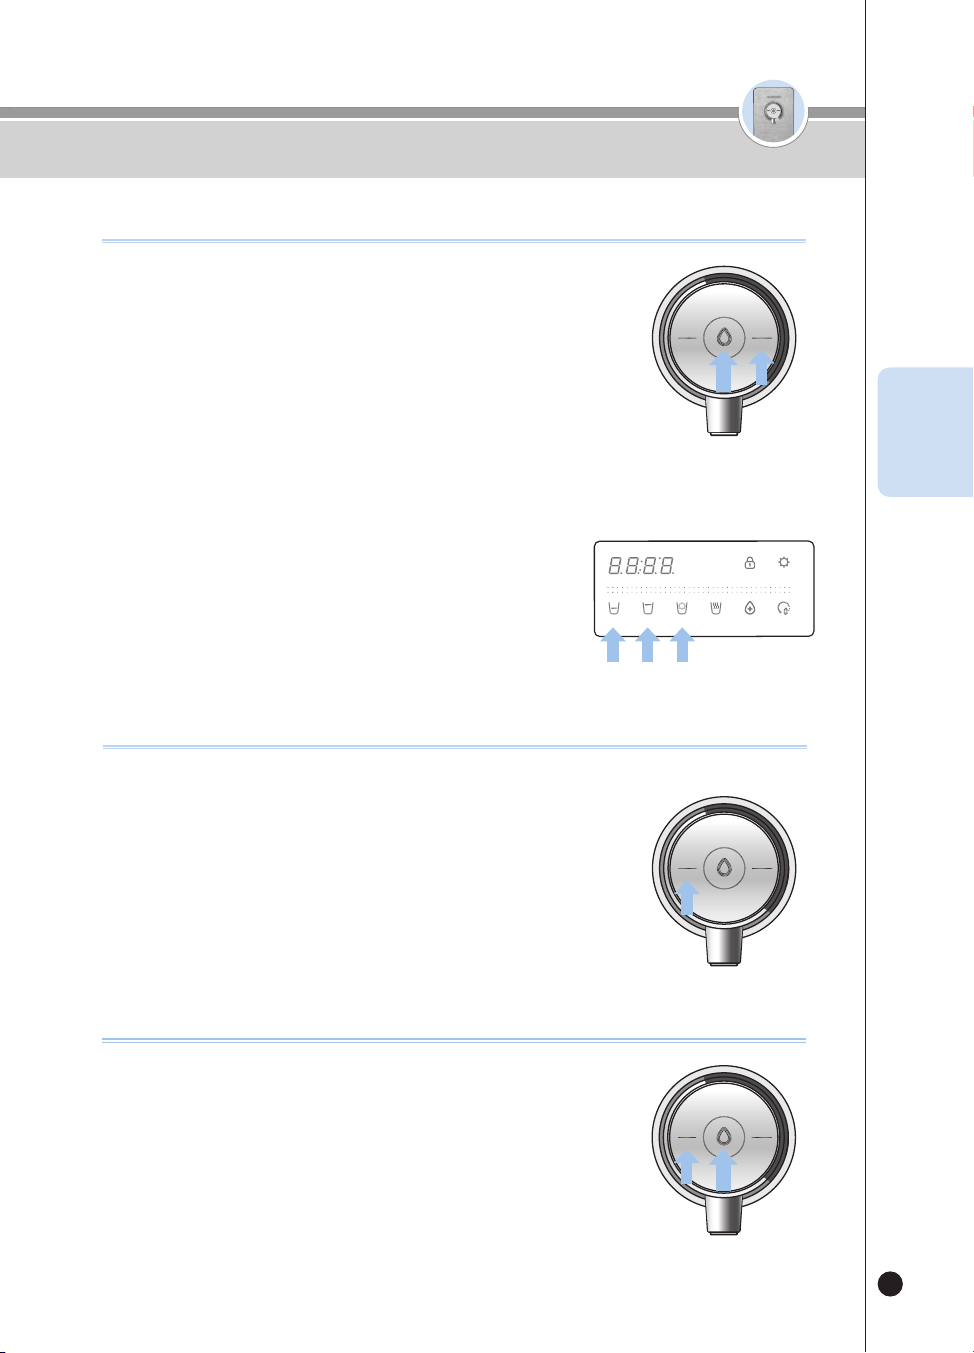
47
온수
잠금
온수
잠금
사용하기
KOR
❶
[Room/Cold] 버튼을 눌러 정수를 선택해주세요.
▶ “정수” 음성 안내합니다.
❷
정량 출수를 하려면
▶ [Half Cup], [One Cup], [Non-Stop] 버튼 중 원하는 출수량을 선택합니다.
▶ [Outflow] 버튼을 한번 눌러주세요. 정수가 출수됩니다.
▶ 선택된 정량이 출수되면 출수가 종료됩니다.
▶ 정량 출수 중 [Outflow] 버튼 또는 그 외 모든 버튼을 누르면 출수가 종료됩니다.
❸
수동 출수를 하려면
▶ [Outflow] 버튼을 눌러주세요. 정수가 출수됩니다.
▶ [Outflow] 버튼을 2초 이상 누르고 있으면 수동 출수로 변경됩니다.
▶ “누르고 있는 동안 출수됩니다.” 음성 안내합니다.
▶ 수동 출수 중 [Outflow] 버튼을 떼면 출수가 종료됩니다.
❹
정수 출수 중 출수구에 녹색 조명이 켜집니다.
(무드기능이 OFF되어 있으면 켜지지 않습니다.)
정수를 사용하려면
온수잠금 기능을 설정하려면
어린이 등의 임의 조작을 방지하여 화상에 대한 보호 기능 입니다.
기능이 선택되면 [Hot/Lock] 버튼이 입력되지 않습니다.
❶
대기상태에서 [Hot/Lock] 버튼을 약 3초간 누르면 온수 잠금이 선택됩니다.
▶ 온수 잠금 상태에서 [Hot/Lock] 버튼을 누르면 “Loc_” 표시하고,
“온수 잠금 중입니다.” 음성 안내합니다.
▶ 온수 잠금 중 [Hot/Lock] 버튼을 3초간 누르면 “Un_Loc_” 표시하고
온수 잠금이 해제됩니다.
제품 설치 후 온수를 사용하려면
❶
[Hot/Lock] 버튼 입력 후 [Outflow] 버튼을 눌러주세요.
▶ “입수 설치 점검을 시작합니다.” 음성 안내 합니다.
▶ 점검이 완료되면 출수가 종료 됩니다.
▶ “제품이 정상 설치 되었습니다.” 음성 안내 합니다.
❷
제품 설치 가 완료 된 후 온수를 사용할 수 있습니다.
(3)
(3)
.
(3)
(3)
(3)
(3)
.
(3)
(3)
(3)
(3)
.
(3)
(3)
(3)
(3)
.
(3)
(3)
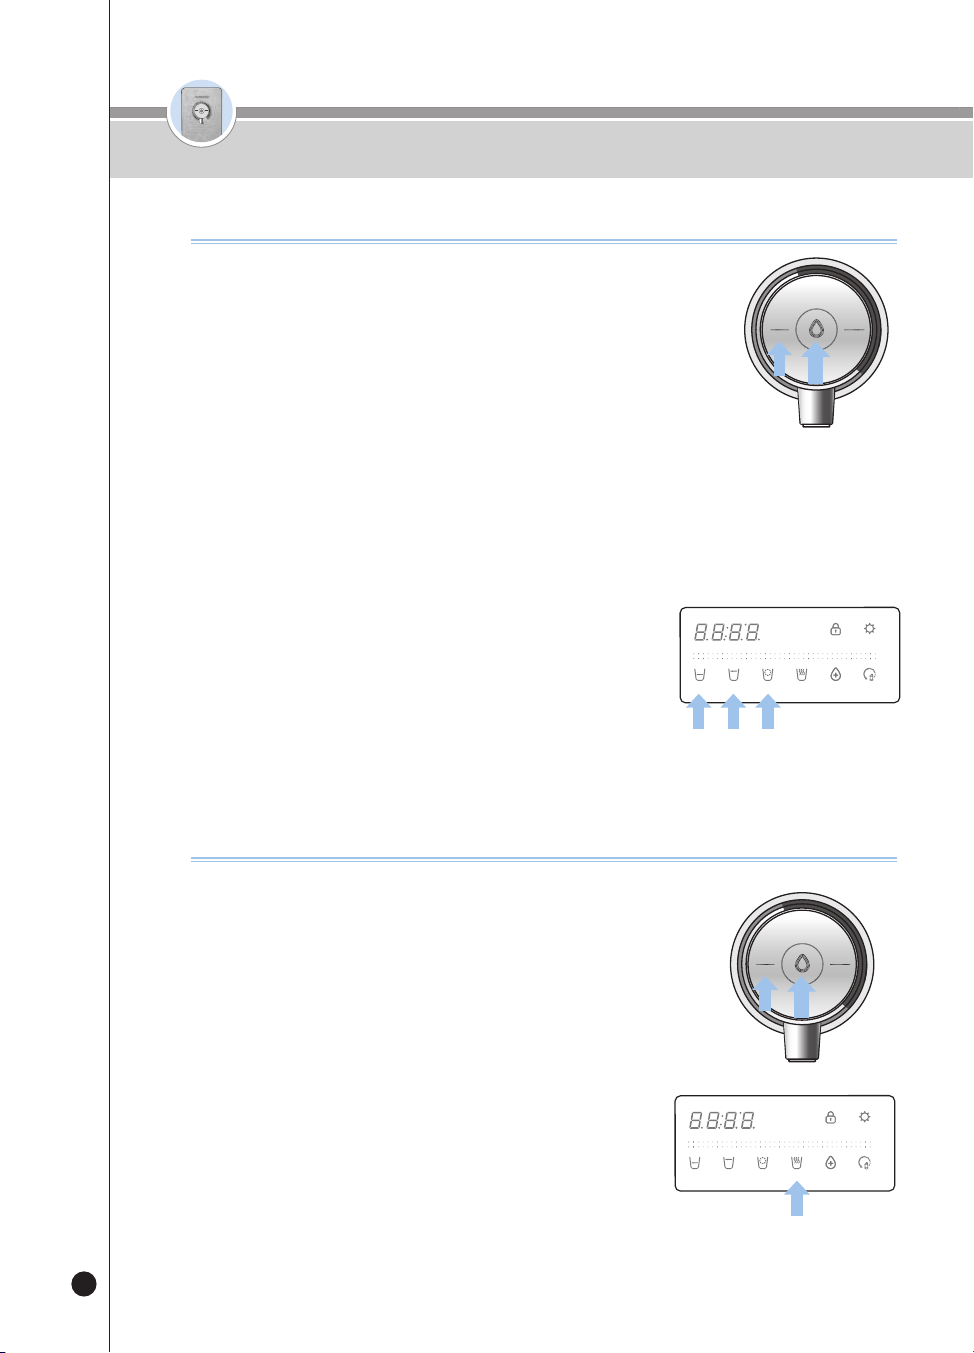
48
온수
잠금
온수
잠금
사용하기
온수를 사용하려면
❶
[Hot/Lock] 버튼을 눌러 온수를 선택하세요.
▶ “온수” 음성 안내합니다.
❷
정량 출수를 하려면
▶ [Half Cup], [One Cup], [Non-Stop] 버튼 중 원하는 출수량을 선택합니다.
▶ [Outflow] 버튼을 한번 눌러주세요. 예열 후 온수가 출수됩니다.
▶ 선택된 정량이 출수되면 출수가 종료됩니다.
▶ 정량 출수 중 [Outflow]버튼 또는 그 외 모든 버튼을 누르면 출수가 종료됩니다.
❸
수동 출수를 하려면
▶ [Outflow] 버튼을 눌러주세요. 온수가 출수됩니다.
▶ [Outflow] 버튼을 2초 이상 누르고 있으면 수동 출수로 변경됩니다.
▶ “누르고 있는 동안 출수됩니다.” 음성 안내합니다.
▶ 수동 출수 중 [Outflow] 버튼을 떼면 출수가 종료됩니다.
❹
온수 출수 중 출수구에 빨간색 조명이 켜집니다.
(무드기능이 OFF되어 있으면 켜지지 않습니다.)
※ 물튐으로 인한 화상의 위험이 있으니 출수부에 컵을 가까이
대주세요.
※ 제품 설치 후 온수 첫 잔 출수 시 미지근한 물이 출수 됩니다.
(첫 잔 이 후 온수 출수 가능 합니다.)
온수온도 기능(맞춤온수)을 사용하려면
❶
▶ [Hot Temp] 버튼 입력 시 마다 약 10도씩 온수 온도가 변경됩니다.
104℉ → 122℉ → 140℉ → 158℉ → HOT (최고온도)…
[40
℃
50
℃
60
℃
70
℃
HOT(최고온도) …]
▶ 온수온도를 선택 후 [Outflow] 버튼을 누르면 선택된 온도의
온수가 출수됩니다.
▶ 온수온도 선택없이 [Hot/Lock] 버튼으로 온수를 출수하면 최고 온도가
출수됩니다.
▶ 온수 출수 중 [Outflow]버튼 또는 그 외 모든 버튼을 누르면
출수가 종료됩니다.
(3)
(3)
.
(3)
(3)
(3)
(3)
.
(3)
(3)
(3)
(3)
.
(3)
(3)
(3)
(3)
.
(3)
(3)
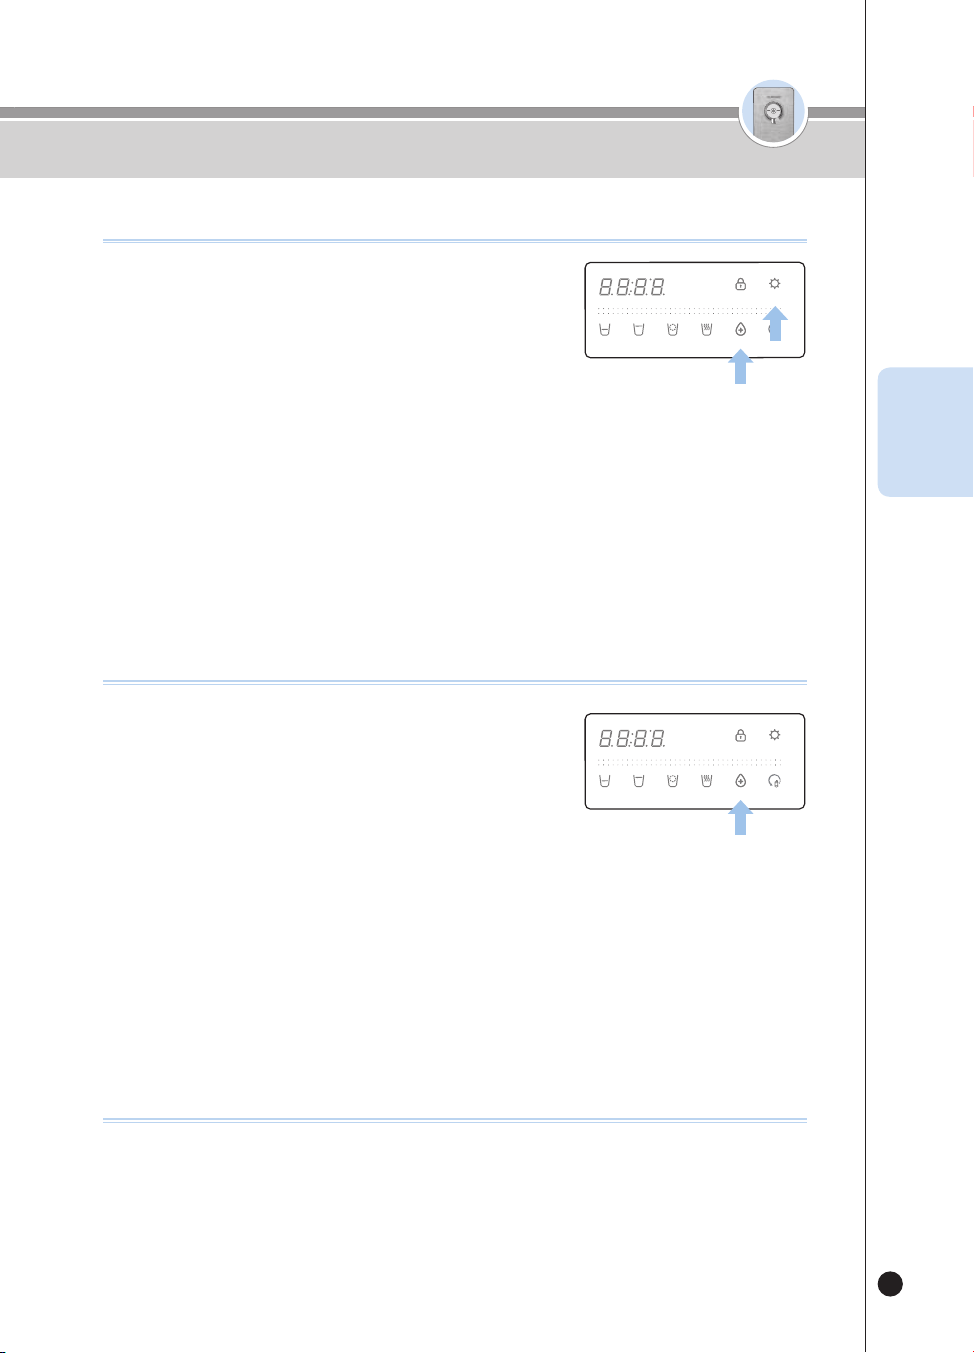
49
온수
잠금
온수
잠금
사용하기
KOR
❶
제품 대기 상태에서 [Time/Sterilize] 버튼이 깜박일 경우,
살균 예약 기능을 사용해주세요.
❷
[Time/Sterilize] 버튼을 눌러주세요.
▶ “불빛이 깜박이는 버튼으로 예약시간을 변경 후 설정버튼을
눌러주세요.” 음성안내 합니다.
▶ [Time/Sterilize] 버튼에 불이 들어옵니다.
❸
[Time/Sterilize] 버튼을 눌러 원하시는 예약 시간을 선택하세요.
▶ [Time/Sterilize] 버튼 입력 시 마다 1시간씩 예약 시간이 변경 됩니다.
(1시간 후 → 2시간 후 → … → 10시간 후 → 1시간 후 … )
❹
원하는 살균 예약 시간을 선택 후 [Energy Save/Setting] 버튼을 눌러 예약 시간을 저장해 주세요.
(살균 예약기능을 사용 시 반드시 살균컵을 장착해 주세요.)
살균예약 기능을 사용하려면
❶
[Time/Sterilize] 표시등을 통한 장시간 미사용 알림.
▶ 장시간 자동살균을 사용하지 않은 경우 출수 종료 후 [Time/Sterilize] 버튼 표시등이 3번 깜빡입니다.
살균 장시간 미사용 알림 기능
(3)
(3)
.
(3)
(3)
❶
살균컵을 놓아주세요.
▶“살균컵이 감지되었습니다.” 음성 안내합니다.
❷
대기상태에서 [Time/Sterilize] 버튼을 3초간 눌러주세요.
▶ 즉시 살균을 시작하고 “자동살균을 시작합니다.” 음성 안내
합니다.
▶ [Time/Sterilize] 버튼을 표시등이 점등되고 살균 진행 상태가 표시됩니다.
❸
살균 동작을 취소하려면 자동살균 동작 중 [Time/Sterilize] 버튼을 눌러주세요.
▶ “자동살균을 취소합니다.” 음성이 나오며 살균취소 동작이 진행됩니다.
▶ 디스플레이부에 살균 취소 상태가 표시됩니다.
※ 동작완료 후 살균컵을 제거해 주세요.
※ 살균수는 음용수가 아닙니다. 살균수를 음용하지 않도록 주의해 주십시오.
즉시 살균 기능을 사용하려면
(3)
(3)
.
(3)
(3)
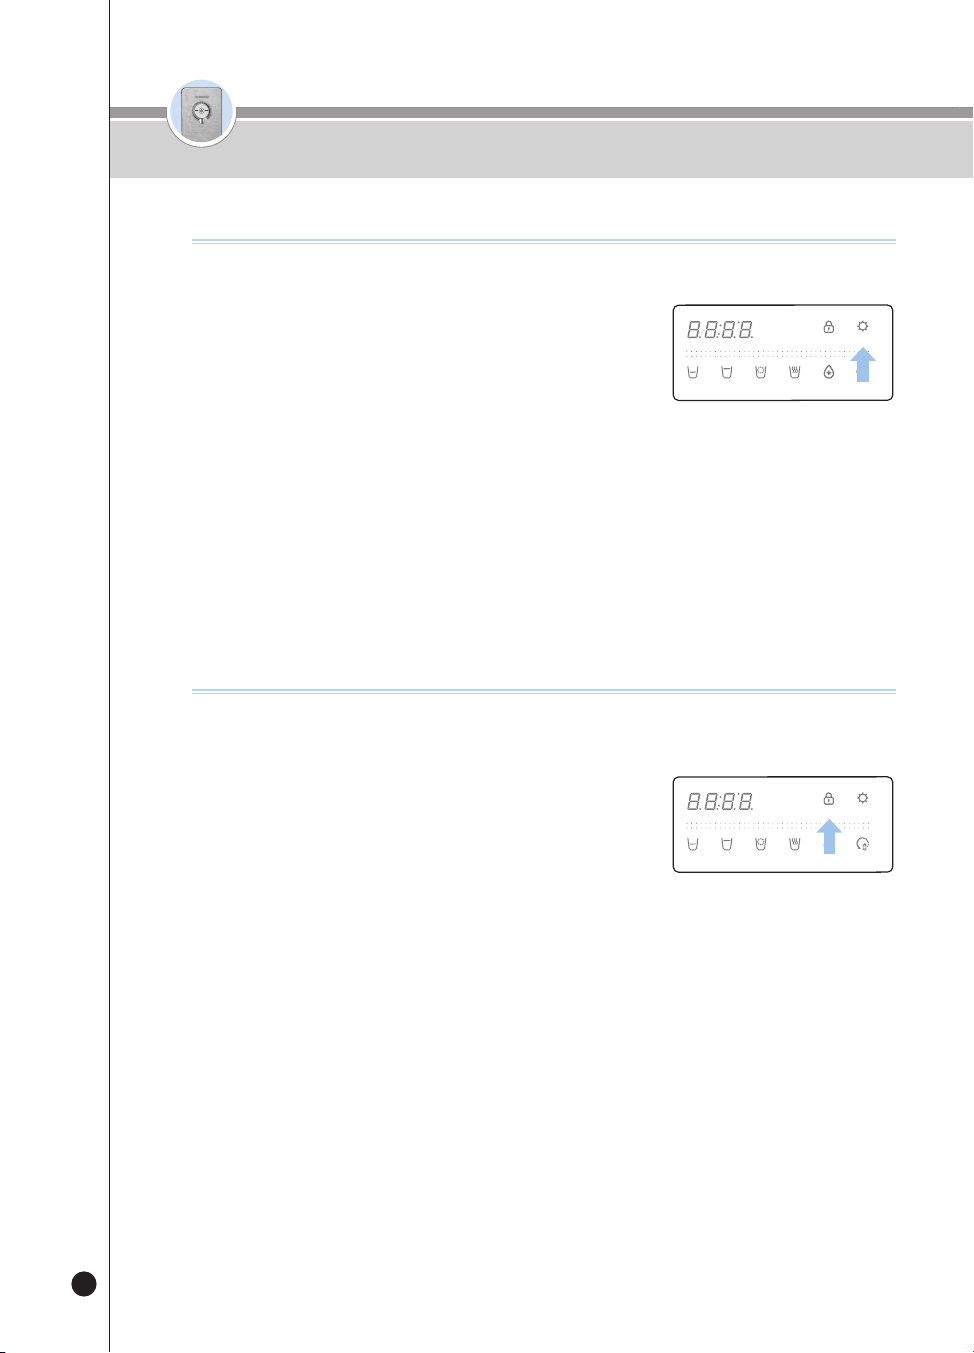
50
온수
잠금
온수
잠금
사용하기
버튼잠금 기능을 사용하려면
어린이 등의 임의 조작 방지 및 제품 청소 시 사용하는 기능입니다.
기능이 선택되면 모든 버튼의 입력이 차단됩니다.
❶
대기상태에서 [Select Mode/Lock] 버튼을 3초간 누르면 버튼
잠금이 선택됩니다.
▶ 버튼 잠금 상태에서 버튼을 누르면 “Loc_” 표시하고,
“버튼 잠금 중입니다.” 음성 안내합니다.
▶ 버튼 잠금 중 [Select Mode/Lock] 버튼을 3초간 누르면 “Un_Loc_”
표시하고 버튼 잠금이 해제됩니다.
절전기능을 사용하려면
표시등의 밝기를 줄여 에너지를 절약하는 기능입니다.
❶
[Energy Save/Setting] 표시등이 꺼진 상태에서
[Energy Save/Setting] 버튼을 눌러주세요.
▶ [Energy Save/Setting] 표시등이 켜지고, 1초 후 모든 표시등이
어두워집니다.
▶ “에너지아이 기능이 설정되었습니다.” 음성 안내합니다.
▶ 절전기능이 동작 중 버튼입력시 표시등이 밝아집니다.
(일정시간 동안 버튼입력이 없으면 표시등은 다시 어두워집니다.)
❷
[Energy Save/Setting] 표시등이 켜진 상태에서 [Energy Save/Setting] 버튼을 누르면 절전
기능이 해제됩니다.
▶ [Energy Save/Setting] 표시등이 꺼진 상태가 되고, 모든 표시등이 밝아집니다.
▶ “에너지아이 기능이 해제되었습니다” 음성 안내합니다.
(3)
(3)
.
(3)
(3)
(3)
(3)
.
(3)
(3)
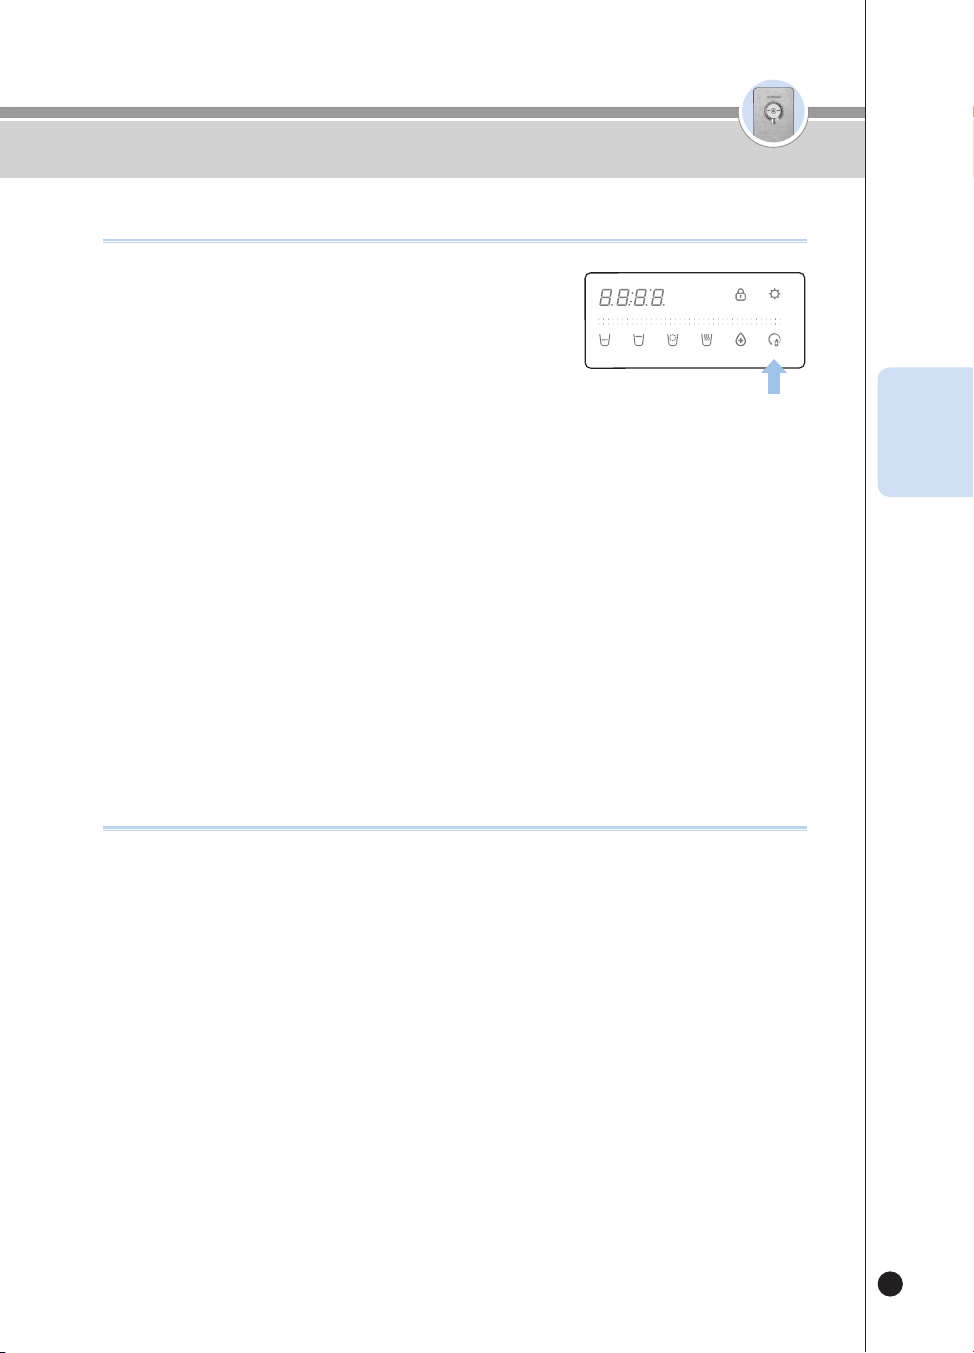
51
온수
잠금
온수
잠금
사용하기
KOR
❶
출수구 3색조명 LED(무드등)를 통한 교체 알림
▶ LED 표시 없음 → 하늘색 → 노랑색 → 자주색
(필터 사용량이 증가함에 따라 순차적으로 색이 변경됨.)
❷
[Filter Reset] 버튼 표시등 점등을 통한 교체 알림
▶ [Filter Reset] 버튼 표시등 점등 상태에서 [Filter Reset] 버튼 입력 시 “필터 교체가 필요합니다.”
음성 안내 함.
❸
출수 시 음성을 통한 교체 알림
▶ 출수 시 “필터 교체가 필요합니다.” 음성 안내 함.
예) 처음 출수 시 1일 1회만 안내 함.
※ 필터 교체 음성이 출력되면 네추럴 매니저에게 연락하여 필터를 교체하세요.
필터 교체시기 알림 기능
❶
대기상태에서 [Filter Reset] 버튼을 3초 동안 눌러주세요.
▶ “초기화를 시작합니다.” 음성 안내합니다.
❷
초기화 완료 후 “초기화를 완료 하였습니다.” + “자동필터 세
척을 시작합니다” 음성 안내가 나오고 자동으로 필터를 세척합니다.
▶ 필터 세척 시간을 디스플레이부에 표시합니다.
▶ 조리수 밸브 또는 볼 밸브를 수동으로 열어 주세요. 조리수 밸브를 열지 않은 경우 “조리수 레버를 열
어주세요.” 음성안내 합니다.
▶ 필터 세척 진행 중 “조리수 레버를 잠가주세요.” 음성안내 합니다.
조리수 밸브 또는 볼 밸브를 수동으로 닫아주세요. (55페이지 필터 세척 방법 참조)
❸
필터 세척 완료 시 “자동필터 세척을 완료하였습니다.” 라는 음성안내가 나오고 출수
대기상태가 됩니다.
❹
필터 세척 기능을 취소하려면 필터 세척 중 [Outflow] 버튼을 눌러주세요.
▶ “자동필터 세척을 중지합니다.” 음성 안내합니다.
❺
필터 세척의 소요시간은 원수 수압에 따라 달라지며, 10~15분 가량 소요됩니다.
▶필터 세척 시 조리수 레버를 열고 나서 “조리수 레버를 열어주세요.” 음성 안내가
다시 나오면 제품 좌측면의 필터도어 잠금 레버를 CLOSE 방향으로 돌려주십시오.
필터 초기화 기능을 사용하려면
(3)
(3)
.
(3)
(3)
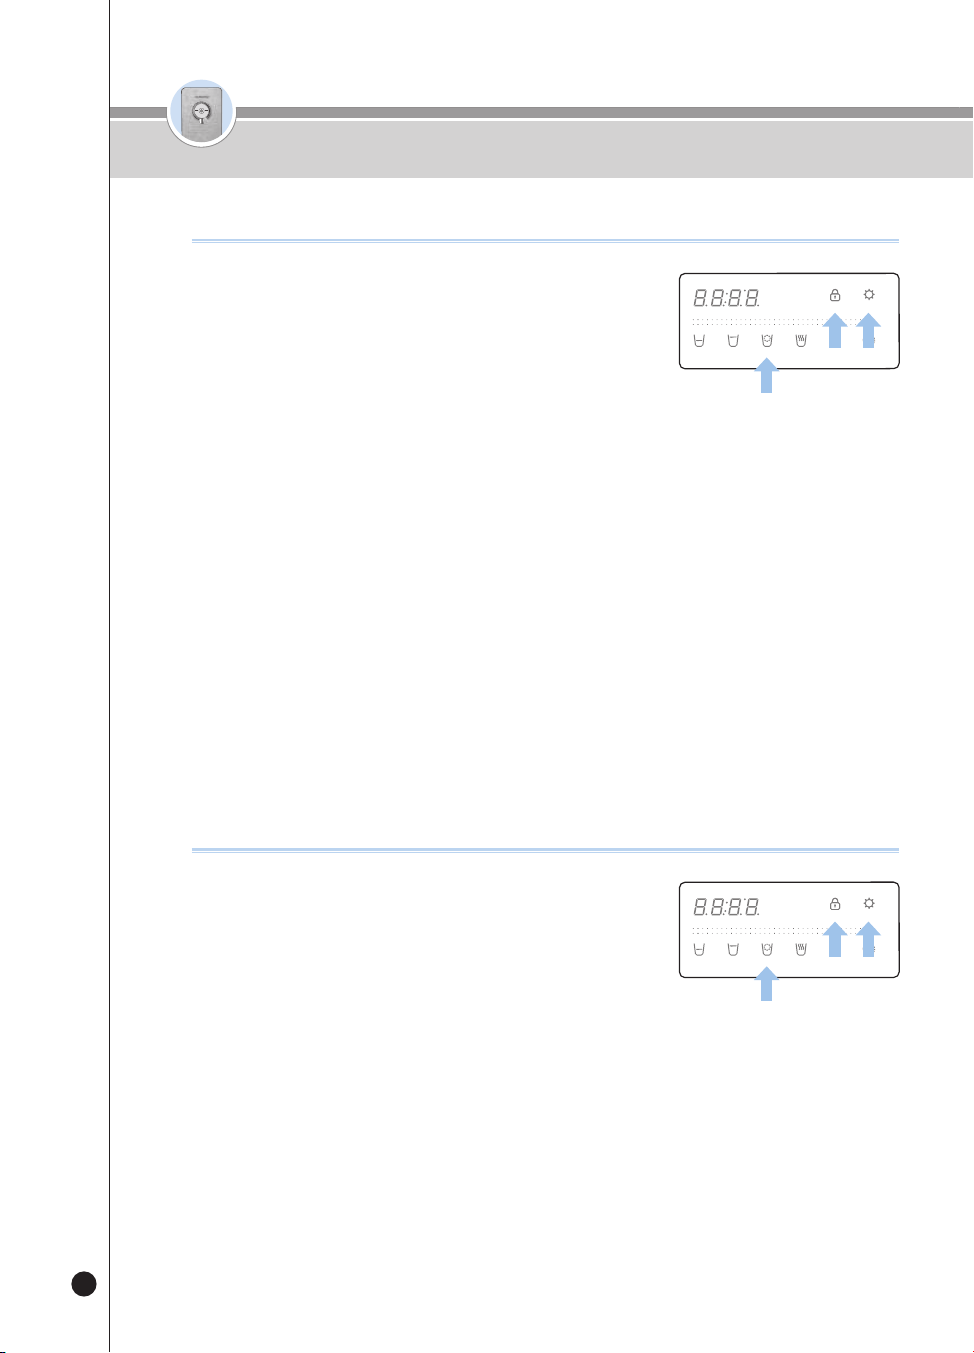
52
온수
잠금
온수
잠금
사용하기
❶
대기상태에서 [Energy Save/Setting] 버튼을 3초 동안 눌러주세요.
▶ 사용자 설정 모드에 진입합니다.
❷
사용자 설정 모드 진입 후 [Select Mode/Lock] 버튼을 1회
눌러주세요.
▶ “필터 교체 알림 설정모드입니다.” 음성 안내합니다.
❸
[Energy Save/Setting] 버튼을 눌러 필터 교체 알림 설정모드에 진입합니다.
❹
[Non-Stop] 버튼을 눌러 필터 교체 알림 기능을 설정합니다.
▶ 버튼 입력 시 마다 ON / OFF를 반복합니다.
예) ON OFF ON OFF …
❺
필터 교체 알림 ON/OFF를 선택 후 [Energy Save/Setting] 버튼을 눌러 저장하세요.
▶ “설정이 완료되었습니다.” 음성 안내합니다.
※ 기능 OFF 시 필터 교체 알림을 하지 않습니다.
필터 교체 알림 기능을 설정하려면
❶
대기상태에서 [Energy Save/Setting] 버튼을 3초 동안 눌러주세요.
▶ 사용자 설정 모드에 진입합니다.
❷
사용자 설정 모드 진입 후 [Select Mode/Lock] 버튼을 2회 눌러주세요.
▶ “살균키트모듈” 음성 안내합니다.
❸
[Energy Save/Setting] 버튼을 눌러 살균 미사용 알림 설정모드에 진입합니다.
❹
[Non-Stop] 버튼을 눌러 살균 미사용 알림 기능을 설정합니다.
▶ 버튼 입력 시 마다 ON / OFF를 반복합니다.
예) ON OFF ON OFF …
❺
살균 미사용 알림 ON/OFF를 선택 후 [Energy Save/Setting] 버튼을 눌러 저장하세요.
▶ “설정이 완료되었습니다.” 음성 안내합니다.
※ 기능 OFF 시 살균 미사용 알림을 하지 않습니다.
살균 미사용 알림 기능을 설정하려면
(3)
(3)
.
(3)
(3)
(3)
(3)
.
(3)
(3)
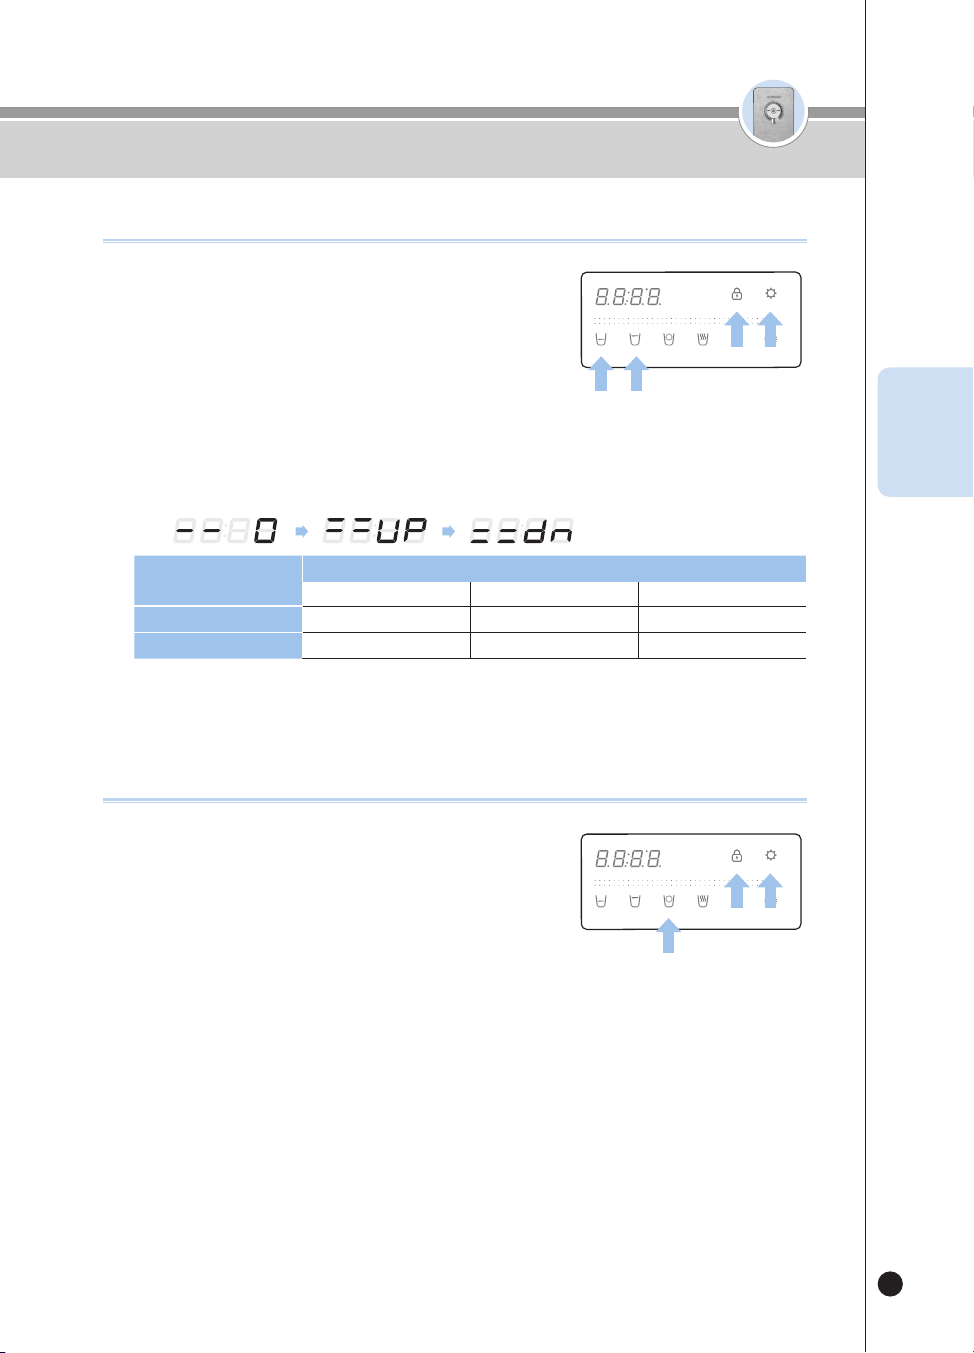
53
온수
잠금
온수
잠금
사용하기
KOR
❶
대기상태에서 [Energy Save/Setting] 버튼을 3초 동안 눌러주세요.
▶ 사용자 설정 모드에 진입합니다.
❷
사용자 설정 모드 진입 후 [Select Mode/Lock] 버튼을 3회
[한컵출수량] 또는 4회 [반컵출수량] 눌러주세요.
▶ “한컵 또는 반컵 출수량 설정모드입니다.” 음성 안내합니다.
❸
[Energy Save/Setting] 버튼을 눌러 출수량 설정모드에 진입합니다.
❹
[One Cup] 또는 [Half Cup] 버튼을 눌러 원하는 출수량을 설정합니다.
▶ 버튼 입력 시 마다 0(표준) / UP / DOWN을 반복합니다.
예)
정량
출수량(CC)
감소(DOWN)표준증가(UP)
반컵
약 95 CC(3.2oz)약 110 CC(3.7oz)약 125 CC(4.2oz)
한컵
약 130 CC(4.4oz)약 150 CC(5.1oz)약 170 CC(5.7oz)
❺
원하는 출수량을 선택한 후 [Energy Save/Setting] 버튼을 눌러 저장합니다.
▶ “설정이 완료되었습니다.” 음성 안내합니다.
출수량을 변경하려면
❶
대기상태에서 [Energy Save/Setting] 버튼을 3초 동안 눌러주세요.
▶ 사용자 설정 모드에 진입합니다.
❷
사용자 설정 모드 진입 후 [Select Mode/Lock] 버튼을 5회 눌러주세요.
▶ “음성볼륨 설정모드입니다.” 음성 안내합니다.
❸
[Energy Save/Setting] 버튼을 눌러 음성볼륨 설정모드에 진입합니다.
❹
[Non-Stop] 버튼을 눌러 음성볼륨 단계를 설정합니다.
▶ 버튼 입력 시 마다 현재 설정된 음성레벨을 기준으로 1단계씩 변경됩니다.
예) 4단계 5단계 OFF 1단계 2단계 …
▶ 최대 볼륨으로 설정하고자 하는 경우 설정값이 5가 되도록 선택해 주세요.
▶ 음성 안내를 사용하지 않을 경우 설정값이 OFF가 되도록 선택해 주세요.
❺
원하는 음성 볼륨을 선택 후 [Energy Save/Setting] 버튼을 눌러 저장하세요.
▶ “설정이 완료 되었습니다.” 음성 안내합니다.
음성볼륨을 변경하려면
(3)
(3)
.
(3)
(3)
(3)
(3)
.
(3)
(3)
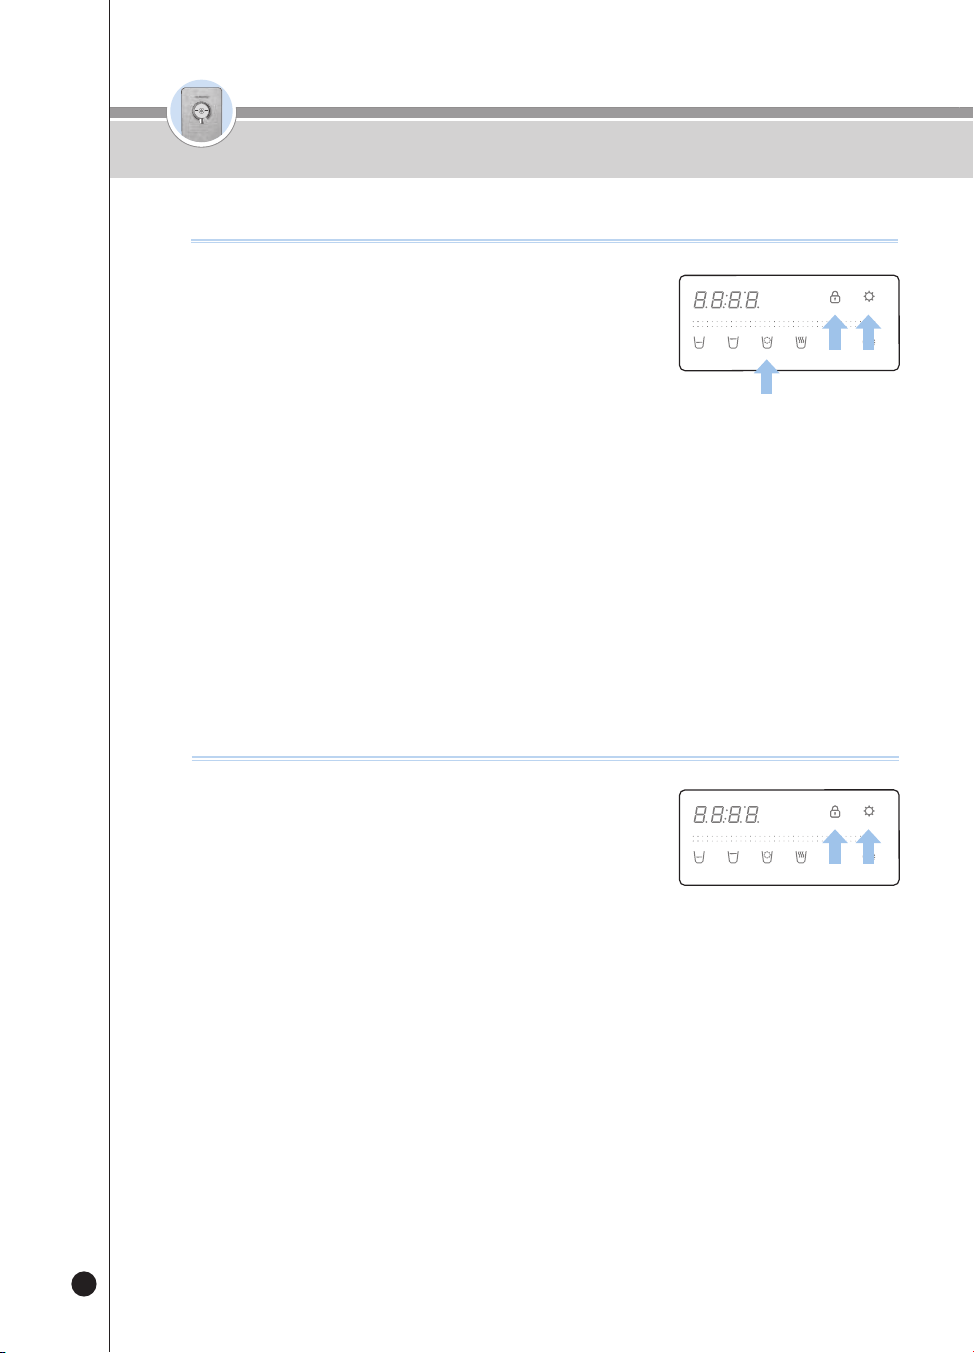
54
온수
잠금
온수
잠금
사용하기
❶
대기상태에서 [Energy Save/Setting] 버튼을 3초 동안 눌러주세요.
▶ 사용자 설정 모드에 진입합니다.
❷
사용자 설정 모드 진입 후 [Select Mode/Lock] 버튼을 6회 눌러주세요.
▶ “무드램프 설정모드입니다.” 음성 안내합니다.
❸
[Energy Save/Setting] 버튼을 눌러 무드램프 설정모드에 진입합니다.
❹
[Non-Stop] 버튼을 눌러 무드램프 기능을 설정합니다.
▶ 버튼 입력 시 마다 ON / OFF를 반복합니다.
예) ON OFF ON OFF …
❺
무드램프 ON/OFF를 선택후 [Energy Save/Setting] 버튼을 눌러 저장하세요.
▶ “설정이 완료되었습니다.” 음성 안내합니다.
무드램프 기능을 설정하려면
❶
대기상태에서 [Energy Save/Setting] 버튼을 3초 동안 눌러주세요.
▶ 사용자 설정 모드에 진입합니다.
▶ 사용자 설정 모드 진입 후 [Select Mode/Lock] 버튼을 7회 눌러 주세요.
▶ “자동필터 세척 기능입니다.” 음성 안내합니다.
❷
[Energy Save/Setting] 버튼을 눌러 주세요.
▶ “자동필터 세척을 시작합니다.” 음성 안내가 나오고, 필터를 세척합니다.
▶ 필터 세척 시간을 디스플레이부에 표시합니다.
▶ 조리수 밸브 또는 볼 밸브를 수동으로 열어 주세요. 조리수 밸브를 열지 않은 경우
“조리수 레버를 열어주세요.” 음성안내 합니다.
▶ 필터 세척 진행 중 “조리수 레버를 닫아주세요.” 음성안내 합니다.
조리수 밸브 또는 볼 밸브를 수동으로 닫아주세요.(55페이지 필터 세척 방법 참조)
❸
필터 세척 완료 시 “자동필터 세척을 완료하였습니다.” 라는 음성안내가 나오고
출수 대기상태가 됩니다.
❹
필터 세척 기능을 취소하려면 필터 세척 중 [출수] 버튼을 눌러주세요.
▶ “자동필터 세척을 중지합니다.” 음성 안내합니다.
❺
필터 세척의 소요시간은 원수 수압에 따라 달라지며, 10~15분 가량 소요됩니다.
필터세척 기능을 사용하려면
(3)
(3)
.
(3)
(3)
(3)
(3)
.
(3)
(3)
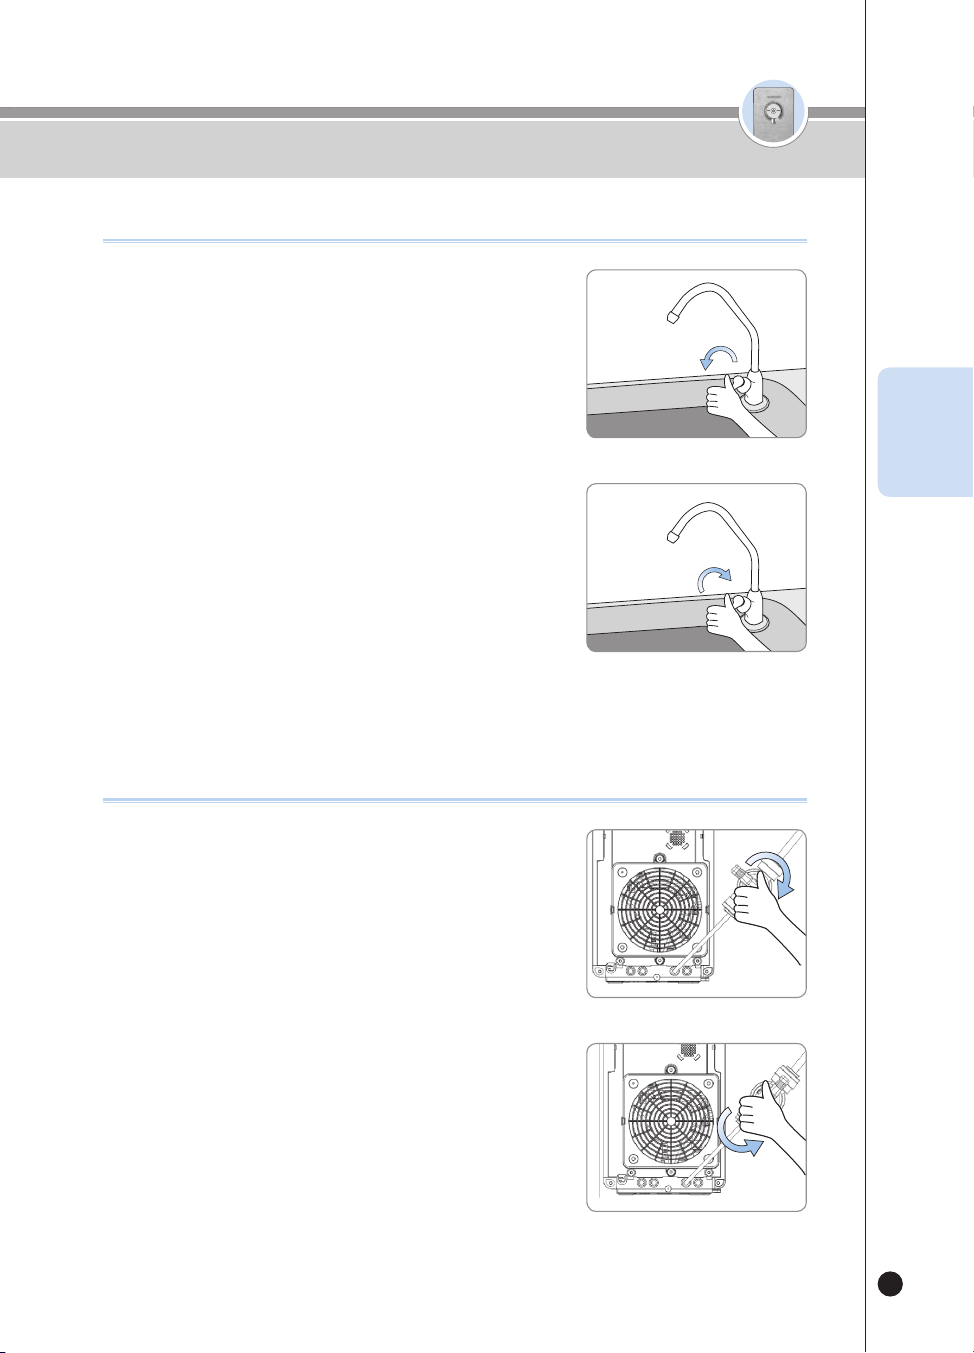
55
온수
잠금
온수
잠금
사용하기
KOR
필터 세척 방법 (조리수 밸브 설치 고객)
❶
필터 세척 진행 중 “조리수 레버를 열어주세요.” 음성안내가
나오면 조리수 밸브를 열어 주세요.
❷
필터 세척 진행 중 “조리수 레버를 잠가주세요.” 음성안내가
나오면 조리수 밸브를 잠가 주세요.
열림
닫힘
필터 세척 방법 (조리수 밸브 미설치 고객)
❶
필터 세척 진행 중 “조리수 레버를 열어주세요.” 음성안내가
나오면 제품 후면의 볼밸브를 열어 주세요.
❷
필터 세척 진행 중 “조리수 레버를 잠가주세요.” 음성안내가
나오면 제품 후면의 볼밸브를 닫아주세요.
열림
닫힘
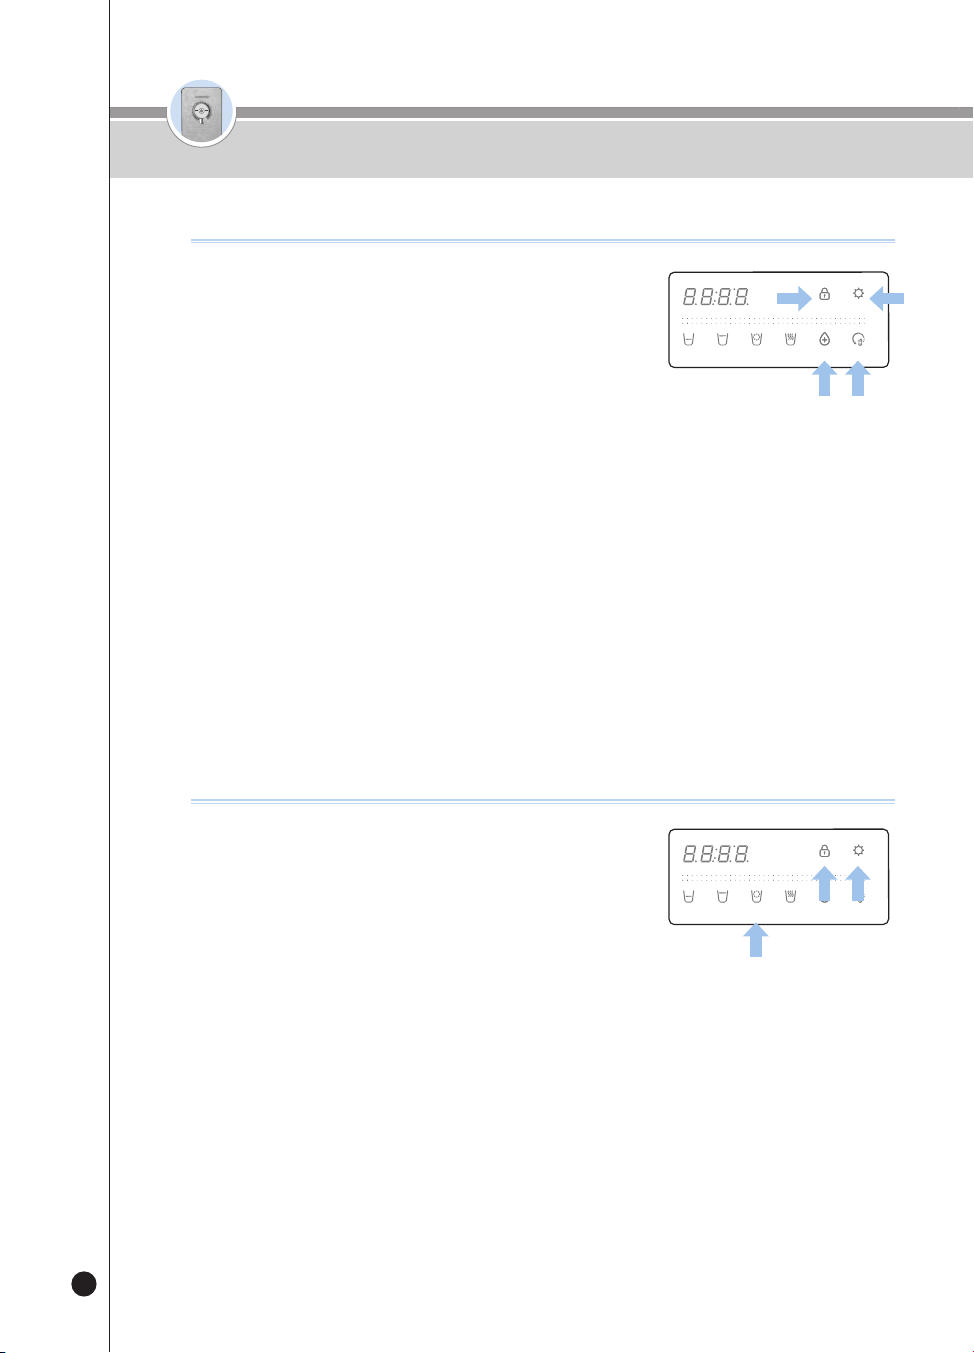
56
온수
잠금
온수
잠금
사용하기
현재시간을 변경하려면
❶
대기상태에서 [Energy Save/Setting] 버튼을 3초 동안
눌러주세요.
▶ 사용자 설정 모드에 진입합니다.
❷
사용자 설정 모드 진입 후 [Select Mode/Lock] 버튼을 8회 눌러주세요.
▶ “현재시간 표시 및 설정모드입니다.” 음성 안내합니다.
❸
[Energy Save/Setting] 버튼을 눌러 시간 설정모드에 진입 합니다.
❹
[TIME/STERILIZE] 버튼을 눌러 현재 시간의 시 단위를 설정해 주세요.
❺
[Filter Reset] 버튼을 눌러 현재 시간의 분 단위를 설정해 주세요.
❻
[Energy Save/Setting] 버튼을 눌러 현재 시간을 저장해 주세요.
▶ “설정이 완료되었습니다.” 음성 안내합니다.
언어를 변경하려면
❶
대기상태에서 [Energy Save/Setting] 버튼을 3초 동안
눌러주세요.
▶ 사용자 설정 모드에 진입합니다.
❷
사용자 설정 모드 진입 후 [Select Mode/Lock] 버튼을 9회
눌러주세요.
▶ “언어 설정 모드입니다.” 음성 안내합니다.
❸
[Energy Save/Setting] 버튼을 눌러 언어 설정 모드로 진입합니다.
❹
[Non-Stop] 버튼을 눌러 언어를 설정합니다.
▶ 버튼 입력 시 마다 아래 순서로 언어가 설정됩니다.
ex) 1(영어) → 2(한국어) → 3(스페인어) → · · ·
❺
원하는 언어를 선택 후 [Energy Save/Setting] 버튼을 눌러 저장하세요.
▶ “설정이 완료되었습니다.” 음성 안내합니다.
(3)
(3)
.
(3)
(3)
(3)
(3)
.
(3)
(3)
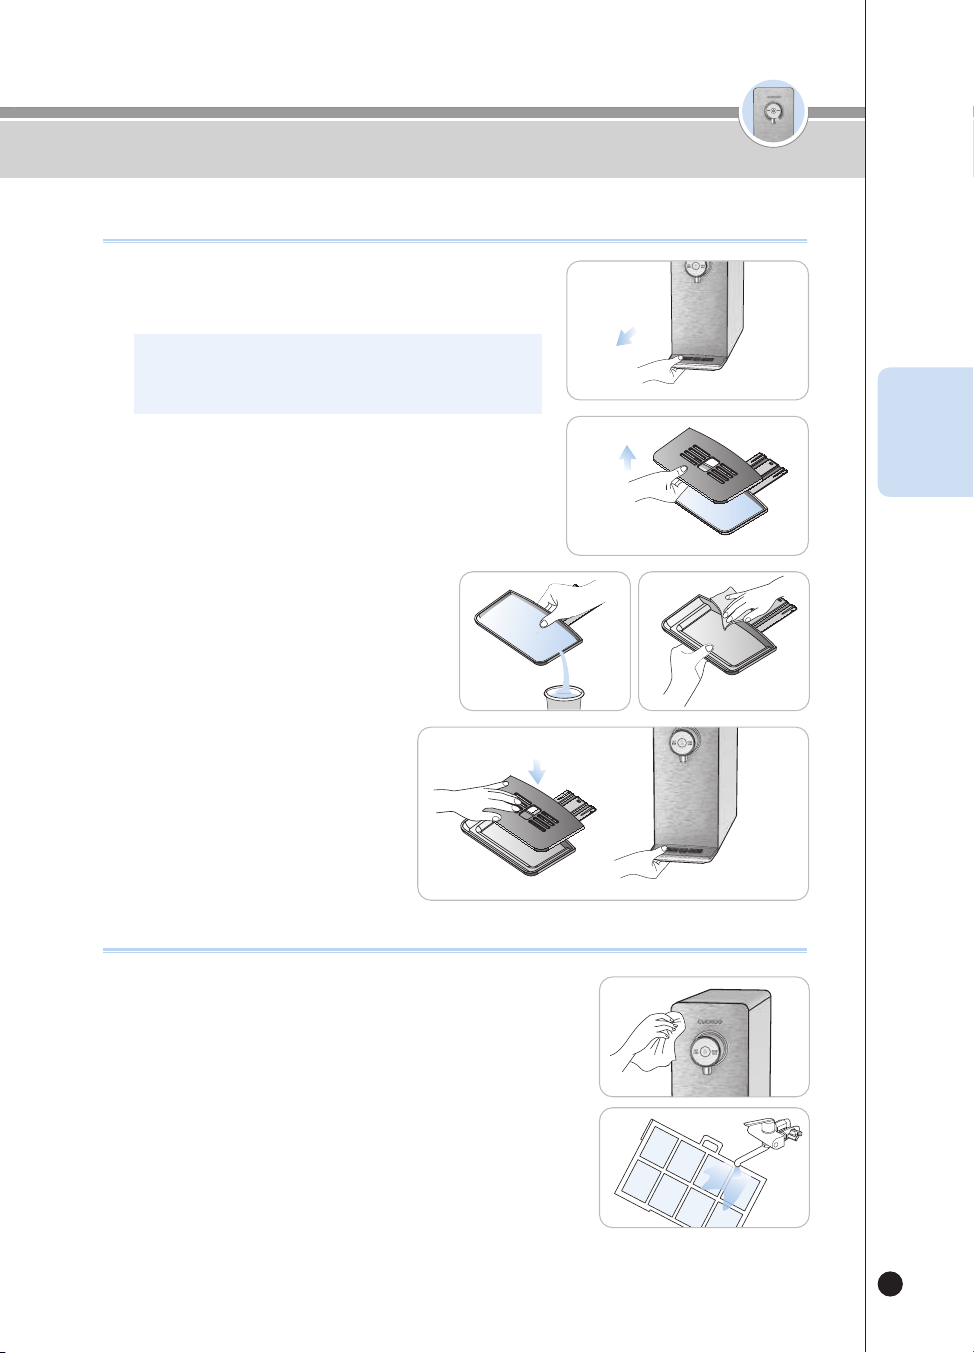
57
온수
잠금
온수
잠금
물받이 청소 방법 / 제품 본체 청소 방법
KOR
물받이 청소 방법
제품 본체 청소 방법
▶ 부드럽고 마른 천으로 닦아 주십시오.
- 닦기전, 버튼잠금기능을 설정하여 청소시의 오동작을 방지합니다.
- 오염이 심한 경우에는 약간의 물기가 있는 천으로 닦아 주십시오.
(벤젠, 신나, 연마제 등을 이용하여 청소하지 마십시오.)
▶ 제품 바닥면의 프리필터를 당겨 분리하고 흐르는 물에 씻어
말린 후 다시 조립하십시오.
- 장기간 청소하지 않을 경우 냉수성능에 저하가 있을 수 있습니다.
❶
물받이 분리
▶ 물받이를 잡고 제품 앞쪽으로 당겨서 물받이를 분리하십시오.
※ 물받이를 잡아당길 때 천천히 두 손으로 당기십시오.
강하게 당기시면 물이 쏟아질 수 있습니다.
❷
물받이 그릴 분리
▶ 물받이를 분리하신 후 물받이 상단 그릴의 구멍을 잡아 올려
물받이 그릴을 분리하십시오.
❸
물받이 청소
▶ 고인 물은 버리고, 남은 물기는 부드러운 천
등을 이용하여 제거하십시오.
❹
물받이 조립
▶ 물받이 청소를 마치신 후 분해의 반대
순서대로 다시 조립하십시오.

58
온수
잠금
필터 교체 방법
온수
잠금
필터 교체 방법 (반드시 쿠쿠 정품필터를 사용하십시오.)
❶
제품 좌측면의 필터도어 잠금 레버를
OPEN 방향으로 돌려주십시오.
· 물 공급을 차단하여 필터교체 시 물이 흐르는 것을 방지합니다.
❷
물이 나오지 않을 때까지 정수를 출수하여
정수기 내부의 잔수를 제거해 주세요.
· 정수 출수 시 컵 등을 이용해 주세요.
❸
필터 도어를 분리하여 주십시오.
· 필터 도어 분리 후 필터도어 잠금 레버를 강제로
돌리지 마십시오. 제품 고장의 원인이 됩니다.
· 필터 도어가 열리지 않을 시 필터도어 잠금 레버를
OPEN 방향으로 돌려주십시오.
❹
필터를 들어올린 후 당겨서 제거하여 주십시오.
· 필터 교체 시 사용자 환경에 따라 물방울이 떨어질 수
있으니 교체 후 물기를 닦아주세요.
잠금
원수단밸브
필터도어
잠금 레버
열림
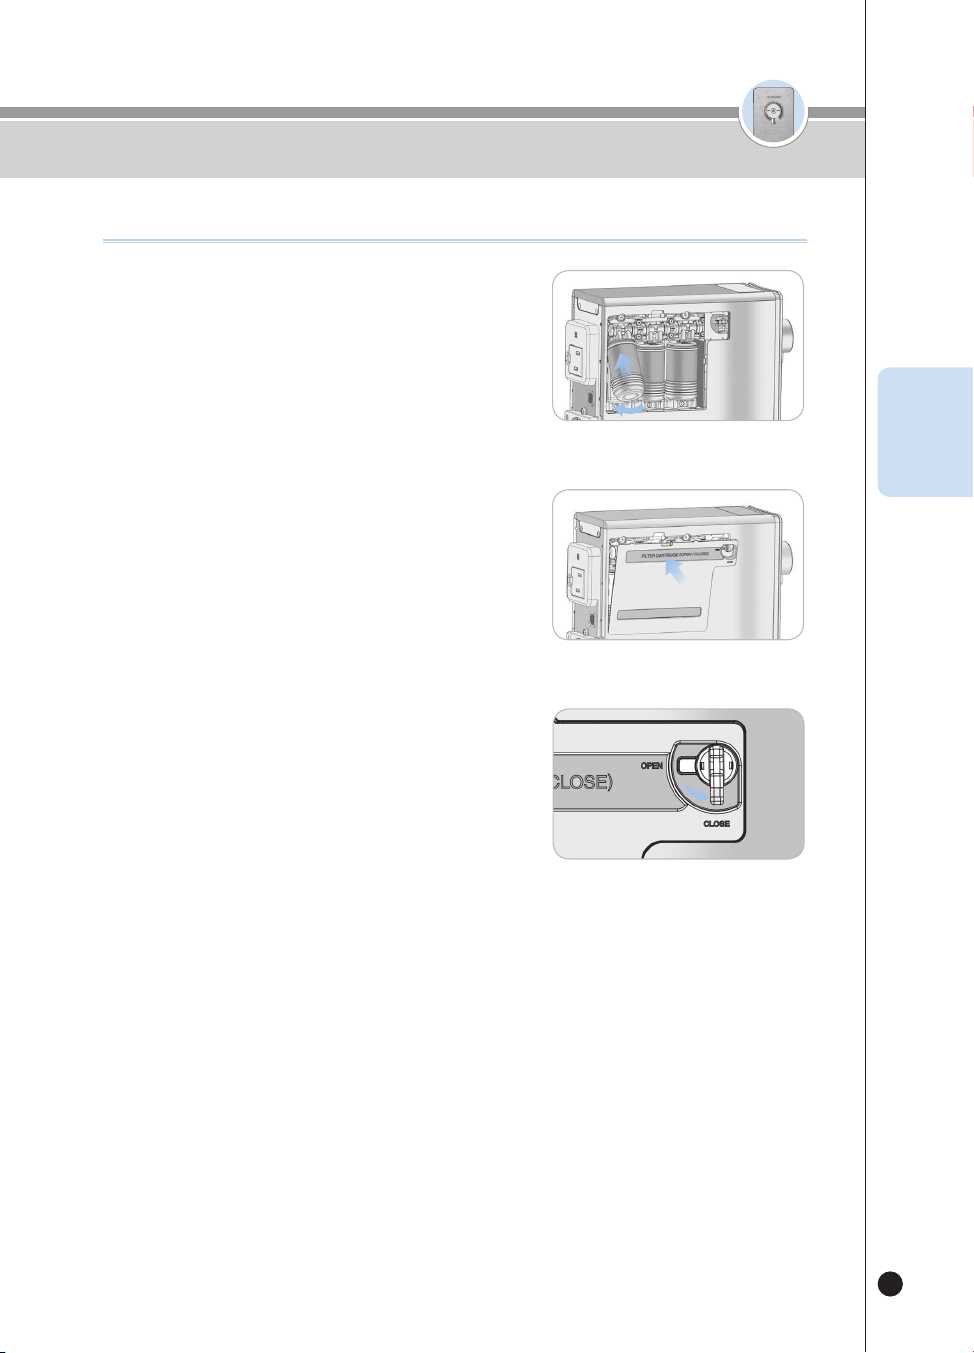
59
온수
잠금
온수
잠금
필터 교체 방법
KOR
필터 교체 방법 (반드시 쿠쿠 정품필터를 사용하십시오.)
❻
필터 도어를 그림과 같이 체결하여 주십시오.
·
하단의 홈을 정확히 맞추어야 장착을 원활하게 할 수 있습니다.
❼
제품 좌측면의 필터도어 잠금 레버를
CLOSE 방향으로 돌려주십시오.
·
정수기에 물이 공급됩니다.
❽
제품 대기 상태가 되면 51페이지를 참고하여 필터 초기화 기능을 진행하십시오.
※ 필터 초기화를 진행하지 않은 경우 필터 교체 알림이 발생할 수 있습니다.
※ 필터 세척 시 조리수 레버를 열고나서 “조리수 레버를 열어주세요.” 음성 안내가 다시 나오면
제품 좌측면의 필터도어 잠금 레버를 CLOSE 방향으로 돌려주십시오.
❺
필터를 그림과 같이 끼워 넣은 후 필터케이스 안으로 밀어
넣어 연결하여 주십시오.
·
필터는 오른쪽부터 세디카본복합, 내추럴 플러스, 나노포지티브 필터
순입니다.(혹은 프리카본 2.0, 나노포지티브. 알칼리 미네랄 필터
순입니다.) 순서에 주의하여주십시오.
·
필터가 필터케이스에 제대로 안착되어 있는지 확인하여 주십시오.
필터도어
잠금 레버
잠금
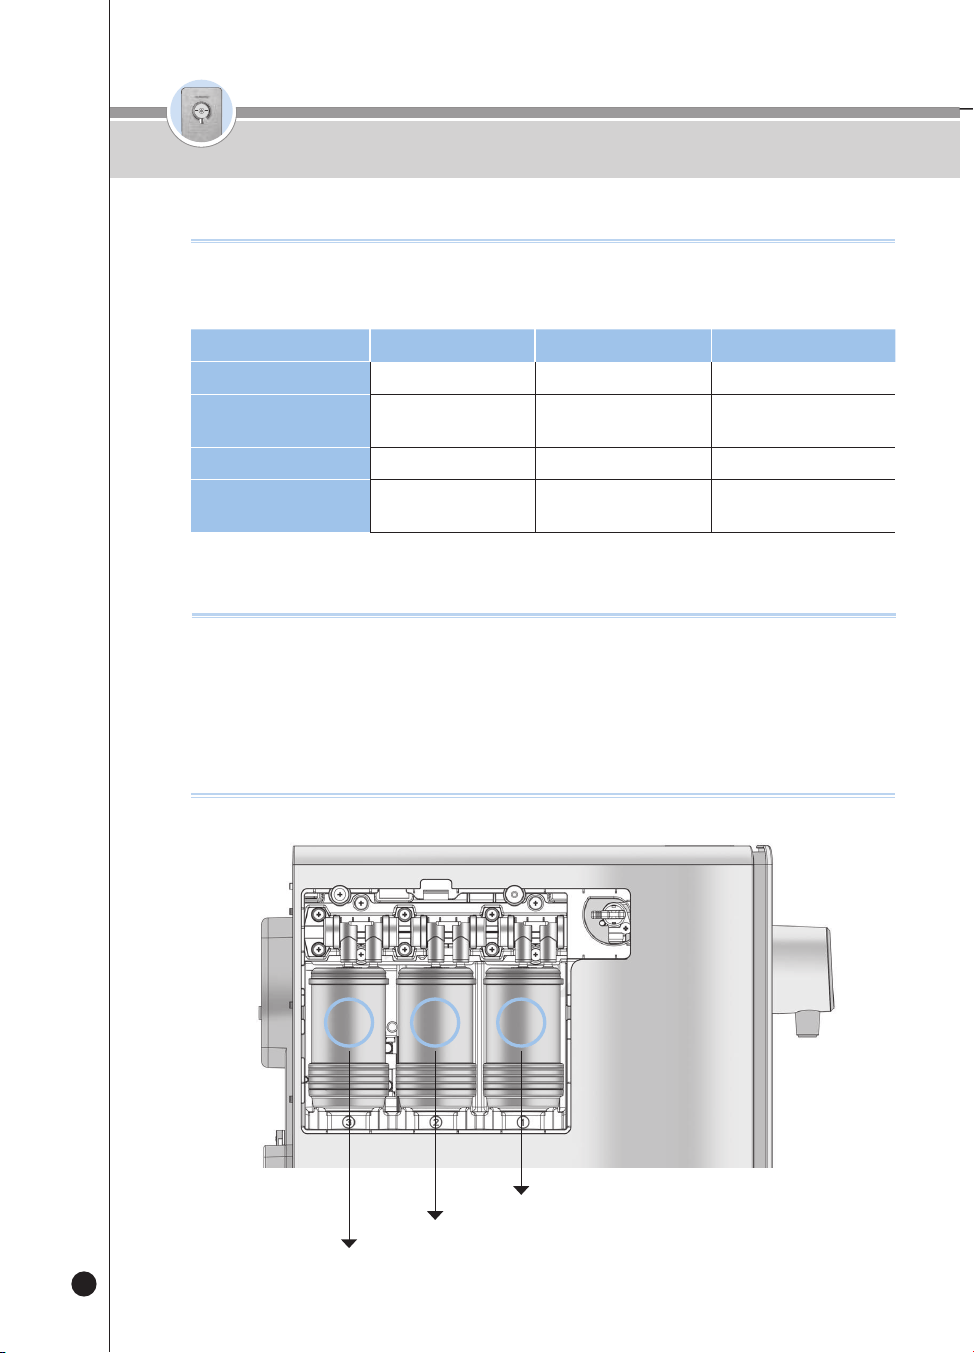
60
온수
잠금
▶ 필터 교체 주기는 가정에서 1일 10L(338.1oz) 사용 기준으로 책정되며, 원수 상태에 따라 영향을 받을 수 있
습니다.
단계1
23
필터 이름
세디카본복합 필터
내추럴 플러스 필터나노포지티브 필터
필터 교체 주기
4개월
[1,200L(40576.8oz)]
4개월
[1,200L(40576.8oz)]
8개월
[2,400L(81153.6oz)]
필터 이름
프리카본 2.0 필터
나노포지티브 필터알칼리-미네랄 필터
필터 교체 주기
4개월
[1,200L(40576.8oz)]
8개월
[2,400L(81153.6oz)]
8개월
[2,400L(81153.6oz)]
필터 예상 교체 주기
▶ 필터 교체 주기
• 필터 교체 주기는 필터를 면밀히 검토한 결과 각 필터가 제 성능을 발휘할 수 있을 것으로 예상되는 시기를 의미합니다. 이는 수돗물을 유입수로 하
고 하루 사용량이 약 10L(338.1oz)(음용수(4인기준)) 일때를 기준으로 하였으므로, 그 사용량이 많은 경우에는 교체 주기가 더 짧아질 수 있습니다.
권고사항
1단
2단
3단
3 2 1
필터배열도
필터 예상 교체 주기 / 권고사항 / 필터 배열도
61
온수
잠금
KOR
고장신고 전에 확인하십시오
▼
사용방법 대로 올바르게 사용하지 않았을 경우에는 고장이 아니더라도 제품이 제대로 작동하지 않을 수가 있습니다.
제품 기능에 이상이 있으면 아래의 점검표대로 점검해 보고 그래도 이상이 있으면 고객상담실로 문의하여 주십시오.
증 상 확인사항
조치사항
물에서 불쾌한 맛이나
냄새가 나요
•장기간 정수기를 사용하지 않았습니까?
•필터를 교체할 시기가 되지 않았습니까?
•얼음토출 버튼을 이용하여 얼음저장고의
얼음을 비워주시고 즉시 자동 살균을
진행해 주십시오.
•고객상담실로 필터 교체를 요청하세요.
•전원코드가 연결되어 있습니까? •전원코드를 연결해주세요.
물이 안 나와요
•원수 공급이 원활합니까?
•[출수버튼]을 정상적으로 누르셨습니까?
•제품 아래에 물이 고여 있지 않습니까?
•필터를 교체할 시기가 되지 않았습니까?
•원수 공급 밸브를 열어 주세요.
•급수 호스가 꺾이지 않았는지 확인해 주세요.
•단수가 되지는 않았는지 확인해 주세요.
•[출수버튼]을 정상적으로 눌러 주세요.
•원수밸브를 잠그고, 전원플러그를 뽑으신 후,
고객상담실로 문의하시기 바랍니다.
•
고객상담실로 필터 교체를 요청하세요.
냉수/얼음이 안 나와요.
•제빙 기능이 켜져 있습니까?
•[얼음토출버튼]을 정상적으로 누르셨습니까?
•다량의 냉수를 취수하셨습니까?
•원수 공급밸브를 잠그지 않았습
니까?
•제품 뒷면의 통풍이 원활합니까?
•제빙 기능을 켜주세요.
•얼음만빙 상태를 확인해 주세요.
•[얼음토출버튼]을 정상적으로 눌러 주세요.
•냉수 탱크 용량 이상 취수 시에는
재냉각시간이 필요합니다.
•원수 공급밸브를 확인하세요.
•제품 뒷면의 방열판이 막혀있는지 확인하시어
장애물을 치워 주십시오.
•통풍이 잘되는 곳으로 이동 설치해 주십시오.
(제품 이동설치시에는 고객상담실로 연락해 주십시오.)
증 상확인사항조치사항
물에서 불쾌한 맛이나
냄새가 나요.
• 장기간 정수기를 사용하지 않았습니까?
• 필터를 교체할 시기가 되지 않았습니까?
• 필터세척을 진행해 주세요. (54페이지 참조)
• 고객상담실로 필터 교체를 요청하세요.
물이 안 나와요.
• 전원 코드가 연결되어 있습니까?
• 원수 공급이 원활합니까?
• [출수] 버튼을 정상적으로 누르셨습니까?
• 제품 아래에 물이 고여 있지 않습니까?
• 필터를 교체할 시기가 되지 않았습니까?
• 필터도어 잠금 레버가 열려 있습니까?
• 전원코드를 연결해주세요.
• 원수 공급 밸브를 열어 주세요.
• 급수 호스가 꺾이지 않았는지 확인해 주세요.
• 단수가 되지는 않았는지 확인해 주세요.
• [출수] 버튼을 정상적으로 눌러 주세요.
• 원수밸브를 잠그고, 전원 플러그를 뽑으신 후,
고객상담실로 문의하시기 바랍니다.
• 고객상담실로 필터 교체를 요청하세요.
• 제품 좌측면의 필터도어 잠금 레버를
CLOSE 방향으로 돌려주세요.
(정수기에 물이 공급됩니다.)
냉수가 안 나와요.
• 다량의 냉수를 출수하셨습니까?
• 원수 공급밸브를 잠그지 않았습니까?
• 제품 뒷면의 통풍이 원활합니까?
• 다량의 냉수 출수 시에는 재 냉각 시간이 필요합니다.
• 원수 공급 밸브를 확인하세요.
• 제품 뒷면의 방열판이 막혀있는지 확인하시어
장애물을 치워 주십시오.
• 통풍이 잘되는 곳으로 이동 설치해 주십시오.
(제품 이동설치 시에는 고객상담실로 연락해 주십시오.)
• 통풍구의 먼지가 많을 시 고객상담실로 연락해 주십시오.
온수가 미지근해요.
• 온수가 첫 잔이십니까?• 순간 온수를 처음 가동할 때는 첫 잔의 온도가 낮을 수
있습니다.
• 둘째 잔부터 정상적인 온도로 출수 되는지 확인해 주세요.
62
▼ 사용방법 대로 올바르게 사용하지 않았을 경우에는 고장이 아니더라도 제품이 제대로 작동하지 않을 수가 있습니다.
제품 기능에 이상이 있으면 아래의 점검표대로 점검해 보고 그래도 이상이 있으면 고객상담실로 문의하여 주십시오.
증 상 확인사항
조치사항
온수가 미지근해요
•온수가 첫 잔이십니까? •순간 온수를 처음 가동할 때는
첫 잔의 온도가 낮을 수 있습니다.
•둘째잔부터 정상적인 온도로 출수되는지
확인해 주세요.
정수량이 갑자기
적어졌어요.
•원수 공급 밸브를 잠그지는 않았습니까?
•필터 교체 주기가 지나지는 않았습니까?
•원수 공급 밸브를 열어 주세요.
•쿠쿠 정품필터로 교체해 주세요.
소음이 심하게 나요.
•제품이 설치된 바닥 면이 평평합니까?
•다른 물건과 닿아 있습니까?
•출수구에서 물을 취수한 후 소음이
발생합니까?
•물받이가 정상적으로 조립되어 있습니까?
•제빙기능이 동작 중이지 않습니까?
•바닥이 평평하고 견고한 곳에 설치해 주세요.
•다른 물건과 접촉하지 않도록 해 주세요.
•정수기는 수도 직결식 방식이기 때문에 출수구를
통해 정수가 빠져 나가면 곧바로 물이 채워집니다.
소음
발생은 냉수 탱크에 물이 유입되는 소리이며,
정상적인 정수 유입음 입니다.
•물받이가 제대로 장착되지 않았을 경우, 이상소음이
발생할 수 있습니다. 물받이의 조립상태를 확인해
주세요.
•제빙 동작중에는 ‘졸졸’ 물흐르는 소리나 달그락
거리는 소리등이 날 수 있습니다. 제품 사용빈도에
따라, 소리발생시간이 다를 수 있습니다.
물에서 부유 물질이
나와요.
•필터 교체주기가 지나지 않았습니까? •필터(쿠쿠 정품필터)를 교체해 주세요.
정수기에서 물이 새요.
•조립(연결)부위가 불량인 것 같습니까?
•집 안이나 외부 환경이 습하지 않습니까?
•수도관의 원수 공급 밸브를 잠그고 정수기 전원
플러그를 콘센트에서 뽑은 후 서비스를 신청해 주세요.
•정수기 내부의 찬 부분과 습기가 만나면 이슬 맺힘
현상이 나타날 수 있으며, 이는 물컵에 물방울이
맺히는 것과 같은 이치입니다.
•얼음토출 버튼을 이용하여 얼음저장고의
얼음을 비워주시고 즉시 자동 살균을
진행해 주십시오.
증 상확인사항조치사항
정수량이 갑자기
적어졌어요.
• 원수 공급 밸브를 잠그지 않았습니까?
• 필터 교체 주기가 지나지는 않았습니까?
•필터도어 잠금 레버가 열려 있습니까?
• 원수 공급 밸브를 열어 주세요.
• 쿠쿠 정품필터로 교체해 주세요.
•제품 좌측면의 필터도어 잠금 레버를
CLOSE 방향으로 돌려주세요.
(정수기에 물이 공급됩니다.)
소음이 심하게 나요.
• 제품이 설치된 바닥 면이 견고하고 평평합니까?
• 다른 물건과 닿아 있습니까?
• 물받이가 정상적으로 조립되어 있습니까?
• 제품 뒷면과 옆면이 벽에 닿았습니까?
• 제품 위에 화분, 책, 탁상시계 등 물건이 올려져
있습니까?
• 바닥이 평평하고 견고한 곳에 설치해 주세요.
• 다른 물건과 접촉하지 않도록 해 주세요.
• 물받이가 제대로 장착되지 않았을 경우, 이상 소음이
발행할 수 있습니다. 물받이의 조립상태를 확인해 주세요.
• 벽으로부터 적당한 간격(20cm)을 두어 제품을 재설치
하십시오.
• 제품 위에 있는 물건을 치워주십시오.
물에서 부유 물질이
나와요.
• 필터 교체 주기가 지나지 않았습니까?• 필터(쿠쿠 정품필터)를 교체해 주세요.
정수된 물에 미세한
입자가 나와요.
• 기포가 생겼습니까?• 물을 받고 약 5분이 지난 후에도 미세한 입자가 있다면
바로 서비스센터에 연락하여 주십시오.
정수기에서 물이 새요.
• 조립(연결)부위가 불량인 것 같습니까?
• 집 안이나 외부 환경이 습하지 않습니까?
• 수도관의 원수 공급 밸브를 잠그고 정수기 전원 플러그를
콘센트에서 뽑은 후 서비스를 신청해 주세요.
• 정수기 내부의 찬 부분과 습기가 만나면 이슬 맺힘 현상이
나타날 수 있으며, 이는 물컵에 물방울이 맺히는 것과
같은 이치입니다.
고장신고 전에 확인하십시오

63
KOR
제품명
쿠쿠 냉온정 정수기
모델명CP-P011T(White, Titan Silver), CP-P011G(White, Peach Gold)
정격전압단상 AC 120V / 60Hz
소비전력합계 : 1440W(12A) [냉수 : 90W(0.75A)). 온수 : 1350W(11.25A)
정수방식정전흡착여과방식
필터
구성
단계 1
세디카본복합 필터프리카본 2.0 필터
단계 2
내추럴 플러스 필터나노포지티브 필터
단계 3
나노포지티브 필터알칼리 미네랄 필터
용량
정수직수
냉수직수
온수직수
냉매 종류R-134a, 1.06oz
냉매 압력최대 : 186psig, 최소 : 88psig
기후등급N (온대용)
제품
중량약 23.2lb(10.5㎏)
사이즈
(W×D×H)
6.7″ x 18.4″ x 16.1″ (170mm x 468mm x 408mm)
사용
원수
압력
0.049MPa(0.49bar)미만
설치 불가
0.049MPa~0.196MPa
(0.49bar~1.96bar)
설치 가능(조리수 밸브 설치 불가)
0.196MPa(1.96bar)이상
적정 수압(조리수 사용 원활)
사용환경온도41℉ - 104℉ (5℃ - 40℃)
사용원수온도41℉ - 95℉ (5℃ - 35℃)
※ 본 사용설명서에 표시된 내용(외관, 디자인 및 규격)은 제품의 품질 향상을 위해 예고없이 변경되는 수가 있습니다.
제품규격
64
온수
잠금
Estimado cliente:
Gracias por adquirir el puricador de agua CUCKOO.
Por favor guarde este manual (incluida la Garantía).
Este manual será de gran ayuda cuando usted tenga dudas o cuando las funciones no
operen correctamente.
Benecios del producto
Características y ventajas del puricador de agua CUCKOO
Este manual incluye la garantía.
Por favor lea este Manual del usuario antes de usar el producto. Después de leer este manual, guárdelo en un lugar
que le sea fácilmente accesible al usuario para referencia futura.
Precaución : Este producto es para uso doméstico. Se prohíben otros usos (industrial, experimental, etc.). Para usar
este producto durante mucho tiempo sin problemas, sírvase leer este Manual del usuario.
Sistema de ltrado nanopositivo
El sistema de ltrado nanopositivo entrega agua mineral limpia y saludable.
Puricador de agua de ujo directo para obtener agua limpia
Este purificador de agua no contiene un tanque de almacenamiento; en cambio, emplea métodos de calefacción y
refrigeración instantáneas para entregar agua caliente, fría o a temperatura ambiente inmediatamente después de
ltrar el agua.
Un renado puricador de agua con múltiples funciones y diseño estilizado
Su estilizado diseño, compacto y refinado, permite un uso eficiente del espacio sin sacrificar las funciones más
importantes de un puricador de agua.
Sistema de esterilización electrolítica
Este producto emplea un sistema de esterilización electrolítica para asegurar una higiene constante. Usted puede
esterilizar el producto en cualquier momento que lo desee.
Sistema de ltrado de agua económico y respetuoso del medio ambiente
Mediante el uso del ltro nanopositivo hemos creado un sistema de ltrado de agua altamente económico, respetuoso
del medio ambiente y que no produce desechos.
Bloqueo de botones / Bloqueo de funciones
El producto ofrece bloqueo de botones y bloqueo de funciones para evitar su mal uso por parte de niños o ancianos.
Sistema de prevención de pérdidas de agua
Para un uso seguro, el puricador de agua está diseñado para detectar / bloquear las pérdidas de agua.
Función de ujo continuo
Puede dispensar agua de manera continua agua fría, caliente y a temperatura ambiente.
Dispensación de cantidades jas
Función muy cómoda que le permite dispensar una cantidad ja de una taza (alrededor de 150cc(5.1oz)) o media taza
(alrededor de 110cc(3.7oz)) de agua fría, caliente o a temperatura ambiente.

65
Características y ventajas del puricador de agua
eléctrico CUCKOO
Advertencias de seguridad
Precauciones para un uso seguro
Nombres de las piezas/accesorios
Circuito de ltrado/Sistema de ltrado de agua
Detalles que debe vericar antes del uso
Cómo usar
Cómo limpiar la bandeja / Cómo limpiar el
cuerpo principal
Cómo reemplazar los ltros
Ciclo esperado de reemplazo de los ltros /
Recomendaciones / Disposición de los ltros
Por favor verique antes de pedir soporte
Especicaciones del producto
64
66 ~ 69
70 ~ 71
72 ~ 73
74
75
76 ~ 87
88
89 ~ 90
91
92 ~ 93
94
Before Use
Durante el uso
Antes de pedir soporte
Guía de servicio
ÍNDICE
온수
잠금
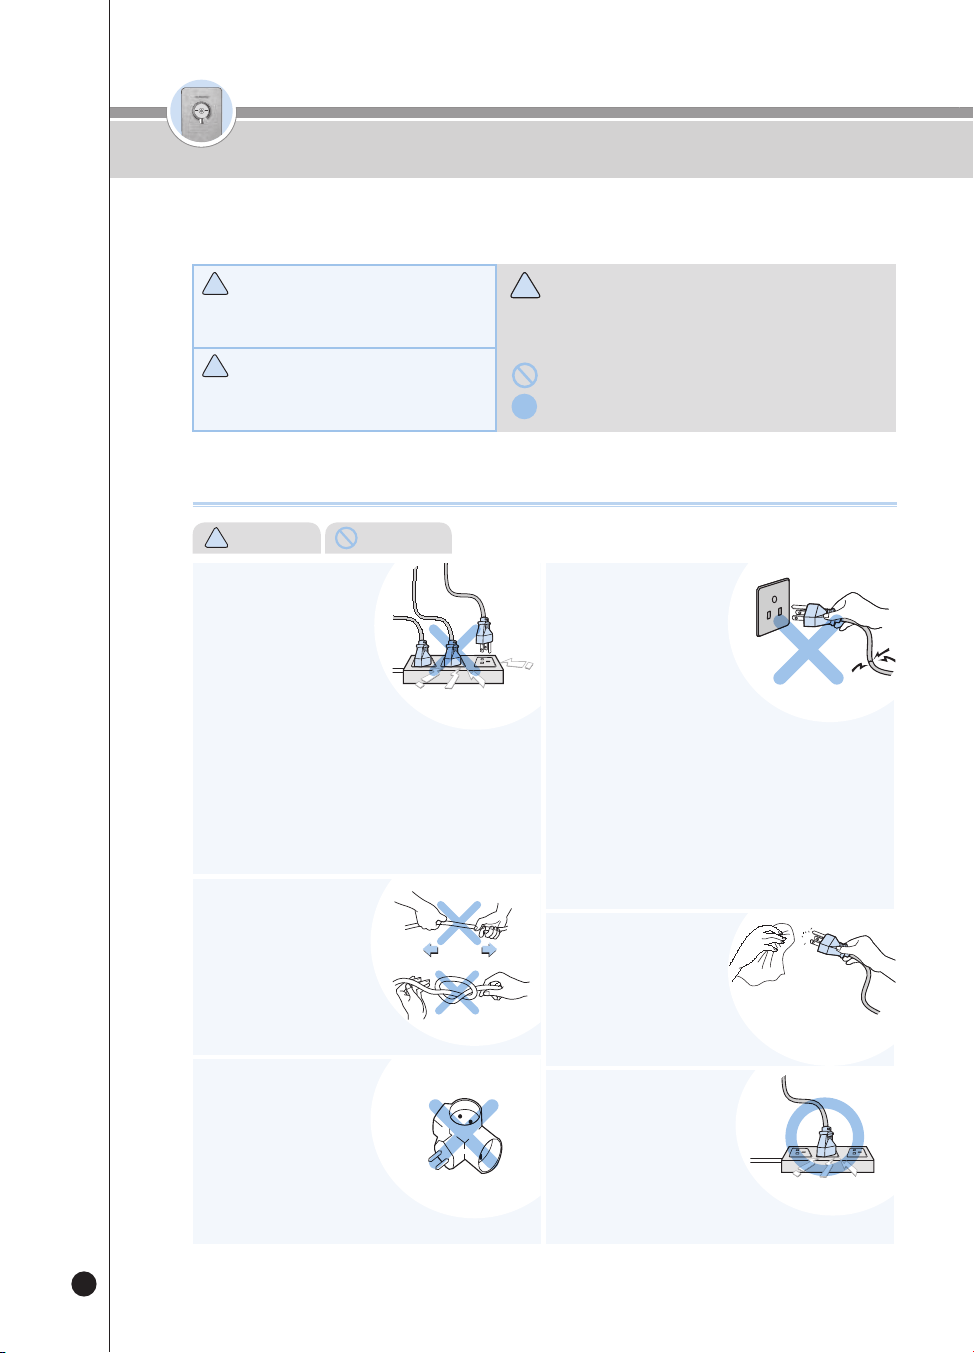
66
온수
잠금
온수
잠금
No use una toma múltiple
conectable (regleta).
• Esto puede causar una descarga
eléctrica o un incendio.
Acerca del suministro eléctrico
!
Advertencia (Prohibido)
Advertencias de seguridad
!
!
!
Advertencia
!
Precaución
•
Este símbolo indica una situación potencialmente peligrosa bajo
ciertas circunstancias.
•
Lea atentamente los detalles y siga las instrucciones para evitar
las situaciones peligrosas.
•
Este símbolo se usa para indicar las acciones que están “prohibidas”.
•
Este símbolo se usa para indicar las acciones “indicadas”.
Situación potencialmente peligrosa que puede
causar graves lesiones o la muerte si no se evita.
Situación potencialmente peligrosa que puede
causar lesiones menores si no se evita.
● Observe las “Advertencias para el uso seguro”, ya que se ofrecen para garantizar un uso seguro y correcto del
dispositivo y evitar accidentes y situaciones peligrosas.
● La sección “Advertencias para el uso seguro” se divide en “Advertencias” y precauciones”, las que se definen como sigue:
• Si la usa con muchos productos, puede causar un incendio o una
descarga eléctrica.
• Revise regularmente la toma de corriente.
• Si no está correctamente conectada a tierra, puede causar una
descarga eléctrica debido a un corto circuito.
• Si el conector eléctrico tiene substancias extrañas o humedad,
límpielo completamente antes de usarlo.
Por favor use el producto solo
con una toma de corriente
que sea exclusivamente
para 120V con una valuación
nominal de por lo menos 15A
y cuando esté apropiadamente
conectada a tierra. No conecte
simultáneamente varios dispositivos
a una misma toma de corriente.
• Si la funda del cable eléctrico se pela o corta durante el uso debido
a negligencia, puede causar un incendio o una descarga eléctrica.
Por ello, por favor revise frecuentemente el estado del cable
eléctrico, del conector eléctrico y de la toma de corriente.
• Para evitar las situaciones peligrosas que surgen de daños al cable
eléctrico o al conector eléctrico, por favor póngase en contacto con
el fabricante, el distribuidor o un técnico certificado (personal de
servicio) para su reemplazo.
• Recomendamos enfáticamente reparar las piezas dañadas en un
centro de reparaciones designado.
• Esto puede causar un corto circuito, una descarga eléctrica y un
incendio.
Si un cable eléctrico o un
conector eléctrico están
dañados o la toma de
corriente es insegura,
deje de usar el producto y
póngase en contacto con
nuestro Centro de Servicio al
Cliente.
• Esto puede causar una descarga
eléctrica o un incendio. Revise
frecuentemente el conector eléctrico.
Si hay humedad, polvo o
substancias extrañas en el
conector eléctrico, quítelos
con un paño seco.
• Esto puede causar una descarga eléctrica o un incendio.
Si usa un alargador, emplee
solamente un único producto
para un alargador con una
capacidad nominal de
15A y compruebe que esté
apropiadamente conectado a
tierra.
No doble, ate ni tire a la
fuerza el cable eléctrico.
• Puede causar una descarga
eléctrica o, un incendio debido a un
corto circuito. Revise frecuentemente
el conector eléctrico.

67
온수
잠금
온수
잠금
Acerca del suministro eléctrico
!
Advertencia (Prohibido)
Advertencias de seguridad
Al desenchufar el producto
asegúrese de sostener el
conector, no el cable.
• La aplicación de fuerza al cable eléctrico puede causar un incendio
o una descarga eléctrica. Por favor revise frecuentemente el cable
eléctrico y el conector eléctrico.
Use únicamente un voltaje
de corriente alterna de
120V.
• Esto puede causar una descarga
eléctrica o un incendio.
• El producto no funcionará apropiadamente.
• Por favor revise frecuentemente el cable eléctrico y el conector
eléctrico.
Al enchufar o desenchufar
el conector eléctrico de la
toma de corriente, primero
elimine la humedad de
sus manos y luego enchufe
o desenchufe el conector
eléctrico sosteniéndolo.
• Desenchufar el conector eléctrico con las manos húmedas puede
causar una descarga eléctrica.
• Desenchufar el cable eléctrico con fuerza excesiva puede dañar el
cable eléctrico, causando un cortocircuito o una descarga eléctrica.
• Por favor revise frecuentemente el cable eléctrico y el conector
eléctrico.
Cuando no vaya a usar el
producto durante mucho
tiempo, primero cierre
la válvula de suministro
de agua del grifo y luego
desconecte el conector
eléctrico.
• Para volver a usarlo, primero use la función de esterilización
inmediata y luego use el producto. (Consulte la página 80).
• Antes de volver a usarlo, consulte ‘Detalles que debe verificar antes
del uso’ (Consulte la página 75).
Si entra agua al área del
suministro eléctrico,
desconecte el producto y
séquelo completamente
antes usarlo.
• Esto puede causar una descarga
eléctrica o un incendio. Por favor revise frecuentemente el cable
eléctrico y el conector eléctrico.
En caso de limpieza o de
pérdida de agua, primero
cierre la válvula de
suministro de agua del
grifo y luego desenchufe el
conector eléctrico.
• Hay un riesgo de descarga eléctrica o funcionamiento defectuoso.
Por favor revise frecuentemente el cable eléctrico y el conector
eléctrico.
Asegúrese de que el cable
eléctrico no esté bajo un
objeto pesado ni cerca de
objetos punzantes. Tome
precauciones especiales
para que sus mascotas no
lo dañen fácilmente.
• Si no lo hace, pueden dañar el cable, lo que puede producir una
descarga eléctrica o un incendio. Por favor revise frecuentemente el
cable eléctrico.
Desconecte el producto
también antes de su
inspección, reparación o
reemplazo de sus piezas.
• Existe el riesgo de funcionamiento
defectuoso o descarga eléctrica. Por favor revise
frecuentemente el cable eléctrico y el conector eléctrico.
ESP
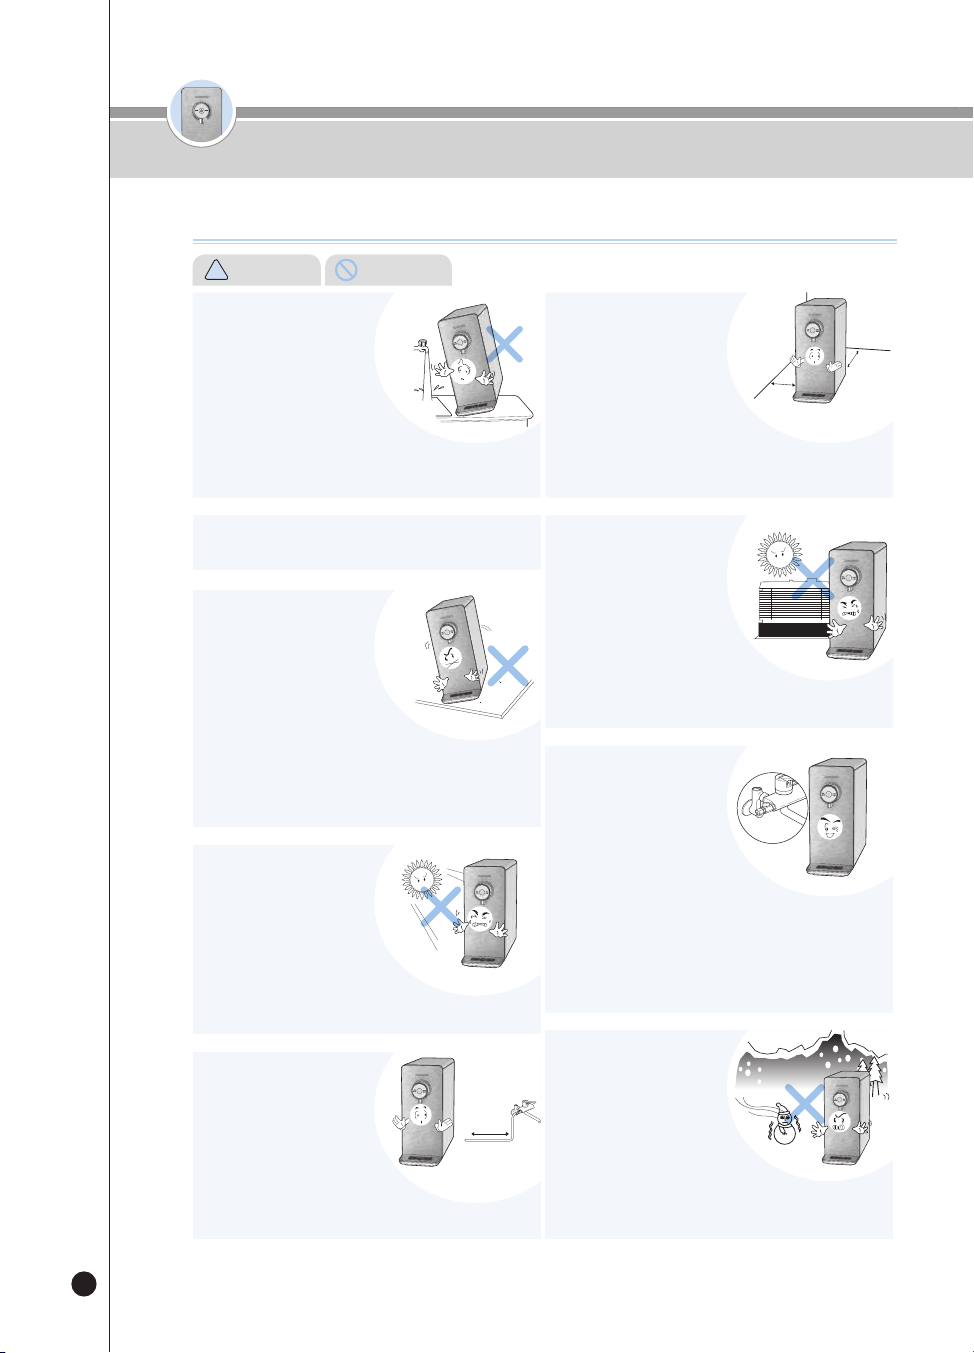
68
온수
잠금
온수
잠금
No instale el producto cerca del baño.
No lo ponga sobre una
superficie irregular o
inclinada. Por favor evite
ponerlo sobre una alfombra,
cojín o piso laminado.
• Puede causar un funcionamiento defectuoso, ruido no deseado
o lesiones. Por favor verifique regularmente si el producto está
funcionando apropiadamente.
• Esto puede causar daños al producto o un incendio.
• El purificador es un producto fijo; úselo fijo.
Evite la luz solar directa y las
altas temperaturas.
• Esto puede causar cambios de color o
decoloración.
• El purificador es un producto fijo; úselo fijo.
Agua de
refrigeración
Asegúrese de que la longitud
del tubo de suministro de
agua del grifo no exceda los
16.4 feet a contar desde la
válvula de suministro de agua.
• Si el tubo es más largo que 16.4 feet, puede causar
un desempeño deficiente del producto.
16.4 feet o menos
Instale el producto sobre un
piso firme y plano a una
distancia de 8inch o más de
la pared.
No lo ponga en una área
donde exista el riesgo de
fuga de gas ni cerca de un
dispositivo calorífico.
Use siempre la plomería
instalada para el agua del
grifo e instale la válvula
de suministro de agua del
grifo cerca de la tubería de
agua de refrigeración.
Evite los lugares donde la
temperatura baja a
menos de 41℉ y los
exteriores.
8” o más
8” o más
No lo instale donde pueda
exponerse a la humedad,
al polvo excesivo y a las
salpicaduras de agua.
• Instale el producto en un entorno limpio.
• Esto puede causar funcionamiento defectuoso, descarga eléctrica o
incendio.
• Si no lo hace, puede causar un desempeño deficiente del producto.
• Hay riesgo de explosión o incendio.
• No use otras fuentes de agua excepto el agua del grifo, como agua
de pozo.
• El ciclo de cambio de los filtros puede variar según la región y la
capacidad de uso de agua.
• Conectar la válvula a la tubería del agua caliente puede dañar el filtro
o causar el funcionamiento defectuoso del producto.
• Esto puede hacer que el filtro o
cualquier otro componente se congele,
causando el funcionamiento defectuoso del producto.
• La temperatura de entorno para usar el producto debe estar entre
41℉ y 104℉.
Installation Guide
Advertencias de seguridad
!
Advertencia (Prohibido)

69
온수
잠금
온수
잠금
• Esto puede causar una pérdida de agua.
Al reemplazar los filtros, cierre
la válvula de suministro de
agua del grifo. (La válvula de
suministro de agua del grifo está
normalmente bajo una pila).
잠금
원수차단밸브
Por favor tenga cuidado al
dispensar agua caliente.
• No permita que el agua caliente
entre en contacto con sus manos.
Se requiere supervisión cuando el
dispositivo sea usado por niños o
ancianos.
고객상담실
고객상담실
고객상담실
고객상담실
Advertencias de seguridad
Durante el uso
No ponga encima del
producto ningún dispositivo
calefactor como un horno
microondas, un horno o
tostador eléctrico, o artículos
inflamables como velas,
contenedores de gas o
encendedores.
No tire el cable eléctrico o la
manguera ni agarre el grifo al
mover el producto.
• Existe el riesgo de incendio, descarga eléctrica o accidentes.
• Esto puede causar daños al producto.
No ponga productos
químicos, botellas con
agua ni materiales
metálicos pequeños
encima del producto.
No desmonte ni remodele
el producto.
• Ellos podrían caer en el producto y causar
incendios o dañar el producto.
• Esto puede causar una descarga
eléctrica o un incendio.
• No permita que nadie excepto nuestros
técnicos de servicio desmonten o retiren el producto.
고객상담실
고객상담실
Si encuentra una fuga desde
el interior o una poza de agua
alrededor del producto, cierre
la válvula de suministro de
agua, apague el producto,
desconéctelo y luego póngase
en contacto con nuestro Centro
de Servicio al Cliente
Si siente olor a quemado o ve
que sale humo del dispositivo,
desconéctelo inmediatamente
y cierre la válvula de suministro
de agua del grifo. Después
de eso, por favor póngase en
contacto con nuestro Centro de
Servicio al Cliente.
El producto debe ser instalado y retirado por nuestros
técnicos de servicio a través del Centro de Servicio al
Cliente.
Impida el bloqueo o la presencia de substancias extrañas
como agujas, mientras limpiando el pasador y metales
pegados en el orificio de toma de aire, orificio de descarga
de aire y otras aberturas.
• Si no lo hace, puede causar una descarga eléctrica o un incendio.
Si frota con un cepillo o limpiador la válvula del agua
para cocinar, el enchapado puede dañarse y causar la
adhesión de minerales.
• Existe el riesgo de incendio, descarga eléctrica o accidentes.
• Esto puede causar un incendio.
!
Caution (Instruction)
Preste atención a los niños o a cualquier persona que
controle el panel de control; asegúrese de que no lo usen
inadecuadamente.
• Esto puede causar una alteración del producto y accidentes.
Close
!
Advertencia (Prohibido)
ESP

70
온수
잠금
온수
잠금
Si no ha usado el producto
durante mucho tiempo, opere
primero la función de
esterilización inmediata una
vez antes del uso.
• Puede limpiar fácilmente los conductos y el
tanque de agua de refrigeración con la función de esterilización
inmediata. (Consulte la página 80)
Reemplace los filtros según el ciclo de
reemplazo.
• Si no lo hace, puede deteriorar
el desempeño de los filtros o
producir mal olor.
• Consulte el ciclo de reemplazo de
filtros en la página 91.
Si hay una fuga de gas o de
propano, no desconecte el
cable eléctrico del producto,
sino que abra inmediatamente
las ventanas para ventilar.
• Esto puede causar una descarga
eléctrica o un incendio.
Asegúrese de que la cubierta
del tanque de agua de
refrigeración dentro del
producto y la cubierta
superior estén completamente
cerradas antes del uso.
• Esto también evita la entrada de
materiales extraños.
Por favor evite usar el agua dispensada para llenar una
pecera o un acuario.
• Puede que el agua a temperatura ambiente no sea adecuada para
los peces en reproducción. Podrían morir, dependiendo de las
circunstancias.
No limpie el producto con
benceno o aguarrás.
• Hay un riesgo de dañar el producto.
Durante el uso, no desconecte
la manguera en la parte
trasera del producto.
•Esto puede causar una fuga de agua y
el funcionamiento defectuoso del producto.
No mueva el producto mientras
lo opera.
• No mueva ni agite el producto cuando
esté encendido. Esto puede causar que
el tubo de empalme se separe, llevando a un
funcionamiento defectuoso del producto y a una fuga de agua.
No incline el producto en un ángulo de 30 grados o más al
moverlo.
• Esto puede causar un desempeño deficiente del producto.
No debe usar filtros purificadores de agua que NO sean
Cuckoo.
• Si usa un filtro que no sea un filtro CUCKOO auténtico puede
disminuir el desempeño de la purificación del agua, provocar un
sabor anormal en el agua, pérdidas de agua y un funcionamiento
defectuoso del producto.
Precauciones de uso seguro
!
Precaución (Instrucción)
!
Advertencia (Prohibido)
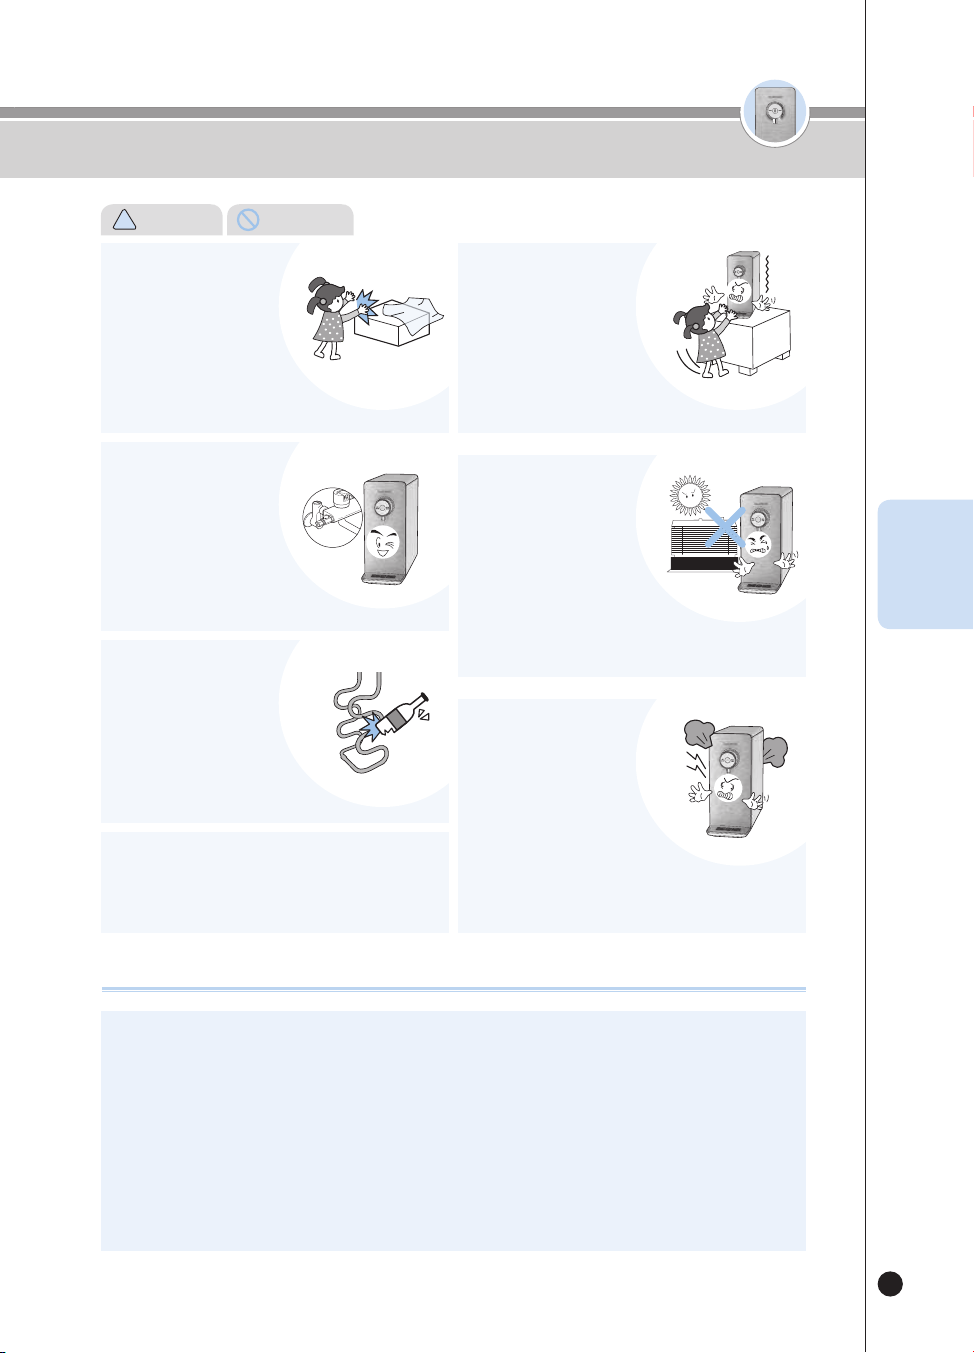
71
온수
잠금
온수
잠금
Agua
potable
ON
OFF
Este producto es exclusivamente para 120V, así que use siempre una toma de corriente exclusivamente para
120V y que esté apropiadamente conectada a tierra.
Cuando use un alargador (como una regleta), no conecte simultáneamente ningún otro producto.
Si no está correctamente conectada a tierra, puede causar una descarga eléctrica debido a un corto circuito.
❶
En caso de una toma de corriente con terminal de conexión a tierra
Si hay un terminal de conexión a tierra, usted puede usar inmediatamente la toma de corriente sin ninguna otra
operación.
❷
En caso de una toma de corriente sin terminal
de conexión a tierra: primero, compruebe si hay instalado un disyuntor de fuga de tierra. Si no hay un disyuntor de
fuga de tierra, instale uno antes de usar el producto. La ausencia de un disyuntor de fuga de tierra puede causar un
incendio.
Durante el uso
Precauciones de uso seguro
Mantenga los materiales de
embalaje como la espuma
de estireno y el vinilo fuera
del alcance de los niños.
No lo conecte a nada
excepto a la tubería de
suministro de agua del grifo
(agua potable).
Evite dañar el circuito del
refrigerante.
No conecte al azar un aparato para reducir la presión de
la tubería del aparato de agua caliente.
• Esto puede causar un funcionamiento defectuoso del producto.
Evite que los niños trepen al
producto o se cuelguen de él.
No instale el producto en los
siguientes lugares:
No opere repetidamente las
funciones Hot Water Outflow
y Stop.
• Esto puede causar sofocación.
• El agua que no sea del grifo (agua
potable) puede causar enfermedades.
• Esto puede causar un desempeño
deficiente o acortar la vida útil del producto.
• Esto puede causar un funcionamiento
defectuoso del producto.
• Esto puede causar que el producto caiga, lesionando a los niños.
• Exteriores.
• Lugares expuestos a la luz solar directa.
• Cerca de un baño.
• Frente a un refrigerador o calefactor.
• Un lugar inclinado.
• Esto puede causar un funcionamiento defectuoso del producto.
En particular, puede causar vapor.
!
Precaución (Instrucción)
ESP
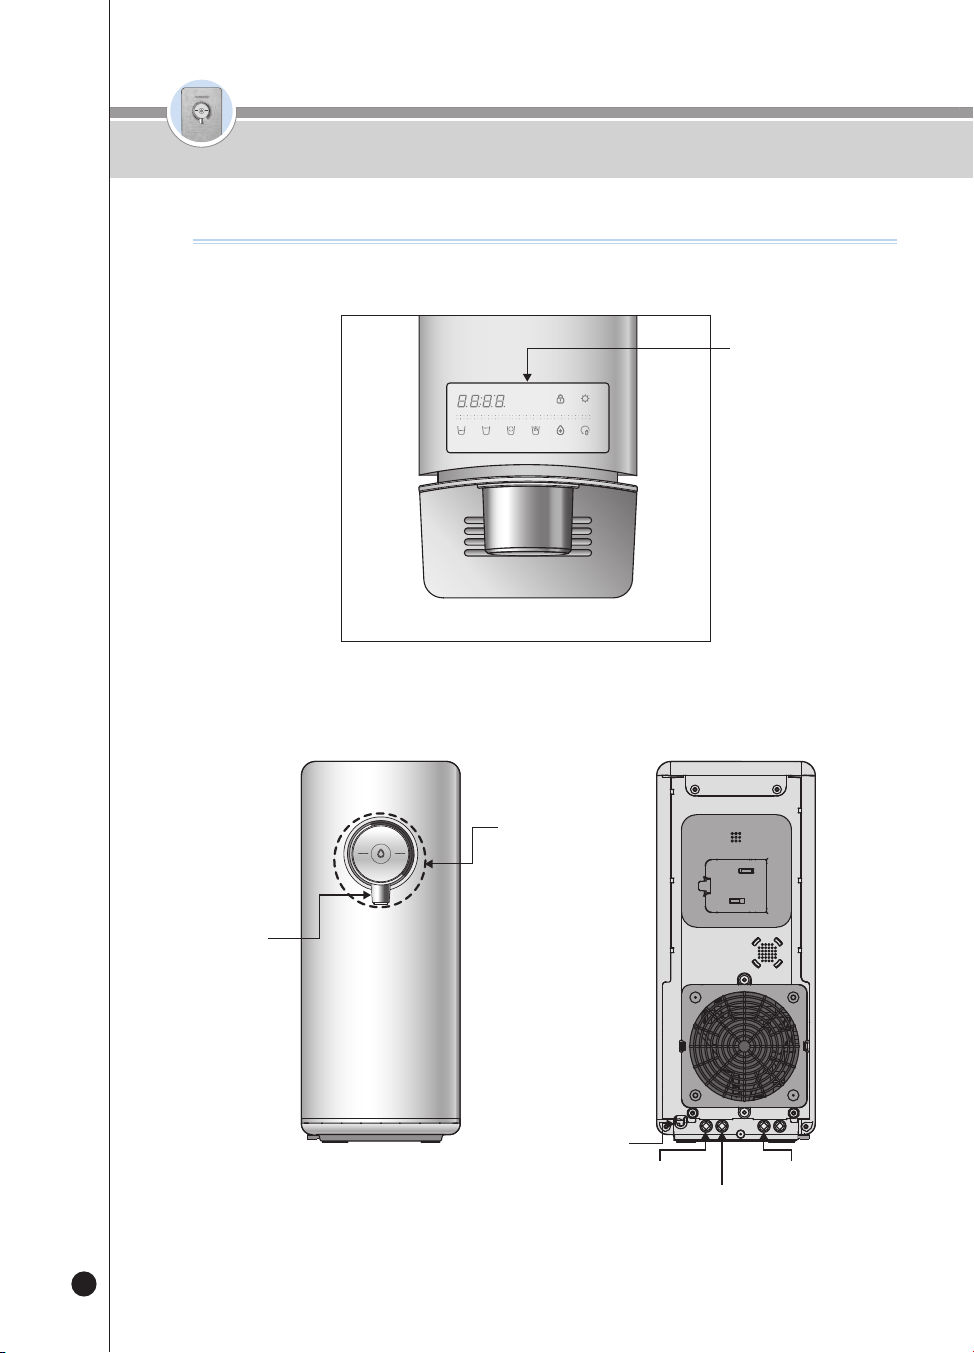
72
온수
잠금
온수
잠금
< Parte frontal y trasera >
Nombres de las piezas
Nombres de las piezas
< Parte superior >
(3)
(3)
.
(3)
(3)
Operación de funciones y
pantalla
Botón de selección y
salida
de agua fría/ agua
caliente/
agua a tem peratura
ambiente
Tapón extremo para grifo
externo
Cable eléctrico
Drenaje
Suministro de agua del grifo
Grifo
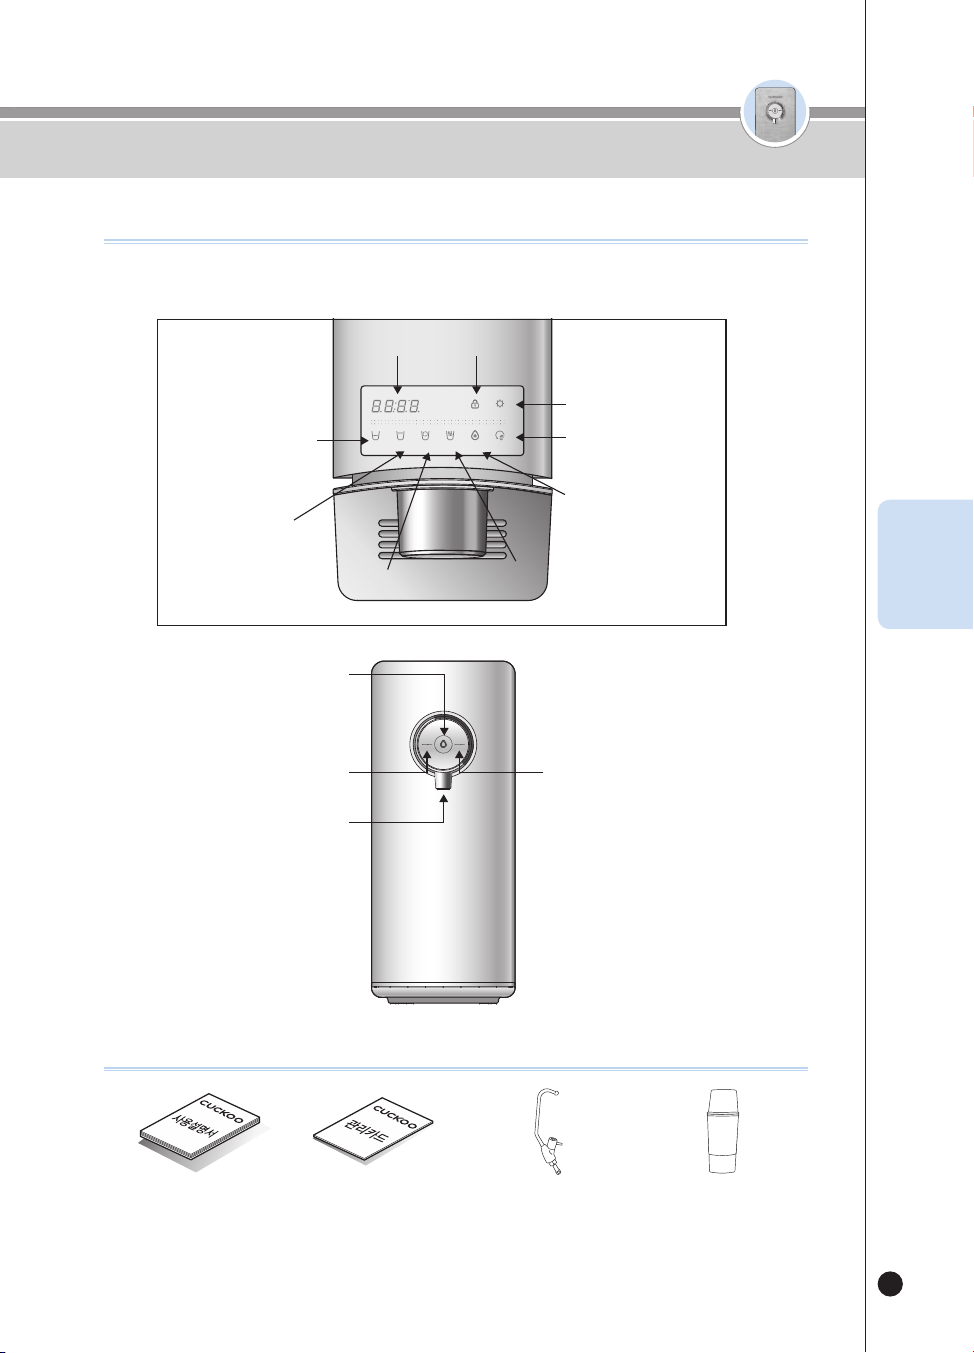
73
온수
잠금
온수
잠금
Nombre de las piezas
Accesorios
< Detalles del panel de pantalla >
Puricación del agua
SELECT MODESELECT
LOC
(3SEC)
ENERG SAVE/
SETTING
(3SEC)
HALF
CUP
ONE
CUP
NON-
STOP
HOT
TEMP.
TIME/
STERILIZE
(3SEC)
FILTER
RESET
(3SEC)
HOT
LOC
ROOM
COLD
Manual del usuario Tarjeta de servicio Válvula externa (opcional) Taza para esterilización
(Si la pierde, póngase en
contacto con el Centro de
Servicio al Cliente para adquirir
una nueva).
Botón de Selección de agua a temperatura
ambiente (luz de salida: BLANCA) y agua
fría (luz de salida: AZUL)
Botón de Salida
Botón de Selección de agua caliente (luz de
salida: ROJA)
Grifo
Pantalla de hora
Botón de Media taza
Botón de Una taza
Botón Continuo
Botón de Temp caliente
Botón de Selección /
Ahorro de energía /
Configuración
Botón de Reinicio de filtros
Botón de Hora /
Esterilización
Botón de Modo / Bloqueo
ESP
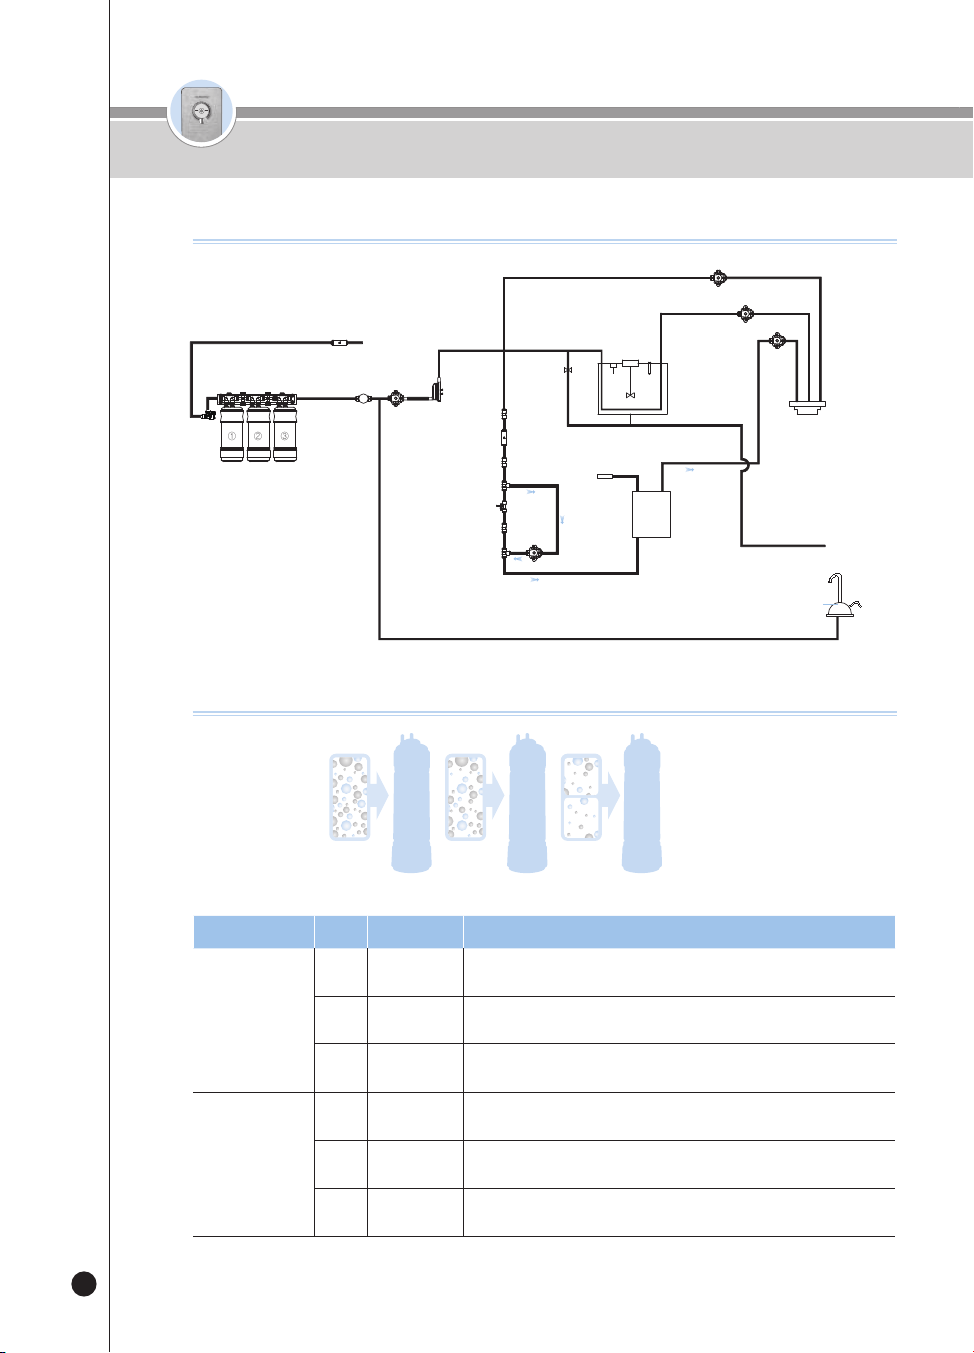
74
온수
잠금
온수
잠금
Composición Paso
Nombre
Función
1
1
Sedi Carbon
Composite
Elimina el óxido, el material en flotación, el cloro y los metales pesados
(plomo) residuales.
2
Natural Plus
Elimina las partículas finas, los gérmenes en general, los metales
pesados (mercurio, hierro, aluminio) residuales y el norovirus.
3
Nano
Positive
Proporciona una infusión mineral para crear un agua alcalina
saludabl.
2
1
Pre Carbon
2.0
Elimina partículas y cloro residual.
2
Nano
Positive
Proporciona una infusión mineral para crear un agua alcalina
saludabl.
3
Alkali-
Mineralizer
Genera agua alcalina y mineral, mejora el sabor del agua.
※ El uso durante mucho tiempo de un filtro que NO sea Cuckoo o de otro filtro no autorizado puede disminuir el
desempeño del filtro.
Paso 1 Paso 2 Paso 3
Sistema de ltrado
Circuito de ltrado / Sistema de ltrado
Circuito de ltrado
Módulo de
esterilización
electrolítica
Válvula de
suministro de
agua
Sensor
de agua
Sensor del motor
Tanque de
agua fría
Válvula
de bola de
suministro
de agua
Calentador
de película
Válvula de salida caliente
Válvula externa de
drenaje del tanque
Externa
Grifo
Válvula de salida de agua a
temperatura ambiente
Válvula de salida de agua fría
Sensor de
temperatura de
mezclado de niveles
Agua del grifo
Válvula
externa
4PULG. 4PULG. 4PULG.
①
②
③
Flujómetro
Palanca de bloqueo de la
puerta del filtro
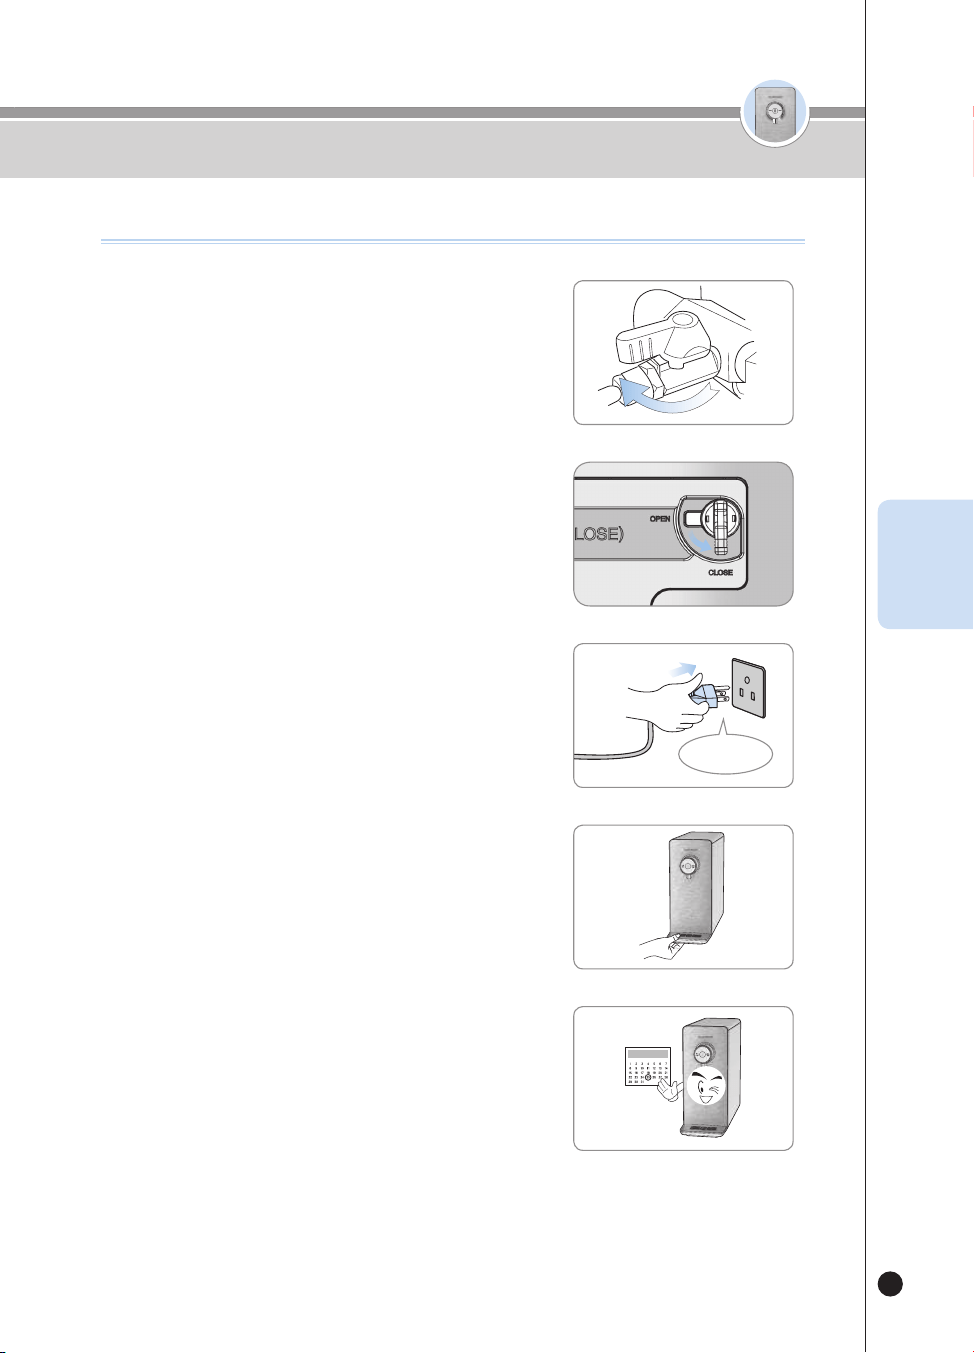
75
온수
잠금
온수
잠금
❹
Vacíe la bandeja regularmente.
❺
Por favor, reemplace y limpie el filtro regularmente.
▶
Limpie y reemplace los filtros con regularidad para que
siempre pueda disfrutar de agua pura y limpia.
▶
Consulte la página 91 para conocer la frecuencia de
reemplazo del filtro.
❶
Abra
Detalles que debe vericar antes del uso
Detalles que debe vericar antes del uso
❸
120V CA
Lleve la palanca de bloqueo de la puerta del filtro a
la izquierda del producto hacia el signo Close. (para
permitir que el agua del grifo fluya internamente)
• Cuando se cierra el bloqueo de la puerta del filtro, entra agua al
producto.
❷
Palanca
de
bloqueo
de la
puerta
del filtro
Close
Abra la válvula de suministro de agua del grifo.
▶
Abra la válvula de suministro de agua del grifo y observe si hay
pérdidas de agua en cada pieza conectora.
• Válvula de suministro de agua del grifo, entrada de agua del grifo y
exterior del producto.
Conecte el producto.
▶
Este producto usa exclusivamente 120V 60Hz. Por favor
asegúrese de conectarlo a una toma de corriente apropiada.
ESP
76
온수
잠금
온수
잠금
❶
Modo Espera
▶
Es un modo de espera de salida para dispensar agua fría, agua a temperatura ambiente y agua caliente.
Las luces de la pantalla se encienden en la parte frontal se encienden según la función seleccionada, como
agua fría o agua a temperatura ambiente.
❷
Modo Configuración del usuario
▶
Usted puede configurar la función presionando el botón [Energy Save/Setting] durante tres segundos
mientras se encuentra en el modo Espera.
Modo Configuración del usuario
Al presionar una vez [Select Mode/Lock]
Configuración de la alarma de reemplazo de
los filtros
Al presionar dos veces [Select Mode/Lock] Configuración de la alarma de esterilización
Al presionar tres veces [Select Mode/Lock]
Función de configuración de salida de una
taza
Al presionar cuatro veces [Select Mode/Lock]
Función de configuración de salida de media
taza
Al presionar cinco veces [Select Mode/Lock]
Función de configuración del volumen de la
voz
Al presionar seis veces [Select Mode/Lock]
Función de encendido/apagado de la luz de
ambientación
Al presionar siete veces [Select Mode/Lock] Función de limpieza automática de los filtros
Al presionar ocho veces [Select Mode/Lock] Función de configuración de la hora actual
Al presionar nueve veces [Select Mode/Lock] Función de configuración del idioma
❸
Salida de una cantidad fija
▶
Presione el botón [Outflow] una vez y se dispensará agua en la cantidad fija.
▶
Seleccione el botón [Half Cup] y presione el botón [Outflow] para dispensar 110cc(3.7oz) de agua.
▶
Seleccione el botón [One Cup] y presione el botón [Outflow] para dispensar 150cc(5.1oz) de agua.
▶
Seleccione el botón [Non-Stop] y presione el botón [Outflow] para dispensar el agua continuamente.
❹
Salida manual
▶
El agua se dispensa mientras usted está presionando el botón [Outflow].
▶
Presione el botón [Outflow] durante dos segundos y el producto pasará al estado de Salida manual. Se
dispensará agua mientras usted presione el botón [Outflow].
Cómo usar
How to Set Functions
77
온수
잠금
온수
잠금
❶
Si la función de agua fría está desactivada, presione el botón
[Room/Cold] durante tres segundos para activar la función
de agua fría.
▶
Mientras usted esté presionando el botón [Room/Cold], la Guía de voz
dirá “Seleccionando la función de agua fría”.
▶
Cuando la función de agua fría se active, se mostrará la palabra “ON” y
la Guía de voz dirá “Se seleccionó la función de agua fría”.
❷
Si no desea usar el agua fría, desactive la función de agua
fría presionando el botón [Room/Cold] durante tres segundos
mientras la función de agua fría está en ON.
▶
Mientras usted esté presionando el botón [Room/Cold], la Guía de voz dirá
“Cancelando la función de agua fría”.
▶
Cuando la función de agua fría se desactive, se mostrará la palabra “OFF” y la Guía de voz dirá “Se
canceló la función de agua fría”.
▶
Si presiona el botón [Room/Cold] mientras la función de agua fría está en OFF, la Guía de voz dirá
“Función de agua fría desactivada", "Active la función de agua fría antes del uso".
Cómo usar
Cómo congurar la función de agua fría
HOT
LOCK
ROOM
COLD
※ Puede dispensar agua fría aproximadamente durante una hora después de activar la función de agua fría.
※ La función está configurada en ON como configuración predeterminada del producto.
ESP
Cómo dispensar agua fría
HOT
HOLD
SELECT MODE SELECT
LOCK(3SEC) ENERGY SAVE/
SETTING(3SEC)
HALF
CUP
ONE
CUP
NON-
STOP
HOT
TEMP.
TIME/
STERILIZE(3SEC)
FILTER
RESET(3SEC)
ROOM
COLD
HOT
LOCK
ROOM
COLD
❶
Presione el botón [Room/Cold] para seleccionar el agua fría.
▶
La Guía de voz dirá “Agua fría”.
❷
Para usar la salida de una cantidad fija:
▶
Seleccione la cantidad deseada entre los botones [Half Cup], [One Cup] y [Non- Stop].
▶
Presione el botón [Outflow] una vez. Se dispensará agua fría.
▶
Cuando la cantidad de agua seleccionada haya sido completamente dispensada,
terminará la dispensación de agua.
▶
Si presiona el botón [Outflow] o cualquier otro botón mientras el producto está dispensando la cantidad de
agua seleccionada, terminará el proceso de dispensación de agua.
❸
Si desea operar la Salida manual:
▶
Presione el botón [Outflow]. Se dispensará agua fría.
▶
Si presiona el botón [Outflow] durante dos segundos o más, el estado
del producto cambiará a Salida manual.
▶
La Guía de voz dirá “Se dispensa agua durante la presión”.
▶
Si deja de presionar el botón [Outflow] durante la Salida manual, terminará la dispensación de agua.
❹
Mientras se esté dispensando agua fría, se encenderá la luz de ambientación azul en
el grifo. (Si la función de ambientación está desactivada, la luz no se encenderá)
78
온수
잠금
온수
잠금
Cómo usar
Cómo dispensar agua a temperatura ambiente
Cómo congurar la función de bloqueo del agua caliente
Esta función les impide a los niños operar el producto al azar y quemarse. Si
se selecciona esta función, el botón [Hot/Lock] no funcionará.
❶
Si presiona el botón [Hot/Lock] durante tres segundos en el estado
de Espera, se seleccionará el bloqueo del agua caliente.
▶
Si presiona el botón [Hot/Lock] en el estado de Bloqueo del agua caliente, se
mostrará “Loc_” y la Guía de voz dirá “Seguro para niños activado”.
▶
Si presiona el botón [Hot/Lock] durante tres segundos en el estado de Bloqueo
del agua caliente, se mostrará “Un_Loc_” y terminará el bloqueo del agua
caliente.
HOT
LOCK
ROOM
COLD
❶
Presione el botón [Room/Cold] para seleccionar el agua a
temperatura ambiente.
▶
La Guía de voz dirá “Agua a temperatura ambiente”.
❷
Para usar la salida de una cantidad fija:
▶
Seleccione la cantidad deseada entre los botones [Half Cup], [One Cup] y [Non-
Stop].
▶
Presione el botón [Outflow] una vez. Se dispensará agua a temperatura ambiente.
▶
Cuando la cantidad de agua seleccionada haya sido completamente dispensada, terminará la
dispensación de agua.
▶
Si presiona el botón [Outflow] o el botón de cantidad fija seleccionada
de nuevo mientras el producto está dispensando la cantidad fija de
agua, terminará la dispensación de agua.
❸
Si desea operar la Salida manual:
▶
Presione el botón [Outflow]. Se dispensará agua a temperatura ambiente.
▶
Si sigue presionando el botón [Outflow] durante dos segundos o más,
el estado del producto cambiará a Salida manual.
▶
La Guía de voz dirá “Se dispensa agua durante la presión”.
▶
Si deja de presionar el botón [Outflow] durante la Salida manual, terminará la dispensación de agua.
❹
Mientras se esté dispensando agua a temperatura ambiente, se encenderá la luz de
ambientación verde en el grifo. (Si la función de ambientación está desactivada, la
luz no se encenderá).
HOT
HOLD
SELECT MODE SELECT
LOCK(3SEC) ENERGY SAVE/
SETTING(3SEC)
HALF
CUP
ONE
CUP
NON-
STOP
HOT
TEMP.
TIME/
STERILIZE(3SEC)
FILTER
RESET(3SEC)
ROOM
COLD
HOT
LOCK
ROOM
COLD
Para usar el agua caliente después de la instalación
❶
Presione el botón de agua [Hot/Lock] y presione el botón [Outflow].
▶
La Guía de voz dirá “Iniciar la comprobación de la instalación de la entrada de agua”.
▶
La salida de agua se detendrá cuando termine la comprobación del producto.
▶
La Guía de voz dirá “El producto se instaló con éxito”.
❷
El agua caliente se puede usar una vez completa la instalación del
producto.
HOT
LOCK
ROOM
COLD
79
온수
잠금
온수
잠금
Cómo usar
Cómo usar el agua caliente
❶
Seleccione la función de agua caliente presionando el el botón [Hot/Lock].
▶
La Guía de voz dirá “Agua caliente.”
❷
Para usar la salida de una cantidad fija:
▶
Seleccione la cantidad deseada entre los botones [Half Cup], [One Cup] y [Non-
Stop].
▶
Presione el botón [Outflow] una vez. Después del precalentamiento, se dispensará
agua caliente.
▶
Cuando la cantidad de agua seleccionada haya sido completamente dispensada, terminará la
dispensación de agua.
▶
Si presiona el botón [Outflow] o cualquier otro botón mientras
el producto está dispensando la cantidad de agua
seleccionada, terminará la dispensación de agua.
❸
Si desea operar la Salida manual:
▶
Presione el botón [Outflow]. Se dispensará agua caliente.
▶
Si presiona el botón [Outflow] durante dos segundos o más, el
producto pasará al estado de Salida manual.
▶
La Guía de voz dirá “Se dispensa agua durante la presión”.
▶
Si deja de presionar el botón [Outflow] durante la Salida manual, terminará la dispensación de agua.
❹
Mientras se esté dispensando agua caliente, se encenderá la luz de ambientación roja
en el grifo. (Si la función de ambientación está desactivada, la luz no se encenderá)
※ Las salpicaduras de agua desde el producto pueden causar quemaduras. Por ello, por favor acerque la
taza al grifo.
※ Una vez que el producto esté instalado y usted dispense la primera taza de agua caliente, se dispensará
agua tibia. (Después de la primera taza, se dispensará agua caliente).
HOT
HOLD
SELECT MODE SELECT
LOCK
(3SEC)
ENERGY SAVE/
SETTING
(3SEC)
HALF
CUP
ONE
CUP
NON-
STOP
HOT
TEMP.
TIME/
STERILIZE
(3SEC)
FILTER
RESET
(3SEC)
ROOM
COLD
HOT
LOCK
ROOM
COLD
Cómo congurar la temperatura del agua caliente (agua caliente personalizada)
▶
Cada vez que presione el botón [Hot Temp], la temperatura del agua caliente
cambiará en unos 18℉.
104℉
→
122℉
→
140℉
→
158℉
→
HOT (temperatura máxima) …
[40℃
→
50℃
→
60℃
→
70℃
→
HOT (temperatura máxima) …]
▶
Seleccione el botón [Non-Stop] y presione el botón [Outflow]. Se dispensará
agua caliente a la temperatura seleccionada.
▶
Si presiona el botón [Outflow] o cualquier otro botón mientras el producto está
dispensando agua caliente, terminará la dispensación de agua.
❶
HOT
HOLD
SELECT MODE SELECT
LOCK
(3SEC)
ENERGY SAVE/
SETTING
(3SEC)
HALF
CUP
ONE
CUP
NON-
STOP
HOT
TEMP.
TIME/
STERILIZE
(3SEC)
FILTER
RESET
(3SEC)
ROOM
COLD
HOT
LOCK
ROOM
COLD
ESP
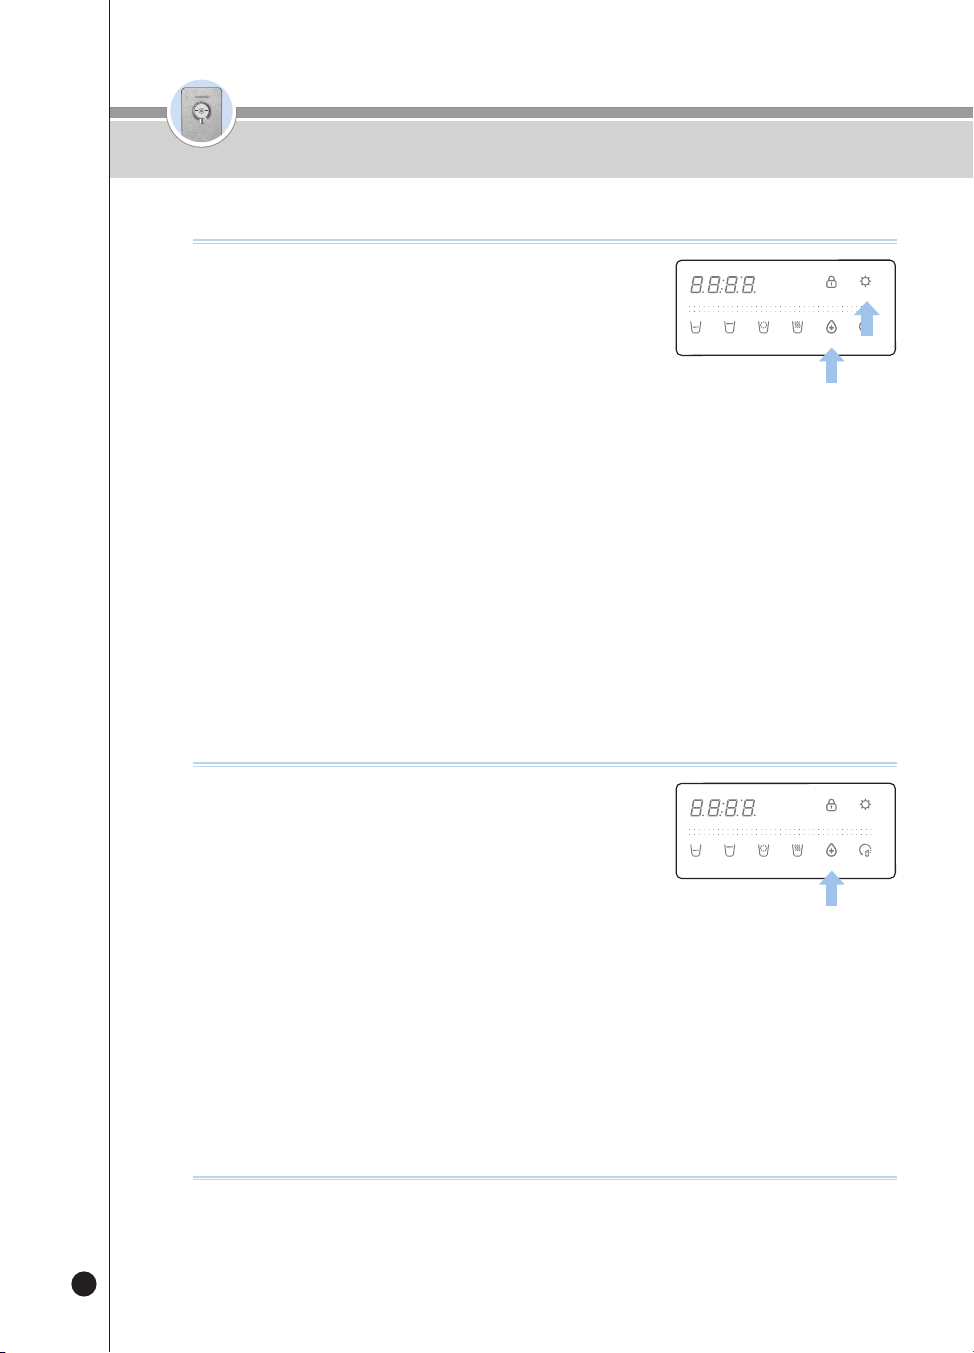
80
온수
잠금
온수
잠금
❶
Si la luz de pantalla del botón [Time/Sterilize] está
encendida en el estado de Espera, la función de
esterilización predeterminada está configurada para
ser usada.
❷
Presione el botón [Time/Sterilize] mientras la luz de
pantalla del botón [Time/ Sterilize] está apagada.
▶
La Guía de voz dirá “Auto Sterilization Reservation Set-up Completed”.
▶
Se encenderá la luz de pantalla del botón Sterilization/Preset.
❸
Seleccione el tiempo predeterminado que desee presionando el botón [Time/Sterilize].
▶
Cada vez que presione el botón [Time/Sterilize], el tiempo predeterminado cambiará en una hora.
(Después de una hora
→
Después de dos horas
→
…
→
Después de 10 horas
→
Después de una hora
→
…)
❹
Después de seleccionar el tiempo de esterilización predeterminada que desee,
guarde el tiempo predeterminado presionando el botón [Energy Save/Setting].
(Cuando use la función de esterilización predeterminada, monte siempre la taza
para esterilización).
Cómo usar la función de esterilización predeterminada
HOT
HOLD
SELECT MODE SELECT
LOCK(3SEC) ENERGY SAVE/
SETTING(3SEC)
HALF
CUP
ONE
CUP
NON-
STOP
HOT
TEMP.
TIME/
STERILIZE(3SEC)
FILTER
RESET(3SEC)
ROOM
COLD
❶
Coloque la taza para esterilización.
❷
Presione el botón [Time/Sterilize] durante
aproximadamente tres segundos en el estado de
Espera.
▶
El producto iniciará inmediatamente la esterilización y la Guía de
voz dirá “Iniciar esterilización automática”.
▶
Se encenderá la luz de pantalla del botón [Time/Sterilize] y se mostrará el avance de la esterilización.
❸
Para canc ela r la operación de esterilizaci ón, p resione el botón [Time/Sterilize]
mientras el p r o d u cto esté realizando la es terilización.
▶
La Guía de voz dirá “Se canceló la esterilización automática” y se cancelará la esterilización.
▶
El panel de pantalla mostrará el estado de cancelación de la esterilización.
※ Una vez completa la operación. retire la taza para esterilización.
※ El agua de esterilización no es agua potable. Evite que alguien beba el agua de esterilización.
Cómo usar la función de esterilización inmediata
HOT
HOLD
SELECT MODE SELECT
LOCK(3SEC) ENERGY SAVE/
SETTING(3SEC)
HALF
CUP
ONE
CUP
NON-
STOP
HOT
TEMP.
TIME/
STERILIZE(3SEC)
FILTER
RESET(3SEC)
ROOM
COLD
Cómo usar
Cuando la alarma de recomendación de esterilización es prolongada.
❶
Si la función de esterilización no se usa durante mucho tiempo, esa condición se
indicará mediante el indicador del botón [Time / Sterilize].
▶
Si usted no usa la esterilización durante mucho tiempo, el indicador del botón destellará tres veces.
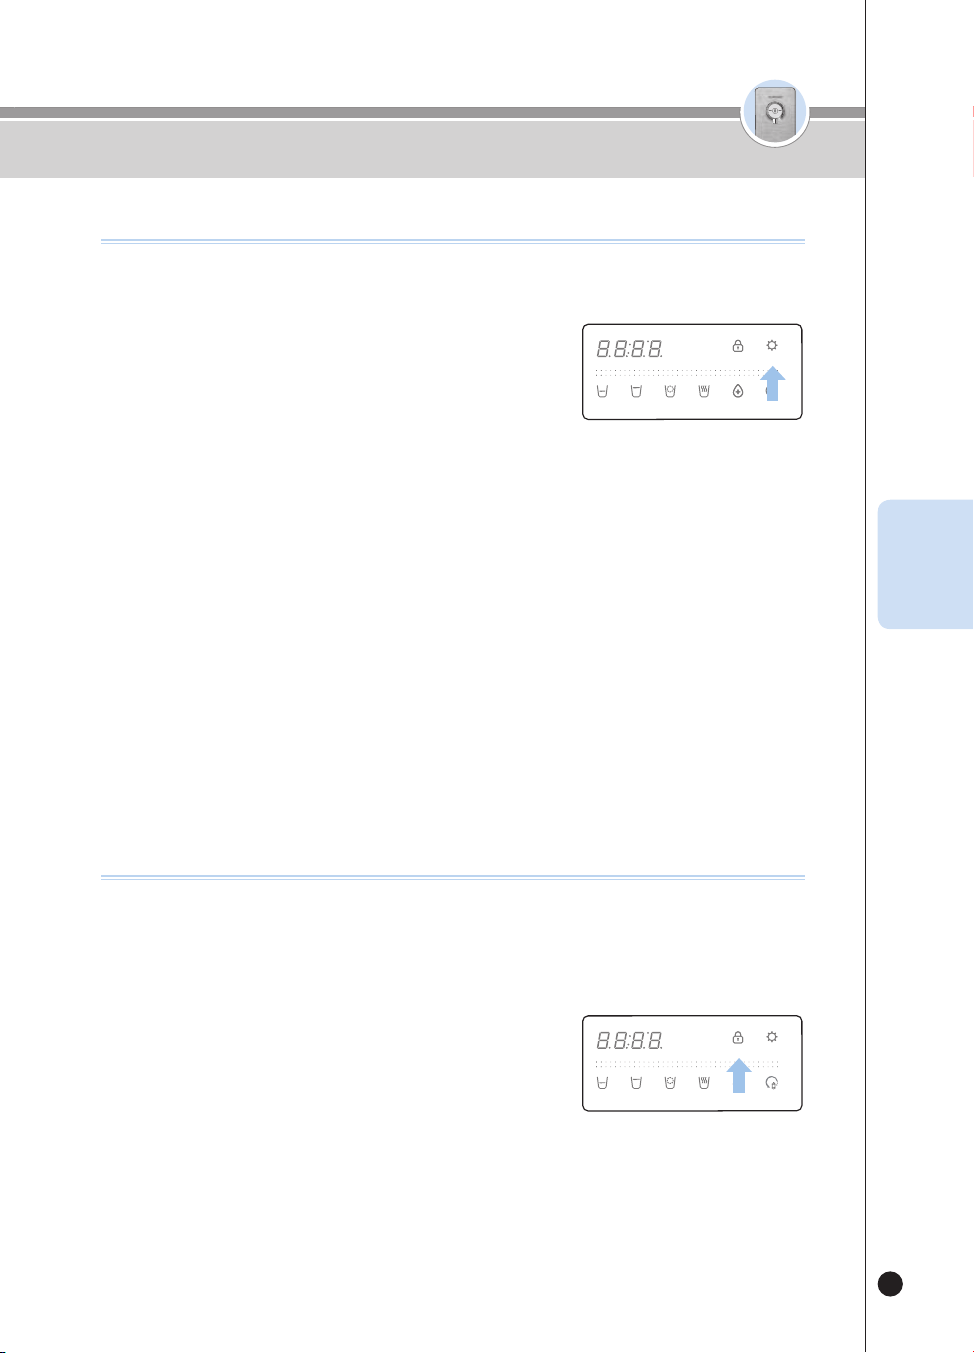
81
온수
잠금
온수
잠금
Cómo usar la función de ahorro de energía
Hay una función para ahorrar energía reduciendo el brillo de las luces de la
pantalla.
❶
Presione el botón [Energy Save/Setting] mientras
la luz de pantalla de [Energy Save/Setting] está
apagada.
▶
La luz de pantalla de [Energy Save/Setting] se encenderá y, en
un segundo, se apagarán todas las luces de pantalla.
▶
La Guía de voz dirá “Se seleccionó la función de ojo de energía”.
▶
Mientras la función de ahorro de energía esté operando, si usted presiona el botón se encenderán las
luces de pantalla. (Si el botón no se presiona durante cierto tiempo, las luces de pantalla se apagarán de
nuevo)
❷
Si presiona el botón [Energy Save/Setting] mientras la luz de pantalla de [Energy
Save/Setting] está encendida, se cancelará la función de ahorro de energía.
▶
Se apagará la luz de pantalla de [Energy Save/Setting] y, en un segundo, se encenderán todas las luces
de pantalla.
▶
La Guía de voz dirá “Se canceló la función de ojo de energía”.
Cómo usar la función de bloqueo de botones
Esta función evita el control aleatorio por parte de niños y otras personas y
sirve además para limpiar el producto.
Si se selecciona esta función, se bloqueará la entrada de todos los botones.
❶
Si presiona el botón [Lock] durante tres segundos en
el estado de Espera, se seleccionará el bloqueo de
los botones.
▶
Si presiona un botón en el estado de Bloqueo de botones,
se mostrará “Loc_” y la Guía de voz dirá “El botón se está
bloqueando”.
▶
Si presiona el botón [Lock] durante tres segundos en el estado de Bloqueo de botones, se mostrará
“Un_Loc_” y terminará el bloqueo de los botones.
HOT
HOLD
SELECT MODE SELECT
LOCK(3SEC) ENERGY SAVE/
SETTING(3SEC)
HALF
CUP
ONE
CUP
NON-
STOP
HOT
TEMP.
TIME/
STERILIZE(3SEC)
FILTER
RESET(3SEC)
ROOM
COLD
HOT
HOLD
SELECT MODE SELECT
LOCK(3SEC) ENERGY SAVE/
SETTING(3SEC)
HALF
CUP
ONE
CUP
NON-
STOP
HOT
TEMP.
TIME/
STERILIZE(3SEC)
FILTER
RESET(3SEC)
ROOM
COLD
Cómo usar
ESP
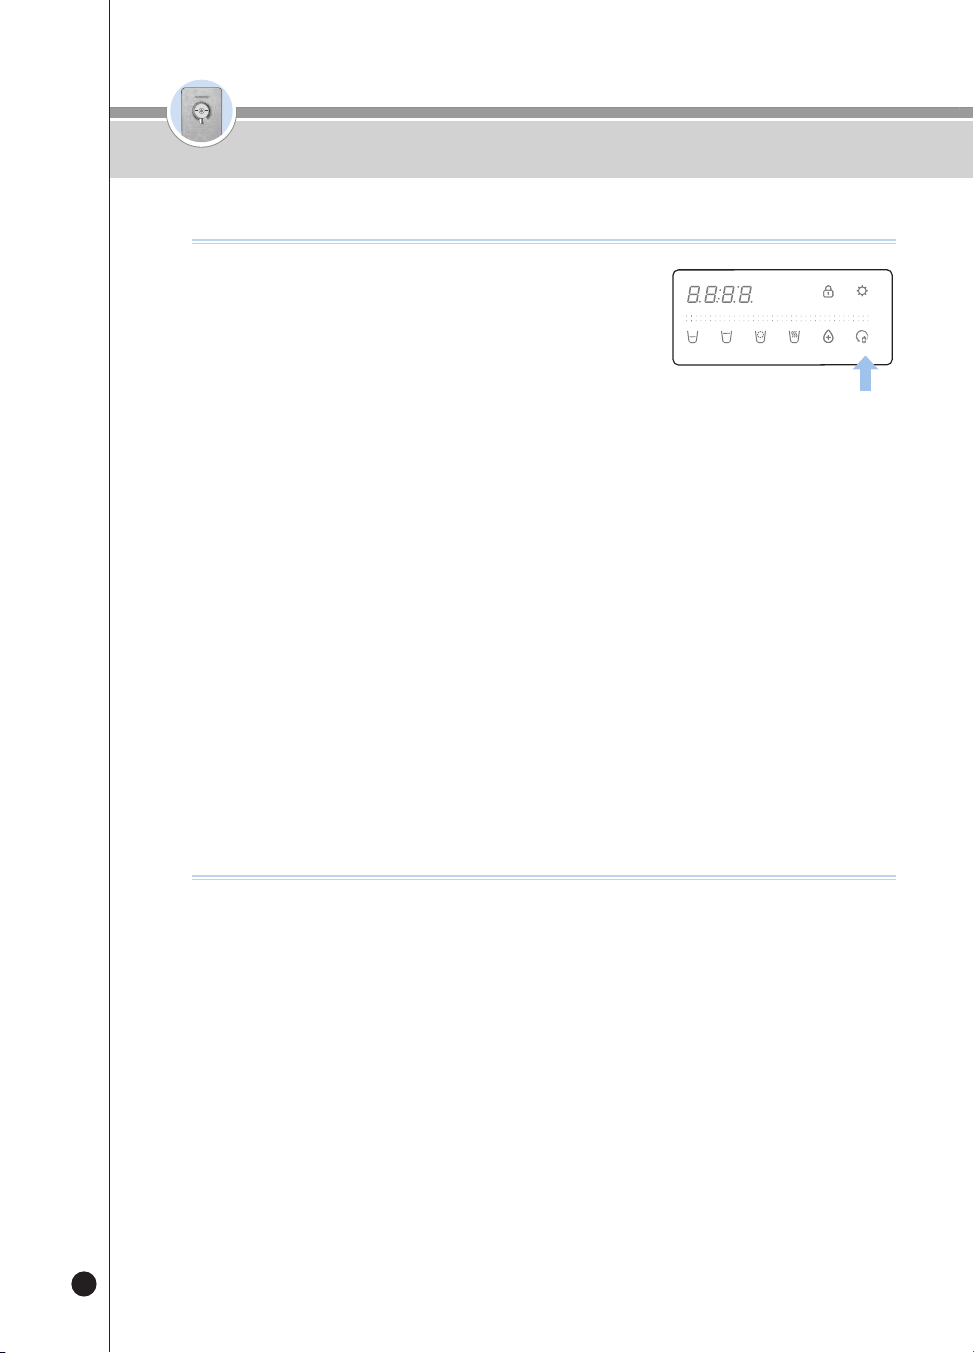
82
온수
잠금
온수
잠금
Cómo usar
❶
Notificación del momento en que debe reemplazar los filtros a través de tres LEDs de
color (luces de ambientación) en el grifo
▶
LED apagado
→
Azul celeste
→
Amarill o
→
Violeta
(A medida que aumenta el volumen de uso de los filtros, el color cambia consecutivamente).
❷
Notificación del momento en que debe reemplazar los filtros a través de la luz de
pantalla del botón [Filter Res et]
▶
Cuando usted presione el botón [Filter Reset] mientras la luz de pantalla del botón [Filter Reset] esté
encendida, la Guía de voz dirá “Se debe reemplazar el filtro”.
❸
Notificación del momento en que debe reemplazar los filtros a través de voz en caso
de salida
▶
Cuando se esté dispensando agua, la Guía de voz dirá “Se debe reemplazar el filtro”.
Por ejemplo, en el caso de la primera salida, la Guía de voz lo dirá solamente una vez por día.
※ Cuando se emita la Guía de voz para reemplazar un filtro, póngase en contacto con nuestro Administrador
Natural para reemplazar el filtro.
Cómo vericar el nivel de uso de los ltros
❶
Presione el botón [Filter Reset] durante tres
segundos mientras se encuentra en el estado de
Espera.
▶
La Guía de voz dirá “Iniciar reinicio”.
❷
Una vez completo el reinicio, la Guía de voz dirá
“Se completó el reinicio” e “Iniciar la limpieza automática del filtro”
y el producto limpiará los filtros.
▶
El panel de pantalla mostrará el tiempo de la limpieza.
▶
Abra manualmente la válvula de agua o válvula de bola. Si la válvula de agua no se abre, la guía de voz
dirá “Abra la palanca del agua para cocinar”.
▶
Cuando la limpieza de filtros esté en curso la guía de voz dirá “Cierre la palanca del agua para cocinar”.
Cierre manualmente la válvula de agua o la válvula de bola. (Vea Cómo limpiar el filtro, página 86)
❸
Cuando el proceso de limpieza termine, la Guía de voz dirá “Se completó la limpieza
automática del filtro”. El producto estará listo para la salida del agua.
❹
Para cancelar la función de limpieza del filtro, presione el botón[Outflow] durante la limpieza del filtro.
▶
La guía de voz dirá “Se detuvo la limpieza automática del filtro”.
❺
El tiempo requerido para la limpieza del filtro depende de la presión del agua sin
tratar; será de aproximadamente 10~15 minutos.
▶
Al limpiar los filtros, abra la palanca del agua y la Guía de voz dirá
“Abra la palanca del agua para cocinar”. Luego, lleve la palanca de bloqueo de la puerta del filtro hacia la
posición “Close”.
Para usar la función de reinicio de ltros
HOT
HOLD
SELECT MODE SELECT
LOCK(3SEC) ENERGY SAVE/
SETTING(3SEC)
HALF
CUP
ONE
CUP
NON-
STOP
HOT
TEMP.
TIME/
STERILIZE(3SEC)
FILTER
RESET(3SEC)
ROOM
COLD

83
온수
잠금
온수
잠금
Cómo usar
ESP
❶
En el modo Espera, presione el botón [Energy Save/
Setting] durante 3 segundos.
▶
Ingrese al modo Configuración del usuario.
❷
Después de entrar al modo Configuración del
usuario, presione el botón [Lock] una vez.
▶
La Guía de voz dirá “Modo Configuración de la alarma de reemplazo de filtro”.
❸
Presione el botón [Energy Save/Setting] para ingresar al modo Configuración de la
notificación para reemplazar el filtro.
❹
Presione el botón [Non-Stop] para configurar la función de alarma de reemplazo del filtro
▶
Esto se activa/ desactiva (ON / OFF) cada vez que se presiona el botón.
ej.) ON
→
OFF
→
ON
→
OFF
→
...
❺
Seleccione la notificación de cambio de filtro ON / OFF y presione el botón [Energy
Save/Setting] para guardar.
▶
La Guía de voz dirá “Se completó la configuración”.
※ Cuando la función está desactivada, la alarma de reemplazo del filtro no opera.
Para usar la alarma del ltro
HOT
HOLD
SELECT MODE SELECT
LOCK(3SEC) ENERGY SAVE/
SETTING(3SEC)
HALF
CUP
ONE
CUP
NON-
STOP
HOT
TEMP.
TIME/
STERILIZE(3SEC)
FILTER
RESET(3SEC)
ROOM
COLD
❶
En el modo Espera, presione el botón [Energy Save/
Setting] durante 3 segundos.
▶
Ingrese al modo Configuración del usuario.
❷
Después de entrar al modo Configuración del
usuario, presione el botón [Lock] dos veces.
▶
La Guía de voz dirá “Módulo de kit esterilizador”.
❸
Presione el botón [Energy Save/Setting] para ingresar al modo Configuración de la
notificación de esterilización.
❹
Presione el botón [Non-Stop] para cancelar la notificación de la alarma de
Esterilización recomendada.
▶
Esto se activa/ desactiva (ON / OFF) cada vez que se presiona el botón.
ej.) ON
→
OFF
→
ON
→
OFF
→
...
❺
Seleccione la alarma de Esterilización recomendada ON/OFF y presione el botón
[Energy Save/Setting] para guardar.
▶
La Guía de voz dirá “Se completó la configuración”.
※ La alarma de Esterilización recomendada no funcionará cuando esté desactivada.
Para usar la alarma de Esterilización recomendada
HOT
HOLD
SELECT MODE SELECT
LOCK(3SEC) ENERGY SAVE/
SETTING(3SEC)
HALF
CUP
ONE
CUP
NON-
STOP
HOT
TEMP.
TIME/
STERILIZE(3SEC)
FILTER
RESET(3SEC)
ROOM
COLD
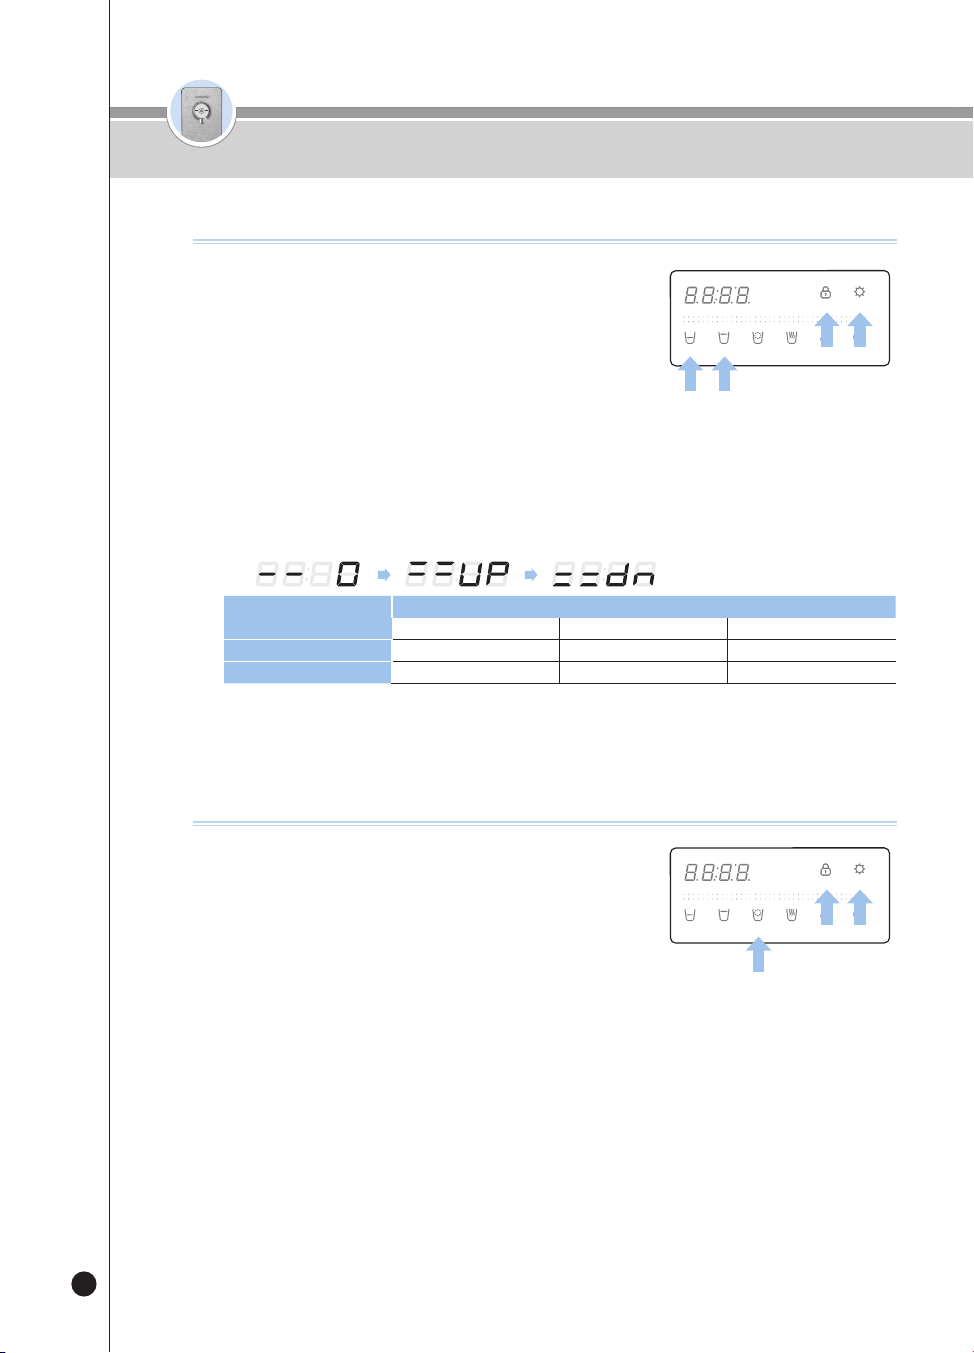
84
온수
잠금
온수
잠금
❶
Presione el botón [Energy Save/Setting] durante tres
segundos en el estado de Espera.
▶
El producto entrará al modo Configuración del usuario.
❷
Después de que el producto entre al modo
Configuración del usuario, presione el botón [Lock]
tres [One cup volume] o cuatro veces [Half cup volume].
▶
La Guía de voz dirá “Modo Configuración del volumen de media taza, una taza”.
❸
Presione el botón [Energy Save/Setting] para ingresar al modo Configuración del
volumen de la salida
❹
Presione el botón [Non-Stop] para configurar el volumen de salida deseado.
▶
Cada vez que presione el botón, la pantalla alternará entre 0 (Estándar), Up (más) y dn (menos).
ej.)
Cantidad fija
Cantidad de salida (cc)
Menos Estándar Más
Media taza Aprox. 95 cc(3.2oz) Aprox. 110 cc(3.7oz) Aprox. 125 cc(4.2oz)
Una taza Aprox. 130 cc(4.4oz) Aprox. 150 cc(5.1oz) Aprox. 170 cc(5.7oz)
❺
Seleccione el volumen de salida deseado y guarde la información presionando el
botón [Energy Save/Setting].
▶
La Guía de voz dirá “Se completó la configuración”.
Cómo cambiar la cantidad de salida ja
HOT
HOLD
SELECT MODE SELECT
LOCK(3SEC) ENERGY SAVE/
SETTING(3SEC)
HALF
CUP
ONE
CUP
NON-
STOP
HOT
TEMP.
TIME/
STERILIZE(3SEC)
FILTER
RESET(3SEC)
ROOM
COLD
❶
Presione el botón [Energy Save/Setting] durante tres
segundos en el estado de Espera.
▶
El producto entrará al modo Configuración del usuario.
❷
Después de que el producto haya entrado al modo
Configuración del usuario, presione el botón [Lock]tres veces.
▶
La Guía de voz dirá “Modo Configuración del volumen de voz”.
❸
Presione el botón [Energy Save/Setting] para ingresar al modo Configuración del
volumen de voz.
❹
Configure el nivel de volumen de la voz presionando el botón [Non-Stop].
▶
Cada vez que presione el botón, el nivel cambiará en un grado con respecto al nivel de voz previamente
configurado. Por
ej.) Nivel 4
Nivel 5
OFF
Nivel 1
Nivel 2
…
▶
Para configurar el volumen máximo, seleccione el valor fijo de 5.
▶
Si no desea usar la Guía de voz, seleccione como valor fijo OFF.
❺
Seleccione el volumen de voz deseado y guarde la información presionando el botón
[Energy Save/Setting].
▶
La Guía de voz dirá “Se completó la configuración”.
Cómo cambiar el volumen de la voz
HOT
HOLD
SELECT MODE SELECT
LOCK(3SEC) ENERGY SAVE/
SETTING(3SEC)
HALF
CUP
ONE
CUP
NON-
STOP
HOT
TEMP.
TIME/
STERILIZE(3SEC)
FILTER
RESET(3SEC)
ROOM
COLD
Cómo usar
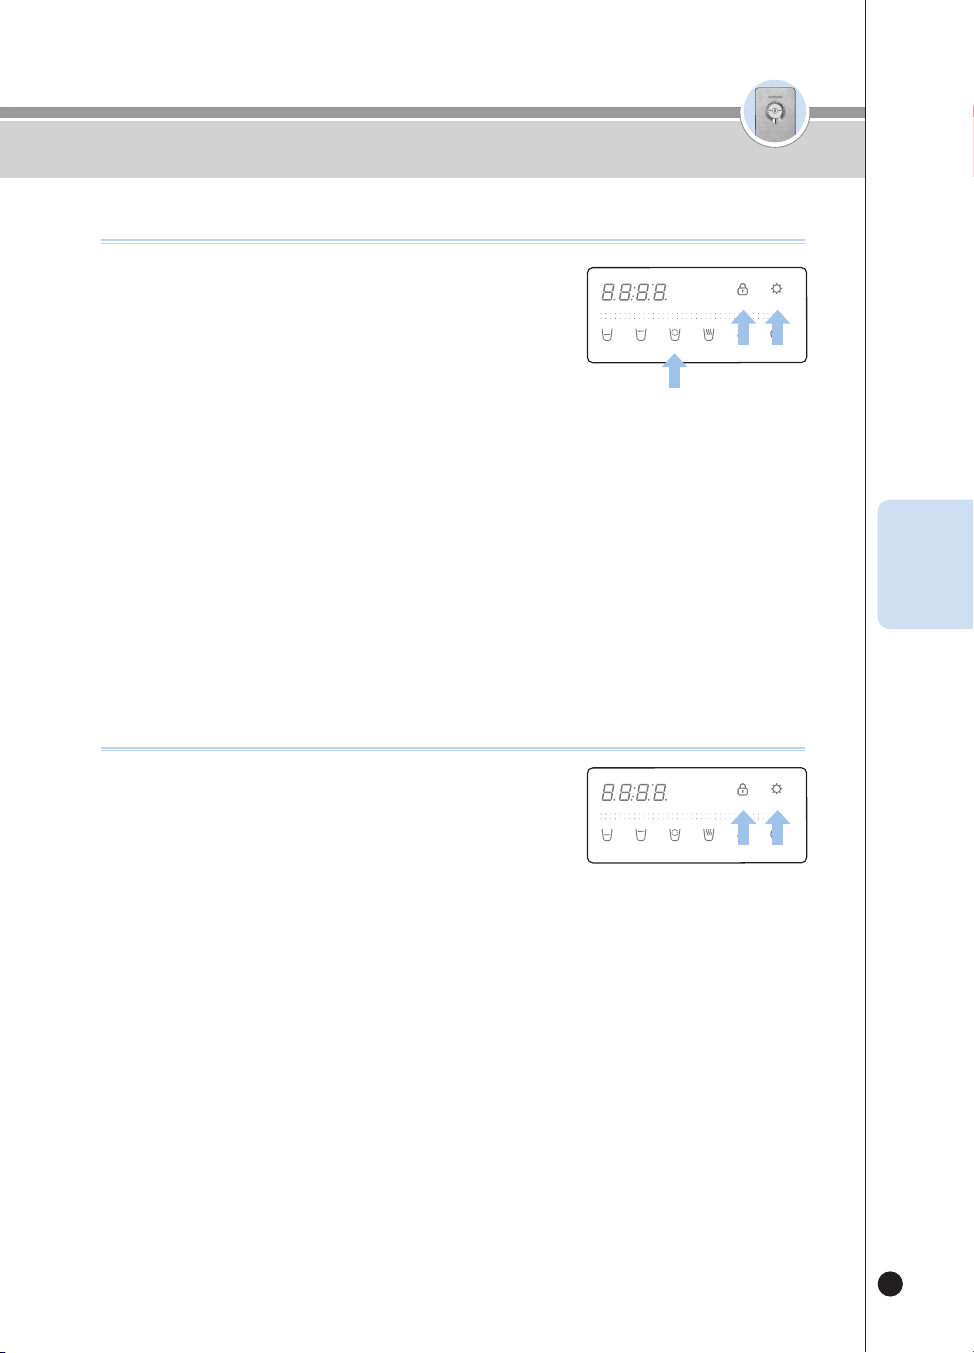
85
온수
잠금
온수
잠금
❶
Presione el botón [Energy Save/Setting] durante tres
segundos en el estado de Espera.
▶
El producto entrará al modo Configuración del usuario.
❷
Después de que el producto haya entrado al modo
Configuración del usuario, presione el botón [Lock] seis veces.
▶
La Guía de voz dirá “Modo Configuración de la luz de ambientación”.
❸
Presione el botón [Energy Save/Setting] para ingresar al modo Configuración de la luz
de ambientación.
❹
Seleccione la función de luz de ambientación presionando el botón [Non-Stop].
▶
Each time you press the button, the Display will repeat showing ON and OFF.
ej.) On
OFF
ON
OFF
…
❺
Seleccione ON u OFF para la luz de ambientación y guarde presionando el botón
[Energy Save/Setting].
▶
La Guía de voz dirá “Se completó la configuración”.
Cómo usar la función de luz de ambientación
HOT
HOLD
SELECT MODE SELECT
LOCK(3SEC) ENERGY SAVE/
SETTING(3SEC)
HALF
CUP
ONE
CUP
NON-
STOP
HOT
TEMP.
TIME/
STERILIZE(3SEC)
FILTER
RESET(3SEC)
ROOM
COLD
❶
Presione el botón [Energy Save/Setting] durante tres
segundos en el estado de Espera.
▶
El producto entrará al modo Configuración del usuario.
▶
Después de que el producto haya entrado al modo Configuración
del usuario, presione el botón [Lock] siete veces.
▶
La Guía de voz dirá “Función de enjuague automático del filtro”.
❷
Presione el botón [Energy Save/Setting].
▶
La Guía de voz dirá “Iniciar la limpieza automática del filtro” y el producto limpiará los filtros.
▶
El panel de pantalla mostrará el tiempo de la limpieza.
▶
Abra manualmente la válvula de agua o válvula de bola.
Si la válvula de agua no se abre, la Guía de voz dirá “Abra la palanca del agua para cocinar”.
▶
Limpieza de filtros en curso “Cierre la palanca del agua para cocinar”.
La guía de voz dirá Manually close the water valve or the ball valve.
(Vea Cómo limpiar el filtro, página 86)
❸
Cuando el filtro esté limpio, la Guía de voz dirá “Se completó la limpieza automática
del filtro”. El producto estará listo para la salida del agua.
❹
Para cancelar la función de limpieza del filtro, presione el botón[Outflow] durante la
limpieza del filtro.
▶
La guía de voz dirá “Se detuvo la limpieza automática del filtro”.
❺
El tiempo requerido para la limpieza del filtro depende de la presión del agua sin
tratar; será de aproximadamente 10~15 minutos.
Cómo usar la función de limpieza de ltros
HOT
HOLD
SELECT MODE SELECT
LOCK(3SEC) ENERGY SAVE/
SETTING(3SEC)
HALF
CUP
ONE
CUP
NON-
STOP
HOT
TEMP.
TIME/
STERILIZE(3SEC)
FILTER
RESET(3SEC)
ROOM
COLD
Cómo usar
ESP

86
온수
잠금
온수
잠금
Cómo usar
Cómo usar la función de limpieza de ltros
(cuando hay instalada una válvula externa)
❶
Abra manualmente la válvula de agua. Si la válvula
de agua no se abre, la Guía de voz dirá “Abra la
palanca del agua para cocinar”.
❷
Limpieza de filtros en curso “Cierre la palanca del
agua para cocinar”. La guía de voz dirá Manually
close the water valve.
OPEN
CLOSE
Cómo usar la función de limpieza de ltros
(cuando no hay instalada una válvula externa)
❶
Abra manualmente la válvula de agua. Si la válvula
de agua no se abre, la Guía de voz dirá “Abra la
palanca del agua para cocinar”.
❷
Limpieza de filtros en curso “Cierre la palanca del
agua para cocinar”. La guía de voz dirá Manually
close the ball valve.
OPEN
CLOSE
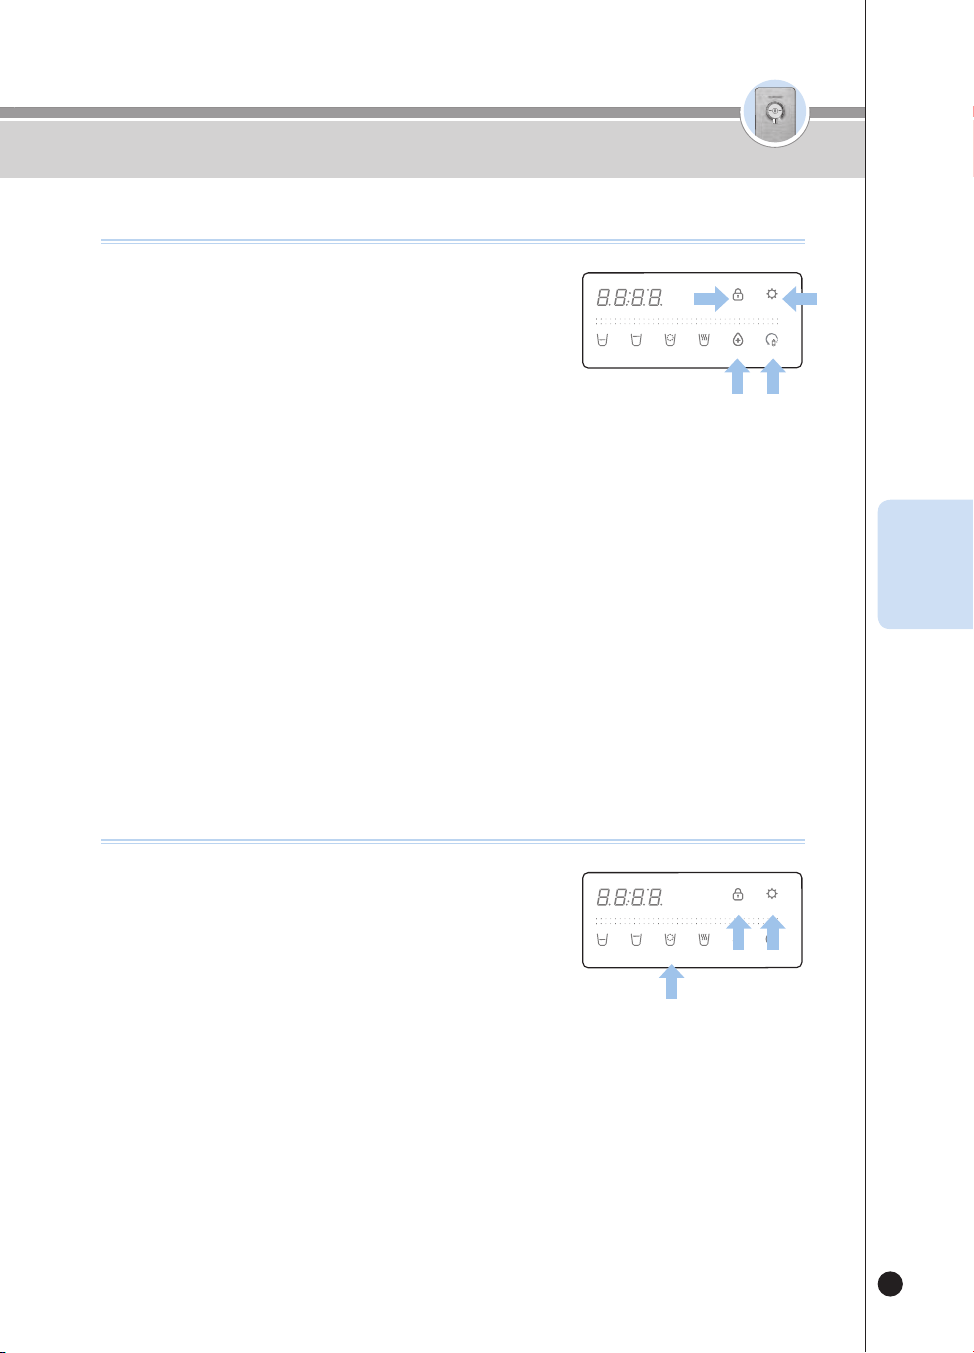
87
온수
잠금
온수
잠금
Cómo congurar el idioma
❶
Presione el botón [Energy Save/Setting] durante tres
segundos en el estado de Espera.
▶
El producto entrará al modo Configuración del usuario.
❷
Después de que el producto haya entrado al modo
Configuración del usuario, presione el botón [Lock] nueve veces.
▶
La Guía de voz dirá “Modo Selección de idioma”.
❸
Presione el botón [Energy Save/Setting] para ingresar al modo Configuración del idioma.
❹
Presione el botón [Non-Stop] para seleccionar un idioma
▶
Cada vez que presione el botón, el idioma cambiará.
ej.) 1(inglés)
→
2(coreano)
→
3(español)
→
…
❺
Seleccione el idioma deseado y guarde la información presionando el botón [Energy
Save/Setting].
▶
La Guía de voz dirá “Se completó la configuración”.
HOT
HOLD
SELECT MODE SELECT
LOCK(3SEC) ENERGY SAVE/
SETTING(3SEC)
HALF
CUP
ONE
CUP
NON-
STOP
HOT
TEMP.
TIME/
STERILIZE(3SEC)
FILTER
RESET(3SEC)
ROOM
COLD
Cómo congurar la hora actual
❶
Presione el botón [Energy Save/Setting] durante tres
segundos en el estado de Espera.
▶
El producto entrará al modo Configuración del usuario.
❷
Después de que el producto haya entrado al modo
Configuración del usuario, presione el botón [Lock] ocho veces.
▶
La Guía de voz dirá “Modo Configuración y visualización del tiempo presente”.
❸
Presione el botón [Energy Save/Setting] para ingresar al modo Configuración de la
hora.
❹
Configure la hora de la hora actual presionando el botón [TIME/STERILIZE].
❺
Configure el minuto de la hora actual presionando el botón [Filter Reset].
❻
Guarde la hora actual presionando el botón [Energy Save/Setting].
▶
La Guía de voz dirá “Se completó la configuración”.
HOT
HOLD
SELECT MODE SELECT
LOCK(3SEC) ENERGY SAVE/
SETTING(3SEC)
HALF
CUP
ONE
CUP
NON-
STOP
HOT
TEMP.
TIME/
STERILIZE(3SEC)
FILTER
RESET(3SEC)
ROOM
COLD
Cómo usar
ESP
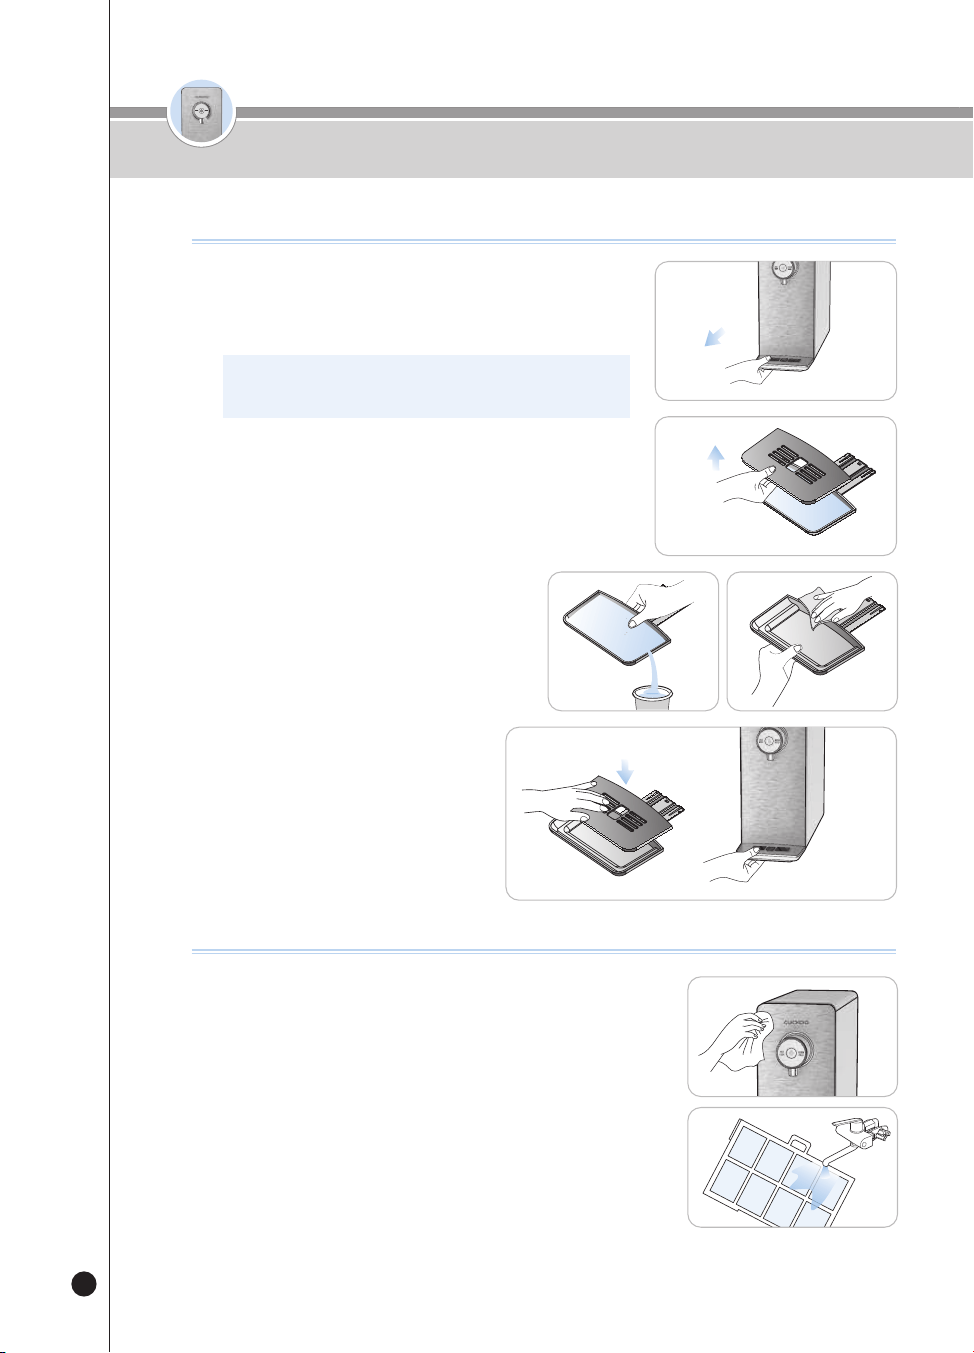
88
온수
잠금
온수
잠금
Cómo limpiar la bandeja
Cómo limpiar el cuerpo principal
● Limpie con un paño suave y seco.
▶
Antes de limpiar, configure la función de bloqueo de botones para evitar
una operación incorrecta durante la limpieza.
▶
Si el producto está muy sucio, limpíelo con un paño levemente húmedo.
(No limpie el producto con benceno, aguarrás ni abrasivos.)
● Ponga el prefiltro en el piso para separarlo del producto,
lávelo bajo el agua corriente y luego vuélvalo a montar.
▶
Si no se limpia en mucho tiempo, el desempeño del agua potable puede
disminuir.
❶
Retire la bandeja.
▶
Sostenga la bandeja y sáquela de la parte frontal del producto para
separarla del producto.
※ Al extraer la bandeja, tírela despacio con ambas manos.
Si tira de ella con fuerza, puede escaparse agua.
❷
Retire la parrilla de la bandeja.
▶
Desprenda la parrilla de la bandeja sosteniéndola y levantándola
por el orificio.
❸
Limpie la bandeja.
▶
Vacíe el agua estancada y limpie completamente
la bandeja con un paño suave.
❹
Vuelva a armar la bandeja.
▶
Después de limpiar la bandeja, vuelva a
instalarla en el orden inverso.
Cómo limpiar la bandeja / Cómo limpiar el cuerpo principal
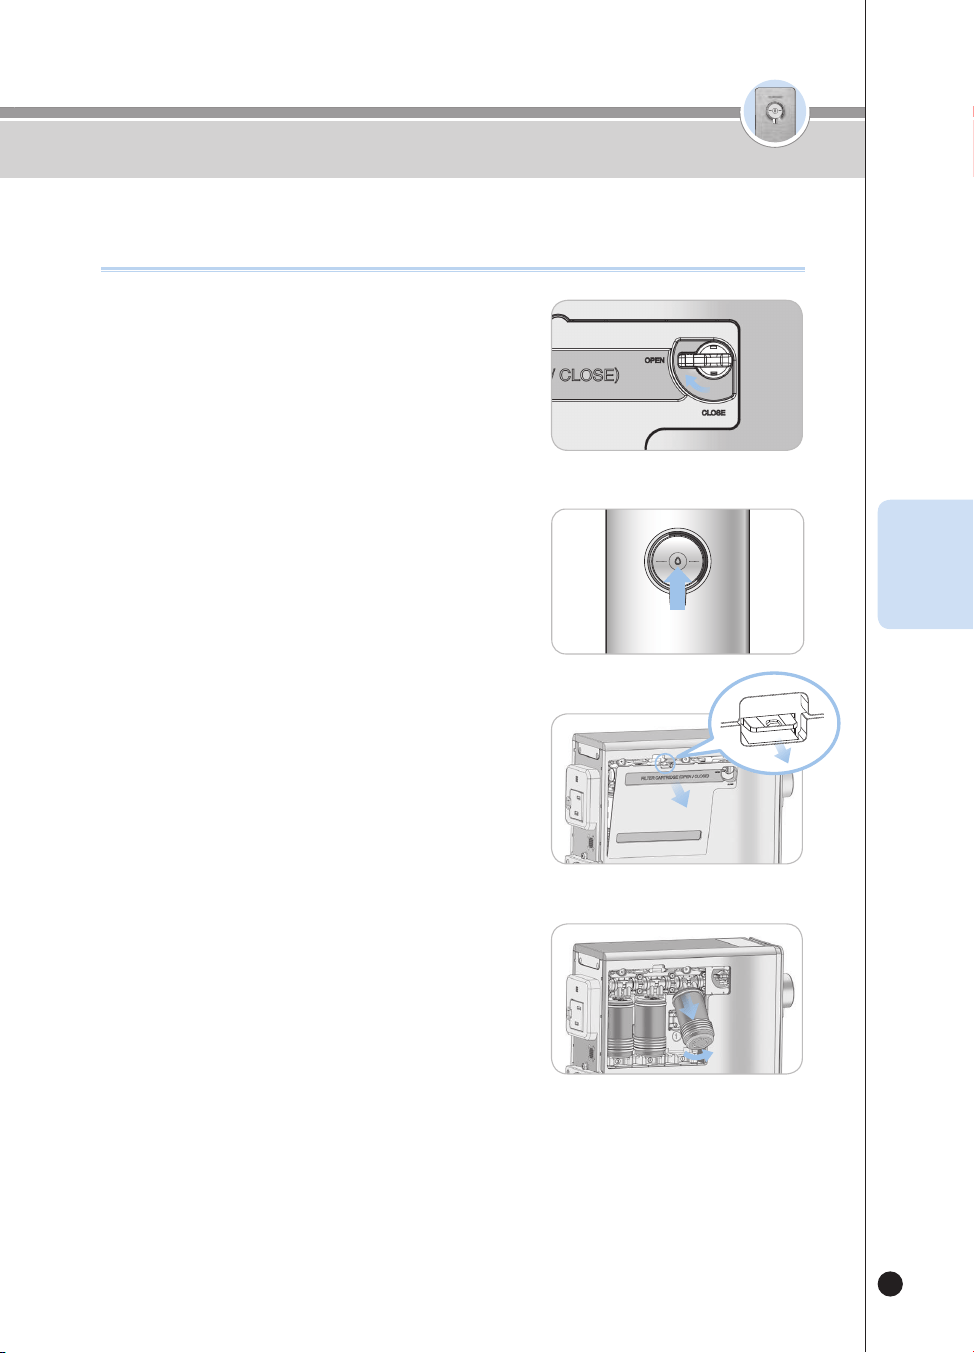
89
온수
잠금
온수
잠금
Cómo reemplazar los ltros
(no se debe usar ltros para puricadores de agua que no sean CUCKOO)
Cómo reemplazar los ltros (no se debe usar ltros para puricadores de agua
que no sean CUCKOO)
❶
Lleve la palanca de bloqueo de la puerta del filtro
a la izquierda del producto hacia el signo Open.
• Esto detiene internamente el flujo de agua del grifo al reemplazar el
filtro, cerrando el suministro de agua.
❷
Deje salir completamente el agua a temperatura
ambiente hasta que no quede agua en el
producto.
•
Al dispensar agua use una taza, recipiente, etc.
❸
Presione la lengüeta y desmonte la puerta del filtro.
• No gire a la fuerza la puerta de bloqueo del filtro; puede dañar el producto.
• Si no puede abrir la puerta del filtro, lleve la palanca de bloqueo de la
puerta del filtro hacia la posición “Open”.
❹
Retire el filtro levantándolo y tirando de él.
• Al sacar el filtro puede salir el agua recolectada en la unidad de
sujeción del filtro. Si eso ocurre, límpiela con un paño u otro elemento.
HOT
LOCK
ROOM
COLD
Palanca
de
bloqueo
de la
puerta
del filtro
OPEN
ESP

90
온수
잠금
온수
잠금
❺
Inserte el filtro como en la figura y empújelo
dentro de la caja del filtro para conectarlo.
• De derecha a izquierda, los filtros son Sedi Carbon Composite Filter,
Nano Positive Filter y Mineralizer Filter.(De derecha a izquierda, los
filtros son Pre Carbon 2.0 Filter, Nano Positive Filter y Alkali-Mineralizer
Filter.). Por favor mantenga este orden.
• Verifique que el filtro esté correctamente asentado en la caja del filtro.
❻
Cierre la puerta del filtro como en la figura.
• Encájela correctamente en las ranuras del extremo inferior para facilitar
la instalación.
❼
Lleve la palanca de bloqueo de la puerta del filtro
a la izquierda del producto hacia el signo Close
(para permitir que el agua del grifo fluya
internamente).
• Cuando se cierra el bloqueo de la puerta del filtro, entra agua al
producto.
Cómo reemplazar los filtros (no se debe usar filtros para purificadores de agua
que no sean CUCKOO)
❽
Si el producto está en el estado de Espera, consulte la página 82 para operar la
función de reinicio de filtros.
※ Si no reinicia el filtro, puede activarse la alarma de reemplazo del filtro.
※ Al limpiar los filtros, abra la palanca del agua y la Guía de voz dirá “Abra la palanca
del agua para cocinar”. Luego, lleve la palanca de bloqueo de la puerta del filtro
hacia la posición “Close”.
CLOSE
Palanca
de
bloqueo
de la
puerta
del filtro
Cómo reemplazar los ltros
(no se debe usar ltros para puricadores de agua que no sean CUCKOO)

91
온수
잠금
온수
잠금
▶
El ciclo de reemplazo de filtros se configura según la cantidad de agua que se filtre en el hogar (10L(338.1oz) por
dla), y el estado del suministro de agua puede afectar el ciclo.
Paso 1
2 3
Nombre del filtro Sedi Carbon Composite
Natural Plus Nano Positive
Ciclo de reemplazo
4meses
[1,200L(40576.8oz)]
4meses
[1,200L(40576.8oz)]
8meses
[2,400L(81153.6oz)]
Nombre del filtro Pre Carbon 2.0
Nano Positive Alkali-Mineralizer
Ciclo de reemplazo
4meses
[1,200L(40576.8oz)]
8meses
[2,400L(81153.6oz)]
8meses
[2,400L(81153.6oz)]
Ciclo de reemplazo de ltros esperado
▶
Ciclo de reemplazo de filtros
• El ciclo de reemplazo de filtros esperado se estima mediante un atento examen de cada filtro para mostrar su correcto
desempeño. Esto se determina según la cantidad de agua del grifo filtrada como potable (10L(338.1oz) por día para cuatro
personas). Así, el ciclo se acorta a medida que aumenta la cantidad usada.
recomendaciones
Paso 1
Paso 2
Paso 3
3 2 1
Disposición de los ltros
Ciclo esperado de reemplazo de ltros /
Recomendaciones / Disposición de los ltros
ESP
92
Por favor verique antes de pedir soporte
Problema Lista de control Acciones recomendadas
El agua tiene mal sabor y/
u olor.
• Ha dejado de usar el producto durante
mucho tiempo?
• Necesita reemplazar los filtros?
• Opere la función de limpieza de filtros.
(Consulte la página 85).
• Póngase en contacto con Servicio al Cliente para el
reemplazo del filtro.
No dispensa agua.
• Está conectado el cable eléctrico?
• Hay un suministro adecuado de agua del
grifo?
• Presionó correctamente el botón [Outflow]?
• Hay agua debajo del producto?
• Necesita reemplazar los filtros?
• Está abierto el bloqueo de la puerta del
filtro?
• Conecte el cable eléctrico.
• Abra la válvula de suministro de agua del grifo.
• Revise si el tubo de suministro de agua está doblado.
• Revise si el agua está cortada.
• Presione correctamente el botón [Outflow].
• Cierre la válvula de suministro de agua del grifo,
desconecte el producto y póngase en contacto con
nuestro Centro de Servicio al Cliente.
• Póngase en contacto con Servicio al Cliente para el
reemplazo del filtro.
• Cierre el bloqueo de la puerta del filtro a la izquierda
del producto. (Así entrará agua al producto).
No dispensa agua fría
• Ha dispensado mucha agua fría?
• Cerró la válvula de suministro de agua del
grifo?
• Funciona bien la ventilación en la parte
trasera del producto?
• Si se dispensa mucha agua fría, el producto
necesita algo de tiempo para volver a enfriar agua.
• Verifique la válvula de suministro de agua del grifo.
• Observe si el radiador en la parte trasera del
producto está bloqueado. Retire cualquier objeto
que esté bloqueando el radiador.
• Lleve el producto a un lugar bien ventilado.(Póngase
en contacto con nuestro Centro de Servicio al Cliente
siempre que mueva y reinstale el producto).
• Si hay demasiado polvo en las salidas de aire,
póngase en contacto con nuestro
The hot water is lukewarm.
• Is it the first cup of hot water? • When you first operate the Instantaneous Hot Water
function, the temperature of the first cup may be low.
• Check if the temperature of the hot water is normal
from the second cup.
▼
Si usted no observa este manual del usuario, puede que el dispositivo no funcione apropiadamente, aun cuando no
haya fallas. Si hay un problema con el producto, por favor tome las siguientes medidas según el caso. Si el problema
persiste, por favor póngase en contacto con nuestro Centro de Servicio al Cliente.

93
Por favor verique antes de pedir soporte
Problema Lista de control Acciones recomendadas
o dispensa suficiente
agua.
• Cerró la válvula de suministro de agua del
grifo?
• Necesita reemplazar los filtros?
• Está abierto el bloqueo de la puerta del
filtro?
• Abra la válvula de suministro de agua del grifo.
• Reemplace el filtro con un auténtico filtro CUCKOO.
• Cierre el bloqueo de la puerta del filtro a la izquierda
del producto.
(Así entrará agua al producto).
Sale un ruido fuerte del
producto.
• Por favor verifique si está instalado sobre
una superficie firme y a nivel.
• Toca algún otro objeto?
• Está bien montada la bandeja?
• Están las superficies trasera y laterales del
producto en contacto con la pared?
• Hay ítems como macetas, libros o relojes
sobre el producto?
• Instale el producto sobre un piso plano y sólido.
• Asegúrese de que no toque ningún otro objeto.
• Si la bandeja no está apropiadamente montada,
puede producirse un ruido anormal. Verifique el
estado de montaje de la bandeja.
• Reinstale el producto a la distancia correcta (20 cm)
de la pared.
• Retire los ítems del producto.
Hay objetos que flotan en
el agua dispensada.
• Necesita reemplazar los filtros? • Reemplace el filtro. (No use un filtro que no sea
Cuckoo).
Hay partículas finas en
el agua a temperatura
ambiente.
• Hay burbujas? • Si después de cinco minutos todavía hay
partículas finas en el agua, póngase en contacto
inmediatamente con nuestro Centro de Servicio al
Cliente.
Gotea agua del
purificador.
• Tiene defectos la pieza montada
(conectora)?
• Están húmedos su hogar o el entorno
externo?
• Cierre la válvula de suministro de agua del grifo y
desconecte el producto. Después de eso, póngase
en contacto con nuestro Centro de Servicio al
Cliente para obtener servicio.
• Cuando una parte fría del purificador de agua entra
en contacto con humedad puede producirse la
condensación del rocío, tal como cuando se forma
una gota en una taza de agua.
▼
Si usted no observa este manual del usuario, puede que el dispositivo no funcione apropiadamente, aun cuando no
haya fallas. Si hay un problema con el producto, por favor tome las siguientes medidas según el caso. Si el problema
persiste, por favor póngase en contacto con nuestro Centro de Servicio al Cliente.
ESP

94
Nombre del producto
Enfriador eléctrico de agua (Calentador instantáneo de agua) / Purificador de agua fría y
caliente CUCKOO
Nombre del modelo
CP-P011T(Blanco, Titan Silver ), CP-P011G(Blanco, Melocotón Dorado )
nominal
Voltaje Monofásico 120V / 60Hz Consumo
de corriente
Total : 1440W(12A) [agua fría : 90W(0.75A). agua caliente : 1350W(11.25A)]
Método de ltrado de agua
Sistema de filtrado nanopositivo
Tipos de
ltro
Paso 1
Sedi Carbon Composite Pre Carbon 2.0
Paso 2
Natural Plus Nano Positive
Paso 3
Nano Positive Alkali-Mineralizer
Capacidad
Agua a temperatura
ambiente
Dispensación directa
Agua fría
Chill directo
Agua caliente
Calentamiento instantáneo
Tipos de refrigerantes
R-134a, 1.06oz
Presión alta y baja de diseño
lateral.
Lado alta : 186psig, Lado bajo : 88psig
Clasicación climática
N (Para regiones de clima templado)
Producto
Peso
Alrededor de 23.2lb(10.5kg)
Tamaño
(Ancho
x Prof. x Alto)
6.7″ x 18.4″ x 16.1″ (170mm x 468mm x 408mm)
Presión del
agua del
grifo usada
Menos de
0,049MPa (0,49bar)
Sin instalación aceptable
0,049MPa~0,196MPa
(0,49bar~1,96bar)
Puede instalarse
0.196MPa(1.96bar) or
higher
Presión hidráulica correcta
Temperatura de entorno usada
41℉ - 104℉ (5℃ - 40℃)
Temperatura de agua del grifo
usada
41℉ - 95℉ (5℃ - 35℃)
※ Las especificaciones y otros detalles pueden estar sujetos a cambios sin previo aviso para mejorar el producto.
Especicaciones del producto
온수
잠금
95
온수
잠금
MEMO

We provide satisfying consultstion and services concerning your complaints, suggestions, and recommendations upon receiving your troubled product model
name, status, and contact information.
After reading this manual, keep it in a place easily accessible to the user for future reference.
This manual includes the warranty.
Caution : Please read this manual carefully to ensure safety and a longer product lifespan.
http://www.cuckooamerica.com
00455-0003K0 Rev.0