Loading ...
Loading ...
Loading ...
Maintenance
Emptying the Collection Tank
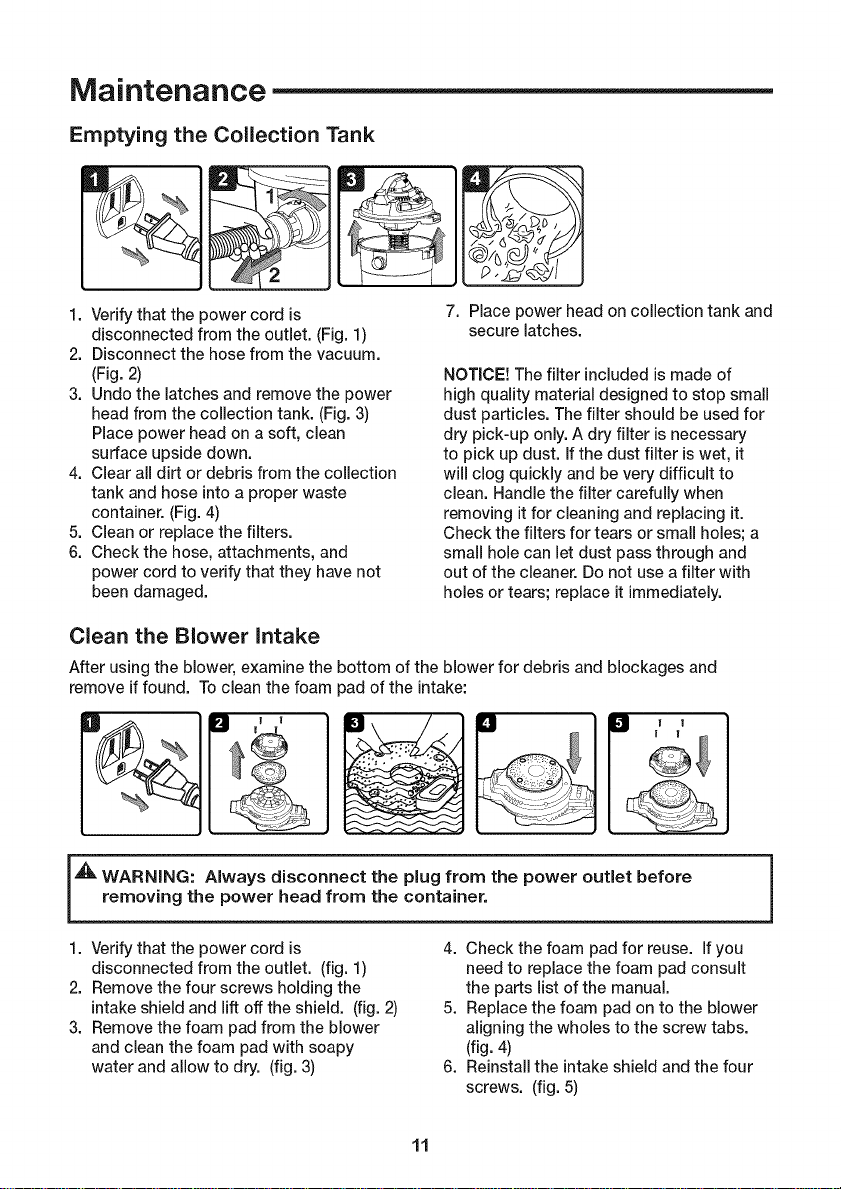
1. Verify that the power cord is
2.
disconnected from the outlet. (Fig. 1)
Disconnect the hose from the vacuum.
(Fig. 2)
Undo the latches and remove the power
head from the collection tank. (Fig. 3)
Place power head on a soft, clean
surface upside down.
4. Clear all dirt or debris from the collection
tank and hose intoa proper waste
container. (Fig. 4)
5. Clean or replace the filters.
6. Check the hose, attachments, and
power cord to verify that they have not
been damaged.
7. Place power head on collection tank and
secure latches.
NOTICE! The filter included is made of
high quality material designed to stop small
dust particles. The filter should be used for
dry pick-up only. A dry filter is necessary
to pick up dust. Ifthe dust filter is wet, it
will clog quickly and be very difficult to
clean. Handle the filter carefully when
removing it for cleaning and replacing it.
Check the filters for tears or small holes; a
small hole can let dust pass through and
out of the cleaner. Do not use a filter with
holes or tears; replace it immediately.
Clean the Blower Intake
After using the blower, examine the bottom of the blower for debris and blockages and
remove if found. Toclean the foam pad of the intake:
I_ WARNING: Always disconnect the plug from the power outlet before
removing the power head from the container.
1. Verify that the power cord is
disconnected from the outlet. (fig. 1)
2. Remove the four screws holding the
intake shield and lift off the shield. (fig. 2)
3. Remove the foam pad from the blower
and clean the foam pad with soapy
water and allow to dry. (fig. 3)
4. Check the foam pad for reuse. If you
need to replace the foam pad consult
the parts list of the manual.
5. Replace the foam pad on to the blower
aligning the wholes to the screw tabs.
(fig.4)
6. Reinstall the intake shield and the four
screws. (fig. 5)
11
Loading ...
Loading ...
Loading ...