Loading ...
Loading ...
Loading ...
10
1. Always leave 2.5cm of space between
contents and rim.
2. Wipe rim of canister to ensure it's clean
and dry.
3. Place the appliance on a flat, dry surface
and plug the supply cord into a standard
electrical outlet.
4. Canisters: place the item(s) to be vacuum
packaged inside the canister. Place the lid
on top of the canister.
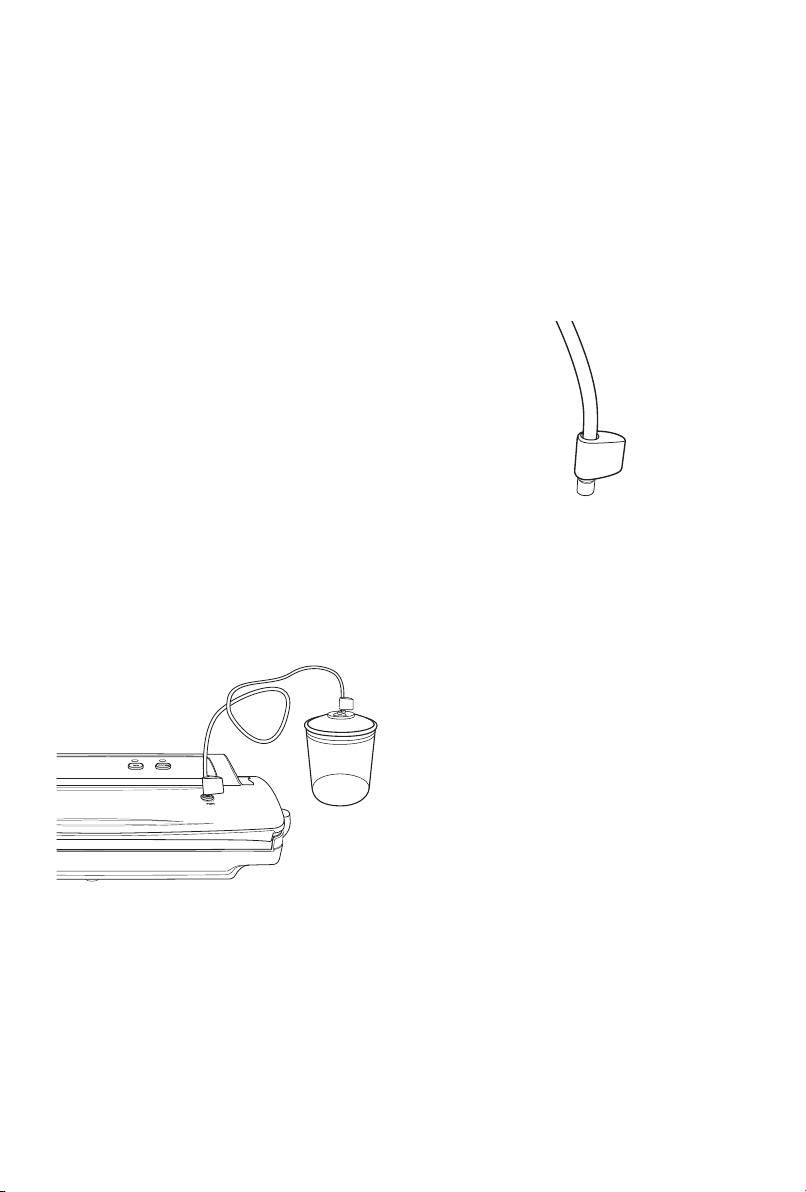
5. Insert one end of the Accessory Hose into
the Accessory Port on the appliance. Insert
the other end of the hose into the canister.
Twist tab on Accessory Hose while inserting
to ensure a tight fit.
See figure 1 & 2.
6. To begin the vacuum process, lock lid by
rotating the latch on the side in a backward
position.
7. Press the Vac/Seal button.
8. When the motor and indicator light turn
off, vacuum process is complete. Note that
the appliance will still go through sealing
cycle even when vacuuming an accessory.
You will hear the motor shut off and then
the sealing cycle will begin
9. To remove accessory hose, gently twist
and remove hose from the appliance and
canister. Unlock side latches.
How to Open the FoodSaver
®
Canister
To open, press and hold down the grey rubber
button in the centre of the lid. This will
release the vacuum – a hissing sound can be
heard as the air rushes in.
IMPORTANT: Remember to remove the
Accessory Hose from the Accessory Port on
the appliance before you vacuum package in
FoodSaver
®
Bags.
Vacuum Packaging with Canisters
Figure 2
Figure 1
Loading ...
Loading ...
Loading ...