Loading ...
Loading ...
Loading ...
9 69-2715EF—07
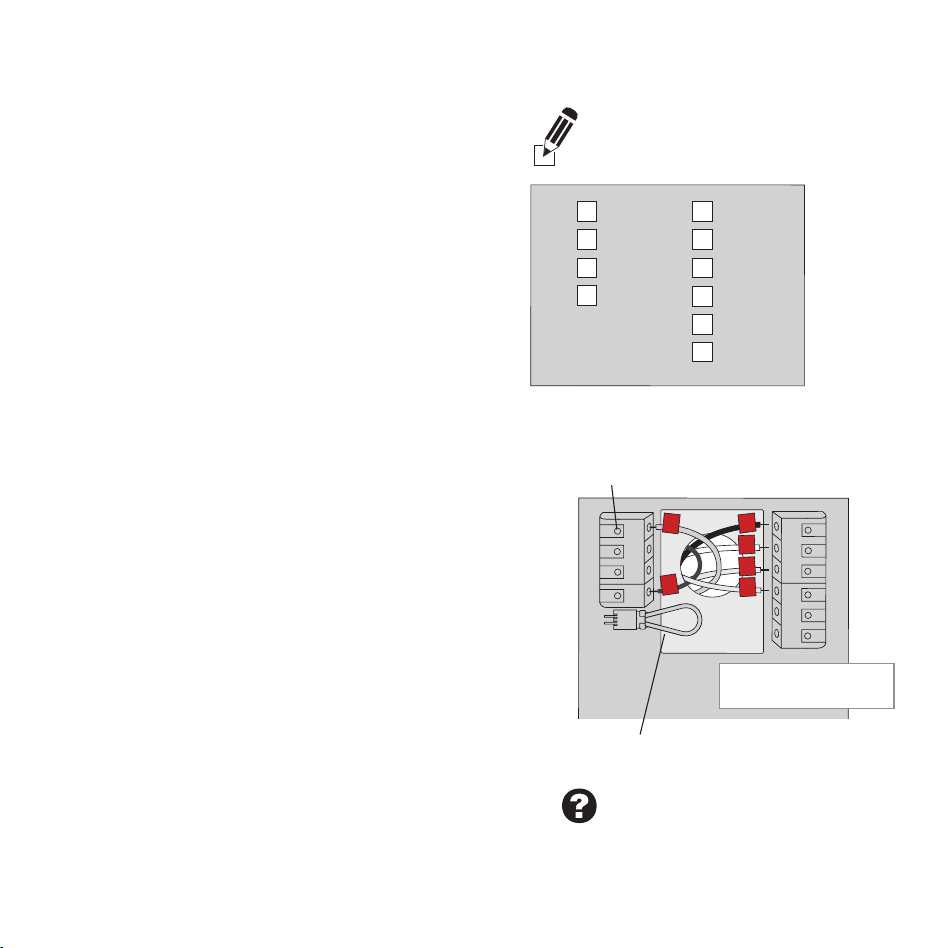
EXAMPLE WIRING
Yours may look different
Installing your thermostat
Wiring (Conventional System continued)
c In the image on the right, check the
box next to each connection. You will
use this checklist in Step 9.
d Verify wire is firmly secured by gently
pulling on wire.
e Repeat steps a–d for all other wires.
f Push any excess wire back into the
wall opening after all wires are
installed.
g Continue to page 12.
Important!
Check the box for each wire
you connect. You will need this
information in Step 9.
C
K
Rc
R
W-O/B
Y
G
W2-
Aux/E
Y2
L
Wiring (Heat Pump System)
6B Wire thermostat to your heat pump.
a Starting with the C Wire, match the sticky tag on
the wire to the terminal labels.
You must have a C wire. See page 8.
b Slide wire gently into terminal hole
until it clicks into place. (If you need
to remove a wire, use a pen tip to
press the terminal release and then
pull the wire out.)
Note: Refer to the wiring picture you took
in Step 2.
Tip: To make it easier to slide the wire into place,
use a pen tip to hold down the terminal release.
Note: The wiring for your application might
be different than the wiring shown below.
MCR34566
C
K
Rc
R
W-
O/B
Y
G
W2-
Aux/E
Y2
L
O
Y
G
R
C
AUX
Labels don’t match?
See alternate wiring keys on
page 11 - page 12..
Terminal release
Remove jumper loop ONLY if
you have both R and Rc wires.
EXAMPLE WIRING
Yours may look different
33-00593ES_A.indb 933-00593ES_A.indb 9 9/20/2021 7:09:52 PM9/20/2021 7:09:52 PM
Loading ...
Loading ...
Loading ...