Loading ...
Loading ...
Loading ...
15
Follow all local codes and ordinances.
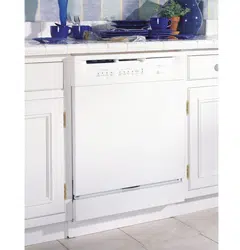
• The molded end of the drain line is de-
signed to fit 5/8", 3/4" and 1" diameter
connections to air gap, waste tee or disposer.
• Cut on marked line as required for your
installation.
Step 14
Connect
Drain Line
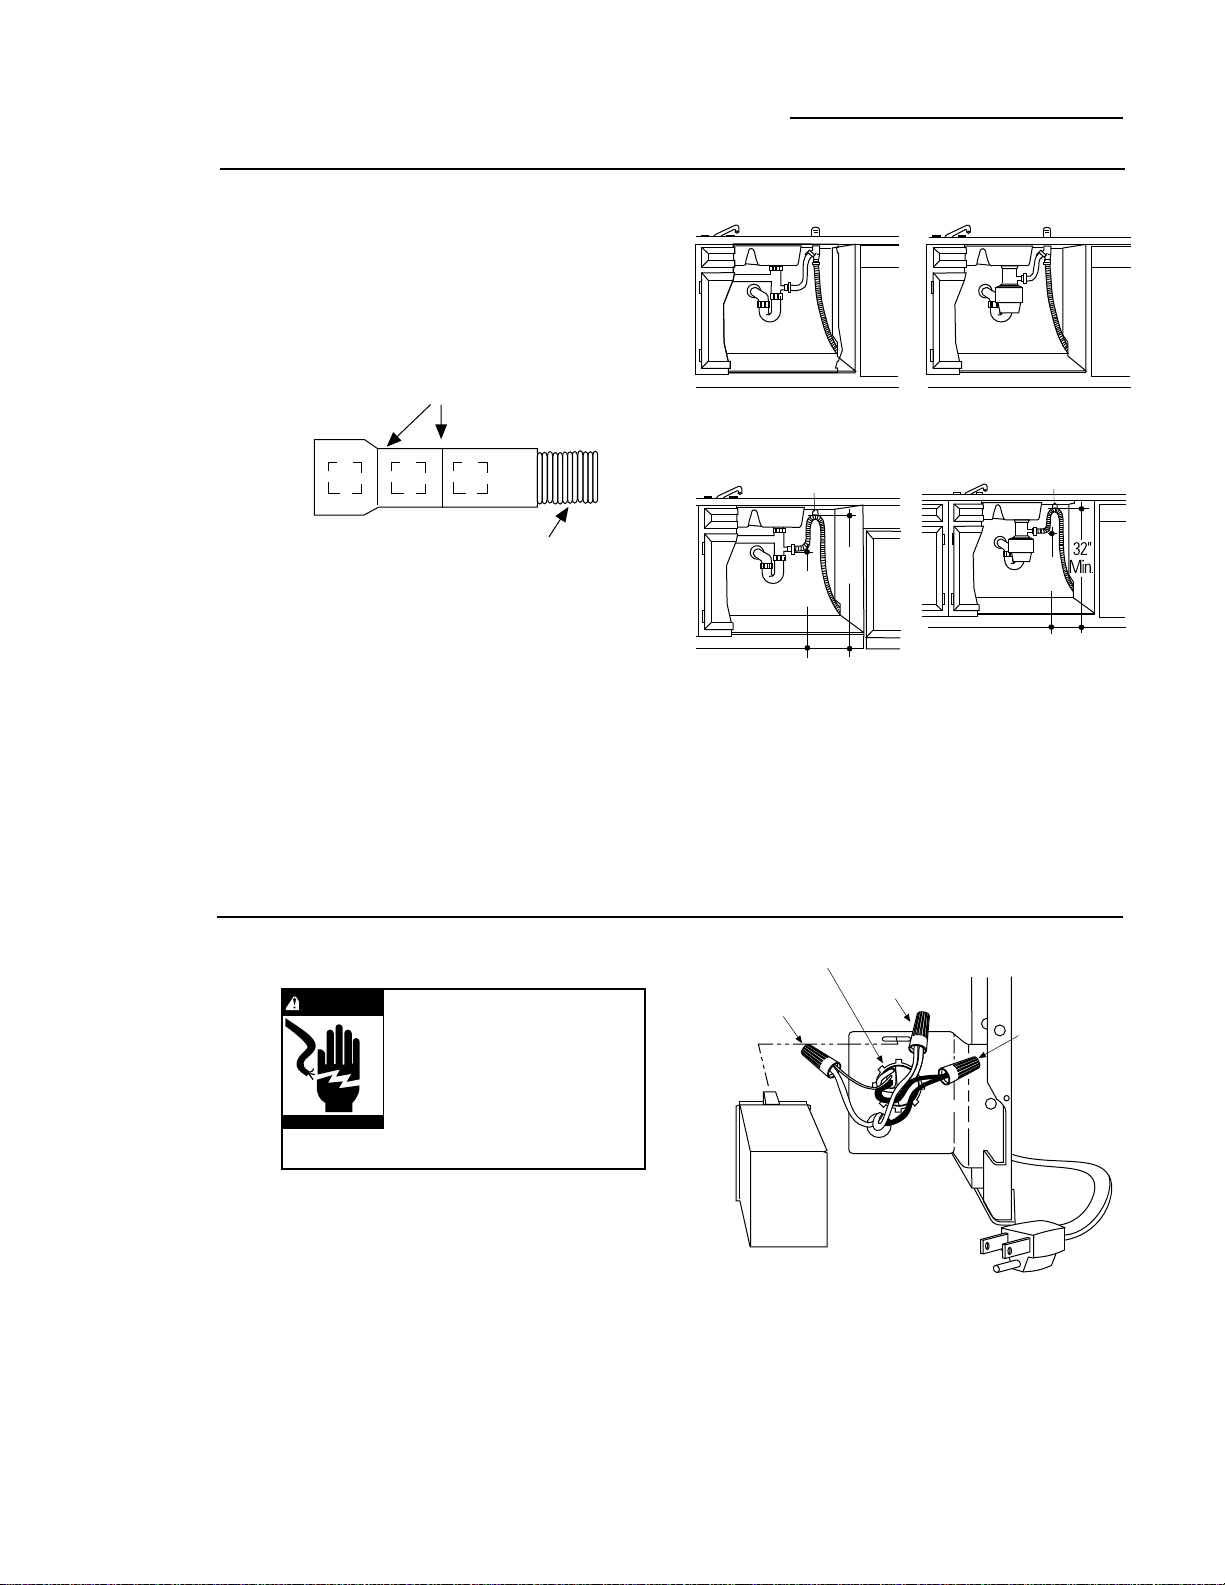
Verify that power is turned off at the source.
Step 15
Connect
Power Supply
•The drain hose supplied is 78" long. If the
location requires a longer drain hose, add
up to 42" length.
•Use 5/8" or 7/8" I.D. hose and short section
of copper water line (not supplied) of
appropriate length and diameter to connect
the two ends.
•Secure the connection with appropriate
clamps (not supplied).
Note:
Total drain hose length must not exceed 10 feet for proper
drain operation.
If house wiring is not 2-wire with
a ground wire, a ground must be
provided by the installer. When
house wiring is aluminum, be sure
to use U.L. listed anti-oxidant
compound and aluminum-to-
copper connectors.
•If a power cord is used, plug into the outlet.
•If dishwasher is wired directly to house
wiring:
–Remove junction box cover.
–Secure the power supply cable to the back
of the junction box with a strain relief (not
supplied).
Cutting Lines
1"
3/4"
5/8"
Do not cut corrugated
portion of hose
CAUTION
WARNING
Installation
CleanSensor Dishwasher
Method 1 – Air gap with waste tee or disposer
Method 2- High drain loop with waste tee or disposer
Waste Tee installation Disposer Installation
Waste Tee installation
•Connect the drain line to air gap, waste tee
or disposer as previously determined.
•Secure connection using appropriate clamps
(not supplied).
•Make sure drain hose is not kinked.
Note:
Remove drain plug before connecting to a disposer.
Dishwasher cannot drain if plug is left in place.
•Locate the 3 dishwasher wires with stripped
ends. Insert wires through the small hole in
the junction box.
•Use wire nuts to secure incoming white to
white, black to black and ground wire to
green.
•Replace junction box cover, checking to be
sure that wires are not pinched.
Fasten to underside
of countertop
32"
Min.
18"
Min.
18"
Min.
Fasten to underside
of countertop
Disposer Installation
White
Neutral
Ground
Black
Live
Note: Check That Harness Leads Are
Threaded Thru Small Hole in Bracket
Loading ...
Loading ...
Loading ...