Loading ...
Loading ...
Loading ...
12
fI lt e r S
1. Remove the back panel.
• Grip
the plastic tab (with the arrow) at the top of the back panel.
Pull down gently on the tab to release the back panel from the
unit.
2. Remove the filter caps.
3. Locate and remove the filters.
• Turn each filter counter-clockwise to remove. Discard.
4. Remove the packaging on the replacement filters and filter caps
(including stickers).
5. Install the new filters.
• Place the filter with threaded end down into the FoodCycler and
turn clockwise until you feel resistance and the filter stops turning.
6. Install a filter cap onto each filter.
• To do so, place the circle-shaped opening on the top of the filter,
ensuring the half-moon shaped opening faces towards the back
panel (when it is installed).
7. Reset filter indicator light.
• If the change filter indicator light does not reset automatically
once the filters are replaced, you must reset it manually. Feel
around along the upper, inner lip of the unit cavity (where, if the
unit’s back panel were in place, a white filter reset arrow would
point). Press and hold the small round button until you hear a
beep. The change filter indicator light should go o.
8. Replace the back panel.
• Place the back panel so that the two bottom tabs fit into the
grooves lining the bottom of the unit’s back cavity. Push the back
panel into the unit’s back cavity until the panel’s tab fits into place
in the unit’s back cavity. If the sides of the panel do not sit flush
against the unit’s back cavity press against the non-flush panel
sections with your thumb or fingers until it snaps flush to the unit.
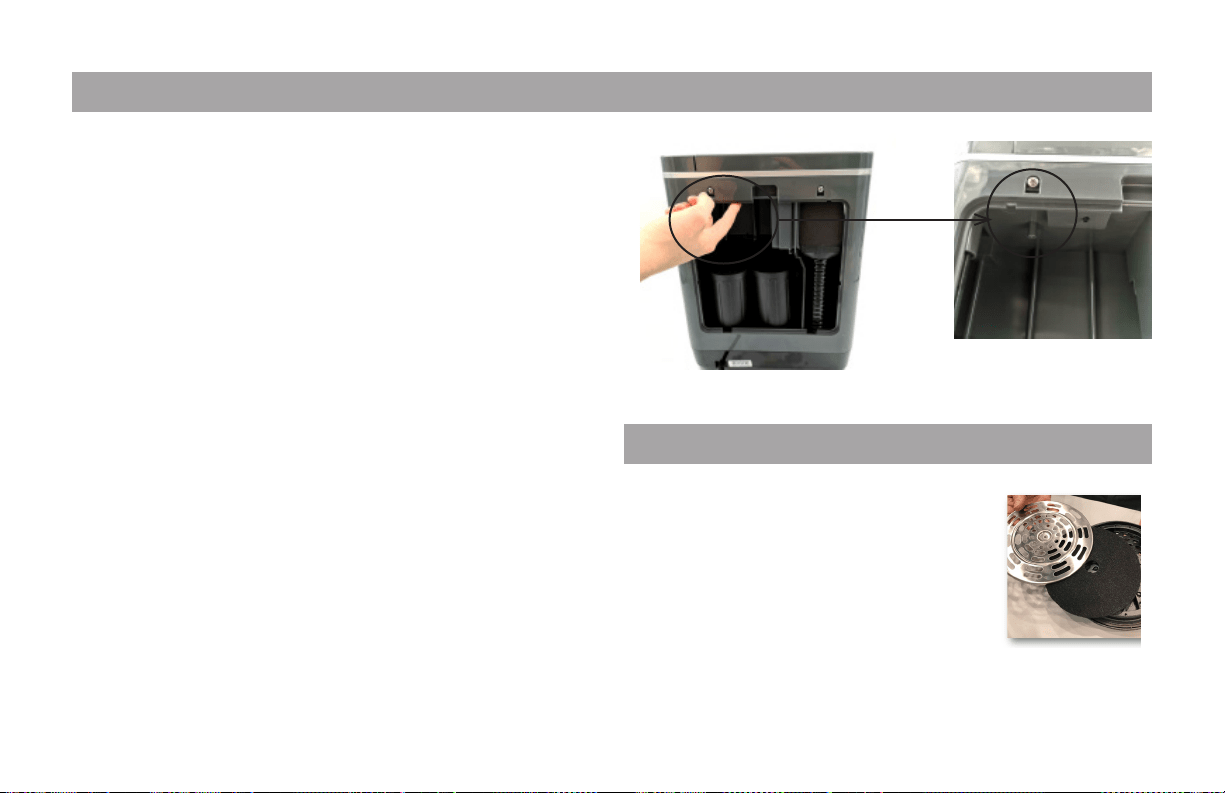
Note: The reset filter button is small and round. Hold it for three seconds
until your unit beeps, and the reset filter light goes o.
To remove:
1. Remove the wingnut.
2. Pull the slotted metal plate from under the lid.
3. Remove the filter and discard.
To install:
1. Fit the filter in the slotted metal plate.
2. Place both under the lid.
3. Use the wingnut to tighten both to the bucket lid.
Co l l e CtIo n lI d fI lt e r
Loading ...
Loading ...
Loading ...