Loading ...
Loading ...
Loading ...
4 E
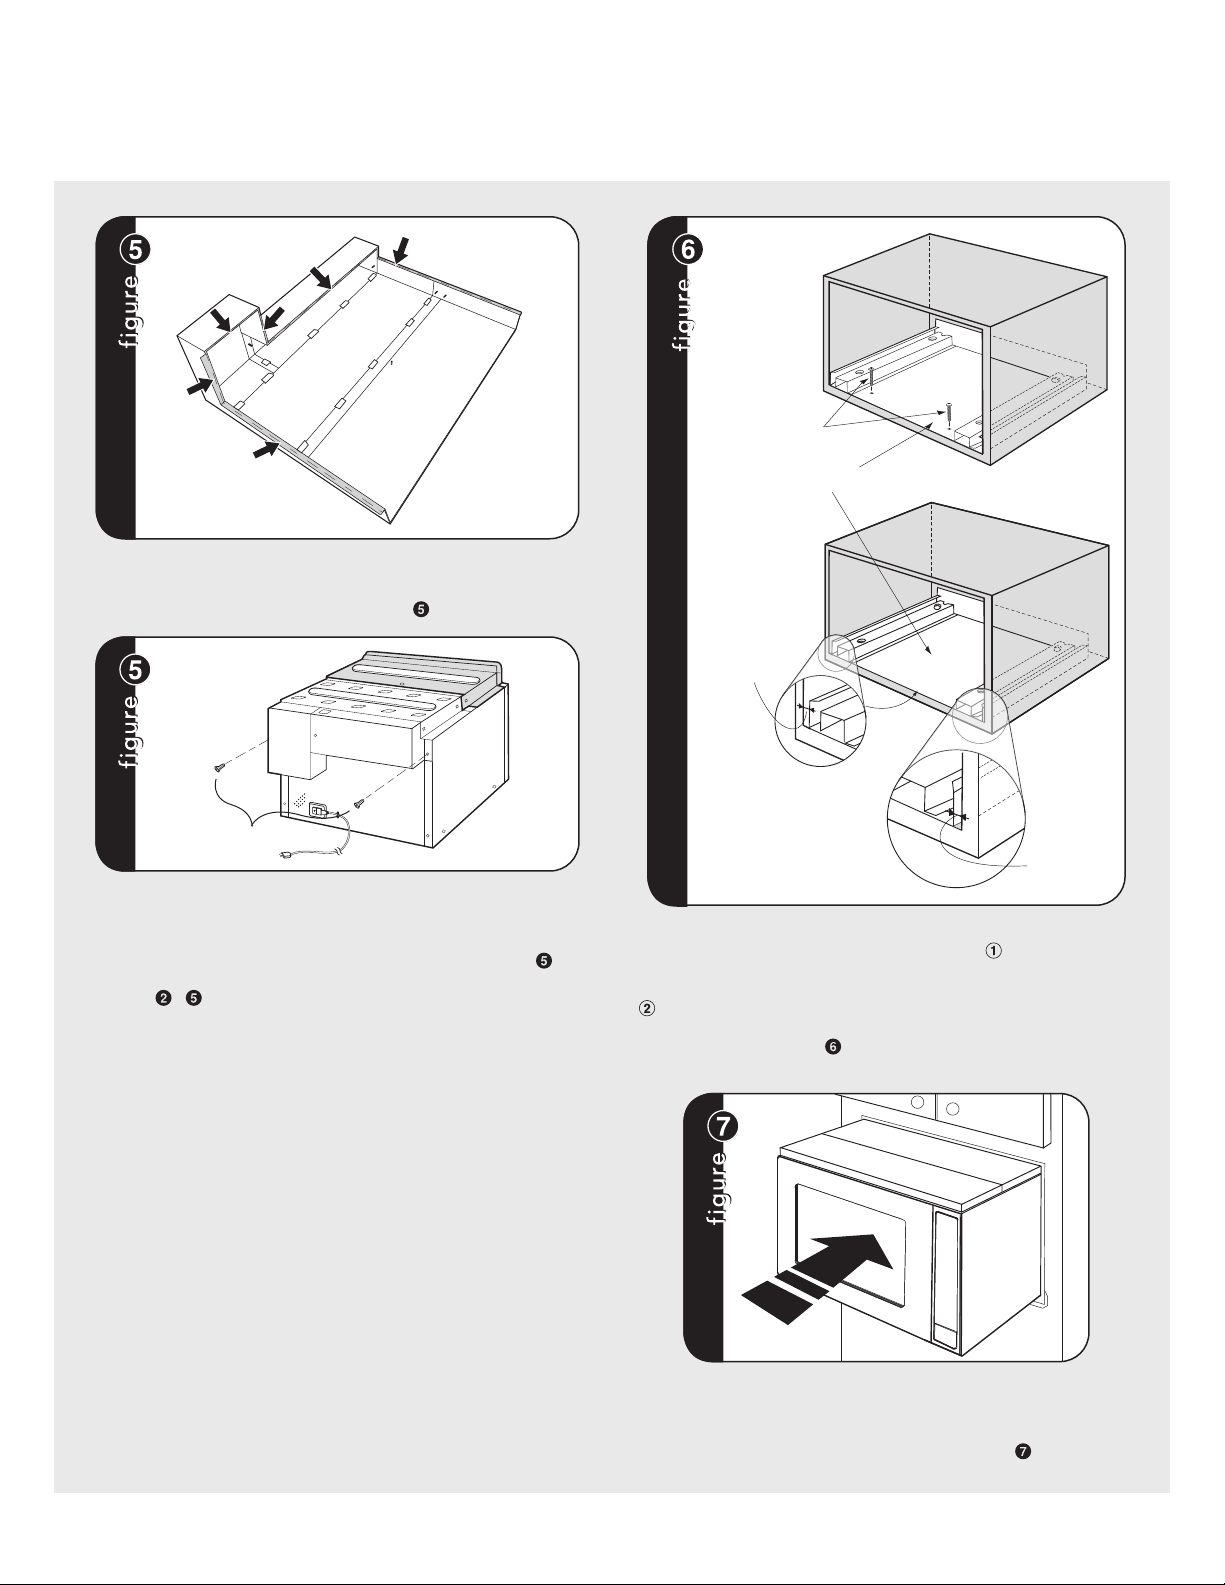
EXHAUST DUCT ASSEMBLY: Remove the cushions from the adhesive
backing. The cushion should be applied to the anges of the duct
assembly as indicated by arrows. See gure A.
B
EXHAUST DUCT ASSEMBLY: Remove SCREW from the upper right
and left corners at the rear of the oven. Place duct assembly on the
top of the unit as shown and secure the duct assembly to the oven
using the two screws just removed from the oven. See gure B.
*Figures - for models VMTK277, 307 and 367 ONLY.
MOUNTING TEMPLATE: Identify the appropriate side of template
to use with your unit. Align the mounting template center line with
the center of the cutout and the oor line with the oor of the cutout.
Tape it into place.
• For VMTK272 only, predrill
4 holes marked “A” with a
1/16" drill bit.
• For VMTK277 only, predrill
4 holes marked “A” with a
1/16" drill bit.
• For VMTK302 only, predrill
4 holes marked “B” with a
1/16" drill bit.
• For VMTK307 only, predrill
4 holes marked “B” with a
1/16" drill bit.
• For VMTK362 only, predrill
4 holes marked “C” with a
1/16" drill bit.
• For VMTK367 only, predrill
4 holes marked “C” with a
1/16" drill bit.
Remove template from the cabinet.
A
Exhaust Duct Assembly Surface Installation
NOTE: CENTER
BOTTOM DUCT
ASSEMBLY IN THE
OPENING
DETAIL A
GAP "B"
BOTTOM DUCT ASSEMBLY
SCREW C
BOTTOM DUCT ASSEMBLY: Place the Bottom Duct in the center of
the opening so that gap "A" is equal to gap "B". When the Bottom
Duct Assembly for VMTK277SS, 307SS or 376SS is positioned properly,
the front edge of the duct will be ush with the front of the cabinet.
The VMTK272SS, 302SS, 372SS Exhaust Duct will be positioned
properly when the edge of the duct is recessed 5mm from the front
of the cabinet. See gure . Secure the Bottom Duct Assembly with
the two (¾") SCREWS (C).
CABINET INSTALLATION: Place the oven adjacent to the wall or
cabinet opening. Plug the power cord into the electrical outlet.
Carefully guide the assembled oven into the prepared opening. Slide
the oven on the Bottom Duct Assembly. See gure .
SCREW
GAP "A"
Loading ...
Loading ...
Loading ...