YrAG
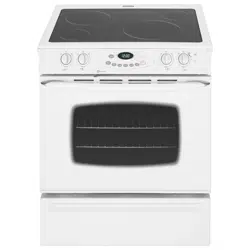
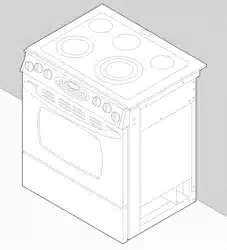
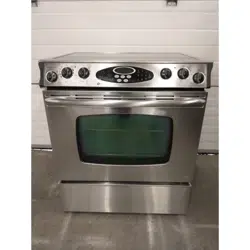
Electric Siide-|n Coil -
Precision Touch Control 500
Suaa_ecooking
Surface Controls
Coil Elements
Oven Cooking ......................... 6-13
Baking
Cook & Hold
Delay Cook & Hold
Keep Warm
Broiling
Sabbath Mode
Oven Racks
Maintenance ......................... 18-19
Oven Window
Oven Light
Troubleshooting ................... 20-21
Warranty & Service .................... 23
Guide d'utilisation et
d'entretien ................................... 24
Guia de Uso y Cuidado ............. 48
Form No. A/01/08 Part No. 8113P767-60 @2006 Maytag Appliances Sales Co. Litho U.S.A.
technician. Do not attempt to adjust, repair, service, or
replace any part of your appliance unless it is specifically
recommended in this guide. All other servicing should be
referred to a qualified servicer.
Always disconnect power to appliance before servicing.
portantSafety
Warning and Important Safety Instructions appearing in
this guide are not meant to cover all possible conditions
and situations that may occur. Common sense, caution,
and care must be exercised when installing, maintaining,
or operating the appliance.
Always contact the manufacturer about problems or
conditions you do not understand.
Recognize Safety Symbols, Words, Labels
Read and follow all instructions before using this
appliance to prevent the potential risk of fire, electric
shock, personal injury or damage to the appliance as a
result of improper usage of the appliance. Use appliance
only for its intended purpose as described in this guide.
To ensure proper and safe operation: Appliance
must be properly installed and grounded by a qualified
To check if device is properly installed, look underneath
range with a flashlight to make sure one of the rear
leveling legs is properly engaged in the bracket slot. The
anti-tip device secures the rear leveling leg to the floor
when properly engaged. You should check this anytime
the range has been moved.
To Prevent Fire or
Smoke Damage
Be sure all packing materials are removed from the
appliance before operating it.
Keep area around appliance clear and free from
combustible materials. Flammable materials should not
be stored in an oven.
Many plastics are vulnerable to heat. Keep plastics away
from parts of the appliance that may become warm or
hot.
To prevent grease fires, do not let cooking grease or other
flammable materials accumulate in or near the appliance.
In Case of Fire
Use dry chemical or foam-type extinguisher or baking
soda to smother fire or flame. Never use water on a
grease fire.
1. Turn off appliance to avoid spreading the flame.
2. NEVER pick up or move a flaming pan.
3. Smother fire or flame by closing the oven door.
Turn off ventilating hood to avoid spreading the flame.
Extinguish flame then turn onhood to remove smoke
and odor.
Child Safety
NEVER leave children alone or unsupervised near the
appliance when it is in use or is still hot. Children should
never be allowed to sit or stand on any part of the
appliance as they could be injured or burned.
Children must be taught that the appliance and utensils in
it can be hot. Let hot utensils cool in a safe place, out of
reach of small children. Children should be taught that an
appliance is not a toy. Children should not be allowed to
play with controls or other parts of the appliance.
About Your Appliance
To prevent potential hazard to the user and damage to the
appliance, do not use appliance as a space heater to heat
or warm a room. Also, do not use the oven as a storage
area for food or cooking utensils.
Do not obstruct the flow of air by blocking the oven vent.
The oven vent is located at the rear of the cooking
surface.
DO NOT TOUCH HEATING ELEMENTS OR INTERIOR
SURFACES OF OVEN. Heating elements may be hot even
though they are dark in color. Interior surfaces of any oven
become hot enough to cause burns. During and after use,
do not touch, or let clothing or other flammable materials
contact heating elements or interior surfaces of oven until
they have had sufficient time to cool. Other surfaces of the
appliance may become hot enough to cause burns -
among these surfaces are: oven vent opening and surface
near this opening, oven door, window of oven door.
Do not touch a hot oven light bulb with a damp cloth as
the bulb could break. Should the bulb break, disconnect
power to the appliance before removing bulb to avoid
electrical shock.
2
NEVER use aluminum foil to cover an oven rack or oven
bottom. Misuse could result in risk of electric shock, fire, or
damage to the appliance. Use foil only as directed in this
guide.
Do not use the cooktop or ovens as a storage area for food
or cooking utensils.
Cooking Safety
Never heat an unopened food container in the oven.
Pressure build-up may cause container to burst resulting in
serious personal injury or damage to the appliance.
Use dry, sturdy potholders. Damp potholders may cause
burns from steam. Dish towels or other substitutes should
never be used as potholders because they can trail across
hot elements and ignite or get caught on appliance parts.
Wear proper apparel. Loose fitting or long hanging-sleeved
apparel should not be worn while cooking. Clothing may
ignite and cause burns if garment comes in contact with
heating elements.
Always place oven racks in the desired positions while oven
is cool. Slide oven rack out to add or remove food, using
dry, sturdy potholders. Always avoid reaching into the oven
to add or remove food. If a rack must be moved while hot,
use a dry potholder. Do not let potholder contact hot
element in oven.
Use racks only in the oven in which they were shipped/
purchased.
Use care when opening the oven door. Let hot air or steam
escape before removing or replacing food.
PREPARED FOOD WARNING: Follow food manufacturer's
instructions. If a plastic frozen food container and/or its
cover distorts, warps, or is otherwise damaged during
cooking, immediately discard the food and its container.
The food could be contaminated.
Do not allow aluminum foil or meat probe to contact
heating element.
Always turn off all controls when cooking is completed.
Utensil Safety
Follow the manufacturer's directions when using oven
cooking bags.
This appliance has been tested for safe performance using
conventional cookware. Do not use any devices or accesso-
ries that are not specifically recommended in this guide. Do
not use element covers, stove top grills or add-on oven
convection systems. The use of devices or accessories that
are not expressly recommended in this guide can create
importantSurety
serious safety hazards, result in performance problems,
and reduce the life of the components of the appliance.
If pan is smaller than element, a portion of the element will
be exposed to direct contact and could ignite clothing or
potholder.
Only certain types of glass, glass/ceramic, ceramic, earth-
enware, or other glazed utensils are suitable for cooktop or
oven service without breaking due to the sudden change in
temperature. Follow utensil manufacturer's instructions
when using glass.
Turn pan handle toward center of cooktop, not out into the
room or over another surface element. This reduces the
risk of burns, ignition of flammable materials, or spillage if
pan is accidently bumped or reached by small children.
Cleaning Safety
Clean cooktop with caution. Turn off all controls and wait
for appliance parts to cool before touching or cleaning.
Clean with caution. Use care to avoid steam burns if a wet
sponge or cloth is used to wipe spills on a hot surface.
Some cleaners can produce noxious fumes if applied to a
hot surface.
Clean only parts listed in this guide.
Self-Clean Oven
Cooktop
NEVER leave surface units unattended especially when
using high heat. An unattended boilover could cause
smoking and a greasy spillover can cause a fire.
This appliance is equipped with different size surface
elements. Select pans with flat bottoms large enough to
cover element. Fitting pan size to element will improve
cooking efficiency.
Coil Elements
To prevent damage to removable heating elements, do
not immerse, soak or clean in a dishwasher or self-clean
oven. A damaged element could short resulting in a fire
or shock hazard.
Make sure drip bowls are in place as absence of these
bowls during cooking could damage wiring.
Protective Liners: Do not use aluminum foil to line
surface unit drip bowls or oven bottoms, except as
suggested in the manual. Improper installation of these
liners may result in a risk of electric shock or fire.
Deep Fat Fryers
Do not clean door gasket. The door gasket is essential for a
good seal. Care should be taken not to rub, damage, or
move the gasket.
Do not use oven cleaners or oven liners of any kind in or
around any part of the self-clean oven.
important Safety Notice
and Warning
The California Safe Drinking Water and Toxic Enforcement
Act of 1986 (Proposition 65) requires the Governor of
California to publish a list of substances known to the State
of California to cause cancer or reproductive harm, and
requires businesses to warn customers of potential expo-
sures to such substances.
Users of this appliance are hereby warned that when the
oven is engaged in the self-clean cycle, there may be some
low-level exposure to some of the listed substances, includ-
ing carbon monoxide. Exposure to these substances can be
minimized by properly venting the oven to the outdoors by
opening the windows and/or door in the room where the
appliance is located during the self-clean cycle.
Use extreme caution when moving the grease pan or
disposing of hot grease. Allow grease to cool before
attempting to move pan.
Ventilating Hoods
Clean range hood and filters frequently to prevent grease
or other flammable materials from accumulating on hood
or filter and to avoid grease fires.
IMPORTANT NOTICE REGARDING PET BIRDS: Never
keep pet birds in the kitchen or in rooms where the fumes
from the kitchen could reach. Birds have a very sensitive
respiratory system. Fumes released during an oven self-
cleaning cycle may be harmful or fatal to birds. Fumes
released due to overheated cooking oil, fat, margarine and
overheated non-stick cookware may be equally harmful.
When flaming foods under the hood, turn the fan on.
Save These Instructions for Future Reference
3
:Surfece. g
Surface Controls
Use to turn on the surface elements. An infinite choice of
heat settings is available from Low to High. The knobs can
be set on or between any of the settings.
Setting the Controls
1. Place pan on surface element.
2. Push in and turn the knob in either direction to the desired
heat setting.
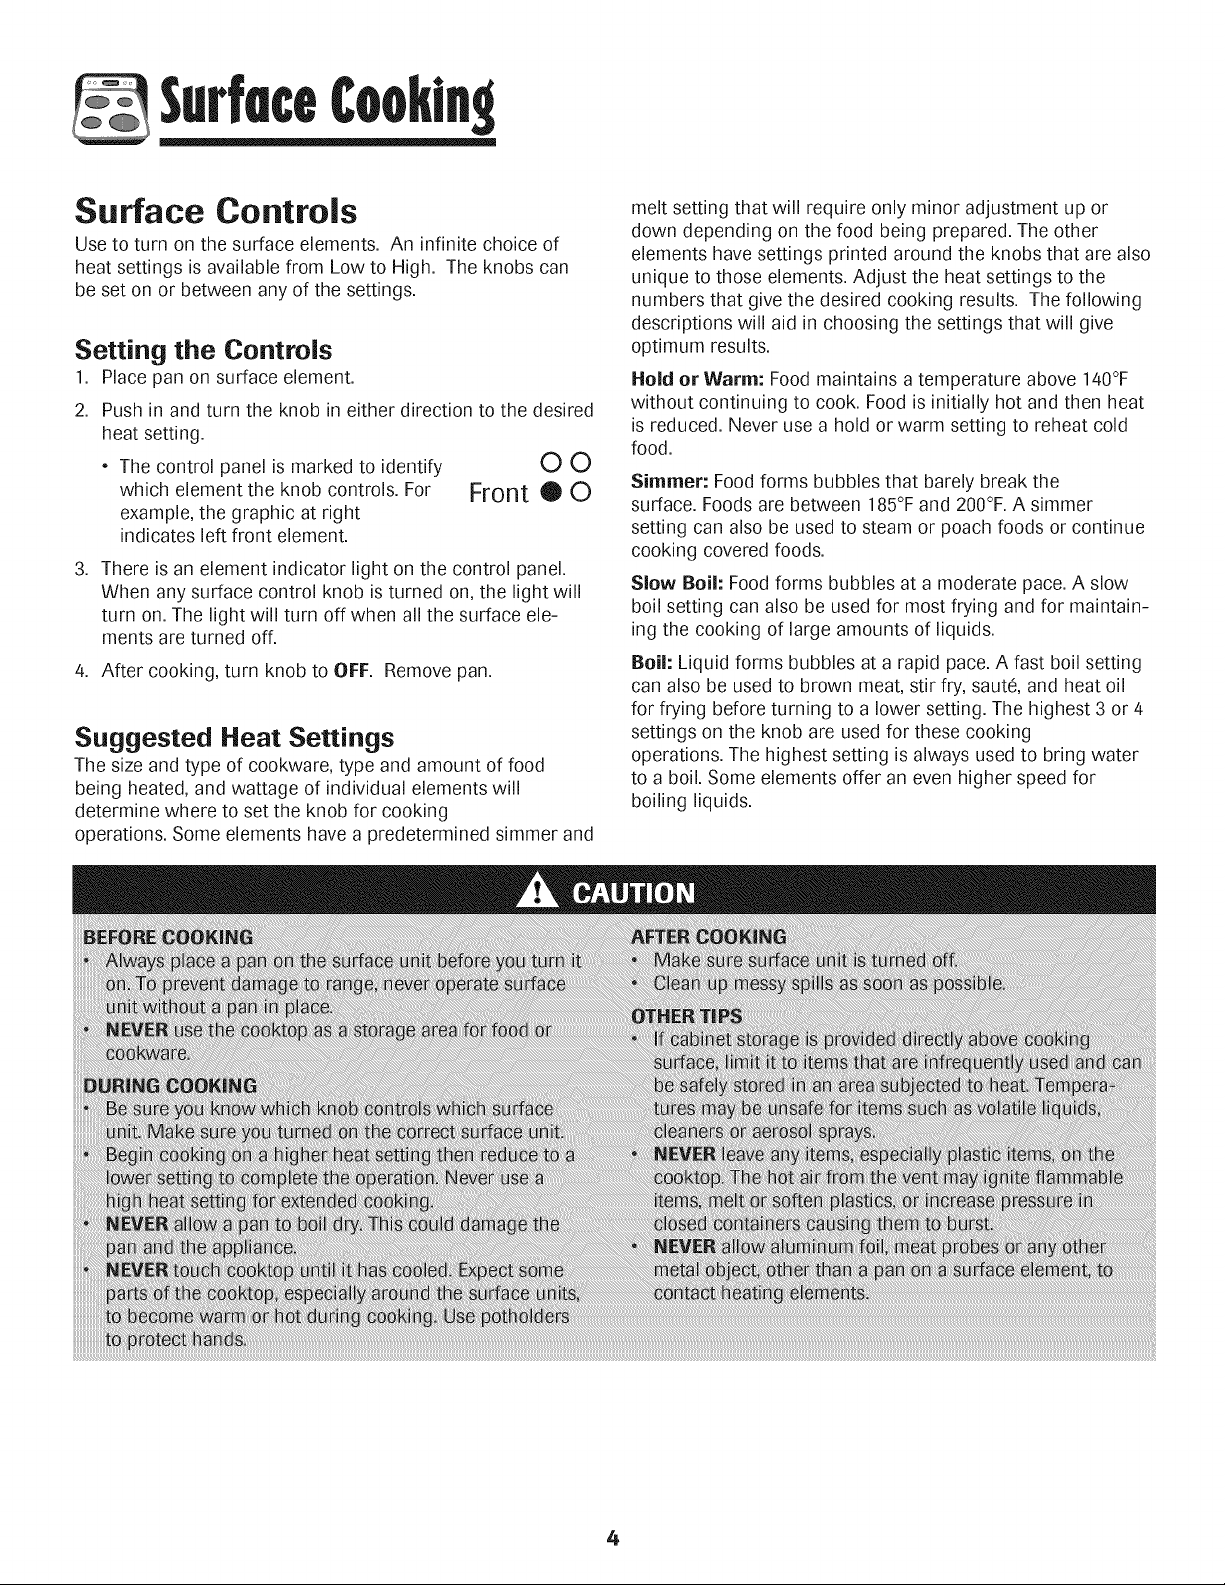
. The control panel is marked to identify O O
which element the knob controls. For Front • O
example, the graphic at right
indicates left front element.
.
There is an element indicator light on the control panel.
When any surface control knob is turned on, the light will
turn on. The light will turn offwhen all the surface ele-
ments are turned off.
4. Aftercooking, turn knob to OFF. Remove pan.
Suggested Heat Settings
The size and type of cookware, type and amount of food
being heated, and wattage of individual elements will
determine where to set the knob for cooking
operations. Some elements have a predetermined simmer and
melt setting that will require only minor adjustment up or
down depending on the food being prepared. The other
elements have settings printed around the knobs that are also
unique to those elements. Adjust the heat settings to the
numbers that give the desired cooking results. The following
descriptions will aid in choosing the settings that will give
optimum results.
Hold or Warm: Food maintains a temperature above 140°F
without continuing to cook. Food is initially hot and then heat
is reduced. Never use a hold or warm setting to reheat cold
food.
Simmer: Food forms bubbles that barely break the
surface. Foods are between 185°F and 200°F.A simmer
setting can also be used to steam or poach foods or continue
cooking covered foods.
Slow Boil: Food forms bubbles at a moderate pace. A slow
boil setting can also be used for most frying and for maintain-
ing the cooking of large amounts of liquids.
Boil: Liquid forms bubbles at a rapid pace. A fast boil setting
can also be used to brown meat, stir fry, saute, and heat oil
for frying before turning to a lower setting. The highest 3 or 4
settings on the knob are used for these cooking
operations. The highest setting is always used to bring water
to a boil. Some elements offer an even higher speed for
boiling liquids.
4
Surfece¢ookin9
Coil Element Surface
Notes:
, Clean cooktop after each use.
Wipe acidic or sugary spills as soon as the cooktop
has cooled as these spills may discolor or etch the
porcelain.
To protect drip bowl finish:
* To lessen discoloration and crazing, avoid using high
heat for long periods.
Do not use oversized cookware. Pans should not
extend more than 1-2 inches beyond the element.
When home canning or cooking with big pots, use
the Canning Element (Model CE1). Contact your
Maytag dealer for details or call 1-877-232-6771 USA
or 1-800-688-8408 Canada to order.
Clean frequently. (:Seepage 160
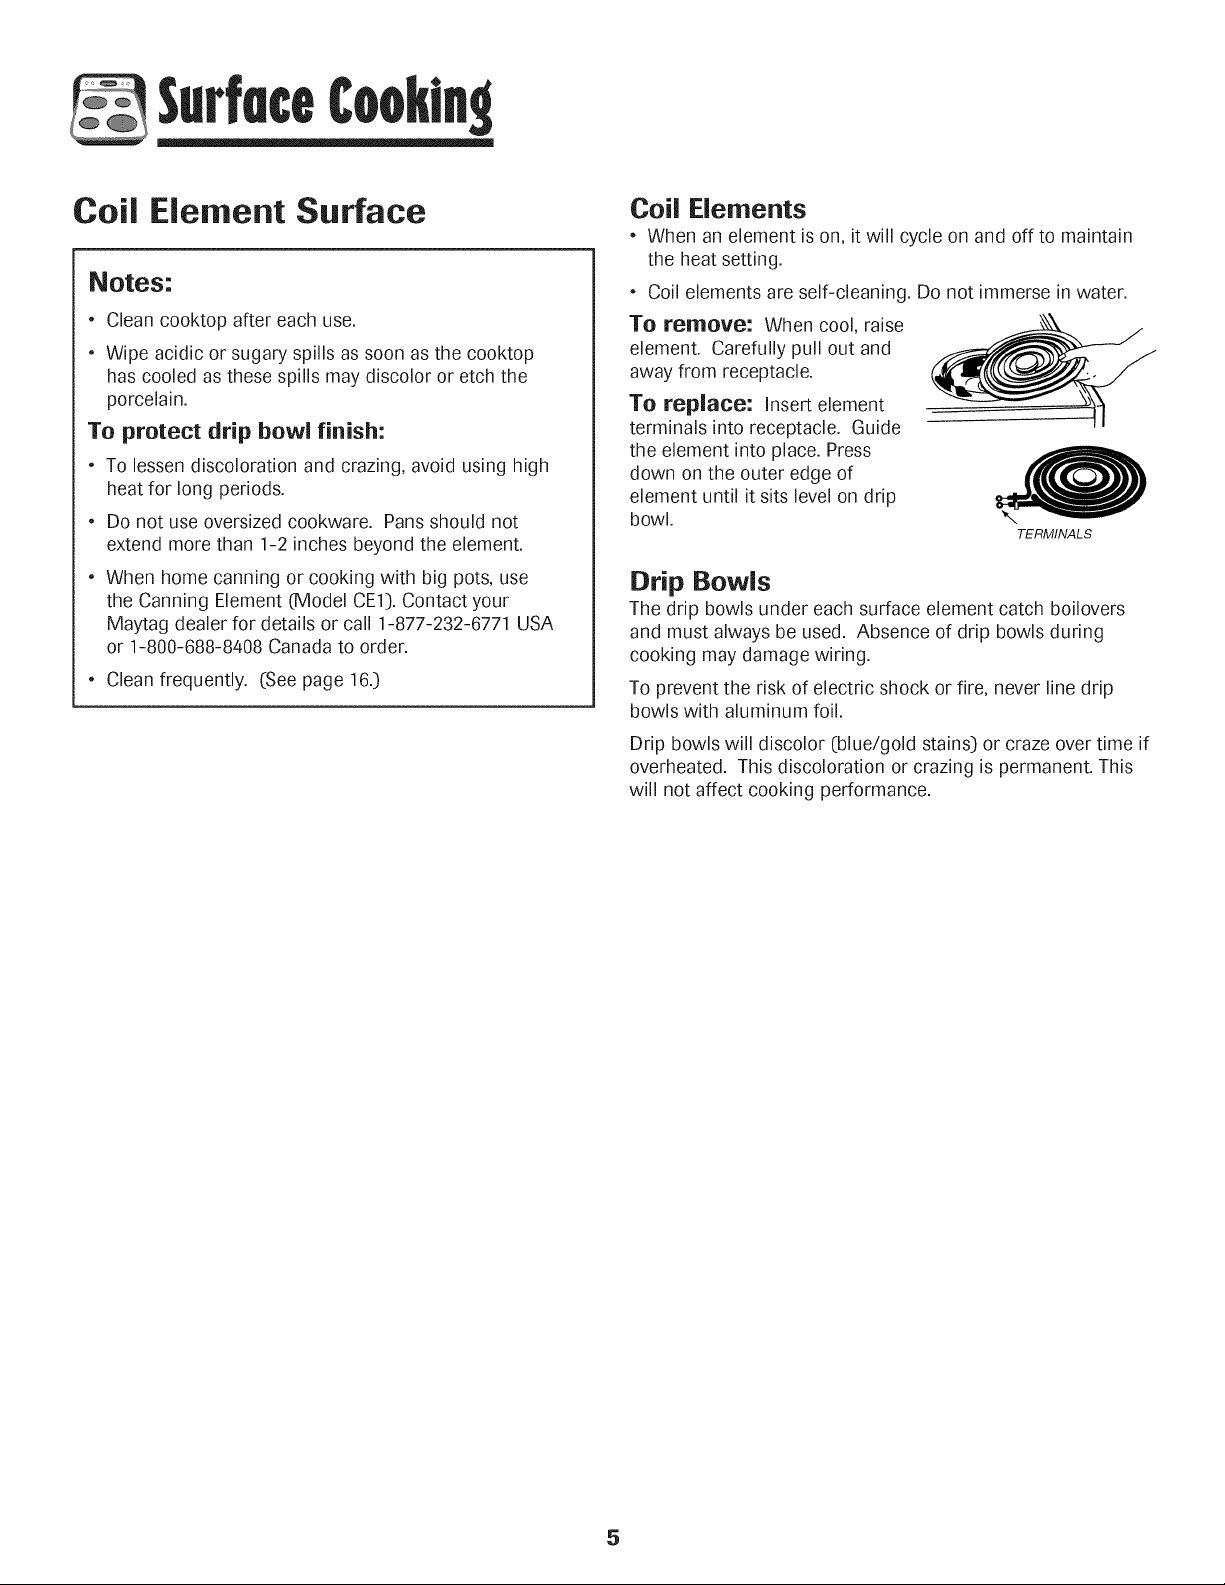
Coil Elements
, When an element is on, it will cycle on and off to maintain
the heat setting.
Coil elements are self-cleaning. Do not immerse in water.
To remove: When cool, raise
element. Carefully pull out and
away from receptacle.
To replace: Insert element
terminals into receptacle. Guide
the element into place. Press
down on the outer edge of
element until it sits level on drip
bowl.
TERMINALS
Drip Bowls
The drip bowls under each surface element catch boilovers
and must always be used. Absence of drip bowls during
cooking may damage wiring.
To prevent the risk of electric shock or fire, never line drip
bowls with aluminum foil.
Drip bowls will discolor (blue/gold stains) or craze over time if
overheated. This discoloration or crazing is permanent. This
will not affect cooking performance.
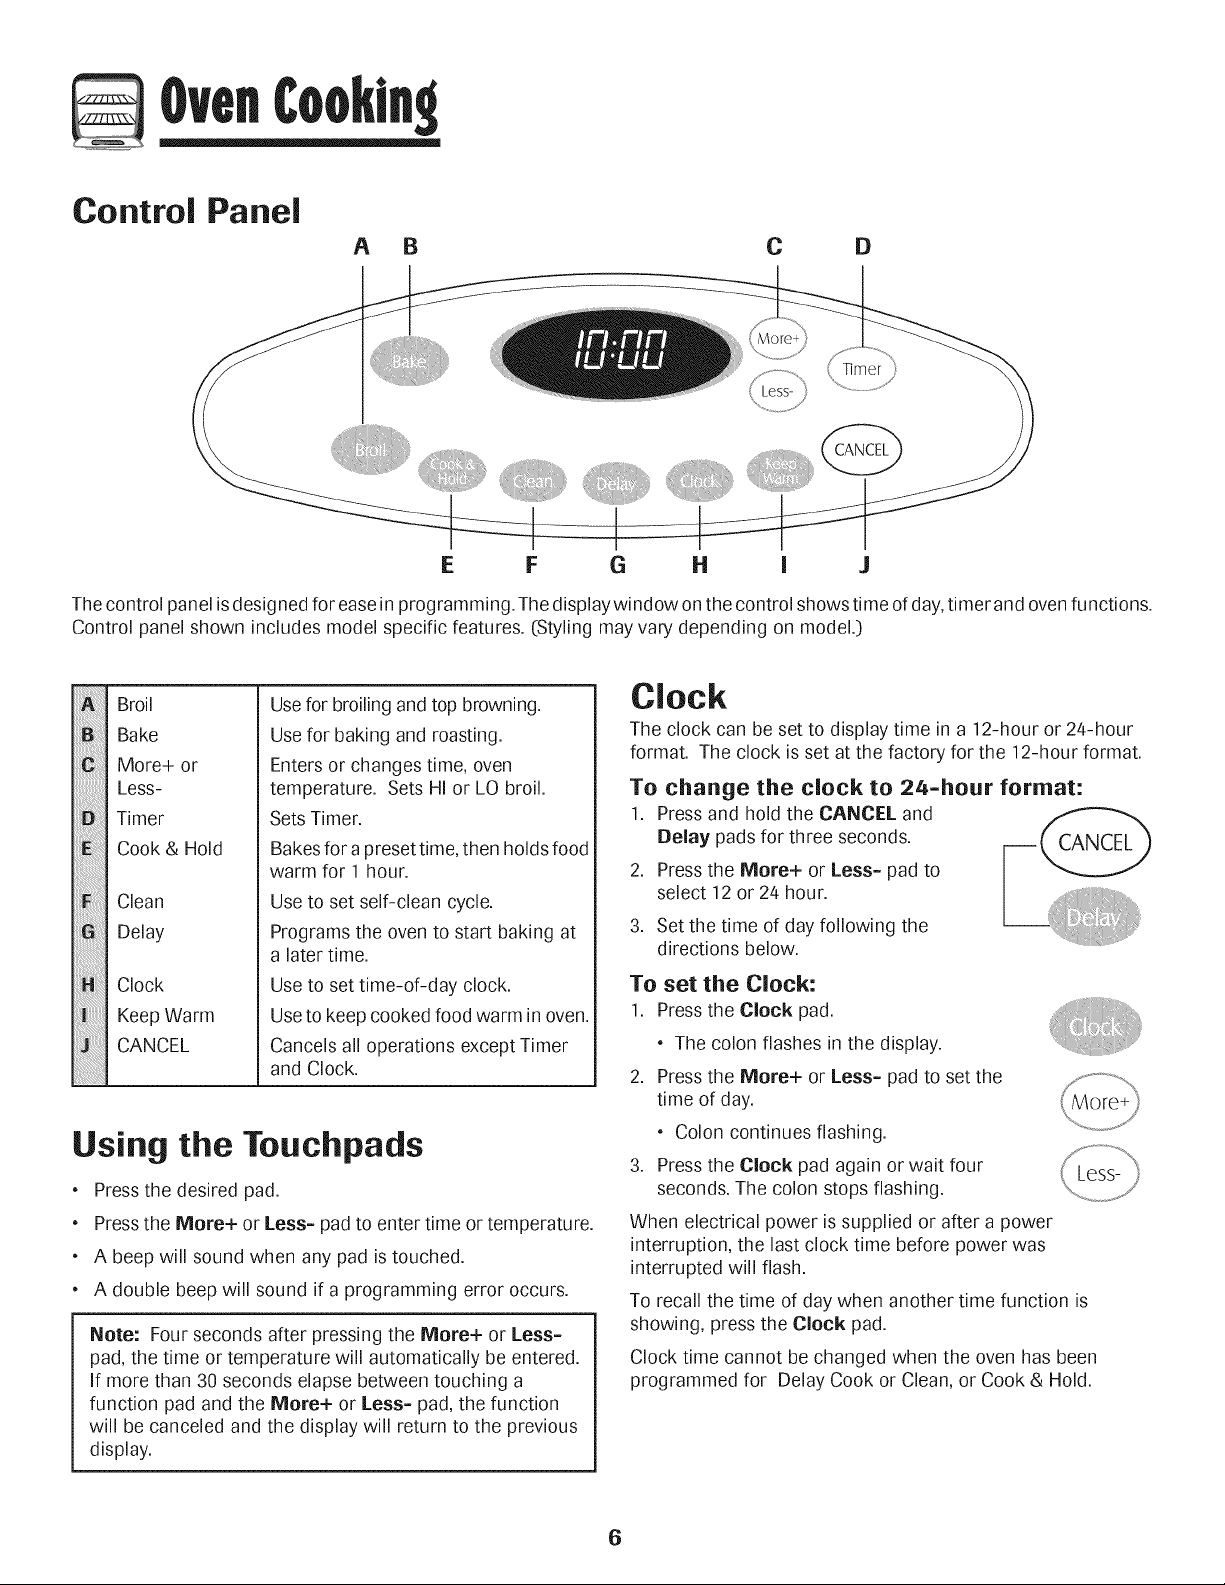
Control Panel
A B C D
E F G H | J
The control panel isdesigned for ease in programming. The displaywindow on the control shows time of day, timer and oven functions.
Control panel shown includes model specific features. (Styling may vary depending on model._)
!!!Cli:ii:!;!i_i_ii;!;
iiD!i_il;!ii!i_ii!i!i
;iilJii_ii_ii_ii_ii_ii_iiii,i!i!_!i
Broil
Bake
More+ or
Less-
Timer
Cook & Hold
Clean
Delay
Clock
Keep Warm
CANCEL
Usefor broiling and top browning.
Use for baking and roasting.
Enters or changes time, oven
temperature. Sets HI or LO broil.
Sets Timer.
Bakes for a preset time, then holds food
warm for 1 hour.
Use to set self-clean cycle.
Programs the oven to start baking at
a later time.
Use to set time-of-day clock.
Useto keep cooked food warm inoven.
Cancels all operations except Timer
and Clock.
Using the Touchpads
* Press the desired pad.
Pressthe More+ or Less= pad to enter time or temperature.
A beep will sound when any pad is touched.
A double beep will sound if a programming error occurs.
Note: Four seconds after pressing the More+ or Less=
pad, the time or temperature will automatically be entered.
If more than 30 seconds elapse between touching a
function pad and the More+ or Less= pad, the function
will be canceled and the display will return to the previous
display.
Clock
The clock can be set to display time in a 12-hour or 24-hour
format. The clock is set at the factory for the 12-hour format.
To change the clock to 24-hour format:
1. Press and hold the CANCEL and
Delay pads for three seconds.
2.
.
Press the More+ or Less= pad to
select 12 or 24 hour.
Set the time of day following the
directions below.
To set the Clock:
1. Press the Clock pad.
, The colon flashes in the display.
2. Press the More+ or Less= pad to set the
time of day.
Colon continues flashing.
3. Press the Clock pad again or wait four
seconds. The colon stops flashing.
When electrical power is supplied or after a power
interruption,the last clock time before power was
interruptedwill flash.
To recall the time of day when another time function is
showing, press the Clock pad.
Clock time cannot be changed when the oven has been
programmed for Delay Cook or Clean, or Cook & Hold.
6
To cancel the Clock display:
If you do not want the time of day to display:
Press and hold the CANCEL and Clock
pads for three seconds. The time of day will
disappear from the display
When the clock display is canceled, press
the Clock pad to briefly display the time of
day.
To restore the Clock display:
Press and hold the CANCEL and Clock pads for three
seconds. The time of day will reappear in the display.
Timer
The timer can be set from one minute (0:01) up to 99 hours
and 59 minutes (99:59).
The timer can be used independently of any other oven
activity. It can also be set while another oven function is
operating.
The timer does not control the oven. It only controls a beeper.
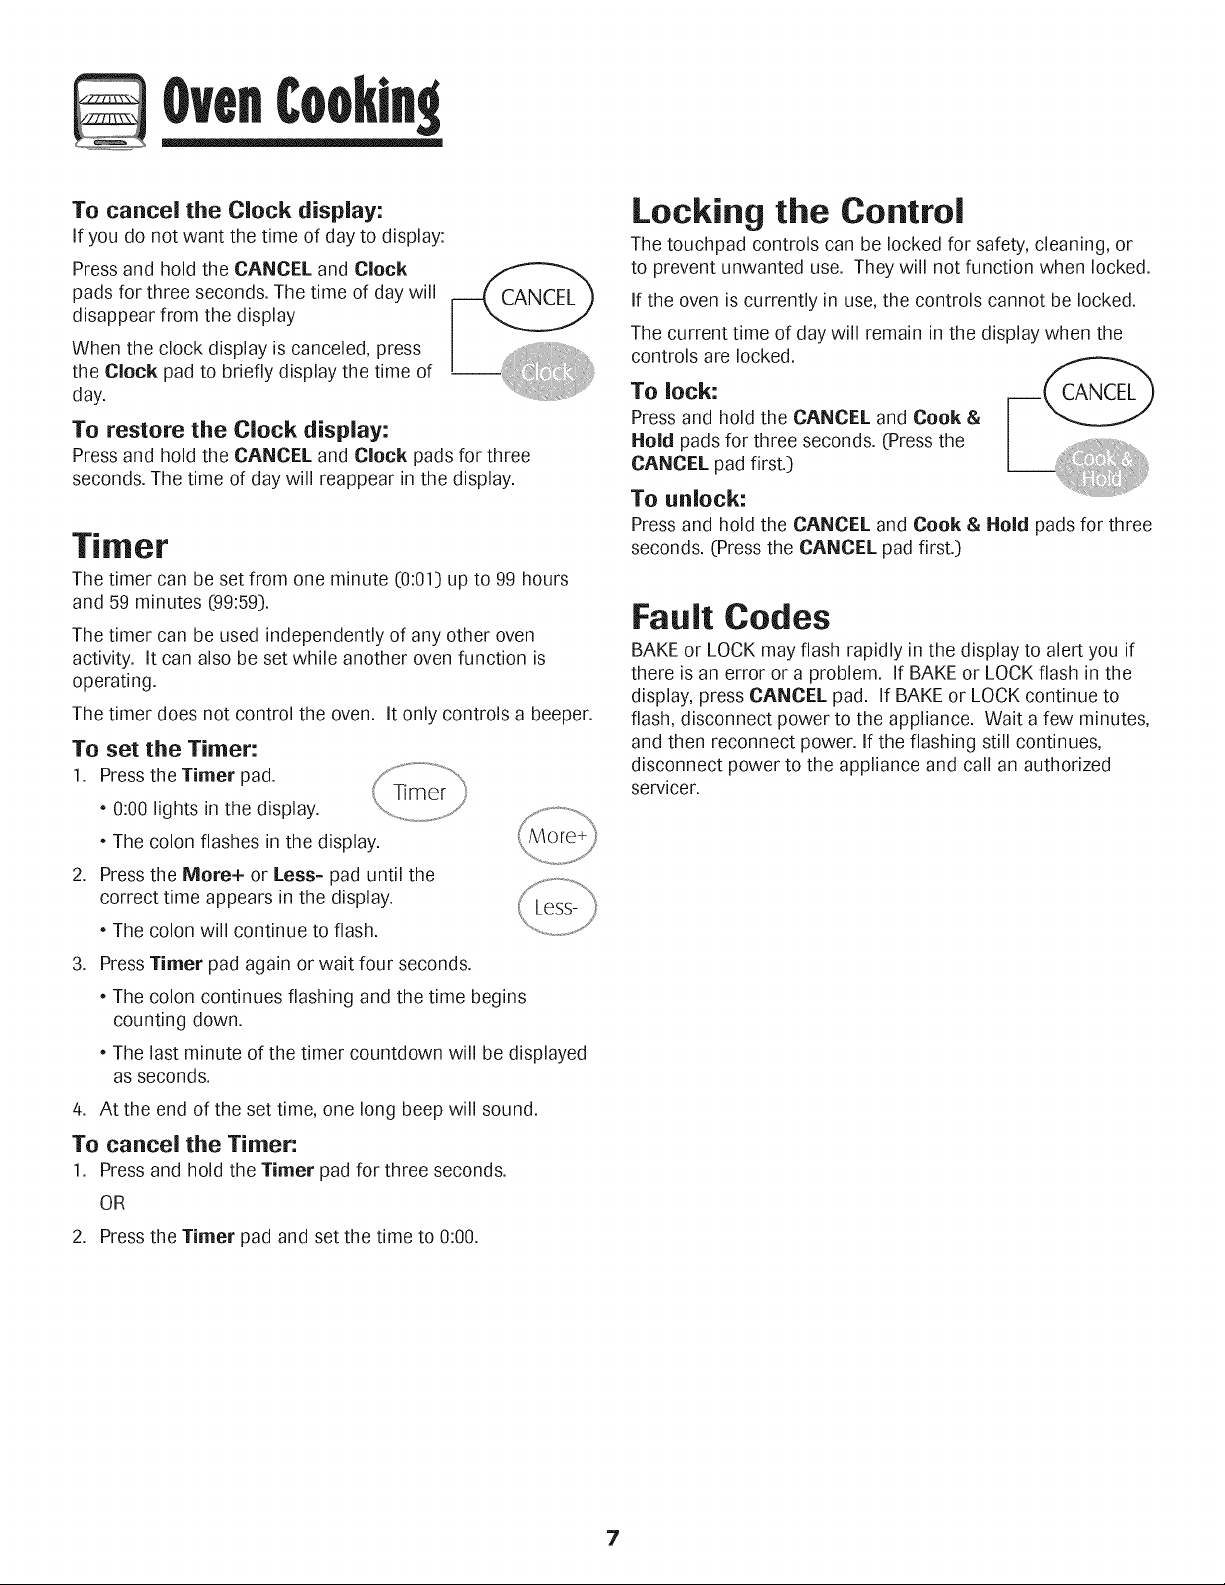
To set the Timer:
1. Press the Timer pad.
0:00 lights in the display.
The colon flashes in the display.
2. Press the More+ or Less= pad until the
correct time appears in the display.
The colon will continue to flash.
3. PressTimer pad again or wait four seconds.
The colon continues flashing and the time begins
counting down.
The last minute of the timer countdown will be displayed
as seconds.
4. At the end of the set time, one long beep will sound.
To cancel the Timer:
1. Press and hold the Timer pad for three seconds.
OR
2. Press the Timer pad and set the time to 0:00.
Locking the Control
The touchpad controls can be locked for safety, cleaning, or
to prevent unwanted use. They will not function when locked.
If the oven is currently in use, the controls cannot be locked.
The current time of day will remain in the display when the
controls are locked.
To lock:
Press and hold the CANCEL and Cook &
Hold pads for three seconds. (Pressthe
CANCEL pad first.)
To unlock:
Press and hold the CANCEL and Cook & Hold pads for three
seconds. (Press the CANCEL pad first.)
Fault Codes
BAKE or LOCK may flash rapidly in the display to alert you if
there is an error or a problem. If BAKE or LOCK flash in the
display, press CANCEL pad. If BAKE or LOCK continue to
flash, disconnect power to the appliance. Wait a few minutes,
and then reconnect power. If the flashing still continues,
disconnect power to the appliance and call an authorized
servicer.
7
Baking
To set Bake:
1. Press the Bake pad.
* BAKE will flash.
000 will light in the display.
2. Select the oven temperature. The oven
temperature can be set from 170° to 550°. Press
or press and hold the More+ or Less- pad.
350° will light when either pad is first pressed.
Press the More+ pad to increasethe temperature.
Press the Less- pad to decrease the temperature.
3. Press Bake pad again or wait four seconds.
BAKEwill stop flashing and light in the display.
5.
6.
7. When cooking is finished, press CANCEL.
8. Remove food from the oven.
100° or the actual oven temperature will display. The
temperature will rise in 5 degree increments until the
preset temperature is reached.
4. Allow the oven to preheat for 8-15 minutes.
When the set oven temperature is reached, one long
beep will sound.
To recall the set temperature during preheat, press the
Bake pad.
Place food in the oven.
Check cooking progress. Cook longer if needed.
@
Baking Notes:
* To change the oven temperature during cooking,
press the Bake pad, then the More+ or Less- pad until
the desired temperature is displayed.
* To change the oven temperature during preheat, press
the Bake pad twice, then press the More+ or Less= pad
until the desired temperature is displayed.
* if you forget to turn off the oven, it will automatically turn
off at the end of 12 hours, if you wish to deactivate this
feature, see page 12.
Baking Differences Between Your Old
and New Oven
It is normal to notice some baking time differences between a
new oven and an old one. See"Adjusting the OvenTemperature"
on page 12.
Cook & Hold
Cook & Hold allows you to bake for a preset amount of time,
followed by a one-hour Keep Warm cycle.
To set Cook & Hold:
1. Press the Cook & Hold pad.
BAKE and HOLD flash.
* 000 lights in the display.
2. Select the oven temperature. The oven
temperature can be set from 170° to 550°. Press /
or press and hold the More+ or Less= pad. "_._ jjj/
Pressthe More+ pad to increase the temperature.
Pressthe Less- pad to decrease the temperature.
3. Press Cook & Hold again OR wait four seconds.
HOLD flashes.
00:00 flashes in the display.
4. Enter the amount of time you want to bake by pressing the
More+ or Less- pad. Bake time can be set from ten
minutes (00:10} to 11 hours, 59 minutes (11:59}.
BAKE and HOLD light in the display.
The baking time will light in the display.
The baking time will start counting down.
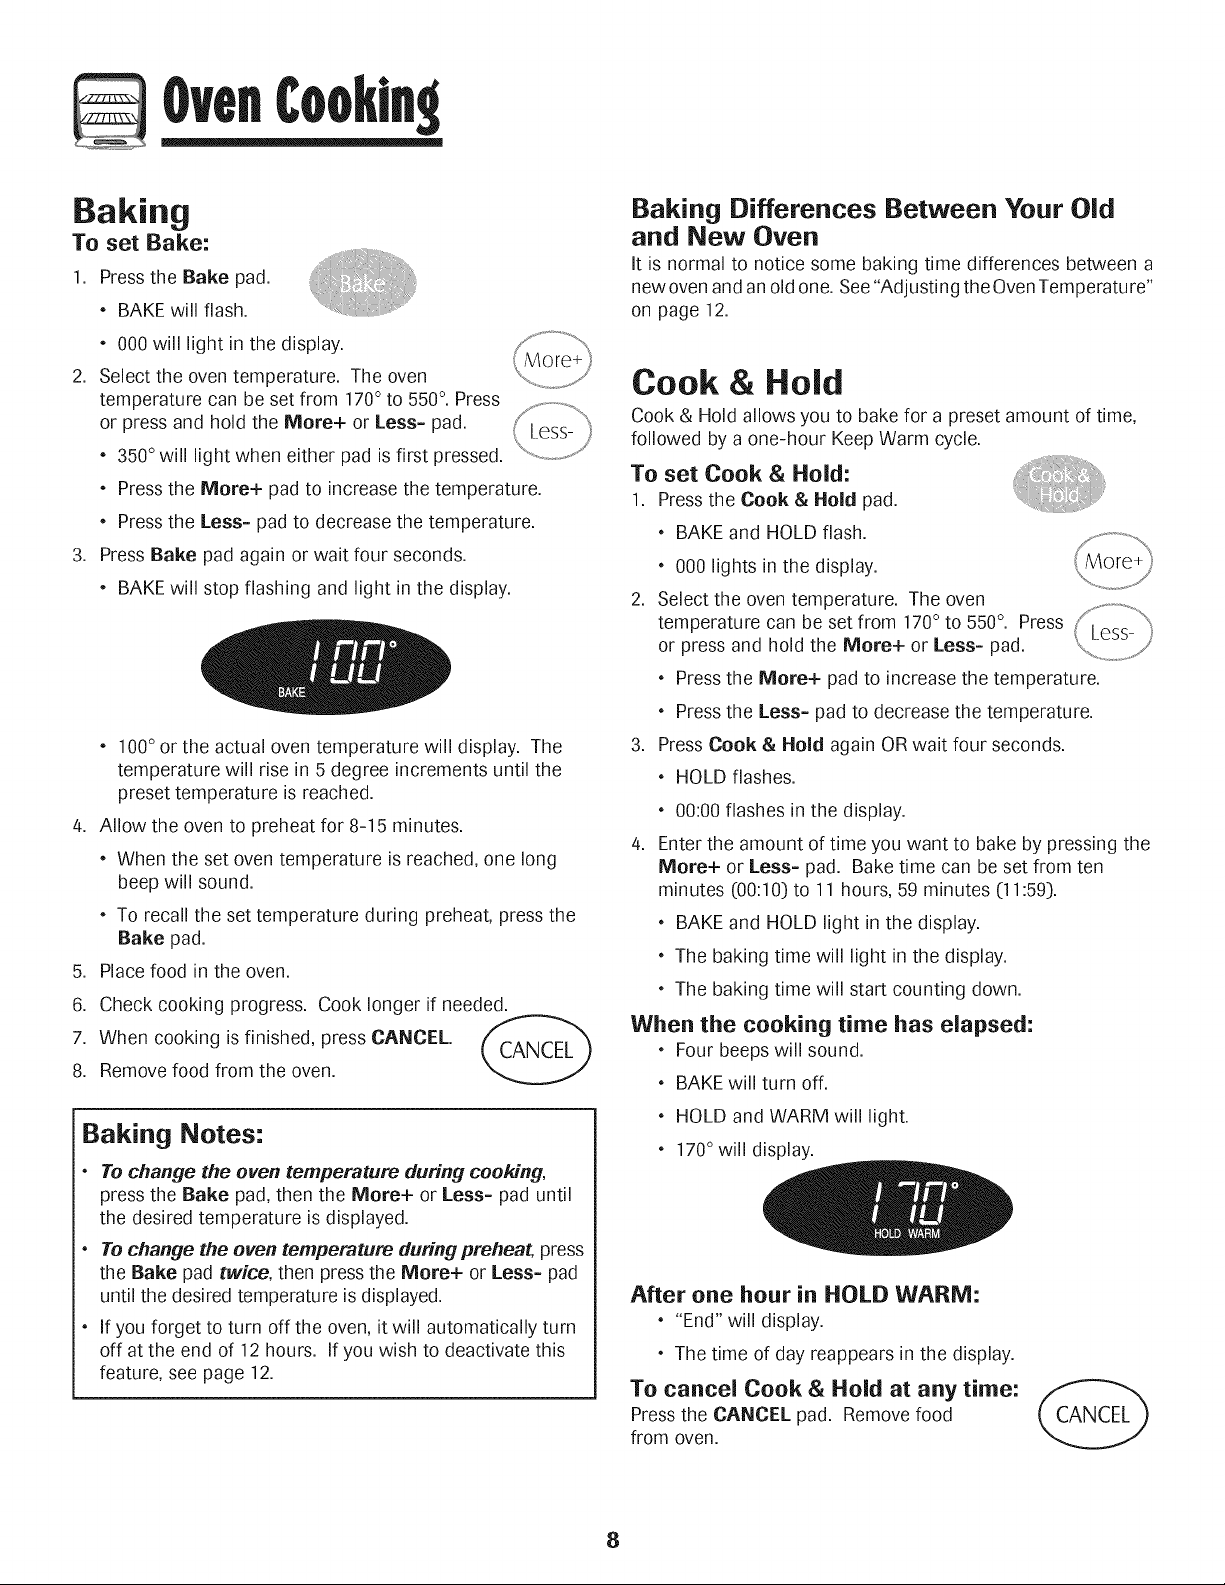
When the cooking time has elapsed:
* Four beeps will sound.
* BAKE will turn off.
* HOLD and WARM will light.
* 170°will display.
After one hour in HOLD WARM:
. "End" will display.
* The time of day reappears in the display.
To cancel Cook & Hold at any time:
Press the CANCEL pad. Remove food
from oven.
8
Delay Cook & Hold
When using Delay, the oven begins to cook later in the day.
Set the amount of time that you want to delay before the oven
turns on and how long you want to cook. The oven begins to
heat at the selected time and cooks for the specified length of
time, then keeps food warm for up to one hour.
Delay time can be set from 10 minutes (00:10) to 11 hours, 59
minutes (11:59).
To set a Delayed Cook & Hold cycle:
1. Pressthe Delay pad.
* DELAY flashes.
* 00:00 flashes in the display.
2. Pressthe More+ or Less= pad to set the
delay time.
While DELAY is still flashing:
3. Pressthe Cook & Hold pad.
* 000 lights in the display.
* BAKE and HOLD flash.
4. Press More+ pad to set the baking temperature.
* 00:00 and HOLD flash.
* BAKE stays lit.
5. Press More+ pad to set the baking time.
* The Delay time, DELAY, BAKE and HOLD light in
the display.
When the Delay time has expired:
* DELAY will turn off.
* Baking time is displayed.
* BAKE and HOLD are displayed.
To set a Delay when Cook & Hold has already
been programmed:
1. Pressthe Delay pad.
* DELAY flashes.
* 00:00 appears in the display.
2. Pressthe More+ or Less- pad to set the
delay time.
* After four seconds, DELAY will
stay lit to remind you that a delayed
cooking cycle has been set.
When the Delay time has expired and the
oven starts:
* The baking time will be displayed.
* DELAY will turn off.
* BAKE and HOLD will remain lit.
To cancel:
Press the CANCEL pad.
* All timed and untimed cooking functions will be
canceled.
* The time of day will reappear in the display.
Notes:
* Do not use delayed baking for items that require a
preheated oven, such as cakes, cookies, and breads.
* Do not use delayed baking if oven is already hot.
9
Keep Warm
For safely keeping foods warm or for warming breads
and plates.
To set Keep Warm:
1. Pressthe Keep Warm pad.
. WARM flashes.
. OOOappears in the display.
2. Select the Keep Warm temperature. The
Keep Warm temperature can be set from 145°
to 190°. Press or press and hold the More+
or Less- pad.
.170 ° will light when either pad is first pressed.
Press the More+ pad to increase the temperature.
Press the Less= pad to decrease the temperature.
WARM and the temperature will be displayed while Keep
Warm is active.
Keep Warm Notes:
For optimal food quality, oven cooked foods should be kept
warm for no longer than 1 to 2 hours.
. To keep foods from drying, cover loosely with foil or a lid.
, To warm dinner rolls:
- cover rolls loosely with foil and place in oven.
- press Keep Warm and More+ pads to set 170° F.
- warm for 12-15 minutes.
To warm plates:
- place 2 stacks of up to four plates each inthe oven.
- press Keep Warm and More+ pads to set 170° F.
- warm for five minutes, turn off the oven and leave plates
in the oven for 15 minutes more.
- use only oven-safe plates, check with the manufacturer.
- do not set warm dishes on a cold surface as rapid
temperature changes could cause crazing or breakage.
To cancel Keep Warm:
1. Press the CANCEL pad.
2. Remove food from the oven.
Changing Temp °F/°C
1. The factory default setting for temperature is Fahrenheit.
2. To change the setting, press and hold the Cancel and Bake
pads at the same time for three seconds.
3. A single beep will sound and the current setting will be
displayed (°F or °C). (if no change is made, the range will
return to the existing setting after 30 seconds.)
4. To change the setting, press the More+ or Less= pad. Press
again to return to existing setting. Wait five seconds and the
setting will be complete.
10
Broiling
To set Broil:
1. Press the Broil pad.
* BROIL flashes.
* SEt is displayed.
2. Press the More+ pad to set Hi Broil or press the Less=
pad to set LO Broil.
* Hi or LO will be displayed.
* Select HI broil (550° F) for normal broiling. Select
LO broil (450° F) for low-temperature broiling of longer
cooking foods such as poultry.
3. After four seconds, the oven will start.
* BROIL will remain lit.
4.
5.
.
7.
For optimum browning, preheat broil element for 3-4
minutes before adding food.
Place food in the oven. Leave oven door open about four
inches (the first stop).
Turn meat once about halfway through cooking.
When food is cooked, press the CANCEL
pad. Remove food and broiler pan from
the oven.
* The time of day will reappear in the display.
Broil Notes:
For best results when broiling, use a pan designed for
broiling.
Expect broil times to increase and browning to be
slightly lighter if appliance is installed on a 208-volt
circuit.
HI is used for most broiling. Use LO broil when broiling
longer cooking foods. The lower temperature allows
food to cook to the well done stage without excessive
browning.
To change the oven temperature during broiling,
press the Broil pad and then press the More+ or Less=
pad to switch between LO and HI broil.
Broil times may be longer when the lower broiling
temperature is selected.
Most foods should be turned halfway through broiling
time.
Broiling Chart
Beef
Steak, 1" thick
Hamburgers, 3/4" thick
Pork
Bacon
Chops, 1"
Ham - precooked slice, 1/2" thick
Poultry
Chicken Pieces
Seafood
Fish Steaks, buttered, 1" thick
Fillet_
The top rack position is #5.
4
4
4
4
4
4
Medium
Well Done
Well Done
Well Done
Well Done
Warm
15- 18 minutes
19 - 23 minutes
15- 18 minutes
6- 10 minutes
22 - 26 minutes
8- 12 minutes
LO Broil
3 or 4 Well Done 28 - 38 minutes
4
4
Flaky
Flak_
Note: This chart is a suggested guide. The times may vary with the food being cooked.
11
10 - 15 minutes
8- 12 minutes
Automatic Shut=Off/
Sabbath Mode
The oven will automatically turn off after 12 hours if you
accidentally leave it on. This safety feature can be turned off.
To cancel the 12-hour shut=off and run the
oven continuously for 72 hours:
1. Set the oven to bake (see page 8:).
2. Press and hold the Clock pad for five seconds.
SAb will be displayed and flash for five seconds.
SAb will then be displayed continuously until turned
off or until the 72-hour time limit is reached.
BAKEwill also be displayed if a bake cycle is in use
while the oven is in Sabbath Mode.
BAKE b the only function that operates during the
Sabbath Mode. A# other functions (Timer, Keep Warm,
Clean, etc.) are locked out during the Sabbath Mode.
To cancel Bake when in Sabbath Mode:
Press CANCEL.
BAKEwill turn off in the display.
No beeps will sound,
To cancel the Sabbath Mode:
1. Press the Clock pad for five seconds.
OR
2. After 72 hours, the Sabbath Mode will end.
SAb will flash for five seconds.
The time of day will return to the display.
Adjusting the Oven Temperature
Oven temperatures are carefully tested for accuracy at the
factory. It is normal to notice some baking or browning
differences between a new oven and an old one. As ranges
get older, the oven temperature can shift.
You may adjust the oven temperature if you think the oven is
not baking or browning correctly. To decide how much to
change the temperature, set the temperature 25° higher or
lower than your recipe recommends, then bake. The results
of the "test" should give you an idea of how much to adjust
the temperature.
To adjust the oven temperature:
1. Press Bake.
2.
3.
Enter 550° by pressing the More+ pad.
Press and hold the Bake pad for several
seconds or until 0° appears in the display.
If the oven temperature was previously adjusted, the
change will be displayed. For example, if the oven
temperature was reduced by 15 degrees the display will
show -15°.
4. Press the More+ or Less- pad to adjust the temperature.
Each time a pad is pressed, the temperature changes by 5
degrees. The oven temperature can be increased or
decreased by 5 to 35 degrees.
5. The time of day will automatically reappear in the display.
You do not need to readjust the oven temperature if there
is a power failure or interruption. Broiling, Keep Warm and
Cleaning temperatures cannot be adjusted.
Sabbath Mode Notes:
Sabbath Mode can be turned on at any time with or
without the oven on.
Sabbath Mode cannot be turned on if the touchpads are
locked out or when the door is locked.
If the oven is baking when Sabbath Mode is set, BAKE
will go out at the end of the baking cycle. There will be
no audible beeps.
If the oven light is desired while in Sabbath Mode, it
must be turned on before the Sabbath Mode is started.
When the Sabbath Mode is started, no preheat beep will
sound.
All prompts, messages and beeps are deactivated when
Sabbath Mode is active.
The automatic door lock does not operate during the
Sabbath Mode.
Pressing CANCEL will cancel a Bake cycle, however the
control will stay in the Sabbath Mode.
If power fails, the oven will power up in Sabbath Mode with
72 hours remaining and no cycle active.
12
Oven Fan
A cooling fan will automatically turn on during all broiling and
some baking operations. It is used to keep internal parts on
the control panel cool. The fan will automatically turn off
when parts have cooled. The fan may continue to operate
after the oven has been turned off. This is normal.
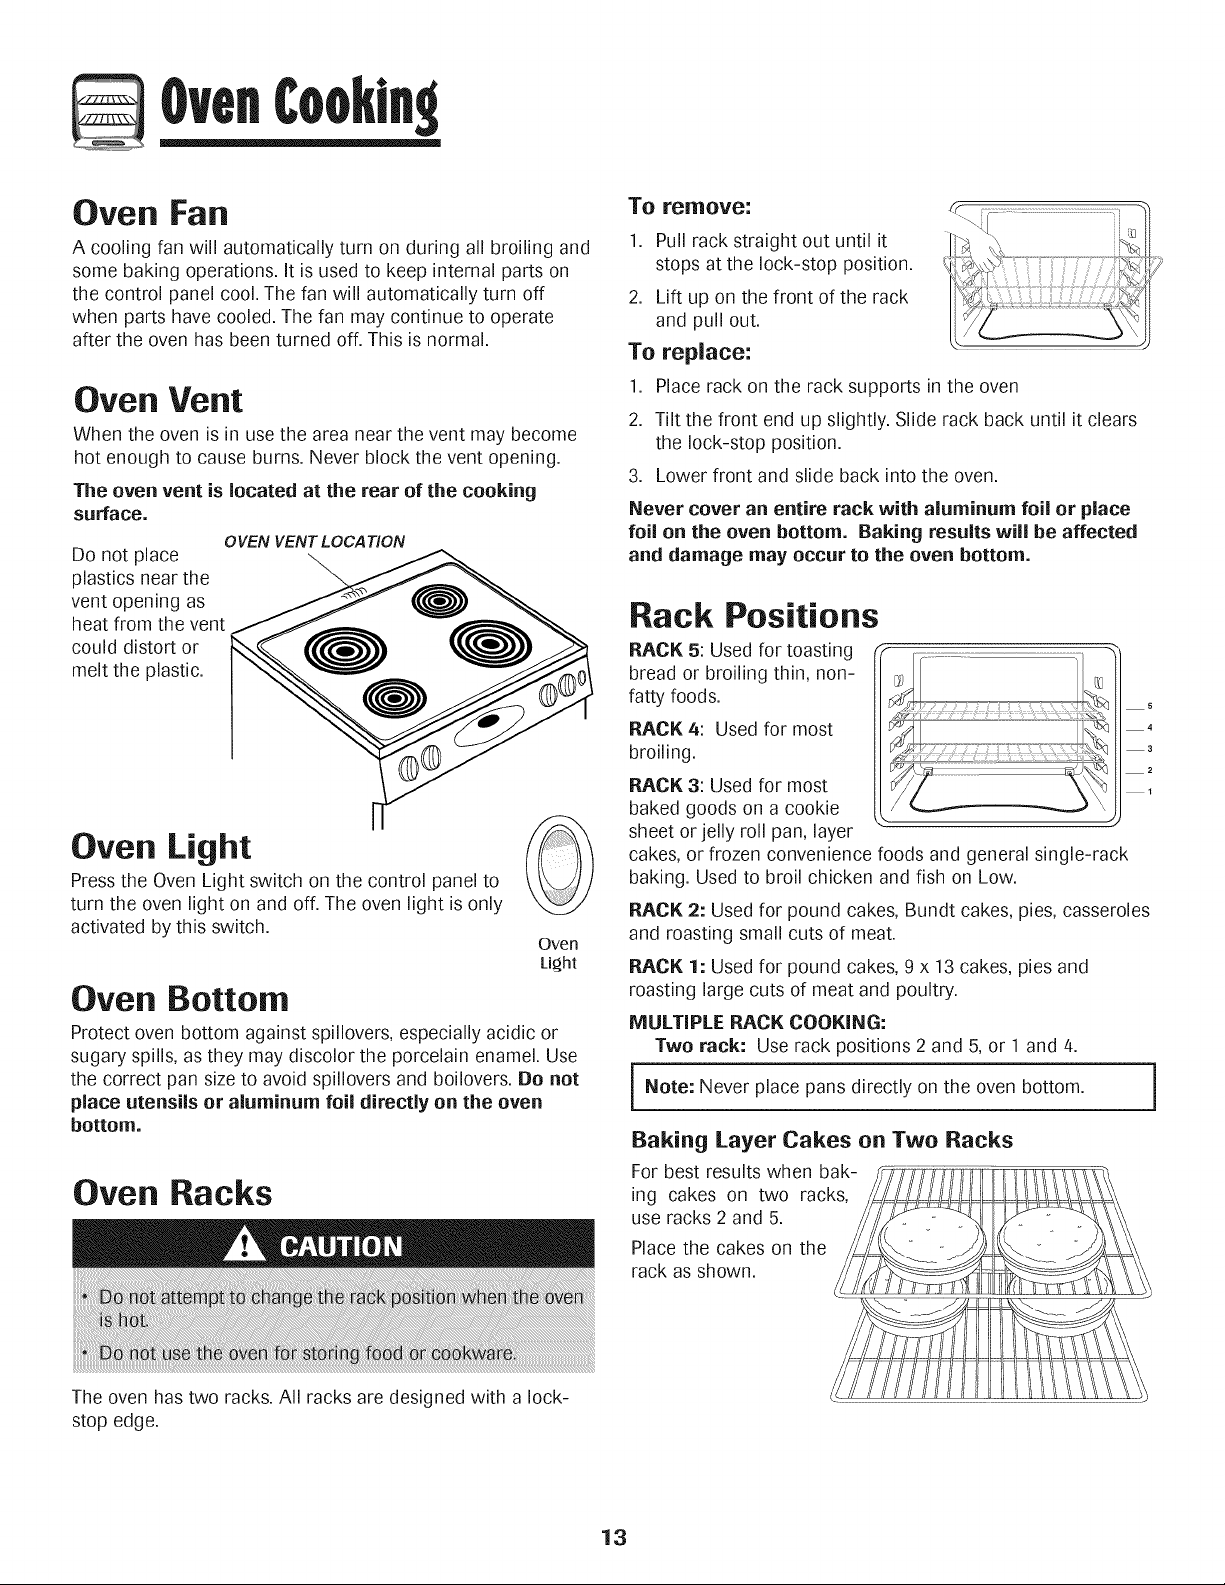
Oven Vent
When the oven is in use the area near the vent may become
hot enough to cause burns. Never block the vent opening.
The oven vent is located at the rear of the cooking
surface.
OVEN VENT LOCATION
Do not place
\
plastics near the \
vent opening as
heat from the vent
could distort or
melt the plastic.
Oven Light
Press the Oven Light switch on the control panel to
turn the oven light on and off. The oven light is only
activated by this switch.
Oven
Light
Oven Bottom
Protect oven bottom against spillovers, especially acidic or
sugary spills, as they may discolor the porcelain enamel. Use
the correct pan size to avoid spillovers and boilovers. Be not
place utensils or aluminum foil directly on the oven
bottom.
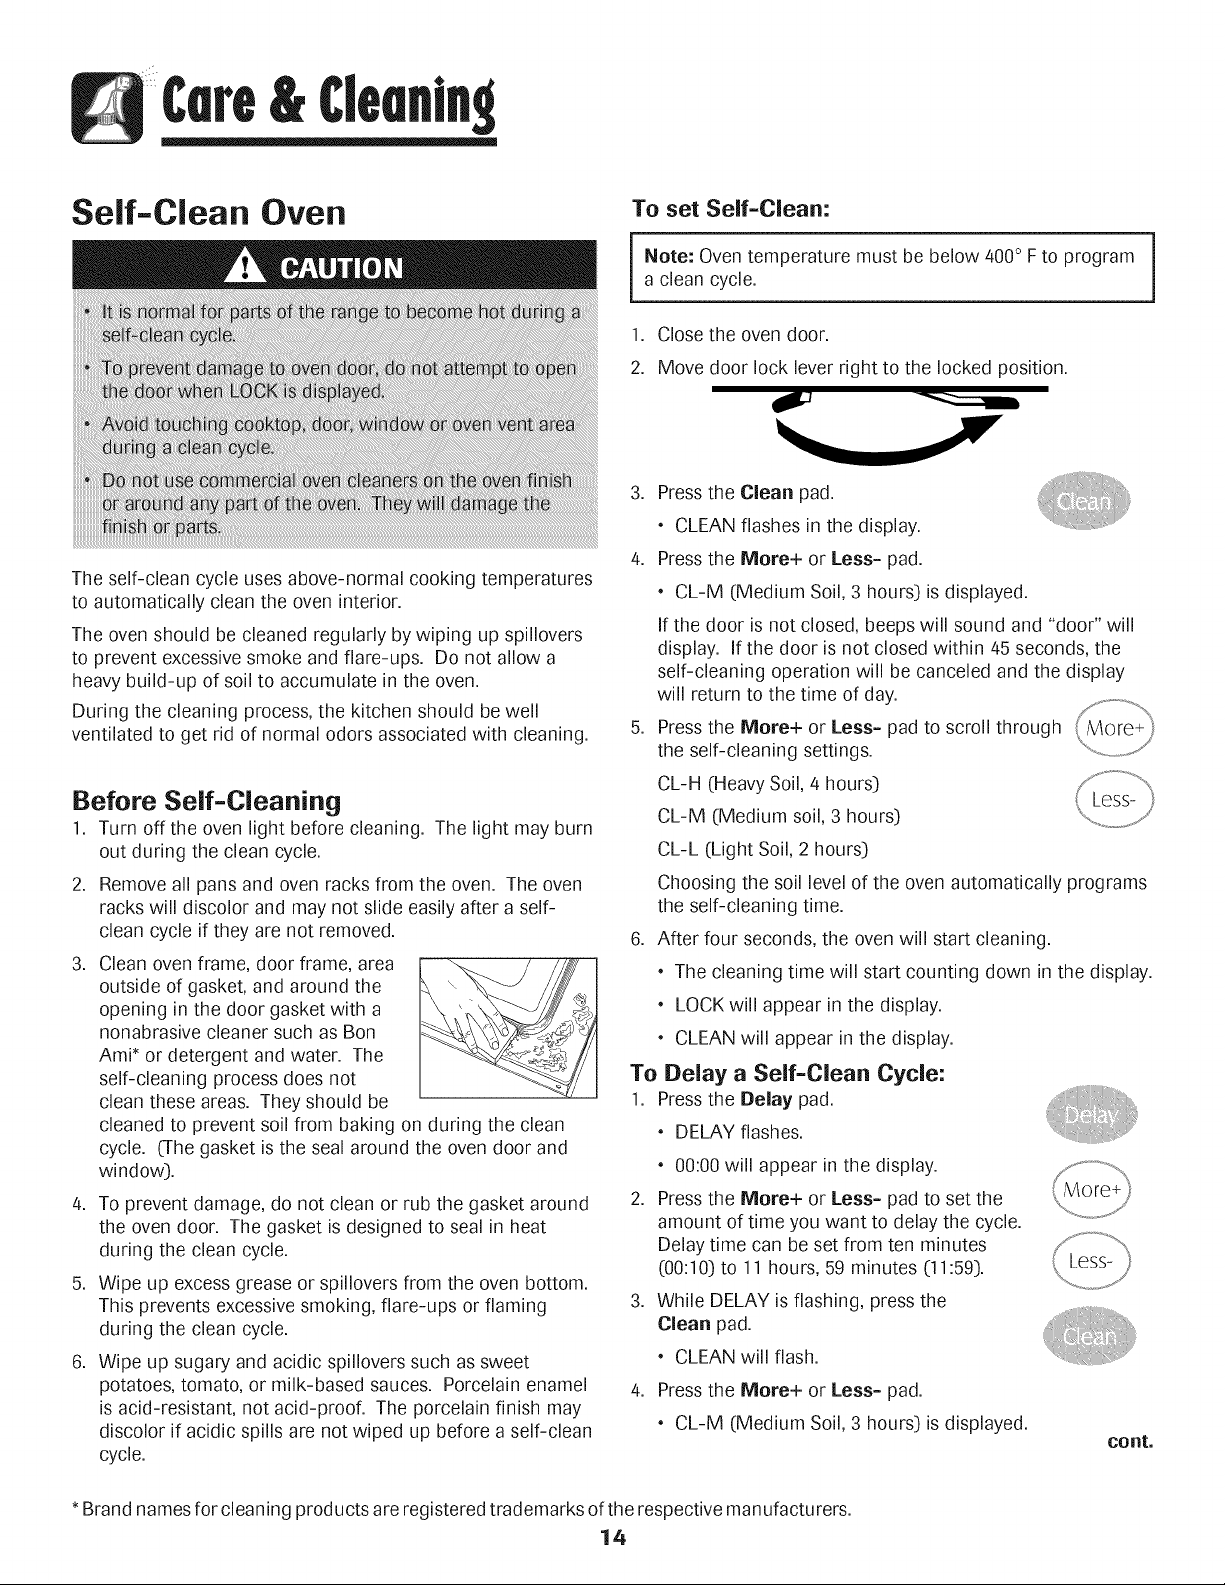
Oven Racks
To remove:
1. Pull rack straight out until it
stops at the lock-stop position.
2. Lift up on the front of the rack
and pull out.
To replace:
1. Place rack on the rack supports in the oven
2. Tilt the front end up slightly. Slide rack back until it clears
the lock-stop position.
3. Lower front and slide back into the oven.
Never cover an entire rack with aluminum foil or place
foil on the oven bottom. Baking results will be affected
and damage may occur to the oven bottom.
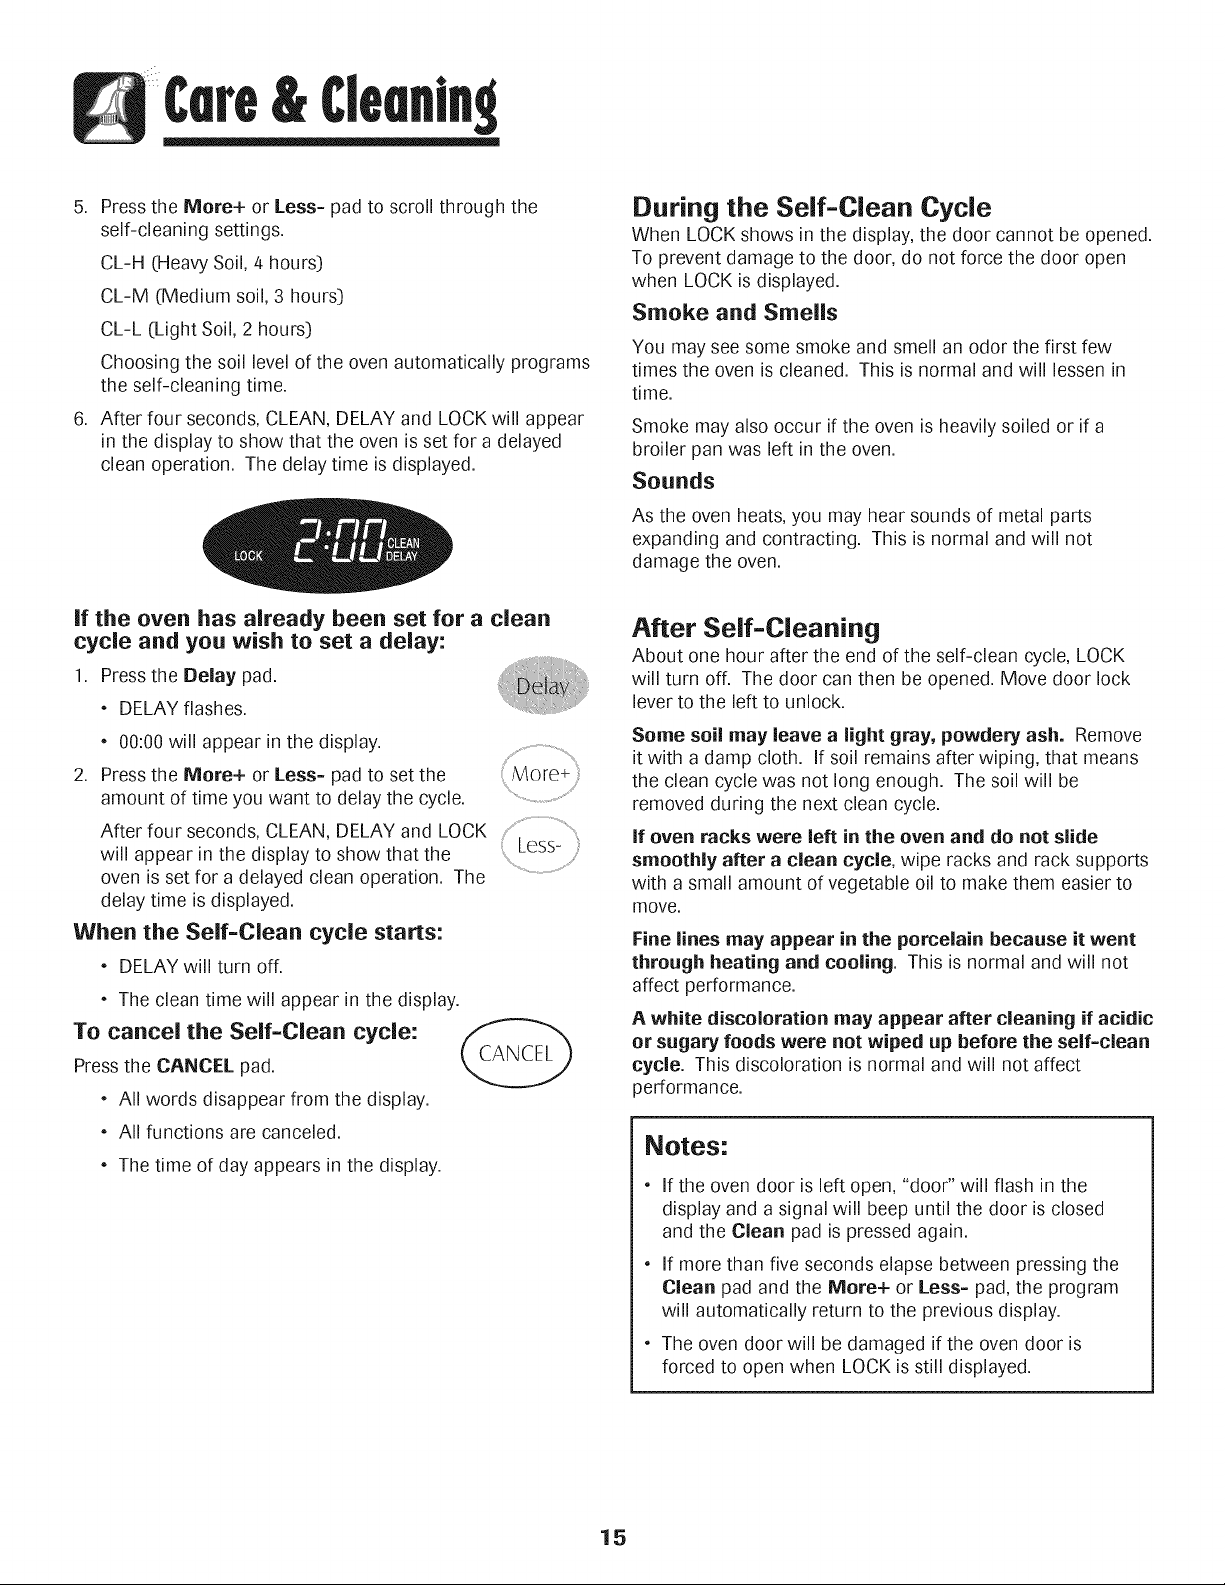
Rack Positions
RACK 5: Used for toasting
bread or broiling thin, non-
fatty foods.
RACK 4: Used for most
broiling.
RACK 3: Used for most
baked goods on a cookie
sheet or jelly roll pan, layer
5
4
3
2
1
J
cakes, or frozen convenience foods and general single-rack
baking. Used to broil chicken and fish on Low.
RACK 2: Used for pound cakes, Bundt cakes, pies, casseroles
and roasting small cuts of meat.
RACK 1: Used for pound cakes, 9 x 13 cakes, pies and
roasting large cuts of meat and poultry.
MULTIPLE RACK COOKING:
Two rack: Use rack positions 2 and 5, or 1 and 4.
Note: Never place pans directly on the oven bottom.
Baking Layer Cakes on Two Racks
The oven has two racks. All racks are designed with a lock-
stop edge.
13
Cleanin
Self-Clean Oven
To set Self=Clean:
i ote: Oven temperature must be below 400° F to program
a clean cycle.
1. Close the oven door.
2. Move door lock lever right to the locked position.
J
The self-clean cycle uses above-normal cooking temperatures
to automatically clean the oven interior.
The oven should be cleaned regularly by wiping up spillovers
to prevent excessive smoke and flare-ups. Do not allow a
heavy build-up of soil to accumulate in the oven.
During the cleaning process, the kitchen should be well
ventilated to get rid of normal odors associated with cleaning.
Before Self=Cleaning
1. Turn off the oven light before cleaning. The light may burn
out during the clean cycle.
2.
.
Remove all pans and oven racks from the oven. The oven
racks will discolor and may not slide easily after a self-
clean cycle if they are not removed.
Clean oven frame, door frame, area
outside of gasket, and around the
opening in the door gasket with a
nonabrasive cleaner such as Bon
Ami* or detergent and water. The
self-cleaning process does not
clean these areas. They should be
cleaned to prevent soil from baking on during the clean
cycle. (The gasket is the seal around the oven door and
window).
4. To prevent damage, do not clean or rub the gasket around
the oven door. The gasket is designed to seal in heat
during the clean cycle.
5. Wipe up excess grease or spillovers from the oven bottom.
This prevents excessive smoking, flare-ups or flaming
during the clean cycle.
.
Wipe up sugary and acidic spillovers such as sweet
potatoes, tomato, or milk-based sauces. Porcelain enamel
is acid-resistant, not acid-proof. The porcelain finish may
discolor if acidic spills are not wiped up before a self-clean
cycle.
3. Pressthe Clean pad.
, CLEAN flashes in the display.
4. Pressthe More+ or Less= pad.
, CL-M (Medium Soil, 3 hours) is displayed.
If the door is not closed, beeps will sound and "door" will
display. If the door is not closed within 45 seconds, the
self-cleaning operation will be canceled and the display
will return to the time of day.
S j,,,,, ..................
5. Pressthe More+ or Less= pad to scroll through ( More+ )
the self-cleaning settings. '"........................J
CL-H (Heavy Soil, 4 hours)
CL-M (Medium soil, 3 hours)
CL-L (Light Soil, 2 hours)
Choosing the soil level of the oven automatically programs
the self-cleaning time.
6. After four seconds, the oven will start cleaning.
, The cleaning time will start counting down in the display.
, LOCK will appear in the display.
, CLEAN will appear in the display.
To Delay a Self=Clean Cycle:
1. Pressthe Delay pad.
, DELAY flashes.
, OO:OOwill appear in the display.
2. Pressthe More+ or Less= pad to set the
amount of time you want to delay the cycle.
Delay time can be set from ten minutes
(00:10) to 11 hours, 59 minutes (11:59).
3. While DELAY is flashing, press the
Clean pad.
, CLEAN will flash.
4. Pressthe More+ or Less= pad.
, CL-M (Medium Soil, 3 hours) is displayed.
cont.
* Brand names for cleaning products are registered trademarks of the respective manufacturers.
14
5. Press the More+ or Less= pad to scroll through the
self-cleaning settings.
CUH (Heavy Soil, 4 hours)
CL-M (Medium soil, 3 hours)
CL-L (Light Soil, 2 hours)
Choosing the soil level of the oven automatically programs
the self-cleaning time.
6. After four seconds, CLEAN, DELAY and LOCK will appear
in the display to show that the oven is set for a delayed
clean operation. The delay time is displayed.
During the Self=Clean Cycle
When LOCK shows in the display, the door cannot be opened.
To prevent damage to the door, do not force the door open
when LOCK is displayed.
Smoke and Smells
You may see some smoke and smell an odor the first few
times the oven is cleaned. This is normal and will lessen in
time.
Smoke may also occur if the oven is heavily soiled or if a
broiler pan was left in the oven.
Sounds
As the oven heats, you may hear sounds of metal parts
expanding and contracting. This is normal and will not
damage the oven.
|fthe oven has already been setfor a clean
cycle and you wishto seta delay:
1. Press the Belay pad.
DELAY flashes.
00:00 will appear in the display.
2. Press the More+ or Less= pad to set the
amount of time you want to delay the cycle.
After four seconds, CLEAN, DELAY and LOCK ....................................
will appear in the display to show that the t Less- )
oven is set for a delayed clean operation. The
delay time is displayed.
When the Self=Clean cycle starts:
DELAY will turn off.
The clean time will appear in the display.
To cancel the Self=Clean cycle:
Press the CANCEL pad.
All words disappear from the display.
All functions are canceled.
The time of day appears in the display.
After Self=Cleaning
About one hour after the end of the self-clean cycle, LOCK
will turn off. The door can then be opened. Move door lock
lever to the left to unlock.
Some soil may leave a light gray, powdery ash. Remove
it with a damp cloth. If soil remains after wiping, that means
the clean cycle was not long enough. The soil will be
removed during the next clean cycle.
If oven racks were left in the oven and do not slide
smoothly after a clean cycle, wipe racks and rack supports
with a small amount of vegetable oil to make them easier to
move.
Fine lines may appear in the porcelain because it went
through heating and cooling. This is normal and will not
affect performance.
A white discoloration may appear after cleaning if acidic
or sugary foods were not wiped up before the self=clean
cycle. This discoloration is normal and will not affect
performance.
Notes:
If the oven door is left open, "door" will flash in the
display and a signal will beep until the door is closed
and the Clean pad is pressed again.
If more than five seconds elapse between pressing the
Clean pad and the More+ or Less- pad, the program
will automatically return to the previous display.
The oven door will be damaged if the oven door is
forced to open when LOCK is still displayed.
15

Cleaning Procedures
* Brand names are registered trademarks of the
respective manufacturers.
** To order call 1-877-232-6771 USA or
1-800-688-8408 Canada.
Cooktop -
Porcelain Enamel
Clock and
Control Pad
Area
Control Knobs
Drip Bowls =
Porcelain
Oven Window
and Door = Glass
Oven Interior
Porcelain enamel is glass fused on metal and may crack or chip with misuse. It isacid resistant, not acid
proof. All spillovers, especially acidic or sugary spillovers, should be wiped up immediately with a dry cloth.
. When cool, wash with soapy water, rinse and dry.
. Never wipe off a warm or hot surface with a damp cloth. This may cause cracking or chipping.
. Never use oven cleaners, abrasive or caustic cleaning agents on exterior finish of range.
. To activate control lock for cleaning, see "Locking the Controls" page 7.
. Wipe with a damp cloth and dry. Do not use abrasive cleaning agents as they may scratch the finish.
', Glass cleaners may be used if sprayed on a cloth first. DO NOT spray directly on controlpadand
display area.
. Remove knobs in the OFF position by pulling forward.
. Wash, rinse and dry. Do not use abrasive cleaning agents as they may scratch the finish.
. Turn on each element to be sure the knobs have been correctly replaced.
Porcelain may discolor or craze if overheated. This is normal and will not affect cooking performance.
. When cool, wash after each use, rinse and dry to prevent staining or discoloration. May bewashed in the
dishwasher.
. To clean heavy soil, soak in hot sudsy water, then use a mild abrasive cleaner such as Soft Scrub* and a
plastic scouring pad.
. For burned on soil, remove from range, place on newspapers and carefully spraywith commercial oven
cleaner. (Do not spray surrounding surfaces.) Place in plastic bag and allowto soak several hours. Wearing
rubber gloves, remove from bag, wash, rinse and dry.
. Avoid using excessive amounts of water which may seep under or behind glass causing staining.
. Wash with soap and water. Rinsewith clearwater and dry. Glass cleaner can be used if sprayed on a cloth
first.
. Do not use abrasive materials such as scouring pads, steelwool or powdered cleaners as they will scratch
glass.
', Follow instructionson page 14-15 to set a self-clean cycle.
16
Cleanln l
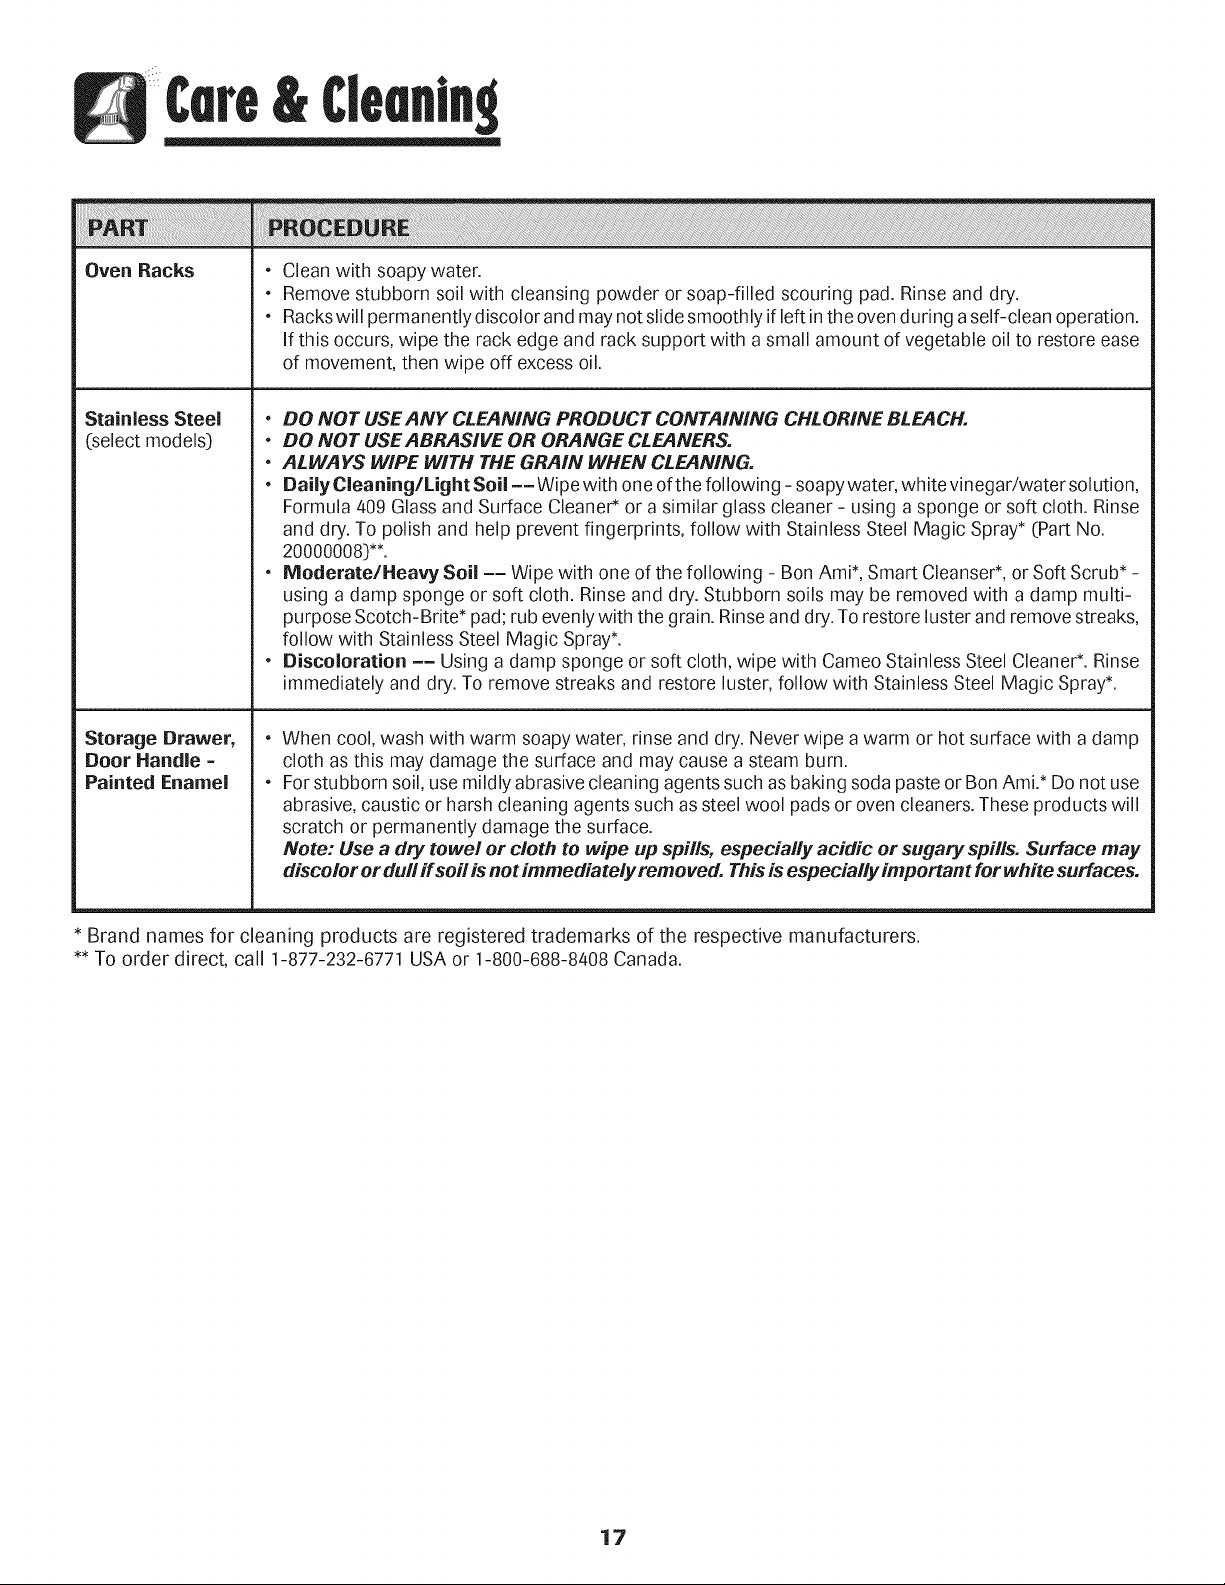
Oven Racks
Stainless Steel
(select models)
Storage Drawer,
Door Handle =
Painted Enamel
e
e
e
Clean with soapy water.
Remove stubborn soil with cleansing powder or soap-filled scouring pad. Rinse and dry.
Rackswill permanently discolor and may not slide smoothly if left in the oven during a self-clean operation.
If this occurs, wipe the rack edge and rack support with a small amount of vegetable oil to restore ease
of movement, then wipe off excess oil.
* DO NOT USEANY CLEANING PRODUCT CONTAINING CHLORINE BLEACH.
* DO NOT USEABRASIVE OR ORANGE CLEANERS.
* ALWAYS WIPE WITH THE GRAIN WHEN CLEANING.
', Daily Cleaning/Light Soil ==Wipe with one of the following - soapywater, white vinegar/water solution,
Formula 409 Glass and Surface Cleaner* or a similar glass cleaner - using a sponge or soft cloth. Rinse
and dry. To polish and help prevent fingerprints, follow with Stainless Steel Magic Spray* (Part No.
20000008)**.
* Moderate/Heavy Soil == Wipe with one of the following -Bon AmP, Smart Cleanser*, or Soft Scrub* -
using a damp sponge or soft cloth. Rinse and dry. Stubborn soils may be removed with a damp multi-
purpose Scotch-Brite* pad; rub evenly with the grain. Rinse and dry. To restore luster and remove streaks,
follow with Stainless Steel Magic Spray*.
* Discoloration == Using a damp sponge or soft cloth, wipe with Cameo Stainless Steel Cleaner*. Rinse
immediatelyand dry. To remove streaks and restore luster, follow with Stainless Steel Magic Spray*.
e
e
When cool, wash with warm soapy water, rinse and dry. Never wipe a warm or hot surface with a damp
cloth as this may damage the surface and may cause a steam burn.
For stubborn soil, use mildly abrasive cleaning agents such as baking soda paste or Bon Ami.* Do not use
abrasive, caustic or harsh cleaning agents such as steel wool pads or oven cleaners. These products will
scratch or permanently damage the surface.
Note: Use a dry towel or cloth to wipe up spills, especially acidic or sugary spills. Surface may
discolor or dull if soil is not immediately removed. Thisis especially important forwhite surfaces.
* Brand names for cleaning products are registered trademarks of the respective manufacturers.
** To order direct, call 1-877-232-6771 USA or 1-800-688-8408 Canada.
17
eintenence
Oven Door
Note: The oven door on a new range may feel "spongy" ]
when it is closed. This is normal and will decrease with use.
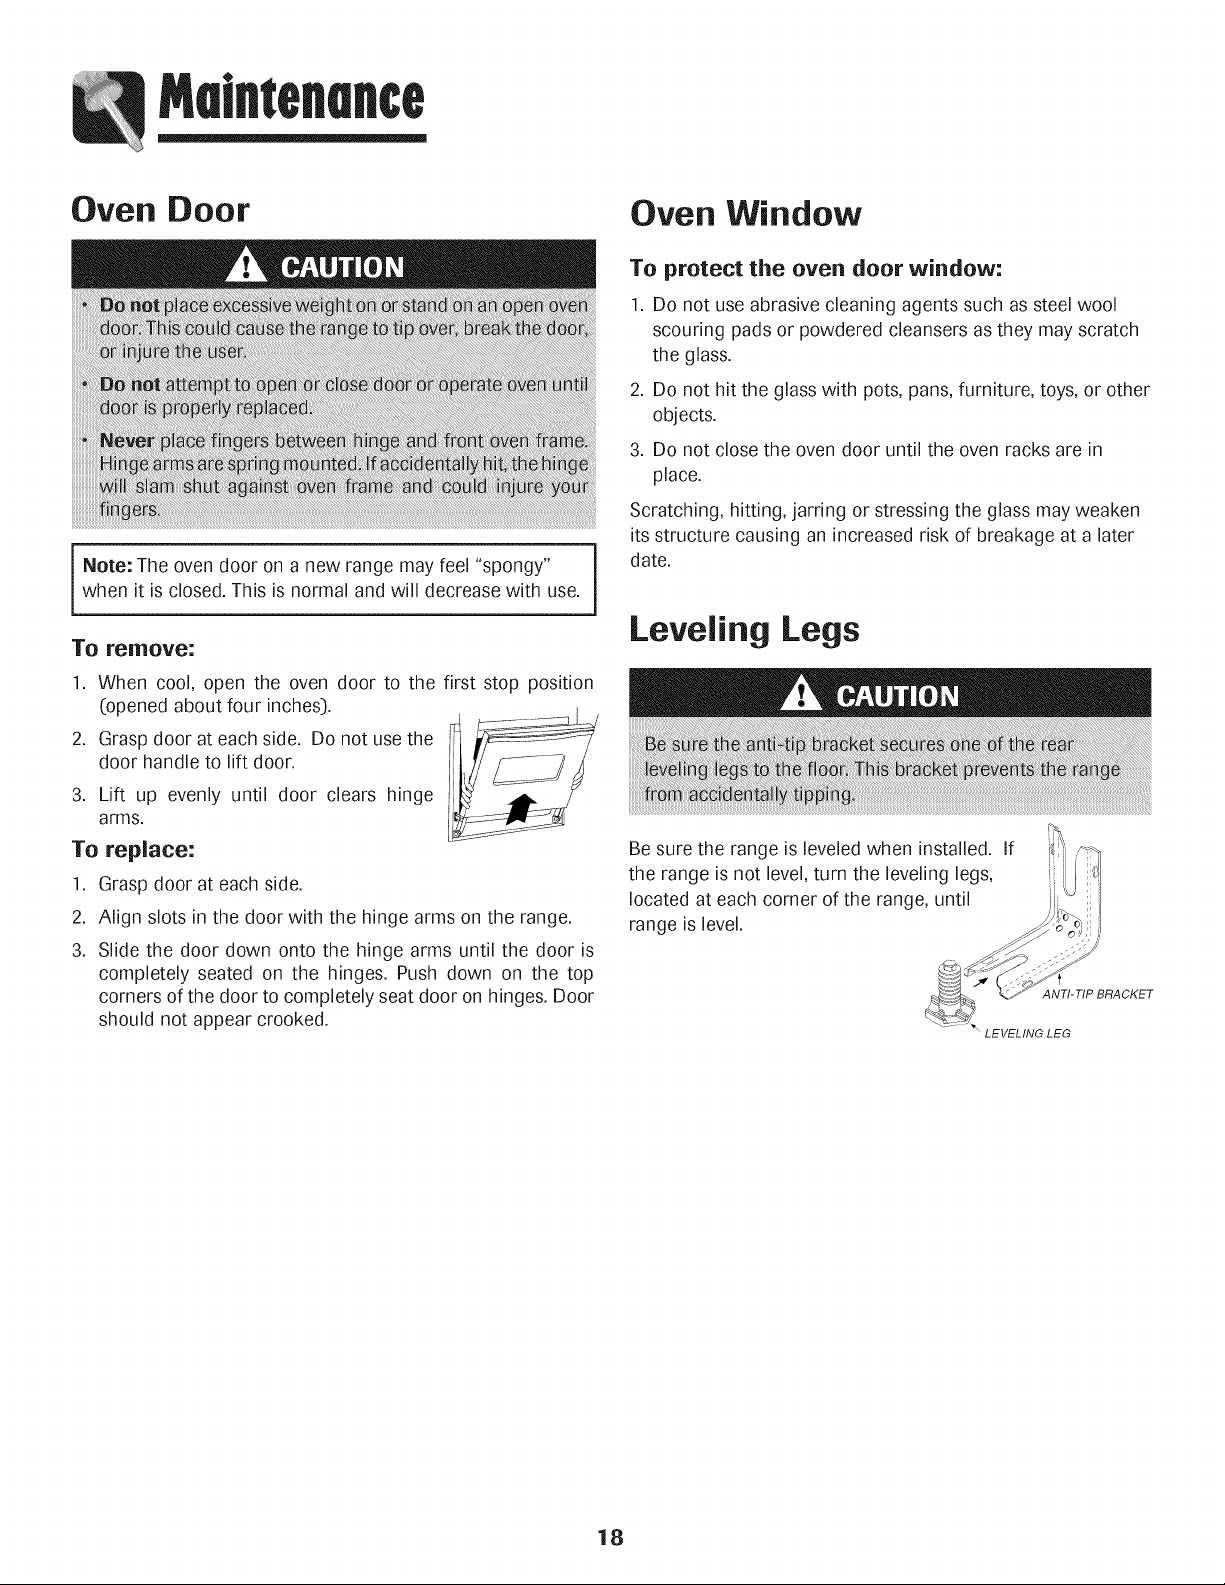
To remove:
1. When cool, open the oven door to the first stop
(opened about four inches).
2. Grasp door at each side. Do not use the
door handle to lift door.
3. Lift up evenly until door clears hinge
arms.
To replace:
1. Grasp door at each side.
2.
3.
position
Align slots in the door with the hinge arms on the range.
Slide the door down onto the hinge arms until the door is
completely seated on the hinges. Push down on the top
corners of the door to completely seat door on hinges. Door
should not appear crooked.
Oven Window
To protect the oven door window:
1. Do not use abrasive cleaning agents such as steel wool
scouring pads or powdered cleansers as they may scratch
the glass.
2. Do not hit the glass with pots, pans, furniture, toys, or other
objects.
3. Do not close the oven door until the oven racks are in
place.
Scratching, hitting, jarring or stressing the glass may weaken
its structure causing an increased risk of breakage at a later
date.
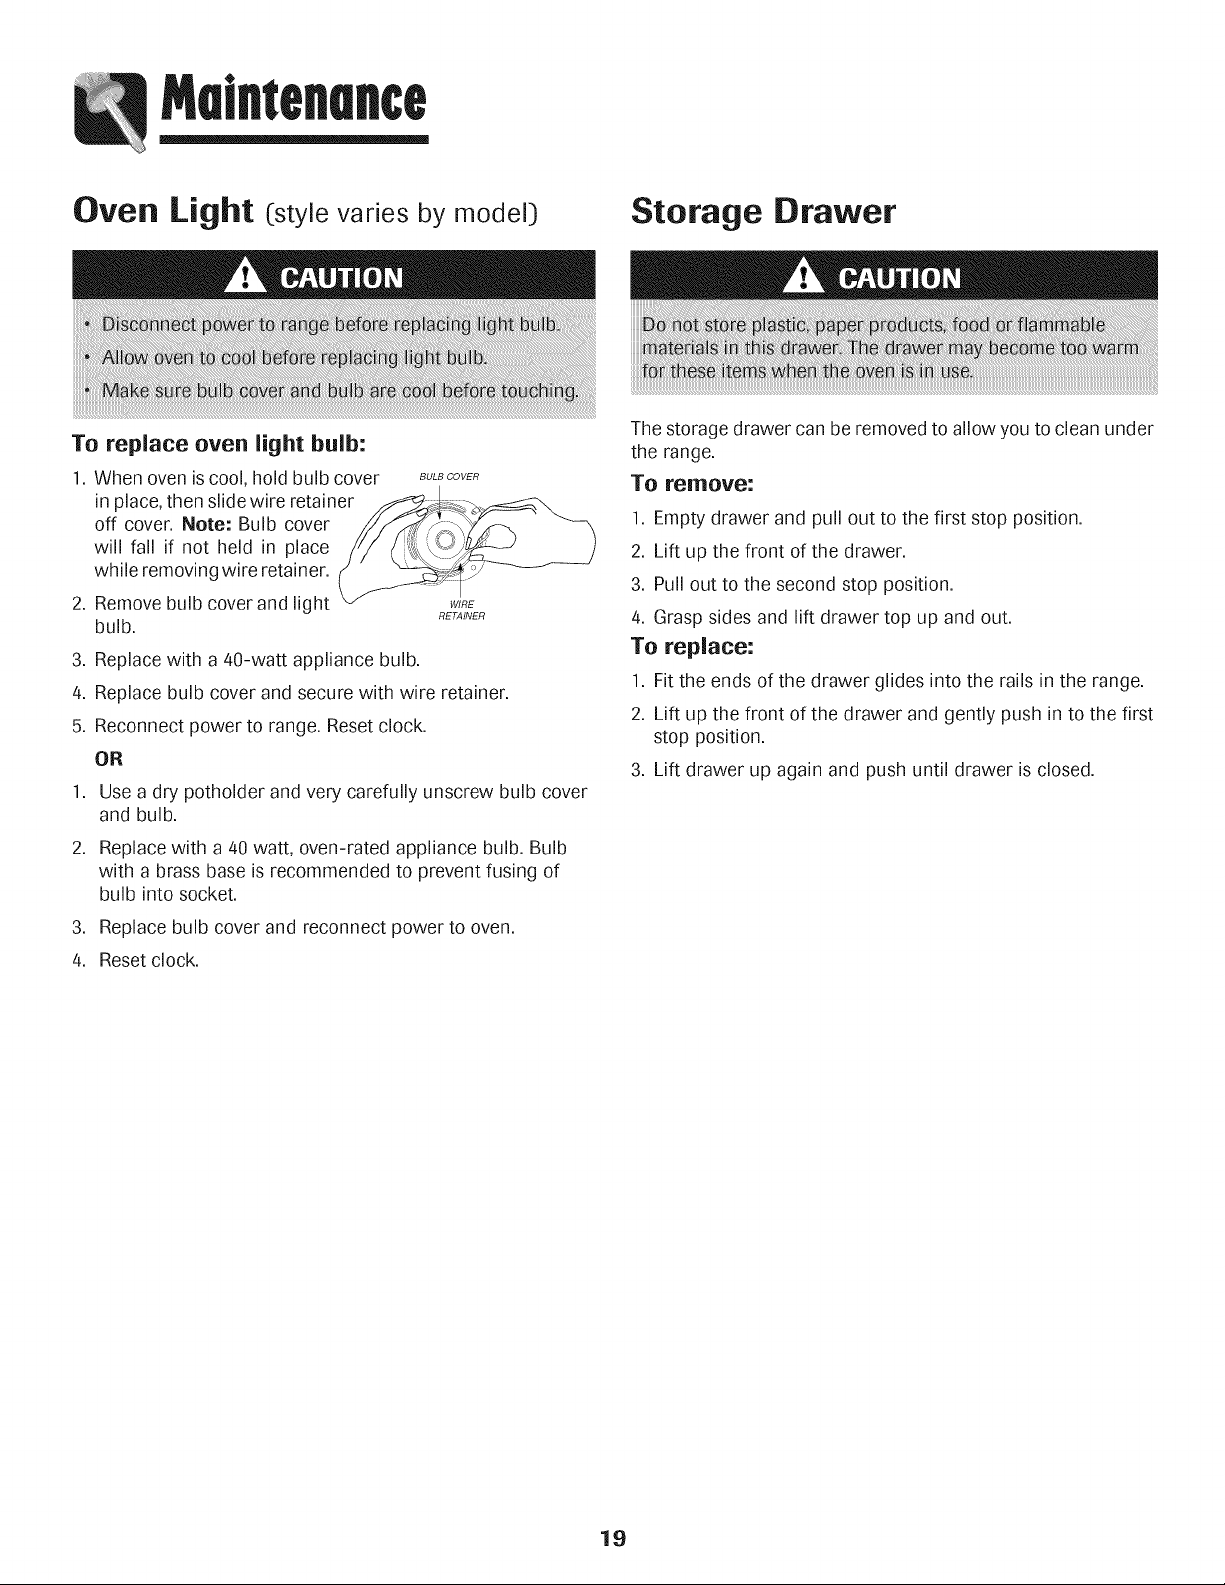
Leveling Legs
Be sure the range is leveled when installed. If
the range is not level, turn the leveling legs,
located at each corner of the range, until
range is level.
ANTI-TIP BRACKET
LEVELING LEG
18
Oven Light (style varies by model:)
Storage Drawer
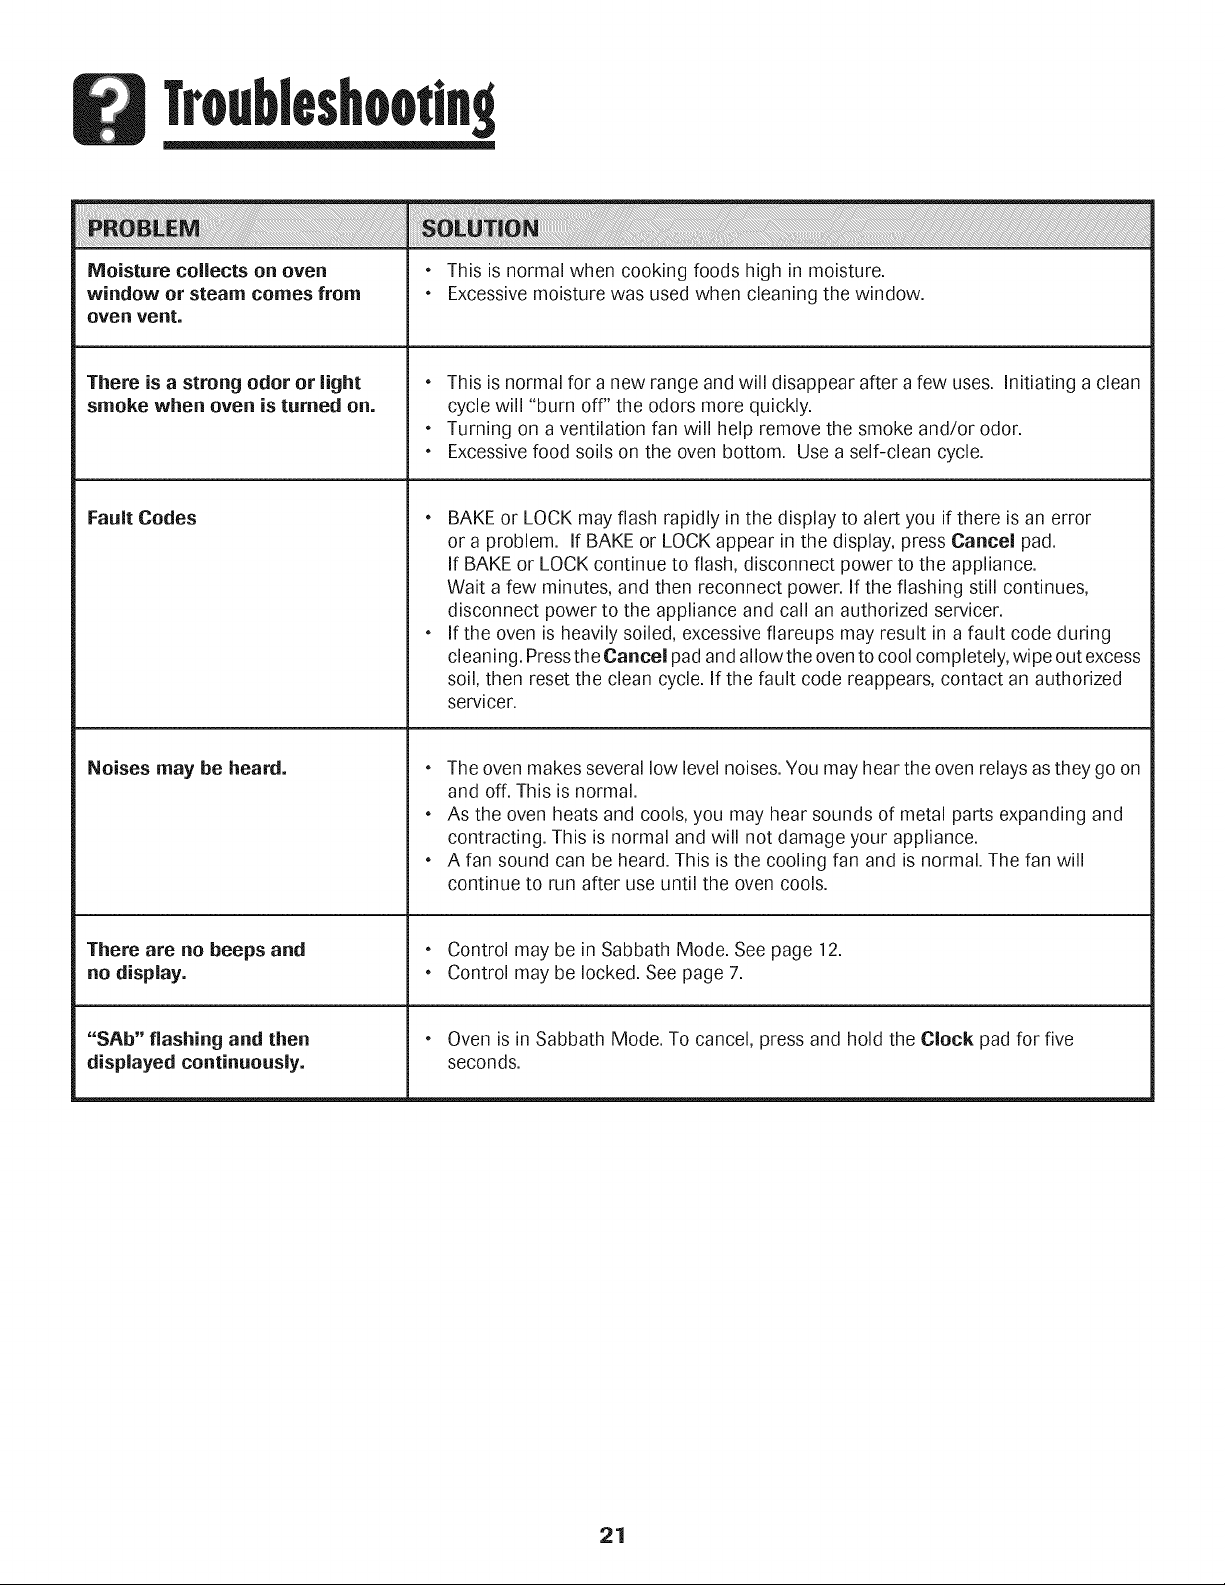
To replace oven light bulb:
1. When oven is cool, hold bulb cover
in place, then slide wire retainer
off cover. Note: Bulb cover
will fall if not held in place
while removing wire retainer.
2. Remove bulb cover and light
bulb.
BULB COVER
RETAINER
3. Replace with a 40-watt appliance bulb.
4. Replace bulb cover and secure with wire retainer.
5. Reconnect power to range. Reset clock.
OR
1. Use a dry potholder and very carefully unscrew bulb cover
and bulb.
2. Replace with a 40 watt, oven-rated appliance bulb. Bulb
with a brass base is recommended to prevent fusing of
bulb into socket.
3. Replace bulb cover and reconnect power to oven.
4. Reset clock.
The storage drawer can be removed to allow you to clean under
the range.
To remove:
1. Empty drawer and pull out to the first stop position.
2. Lift up the front of the drawer.
3. Pull out to the second stop position.
4. Grasp sides and lift drawer top up and out.
To replace:
1. Fit the ends of the drawer glides into the rails in the range.
2. Lift up the front of the drawer and gently push in to the first
stop position.
3. Lift drawer up again and push until drawer is closed.
19

Troubleshootln9
For most concerns, try these first.
Part or all of appliance does not
work.
Clock, indicator words, and/or
lights operate but oven does
not heat.
Baking results are not as
expected or differ from
previous oven.
Food is not broiling properly or
smokes excessively.
Oven will not self=clean.
Oven did not clean properly.
Oven door will not unlock after
self=clean cycle.
, Check if oven controls have been properly set.
, Check to be sure plug is securely inserted into receptacle.
, Check or re-set circuit breaker. Check or replace fuse.
, Check power supply.
, Check if surface and/or oven controls have been properly set. See pages 4 & 8.
, Check if oven door is unlocked after self-clean cycle. See page 15.
Check if oven is set for a delayed cook or clean program. See pages 9 & 14.
Check if Control Lock is activated. See page 7.
Check if control is in Sabbath Mode. See page 12.
Oven may be set for a Cook & Hold or delay function.
The Control Lock may have been set. See page 7.
e
e
e
Make sure the oven vent has not been blocked. See page 13 for location.
Check to make sure range is level.
Temperatures often vary between a new oven and an old one. As ovens age, the oven
temperature often "drifts" and may become hotter or cooler. See page 12 for
instructions on adjusting the oven temperature. Note: It is not recommended to
adjust the temperature if only one or two recipes are in question.
, Check oven rack positions. Food may be too close to element.
, Broil element was not preheated.
, Aluminum foil was incorrectly used. Never line the broiler insert with foil.
, Oven doorwas closed during broiling. Leave the door open to the first stop position
(about 4 inches:}.
, Trim excess fat from meat before broiling.
, A soiled broiler pan was used.
, Voltage in house may be low.
Check to make sure the cycle is not set for a delayed start. See page 14.
Check if door is closed.
Check if control is in Sabbath Mode. See page 12.
Oven may be over 400° F. Oven temperature must be below 400° F to program a
clean cycle.
, Longer cleaning time may be needed.
, Excessive spillovers, especially sugary and/or acidic foods, were not removed prior
to the self-clean cycle.
, Oven interior is still hot. Allow about one hour for the oven to cool after the
completion of a self-clean cycle. The door can be opened when the LOCK is not
displayed.
, The control and door may be locked. See page 15.
cont.
2O
Troubleshootln9
Moisture collects on oven
window or steam comes from
oven vent.
There is a strong odor or light
smoke when oven is turned on.
Fault Codes
Noises may be heard.
There are no beeps and
no display.
"SAb" flashing and then
displayed continuously.
, This is normal when cooking foods high in moisture.
, Excessive moisture was used when cleaning the window.
, This is normal for a new range and will disappear after a few uses. Initiating a clean
cycle will "burn off" the odors more quickly.
, Turning on a ventilation fan will help remove the smoke and/or odor.
, Excessive food soils on the oven bottom. Use a self-clean cycle.
, BAKE or LOCK may flash rapidly in the display to alert you if there is an error
or a problem. If BAKE or LOCK appear in the display, press Cancel pad.
If BAKE or LOCK continue to flash, disconnect power to the appliance.
Wait a few minutes, and then reconnect power. If the flashing still continues,
disconnect power to the appliance and call an authorized servicer.
, If the oven is heavily soiled, excessive flareups may result in a fault code during
cleaning. Pressthe Cancel pad and allow the oven to cool completely, wipe out excess
soil, then reset the clean cycle. If the fault code reappears, contact an authorized
servicer.
, The oven makes several low level noises. You may hear the oven relays as they go on
and off. This is normal.
, As the oven heats and cools, you may hear sounds of metal parts expanding and
contracting. This is normal and will not damage your appliance.
, A fan sound can be heard. This is the cooling fan and is normal. The fan will
continue to run after use until the oven cools.
, Control may be in Sabbath Mode. See page 12.
, Control may be locked. See page 7.
, Oven is inSabbath Mode. To cancel, press and hold the Clock pad for five
seconds.
21

22

MAYTAG ®MAJOR APPLIANCE WARRANTY
LIM ITED WARRANTY
For one year from the date of purchase, when this major appliance is operated and maintained according to instructions attached to or
furnished with the product, Maytag brand of Whirlpool Corporation or Whirlpool Canada LP (hereafter "Maytag") will pay for factory
specified parts and repair labor to correct defects in materials or workmanship. Service must be provided by a Maytag designated
service company. This limited warranty is valid only in the United States or Canada and applies only when the major appliance is used
in the country in which it was purchased. Outside the 50 United States and Canada, this limited warranty does not apply. Proof of
original purchase date is required to obtain service under this limited warranty.
ITEMS EXCLUDED FROM WARRANTY
This limited warranty does not cover:
1. Service calls to correct the installation of your major appliance, to instruct you on how to use your major appliance, to replace or
repair house fuses, or to correct house wiring or plumbing.
2. Service calls to repair or replace appliance light bulbs, air filters or water filters. Consumable parts are excluded from warranty
coverage.
3. Repairs when your major appliance is used for other than normal, single-family household use or when it is used in a manner that is
contrary to published user or operator instructions and/or installation instructions.
4. Damage resulting from accident, alteration, misuse, abuse, fire, flood, acts of God, improper installation, installation not in
accordance with electrical or plumbing codes, or use of consumables or cleaning products not approved by Maytag.
5. Cosmetic damage, including scratches, dents, chips or other damage to the finish of your major appliance, unless such damage
results from defects in materials or workmanship and is reported to Maytag within 30 days from the date of purchase.
6. Any food loss due to refrigerator or freezer product failures.
7. Costs associated with the removal from your home of your major appliance for repairs. This major appliance is designed to be
repaired in the home and only in-home service is covered by this warranty.
8. Repairs to parts or systems resulting from unauthorized modifications made to the appliance.
9. Expenses for travel and transportation for product service if your major appliance is located in a remote area where service by an
authorized Maytag servicer is not available.
10. The removal and reinstallation of your major appliance if it is installed in an inaccessible location or is not installed in accordance
with published installation instructions.
11. Major appliances with original model/serial numbers that have been removed, altered or cannot be easily determined. This warranty
is void if the factory applied serial number has been altered or removed from your major appliance.
The cost of repair or replacement under these excluded circumstances shall be borne by the customer.
DISCLAIMER OF IMPLIED WARRANTIES; LIMITATION OF REMEDIES
CUSTOMER'S SOLE AND EXCLUSIVE REMEDY UNDER THIS LIMITED WARRANTY SHALL BE PRODUCT REPAIR AS PROVIDED
HEREIN. IMPLIED WARRANTIES, INCLUDING WARRANTIES OF MERCHANTABILITY OR FITNESS FOR A PARTICULAR PURPOSE,
ARE LIMITED TO ONE YEAR OR THE SHORTEST PERIOD ALLOWED BY LAW. MAYTAG SHALL NOT BE LIABLE FOR INCIDENTAL
OR CONSEQUENTIAL DAMAGES. SOME STATES AND PROVINCES DO NOT ALLOW THE EXCLUSION OR LIMITATION OF
INCIDENTAL OR CONSEQUENTIAL DAMAGES, OR LIMITATIONS ON THE DURATION OF IMPLIED WARRANTIES OF
MERCHANTABILITY OR FITNESS, SO THESE EXCLUSIONS OR LIMITATIONS MAY NOT APPLY TO YOU. THIS WARRANTY GIVES
YOU SPECIFIC LEGAL RIGHTS, AND YOU MAY ALSO HAVE OTHER RIGHTS WHICH VARY FROM STATE TO STATE OR PROVINCE
TO PROVINCE.
If outside the 50 United States and Canada, contact your authorized Maytag dealer to determine if another warranty applies.
If you need service, first see the "Troubleshooting" section of the Use & Care Guide. After checking "Troubleshooting," you may find
additional help by checking the "Assistance or Service" section or by calling Maytag. In the U.S.A., call 1-800-688-9900. In Canada, call
1-800-807-6777.
9/07
Cuisinibre _lectrique encastrable
en _l_rnents spiral_s -
touches de prbcision 500
.... i_ _:i__i__iii_iiIi!_!_!_i_i_i_i_i
IS/
Table dq
importantes .......
M_thodes de nettoyage
Cuisson sur la surface ............. 29=30
Boutons de commande
lel_ments spirales
Cuisson dans le four ................ 31=38
Cuisson courante
Cuisson et maintien
Cuisson et maintien diff_r_e
Maintien au chaud
Cuisson au gril
Arr_te automatique/Mode sabbat
Grilles du four
Entretien ...................................... 43=44
Hublot du four
Lampe du four
Recherche des pannes ............ 45=46
Garantie et service apr_s=vente ....47
Guia de Uso y Cuidado ....................48
que pourrait susciter une utilisation incorrecte de I'appareil.
Utiliser I'appareil uniquement pour les fonctions pr6vues,
d6crites dans ce guide.
Pour une utilisation adequate et en s_curit_, il faut que
I'appareil soit convenablement install6 par un technicien
qualifi& et reli6 _ la terre.
Ne pas r6gler, r@arer ni remplacer un composant, _ moins que
cela ne soit sp6cifiquement recommand6 dans ce guide. Toute
autre r@aration doit 6tre effectu6e par un technicien qualifl&
Toujours d6brancher I'appareil avant d'y fake de I'entretien.
Inslructionsde
securlteimportentes
Les instructions de s6curit6 importantes et los paragraphes
_avertissement ))de ce guide ne sont pas destin6s _ couvrir
toutes les conditions et situations qui pourraient se pr6senter.
II faut faire preuve de bon sens, de prudence et de soin Iors de
I'installation, de I'entretien ou du fonctionnement de I'appareik
Toujours prendre contact avec le fabficant dans le cas de
problSmes ou de conditions qui ne seraient pas comprises.
Reconnaitre los _tiquettes, paragraphes
et symboles sur la s_curit_
Life routes los instructions avant d'utiliser cot appareil;
observer toutes les instructions pour 61iminer les risques
d'incendie, choc 61ectrique, dommages mat6riels et corporels
Utiliser une lampe torche pour d6terminer si la bride antibascu-
lement est convenablement install6e sous la cuisiniSre. L'un des
pieds arriere de r6glage de I'aplomb doit 6tre convenablement
engag6 dans la fente de la bride. Lorsque la cuisiniSre est con-
venablement cal6e, la bride antibasculement immobilise le pied
artiste contre le sol. V6rifier la parfaite immobilisation de la
cuisiniSre par la bride apres chaque d@lacement de la
cuisiniSre.
Pour viter un incendie ou des
dornmages de furn e
S'assurer que tousies mat6riaux de conditionnement sont
retir6s de I'appareil avant de le mettre en marche.
Garder les mat6riaux combustibles bien 61oign6sde I'appareik
Ne pas ranger de mat6riaux inflammables dans un four.
De nombreux types de plastique sont affect6s par la chaleur.
Garder les plastiques 61oign6s des pisces de I'appareil pouvant
devenir chaudes.
Pour emp6cher qu'un feu de graisse nese d6clare, 6viter toute
accumulation de graisse ou autres mati_res inflammables
dans I'appareil ou au voisinage.
25

securltelmportentes
En cas d'incendie
Ne jamais utiliser d'eau pour 6teindre de la graisse
enflamm6e. Utiliser du bicarbonate de soude ou un extincteur
poudre chimique ou _ mousse pour 6touffer les flammes.
1. Interrompre I'alimentation @ctrique de I'appareil pour
minimiser la propagation des flammes.
2. HE JAMAIS saisir ou d@lacer un ustensile de cuisine
enflamm6.
3. Fermer la porte du four pour 6touffer ies flammes.
Arr6ter ia hotte pour 6viter ia propagation des flammes.
leteindre ies flammes, puis mettre ia hotte en marche pour
6vacuer la fum6e et les odeurs.
S curit pour les enfants
NE ]AMAIS laisser des enfants seuls ou sans supervision
Iorsque I'appareil est en service ou encore chaud. Ne jamais
laisser un enfant s'asseoir ou se tenir sur une pattie quelconque
de I'appareil. II pourrait se blesser ou se br01er.
II est important d'enseigner aux enfants que I'appareil et les
ustensiles places dedans peuvent 6tre chauds. Laisser refroidir
les ustensiles en un lieu s0r, hors d'atteinte des enfants. II est
important d'enseigner aux enfants qu'un appareil m@ager n'est
pas un jouet, et qu'ils ne doivent toucher aucune commande ou
autre composant de I'appareil.
Farniliarisation avec I'appareil
Ne pas utiliser cet appareil pour chauffer ou pour garder
chaude une piece, sinon des dommages _ I'appareil pourraient
s'ensuivre et cela pourrait etre dangereux pour I'utilisateur.
Aussi, ne pas utiliser le four pour ranger des aliments ou des
ustensiles de cuisine.
Ne pas bloquer ou obstruer I'event du four. L'event de four est
situe _ I'arriere de la surface de cuisson.
NE JAMAIS TOUCHER LESleLleMENTSCHAUFFANTS NI LES
PAROISINTI%EURES DU FOUR.Les elements chauffants
peuvent 6tre br01ants m@e s'ils ne sont plus rouges. Les
surfaces interieures du four peuvent atteindre une temperature
suffisamment elevee pour infliger des br01ures.Pendant et
apres usage, ne pas toucher les elements chauffants ni les
patois interieures du four et eviter leur contact avec des
v6tements ou autres materiaux inflammables avant qu'ils
n'aient eu le temps de refroidir suffisamment. D'autres surfaces
peuvent egalement atteindre une temperature suffisamment
elevee pour br01er : le ouverture d'event et le surface
avoisinante, ainsi que le porte et le hublot de four.
Ne pas toucher I'ampoule du four br01ante avec un chiffon
humide car elle pourrait se briser. Si tel est le cas, d@rancher
I'appareil avant de retirer I'ampoule pour eviter une decharge
@ctrique.
NE JANIAIS garnir la sole du four ou une grille du four avec
de la feuille d'aluminium. Ceci pourrait susciter un risque de
d@harge @ctrique ou d'incendie, ou une deterioration de
I'appareil. Utiliser de la feuille d'aluminium uniquement selon
les instructions de ce guide.
Ne pas remiser des aliments ou ustensiles de cuisine sur la
table de cuisson ou dans le four.
Cuisson et s curit
NE JAIVlAIS fake chauffer un recipient non ouvert dans le
four. L'accumulation de pression dans le recipient pourrait
provoquer son eclatement et de graves dommages materiels
ou corporels.
Utiliser des maniques robustes et seches. Des maniques
humides peuvent provoquer la formation de vapeur brOlante.
Ne jamais utiliser un torchon _ vaisselle ou autre article textile
la place de maniques; un tel article pourrait trainer sur un
element et s'enflammer, ou accrocher un ustensile ou un
composant de I'appareil.
Porter un vetement approprie, leviterde porter des vetements
amples ou _ Iongues manches pendant I'utilisation de
I'appareil. IIs peuvent prendre feu si le v6tement entre en
contact avec un 61@ent de cuisson br01ant.
Placer toujours les grilles _ la position appropri@ dans le four
Iorsque le four est froid. Fake coulisser la grille vers I'ext6rieur
avant d'ajouter ou enlever un plat; utiliser pour cela une
manique robuste et sSche, leviter d'introduire la main dans le
four pour y placer ou retirer un plat. S'il est n@essaire de
d@lacer une grille Iorsqu'elle est chaude, utiliser une manique
sSche. Ne pas toucher un 61@ent chaud avec une manique.
26
instructionsdesecurltelmportentes
N'utiliser les grilles que dans le four dans lequel elles ont 6t6
achet6es/exp6di6es.
Ouvfir toujours la porte du four tres prudemment. Laisser rair
chaud ou la vapeur s'6chapper avant de retirer ou d'introduire
un plat.
AVERTISSEMENT = METS PRi_PARi_S: Respecter les
instructions du fabricant. Sile contenant ou le couvercle en
plastique d'un mets surgel6 se d6forme ou est endommag6
durant la cuisson, jeter imm6diatement le recipient et son
contenu. Les aliments pourraient 6tre contamin6s.
Ne pas permettre le contact de papier d'aluminium ou de la
sonde _ viande avec les 616ments chauffants.
Toujours 6teindre routes les commandes une fois la cuisson
termin6e.
Ustensiles et s curit
Appliquer les instructions du fabricant Iors de I'emploi d'un
sachet pour cuisson au four.
La s6curit6 de fonctionnement de cet appareil a 6t6 test6e
I'aide d'ustensiles de cuisine traditionnels. Ne pas utiliser un
ustensile ou accessoire qui n'est pas sp6cifiquement
recommand6 dans ce guide. Ne pas utiliser de couvre-
616ment,gril plac6 sur la table de cuisson ou systSme de
convection additionnel. L'utilisation d'un dispositif ou
accessoire qui n'est pas express6ment recommand6 dans ce
guide peut degrader la s6curit6 de rappareil ou sa perfor-
mance, ou r6duire la Iong6vit6 des composants.
Si un ustensile est plus petit que 1'616mentutilis& une partie
de 1'616mentchauffant est exposee et pout provoquer
I'inflammation d'un v6tement ou des maniques.
Seuls certains mat6riaux en verre, vitroc6ramique, c6ramique,
gres, ou certains ustensiles vitrifi6s/6maill6s peuvent 6tre
utilises sur la table de cuisson ou dans le four sans risque de
bfis sous reffet du choc thermique. Observer les instructions
du fabricant lots de I'utilisation d'un ustensile en verre.
Orienter la poignee de chaque ustensile vers le centre de la
table de cuisson et non vers I'exterieur ou vers un autre
element; ceci reduira le risque de brOlure, inflammation de
matiere inflammable ou renversement I:un jeune enfant
pourrait saisir et renverser un ustensile dont le manche est
oriente vers I'exterieur).
Table de cuisson
NE JAMAIS laisser un element de surface allume sans
surveillance, particuliSrement avec chauffage elev& Le
debordement du contenu de rustensile pourrait provoquer la
generation de fumee abondante et rinflammation de la
graisse.
Cet appareil comporte des elements chauffants de differentes
tallies. Utiliser toujours un ustensile _ fond plat, de taille
suffisante pour qu'il puisse recouvrir completement relement.
Pour optimiser refficacit& choisir un ustensile de meme taille
que I'element.
u
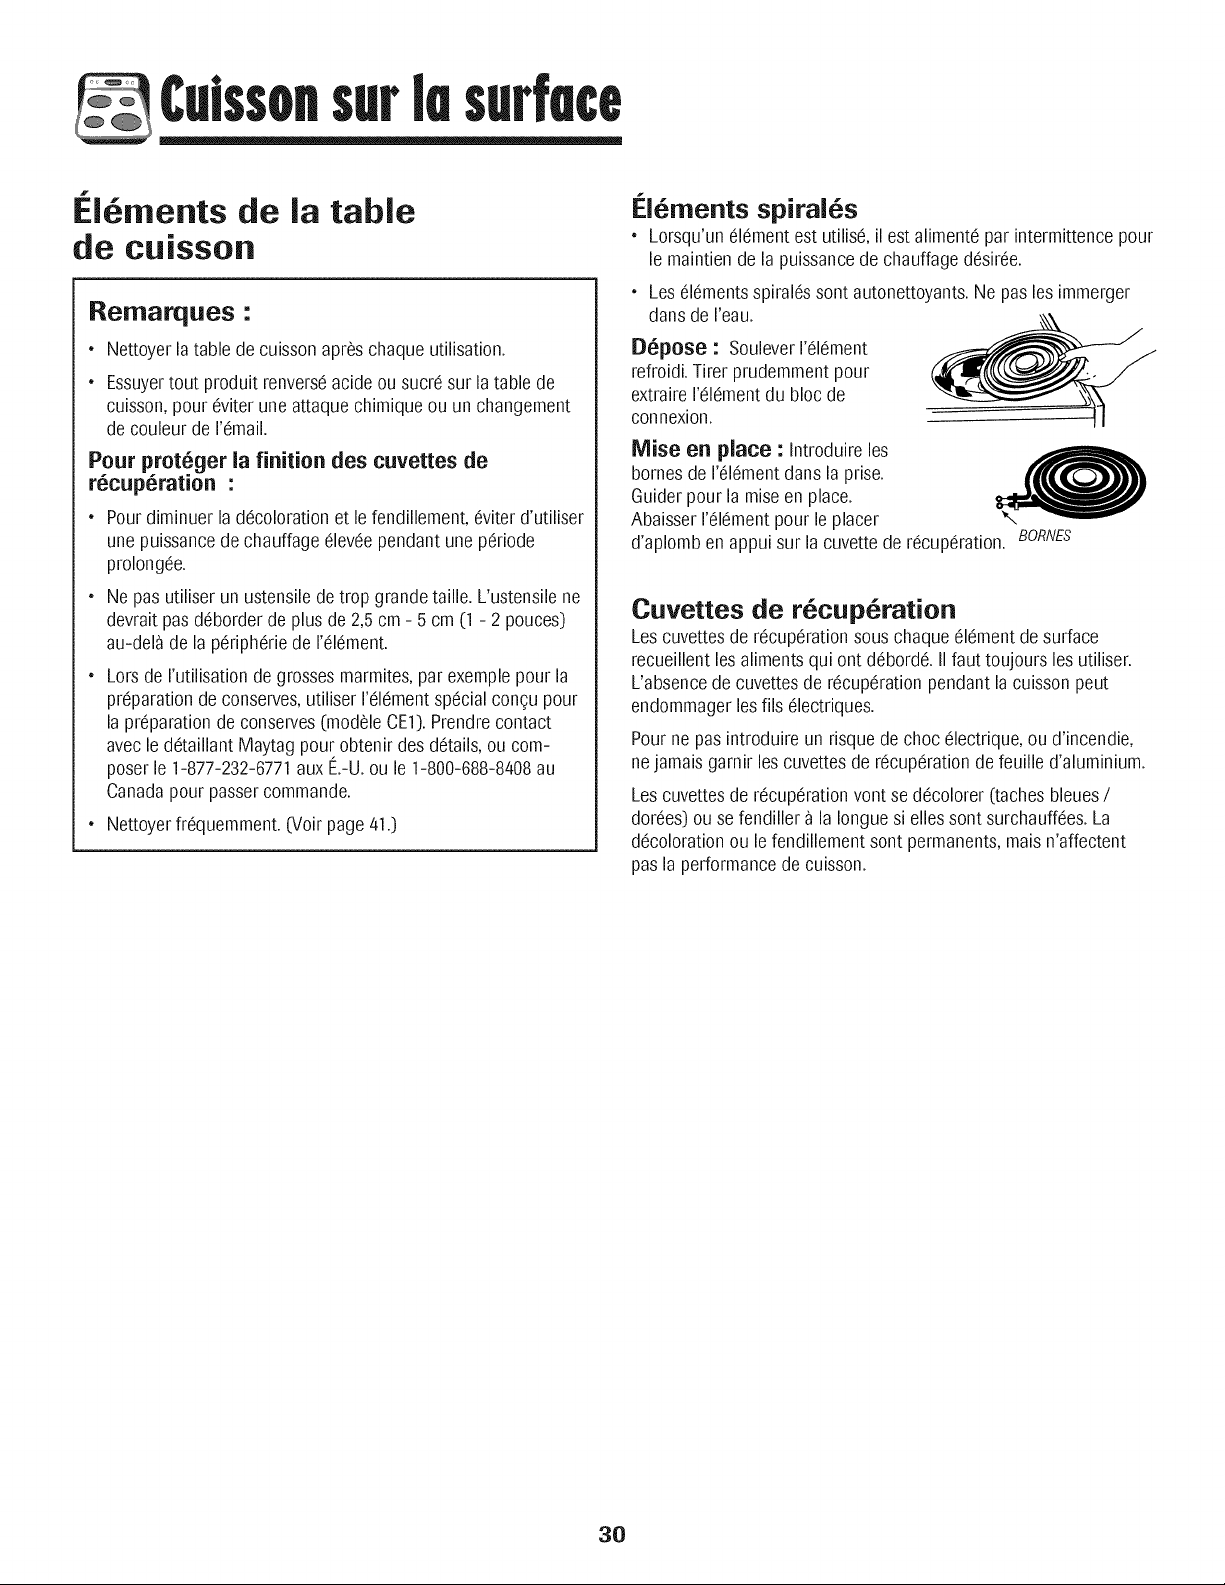
Elements spiral s
Pour eviter de deteriorer los elements chauffants amovibles, ne
pas les immerger / tremper / nettoyer dans un lave-vaisselle,
ou dans un four autonettoyant. Un element chauffant
endommage pourrait provoquer un court-circuit suscitant un
incendie ou un choc electrique.
Veiller _ ce que la cuvette de recuperation soit toujours en
place lots de rutilisation de relement; rabsence de la cuvette
de recuperation Iors d'une cuisson peut faire subir des
dommages au c_blage.
Garnitures de protection : Ne pas garnir les cuvettes de
recuperation sous les elements ou le fond du four avec de la
feuille d'aluminium, sauf Iorsque ceci est suggere dans le
guide. La mise en place d'un tel garnissage peut susciter un
risque de choc electrique ou d'incendie.
Friteuses
Exercer une prudence extreme Iors du deplacement du
recipient de graisse ou Iors de relimination de graisse chaude.
Laisser la graisse refroidir avant de deplacer rustensile.
Flottes d'extraction
Nettoyer frequemment los flltres et la hotte de la cuisiniSre
pour empecher la graisse ou d'autres produits inflammables
de s'accumuler sur les filtres ou la hotte en provoquant des
feux de graisse.
Pour flamber des aliments sous la hotte, mettre le ventilateur
en marche.
Nettoyage et s curit
Nettoyer prudemment la table de cuisson. Arreter toutes les
commandes et attendre le refroidissement de tousles
composants avant de los toucher ou d'entreprendre le
nettoyage. Nettoyer rappareil avec precaution. Travailler
prudemment pour eviter des br01ures par la vapeur en cas
d'utilisation d'un chiffon ou d'une eponge humide lots de
relimination d'un produit renverse sur une surface chaude.
Certains produits de nettoyage peuvent generer des vapeurs
nocives Iorsqu'on les applique sur une surface chaude.
Nettoyer uniquement les pieces mentionnees dans ce guide.
27
securltelmportentes
Four autonettoyant
Ne pas nettoyer le joint de porte; le joint joue un rOle essentiel
quant _ 1'etancheit& Ne pas frotter, endommager ou d@lacer
le joint.
Ne pas utiliser de produits de nettoyage pour four ou enduits
de four, dans le four autonettoyant ou sur les zones voisines.
Avertissement et avis
important pour la s_curit_
La Ioi californienne <<Safe Drinking Water and Toxic Enforce-
ment Act ))de 1986 (proposition 65] stipule la publication par
le gouverneur de la Californie d'une liste de substances que
I'etat de Californie considere comme cancerigenes ou
dangereuses pour le systeme reproducteur, et imposeaux
entreprises commerciales I'obligation de signaler _ leurs
clients les risques d'exposition _ de relies substances.
Nous informons les utilisateurs de cet appareil que lots d'une
operation d'autonettoyage, ils peuvent 6tre exposes _ une
faible concentration de certaines substances figurant dans la
liste mentionnee ci-dessus, dont le monoxyde de carbone.
Pour minimiser I'exposition, veiller _ ce que la piece o_ se
trouve le four soit convenablement aeree durant une operation
d'autonettoyage par I'ouverture d'une fenetre ou d'une porte.
AVIS IMPORTANT = OISEAUX FAMILIERS : Les oiseaux ont
un systeme respiratoire tres sensible. Ne pas garder un oiseau
familier dans la cuisine ou dans une piece o_ il pourrait 6tre
expos6 aux fumees. Les fumees 6raises durant une operation
d'autonettoyage peuvent 6tre dangereuses ou mortelles pour
un oiseau, de meme que les fumees 6raises lots du chauffage
excessif de graisse, huile, margarine, et du chauffage excessif
dans un ustensile _ revetement antiadhesif.
Conserver cos instructions pour consultation ult_rieure
28

Culssonsurlesurfece
Boutons de cornmande
PermettentI'utilisationdes elementschauffants desurface,avec une
progressioncontinuede la puissanceentre lesreglagesextremesLow
(Basse)et High (l'--levee).On peut regleron bouton _ toute position
entre cesdeux extremes.
R glage des cornrnandes
1. PlacerI'ustensilesur I'element.
2.
Enfonceret faire tourner le boutonjusqu'_ la position desiree
(rotation dans unsensou dans rautre).
Desmarquessur letableau de commandeidentifient
I'elementcommandepar chaque bouton. 0 0
Parexemple,le graphique_ droit indique Front 0 0
I'elementavant/gauche.
3. II y aun temoin lumineux pour les elementssur le tableau de
commande.LorsqueI'un des boutonsde commanded'un element
de surfaceest alimente,letemoins'illumine. Letemoin s'eteint des
qu'on interrompt I'alimentationde I'element.
4. Apres une cuisson, ramenerle bouton _ la positionOFF(Arret).
RetirerI'ustensile.
Suggestions de r6glage
Ladimensionet le typed'ustensile,letype et la quantite d'aliments
cuire, et la puissancedes elementsdeterminerontcomment regler
les boutonspourles operationsde cuisson.Certainselementsont un
reglagepreetabli pour le mijotageet la fusion qui ne necessiteque
des ajustementsmineursdansun sens ou duns rautre selon
raliment 9 preparer.Lesautreselementsont des reglagesimprimes
autour des boutonsqui sontspecifiquesde ces elements.Ajuster les
reglagesselon les chiffresqui donnent les resultatsde cuisson
desires.Les descriptionssuivantesaideront9 choisir les reglages
donnant les meilleursresultats.
Maintien au chaud : Lesalimentsrestent 9 unetemperature
superieure9 140°Fsanscontinuer9 cuire. L'alimentest audepart
unetemperatureelevee,puissa chaleurest reduite.Nejamais
utiliser le reglageMaintienau chaud pour rechaufferdes aliments
froids.
Mijotage : Desbullesse forment tout juste _ la surface.Les
alimentssont _ unetemperaturesitueeentre 185 et 200 °F.Ce
reglagepeut aussiservirpour etuver desalimentsou les pocherou
encore pourcontinuer lacuisson d'alimentssouscouvercle.
l_bullition lente : Des bullesse forment _ un rythme modere.Ce
reglagepeut aussiservirpour frire la majorite des alimentset pour
maintenirI'ebullition de grandesquantitesde liquide.
l_bullition : Des bullesse forment dans le liquide _ un rythme
rapide.Ce reglagepeut aussiservir pourfaire brunir la viande, la
faire sauteret chauffer rhuile pour faire frire avantde passer_ un
reglageinferieur.Les3 ou/4 reglagesles plus elevessur le bouton
servent_ cesoperationsde cuisson.Le reglagele pluselevesert
toujours_ porter I'eau_ ebullition.Certainselementsont memeune
vitesseplus eleveepour I'ebullition desliquides.
29
Cuissonsurlesurfece
Elements de la table
de cuisson
Remarques -
• Nettoyerla table de cuisson apreschaque utilisation.
• Essuyertout produit renverseacideou sucre sur la table de
cuisson,pour eviter une attaquechirniqueou un changernent
de couleur de I'ernail.
Pour proteger la finition des cuvettes de
recuperation :
• Pourdirninuer la decolorationet le fendillernent,eviter d'utiliser
une puissancede chauffageeleveependantune periode
prolongee.
• Ne pas utiliser un ustensilede trop grande taille. L'ustensilene
devraitpas deborderde plus de 2,5 crn- 5 crn (1 - 2 pouces)
au-del_de la peripheriede I'elernent.
Lors de rutilisation de grossesrnarrnites,parexernplepour la
preparationde conserves,utiliserI'elernentspecialcongupour
la preparationde conserves(rnodeleCE1).Prendrecontact
avecle detaillantMaytag pourobtenir des details,ou corn-
poser le 1-877-232-6771aux I_.-U.ou le 1-800-688-8408au
Canadapour passercornrnande.
• Nettoyerfrequemment.(Voirpage 41.)
[_l_ments spiral_s
• Lorsqu'unelementest utilis& il est alimente par intermittencepour
le rnaintiende la puissancede chauffagedesiree.
• Les elementsspiralessont autonettoyants.Ne pas lesimmerger
dans de reau.
Depose : SouleverI'element
refroidi.Tirer prudemmentpour
extraireI'elementdu bloc de
connexion.
Mise en place : Introduireles
bornesde I'elernentdans la prise.
Guiderpour la rniseen place.
AbaisserI'elernentpour le placer
d'aplornben appui sur la cuvettede recuperation. BORNES
Cuvettes de r_cup_ration
Les cuvettesde recuperationsouschaque elementde surface
recueillentles alimentsqui ont debord& IIfaut toujours les utiliser.
L'absencede cuvettesde recuperationpendant la cuissonpeut
endornrnagerlesills electriques.
Pourne pas introduire un risquede choc electrique,ou d'incendie,
nejarnais garnirles cuvettesde recuperationdefeuille d'alurniniurn.
Les cuvettesde recuperationvont se decolorer(tachesbleues/
dorees)ou se fendiller 9 la Ionguesi ellessontsurchauffees.La
decolorationou lefendillernentsont permanents,rnaisn'affectent
pas la performancede cuisson.
3O
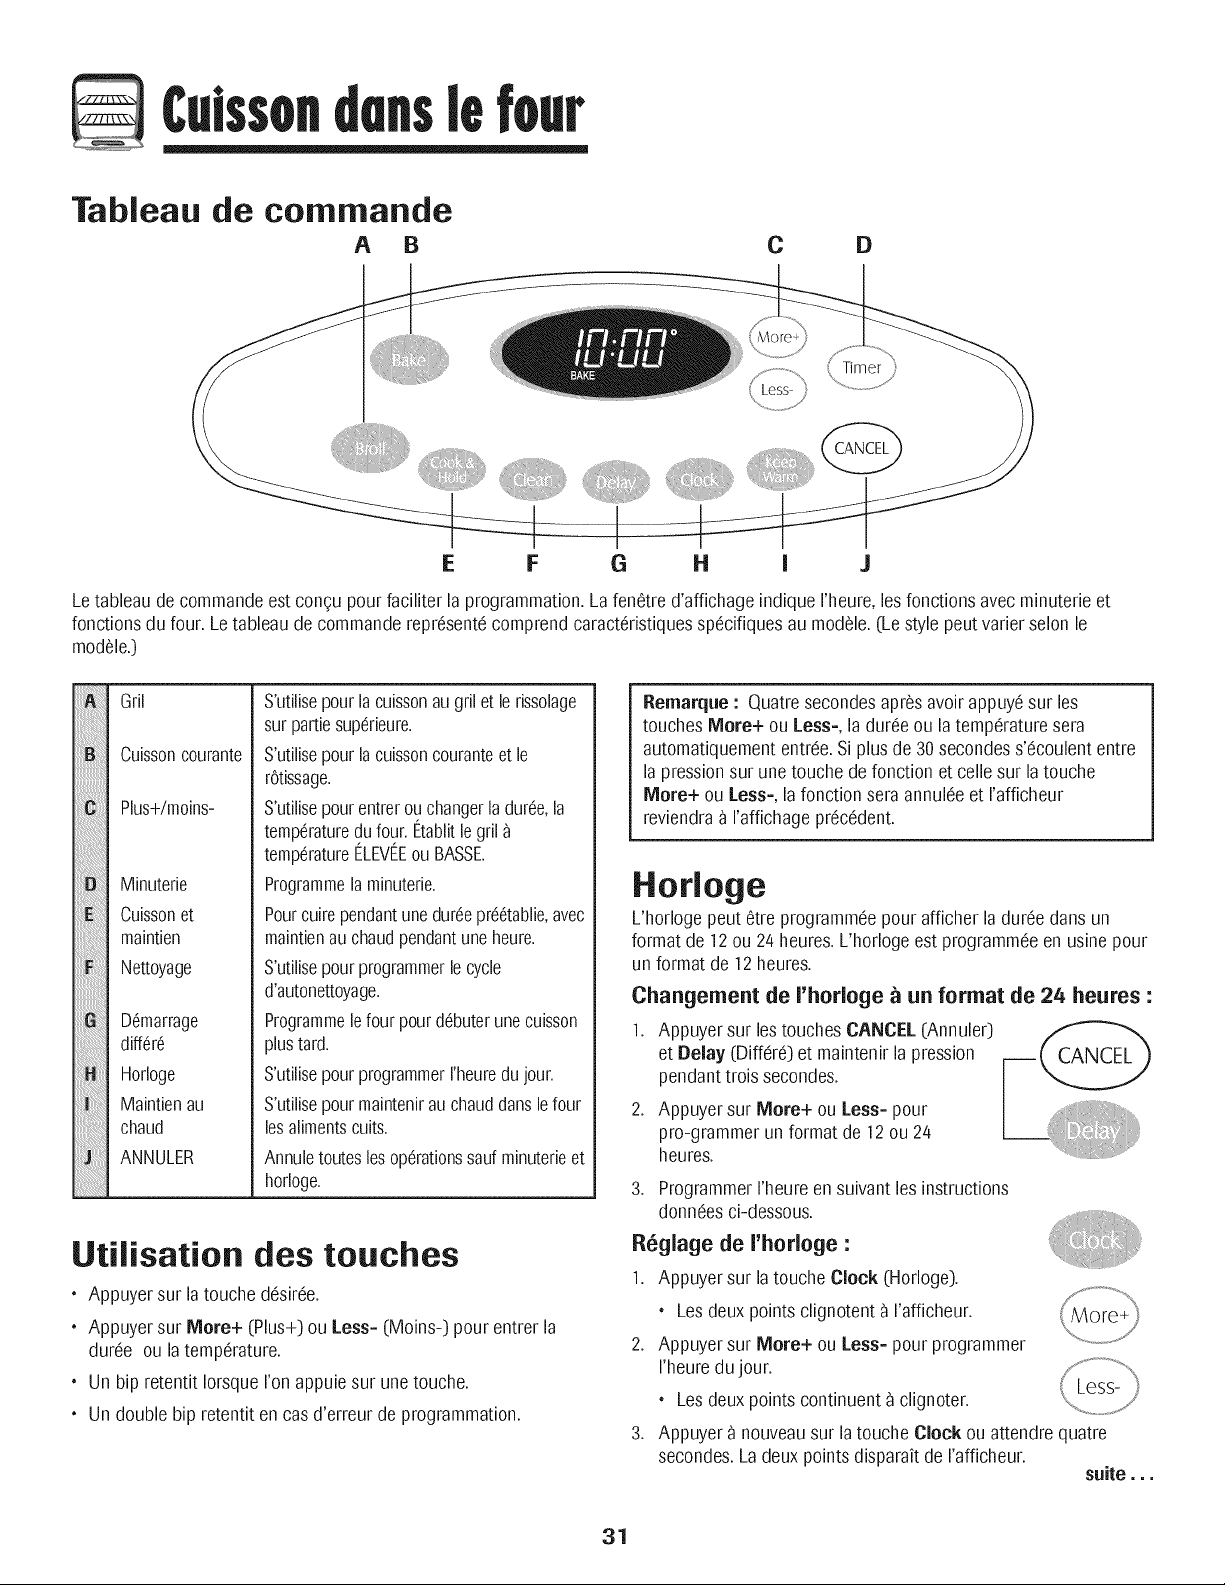
Cuissondens four
Tableau de commande
A B C D
E F G H i J
Letableau de commandeest congu pour faciliter la programmation.La fenetred'affichageindique rheure, lesfonctions avec minuterieet
fonctionsdu four. Letableau decommandorepresentecomprendcaracteristiquesspecifiquesau modele. (Lestyle poutvarier solon le
modele.)
iiiiiiiiiiiiiiiiiii_i
Gril
Cuissoncourante
Plus+/moins-
Minuterie
Cuissonet
maintien
Nettoyage
Demarrage
differe
Horloge
Maintienau
chaud
ANNULER
S'utilisepourla cuissonaugrilet le rissolage
surpattiesuperieure.
S'utilisepourla cuissoncouranteet le
r0tissage.
S'utilisepourentrerouchangerladuree,la
temperaturedufour. I_tablitle gril
temperatureI_LEVI_Eou BASSE.
Programmelaminuterie.
Pourcuirependantune dureepreetablie,avec
maintienauchaudpendantuneheure.
S'utilisepourprogrammerlecycle
d'autonettoyage.
Programmelefour pourdebuterunecuisson
plustard.
S'utilisepourprogrammerrheuredu jour.
S'utilisepourmaintenirauchauddanslefour
lesalimentscults.
Annuletouteslesoperationssauf minuterieet
horloge.
Utilisation des touches
• Appuyersur latouche desiree.
• Appuyersur More+ (Plus+) ou Less- (Moins-) pour entrer la
duree ou la temperature.
• Un bip retentit IorsqueI'onappuiesur unetouche.
• Un doublebip retentit en cas d'erreur de programmation.
Remarque: Quatresecondesapresavoir appuyesur les
touches More+ ou Less=,la duroc ou la temperaturesera
automatiquemententree.Si plus de30 secondess'ecoulententre
la pressionsur unetouche defonction et cello sur latouche
More+ ou Less=,la fonction seraannuleeet rafficheur
reviendra9 raffichage precedent.
Horloge
L'horlogepout etre programmeepour afficher la duroc dans un
format de 12ou 2/4heures.L'horloge est programmeeen usine pour
unformat de 12heures.
Changement de rhorioge _ un format de 24 heures :
1. Appuyersur lestouches CANCEL(Annuler) _,
et Delay (Differe)et maintenirla pression
pendanttrois secondes.
2. Appuyer sur More+ ou Less- pour
on,o atco
heures.
3. ProgrammerI'heureen suivantlos instructions
donneesci-dessous.
R_glage de rhorloge :
1. Appuyer sur la touche Clock (Horloge).
* Les deuxpoints clignotent9 I'afficheur.
2. Appuyer sur More+ ou Less- pour programmer
I'heuredujour.
* Les deuxpoints continuent9 clignoter.
3. Appuyer 9 nouveausur la touche Clock ou attendrequatre
secondes.La deux points disparait de rafficheur.
suite...
31
C.tsson(lenslefour
Lorsquele courantelectriquearriveou apres une interruption de
courant,la derniereheureavantI'interruptionde courant va
clignoter.
PourrappelerI'heuredujour Iorsqu'uneautre fonction de duree
s'affiche,appuyersur la touche Clock.
L'heure de I'horlogene peut etre changeeIorsquele four a ete
programmepour une cuissonou un nettoyagediffere ou pour la
fonction de cuissonet maintien.
Annalation de I'affichage de I'heare :
SiI'on ne desirepas I'affichagede I'heuredu jour :
Appuyer sur lostouches CANCEL(Annuler)et
Clock (Horloge)et los maintenirainsi pendant
trois secondes.L'heuredu jour disparaitde
I'afficheur.
LorsqueI'affichagede I'heureestannule,
appuyersur la touche Clock pour afficher
brievementI'heure dujour.
R_affichage de I'heare :
Appuyer sur lestouches CANCELet Clock et les maintenirainsi
pendanttrois secondes.L'heure du jour reapparait_ I'afficheur.
Nlinuterie
La minuteriepout etre programmeede uneminute (0:01)jusqu'_
99 heureset 59 minutes(99:59).
La minuteriepout ¢tre utiliseeind@endammentdetoute autre
activitedu four. Ellepout ¢tre aussiprogrammeealors qu'une autre
fonction du four esten coursd'utilisation.
La minuterienecommandepas le four. Elle ne sert qu'9 emettre
des bips.
Programmation de la minaterie :
1. Appuyer sur la touche Timer (Minuterie].
• 0:00s'allume _ I'afficheur.
2.
• Losdeux points clignotent.
Appuyer sur la touche More+ (Plus+) ou Less=
(Moins-)jusqu'_ ce queI'heurejuste paraisse
I'afficheur.
.
• Losdeux points continuent _ clignoter.
Appuyer _ nouveausur latouche Timer ou attendre
quatre secondes.
•Les deux points continuent _ clignoter et le decomptede la
duroc commence.
• La derniere minutedu decomptesera afficheesous forme de
secondes.
4. A la fin de la duree programmee,un bip long retentit.
Annalation de la minaterie :
1. Appuyersur la touche Timer et la maintenir ainsi pendanttrois
secondes.
OU
2. Appuyersur la touche Timer et regler I'heure_ 0:00.
Verrouillage des commandos
Lostouches peuventetre verrouilleespour des raisonsde securite,
nettoyageou pouremp_,chertoute utilisation non souhaitee.Ellesne
pourront ¢tre utiliseessi oliossontverrouillees.
Si lefour esten coursd'utilisation, los commandosne peuvent¢tre
verrouillees.
L'heure actuelledujour restera_ I'afficheur Iorsqueles commandes
serontverrouillees.
Verroaillage :
Appuyer sur lestouches CANCELet Cook &
Hold (Cuissonet maintien)et les maintenir
ainsi pendanttrois secondes.(Appuyerd'abord
sur la touche CANCEL.)
D_verroaillage :
Appuyer sur lostouches CANCELet Cook& Hold et los maintenir
ainsi pendanttrois secondes.(Appuyerd'abord sur la touche
CANCEL.)
Codes d'anomalie
Les motsBAKE(Cuissoncourante] ou LOCK(Verrouillage]peuvent
clignoterrapidement_ I'afficheur pour preveniren cas d'erreurou de
probleme.Sitel est lecas, appuyersur latouche CANCEL.Siles
rootsBAKEou LOCKcontinuent _ clignoter, debrancherI'appareil.
Attendre quelquesminutes,puis rebrancherI'appareil.Si I'undes
mots continue_ clignoter,debrancherI'appareilet prendre contact
avecun r@arateur autorise.
Caisson courante
Programmation de la caisson coarante :
1. Appuyersur la touche Bake.
• Le mot BAKEclignote.
2.
• 000clignote 9 I'afficheur.
Selectionnerlatemperaturedu four. La
temperaturepout etre programmeede 75 9 290 °C
(1709 550°F).Appuyer une foissur la touche
More+ ou Less=,ou appuyersur latouche More+
ou Less= et la maintenir ainsi.
• 175° (350°) s'allume IorsqueI'on appuie la
premierefois sur I'unedestouches.
32
Caissondens four
.
• Appuyersur latouche More+ (Plus+) pour augmenterla
temperature.
• Appuyersur latouche Less- (Moins-) pour diminuer la
temperature.
Appuyer _ nouveausur la touche Bake ou attendrequatre
secondes.
• Le mot BAKEs'arrete de clignoteret s'allume 9 I'afficheur.
5.
6.
• 38° (100°) ou la temperaturereelle du four seraaffichee.La
temperatureaugmenterapar intervallede 3 °C(5 °E)jusqu'_
ce que latemperaturepreprogrammeesoit atteinte.
Laisserlefour prechauffer pendant8 _ 15 minutes.
• Lorsquelatemperatureprogrammeepour le four est atteinte,
un bip long retentit.
• Pourrappelerla temperatureprogrammeependantle
prechauffage,appuyersur la touche Bake.
Placerla nourrituredans le four.
Verifier ravancementde la cuisson9 la duree minimalede
cuisson.Cuireplus Iongtempsau besoin.
7. Lorsquela cuissonest terminee,appuyersur /'_^,,rr,"_
latouche CANCEL(Annuler).
8. Retirerla nourriture du four.
Diff6rences de cuisson entre I'ancien
four et le nouveau
II est normalde remarquerquelquesdifferencesdans laduree de
cuissonentre un four neuf et un four ancien.VoirAjustementde la
temperaturedu four 9 la page37.
Rernarques sur la caisson courante
au four-
. Pour changerla temp#raturedu fourpendant la cuisson,
appuyersur latouche Bake et plus More+ ou Less- jusqu'_ ce
que ron obtienne latemperaturedesiree.
• Pour changer la temp#raturedu four Iors du pr#chauffage,
appuyerdeuxfoissur latouche Bake, puissur la touche
More+ ou Less- jusqu'b ceque la temperature desireesoit
affichee.
• Si ron oublie d'arreterle four, il s'arreteraautomatiquement
apres 12heures.Si I'on desiredesactivercette fonction,voir
page37.
Caisson et rnaintien
Lafonction Cook& Hold (Cuissonet maintien) permet de cuire
pendant une dureepredeterminee,suiviepar un cycle de maintien
auchaud d'une heure.
Programmation de la fonction cuisson et maintien :
1. Appuyersur la touche Cook & Hold.
* Los mots BAKEet HOLD(Maintien)clignotent.
2.
* 000 s'allume9 I'afficheur...............................
Selectionnerlatemperaturedu four. Latemperature /i More+)
_\ ,//
pout etre programmeede 75 b290 °C (170
550°E).Appuyer une foissur la touche More+
ou Less- ou appuyersur la touche More+ ou
Less- et la maintenirainsi.
.
4.
• Appuyersur latouche More+ pour augmenterlatemperature.
• Appuyersur latouche Less- pour diminuer latemperature.
Appuyerb nouveausur latouche Cook & Hold OU attendre
quatre secondes.
• Le mot HOLDclignote.
• 00:00clignote9 rafficheur.
Entrer laduree pendantlaquelleI'on desireque la cuissonait
lieu en appuyantsur letouche More+ ou Less-. La duree
de cuissonpout etre programmeede 10 minutes(00:10)
11heures,59minutes (11:59).
• Los mots BAKEet HOLDs'allument_ I'afficheur.
• La dureede cuissons'allume_ rafficheur.
* La duree de cuissoncommencele compte9 rebours.
Lorsque la duroc de cuisson s'est _coul_e :
* Quatre bips retentissent.
. Le mot BAKEs%teint.
. Los mots HOLDet WARM (Chaud)s'allument.
. 75° (170°) parait _ I'afficheur.
Apr_s une heure de MAINTIEN AU CHAUD :
• Le mot End(Fin)s'affiche.
• L'heure dujour reapparait_ I'afficheur.
Annulation de la fonction cuisson et
maintien _ tout moment :
Appuyer sur la touche CANCEL.Retirer
nourriture du four.
33
Caisson(lenslefour
Caisson et maintien diff r e
Avec la fonction differee,le four se met9 cuire plustard dans la
journee. Programmerla duree d'attentedesireeavantque lefour ne
se mottoen marcheet la dureede cuissondesiree.Le four com-
mence9 chauffer 9 I'heureselectionneeet cult pour la duree
specifiee,puisgarde la nourriture auchaud pendantune heure.
Laduree d'attentepeut etre programmeede 10 minutes (00:10)
11heures,59 minutes(11:59).
Programmation d'an cycle de caisson
coarante diff_r_e :
1. Appuyersur la touche Delay (Differe).
• Le mot DELAYclignote.
• 00:00clignote_ I'afficheur.
2. Appuyersur la touche More+ (Plus+) ou Less-
(Moins-) pour programmer la dur_e d'attente.
3. Appuyersur la touche Cook & Hold (Cuissonet
maintien).
• 000s'allume 9 rafficheur.
• Les rootsBAKE(Cuissoncourante)et HOLD
(Maintien) clignotent.
4. Appuyersur More+ pour programmer la
temp#rature de cuisson.
• 00:00et le mot HOLD clignotent.
• Le mot BAKEresteallume.
5. Appuyersur More+ pour programmer la dur#e de cuisson.
• La dureed'attente, lesmots DELAY,BAKEet HOLDs'allument
I'afficheur.
Lorsque la duroc d'attente s'est _coul_e :
• Le mot DELAYs'eteint.
• Laduree de cuisson est affichee.
• Les rootsBAKEet HOLDsont affiches.
Pour programmer an temps d'attente Iorsque la
fonction caisson et maintien a d_j_ _t_
programm_e :
1. Appuyer sur la touche Delay.
• Le mot DELAYet 00:00parait _ I'afficheur.
2. Appuyersur la touche More+ ou Less- pour
programmerladureed'attente.
• Le mot DELAYreste allume pour rappeler
qu'un cycle decuisson differeea ete
programme.
Lorsque la duroc d'attente s'est _coul_e
et qae le four se met en marche :
• La dureede cuissonseraaffichee.
• Le mot DELAYs'eteint.
• Les rootsBAKEet HOLDrestentallumes.
Annalation :
Appuyer sur latouche CANCEL(Annuler).
• Touteslesfonctions decuisson minutee et
non minuteeserontannulees.
• L'heure dujour reapparait9 I'afficheur.
Rernarques :
, Ne pas utiliserla cuissondifferee pour des articlesqui
necessitentque le four soit prechauffe,commelos ggteaux,
lospetits biscuitset los pains.
Ne pas utiliserle cyclede cuissonet maintien differessile
four estdej_ chaud.
Nlaintien au chaud
Pourmaintenirauchaud dans le four des alimentscults et chauds
ou pour rechaufferpainset assiettes.
Programmation da maintien aa chaad :
1. Appuyersur la touche Keep Warm
(Maintien au chaud).
2.
• Le motWARM (Chaud)clignote.
• 000parait _ rafficheur.
Selectionnerlatemperaturede maintienau chaud.
Celle-cipout etre regleede 63 _90 °C (1/45
190°F).Appuyer une fois sur latouche More+ ou
Less- ou appuyersur latouche More+ ou Less-
et la maintenirainsi.
• 75° (170°) s'allumeIorsque I'on appuiela premierefois sur
I'une destouches.
• Appuyersur latouche More+ pour augmenterlatemperature.
• Appuyersur latouche Less- pourdiminuer la temperature.
Lemot WARMet latemperatureseront affiches pendantque la
fonction maintienau chaud estactive.
34
suite ...

Culssondens four
Annulation du maintien au chaud :
1.Appuyersur la toucheCANCEL(Annuler).
2. Retirerla nourriture du four.
Rernarques sur la fonction rnaintien
au chaud -
• Pourobtenir desqualitesalimentaireset nutritives optimales,
lesalimentscuits au four nedoivent pas6tre gard6sau chaud
plus de I _2 heures.
• Pourempecherlos alimentsde dess6cher,los recouvrirde
papieraluminium,sans serrer, ou d'un couvercle.
• Pour r6chauffer des petits pains :
recouvrirles petits painsde papieraluminium sans serreret
les placerau four.
appuyersur lostouches Keep Warm et More+ (Plus+)
pour programmer75 °C(170°F).
r6chaufferpendant 12_ 15 minutes.
• Pour r6chauffer des assiettes :
placerdeux piles de quatreassiettesmaximumdartsle four.
appuyersur lestouches Keep Warm et More+ pour
programmer75 °C (170°F).
r6chaufferpendant cinq minutes,arreter le four et laisserlos
assiettesaufour pendant encore15 minutes.
n'utiliser que desassiettespouvantallot aufour, 9 verifier
aveclefabricant.
ne pas poserdesassiettestiedes sur une surfacefroide, los
changementsrapidesde temperature pouvant casser
I'assietteou lafendiller.
Changement de la
temperature °F/°C
1. Ler6glage par ddaut de I'usine pour la temperatureesten
Fahrenheit.
2. Pourmodifier ce r6glage,appuyersur lostouches CANCELet
Bakesimultan6mentet maintener-lesenfonc6espendanttrois
secondes.
3. Un bip retentit et le r6glage courant (°Fou °C)parait 9 I'afficheur.
(Sivous nefaites pas de changement,la cuisiniere retourneau
r6glageexistantapres30secondes.)
/4. Pour modifierle r6glage,appuyersur la touche More+ ou Less=.
Appuyer 9 nouveausur latouche pour retournerau r6glage
existant.Attender cinq secondeset le r6glagesera6ffectu&
35
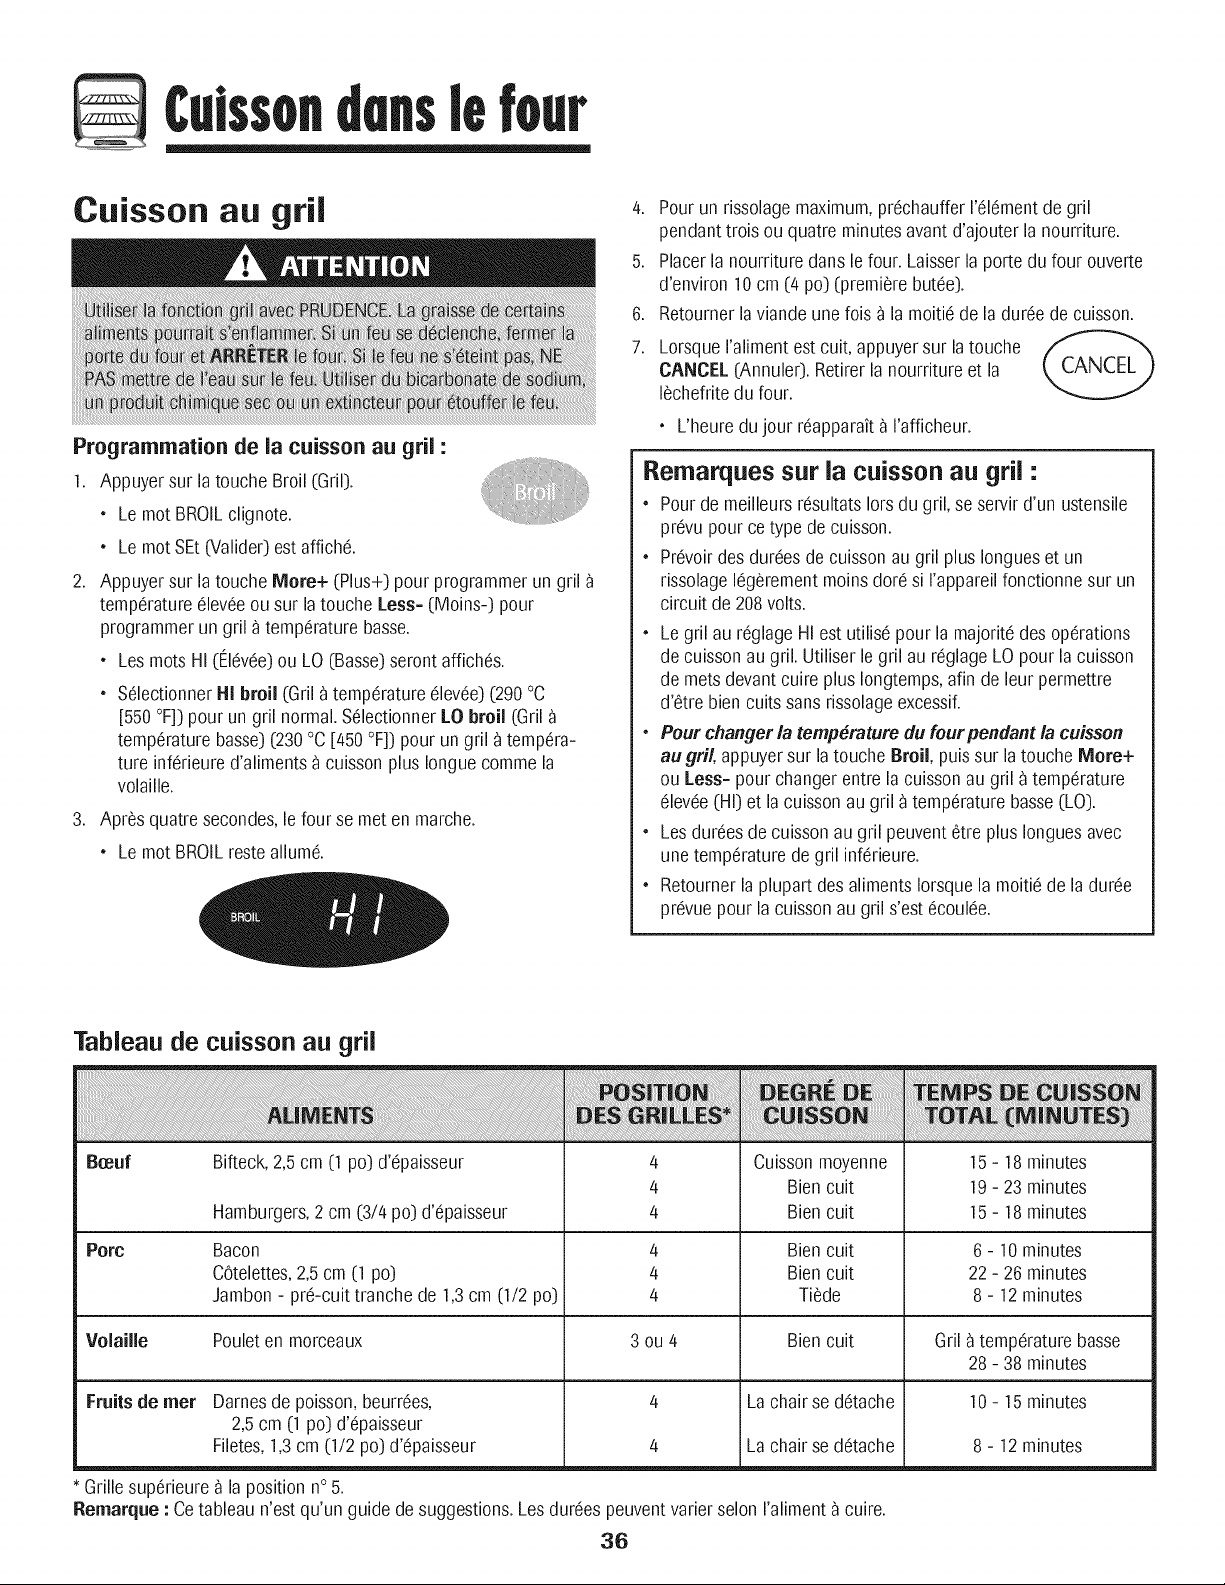
Caisson(lenslefour
Caisson au gril
Programmation de la caisson au gril :
Appuyer sur latouche Broil (Gril).
• Le mot BROILclignote.
• Le motSEt(Valider) est affiche.
Appuyer sur latouche More+ (Plus+) pour programmerun gril
temperatureeleveeou sur la toucheLess= (Moins-) pour
programmerun gril 9temperaturebasso.
• Les mots HI(I--levee)ou LO (Basso)seront affiches.
• SelectionnerH! broil (Gril 9 temperatureelevee)(290°C
[550 °F]) pour un gril normal. SelectionnerLO broil (Gril
temperature basso)(230°C [450 °F]) pour un gril 9 tempera-
ture inferieured'aliments9cuisson plus Ionguecomme la
volaille.
Apres quatre secondes,le four se met en marche.
• Le mot BROILreste allume.
/4. Pourun rissolagemaximum,prechauffer I'elementde gril
pendanttrois ou quatre minutes avantd'ajouterla nourriture.
5. Placerla nourriture dans le four. Laisserla porte du four ouverte
d'environ 10cm (4 po) (premierebutee).
6. Retournerla viandeune fois 9 la moitie de la dureede cuisson.
7. Lorsqueraliment est cult, appuyersur la touche
CANCEL (Annuler).Retirerla nourritureet la
lechefritedu four.
• L'heure dujour reapparait9 I'afficheur.
Remarques sur la caisson aa gril •
• Pourde meilleursresultats Iors du gril, se sepJird'un ustensile
prevu pource type de cuisson.
• Prevoirdes dureesde cuissonau gril plus Iongueset un
rissolagelegerementmoinsdoresi rappareilfonctionne sur un
circuit de 208volts.
• Le gril au reglageHI est utilise pour la majorite des operations
de cuissonaugril. Utiliser legril au reglage LO pour la cuisson
de metsdevantcuire plus Iongtemps,afin de leur permettre
d'etre biencults sans rissolageexcessif.
• Pourchangerlatemp6raturedufourpendantlaeuisson
au gril, appuyersur latouche Broil, puissur la touche More+
ou Less=pour changerentre lacuissonau gril _ temperature
elevee(HI) et lacuisson au gril _ temperature basse(LO).
• Lesdureesde cuissonau gril peuventetre plus Ionguesavec
unetemperaturede gril inferieure.
• Retournerla plupart des alimentsIorsquela moitiede la duree
prevuepour la cuissonau gril s'estecoulee.
Tableau de caisson au gril
Boeuf
Pore
Bifteck,2,5 cm (1 po) d'@aisseur
Hamburgers,2 cm (3/4 po) d'@aisseur
Bacon
C0telettes,2,5cm (1 po)
Jambon- prO-culttranche de 1,3cm (1/2 po)
4
4
4
4
4
4
Cuissonmoyenne
Bien cult
Bien cult
Bien cult
Bien cult
Tiede
15 - 18 minutes
19 - 23 minutes
15 - 18 minutes
6 - 10 minutes
22 - 26 minutes
8 - 12 minutes
Voiaiiie Pouleten morceaux 3 ou 4 Bien cult Gril_ temperaturebasso
28- 38 minutes
Fruitsde mer 10- 15minutes
Damesde poisson,beurrees,
2,5cm (1 po) d'@aisseur
Filetes,1,3cm (1/2 po)d'@aisseur
4
4
Lachair se detache
Lachair se detache
Grillesuperieure_ la positionn° 5.
Remarque : Cetableau n'est qu'un guidede suggestions.Lesdurees peuventvariersolon raliment _ cuire.
36
8 - 12 minutes
Cuisson(lenslefour
Arr t autornatique/
Mode sabbat
Lefour s'arreteautomatiquementapres 12 heuress'il a ete
accidentellementlaisseen marche.Cettecaracteristiquede securite
pout ¢tre arretee.
Pour annulet I'arr_t 12 heures et faire fonctionner le
four en continu pendant 72 heures :
1. Programmerle four pour unecuissoncourante(voir page32).
2. Appuyer sur la touche Clock (Horloge)et la
maintenirainsi pendant cinq secondes.
• SAbseraaffiche et clignotera pendant
cinq secondes.
• SAbseraensuite affiche en continu jusqu'_ ce qu'on I'arrete
oujusqu'_ ce que laduree limite de 72 heuressoit atteinte.
• Le mot BAKE(Cuissoncourante)sera aussi affichesi un
cycle decuissoncouranteest en cours alors que le four est en
modesabbat.
• La CUISSONAUFOURest la seulefonctionqui est
operationne//eenmodesabbat.Toutes/esautresfonctions
(Minuterie,Maintienau chaud,Nettoyage,etc.) sontverrouill#es
pendant/emodesabbat.
Annulation de la cuisson courante alors que le four
est en mode sabbat :
Appuyer sur CANCEL(Annuler).
• Le mot BAKEs'eteint _ I'afficheur.
• Aucun bip sonore ne retentit.
Annulation du mode sabbat :
1. Appuyer sur la touche Clock pendant
cinq secondes.
OU
2. Apres 72 heures,le modesabbatse termine.
• SAbclignote pendantcinq secondes.
• L'heure dujour revient _ I'afficheur.
Ajustement de la temperature
du four
Laprecisiondestemperaturesdu four a ete soigneusementverifiee
I'usine.II est normalde remarquerquelquesdifferencesdans la
cuissonentre un four neuf et un four ancien.Au fur et 9 mesureque
les cuisinieressont moinsneuves,la temperaturedu four pout varier.
IIest possibled'ajuster latemperature du four si I'on penseque le
four ne cult pus ou ne rissolepuscorrectement.Pourdecider de
I'ajustement_ apporter,regler lefour _ unetemperaturede 15 °C
(25°F)plus eleveeou plus basseque latemperatureindiquee duns
la recette,puis faire cuire la preparation.Les resultatsdu {{test >>de
cuissondoiventdonnerune ideedu hombre de degresduquel la
temperaturedolt ¢tre ajustee.
Ajustement de la temperature du four :
1. Appuyersur la touche Bake.
2. Entrer285 °C (550°F)en appuyantsur latouche
More+ (Plus+).
Appuyersur latouche Bake et la maintenirainsi
pendant plusieurssecondesou jusqu'_ ceque 0°
paraisse_ I'afficheur.
Si latemperaturedu four a ete precedemmentajustee,le
changementsera affiche.Par exemple,si la temperaturedu four
a ete reduite de 8 °C(15°F), I'afficheurindiquera-8 (-15).
Appuyersur latouche More+ ou Less- (Moins-) pourajusterla
temperature.
A chaquelois que I'on appuiesur unetouche,la temperature
changede 3 °C (5 °F). Latemperaturedu four peutetre
augmenteeou diminueede 3 _ 20°C (5 _ 35 °F).
5. L'heure du jour reapparaitautomatiquement_ I'afficheur.
II n'est pas necessairede reajusterla temperaturedu four en cas
de panneou d'interruption de courant.Lestemperaturesde
cuissonau gril, maintienau chaud et de nettoyagene peuvent
etre ajustees.
Remarques sat le mode sabbat "
Lemode sabbatpeut etre mis en marche_ tout moment, que
lefour soit en marcheou non.
• Le mode sabbat ne peut pusetre misen marchesiles
commandossont verrouilleesou la porte verrouillee.
• Sile four esten mode cuissonIorsquele modesabbat est
programme,le mot BAKEs'eteint _ la fin du cyclede cuisson.II
n'y auraaucun signalsonore audible.
• Si I'eclairagedu four est souhaite pendantle modesabbat,la
lampedevraetre allumeeavantque le modesabbat ne debute.
Lorsquele modesabbata demarre,aucun bip de prechauffage
ne retentit.
Tousles messageset los bipssont desactivesIorsquele mode
sabbatest actif.
• Leverrouillageautomatiquede la porte ne fonctionne pus
pendantle mode sabbat.
• Si I'on appuiesur la touche CANCEL,un cyclede cuisson
couranteau four seraannule.Cependant,le programmateur
resteraen modesabbat.
Apres une pannede courant,le four revienten modesabbat avec
72 heuresrestanteset aucun cycleactif.
37
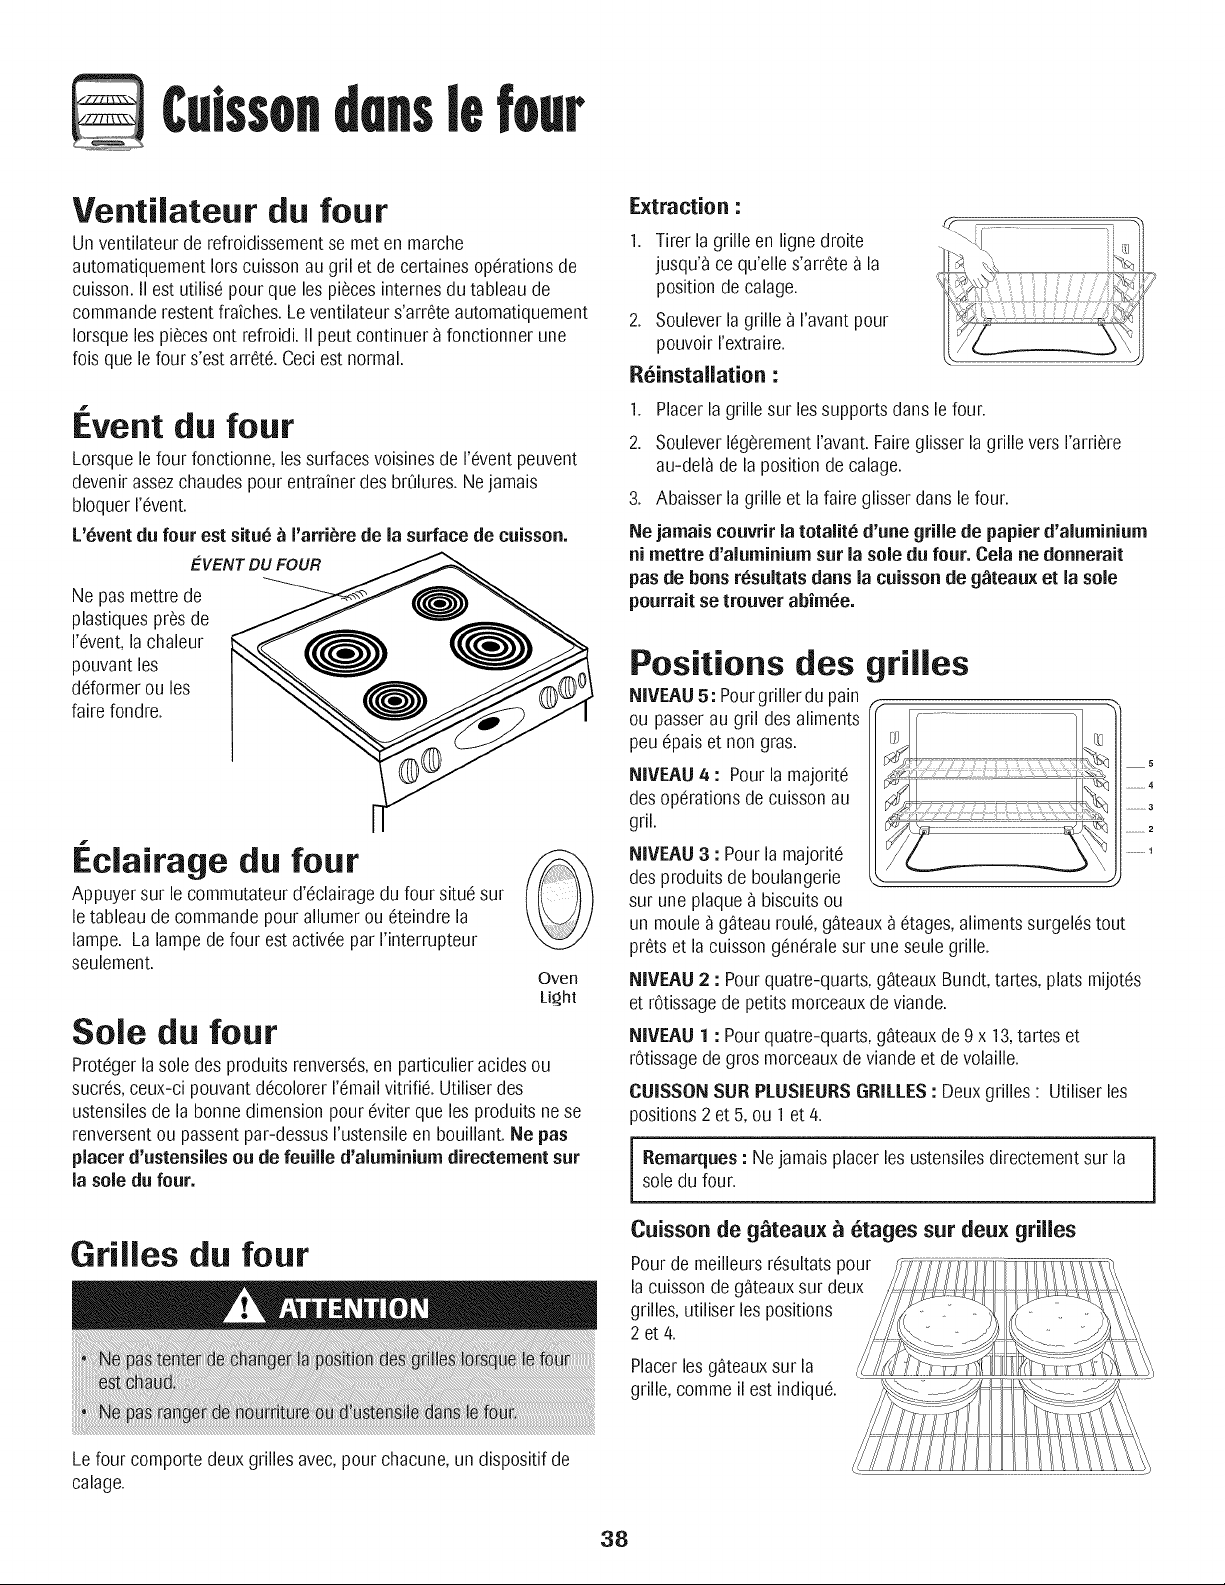
Cuissondens
Ventilateur du four
Un ventilateurde refroidissementse met en marche
automatiquementIorscuissonau gril et de certainesoperationsde
cuisson.II est utilisepour que los piecesinternesdutableau de
commandorestentfraiches.Leventilateur s'arreteautomatiquement
Iorsquelos piecesont refroidi.II pout continuer_ fonctionner une
fois que lefour s'estarrete.Ceciest normal.
u
Event du four
Lorsquele four fonctionne,les surfacesvoisinesde I'eventpeuvent
devenirassezchaudespour entrainer des brOlures.Nejamais
bloquerI'event.
L'6ventdu four est situ6 _ I'arri_re de la surfacede cuisson.
E'VENT DU FOUR
Ne pas mettrede
plastiquesprosde
I'event,lachaleur
pouvantlos
deformerou les
faire fondre.
u
Eclairage du four
Appuyer sur lecommutateurd'eclairagedu four situe sur
letableau de commandopourallumer ou eteindre la
lampe. La lampedefour est activeepar I'interrupteur
seulement.
Oven
Li_jht
Sole du four
Protegerlasole des produitsrenvers_s,en particulieracidesou
sucres,ceux-ci pouvantdecolorer I'emailvitrifie.Utiliser des
ustensilesde la bonnedimensionpour eviterque los produitsnese
renversentou passentpar-dessusI'ustensileen bouillant. Ne pas
placer d'ustensilesou de feuille d'aluminiumdirectemeut sur
la sole du four.
Grilles du four
Extraction :
1. Tirer la grille en ligne droite
jusqu'9 ce qu'elle s'arrete 9 la
positionde calage.
2. Souleverla grille 9 I'avantpour
pouvoir rextraire.
R_installation :
1. Placerla grille sur lossupports dans lefour.
2. SouleverlegerementI'avant.Faireglisserla grillevers I'arriere
au-del9de la positionde calage.
3. Abaisser la grille et la faire glisserdans lefour.
Ne jamais couvrir la totalit6 d'une grille de papier d'aluminium
ni mettre d'aluminium sur la sole du four. Cola ne donnerait
pas de bous resultatsdaus la cuisson de g_teau× et la sole
pourraitse trouver abim6e.
Positions des
NIVEAU5: Pourgriller du pain
ou passerau gril des aliments
peu Opalset non gras.
NNEALI 4 : Pourla majorit(!
des operationsde cuissonau
gril.
grilles
NIVEALI3 : Pourla majorite
des produitsde boulangerie
sur uneplaque_ biscuitsou
un moule_ g_teauroule, g_teaux_ etages,alimentssurgelestout
prets et la cuissongeneralesur uneseule grille.
5
.............4
.............3
.............2
.............1
NIVEAU 2 : Pourquatre-quarts,g_teauxBundt,tartes,platsmijote!s
et r0tissagede petits morceauxde viande.
NIVEAU 1 : Pourquatre-quarts,g_teauxde9 x 13,tartes et
r0tissagedegros morceauxde viande et de volaille.
CUBSON SUR PLUSIEURSGRILLES: Deux grilles : Utiliser los
)ositions2 et 5, ou 1 et 4.
Remarques: Nejamais placer les ustensilesdirectementsur la
soledu four.
Cuissen de g_teaux _ _tages sur deu× grilles
grille, commeil est indique.
Lefour comportedeux grilles avec,pourchacune,un dispositif de
calage.
38
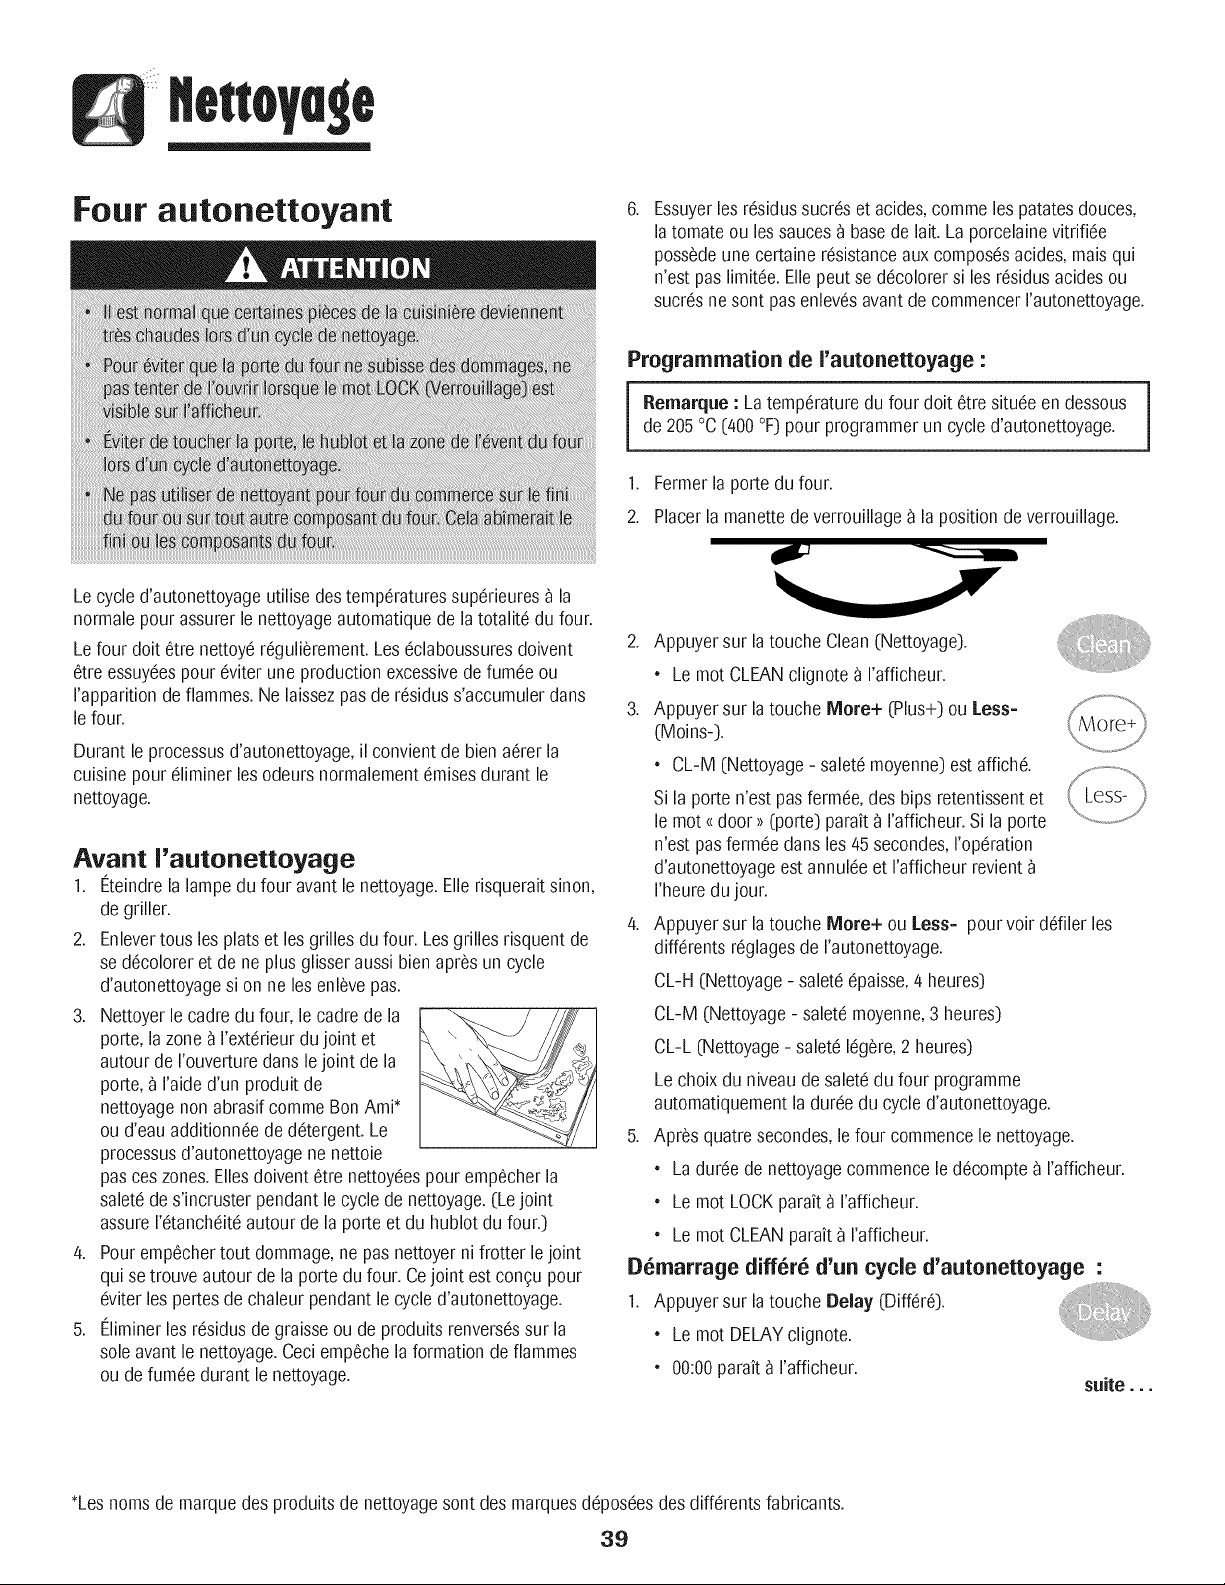
Four autonettoyant
.
Essuyerles residussucreset acides,comme les patatesdouces,
latomate ou les sauces9 basede lait. La porcelainevitrifiee
possedeune certaine resistanceaux composesacides,maisqui
n'est pas limitee.Ellepeut se decolorersi les residusacidesou
sucres nesont pas enlevesavantde commencerI'autonettoyage.
Lecycle d'autonettoyageutilise destemperaturessuperieures9 la
normalepour assurerle nettoyageautomatiquede latotalite du four.
Lefour dolt ¢tre nettoyeregulierement.Leseclaboussuresdoivent
¢tre essuyeespour eviter une production excessivede fumee ou
rapparition deflammes.Ne laissezpasde residuss'accumulerdans
lefour.
Durantle processusd'autonettoyage,il convientde bien aerer la
cuisine poureliminer les odeursnormalementCruisesdurant le
nettoyage.
Avant I'autonettoyage
1. I_teindrela lampedu four avantle nettoyage.Elle risqueraitsinon,
de griller.
2. Enlevertous les plats et lesgrilles du four. Lesgrilles risquentde
se decoloreret de ne plus glisseraussibien apres un cycle
d'autonettoyagesi on ne les enlevepas.
3. Nettoyerle cadredu four, le cadrede la
porte,la zone9 I'exterieurdujoint et
autour de I'ouverturedans lejoint de la
porte,_ raide d'un produit de
nettoyagenonabrasifcomme BonAmi+
ou d'eau additionneede detergent.Le
processusd'autonettoyagenenettoie
pas ceszones.Ellesdoivent ¢tre nettoyeespour empecherla
saletede s'incruster pendant lecycle de nettoyage.(Le joint
assureI'etancheiteautour de la porte et du hublot du four.)
/4. Pour empechertout dommage,ne pas nettoyerni frotter lejoint
qui setrouve autour de la porte du four. Cejoint estcongu pour
eviterles pertesde chaleurpendant le cycled'autonettoyage.
5. I'--_liminerles residusde graisseou de produits renversessur la
soleavantle nettoyage.Ceci emp_,chela formation de flammes
ou defumee durant le nettoyage.
Programmation de rautonettoyage :
Remarque: Latemperaturedu four dolt etre situee en dessous I
de 205°C(400°F)pour programmerun cycle d'autonettoyage.
1
1. Fermerla porte du four.
2. Placerla manettede verrouillage9 la position deverrouillage.
2. Appuyer sur la touche Clean(Nettoyage).
• Le motCLEANclignote 9 I'afficheur.
3. Appuyer sur la touche Mere+ (Plus+) ou Less=
(Moins-).
• CL-M (Nettoyage- saletemoyenne)est affiche.
Si la porte n'est pasfermee,des bips retentissentet
le mot{<door >>(porte) parait 9 rafficheur.Si la porte
n'est pasfermeedans les/45secondes,I'operation
d'autonettoyageestannuleeet I'afficheur revient
I'heuredujour.
/4. Appuyer sur latouche Mere+ ou Less- pourvoir defiler les
differentsreglagesde rautonettoyage.
CL-H(Nettoyage- salete@aisse,/4heures)
CL-M (Nettoyage- saletemoyenne,3 heures)
CL-L (Nettoyage- salete legere,2 heures)
Lechoix du niveaude saletedu four programme
automatiquementla dureedu cycled'autonettoyage.
5. Apres quatre secondes,le four commencele nettoyage.
• Laduree de nettoyagecommencele decompte9 rafficheur.
• Le mot LOCKparait 9 I'afficheur.
• Le motCLEANparait 9 rafficheur.
D_marrage diff_r_ d'un cycle d'autonettoyage :
1. Appuyer sur la touche Delay (Differe).
• Le mot DELAYclignote.
• 00:00parait _ I'afficheur.
suite...
+Lesnomsde marquedes produits de nettoyagesont desmarquesd@oseesdesdifferentsfabricants.
39
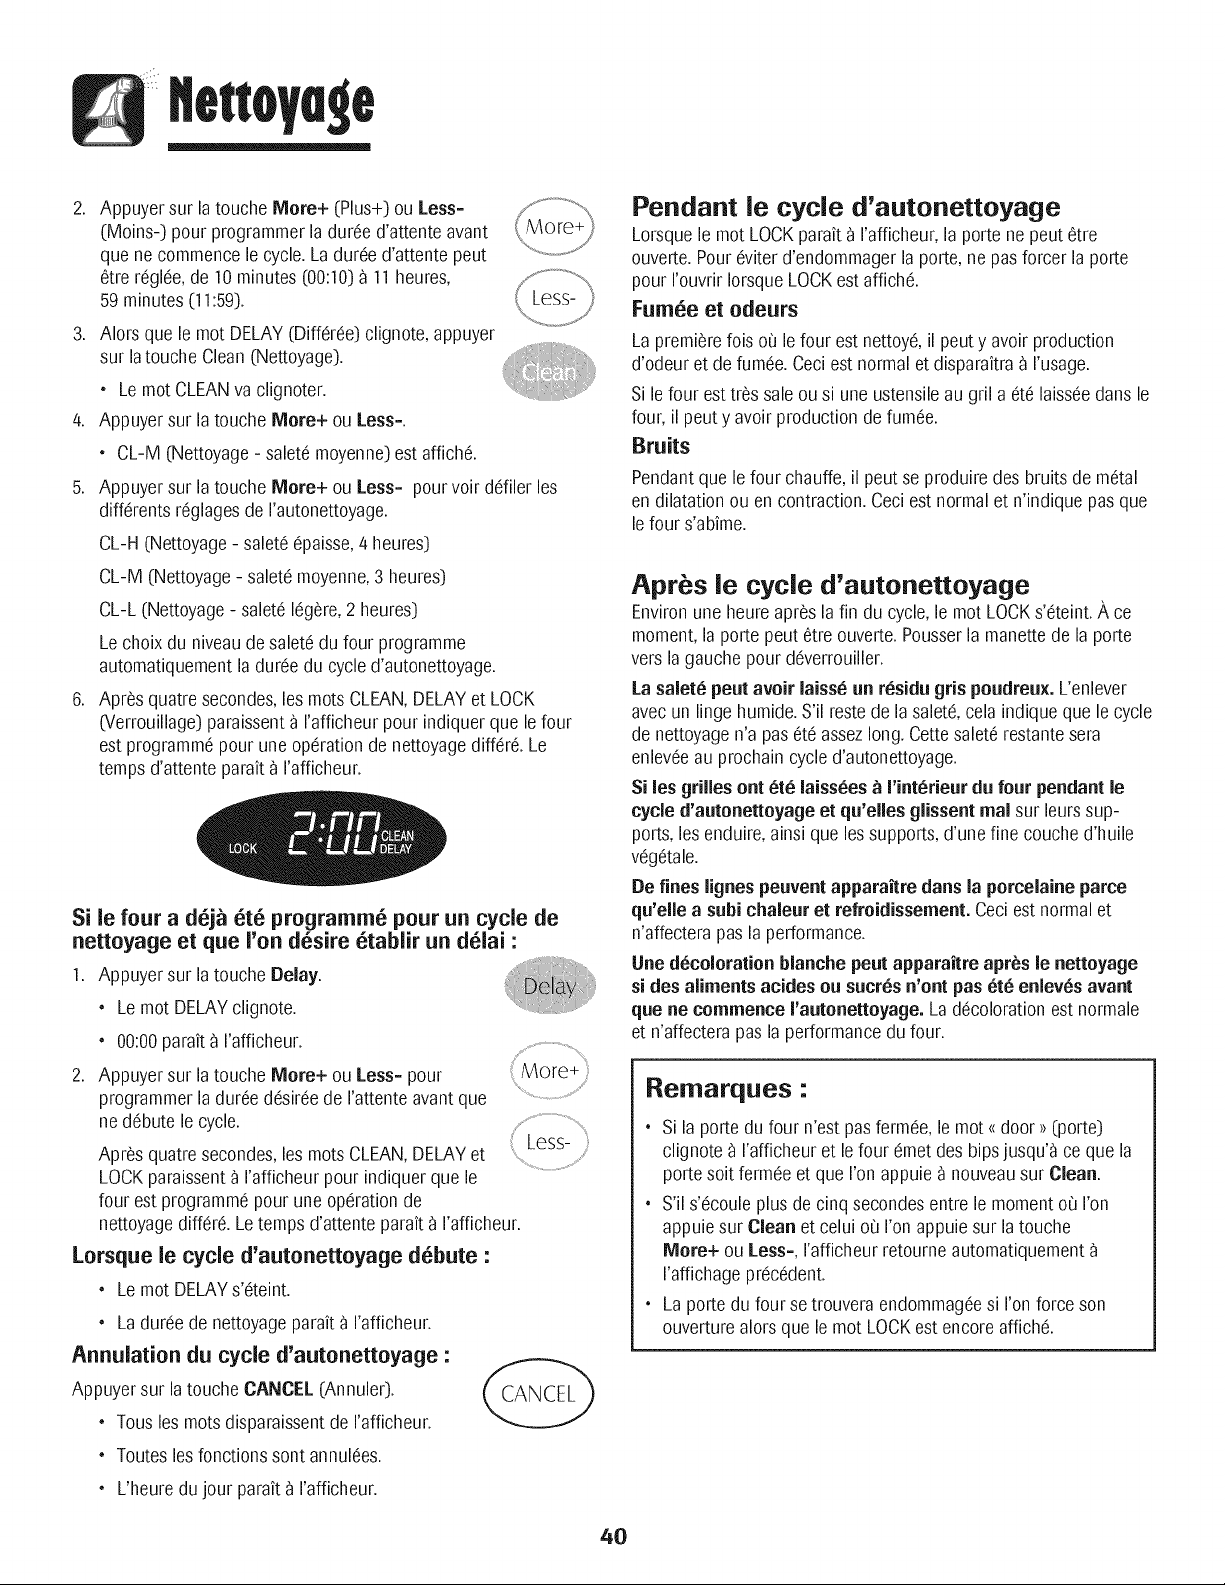
Appuyer sur latouche More+ (Plus+) ou Less-
(Moins-) pour programmerladuree d'attenteavant
que necommencelecycle. La duree d'attentepout
6tre reglee,de 10minutes (00:10)9 11 heures,
59 minutes(11:59).
3. Alors que le mot DELAY(Differee)clignote,appuyer
sur latouche Clean(Nettoyage).
• Le motCLEANva clignoter.
4. Appuyer sur la touche More+ ou Less-.
• CL-M (Nettoyage- saletemoyenne)est affiche.
Appuyer sur la touche More+ ou Less- pour voir defiler los
differents reglagesde I'autonettoyage.
CL-H (Nettoyage- salete@aisse,4 heures)
CL-M (Nettoyage- saletemoyenne,3 heures)
CL-L (Nettoyage- salete legate, 2 heures)
Lechoixdu niveaudesalete du four programme
automatiquementladureedu cycled'autonettoyage.
Apres quatre secondes,les rootsCLEAN,DELAYet LOCK
(Verrouillage)paraissent_ rafficheur pour indiquer qua le four
est programmepour une operationde nettoyagediffere. Le
temps d'attente parait_ I'afficheur.
Si le four a d_j_ _t_ programm_ pour un cycle de
nettoyage et que Yon d_sire _tablir un d_lai :
1. Appuyersur la touche Belay.
• Le mot DELAYclignote.
• 00:00parait _ I'afficheur.
2. Appuyersur la touche More+ ou Less- pour
programmerladuree desireede rattente avant qua
ne debute le cycle.
Apres quatresecondes,les rootsCLEAN,DELAYet
LOCKparaissent_ I'afficheur pour indiquer qua le
four est programmepour une operationde
nettoyagediffere. Letemps d'attenteparait _ I'afficheur.
Lorsque le cycle d'autonettoyage d_bute :
• Le mot DELAYs'eteint.
More+
Less-'
• La duree de nettoyageparait_ I'afficheur.
Annulation du cycle d'autonettoyage :
Appuyer sur latouche CANCEL(Annuler).
•Tous les rootsdisparaissentde I'afficheur.
• Touteslos fonctionssont annulees.
• L'heuredu jour parait_ I'afficheur.
Pendant ie cycle d'autonettoyage
Lorsquele motLOCKparaft _ I'afficheur,la porte ne peut etre
ouverte.Poureviterd'endommagerla porte, ne pasforcer la porte
pour I'ouvrirIorsqueLOCKest affiche.
Fum_e et odeurs
Lapremierelois o_ lefour est nettoye,il peuty avoir production
d'odeur et de fumee.Ceciest normal et disparaitra_ I'usage.
Sile four esttres sale ousi uneustensileau gril a eta laisseedans le
four, il peuty avoir productionde fumee.
Bruits
Pendantque lefour chauffe,il peutse produire des bruits de metal
en dilatationou encontraction.Ceciest normalet n'indique pas que
lefour s'abime.
Apres ie cycle d'autonettoyage
Environune heureapresla fin du cycle, le mot LOCKs'eteint.Ace
moment,la porte peut etre ouverte.Pousserla manettede la porte
versla gauche pourdeverrouiller.
La salete peat avoir laisse an resida gris poudreux.L'enlever
avecun lingohumide.S'il restede la salete,cola indique que le cycle
de nettoyagen'a paseta assezlong. Cartesalete restantesera
enleveeau prochaincycle d'autonettoyage.
Si los grilles ont ere laissees _ I'interiear du four pendantle
cycle d'aatonettoyage et qa'elles glissent real sur leurssup-
ports,les enduire,ainsi queles supports,d'une fine couched'huile
vegetale.
De fines lignes peavent apparaitre dartsla porcelaine parce
qn'elle a snbi chalear et refroidissement. Ceciest normalet
n'affecterapas la performance.
Une decolorationblanche peat apparaitre apres le nettoyage
si des aliments acides on sucres n'ont pas eta enleves avant
qua ne commence I'aatonettoyage.Ladecolorationest normale
et n'affecterapas la performancedufour.
Remarques -
• Si la porte du four n'est pasfermee,le mot <<door_>(porte)
clignote9 I'afficheuret lefour emet des bipsjusqu'9 ce qua la
porte soit fermeeet qua I'on appuie9 nouveausur Clean.
• S'il s'ecoule plus de cinq secondesentre le momento_ I'on
appuiesur Clean et celui o_ I'on appuiesur la touche
More+ ou Less-, rafficheur retourneautomatiquement
I'affichageprecedent.
• La porte du four se trouveraendommageesi I'onforce son
ouverturealors qua le mot LOCKest encoreaffiche.
40
M thodes de nettoyage
* Les noms de marquesontdes marques
deposeesdes diff6rents fabricants.
** Pourcommanderdirectement,composer
le 1-877-232-6771aux I_.-U.ou le
1-800-688-8408au Canada.
Table de
cuisson =
l_mailvitrifi6
Zone de la console
de commandoet
horloge
Boutonsde
commando
Cuvettesde
r6cuperation=
l_mail
Hublot et porte
du four en verre
L'6mailvitrifie est du verrelieau metalparfusion.II peutse fissurerous'6cailleren cas de mauvaiseutilisation.II est
resistantauxacides,maispastotalementinattaquableparlos acides.Tous los produitsrenvers6s,en particulier
acidesou sucres,doivent6tre essuy6simm6diatementavecun lingo sec.
• Unefois la piecerefroidie,la laveravecde I'eausavonneuse,rinceret s6cher.
• Nejamais essuyerunesurfacetiede ou chaudeavec un lingo humide.Cecipourraitla fissurerou 1'6cailler.
• Nejamais utiliserde nettoyantspourfour,d'agentsde nettoyagecaustiquesou abrasifssur lefini ext6rieurde la
cuisiniere.
• Pourutiliserla fonctionVerrouillagedescommandospourle nettoyage,voir page32.
• Essuyeravecun lingo humide,puisfaire s6cher.Ne pas utiliserun agentde nettoyageabrasifsusceptiblede rayerla
finition.
• On poututiliser un produitde nettoyagedu verre,pulv6ris6d'abordsur un chiffon. NEPASprejeterlepreduit
directementsur les touchesde commandeou sur I'afficheur.
• Placerchaquebouton9 la positiond'ARRI_T,et retirerchaqueboutonenletirant.
• Laver,rinceret faires6cher.Ne pasutiliserun agentdenettoyageabrasifsusceptiblede rayerla finition.
• Fairefonctionnerbrievementchaqueelementpour verifierque le bouton a 6t6 correctementr6install6.
L'6mailpoutse d6colorerou sefendillers'ilestsurchauff6.Ceciestnormalet n'affectepaslosperformancesde cuisson.
• Unelois loscuvettesde recuperationrefroidies,los laverapreschaqueutilisation,losrinceret loss6cherpour 6viter
lostachesou la d6coloration.Lescuvettesde recuperationpeuvent6tre lav6esen lave-vaisselle.
• Pour61iminerlos grossessouillures,faire tremperdans de I'eausavonneusechaude,puis utiliserun produitde
nettoyagepeuabrasifcommeSoftScrub*et untampon9 r6cureren plastique.
• Encas de salet6incrust6edanslos cuvettesde recuperation,los retirerdela cuisiniere,los posersur desfeuilles
de papierjournal et los pulv6riserdoucementde nettoyantcommercialpour four. (No paspulv6riserde produit
sur lossurfacesavoisinantes.)Mettrelos cuvettesde recuperationdansunsac en plastiqueet laisserle produit
agir plusieursheures.Porterdes gantsen caoutchoucpour retirer loscuvettesde recuperationdusac,laverlos
cuvettes,losrincer et loss6cher.
• I_viterd'utilisertrop d'eau,qui risqueraitde s'infiltrersousouderrierele verreet de tacher.
• Laver_ reau et au savon.Rinceravecde reaupropreet s6cher.Un produitdenettoyagedu verrepout 6tre utilis6
en levaporisantd'abordsur un lingo.
• Ne pas utiliserde produitsabrasifscommetampons_ r6curer,lained'acierou produitde nettoyageen poudrequi
risqueraientde rayerle verre.
Int6rieurdu four • Ex6cuterlesinstructionspr6sent6esaux pages39-40pour rautonettoyagedu four.
41
Grillesdu four
Acier ino×ydable
(certainsmodeles)
Tiroirde remisage,
poigneede porte =
Email peint
• Nettoyeravecde I'eausavonneuse.
• [_liminerlossouillurestenacesavec une poudre de nettoyageou un tampon 9 recurersavonneux.Rincer et
faire secher.
• Silosgrilles sent laisseesdartslefour pendantlecycled'autonettoyage,oliosse decolorentet peuventne plustres
bienglisser.Si colaseproduit, enduirele bord desgrilleset lesupportdesgrillesd'une fine couched'huile vegetale,
puis essuyerrexcedent.
* NE PAS UTILISERDE PRODU/TSDE NETTOYAGECONTENANTDU JAVELLISANT.
* NEPAS UTILISERDE NETTOYANT$_ ORANGE_ OU ABRA$/F&
* TOUJOUR$ESSUYERDAN$ LESENSDE LA TEXTUREDEL'/ICIER LOR$ DU NETTOYAGE.
* Nettoyagejoumalier/salet6 16g_re= Essuyeravecrun des produitssuivants : eau savonneuse,vinaigre blanc/
eau,produit de nettoyagepourverre et surfaceFormula409*ou un produit semblable pour verre - avecun lingo
soupleet une@onge. Rinceret secher.Pourpolir etenleverlosmarquesdedoigts,fairesuivre par unevaporisation
de MagicSpray pouracier inoxydable(piece n° 20000008)**.
. Salete moderee/epaisse = EssuyeravecI'un des produitssuivants : BenAmi, SmartCleanserou SoftScrub*-
I'aided'un lingosoupleou d'une @onge humide.Rinceret secher.Lostaches rebellespeuvent¢tre enleveesavec
untamponmulti-usagesScotch-Brite*humidifie.Frotteruniformementdartslesensdu metal.Rinceretsecher.Pour
redonnerdu lustreet rotifer los rayures,faire suivre par une vaporisationde Magic Spraypour acier inoxydable*.
. Deceleration = A raide d'une @onge humidifiee ou d'un lingosouple,essuyer_ raide du nettoyant Cameo
pour acier inoxydable*.Rincerimmediatementet secher.Pourenleverlos marqueset redonnerdu lustre,faire
suivrepar unevaporisationde Magic Spraypour acier inoxydable*.
• Unelois los piecesrefroidies,laver9 reau savonneusetiede, rincer et secher.Nejamais essuyerune surfacetiede
ou chaudeavecun lingo humide,ceci pouvantendommagerlasurface et entrainer une brOlurepar lavapeur.
• Pourlostaches rebelles,utiliser des agents de nettoyagelegerementabrasifscommela pate au bicarbonatede
soudeou BenAmi*. Ne pasutiliser d'agentsde nettoyageabrasifs,caustiquesouenergiquescommelosnettoyants
pourfour ou lostamponsen laine d'acier.Cesproduitsraieraientou endommageraientde fagon permanentela
surface.
Remarque: Utiliserunlinge ou untorchonsecpour essuyer losproduits renvers_s,surtouts'ilssentacides
ou sucrds. La surface pourraitse ddcolorerou se ternirsi la salet# n'dtaitpas immddiatement enlevde. Ceci
est particuli#rement important clans le cas de surfaces blanches.
*Lesnomsde marquesont des marquesd@oseesdes differents fabricants.
** Pourcommanderdirectement,composerle 1-877-232-6771aux I_.-U.ou le 1-800-688-8/408au Canada.
42
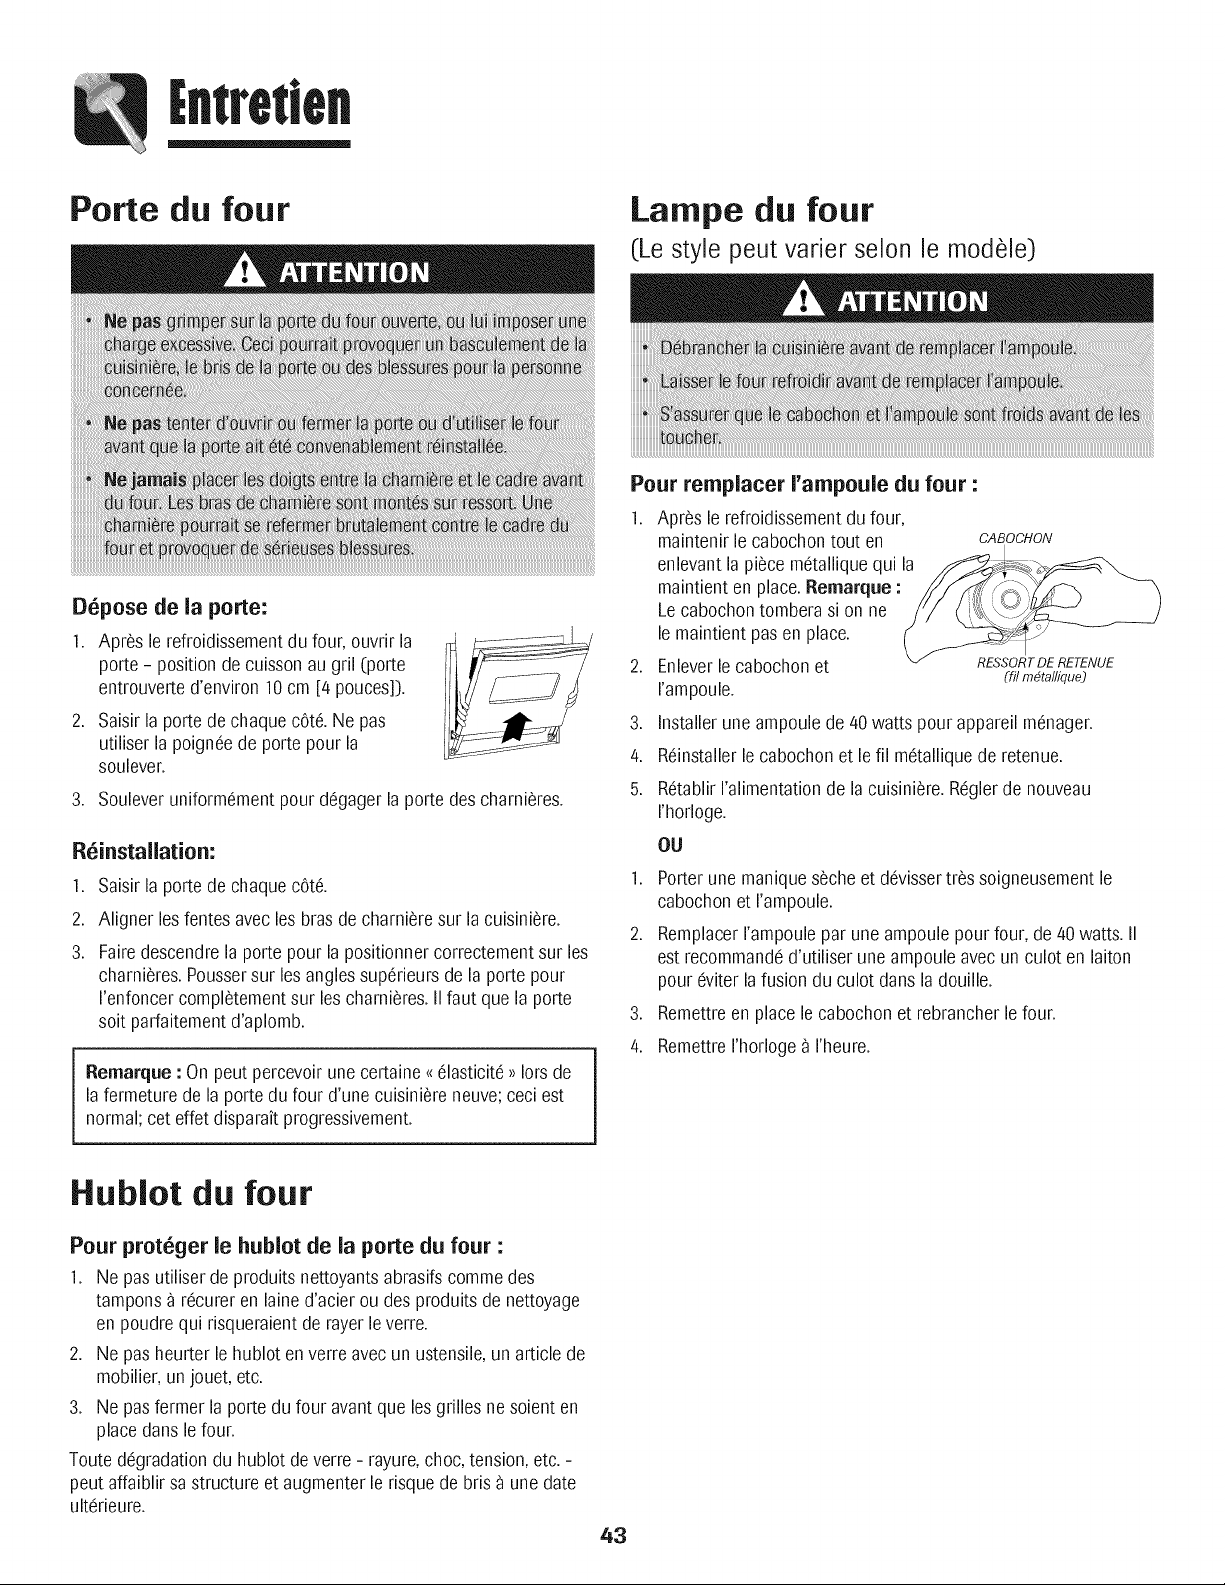
[ntretlen
Porte du four
Lampe du four
(Lestylepeut vafierselonlemod61e)
D_pose de la porte:
1. Apres le refroidissementdu four, ouvrir la
porte - position decuisson augril (porte
entrouverted'environ10cm [4 pouces]).
2. Saisirla porte de chaquecote. Ne pas
utiliser la poigneede porte pour la
soulever.
3. Souleveruniformement pourdegagerla porte des charnieres.
R_installation:
1. Saisirla porte de chaquecote.
2. Aligner les fentesavec les bras decharnieresur la cuisiniere.
3. Fairedescendrela porte pour la positionnercorrectementsur les
charnieres.Poussersur les anglessuperieursde la porte pour
I'enfoncercompletementsur les charnieres.II faut que la porte
soit parfaitementd'aplomb.
Remarque: On peut percevoirune certaine<{elasticite_>lots de
lafermeture de la porte du four d'une cuisiniereneuve;ceci est
normal;cet effet disparaitprogressivement.
Pour remplacer rampoule du four :
.
4.
5.
Apres le refroidissementdufour,
maintenirle cabochontout en
enlevantla piece metalliquequi la
maintienten place.Remarque :
Lecabochontomberasi on ne
lemaintient pas en place.
Enleverlecabochon et
rampoule.
CABOCHON
RESSORT DE RETENUE
(fil m_tallique)
Installeruneampoulede 40watts pour appareil menager.
Reinstallerlecabochon et le fil metalliquede retenue.
Retablirralimentation de lacuisiniere.Reglerde nouveau
rhorloge.
OU
1. Porterunemaniqueseche et devissertres soigneusementle
cabochonet I'ampoule.
2. Remplacerrampoule par une ampoulepour four, de 40 watts. II
est recommanded'utiliser une ampouleavec un culot en laiton
poureviter lafusion du culot dartsla douille.
.
4.
Remettreen place le cabochon et rebrancherle four.
RemettreI'horloge_ rheure.
Hublot du four
Pour prot_ger le hublot de la porte du four :
1. Ne pasutiliser de produits nettoyantsabrasifscommedes
tampons_ recurer en lained'acier ou des produits de nettoyage
en poudrequi risqueraientde rayerleverre.
2. Ne pasheurter le hublot en verreavec un ustensile,un article de
mobilier,unjouet, etc.
3. Ne pasfermer la portedu four avant que les grilles ne soient en
place dartslefour.
Toutedegradationdu hublot deverre - rayure,choc,tension,etc. -
peut affaiblirsa structure et augmenterle risquede bris _ une date
ulterieure.
43
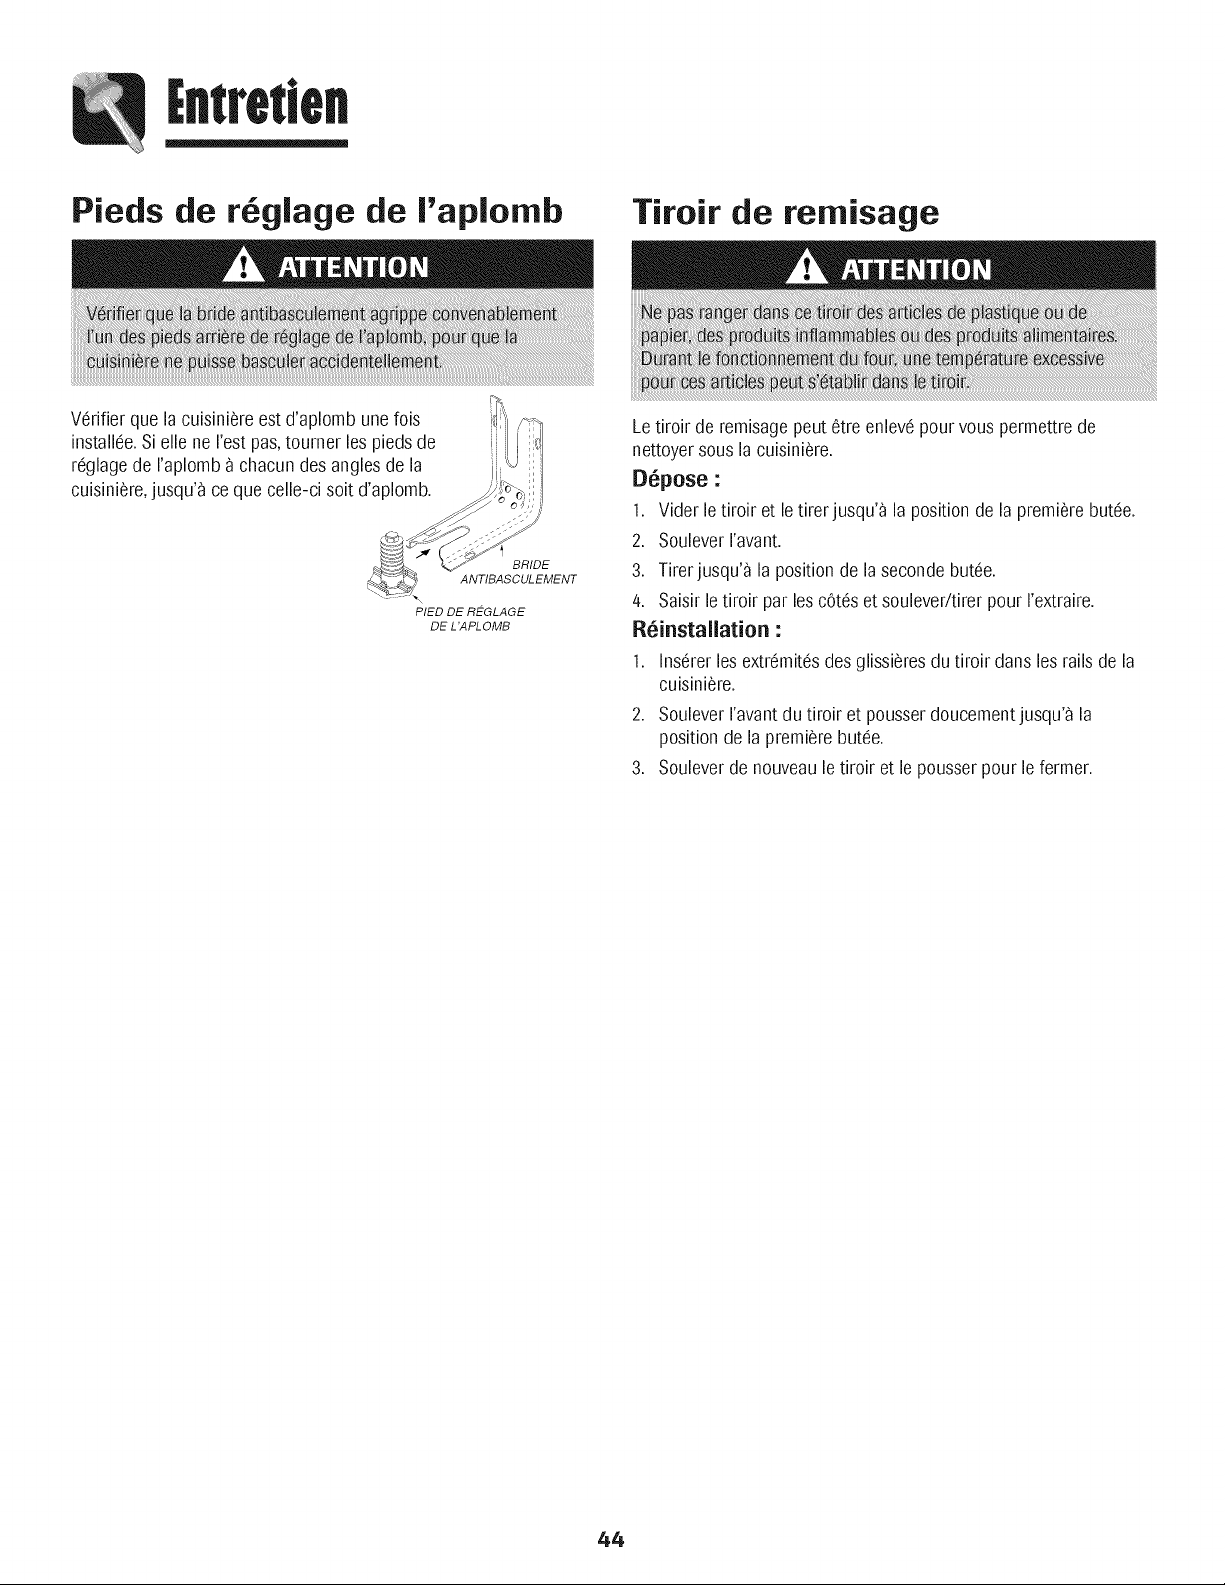
Pieds de r glage de I'aplomb
Tiroir de remisage
Verifier que lacuisiniereest d'aplombunefois
installee.Sielle ne I'estpas,tourner les piedsde
reglagede raplomb 9 chacun desanglesde la
cuisiniere,jusqu'9 ce que celle-ci soit d'aplomb.
BRIDE
ANTIBASCULEMENT
PIED DE REGLAGE
DE L'APLOMB
Letiroir de rernisagepeut etre enlevepour vous permettrede
nettoyersousla cuisiniere.
D_pose :
1. Vider le tiroir et le tirerjusqu'_ la positionde la premierebut(!e.
2. Souleverravant.
3. Tirerjusqu'9 la position de la secondebut(!e.
4. Saisirle tiroir par lescotes et soulever/tirerpour rextraire.
R_installation :
1. InsUrerlesextremit_sdesglissieresdu tiroir dans lesrailsde la
cuisiniere.
2. Souleverravant dutiroir et pousserdoucementjusqu'_ la
positionde la premierebut(!e.
3. Souleverde nouveaule tiroir et le pousserpour le fermer.
44
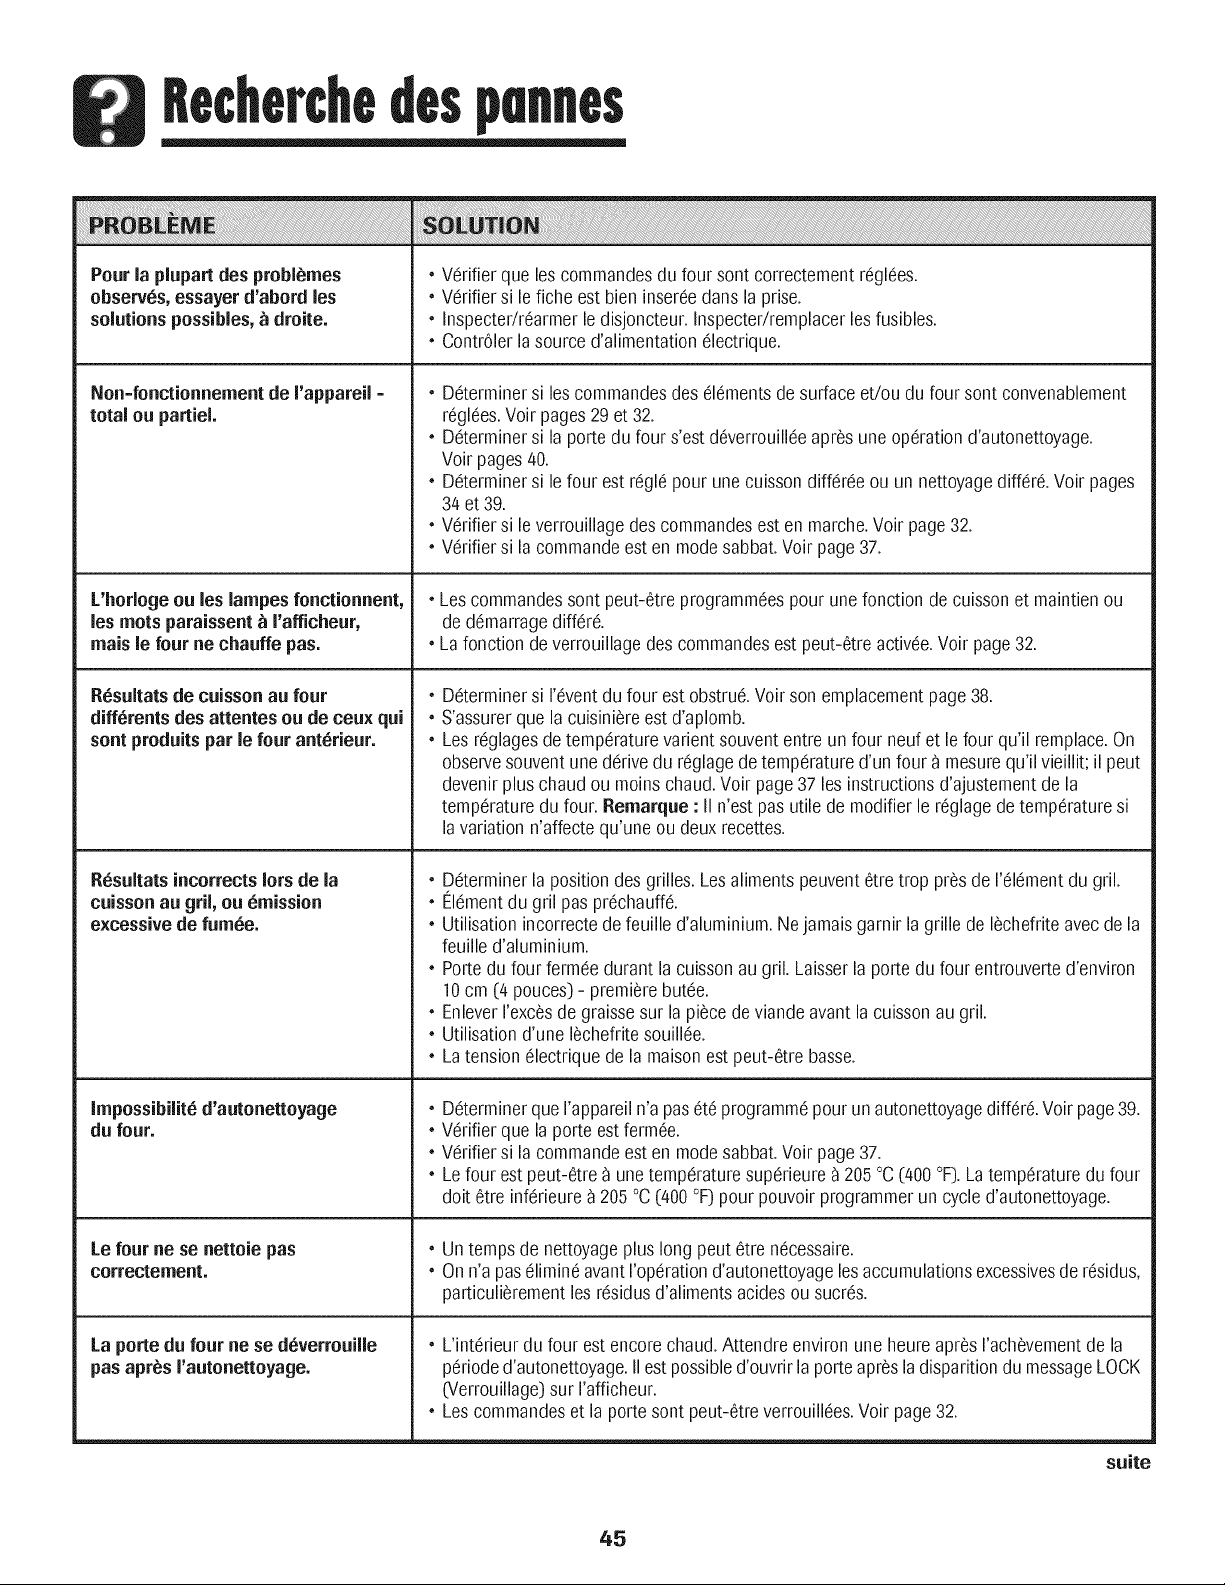
Pour la plupart des problbmes
observ6s,essayer d'abord les
solutionspossibles,tt droite.
Non=fouctionnementde I'appareil =
total ou partiel,
L'horloge ou les lampes fonctionnent,
les rootsparaissent_ I'afficheur,
mais le four ne chauffe pas.
R6sultatsde cuissonau four
diff6rentsdes attentes ou de ceux qui
sont produits par le four ant6rieur.
• Verifier que les commandesdu four sont correctementreglees.
• Verifier si le fiche est bien insereedans la prise.
• Inspecter/rearrnerle disjoncteur.Inspecter/rernplacerlosfusibles.
• ContrOlerla sourced'alirnentation61ectrique.
o
o
o
o
o
o
o
o
o
R6sultatsincorrects Iors de la
cuissonau gril, ou _mission
excessive de fum6e.
o
o
o
Impossibilitb d'autonettoyage
du four.
Le four ne se nettoie pas
correctement.
La porte du four ne se d6verrouille
pas apres I'autonettoyage.
Determinersiles commandesdes 616mentsde surface et/ou du four sont convenablement
reglees.Voir pages29 et 32.
Determinersi la porte du four s'estdeverrouilleeapres uneoperationd'autonettoyage.
Voir pages40.
Determinersi le four estregle pour une cuissondifferee ou un nettoyagediffere,voir pages
34et 39.
verifier si leverrouillagedes commandosest en rnarche.Voir page32.
Verifier si la commandoesten modesabbat.Voir page 37.
Lescommandessont peut-etre programmeespour une fonction de cuissonet maintien ou
de dernarragediffere.
Lafonction de verrouillagedescommandosest peut-etreactivee.Voir page32.
Determinersi I'eventdu four est obstrue.Voir son emplacementpage 38.
S'assurerque la cuisiniere est d'aplornb.
Los reglagesdetemperaturevarient souvententre un four neuf et le four qu'il rernplace.On
observesouventune derivedu reglage de temperatured'un four 9 rnesurequ'il vieillit; il pout
devenirplus chaud ou rnoinschaud.Voir page37 los instructionsd'ajusternentde la
temperaturedu four. Remarque : II n'est pas utile de modifierle reglage de temperaturesi
lavariation n'affectequ'une ou deuxrecettes.
Determinerla positiondes grilles.Lesalimentspeuvent etretrop prosde I'elementdu gril.
I'--lernentdu gril pas prechauffe.
Utilisationincorrectedefeuille d'alurniniurn.Ne jarnaisgarnir la grillede lechefrite avecde la
feuille d'alurniniurn.
Portedu four ferrneedurant la cuissonaugril. Laisserla porte du four entrouverted'environ
10cm (4 pouces)-prernierebutee.
EnleverI'excesde graissesur la piecede viandeavantla cuissonau gril.
Utilisationd'une lechefritesouillee.
Latensionelectriquede la rnaisonest peut-etre basso.
Determinerque I'appareiln'a paset6 programmepour un autonettoyagediffere,voir page39.
verifier que la porte estferrnee.
verifier si la commandoesten modesabbat.Voir page 37.
Lefour estpeut-etre9 unetemperaturesuperieure9 205°C(400°F).Latemperaturedu four
doit ¢tre inferieure9 205°C(400°F)pour pouvoir programmerun cycled'autonettoyage.
Un tempsde nettoyageplus long pout ¢tre necessaire.
Onn'a paselirnineavantI'operationd'autonettoyagelosaccumulationsexcessivesde residus,
particulierernentlos residusd'alirnentsacidesou sucres.
• L'interieurdu four est encorechaud.Attendre environune heure apres I'achevementde la
perioded'autonettoyage.IIestpossibled'ouvrirla porteapresladisparition du messageLOCK
(Verrouillage)sur I'afficheur.
• Loscommandoset la portesont peut-etre verrouillees.Voir page32.
suite
45

Accumulation d'humidit6 sur le • Ceci est normaldurant lacuisson d'alimentscontenant beaucoupd'eau.
hublot ouvapeur sortant de 1'event. • Utilisation excessived'humidit(!Iorsdu nettoyagedu hublot.
o
l':.missiond'une forte odeur ou de
fum6e Iors de la raiseen marehe
du four.
Codesd'anomalie.
Des bruits se font entendre.
II Wya ni bip ni affichage.
SAbelignote puis
reste allure6.
Ceciest normalpour une cuisiniereneuve;cet effet disparait apresquelquesutilisations.
L'executiond'unprogrammed'autonettoyagepermettrade faire disparaitre cetteodeur plus
rapidement.
Fairefonctionner leventilateur pourevacuerla fumee ou I'odeur.
Presenced'une accumulation de residusalimentairessur lefond du four. Executorune
operationd'autonettoyage.
• Les motsBAKE(Cuissoncourante)ou LOCK(Verrouillage)peuventclignoter rapidement
I'afficheur pour prevenird'une erreurou d'un probleme.Si le mot BAKEou LOCKparait
I'afficheur,appuyersur la touche CANCEL(Annulet). Si le mot BAKEou LOCKcontinue
clignoter,debrancherrappareiI.Attendrequelquesminutes,puisrebrancherI'appareil.Sile mot
continue_ clignoter,debrancherrappareil et prendrecontactavec un r@arateurautorise.
• Sile four est tres sale,lesflammechespeuventproduire un coded'anomalieau coursdu cycle
d'autonettoyage.Appuyer sur la toucheCANCEL et laisserle four refroidir completement,
essuyerlasalet(!enexecspuisreprogrammerrautonettoyage.Sile coded'anomaliereapparait,
prendrecontactavecun r@arateur autorise.
• Lefour fait plusieursbruitsfaibles. II est possibled'entendreles relaisdu four qui se mettent
en marcheet s'arretent.Ceciestnormal.
• Alors que lefourse rechauffeetse refroidit,il est possibled'entendredesbruitscorrespondant
ladilatationet _ la contractiondes piecesmetalliques.Ceciest normalet n'endommagepas
I'appareil.
• Le bruit d'un ventilateurpeut ¢tre entendu.C'estle ventilateurde refroidissementet ceci
estnormal. Leventilateur continue_ fonctionnertant que lefour n'a pas refroidi.
• Lefour est peut-etreen modesabbat.Voir page 37.
• Les commandespeuvent¢treverrouillees.Voir page 32.
• Lefour esten modesabbat.Pourannulet, appuyersur latouche Clock (Horloge) et
maintener-laenfonceependantcinq secondes.
46
p
GARANTIE DES GROS APPAREILS MENAGERS
MAYTAG CORPORATION
GARANTIE LIMITI_E
Pendant un an & compter de la date d'achat, Iorsque ce gros appareil menager est utilise et entretenu conformement aux instructions
jointes & ou fournies avec le produit, la marque Maytag de Whirlpool Corporation ou Whirlpool Canada LP (ci-apres designees
"Maytag") paiera pour les pieces specifiees par I'usine et la main-d'ceuvre pour corriger les vices de materiaux ou de fabrication. Le
service doit etre fourni par une compagnie de service designee par Maytag. Cette garantie limitee est v alide uniquement aux €:tats-Unis
ou au Canada et s'applique exclusivement Iorsque I'appareil est utilise dans le pays oQ il a ete achet& A I'exterieur du Canada et des 50
€:tats des €:tats-Unis, cette garantie limitee ne s'applique pas. Une preuve de la date d'achat original est exigee pour obtenir un service
dans le cadre de la presente garantie limitee.
ARTICLES EXCLUS DE LA GARANTIE
La pr_sente garantie limit_e ne couvre pas :
1. Les visites de service pour rectifier I'installation du gros appareil menager, montrer a I'utilisateur comment utiliser I'appareil,
remplacer ou reparer des fusibles ou rectifier le c&blage ou la plomberie du domicile.
2. Les visites de service pour reparer ou remplacer les ampoules electriques de I'appareil, les filtres & air ou les filtres & eau. Les pieces
consomptibles ne sont pas couvertes par la garantie.
3. Les reparations Iorsque le gros appareil menager est utilise & des fins autres que I'usage unifamilial normal ou Iorsque les
instructions d'installation et/ou les instructions de I'operateur ou de I'utilisateur fournies ne sont pas respectees.
4. Les dommages imputables & : accident, modification, usage impropre ou abusif, incendie, inondation, actes de Dieu, installation
fautive ou installation non conforme aux codes d'electricite ou de plomberie, ou I'utilisation de pieces consomptibles ou de produits
nettoyants non approuves par Maytag.
5. Les defauts apparents, notamment les eraflures, les bosses, fissures ou tout autre dommage au fini du gros appareil menager, &
moins que ces dommages soient dus & des vices de materiaux ou de fabrication et soient signales & Maytag dans les 30 jours
suivant la date d'achat.
6. Toute perte d'aliments due & une defaillance du refrigerateur ou du congelateur.
7. Les coQts associes au transport du gros appareil menager du domicile pour reparation. Ce gros appareil menager est con£_upour
etre repare & domicile et seul le service & domicile est couvert par la presente garantie.
8. Les reparations aux pieces ou systemes resultant d'une modification non autorisee faite & I'appareil.
9. Les frais de transport pour le service d'un produit si votre gros appareil est situe dans une region eloignee oQ un service d'entretien
Maytag autorise n'est pas disponible.
10. La depose et la reinstallation de votre gros appareil si celui-ci est installe dans un endroit inaccessible ou n'est pas installe
conformement aux instructions d'installation fournies.
11. Les gros appareils menagers dont les numeros de serie et de modele originaux ont ete enleves, modifies ou qui ne peuvent pas etre
facilement identifies. La presente garantie est nulle si le numero de serie d'usine a ete modifie ou enleve du gros appareil menager.
Le coQt d'une reparation ou des pieces de rechange dans le cadre de ces circonstances exclues est & la charge du client.
CLAUSE D'EXONI:!:RATION DE RESPONSABILITI:!: AU TITRE DES GARANTIES IMPLICITES; LIMITATION DES RECOURS
LE SEUL ET EXCLUSIF RECOURS DU CLIENT DANS LE CADRE DE LA PR¢:SENTE GARANTIE LIMIT¢:E CONSISTE EN LA
R¢:PARATION PR¢:VUE CI-DESS. US. LES GARANTIES IMPLICITES, Y COMPRIS LES GARANTIES APPLICABLES DE QUALIT¢:
MARCHANDE ET D'APTITUDE A UN USAGE PARTICULIER, SONT LIMIT¢:ES A UN AN OU A LA PLUS COURTE P¢:RIODE AUTORIS¢:E
PAR LA LOI. MAYTAG N'ASSUME AUCUNE RESPONSABILIT¢: POUR LES DOMMAGES FORTUITS OU INDIRECTS. CERTAINES
JURIDICTIONS NE PERMETTENT PAS L'EXCLUSION OU LA LIMITATION DES DOMMAGES FORTUITS OU INDIRECTS, OU LES
LIMITATIONS DE LA DUR¢:E DES GARANTIES IMPLICITES DE QUALIT¢: MARCHANDE OU D'APTITUDE A UN USAGE PARTICULIER,
DE SORTE QUE CES EXCLUSIONS OU LIMITATIONS PEUVENT NE PAS S'APPLIQUER DANS VOTRE CAS. CE-I-I-E GARANTIE VOUS
CONF#RE DES DROITS JURIDIQUES SP¢:CIFIQUES ET VOUS POUVEZ €:GALEMENT JOUIR D'AUTRES DROITS QUI PEUVENT
VARIER D'UNE JURIDICTION A UNE AUTRE.
A I'exterieur du Canada et des 50 €:tats des €:tats-Unis, cette garantie ne s'applique pas. Contactez votre marchand Maytag autorise
pour determiner si une autre garantie s'applique.
Si vous avez besoin de service, voir d'abord la section "Depannage" du Guide d'utilisation et d'entretien. Apres avoir verifie la section
"Depannage", de I'aide supplementaire peut etre trouvee en verifiant la section "Assistance ou service" ou en appelant Maytag. Aux
E.-U., composer le 1-800-688-9900. Au Canada, composer le 1-800-807-6777.
9/07
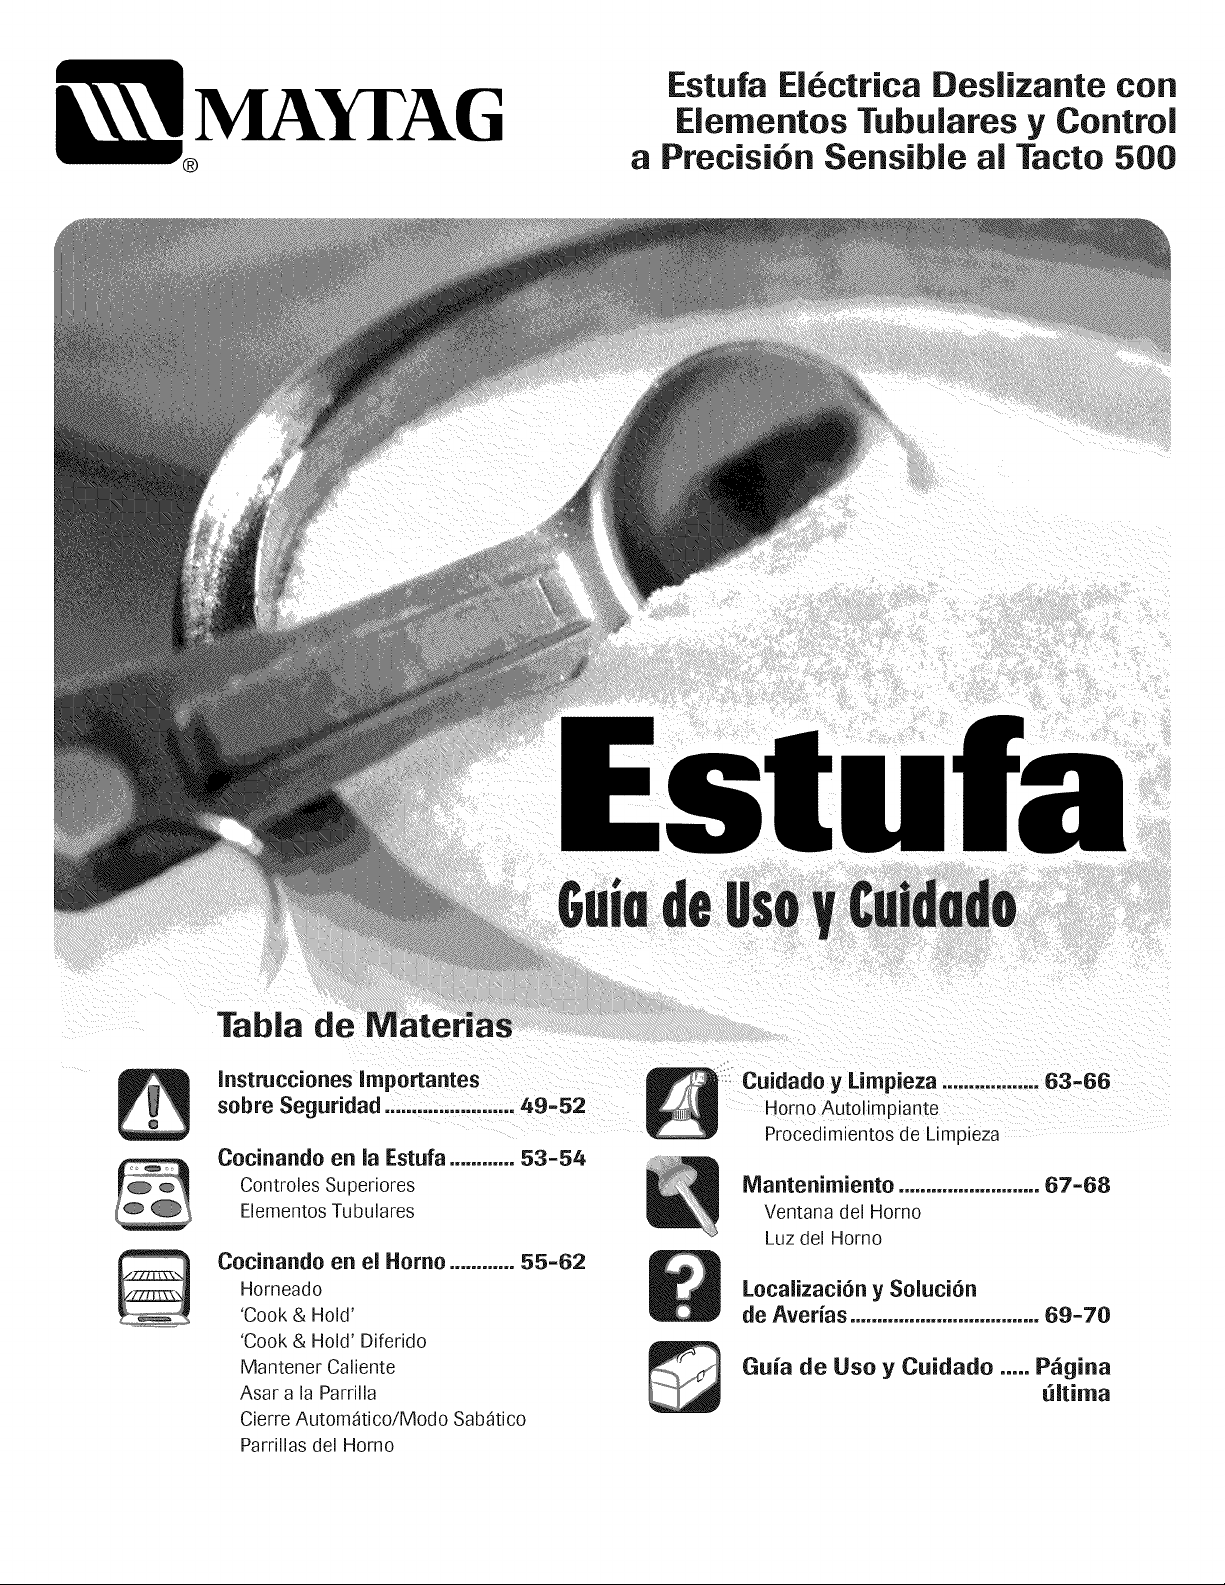
Y[AG
a
Estufa EJ_ctrica Desiizante con
Eiementos Tubulares y Control
Precisi6n Sensible al Tacto 500
Cocinando en la Estufa ............ 53-54
Controles Superiores
Bementos Tubulares
Cocinando en ei Homo ............ 55=62
Horneado
'Cook & Hold'
'Cook & Hold' Diferido
Mantener Caliente
Asar a la Parrilla
Cierre Autom_tico/Modo Sab_tico
Parrillas del Homo
Mantenimiento ..........................67=68
Ventana del Homo
Luz del Homo
Localizaci6n y Soluci6n
de Averias ...................................69=70
Guia de Uso y Cuidado ..... P_gina
_ltima
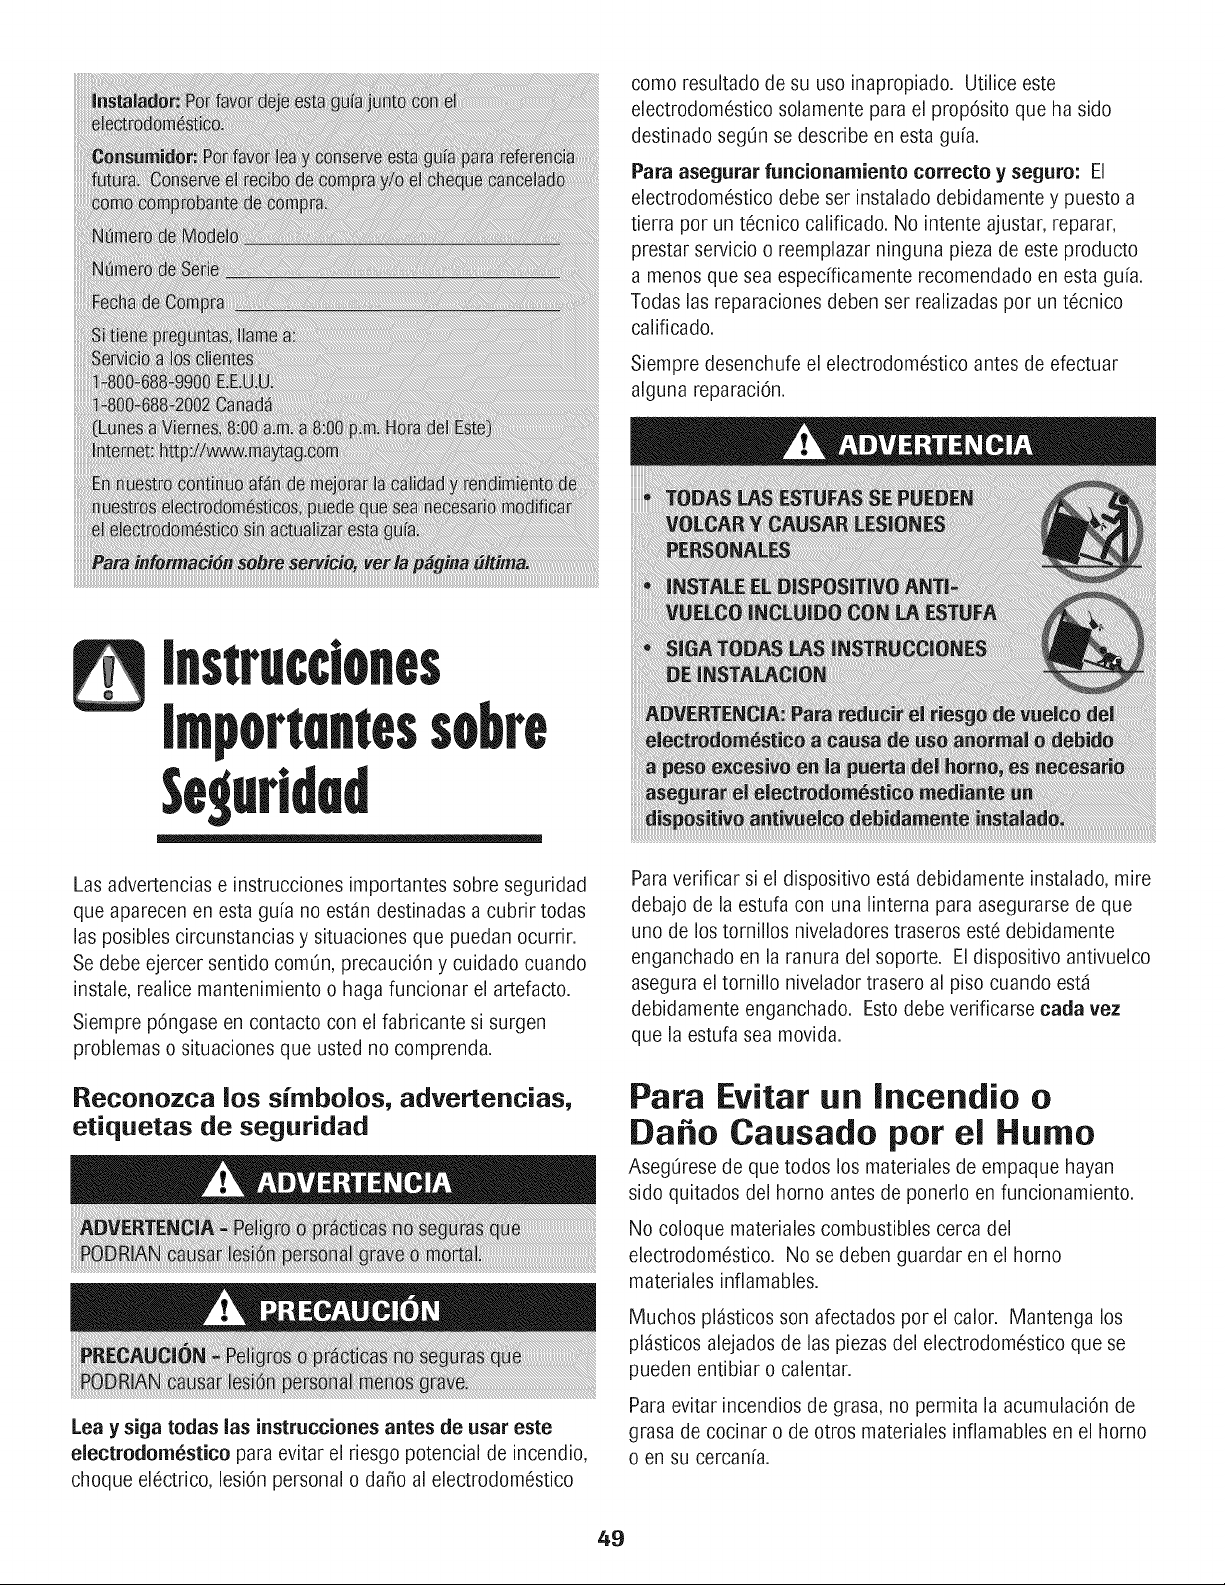
come resultado de su use inapropiado. Utilice este
electrodomOstico solamente para el propOsito que ha side
destinado segOn se describe en esta gufa.
Para asegurar funcionamiente correcto y seguro: El
electrodomOstico debe ser instalado debidamente y puesto a
tierra per un tOcnico calificado. No intente ajustar, reparar,
prestar servicio o reemplazar ninguna pieza de este producto
a menos que sea espedficamente recomendado en esta gu[a.
Todas las reparaciones deben ser realizadas per un tOcnico
calificado.
Siempre desenchufe el electrodomOstico antes de efectuar
alguna reparaciOn.
Las advertencias e instrucciones importantes sobre seguridad
que aparecen en esta gu[a no est4n destinadas a cubfir todas
las posibles circunstancias y situaciones que puedan ocurrir.
Se debe ejercer sentido comOn, precauci6n y cuidado cuando
instale, realice mantenimiento o haga funcionar el artefacto.
Siempre pOngase en contacto con el fabricante si surgen
problemas o situaciones que usted no comprenda.
Reconozca los sirnbolos, advertencias,
etiquetas de seguridad
Lea y siga todas las instrucciones antes de usar este
electredom_stJco para evitar el riesgo potencial de incendio,
cheque elOctrico, lesion personal o da_o al electrodomOstico
Para verificar si el dispositivo est4 debidamente instalado,mire
debajo de la estufa con una linterna para asegurarse de que
uno de los tornillos niveladores traseros est6 debidamente
enganchado en la ranura del soporte. El dispositivo antivuelco
asegura el tornillo nivelador trasero al piso cuando est4
debidamente enganchado. Esto debe verificarse carla vez
que la estufa sea movida.
Para Evitar un |ncendio o
Da o Causado per el I-lumo
Aseg_rese de que todos los materiales de empaque hayan
side quitados del homo antes de ponerlo en funcionamiento.
No coloque materiales combustibles cerca del
electrodomOstico. No se deben guardar en el homo
materiales inflamables.
Muchos pl4sticos son afectados per el calor. Mantenga los
pl4sticos alejados de las piezas del electrodomOstico que se
pueden entibiar o calentar.
Para evitar incendios de grasa, no permita la acumulaciOn de
grasa de cocinar o de otros materiales inflamables en el homo
o en su cercan[a.
49
InstrucdonesImportentes Se:gurlded
En Caso de incendio
Use un extintor con producto qu[mico seco o del tipo espuma o
bicarbonato para apagar el incendio o las llamas. Nunca use
agua en un incendio de grasa.
1. Apague el homo para evitar que la llama se disperse.
2. NUNCA levante o mueva una sart6n en llamas.
3. Apague el fuego o la llama cerrando la puerta del homo.
Apague la campana de ventilaci0n para evitar que las llamas
se dispersen. Apague las llamas y luego encienda la campana
para expulsar el humo y el olor.
Seguridad para los Ni os
NUNCA deje a los ni_os solos o sin supervision cuando el
homo est6 en uso o cuando est6 caliente. Nunca permita que
los ni_os se sienten o se paten en ninguna pieza del
electrodom6stico pues se pueden lesionar o quemar.
Se les debe ense_ar a los ni_os que el electrodom6stico y los
utensilios que est_in en 61pueden estar calientes. Deje enfriar
los utensilios calientes en un lugar seguro, fuera del alcance
de los ni_os. Se les debe ense_ar a los ni_os que un
electrodom6stico no es un juguete y que no deben jugar con
los controles u otras piezas del artefacto.
instrucciones Generales
Para evitar posibles riesgos para el usuario y da_o al
electrodom6stico, no use este producto como una estufa para
calentar o entibiar una habitaci6n. Adem_s no use el homo
como un lugar para guardar alimentos o utensilios de cocina.
No obstruya la circulaciOn del aire bloqueando el respiradero
del homo. El respiradero del homo se encuentra en la parte
trasera de la superficie de cocci6n.
NO TOQUE LOS ELEMENTOSCALEFACTORESNI LAS
SUPERFICIESINTERIORESDEL HORNO. Los elementos
calefactores pueden estar calientes a0n cuando su color sea
obscuro. Las superficies interioresde cualquier homo se
calientan Io suficiente como para causar quemaduras. Du-
rante y despu6s del uso, no toque ni permita que las ropas u
otros materiales inflamables entrenen contacto con los
elementos calefactores o las superficies interioresdel homo
hasta que no se hayan enfriado. Otras superficies que pueden
estar calientes incluyenla cubierta, las superficies que est_n
dirigidas hacia la cubierta, el respiradero del homo, la
superficie cercana a la abertura del respiradero, la puerta del
homo y la _rea que la rodea, y la ventanilla del horno.
No toque un foco caliente del homo con un paso h0medo
pues se puede quebrar. Si el foco se quiebra, desenchufe el
electrodom6stico antes de sacar el foco para evitar sufrir un
choque el6ctrico.
NUNCA use papel de aluminio para cubfir las parfillas del
homo ni el panel inferior del homo. El uso incorrecto puede
resultar en un fiesgo de choque el6ctrico, incendio o da_o al
electrodom6stico. Use papel de aluminio solamente como se
indica en esta gu[a.
No use la cubierta o el homo como una _rea para almacenar
alimentos o utensilios de cocina.
Seguridad al Cocinar
Nunca caliente un contenedor de alimento cerrado en el
homo. La acumulaciOn de presi6n puede reventar el
contenedor causando una lesion personal grave o da_o al
electrodom6stico.
Use tomaollas secos y gruesos. Los tomaollas htimedos
pueden causar quemaduras por vapor. No se deben usar
toallas de secar los platos ni otros sustitutos en vez de los
tomaollas porque pueden pasar sobre los elementos calientes
y encenderse o pueden quedar atrapados en las piezas del
electrodom6stico.
Use vestimentas apropiadas. Las ropas sueltas o ropas con
mangas largas sueltas no se deben usar cuando se est_
cocinando. La ropa se puede prender fuego y causar
quemaduras si entra en contacto con los elementos
calefactores.
Siempre coloque las parrillas del homo en las posiciones
deseadas cuando el homo est6 fr[o. Deslice la parrilla del
homo hacia afuera para agregar o retirar alimentos usando
5O

InstrucdonesImportentes Se:gurlded
tomaollas secos y gruesos. Siempre evite colocar o retirar
alimentos del homo sin sacar la parrilla hacia afuera. Si una
parrilla debe ser movida cuando est6 caliente, use un
tomaollas seco. No deje que el tomaolla entre en contacto
con el elemento caliente del homo.
Use las parfillas solamente en el homo en que fueron
enviadas/compradas.
Tenga cuidado cuando abra la puerta del horno. Primero deje
que salga el aire o vapor caliente antes de sacar o volver a
colocar el alimento en el homo.
ADVERTENCIA SOBRE ALIiVlENTOS PREPARADOS: Siga
las instrucciones del fabficante del alimento. Si un contenedor
de alimento congelado de pl_stico y/o su tapa se deforma,
comba o de otra manera se da_a durante la cocci6n,
inmediatamente descarte el alimento y su contenedor. El
alimento puede estar contaminado.
No permita que el papel de aluminio o la sonda de la came
toque el elemento calefactor.
Siempre apague todos los controles cuando haya terminado
de cocinar.
Seguridad sobre el Uso
de Utensilios
Siga las instrucciones del fabricante cuando use bolsas para
cocinar en el homo.
El rendimiento y funcionamiento seguro de este
electrodomestico ha sido comprobado usando utensilios de
cocina tradicionales. No use ning0n dispositivo o accesofio
que no haya sido espec[ficamente recomendado en esta gu[a.
No use cubiertas a los elementos, rejillas superiores de la
estufa o sistemas de convecci6n para homos. El uso de
dispositivos o accesorios que no sean expresamente
recomendados en esta gu[a puede crear peligros graves de
segufidad, afectar el rendimiento y reducir la vida 0til de los
componentes de este electrodom6stico.
Si el utensilio es m_s peque_o que el elemento, una porci6n
del elemento quedar_ expuesta y puede encender la ropa o un
tomaollas.
Solamente ciertos tipos de utensilios de vidfio, vidrio cer_mico,
cer_mica, gres u otros utensilios vidriados son convenientes
para cocinar en la superficie o en el homo sin quebrarse
debido al repentino cambio de temperatura. Siga las
instrucciones del fabricante del utensilio cuando use vidrio.
Gire los mangos de los utensilios hacia el centro de la
cubierta, no hacia la habitaci6n ni sobre otto elemento
superior. Esto reduce el fiesgo de quemaduras, encendido de
matefiales inflamables o derrames si el utensilio es tocado
accidentalmente o alcanzado pot ni_os peque_os.
Cubierta
NUNCA deje los elementos superiores sin supervision,
especialmente cuando est6 usando los ajustes de calor altos.
Un derrame que no reciba la debida atenci6n puede causar
humo y un derrame de grasa puede causar un incendio.
Este electrodom6stico tiene diferentes tama_os de elementos
supefiores. Seleccione utensilios que tengan bases planas Io
suficientemente grandes para cubfir el elemento. La relaci6n
adecuada entre el utensilio y el elemento mejorar_ la
eficiencia al cocinar.
Elementos Tubulares
Para evitar da_o a los elementos calefactores removibles, no
los sumerja, remoje ni lave en un lavavajillas o en un homo
autolimpiante. Un elemento da_ado puede producir un
cortocircuito resultando en un incendio o riesgo de choque
el6ctrico.
AsegOrese de que los platillos protectores est6n en su lugar
pues la ausencia de estos durante la cocci6n puede da_ar el
alambrado.
Fortes Protectores: No use papel de aluminio para forrar los
platillos protectores o la parte inferior del homo, excepto como
se sugiera en la gu[a. La instalaci6n incorrecta de estos forros
puede resultar en un riesgo de choque el6ctrico o incendio.
Ollas Freidoras
Use extremo cuidado cuando mueva la olla con aceite o
descarte la grasa caliente. Deje que la grasa se enfr[e antes
de intentar mover la olla.
Campanas de Ventilaci6n
Limpie con frecuencia la campana y los filtros a fin de evitar
que se acumule en ellos grasa u otros materiales inflamables y
para evitar incendios de grasa.
Cuando prepare alimentos flameados debajo de la campana,
encienda el ventilador.
51
InstrucdonesImportentes Segurlded
Seguridad en la Lirnpieza
Limpie con cuidado la cubierta. Apague todos los controles y
espere que se enfr[en las piezas del electrodom6stico antes de
tocaflas o limpiarlas. Limpiecon cuidado. Tonga cuidado
para evitar quemaduras de vapor si usa una esponja o un
paso mojado para limpiar derrames en una superficie caliente.
Algunos limpiadores pueden producir vapores nocivos cuando
se aplican en una superficie caliente.
Limpie solamente las piezas indicadas en esta gu[a.
Homo Autolimpiante
No limpie lajunta de la puerta. Lajunta de la puerta es
esencial para obtener un sellado herin@co. Se debe tener
cuidado de no frotar, da_ar ni mover la junta.
No use iimpiadores de homo ni forros de homo de ningOn tipo
alrededor ni en ninguna parte del homo autolimpiante.
Aviso y Advertencia
|mportante Sobre Seguridad
La Propuesta 65 de la Ley de 1986 del Estado de California
Sobre Seguridad y ContaminaciOn del Agua Potable (Califor-
nia Safe Drinking Water and Toxic Enforcement Act of 1986)
exige que el Gobernador de California publique una lista de
las sustancias que segOn el estado de California causan
c_ncer o da_o al sistema reproductivo y exige que las
empresas adviertan a sus clientes sobre la exposiciOn
potencial a tales sustancias.
Se advierte a los usuafios de este electrodom6stico que
cuando el homo est,1funcionando en el ciclo de autolimpieza,
puede haber exposici6n de bajo nivel a algunas de las
sustancias indicadas en la list& incluyendo monOxido de
carbono. La exposici6n a estas sustancias puede ser reducida
a un m[nimo ventilando el homo al exterior en forma
adecuada, abriendo las ventanas y/o la puerta en la habitaci6n
en donde est,1ubicado el electrodom6stico durante el ciclo de
autolimpieza.
AVISO IMPORTANTE RESPECTO A LOS PAJAROS
DOMESTICOS: Nunca mantenga los p_jaros en la cocina o
en las habitaciones donde puedan Ilegar los humos de la
cocina. Los p_jaros tienen un sistema respiratorio muy
sensitivo. Los humos producidos durante el ciclo de
autolimpieza del homo pueden ser perjudiciales o mortales
para los p_jaros. Los humos que despide el aceite de cocina
recalentado, la grasa, margafina y los utensilios
antiadherentes recalentados tambi@ pueden ser perjudiciales.
Conserve estas instrucciones para referencia futura
52
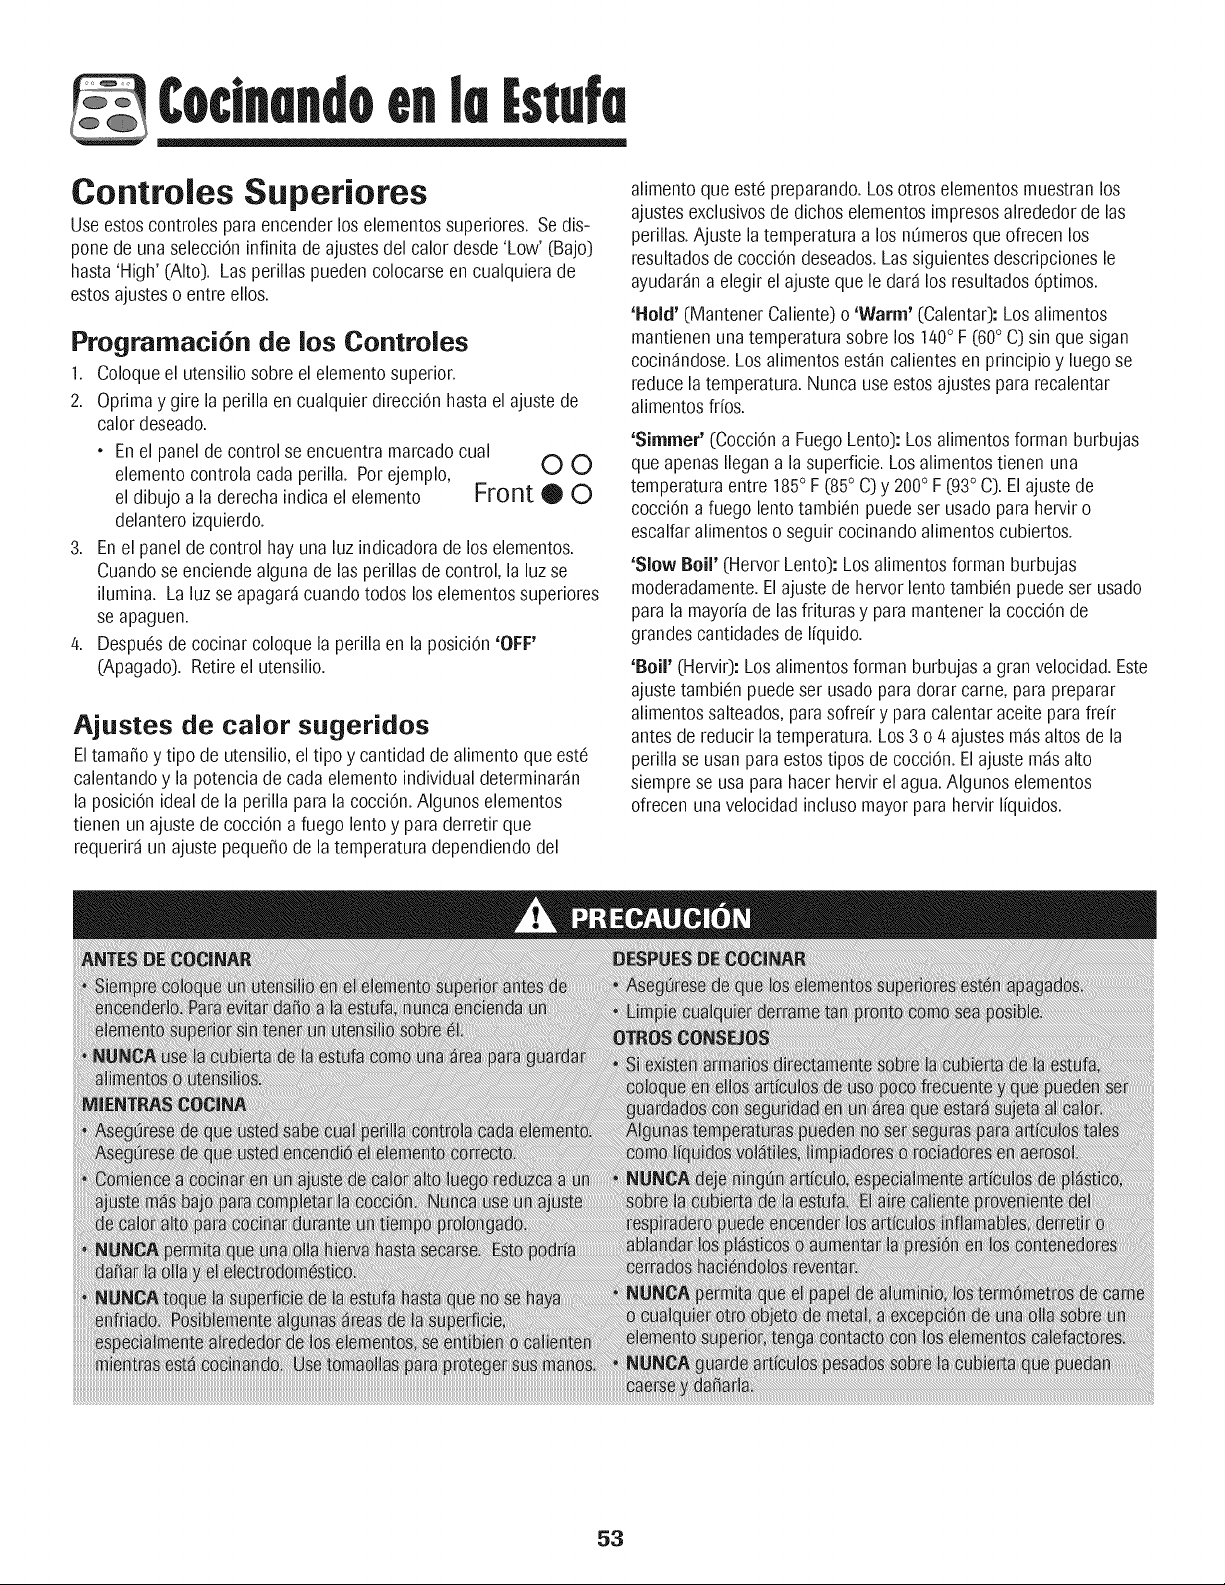
Controles Superiores
Useestoscontrolesparaencenderloselementossuperiores. Se dis-
ponede una selecci6ninfinitadeajustesdel calor desde'Low' (Bajo)
hasta'High' (Alto). Las perillaspueden colocarseen cualquierade
estosajusteso entre olios.
Prograrnaci6n de los Controles
1. Coloqueel utensiliosobre el elementosuperior.
2. Oprimay gire la perilla en cualquier direcci6n hastael ajustede
calor deseado.
• Enel panel de control se encuentramarcadocual
elementocontrolacarla perilla. Potejemplo, O O
el dibujo a la derechaindica el elemento Front O O
delantero izquierdo.
3. Enel panelde control hay una luz indicadorade los elementos.
Cuandose enciendealgunade las perillasde control, la luz se
ilumina. La luzse apagar_cuando todos loselementossuperiores
se apaguen.
4. Despu(!sde cocinar coloquela perillaen la posici6n'OFF'
(Apagado). Retireel utensilio.
Ajustes de calor sugeridos
Eltama_oy tipo de utensilio,eltipo y cantidadde alimentoque est(!
calentandoy la potencia de carla elementoindividual determinardn
la posici6nidealde la perilla para la cocci6n.Algunos elementos
tienen un ajuste de cocci6na fuego lento y paraderretir que
requerir_un ajustepeque_ode la temperaturadependiendodel
alimentoque est(!preparando.Losotros elementosmuestranlos
ajustesexclusivosde dichos elementosimpresosalrededor de las
perillas.Ajuste la temperaturaa los nOmerosque ofrecen los
resultadosde cocci6n deseados.Las siguientesdescripcionesle
ayudar_na elegirel ajusteque le dar_ los resultados6ptimos.
'Hold' (MantenerCaliente)o 'Warm' (Calenta0: Losalimentos
mantienenunatemperaturasobre los 140° F (60° C) sin que sigan
cocin_ndose.Los alimentosest_n calientesen principio y luegose
reduce latemperatura.Nunca useestosajustespara recalentar
alimentosfrfos.
'Simmer' (Cocci6na FuegoLento): Los alimentosforman burbujas
que apenasIlegana lasuperficie.Losalimentostienen una
temperaturaentre 185° F (85° C) y 200° F (93° C). El ajuste de
cocci6n a fuego lentotambi(!n puedeset usado paraherviro
escalfaralimentoso seguir cocinandoalimentoscubiertos.
'Slow Boil' (HervorLento):Los alimentosforman burbujas
moderadamente.El ajuste de hervor lentotambi(!n puedeset usado
para la mayorfade lasfrituras y para mantener la cocci6nde
grandescantidadesde Ifquido.
'Boil' (Hervir): Losalimentosforman burbujasa granvelocidad.Este
ajustetambi(!npuedeset usadopara dorarcame, para preparar
alimentossalteados,para sofrefry para calentar aceiteparafrefr
antesde reducir latemperatura.Los 3 o 4 ajustesm_s altos de la
perillase usanparaestostipos de cocci6n. El ajuste m_salto
siemprese usapara hacerhen/ir el agua.Algunos elementos
ofrecenunavelocidadinclusomayor para hervir liquidos.
53
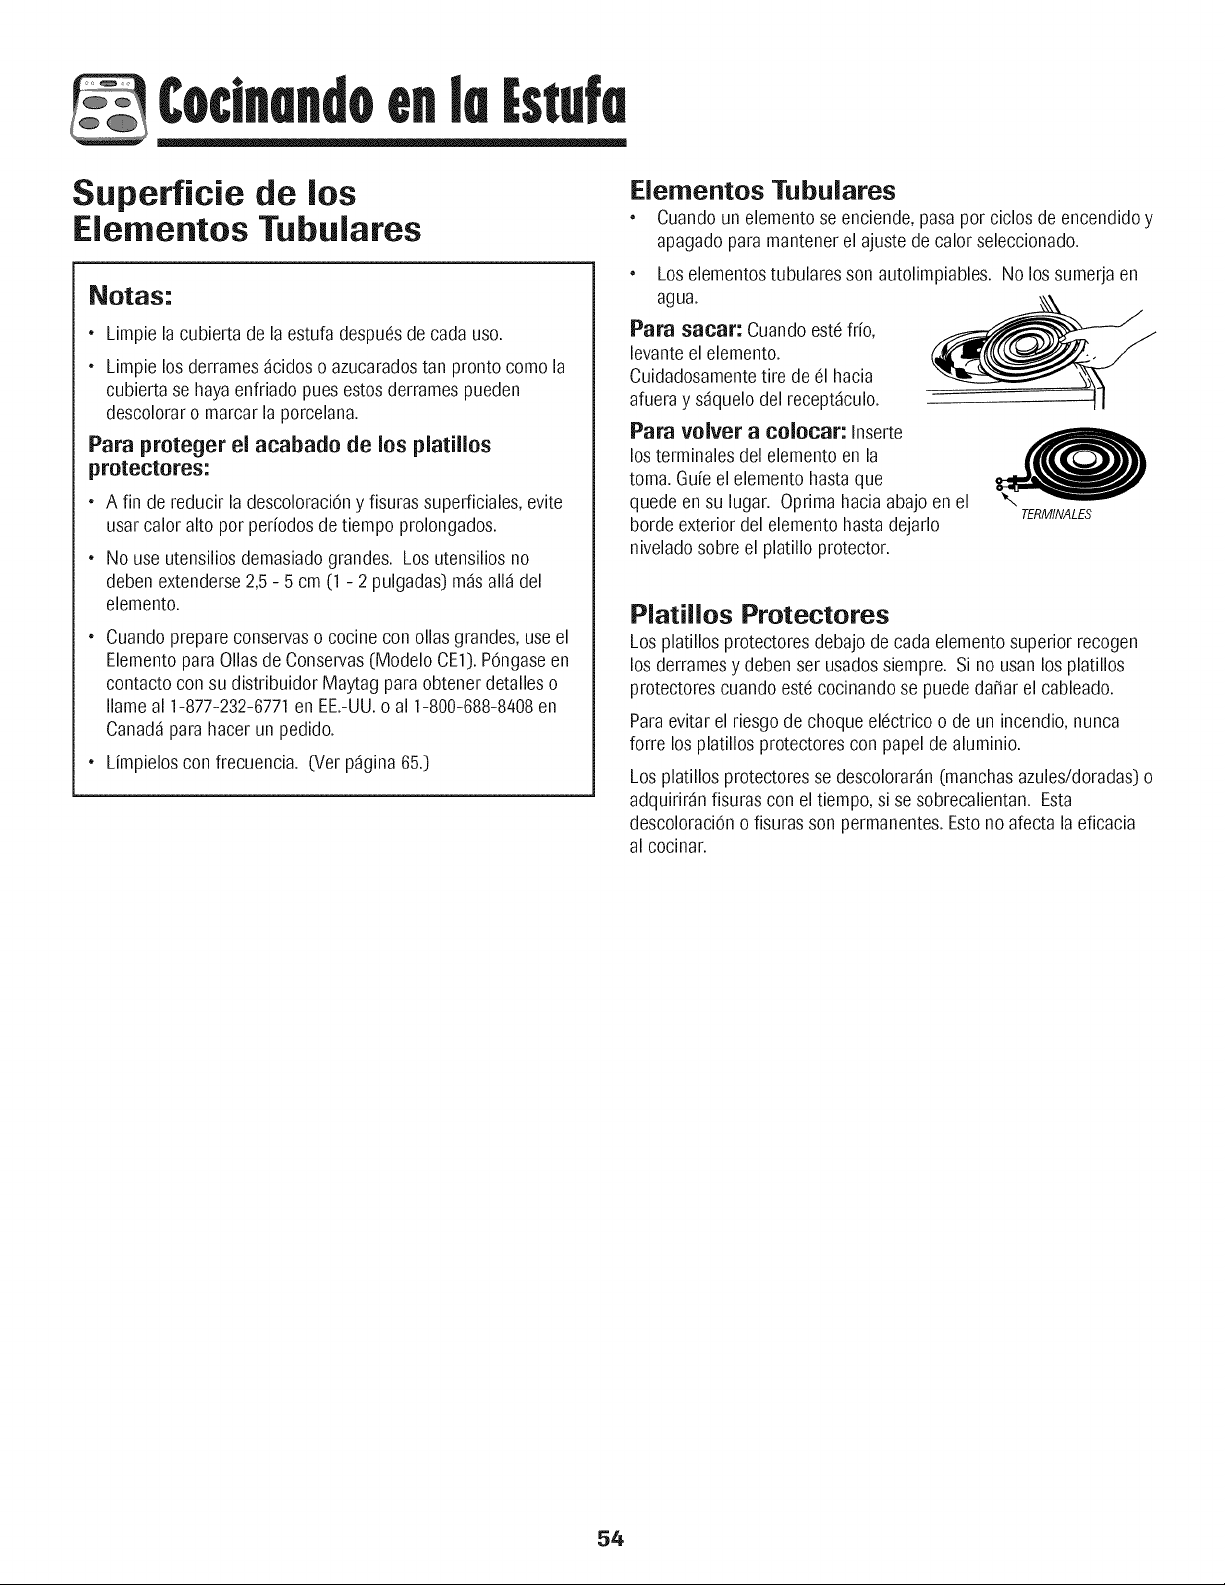
Superficie de los
Elementos Tubulares
Notas:
• Limpie la cubiertade la estufadesp@sde cada uso.
• Limpie los derrames_cidoso azucaradostan prontocomo la
cubiertase hayaenfriado puesestosderramespueden
descoloraro marcar la porcelana.
Para proteger el acabado de los platillos
protectores:
• A fin de reducir la descoloraci0ny fisurassuperficiales,evite
usar calor alto por perfodosdetiempo prolongados.
• No use utensiliosdemasiadograndes. Los utensiliosno
debenextenderse2,5- 5 cm (1 - 2 pulgadas)m_s all_del
elemento.
• Cuandoprepareconservaso cocine con ollas grandes,useel
ElementoparaOllasde Conservas(Modelo CE1).P0ngaseen
contactocon su distribuidor Maytag paraobtenerdetalleso
Ilameal 1-877-232-6771en EE.-UU.o al 1-800-688-8408en
Canad_para hacerun pedido.
• Limpielos con frecuencia. (Ver pdgina 65.)
Elementos Tubulares
• Cuandoun elementose enciende,pasa por ciclos de encendidoy
apagadopararnantenerel ajuste de calor seleccionado.
• Los elementostubularesson autolimpiables.No los sumerjaen
agua.
Para sacar: Cuandoest(!fifo,
levanteel elemento.
Cuidadosamentetire de (!1hacia
afueray s_quelodel recept_culo.
Para volver a colocar: Inserte
losterminalesdel elementoen la
tom& Gufeelelementohastaque
quede en su lugar. Oprimahacia abajoenel TERMINALES
bordeexteriordel elementohastadejarlo
niveladosobre el platillo protector.
Platillos Protectores
Losplatillos protectoresdebajodecada elementosuperior recogen
los derramesy deben ser usadossiernpre. Si no usan los platillos
protectorescuandoest(1cocinando se puede da_arel cableado.
Paraevitarel riesgode choque el@tricoo de un incendio,nunca
forre los platillosprotectorescon papelde aluminio.
Losplatillos protectoresse descolorar_n(man@asazules/doradas)o
adquirir_nfisuras con el tiempo,si sesobrecalientan. Esta
descoloraciOno fisuras son permanentes.Estono afecta la eficacia
al cocinar.
54
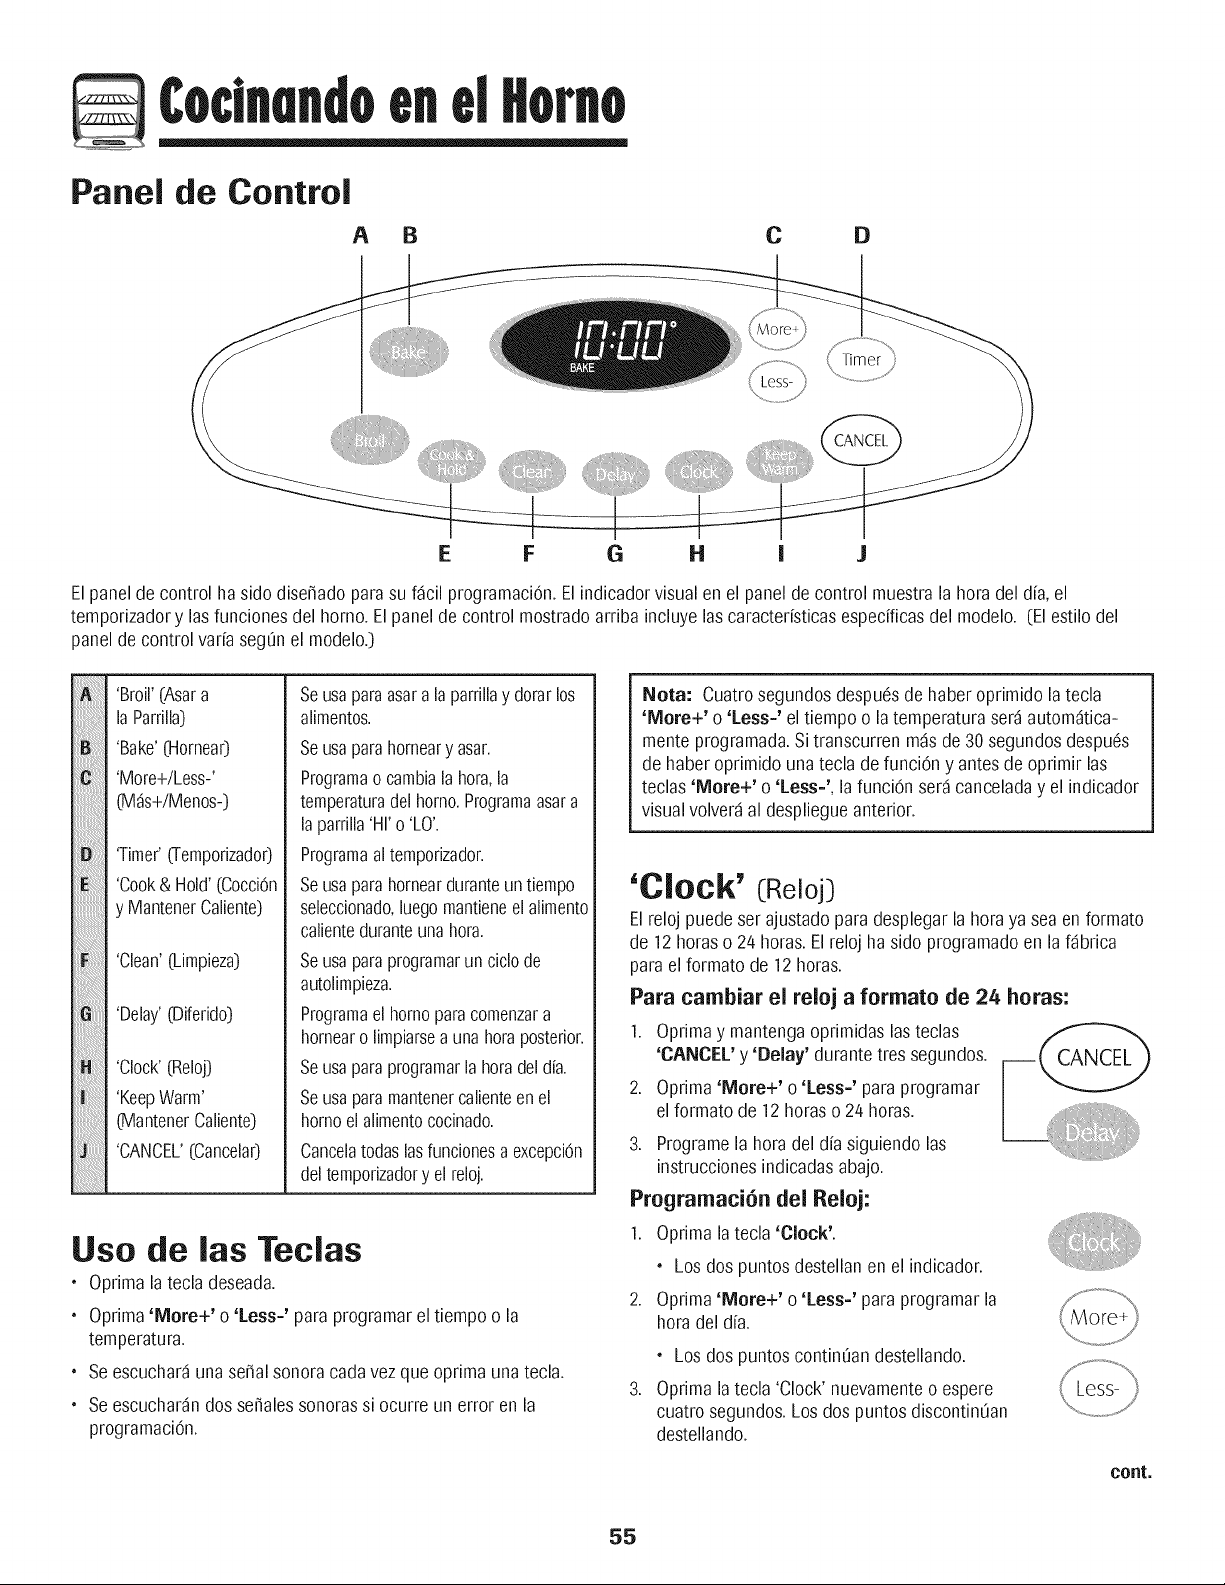
Cocinandoend
Panel de Control
A B C D
E F G H i J
Elpanelde controlha side dise_adopara su fdcil programaciOn.El indicadorvisualen el panelde control muestrala hera del dfa, el
temporizadory las funcionesdel horno.El panel de control mostradoarriba incluyelascaractedsticasespecificasdel modelo. (El estilodel
paneldecontrol varfasegOnel modelo.)
IIIBIIIIIIIIIIIIIIIIIIIIIIII:I
iii_;O!i:!i:!i:!i:!i:!i:!i_!
'Broil'(Asara
laParrilla)
'Bake'(HorneaO
'More+/Less-'
[Mds+/Menos-)
'Timer'(Temporizador)
'Cook& Hold'(CocciOn
y MantenerCaliente)
'Clean'(Limpieza)
'Delay'(Diferido)
'Clock'(Reloj)
'KeepWarm'
(MantenerCaliente)
'CANCEL'(CancelaO
Seusaparaasara la parrillay dorarlos
alimentos.
Seusaparahorneary asar.
Programao cambiala hera,la
temperaturadel homo.Programaasara
laparrilla'HI' o'LO'.
Programaal temporizador.
Seusaparahornearduranteuntiempo
seleccionado,luegomantieneel alimento
calienteduranteunahera.
Seusaparaprogramarun ciclode
autolimpieza.
Programael homoparacomenzara
hornearo limpiarseauna heraposterior.
Seusaparaprogramarlaheradeldin.
Seusaparamantenercalienteenel
homoelalimentococinado.
CancelatodasInsfuncionesaexcepciOn
deltemporizadory elreloj.
Use de las Teclas
* Oprima la tecla deseada.
. Oprima'More+' o 'Less-' paraprogramarel tiempo o la
temperatura.
. Seescucharduna sepalsonoracada vez queoprima unatecla.
. Seescuchardndos so,ales sonorassi ocurre un error en la
programaciOn.
Nora: Cuatrosegundos despuesde haberoprimido la tecla
'More+' o 'Less-' eltiempo o la temperaturaserdautomdtica-
menteprogramada.Si transcurren rodsde 30segundosdespues
de haberoprimido unatecla defunci0n y antesde oprimir las
teclas 'More+' o 'Less-', la funciOnserdcanceladay el indicador
visualvolverdal despliegueanterior.
'Clock' (Reloj)
Elrelojpuedeser ajustado para desplegarla hera ya seaen formate
de 12horaso 2/4horas.El reloj ha side programadoen la fdbrica
paraelformate de 12horas.
Para cambiar eJ relej a formate de 24 heras:
1. Oprimay mantengaoprimidaslas teclas
'CANCEL'y 'Belay' durantetres segundos.
2. Oprima'More+' o 'Less-' paraprogramar
elformate de 12horaso 24 horas.
3. Programela hera del dfa siguiendolas
instruccionesindicadasabajo.
Programaci6n del Relej:
1. Optima la tecla 'Clock'.
• Los dos puntosdestellanen el indicador.
2. Oprima'More+' o 'Less-' para programarla
heradel dfa.
.
• Los dos puntoscontinOandestellando.
Optimalatecla 'Clock' nuevamenteo espere
cuatrosegundos.Los dos puntos discontinOan
destellando.
cont.
55
¢odnendoenel
Cuandose conectaenergfael@tricaal hornoo desp@sde una
interrupciOnde la energfael@trica, la01timahoradel relojpreviaa
la interrupciOndestellarden el indicador.
Paradesplegarlahora del dfacuando el indicador estemostrando
otra funciOnde tiempo,optima latecla 'Clock' (Reloj).
Lahoradel relojno puede ser cambiadacuando el horno ha sido
programadopara'Delay Cook or Clean'(Horneadoo Limpieza
Diferido)o 'Cook & Hold' (Cocci@ y Mantener Caliente).
Para cancelar el despliegue del reloj:
Si no deseaque el indicadorvisual muestrela hora del dfa:
Optimay mantengaoprirnidalasteclas
'CANCEL' (Cancela0y 'Clock' durantetres
segundos.Lahoradel dfa desaparecer_del
indicador.
Cuandose cancelael desplieguedel reloj,
optima latecla 'Clock' paradesplegar
brevementelahora del dfa.
Para restaurar el despliegue del reloj:
Oprimay mantengaoprimida lasteclas 'CANCEL'y 'Clock' durante
tres segundos.La horadel dfa reaparecer_en el indicador.
'Timer' (Temporizador)
Eltemporizadorpuedeser programadode un minuto(0:01)hasta99
horasy 59 minutos(99:59).
Eltemporizadorpuedeser usadoindependientementede cualquier
otra actividaddel horno.Adem_spuedeser programadocuandootra
funci0n del horno est(!enfuncionamiento.
Eltemporizadorno controlael horno.Solamentecontrolaunaserial
sonora.
Para programar el temporizador:
1. Optima la tecla 'Timer'.
• '0:00'se iluminaen el indicadorvisual.
2.
• Los dos puntosdestellar_n.
Optimala tecla'More+' (M_s) o 'Less-' (Menos-)
hastaque eltiempo correctoaparezcaen el
indicadorvisual.
• Los dos puntoscontin0andestellando.
3. Optimanuevamentela tecla 'Timer' o esperecuatro segundos.
• Los dos puntoscontin0andestellandoy comienzala cuenta
regresivadeltiempo.
• El01timominuto de la cuentaregresivadel temporizadorse
desplegar_en segundos.
4. AI final del tiempo programado,se escuchar_unaserialsonora
larga.
Para cancelar el temporizador:
1. Oprimay mantengaoprimida la tecla 'Timer' durante tres
segundos.
U
2. Optimala tecla 'Timer' y coloque la hora a 0:00.
Bloqueo de los Controles y de
la Puerta del Homo
Eltecladoy la puerta del hornopuedenser bloqueadospara
seguridad,limpiezao evitarel uso no autorizado.No funcionar_n
cuando est@ bloqueados.
Si el hornoest_en uso,los controlesni la puerta pueden bloquearse.
Lahoraactual del dfa permanecer_en el indicadorcuando los
controlesest@ bloqueados.
Para bloquear:
Optimay mantengaoprimidaslasteclas
'CANCEL'y 'Cook & Hold' (Cocci@y
MantenerCaliente)durantetres segundos.
(Optimaprimerola tecla'CANCEL').
Para desbloquear:
Optimay mantengaoprimidaslasteclas 'CANCEL'y 'Cook & Hold'
durante tressegundos.(Optimaprimerola tecla 'CANCEL').
CCdigos de Errores
'BAKE'(Horneado)o 'LOCK'(Bloqueado)pueden destellar
r@idamenteparaadvertirleque hay un error oun problema.Si
'BAKE'o 'LOCK'destellan en el indicadorvisual,optima letecla
'CANCEL'. Si 'BAKE'o 'LOCK' continOandestellando,desconectela
corrienteel@trica haciael artefacto.Espereunos pocosminutosy
vuelvaa conectarla corrienteel(!ctrica.Si laspalabrasaOncontinOan
destellando,desconectela corrienteel(!ctricahacia el artefactoy
Ilamea un t@nico de sewicio autorizado.
56
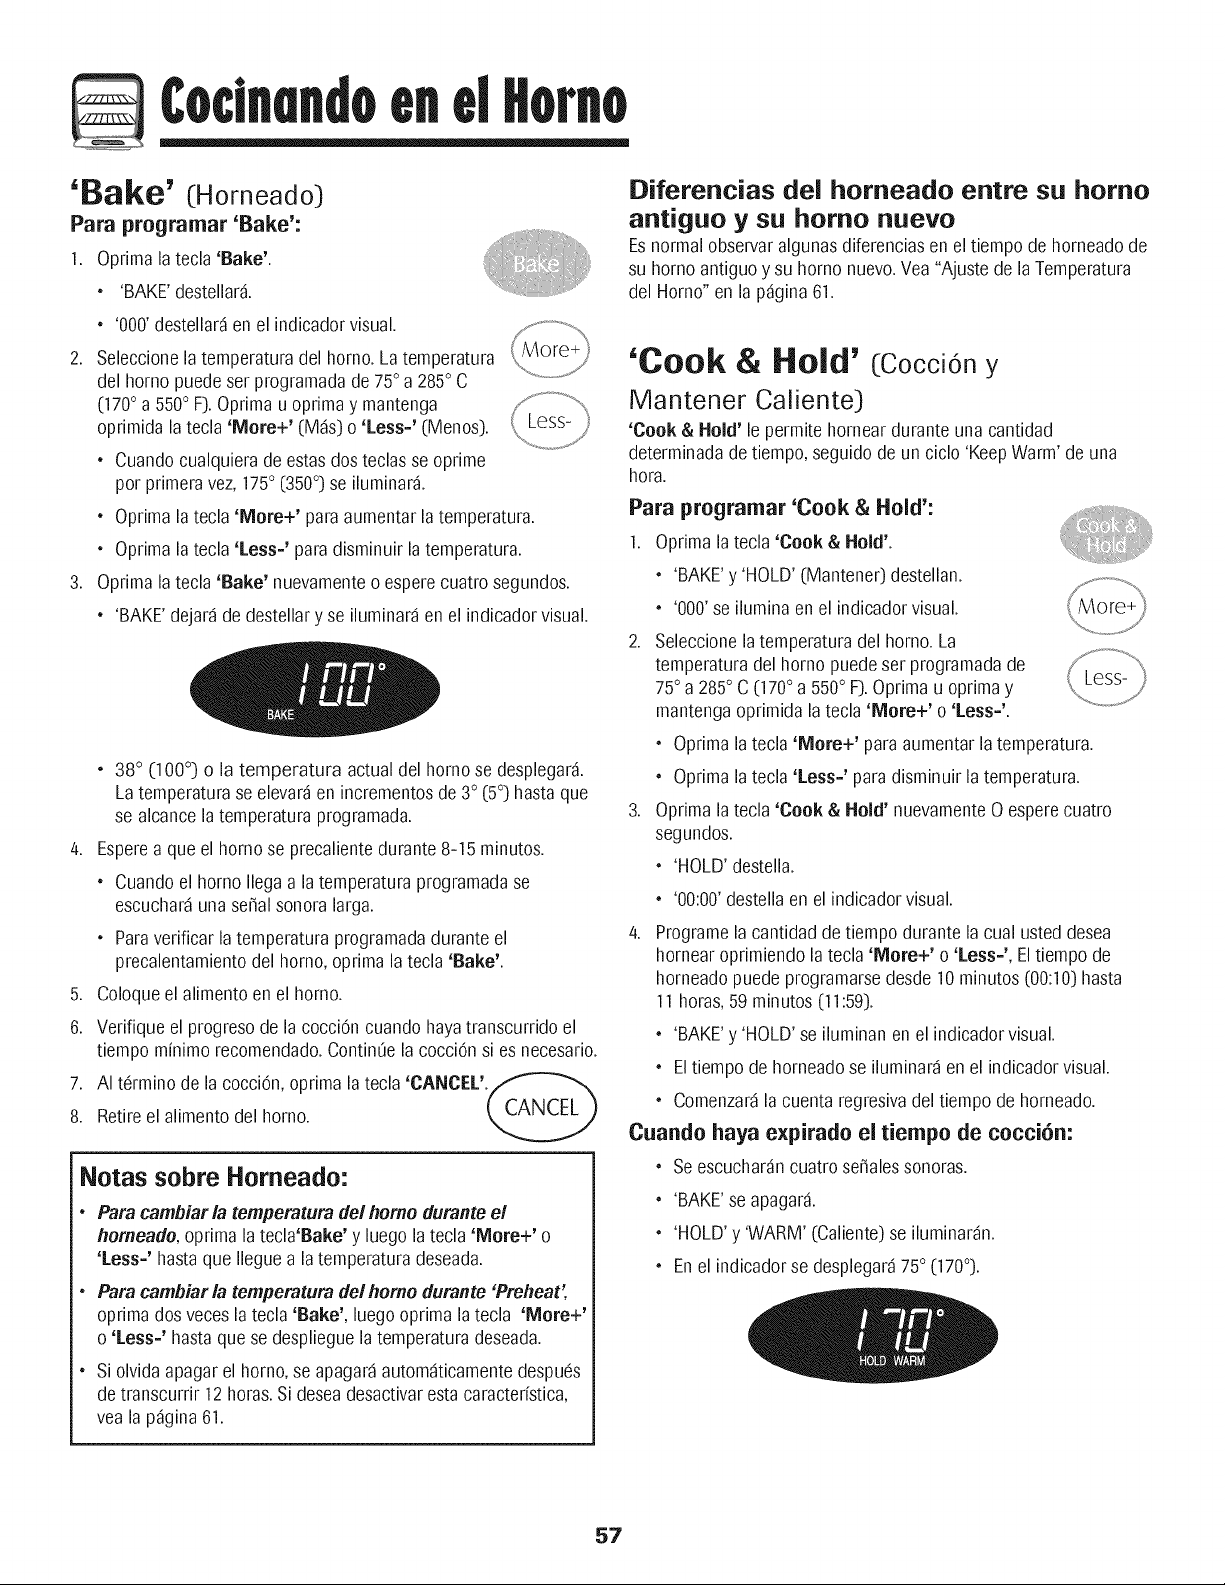
Cocinendoenel
'Bake' (Horneado)
Para programar 'Bake':
1. Oprima la tecla 'Bake'.
• 'BAKE'destellar_.
2.
.
• '000' destellarden el indicadorvisual.
Seleccionelatemperaturadel homo. Latemperatura
del homo puedeset programadade 75° a 285° C
(170° a 550° F).Oprima u oprimay mantenga
oprimida la tecla'More+' (M_s)o 'Less-' (Menos).
• Cuandocualquierade estasdosteclas se oprime
pot primeravez, 175° (350°) se iluminard.
• Oprima latecla 'More+' para aumentarla temperatura.
• Oprima latecla 'Less-' paradisminuir la temperatura.
Oprima latecla 'Bake' nuevamenteo esperecuatro segundos.
• 'BAKE'dejard de destellary se iluminarden el indicadorvisual.
4.
5.
6.
7.
8.
38° (100°} o la temperatura actual del homo se desplegar&
Latemperaturase elevar_en incrementosde 3° (5°) hasta que
se alcancelatemperaturaprogramada.
Esperea que el homo se precalientedurante8-15 minutos.
• Cuandoel homo Ilegaa la temperaturaprogramadase
escuchar_unasepal sonoralarga.
• Paraverificar la temperaturaprogramadadurante el
precalentamientodel homo, oprima la tecla 'Bake'.
Coloqueel alimentoen el horno.
Verifique el progresode lacocci6n cuando hayatranscurrido el
tiempo minimorecomendado.ContinUela cocci6nsi es necesario.
AI t(!rmino de la cocci6n,optima la tecla'CANCEL'.
Retireel alimentodel homo.
Notas sobre Horneado:
• Para cambiarla temperaturade/homo duranteel
horneade,oprima latecla'Bake' y luego la tecla 'More+' o
'Less-' hasta que Ileguea latemperatura deseada.
• Para cambiarla temperaturade/homo durante 'Preheat',
optima dos veceslatecla 'Bake', luego optima la tecla 'More+'
o 'Less-' hastaque se desplieguela temperaturadeseada.
• Si olvidaapagarel homo, se apagar_ autom_ticamentedespues
de transcurrir 12 horas.Si deseadesactivarestacaractdstica,
vea la p_gina61.
Diferencias del horneado entre su homo
antiguo y su homo nuevo
Esnormal observaralgunasdiferenciasen el tiempo de horneado de
su homo antiguoy su homo nuevo.Vea"Ajustede la Temperatura
del Homo" en la p_gina61.
'Cook & Hold' (Cocci6ny
Mantener Caliente)
'Cook & Hold' le permitehorneardurante unacantidad
determinadadetiempo, seguidode un ciclo 'KeepWarm' de una
hora.
Para programar 'Cook & Hold':
1. Optima la tecla 'Cook & Hold'.
• 'BAKE'y 'HOLD' (Mantener)destellan.
2.
.
• '000' se ilumina en el indicadorvisual.
4.
Seleccionelatemperaturadel homo. La
temperaturadel homo puedeset programadade
75° a 285° C (170° a 550° F).Optimau oprimay
mantengaoprimida la tecla'More+' o 'Less='.
• Oprima
• Oprima
latecla 'More+' para aumentarla temperatura.
latecla 'Less=' paradisminuir la temperatura.
Optima latecla 'Cook & Hold' nuevamente0 esperecuatro
segundos.
• 'HOLD' destella.
• '00:00' destellaen el indicadorvisual.
Programelacantidad de tiempo durante la cual usted desea
hornearoprimiendo la tecla 'More+' o 'Less=', El tiempo de
horneadopuedeprogramarsedesde 10 minutos (00:10)hasta
11horns,59 minutos(11:59).
• 'BAKE'y 'HOLD'se iluminanen el indicadorvisual.
• Eltiempo de horneadose iluminar_ en el indicadorvisual.
• Comenzar_la cuenta regresivadel tiempo de horneado.
Cuando haya expirado el tiempo de cocci6n:
• Seescuchardncuatro se_alessonoras.
• 'BAKE'se apagar&
• 'HOLD'y 'WARM' (Caliente)se iluminar_n.
• Enel indicadorse desplegar_75° (170°).
57
¢odnandoenel
Despu6s de aria hora en 'HOLD WARM' (Mantener
Caliente):
• 'End' se desplegar&
• La hora del dfa volverda desplegarseen el indicadorvisual.
Para cancelar 'Cook & Hold' en cualquier momento:
Optimala tecla'CANCEL' (Cancelar).Retireel
alimentodel homo. CANCEL
'Delay 'Cook & Hold" (Cocci6ny
Mantener Caliente Diferido)
Cuandousa 'Delay'(Diferido),el homo comienzaa cocinar m_s
tarde en el dfa.Programela cantidad de tiempo que usted desea
diferir antesdeque se enciendael homo y cuantotiempo desea
cocinarel alimento.Elhomo comienzaa calentar en la hora
seleccionaday cocinadurante eltiempo especificado,pues
mantieneel alimentocalientedurante una hora.
Eltiempo diferido puedeprogramarsede 10 minutos(00:10)hasta
11horas,59 minutos(11:59).
Para programar an ciclo de cocci6n y
mantener caliente diferido:
1. Optima la tecla 'Delay'.
* 'DELAY'destella.
2.
.
4.
5.
• '00:00'destellaen el indicadorvisual.
Optimalatecla 'More+' (M_s) o 'Less=' (Menos)
para programar el tiempo diferido.
Optimalatecla 'Cook & Hold'.
• '000'se ilumina en el indicadorvisual.
• 'BAKE'(Horneado)y 'HOLD' (Mantener)destellan.
Optima'More+' para programar la temperatura
de horneado.
• '00:00'y 'HOLD' destellan.
• 'BAKE'permaneceiluminado.
Optima'More+' para programar el tiempo de horneado.
• Enel indicadorvisual se iluminan el tiempo difierdo,
'DELAY','BAKE',y 'HOLD'.
Cuando el tiempo diferido ha e×pirado:
* 'DELAY'se apagar&
. Se despliegael tiempo y de horneado.
* Se despliega'BAKE'y 'HOLD'.
Para programar an tiempo diferido cuando ya se ha
programatic 'Cook & Hold':
1. Oprimala tecla'Delay'.
* 'DELAY'destella.
. '00:00'se despliegaen el indicadorvisual.
2. Optimala tecla 'More+' o 'Less=' paraprogramarel
tiempo diferido.
. Despuesde cuatro segundos,'DELAY'
permanecer_iluminado para recordarleque se
ha programaticun ciclo de horneadodiferido.
Cuando ha expirado el tiempo diferido y el homo
comienza a funcionar:
• Se desplegar_el tiempo de horneado.
• 'DELAY'se apagar&
• 'BAKE'y 'HOLD'permanecer_niluminados.
Para cancelar:
Optima latecla'CANCEL'.
o
Todaslasfunciones de horneadocontroladaso no pot el
temporizadorser_ncanceladas.
Lahora del dfavolver_a desplegarseenel indicadorvisual.
Notas:
• No use horneadodiferido paralos artfculos que necesitan
precalentamientodel homo, tal como pasteles,galletasy panes.
• No use horneadodiferido si el homo ya est_ caliente.
58
'Keep Warm' (Mantener Caliente)
Pararnantenercalientesen forrnasegura alirnentoscalienteso para
calentarpanesy platos.
Para programar 'Keep Warm':
1. Optima la tecla 'Keep Warm'.
• 'WARM' (Caliente) destella.
2.
• '000' se despliegaen el indicadorvisual.
Seleccionelaternperaturade 'Keep Warm'. La
ternperaturapara'KeepWarm' puedeser
prograrnadade63° a 90° C (145° a 190° F).
Oprirnau oprirnay rnantengaoprirnidala tecla
'More+' (Mds)o 'Less-' (Menos).
• Cuandocualquierade estasdosteclas se oprirne
porprirneravez,75° (170°) se ilurninar&
• Optima latecla 'More+' para aurnentarlaternperatura.
• Optima latecla 'Less-' paradisrninuirla ternperatura.
'WARM'y la temperaturase desplegar_nen el indicadorcuando
el ciclo 'KeepWarm'est(!activo.
Para cancelar 'Keep Warm':
1. Optima la tecla 'CANCEL'(Cancelar).
2. Retire el alimento del homo.
Notas sobre 'Keep Warm':
= Para calidadOptimade los alirnentos,los alimentoscocinados
en el homo debenser rnantenidoscalientespor no rn_sde I a
2 horas.
Paraevitarquelos alimentosse sequen,c0bralos levemente
con papelde alurninioo unatapa.
Para calentar panecillos:
- cubra levementelos panecilloscon papelde aluminioy
col0quelosen el horno.
- oprirna lasteclas 'Keep Warm' y 'More+' para prograrnar
75° C (170° F].
- caliente durante 12 a 15minutos.
Para calentar platos:
- coloque 2 pilas decuatro platoscada unaen el homo.
- oprima lasteclas 'Keep Warm' y 'More+' para programar
75° C (170° F].
- caliente los platosdurante cinco minutos,apagueel homo y
deje los platosen el homo durante 15 minutosm_s.
- usesolamenteplatos resistentesal homo, verifique con el
fabricante.
- nocoloque los platoscalientessobre una superficiefrfa
puesel carnbior_pidode ternperaturapuedecausarfisuras
superficialeso rotura.
Cambio de la temperatura
de °F/°C
1. El ajuste def_brica de la medidade temperaturaes Fahrenheit.
2. Paracarnbiarel ajuste,oprirnay rnantengaoprirnidaslasteclas
'CANCEL'y 'Bake' al rnisrnotiernpo durantetres segundos.
3. Escuchar_una sepalsonoray el ajuste actual (°F o °C)se
desplegar_en la pantalla.(Si nose realizaningOncarnbio,la
estufa regresar_al ajusteactualdespuesde30 segundos).
4.
Paracambiarel ajuste,optima latecla 'More+' o 'Less-'.
Oprfmalanuevamentepararegresaral ajuste anterior. Espere
cincosegundosy el ajustese guardard.
59
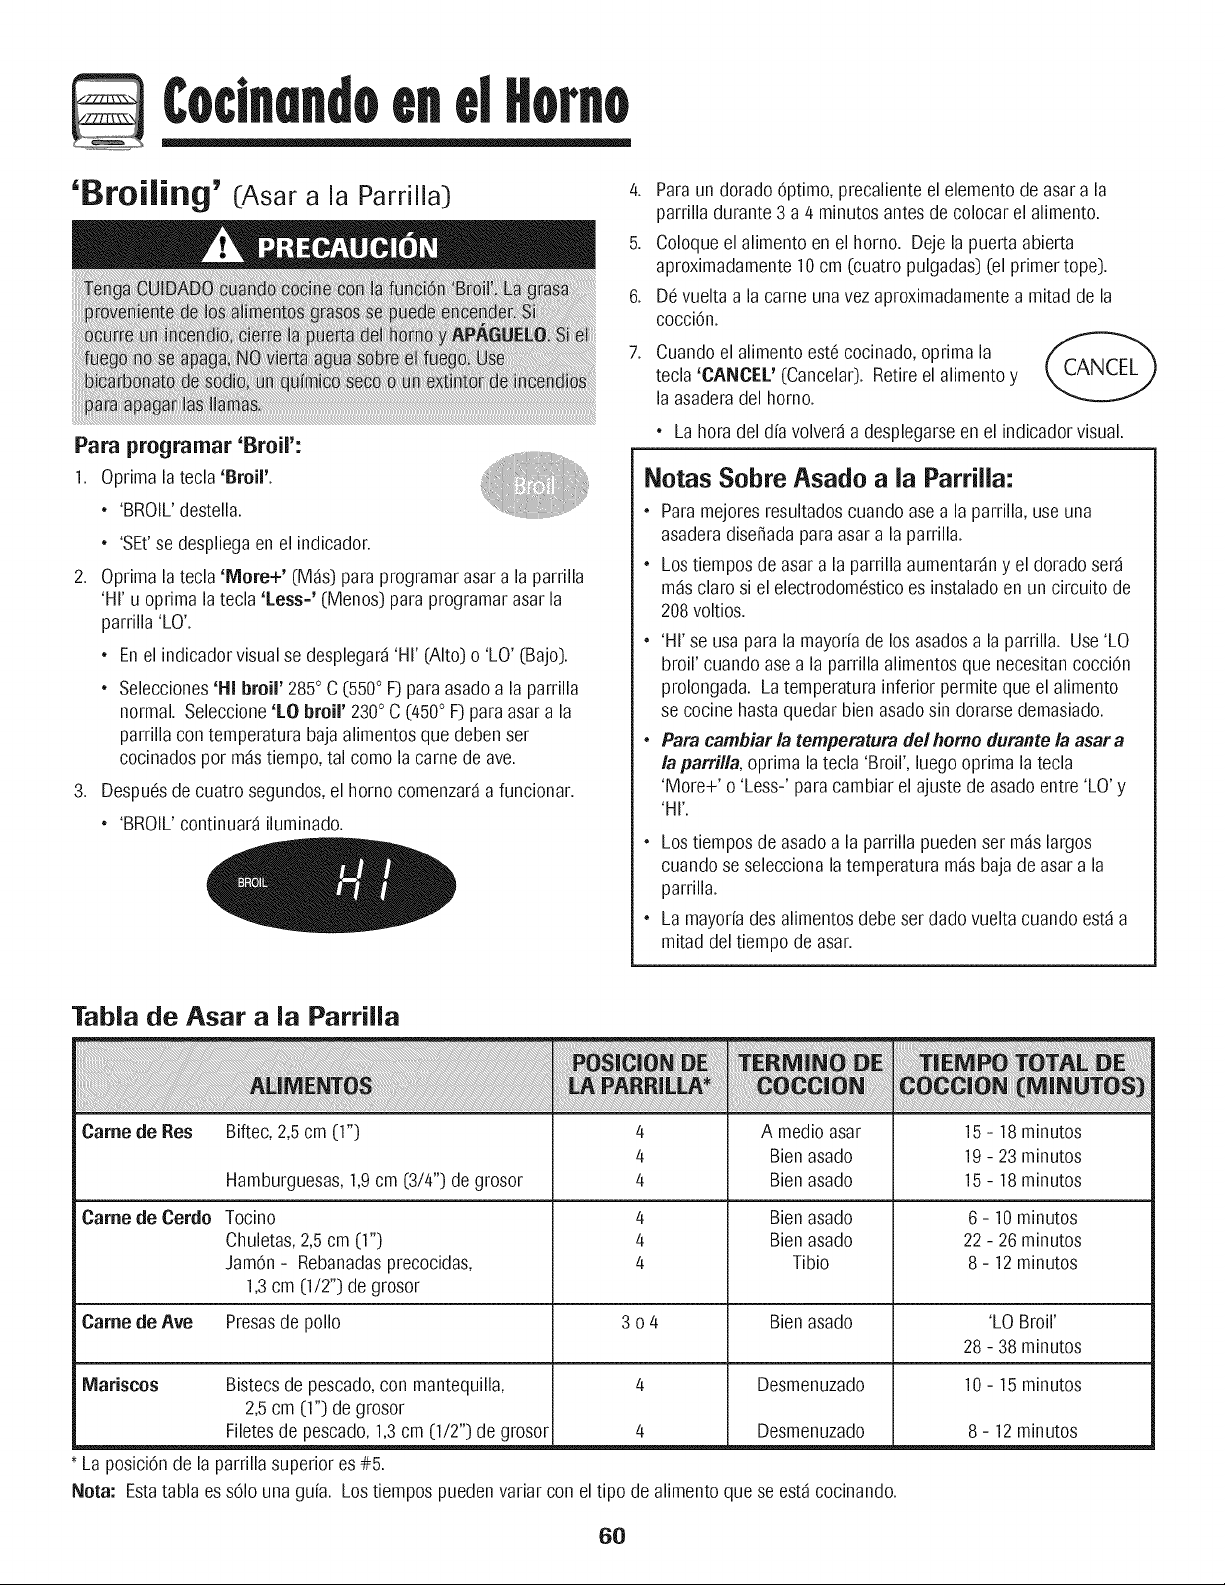
¢oclnandoenel
'Broiling' (Asar a la Parrilla)
Para programar 'Broil':
1. Optima la tecla 'Broil'.
2.
.
• 'BROIL'destella.
• 'SEt'se despliegaen el indicador.
Optima latecla 'More+' (M_s) para programarasar a la parrilla
'HI' u oprima latecla 'Less=' (Menos) para programarasarla
parrilla'LO'.
• En el indicadorvisualse desplegar_'HI' (Alto) o 'LO' (Bajo).
• Selecciones'H! broil' 285° C (550° F) para asadoa la parrilla
normal. Seleccione'LO broil' 230° C (/450° F)paraasar a la
parrillacon temperaturabajaalimentosque debenser
cocinadospor m_stiempo,tal como la came de ave.
Desp@sdecuatro segundos,el horno comenzar_a funcionar.
• 'BROIL'continuar_iluminado.
/4. Paraun dorado 6ptimo, precalienteel elementode asara la
parrilladurante 3 a/4 minutosantesde colocar el alimento.
5. Coloqueel alimento en el horno. Deje la puertaabierta
aproximadamente10 cm (cuatro pulgadas)(el primertope).
6. Devuelta a la came unavez aproximadamentea mitadde la
cocci@.
7. Cuandoel alimentoest_cocinado,oprima la //_, _,,.._,_'_
tecla 'CANCEL' (Cancelar). Retireel alimento y
la asaderadel horno.
• Lahora del dfavolver_ a desplegarseenel indicadorvisual.
Notas Sobre Asado a la Parrilla:
• Paramejoresresultadoscuando asea la parrilla, use una
asaderadisefiadaparaasar a la parrilla.
• Los tiemposde asara la parrilla aumentar_ny el doradoser_
m_sclaro si el electrodomesticoes instaladoen un circuito de
208voltios.
• 'HI' se usa para la mayo@de los asadosa la parrilla. Use 'LO
broil' cuando asea la parrillaalimentosque necesitancocci@
prolongada. Latemperaturainferior permitequeel alimento
se cocine hastaquedarbien asadosin dorarsedemasiado.
• Para cambiar la temperatura de/homo durante la asar a
la parrilla, oprima la tecla 'Broil', luegooprima la tecla
'More+' o 'Less-' para cambiar el ajuste deasadoentre 'LO' y
'HI'.
• Los tiemposde asadoa la parrilla puedenser m_s largos
cuando se seleccionalatemperatura m_s baja de asara la
parrilla.
• La mayorfades alimentosdebe ser dadovueltacuando est_a
mitad deltiempo de asar.
Tabla de Asar a la Parrilla
Came de Res Biftec,2,5 cm (1")
Hamburguesas,1,9cm (3//4")de grosor
Came de Cerdo Tocino
Chuletas,2,5cm (1")
Jam@ - Rebanadasprecocidas,
1,3cm (1/2") degrosor
4
4
4
4
4
4
4
A medicasar
Bienasado
Bienasado
Bienasado
Bienasado
Tibio
15 - 18 minutos
19 - 23 minutos
15- 18 minutos
Desmenuzado
Desmenuzado
Estatabla es sOIounagufa. Lostiempos puedenvariar con el tipo de alimentoque se est_cocinando.
6 - 10 minutos
22 - 26 minutos
8 - 12 minutos
Came de Ave Presasde polio 3 o/4 Bienasado 'LO Broil'
28 - 38 minutos
Mariscos Bistecsde pescado,con mantequilla, 10- 15minutos
2,5 cm (1") de grosor
Filetesde pescado,1,3cm (1/2") de grosor
La posiciOnde la parrilla superior es #5.
Nora:
8 - 12 minutos
6O
¢oclnandoenel
Cierre Autom tico/
Modo Sab tico
Elhomo se apagar_autom_ticamentedespu(!sHe 12horassi usted
Iodejaaccidentalmenteencendido. EstacaracteristicaHeseguridad
puedeser desactivada.
Para cancelar el cierre autom_tico de 12 horas y
dejar que el homo funcione continuamente durante
72 horas:
1.
2.
Programeel horno parahornear (ver pdgina 57).
Optimay mantengaoprimida latecla 'Clock'
(Reloj)durante cinco segundos.
• 'SAb' se desplegardy destellarddurante cinco segundos.
• 'SAb' se desplegardcontinuamentehasta que se desactiveo
hastaquetranscurra el limite de72 horas.
• 'BAKE'(Horneado}tambien se desplegar_si se est_usando
un ciclode homeado cuandoel homo est_en Modo Sab_tico.
La funcidn'BAKE'es/a _nicaque sepuede uti/izar
conel modo sabbtico.Lasdembsfunciones(temporizador,
mantenercaliente,auto/impieza,etc.)se b/oquearbnduranteel
modo sabbtico.
Para cancelar 'Bake' (Hornear) cuando el Modo
Sab_tico est_ activo:
Oprima'CANCEL'(Cancelar).
• 'BAKE'se apagarden el indicadorvisual.
• No se oir_ ningunasepal sonora.
Para cancelar el Modo Sab_tico:
1.
2.
CANCEL
Oprima latecla'Clock' durantecinco segundos.
0
Despuesde 72 horas,el Modo Sab_ticoterminar&
• 'SAb' destellar_durante cinco segundos.
• La hora del aliareaparecer_en el indicadorvisual.
Ajuste de la temperatura
del homo
Laexactitudde lastemperaturasdel homo es cuidadosamente
probadaen la f_brica. Esnormal notar algunadiferenciaentre la
temperaturade horneado,entre un homo nuevoy un homo antiguo.
Conel cotter del tiempo, latemperaturadel homo puedecambiar.
Ustedpuedeajustarla temperaturadel homo, si considera que su
homo noest_ homeandoo dorandoenforma correcta. Paradecidir
cuantodebecambiarla temperatura,programela temperaturadel
homo a 15° C (25° F)m_salta o m_s bajaque latemperatura
indicadaen susrecetas,luego homee. Losresultadosde la
"prueba" puedendarle una ideade cuanto ajustar la temperatura.
Ajuste de la temperatura del homo:
1. Oprima la tecla 'Bake'.
2. Programe280° (550°) oprimiendo la tecla
'More+' (M_s).
Oprimay mantengaoprimida latecla 'Bake'
durante variossegundoso hastaque0° aparezca
en el indicadorvisual.
Si latemperaturadel homo hasido previamenteajustada,el
cambioaparecer_en el indicadorvisual. Pot ejemplo,si la
temperaturadel homo rue reducidaen 8° C (15° F)el indicador
mostrard'- 8°, ('-15°').
Optima latecla 'More+' o 'Less-' (Menos) temperaturacambia
en 3° C (5° F). Latemperatura del homo puede set aumentadao
disminuidaen 3° a 20° C (5° a35° F).
Lahoradel aliareaparecer_autom_ticamenteen el indicador
visual.
No necesitareajustarla temperaturadel homo si hayuna falla o
interrupci0ndeenergiaelectric& Lastemperaturasde asara la
parrilla,mantenercalientey limpiezano puedenset ajustadas.
Notas Sobre el Modo Sab_tico:
• ElModo Sab_ticopuedeset activadoen cualquier momento,
esteo no el homo encendido.
• ElModo Sab_ticono se puede activarsi lasteclas est_n
bloqueadaso cuando la puertaest_ bloqueada.
• Si el homo est_ horneandocuandoel Modo Sab_ticoes
programatic,'BAKE'se apagar_alfinal del ciclo de homeado.
No se emitir_nseSalessonoras.
• Si se deseala luz del homo durante el Modo Sab_tico,esta
debeset encendidaantesde que comienceel Modo Sab_tico.
• Cuandocomienzael Modo Sab_tico,no se emitir_ laseSal
sonora de precalentamiento.
• La mayorfade lasadvertenciasy mensajesy todas las seSales
sonorasest_ndesactivadascuandoel Modo Sab_ticoest_
activo.
• Elciclo de autolimpiezay bloqueo autom_ticode la puertano
funcionar_durante el Modo Sab_tico.
* Si oprime la tecla 'CANCEL'se cancelardun ciclo 'Bake',sin
embargoel control permanecerden Modo Sabdtico.
. Sifalla la corriente electric& cuandovuelva laenergiael homo
se activarden Modo Sabdticocon 72 horasrestantesy ning0n
ciclo activo.
61
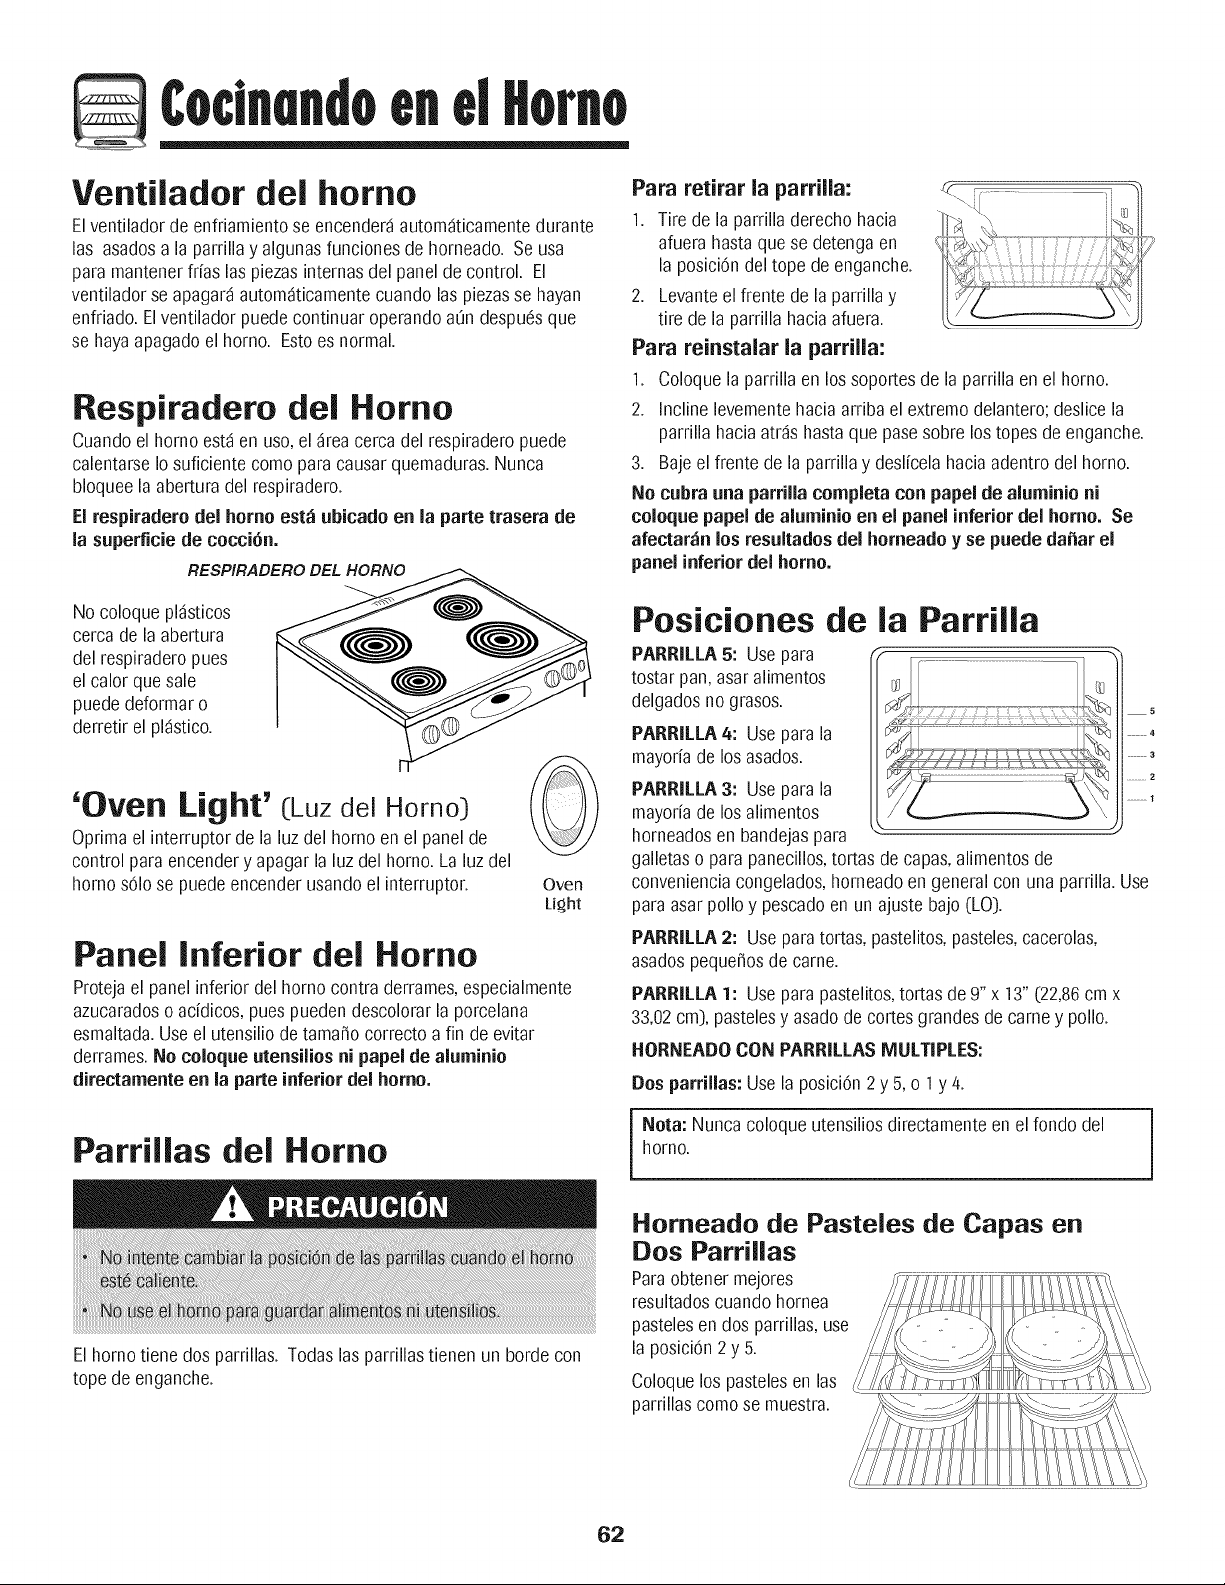
Codnendoenel
Ventilador del homo
ElventiladorHeenfriamientose encenderdautomdticamentedurante
las asadosa la parrilla y algunasfuncionesde horneado. Se usa
paramantenerfrias laspiezasinternasGelpanel de control. El
ventiladorse apagardautomdticamentecuando las piezasse hayan
enfriado.ElventiladorpuedecontinuaroperandoaOndespu6sque
se hayaapagadoel horno. Estoes normal.
Respiradero del Homo
Cuandoel homo estden uso,el dreacerca del respiraderopuede
calentarseIosuficientecomo paracausarquemaduras.Nunca
bloqueela aberturadel respiradero.
El respiradero del homo est_ ubieado en la parte trasera de
la superficie de cocci6n.
RESPIRADERO DEL HORNO
No coloquepldsticos
cercade la abertura
del respiraderopues
el calor que sale
puededeformaro
derretir el pldstico.
'Oven Light' (Luz del Homo)
Optimael interruptorde laluz del homo en el panel de
control paraencendery apagarla luz del horno.La luz del
homo s01ose puedeencenderusandoel interruptor.
Oven
Light
Panel inferior del Homo
Protejael panel inferior del hornocontra derrames,especialmente
azucaradoso acidicos,pues puedendescolorarla porcelana
esmaltada.Use el utensilio de tamaOocorrecto afin de evitar
derrames.No coloque utensiliosni papel de aluminio
directamente en la parte inferiordel homo.
Parrillas del Homo
Elhomo tiene dos parrillas. Todaslas parrillastienen un borde con
tope de enganche.
Para retirar la parrilla:
1. Tire de la parrilla derechohacia
afuerahastaque se detengaen
la posici0ndeltope de enganche.
2. Levanteel frente de laparrilla y
tire de la parrillahaciaafuera.
Para reinstalar la parrilla:
1. Coloquela parrilla en los soportesde la parrillaen el horno.
2. Inclinelevementehacia arriba el extremodelantero;deslicela
parrilla haciaatrdshastaque pasesobre lostopes de enganche.
3. Bajeel frente de la parrilla y deslicelahaciaadentro delhorno.
No cubra una parrilla completa con papel de aluminio ni
coioque papei de aluminio en el panel inferior del homo. Se
afectar_n los resultados del horneadoy se puede da_ar el
panel inferiordel homo.
Posiciones de la
PARRILLA5: Usepara
tostar pan, asaralimentos
delgadosno grasos.
Parrilla
PARRILLA4: Useparala
mayoriade losasados.
PARRILLA3: Use para la
mayoriade losalimentos
horneadosen bandejaspara "
galletaso para panecillos,tortas de capas,alimentosde
convenienciacongelados,horneadoen generalcon una parrilla.Use
paraasarpolioy pescadoen un ajuste bajo(LO).
PARRILLA2: Useparatortas,pastelitos,pasteles,cacerolas,
asadospeque_osde carne.
PARRILLA1: Useparapastelitos,tortas de 9" x 13" (22,86cmx
33,02cm), pastelesy asadode cortesgrandes decame y polio.
HORNEADOCON PARRILLAS MULTIPLES:
5
..............4
.............3
.............2
.............1
Dos parrillas:Usela posici0n2 y 5, o 1 y/4.
i Nora: Nuncacoloqueutensiliosdirectamenteen el fondo del
homo.
Horneado de Pasteles de Capas en
Dos Parrillas
parrillascomose muestra.
62
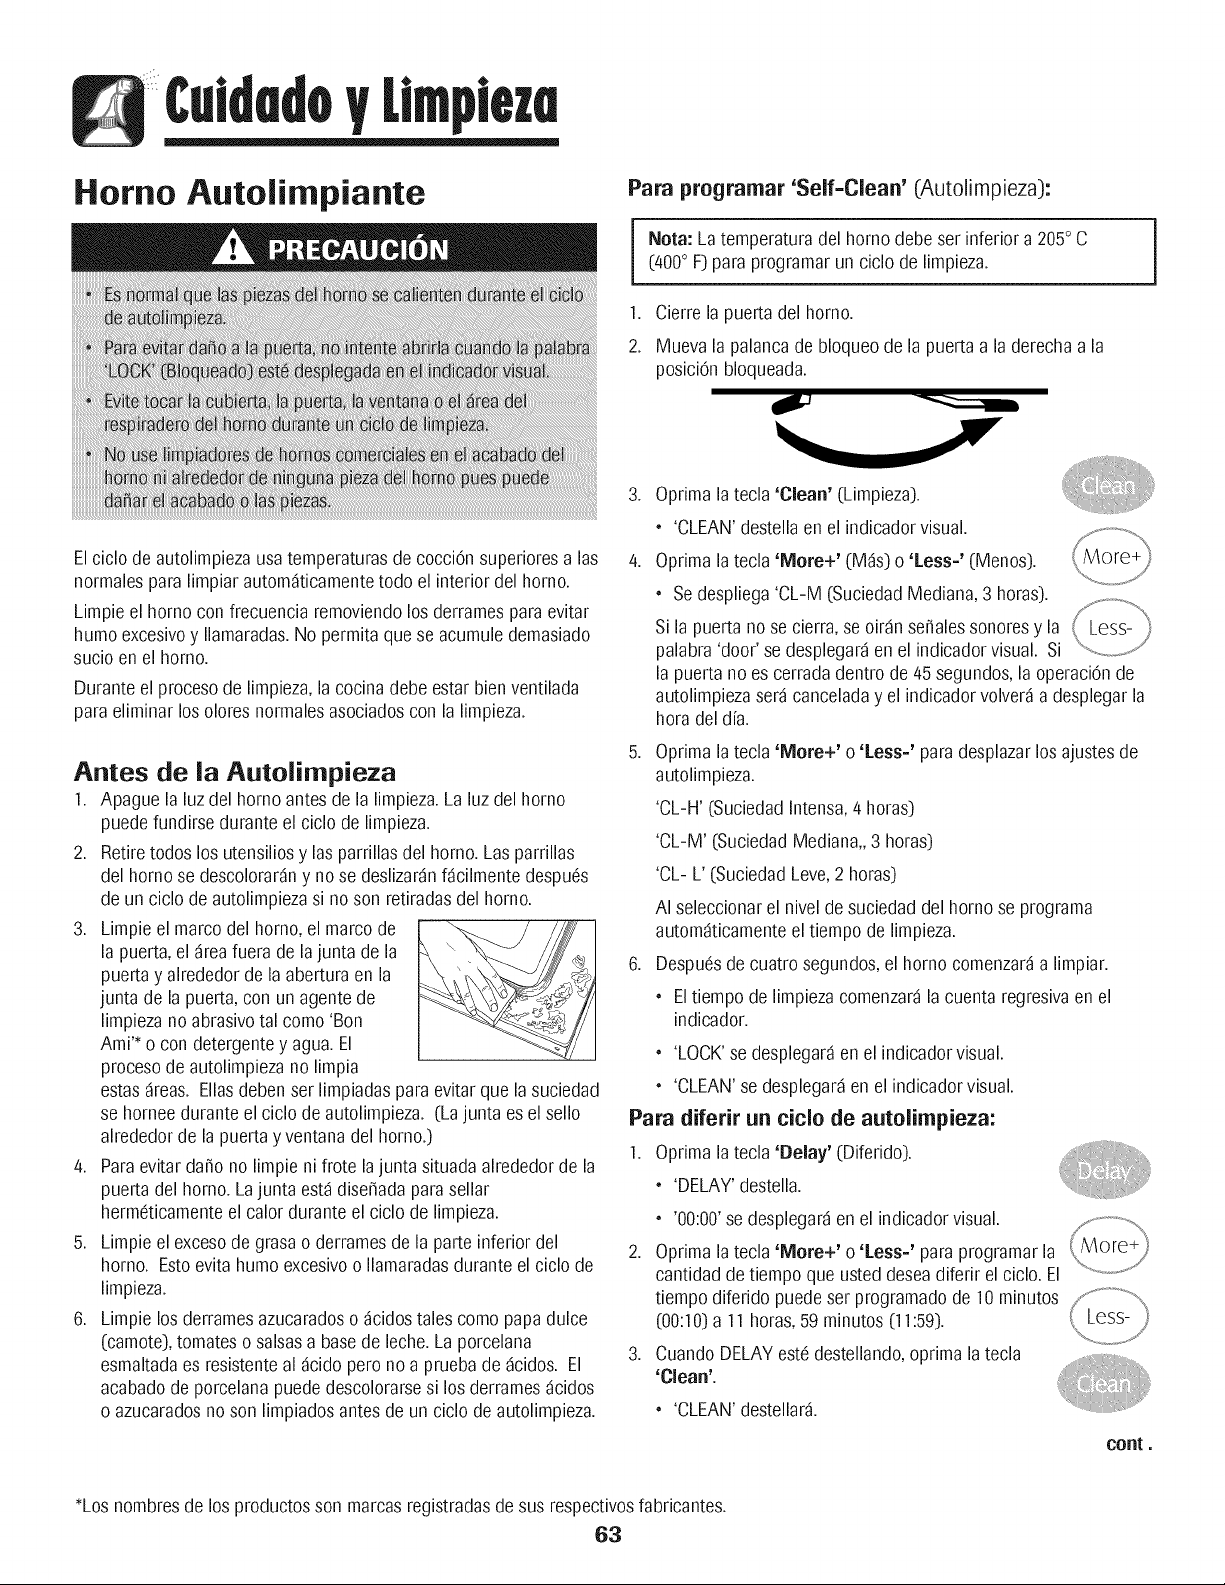
Cul@do Licpim
Homo Autolimpiante
Para programar 'Self-Clean' (Autolimpieza):
Nora: La temperaturadel homo debeset inferior a 205° C
(400° F) paraprogramarun ciclo de limpieza.
1,
2.
Cierre la puertadel homo.
Muevala palancade bloqueode la puerta a la derechaa la
posici6nbloqueada.
Elciclo de autolimpiezausatemperaturasde cocci6nsuperioresa las
normalesparalimpiar automdticamentetodo el interior del homo.
Limpie el homo con frecuencia removiendolos derramespara evitar
humo excesivoy Ilamaradas.No permitaquese acumule demasiado
sucio en el homo.
Duranteel procesode limpieza,lacocinadebe estar bien ventilada
paraeliminar los oloresnormalesasociadoscon la limpieza.
Antes de la Autolimpieza
1. Apague la luzdel homo antes de la limpieza.La luzdel homo
puedefundirsedurante el ciclo de limpieza.
2. Retiretodos losutensiliosy lasparrillasdel homo.Lasparrillas
del homose descolorar_ny no se deslizar_nf_cilmente despu_s
de un ciclo de autolimpiezasi noson retiradasdel homo.
,
4,
5,
,
Limpie el marcodel homo,el marco de
la puerta,el _reafuera de lajunta de la \
puerta y alrededorde la aberturaen la _"
junta de la puerta,con un agentede
limpiezano abrasivotal como 'Bon
Ami'* o con detergentey agua.El
procesode autolimpiezano limpia
estasdreas. Eliasdebenset limpiadas para evitar que lasuciedad
se homee durante el ciclode autolimpieza. (Lajunta es el sello
alrededorde la puertay ventanadel homo.)
Paraevitarda_ono limpie ni frote la junta situada alrededorde la
puerta del homo. Lajunta estddise_adaparasellar
hermeticamenteel calor duranteel ciclo de limpieza.
Limpie el excesode grasao derramesde la parte inferior del
homo. Estoevita humo excesivoo Ilamaradasduranteel ciclo de
limpieza.
Limpie los derramesazucaradoso dcidostalescomo papa dulce
(camote),tomateso salsasa basede leche. La porcelana
esmaltadaes resistenteal dcido pero noa pruebade dcidos. El
acabadode porcelanapuededescolorarsesi losderramesdcidos
o azucaradosnoson limpiadosantesde un ciclo de autolimpieza.
3. Oprima la tecla 'Clean' (Limpieza).
• 'CLEAN'destellaen el indicadorvisual.
4. Oprima la tecla 'More+' (Mds) o 'Less=' (Menos).
• Sedespliega'CL-M (SuciedadMediana, 3 horas).
Si la puerta nose cierra,se oir_nse_alessonoresy la
palabra'door' se desplegar_enel indicadorvisual. Si
la puertano es cerradadentro de/45segundos,laoperaciOnde
autolimpiezaser_ canceladay el indicadorvolver_ a desplegarla
horadel alia.
5. Oprima la tecla 'More+' o 'Less=' paradesplazarlos ajustesde
autolimpieza.
'CL-H' (SuciedadIntensa,/4horas)
'CL-M' (SuciedadMediana,,3 horas)
'CL- L' (SuciedadLeve,2 horas)
AI seleccionarel nivel desuciedaddel homo se programa
autom_ticamenteel tiempo de limpieza.
6. Despuesde cuatro segundos,el homo comenzar_a limpiar.
• Eltiempo de limpiezacomenzar_la cuentaregresivaenel
indicador.
• 'LOCK'se desplegar_en el indicadorvisual.
• 'CLEAN'se desplegar_en el indicadorvisual.
Para diferir an ciclo de autolimpieza:
1. Oprima la tecla 'Delay' (Diferido).
• 'DELAY'destella.
• '00:00'se desplegar_en el indicadorvisual. ,_ ........................4
\
2. Oprima la tecla 'More+' o'Less=' paraprogramarla More+9
\
cantidadde tiempo que usteddeseadiferir el ciclo. El .........................
tiempo diferido puedeset programadode 10 minutos
(00:10)a 11 horas,59minutos (11:59).
3. Cuando DELAYest(!destellando,oprima la tecla
'Cleaa'.
• 'CLEAN'destellar&
coat.
*Los hombresde los productosson marcasregistradasde sus respectivosfabricantes.
63
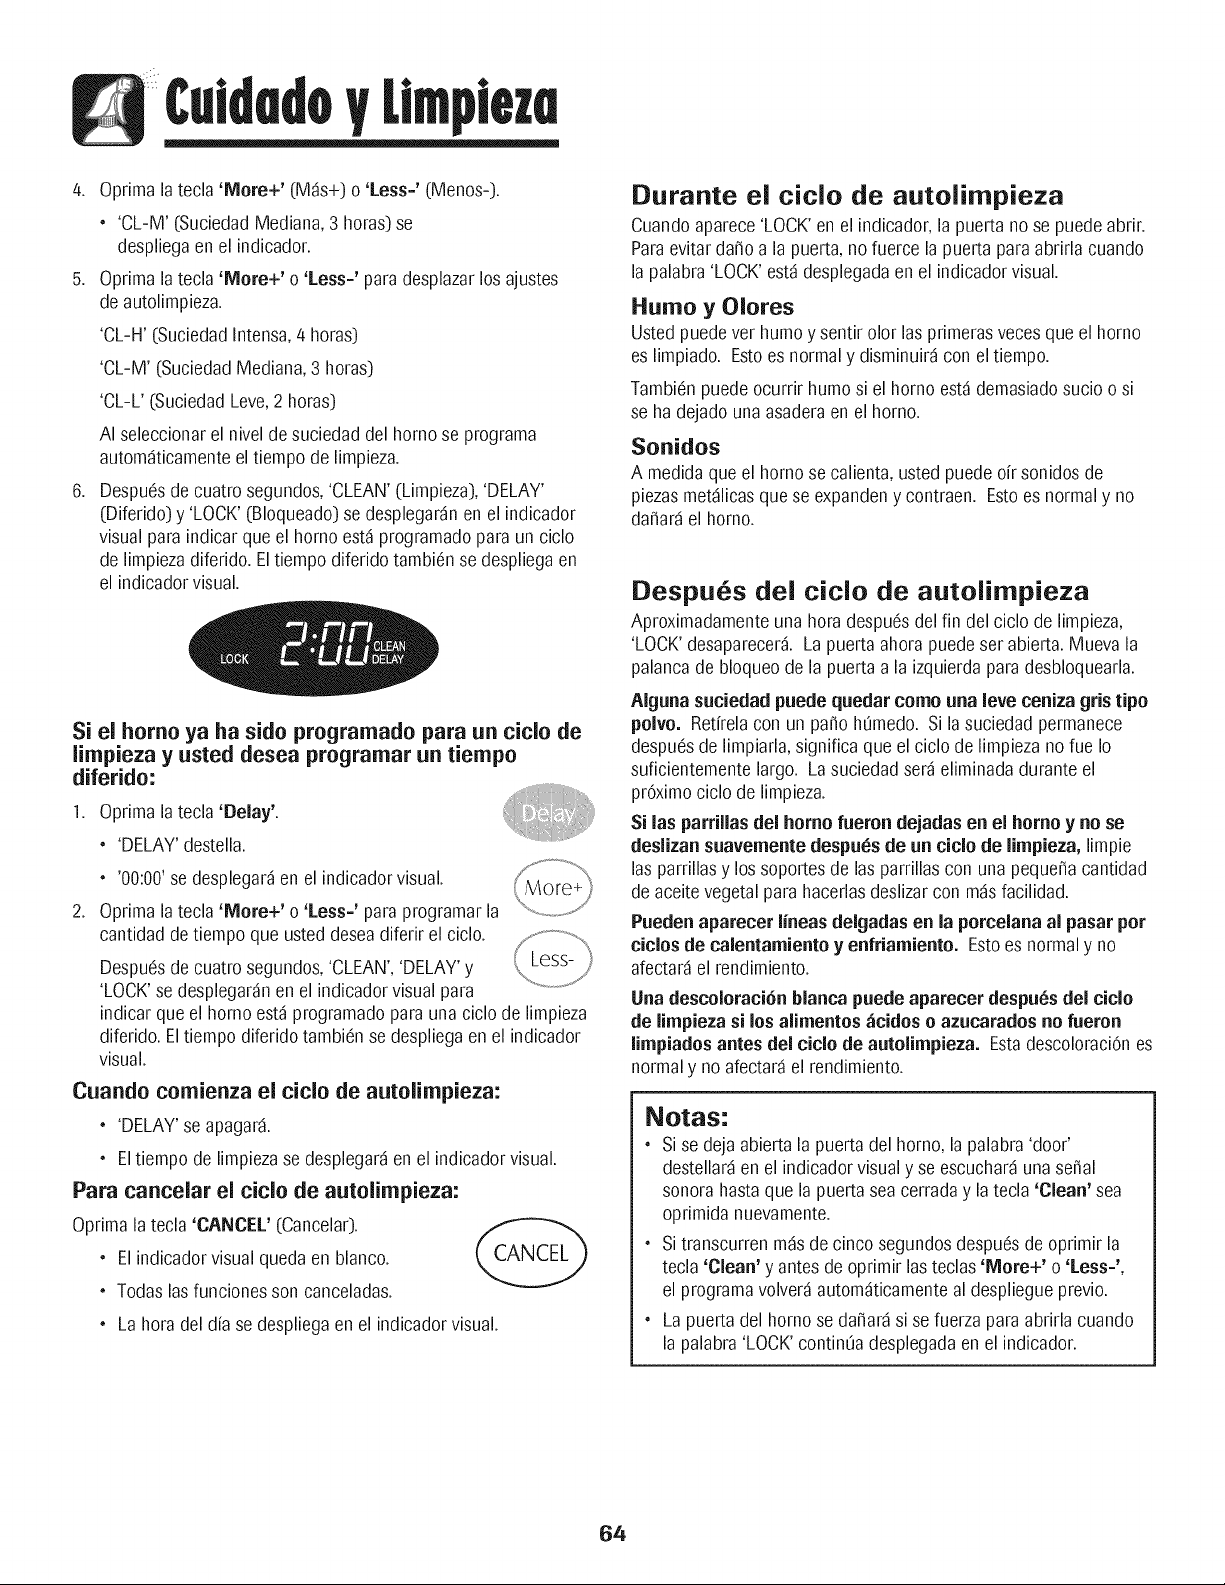
CuldadoLlmplm
4. Optimala tecla 'Mere+' (Mds+) o 'Less-' (Menos-).
• 'CL-M' (SuciedadMediana,3 horns)se
despliegaen el indicador.
5. Optimala tecla 'Mere+' o 'Less-' paradesplazarlosajustes
deautolimpieza.
'CL-H' (SuciedadIntensa,4 horns)
'CL-M' (SuciedadMedian& 3 horns)
'CL-L' (SuciedadLeve,2 horns)
AI seleccionarel nivel desuciedad del homo se programa
autom_ticamenteel tiempo de limpieza.
Despu6sde cuatrosegundos,'CLEAN'(Limpieza),'DELAY'
(Diferido)y 'LOCK' (Bloqueado)se desplegar_nen el indicador
visual paraindicar que el homo est_programadopara un ciclo
de limpiezadiferido.Eltiempodiferido tambi6n se despliegaen
el indicadorvisual.
Si el home ya ha side programado para un ciclo de
limpieza y usted desea programar un tiempe
diferido:
1. Optimala tecla 'Delay'. iI;!ill I
• 'DELAY'destella.
• '00:00'se desplegar_en el indicadorvisual.
2. Optimala tecla 'Mere+' o 'Less=' paraprogramarla
cantidaddetiempo que usteddeseadiferir el ciclo.
Despu6sde cuatrosegundos,'CLEAN','DELAY'y
'LOCK'se desplegar_nen el indicadorvisual para
indicar queel homo est_programadopara una ciclo de limpieza
diferido.Eltiempo diferido tambi6nse despliegaen el indicador
visual.
Cuando cemienza el title de autelimpieza:
• 'DELAY'se apagar&
• Eltiempo de limpiezase desplegar_en el indicadorvisual.
Para cancelar el ciclo de autolimpieza:
Optimala tecla 'CANCEL'(Cancelar).
• Elindicadorvisual queda en blanco.
• Todas Insfuncionesson canceladas.
• La heradel dfase despliegaen el indicadorvisual.
Durante el ciclo de autolimpieza
Cuandoaparece'LOCK'en el indicador,la puerta no se puedeabrir.
Paraevitarda_o a la puerta,nofuerce la puerta para abrirla cuando
la palabra'LOCK'estddesplegadaen el indicadorvisual.
Heine y OIores
Usted puedevet humoy sentir olor Insprimerasvecesque el homo
es limpiado. Estoes normaly disminuirdcon el tiempo.
Tambi6npuedeocurrir humosi el homo estddemasiadosucioo si
se ha dejadounaasaderaenel homo.
Sonidos
A medidaqueel homo se calienta,ustedpuede oft sonidos de
piezasmetdlicasque se expandeny contraen. Estoes normaly no
daSardel homo.
Despues del ciclo de autolimpieza
Aproximadamenteuna hera despu6sdel fin del ciclo de limpieza,
'LOCK'desaparecerd.La puertaahora puedeset abierta.Muevala
palancade bloqueode la puerta a la izquierdaparadesbloquearla.
AIguna suciedad puede quedar come una leve ceniza gris tipe
pelve. Retfrelacon un pa_oh_medo. Si la suciedadpermanece
despu6sde limpiarla,significa que el ciclo de limpiezano rue Io
suficientementelargo. La suciedadserd eliminadaduranteel
pr6ximociclo de limpieza.
Si ins parrillasdel herne fueren dejadas en el berne y ne se
deslizan suavemente despu6sde an cicle de limpieza, limpie
Insparrillasy los soportesde Ins parrillascon una peque_acantidad
de aceitevegetalpara hacerlasdeslizarcon rodsfacilidad.
Pueden aparecer linensdelgadas en la percelana al pasar per
cicles de calentamiente y enfriamiente. Estoes normaly no
afectar_el rendimiento.
Una desceleraci6n blanca puede aparecer despu6s del cicle
de limpieza si los alimentes _cides e azucarades ne fueren
limpiades antes del cicle de autelimpieza. Estadescoloraci6nes
normaly no afectar_el rendimiento.
NOtaS-"
• Sise deja abiertala puerta del homo, la palabra 'door'
destellar_en el indicadorvisualy se escuchar_unaseSal
sonorahastaque la puertasea cerraday la tecla 'Clean' sea
oprimida nuevamente.
• Sitranscurrenm_s de cinco segundos despu6sdeoprimir la
tecla 'Clean' y antes deoprimir Insteclas 'Mere+' o 'Less=',
el programavolver_autom_ticamenteal despliegueprevio.
• La puertadel homo se daSar_si sefuerzapara abrirlacuando
la palabra'LOCK'continuadesplegadaen el indicador.
64
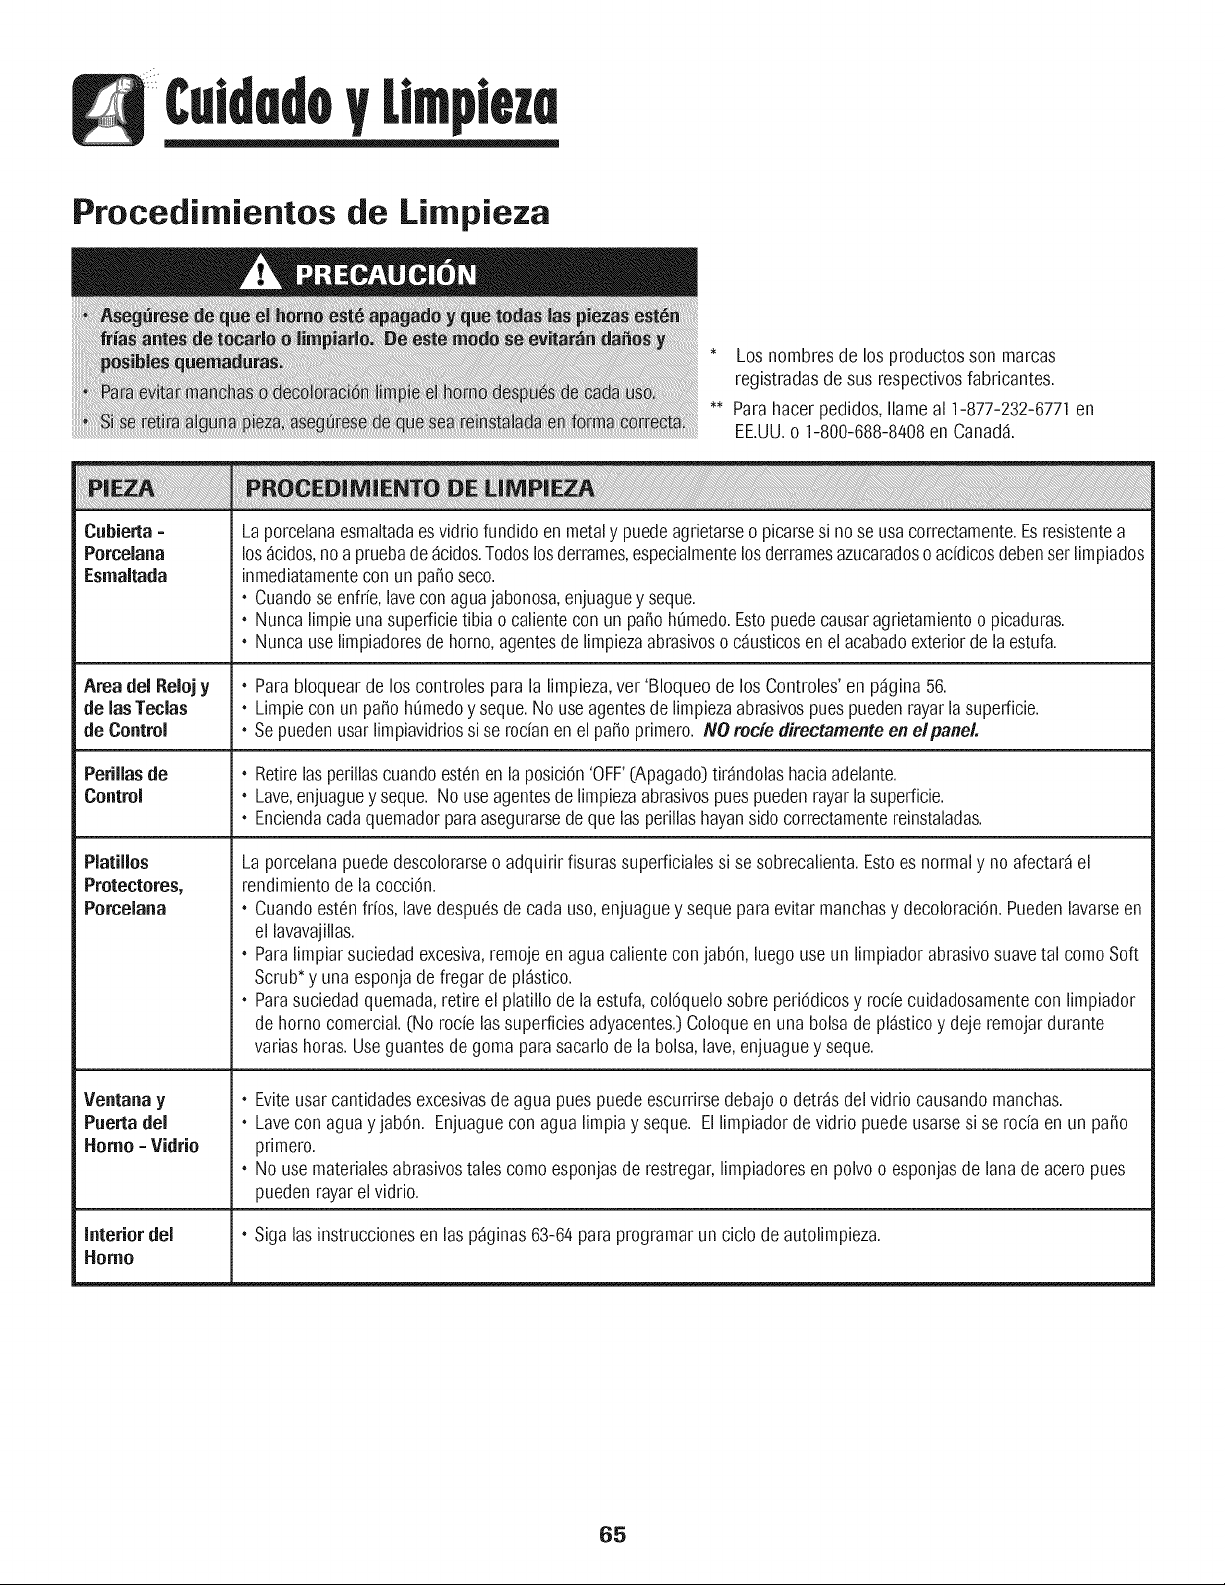
CuidadoLlmpim
Procedimientos de Limpieza
Los nombresde los productosson marcas
registradasde susrespectivosfabricantes.
** Parahacerpedidos,Ilameal 1-877-232-6771en
EE.UU.o 1-800-688-8408en Canadd.
Cnbierta=
Porcelana
Esmaltada
Area del Relojy
de lasTeclas
de Control
Perillasde
Control
Platillos
Protectores,
Porcelana
Ventana y
Pnertadel
Homo =Vidrio
interiordel
Homo
Laporcelanaesmaltadaesvidriofundidoen metaly puedeagrietarseo picarsesi nose usacorrectamente.Esresistentea
los_cidos,noapruebade _cidos.Todoslosderrames,especialmentelosderramesazucaradoso acidicosdebenserlimpiados
inmediatamentecon un pasoseco.
• Cuandoseenfrie,lavecon aguajabonosa,enjuaguey seque.
• Nuncalimpieunasuperficietibia o calienteconun paso h_medo.Estopuedecausaragrietamientoo picaduras.
• Nuncauselimpiadoresdehomo,agentesde limpiezaabrasivoso c_usticosen el acabadoexteriorde laestufa.
• Parabloquearde los controles para la limpieza,ver 'Bloqueode los Controles'en p_gina56.
• Limpiecon un paso h_medoy seque.No useagentesde limpiezaabrasivospuespuedenrayarla superficie.
• Sepuedenusarlimpiavidriossi se rocianen el pasoprimero.NOrocie directamenteen dpanel.
• Retirelasperillascuandoest_nen laposici6n'OFF'(Apagado)tir_ndolashaciaadelante.
• Lave,enjuaguey seque.No useagentesdelimpiezaabrasivospuespuedenrayarlasuperficie.
• Enciendacadaquemadorparaasegurarsede que lasperillashayansidocorrectamentereinstaladas.
Laporcelanapuededescolorarseo adquirir fisurassuperficialessi se sobrecalienta.Estoes normaly no afectar_el
rendimientode la cocci6n.
• Cuandoest_nfrios, lavedespu_sde cadauso,enjuaguey sequepara evitarmanchasy decoloraci6n.Puedenlavarseen
el lavavajillas.
• Paralimpiarsuciedadexcesiva,remojeen aguacaliente conjab6n, luegouse un limpiadorabrasivosuavetal comoSoft
Scrub_y unaesponjade fregar de pl_stico.
• Parasuciedadquemada,retireel platillo de la estufa,col6quelosobreperi6dicosy rode cuidadosamentecon limpiador
de homo comercial.(No rode lassuperficiesadyacentes.)Coloqueen una bolsade pl_sticoy deje remojardurante
variashoras.Useguantesde gomaparasacarlode la bolsa,lave,enjuaguey seque.
• Eviteusarcantidadesexcesivasde agua puespuedeescurrirsedebajoo detr_sdelvidrio causandomanchas.
• Lavecon aguayjab6n. Enjuaguecon agua limpiay seque. Ellimpiadordevidrio puede usarsesi se roda enun paso
primero.
• No usematerialesabrasivostales como esponjasderestregar,limpiadoresenpolvoo esponjasde lana de aceropues
puedenrayarel vidrio.
• Sigalasinstruccionesen las p%inas 63-64paraprogramarun ciclo deautolimpieza.
65
CuidadoLimpim
Parrillasdel • Limpiecon aguaconjab6n.
Homo • Saquelasmanchasdificilesconjab6n enpolvoocon unaesponjallenaconjab6n. Enjuaguey seque.
• Lasparrillasse descolorar_npermanentementey puedenno deslizarsecon suavidadsi sondejadasen el homodurante
unciclode autolimpieza.Siestosucede,limpielaparrillay lossoportesen relieveconunapeque_acantidaddeaceite
vegetalpararestaurarla facilidadde movimiento,luegolimpieelexcesode aceite.
AceroInoxidable • NO USENINGUNPRODUOTODE LIMPIEZA OUECONTENGABLANOUEADORA BASEDE CLORO.
(modeiosselectos) • NO USELIMPIADORES'ORANGE'NI LIMPIADORESABRAMVOS.
• SIEMPRELIMPIE LASSUPERFICIESDEACEROA FAVORDELGRANO.
• LimpiezaDiaria/SuciedadLeve=Limpieconunode lossiguientes- aguaconjab6n,unasoluci6ndevinagrebianco
conagua,Iimpiadorparasuperficiesy vidrio 'Formula409'_o un Iimpiavidriossimilar- usandounaesponjao un paso
suave. Enjuaguey seque. Parapuliry evitarmarcasdededos,useel producto'StainlessSteelMagicSpray'_
(PiezaNo.20000008)_.
• Suciedad Mediana/intensa- Limpiecon unodelossiguientes- 'BonAmi'_,'SmartCleanser'_o 'SoftScrub'_- usando
unaesponjah_medao un pasosuave.Enjuaguey seque. Lasmanchasdificilespuedenserquitadascon unaesponja
multi-uso'Scotch-Brite'_h_meda;frote afavordel grano. Enjuaguey seque.Pararestaurarel lustrey sacarlasvetas,
aplique'StainlessSteelMagicSpray'_.
• Descoloraci6n= Useuna esponjamojadao un pasosuave,limpieconiimpiadorde acero'CameoStainlessSteel
Cleaner'_.Enjuagueinmediatamentey seque.Paraeliminarlasestdasy restaurarel lustre,usedespu(_srociadorparaacero
inoxidable'StainlessSteelMagicSpray'_.
Gavetade • Cuandoest_fria,laveconaguatibiajabonosa,enjuaguey seque.Nuncalimpieuna superficietibia ocalientecon un paso
AImacenamiento, h_medopuesestopuededa_arlasuperficiey causarunaquemaduraa causadei vapor.
Manija de la • Paramanchasrebeldes,useagentesde limpiezalevementeabrasivostal como pastade bicarbonatoo 'BonAmi'_.No use
Puerta, = agentesde limpiezaabrasivos,c_usticoso _sperostal comoesponjasde lanade aceroo limpiadoresdehornos.Estos
Esmalte Pintado productospuedenrayaro da_ar permanentementelasuperficie.
Nota: Useuna toalla o un patio seco para limpiarlosdermmes, especialmente los derramesacidicos o
azucarados.La superficie se puede desco/orar o perder e/bri//o si e/derrame no se /impia inmediatamente.
Estoes especia/mente importante en /assuperficies blancas.
•Los nombresde los productosson marcasregistradasde sus respectivosfabricantes.
•* Parahacer pedidos,Ilameal 1-877-232-6771en EE.UU.o 1-800-688-8408en Canadd.
66
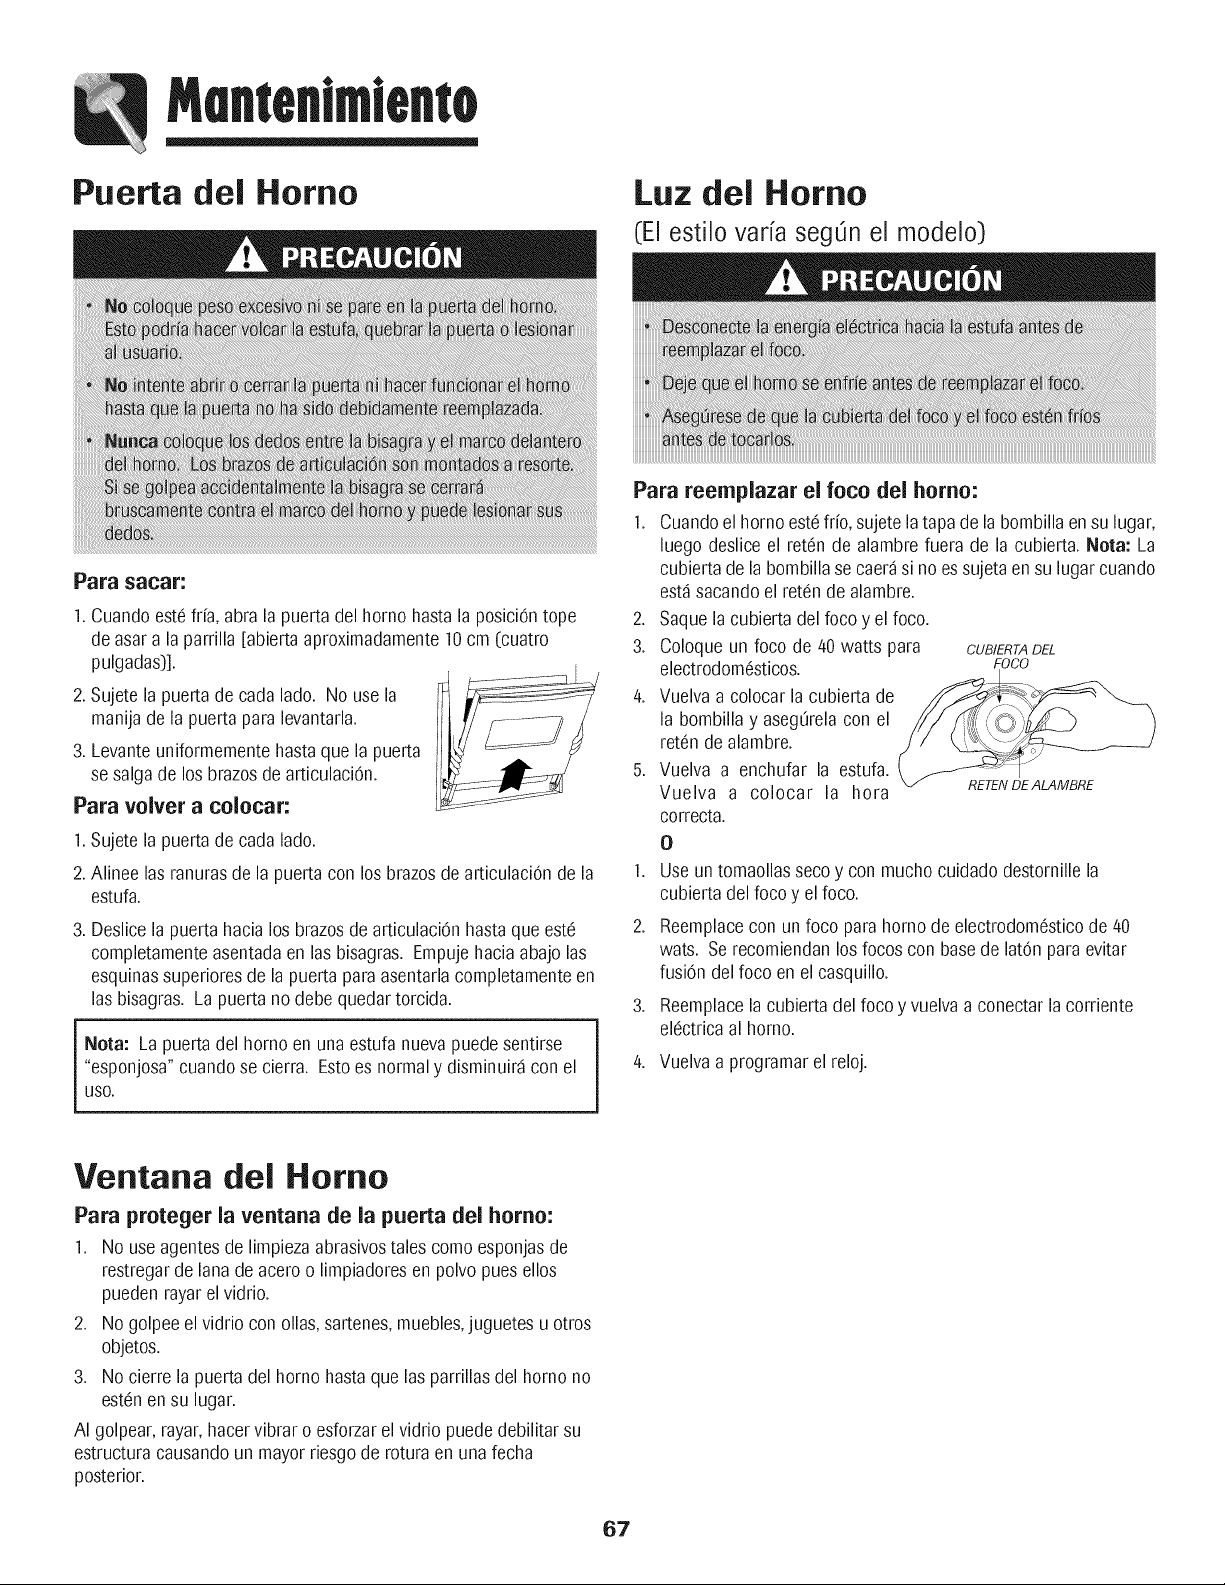
MantenlmJento
Puerta del Homo Luz del Homo
(El estiio varfa seg_n ei modeio)
Para s_car:
1.Cuandoest(!frfa, abrala puerta del horno hastala posiciOntope
de asar a la parrilla[abiertaaproximadamente10cm (cuatro
pulgadas)].
2. Sujete la puertade cada lado. No use la
manijade la puerta paralevantarla.
3. Levanteuniformementehastaque la puerta
se salgade los brazosde articulaciOn.
Para volver a colocar:
1.Sujete la puertade cada lado.
2. Alinee las ranurasde la puertacon los brazosde articulaciOnde la
estufa.
3. Deslicela puertahacia los brazosde articulaciOnhastaque este
completamenteasentadaen las bisagras. Empujehaciaabajo las
esquinassuperioresde la puerta para asentarlacompletamenteen
las bisagras. La puertano debequedartorcida.
Nora: La puerta del hornoen unaestufa nuevapuede sentirse
"esponjosa"cuando se cierra. Estoes normaly disminuird con el
USO.
Para reemplazar el foco del homo:
1. Cuandoel hornoest_fifo, sujetelatapa de la bombillaen su lugar,
luego desliceel ret(!nde alambre fuera de la cubierta.Nota: La
cubiertade la bombillasecaer_si noessujeta en su lugar cuando
est_sacandoel ret(!nde alambre.
2. Saque la cubierta del focoy el foco.
3. Coloqueun foco de 40 watts para CUBIERTADEL
electrodomesticos. FOCO
/4. Vuelvaa colocarla cubiertade
la bombilla y asegOrelacon el
ret(!ndealambre.
5. Vuelva a enchufar la estufa.
Vuelva a colocar la hora RETENDEALAMBRE
correcta.
O
1. Use un tomaollassecoy con muchocuidado destornillela
cubiertadelfoco y elfoco.
2.
.
Reemplacecon un foco para homo de electrodomesticode/40
wats. Se recomiendanlosfocos con basede latOnparaevitar
fusion del foco en elcasquillo.
Reemplacela cubiertadel focoy vuelvaa conectar la corriente
electricaal horno.
/4. Vuelvaa programarel reloj.
Ventana del Homo
Para proteger la ventana de la puerta del homo:
1. No use agentesde limpiezaabrasivostales como esponjasde
restregarde lana de aceroo limpiadoresen polvopues ellos
puedenrayarelvidrio.
2. No golpeeel vidrio con ollas, sartenes,muebles,juguetes u otros
objetos.
3. No cierre la puerta del homo hasta que las parrillasdel homo no
est(!nen su lugar.
AI golpear,rayar,hacervibrar o esforzarel vidrio puededebilitar su
estructuracausandoun mayorriesgode rotura en unafecha
posterior.
67
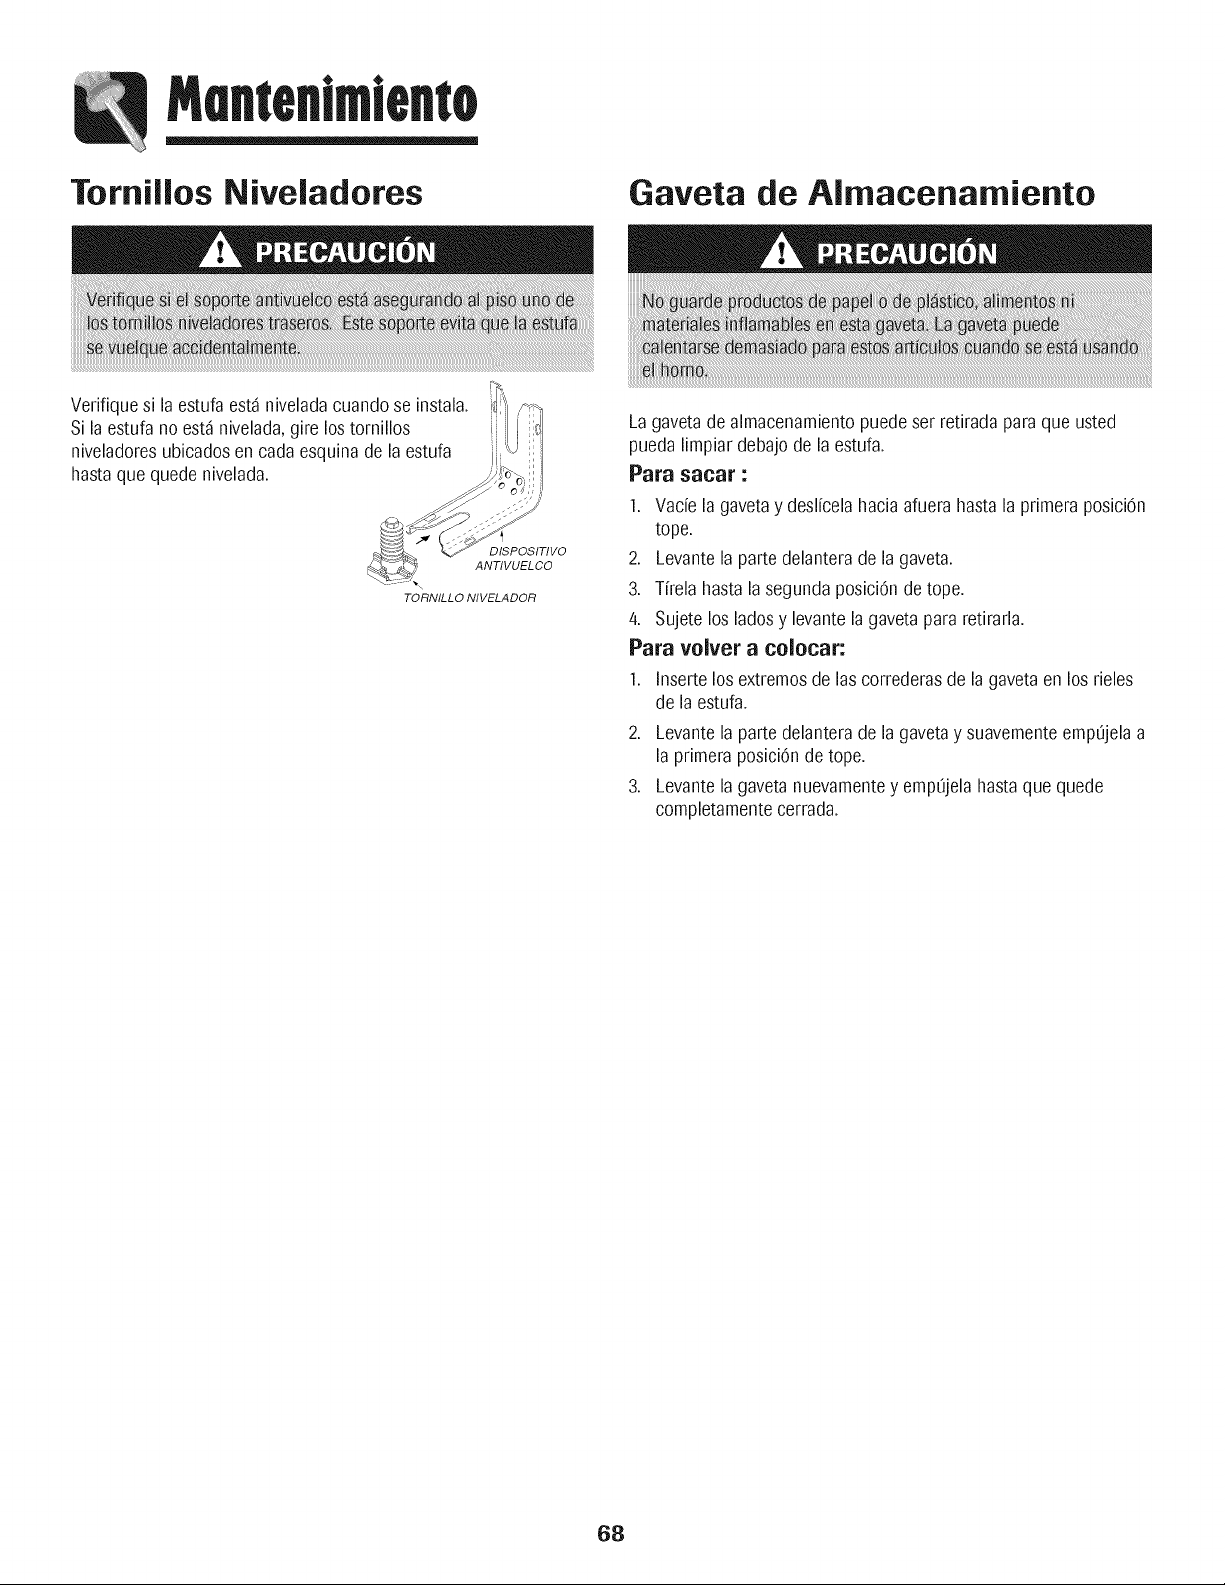
MantenimJento
Tornillos Niveladores Gaveta de AImacenamiento
Verifiquesi la estufaest_niveladacuandose instala.
Si la estufano est_nivelada,gire lostornillos
niveladoresubicadosen cada esquinade la estufa
hastaque quede nivelada.
DISPOSITIVO
ANTIVUELCO
Td)RNILL O NIVELADOR
Lagavetade almacenamientopuedeset retirada para que usted
puedalimpiar debajode la estufa.
Para saoar :
1. Vacie la gavetay deslfcelahaciaafuera hastala primeraposici6n
tope.
2. Levantela partedelanterade la gaveta.
3. Tfrela hasta la segundaposici6ndetope.
/4. Sujete los ladosy levantela gavetapara retirarla.
Para volver a colocar:
1. Insertelos extremosde las correderasde la gavetaen los deles
de la estufa.
2. Levantela partedelanterade la gavetay suavementeempOjelaa
la primeraposici6ndetope.
3. Levantelagavetanuevamentey empOjelahasta que quede
completamentecerrada.
68
Para la mayoriade losproblemas,
verifiqueprimeroIo siguiente.
Toda la estufao parte de ella no
funciona.
=
=
=
=
El reloj,las palabrasen el indicador •
visualy/o las lucesfuncionan pero
el homo no se calienta.
Losresultadosdei horneadono
soncomose esperabano son
diferentesa losdel homo anterior. •
Losalimentosno seasan a la
parrillaen forma debidao sale
demasiadohumo.
e
e
e
e
e
El homo no se autolimpia.
=
=
=
El homo no se limpi6en forma
debida.
e
La puerta del homo no se
desbioqueadespu6sdel ciclo
de autolimpieza.
• Revisesi los controlesdel homo est_ndebidamenteajustados.
• Verifiquesi el enchufeest_ firmementeinsertadoenel tomacorriente.
• Verifiqueo vuelvaa reponerel disyuntor.Verifiqueo reemplaceel fusible.
• Verifiqueel suministrode energfaelectrica.
superficiey/o los controlesdel homo est_ndebidamenteajustados.Verp_ginas
lapuertadel homo se hadesbloqueadodespuesdelciclo deautolimpieza.Ver
homo est_ajustadopara horneadodiferidoo programade limpieza.Ver p_ginas58
Revisesi la
53y 57.
Verifiquesi
p_gina63.
Revisesi el
y64.
Verifiquesi
Verifiquesi
'Control Lock' (Bloqueode Control)est_activado. Ver p_g.56.
el controlest_enModo Sab_tico.Ver p_g.61.
Elhomopuedeestarprogramadoparaunafunci0nde'Cook&Hold'(Cocci0ny MantenerCaliente)
o unafunci0ndiferida.
Puedeestaractivadalacaracterfsticade bloqueodelos controlesdel horno.(Ver p_g.56.)
AsegOresede queel respiraderodel hornonoest6 bloqueado.Ver p_gina62 para la ubicaci0n.
Verifiqueparaasegurarsede que la estufaest_nivelada.
Lastemperaturasa menudovarfan entreun homo nuevoy uno antiguo.A medidaque pasa
eltiempo,latemperaturadel homo cambiay puedehacersem_scalienteo m_sfrfa. Ver
p_gina61paralas instruccionescomo ajustarla temperaturadel horno. Nota: No se
recomiendaajustarla temperaturasi hatenido problemasconsolo unao dos recetas.
Verifiquelas posicionesde las parrillasdel horno.El alimentopuedeestarmuycercadel
elemento.
Elelementode asar nofue precalentado.
Elpapeldealuminiose us0de maneraincorrecta. Nuncaforre el insertodel asadorcon papel
dealuminio.
La puertadel homo estabacerradamientrasseasabaa la parrilla. Dejela puerta abiertaen la
primera posici0n(alrededorde 10cm [4 pulgadas]).
Recorteelexcesode grasade la cameantesde ponerlaa asara la parrilla.
Seus0unaasaderasucia.
Elvoltajedel hogarpuede ser bajo.
Verifiqueparaasegurarsede que el ciclono est6ajustadoparaun comienzodiferido.Ver
p_gina6/4.
Verifiquesi lapuertaest_cerrada.
Verifiquesi el controlest_en Modo Sab_tico.Ver p_g.61.
Elhornopuedeestara m_sde 205° C (/400° F). La temperaturadel homo debeser inferiora
205° C (/400° F) paraprogramarun ciclo de limpieza.
Puedequeseanecesarioun tiempo de limpiezam_slargo.
Losderramesexcesivos,especialmentedealimentosazucaradosy/o _cidosnofueron limpiados
antesdel ciclo de autolimpieza.
Elinteriordel homotodaviaest_caliente. Dejeque paseaproximadamenteunahoraparaque
el homose enfrie antesdequese completeun ciclo deautolimpieza.Lapuertapuedeser
abiertacuandodesaparezcala palabra'LOCK'(Bloqueado)del indicadorvisual.
Elcontroly la puertapuedenestarbloqueadas.Verp_g.56.
69
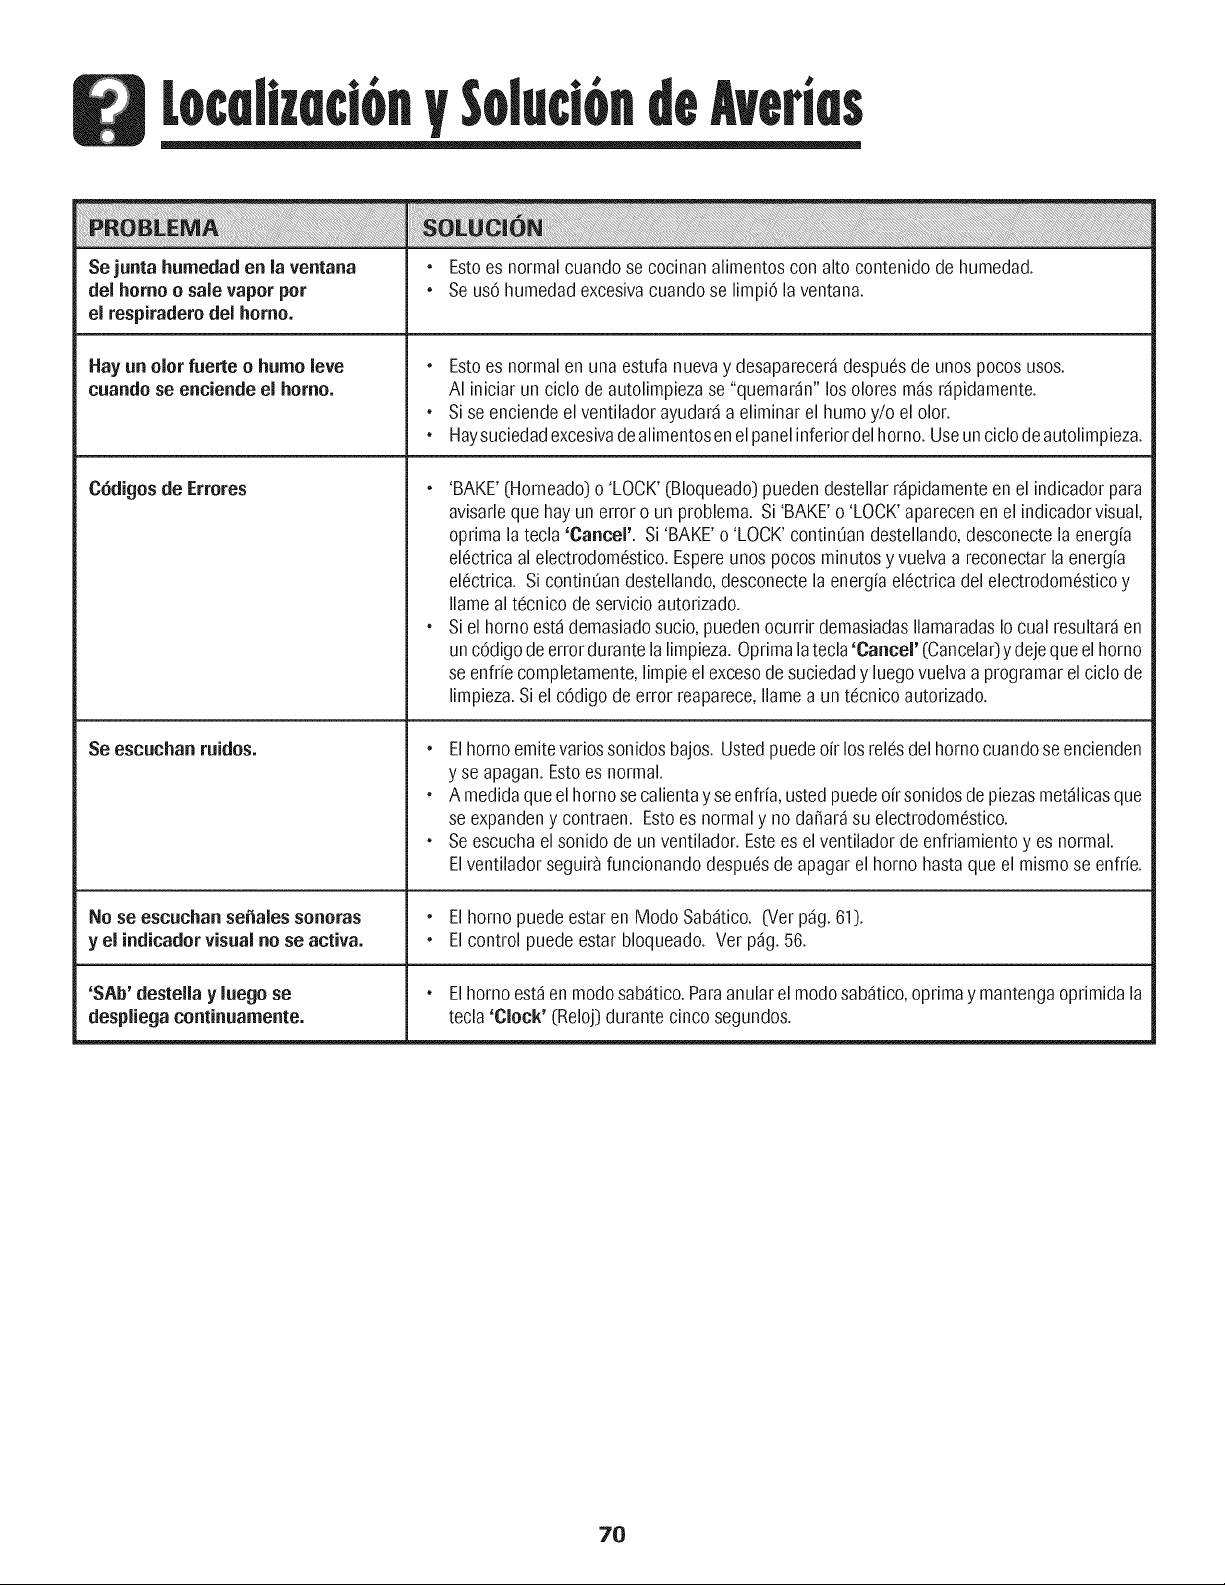
Sejunta humedad en la ventana _ Estoes normalcuandose cocinanalimentoscon alto contenidode humedad.
del homo o sale vapor pot _ Se usOhumedadexcesivacuandose limpiOlaventana.
el respiraderodel homo.
Hay un olor fuerte o humo leve
cuando se enciende el homo.
C6digos de Errores
Se escuchan ruidos.
No se escuchan se_ales sonoras
y el indicadorvisual no se activa.
'SAb' destella y luego se
despliega continuamente.
, Estoes normalen una estufanuevay desaparecer_despu(!sde unos pocosusos.
AI iniciar un ciclo de autolimpiezase "quemar_n"los olores m_sr@idamente.
• Sise enciendeel ventilador ayudar_a eliminar el humo y/o el clot.
• Haysuciedadexcesivadealimentosen el panelinferiordelhomo. Useunciclodeautolimpieza.
, 'BAKE'(Horneado)o 'LOCK'(Bloqueado)puedendestellarr_pidamenteenel indicador para
avisarleque hayun erroroun problema. Si 'BAKE'o 'LOCK'aparecenen el indicadorvisual,
optima latecla 'Cancel'. Si 'BAKE'o 'LOCK' contin0andestellando,desconectela energfa
el(!ctricaal electrodomestico.Espereunos pocosminutosy vuelva a reconectarla energfa
el(!ctrica. Sicontin0andestellando,desconectela energfaelectrica del electrodomesticoy
Ilamealtecnico deservicioautorizado.
• Siel homo est_ demasiadosucio,puedenocurrir demasiadasIlamaradasIo cual resultar_en
unc6digo deerrordurantela limpieza.Optima latecla'Cancel' (Cancela0y dejeque el homo
se enfrfecompletamente,limpieel excesodesuciedady luegovuelvaa programarel ciclo de
limpieza.Si el c6digo de error reaparece,Ilamea unt(!cnico autorizado.
, Elhomo emitevariossonidosbajos.Ustedpuedeoir los rolesdel homo cuandoseencienden
y se apagan.Estoes normal.
• A medidaque el homose calientay se enfria,usted puedeofrsonidosde piezasmet_licasque
se expandeny contraen. Estoes normaly no da_ar_su electrodomestico.
• Seescuchael sonido de un ventilador.Estees el ventiladorde enfriamientoyes normal.
Elventiladorseguir_funcionandodespuesde apagar el homo hastaque el mismose enfrfe.
, El homo puedeestaren Modo Sab_tico. (Ver p_g.61).
, El control puedeestar bloqueado. Vet p_g. 56.
• Elhomo est_en modosab_tico.Paraanularel modosab_tico,optimay mantengaoprimidala
tecla'Clock' (Reloj)durante cinco segundos.
7O
p p
GARANTIA DE LOS ELECTRODOMESTICOS PRINCIPALES
DE MAYTAG CORPORATION
GARANTJA LIMITADA
Durante un afio a partir de la fecha de compra, siempre y cuando se de a este electrodomestico principal un uso y mantenimiento de
conformidad con las instrucciones adjuntas o provistas con el producto, la marca Maytag de Whirlpool Corporation o Whirlpool
Canada LP (en Io sucesivo denominado "Maytag") se hara cargo del costo de las piezas especificadas de fabrica y del trabajo de
reparaci6n para corregir defectos en los materiales o en la mano de obra. El servicio deberA ser suministrado por una compafiia de
servicio designada por Maytag. Esta garantia limitada es valida solamente en Estados Unidos o en CanadA, y se aplica solamente
cuando el electrodomestico principal se use en el pais en el que se ha comprado. Esta garantia limitada no tiene vigor fuera de los
cincuenta Estados Unidos y CanadA. Se requiere una prueba de la fecha de compra original para obtener servicio bajo esta garantia
limitada.
EXCLUSIONES DE LA GARANTJA
Esta garantia limitada no cubre:
1. Visitas de servicio tecnico para corregir la instalaci6n de su electrodomestico principal, para ensefiarle a usar su electrodomestico
principal, para cambiar o reparar fusibles domesticos o para corregir la instalaci6n electrica o de la tuberia de la casa.
2. Visitas de servicio tecnico para reparar o reemplazar focos para electrodomesticos, filtros de aire o filtros de agua. Estas piezas de
consumo estan excluidas de la cobertura de la garantia.
3. Reparaciones cuando su electrodomestico principal se use de un modo diferente al domestico normal de una familia, o cuando se
use de un modo contrario alas instrucciones publicadas para el usuario u operador y/o las instrucciones de instalaci6n.
4. Dafios causados por accidente, alteraci6n, uso indebido, abuso, incendio, inundaci6n, actos fortuitos, instalaci6n incorrecta,
instalaci6n que no este de acuerdo con los c6digos electricos o de plomeria, o el empleo de articulos de consumo o productos de
limpieza no aprobados por Maytag.
5. Dafios esteticos, incluyendo rayaduras, abolladuras, desportilladuras u otro dafio al acabado de su electrodomestico principal, a
menos que el mismo sea debido a defectos en los materiales o la mano de obra y se le informe a Maytag en un lapso de 30 dias a
partir de la fecha de compra.
6. Cualquier perdida de comida debido a fallas del refrigerador o del congelador.
7. Costos relativos a la remoci6n de su electrodomestico principal desde su hogar para obtener reparaciones. Este electrodomestico
principal esta disefiado para ser reparado en el hogar y Qnicamente el servicio de reparaci6n en el hogar esta cubierto bajo esta
garantia.
8. Reparaciones de piezas o sistemas como resultado de modificaciones no autorizadas que se hayan efectuado en el
electrodomestico.
9. Gastos de viaje y transporte para obtener servicio para el producto, si su electrodomestico principal esta ubicado en un lugar
remoto en el cual no haya disponible un tecnico de servicio autorizado por Maytag.
10. La remoci6n y reinstalaci6n de su electrodomestico principal, si estuviera instalado en un lugar inaccesible o si no estuviera
instalado de conformidad con las instrucciones de instalaci6n publicadas.
11. Electrodomesticos principales con nQmeros de modelo/serie que se hayan removido, alterado o que no puedan ser identificados
con facilidad. Esta garantia se anularA si el nQmero de serie aplicado en la fabrica ha sido alterado o removido de su
electrodomestico principal.
El costo de la reparaci6n o el reemplazo bajo estas circunstancias excluidas, correrA por cuenta del cliente.
EXCLUSION DE GARANTJAS IMPLJ.CITAS; LIMITACION DE RECURSOS
EL UNICO Y EXCLUSIVO RECURSO DEL CLIENTE SEGUN LOS TERMINOS DE ESTA GARANT[A LIMITADA SERA EL DE REPARAR
EL PRODUCTO SEGON SE ESTIPULA EN LA PRESENTE. LAS GARANT[AS IMPL[C, ITAS, INCLUYENDO LAS GARANT[AS DE
COMERCIABILIDAD O DE CAPACIDAD PARA UN PROPOSITO PARTICULAR, S ERAN LIMITADAS A UN ANO O AL PER[ODO MAS
CORTO PERMITIDO POR LEY. MAYTAG NO SE RESPONSABILIZARA POR DANOS INCIDENTALES O CONSECUENTES. ALGUNOS
ESTADOS Y PROVINCIAS NO PERMITEN LAS EXCLUSIONES O LIMITACIONES POR DANOS INCIDENTALES O CONSECUENTES, O
LIMITACIONES ACERCA DE CUANTO DEBE DURAR UNA GARANT[A IMPL[CITA DE COMERCIABILIDAD O CAPACIDAD, DE MODO
QUE LAS LIMITACIONES O EXCLUSIONES ARRIBA MENCIONADAS PUEDEN NO APLICARSE EN SU CASO. ESTA GARANT[A LE
OTORGA DERECHOS LEGALES ESPEC[FICOS Y ES POSIBLE QUE USTED TENGA TAMBIC:N OTROS DERECHOS QUE PUEDEN
VARIAR DE UN ESTADO A OTRO O DE UNA PROVINCIA A OTRA.
Si usted se encuentra fuera de los cincuenta Estados Unidos y CanadA, p6ngase en contacto con su distribuidor autorizado de Maytag
para determinar si corresponde otra garantia.
Si necesita servicio, consulte primero la secci6n "Soluci6n de problemas" del Manual de uso y cuidado. Despu6s de consultar la
secci6n "Soluci6n de problemas", puede encontrar ayuda adicional en la secci6n "Ayuda o servicio tecnico," o Ilamando a Maytag. En
EE.UU., Ilame al 1-800-688-9900. En CanadA, Ilame al 1-800-807-6777.
9/07
Form No. A/01/08 Part No. 8113P767-60 ¢c)2006 Maytag Appliances Sales Co. Litho U.S.A.