Loading ...
Loading ...
Loading ...
9
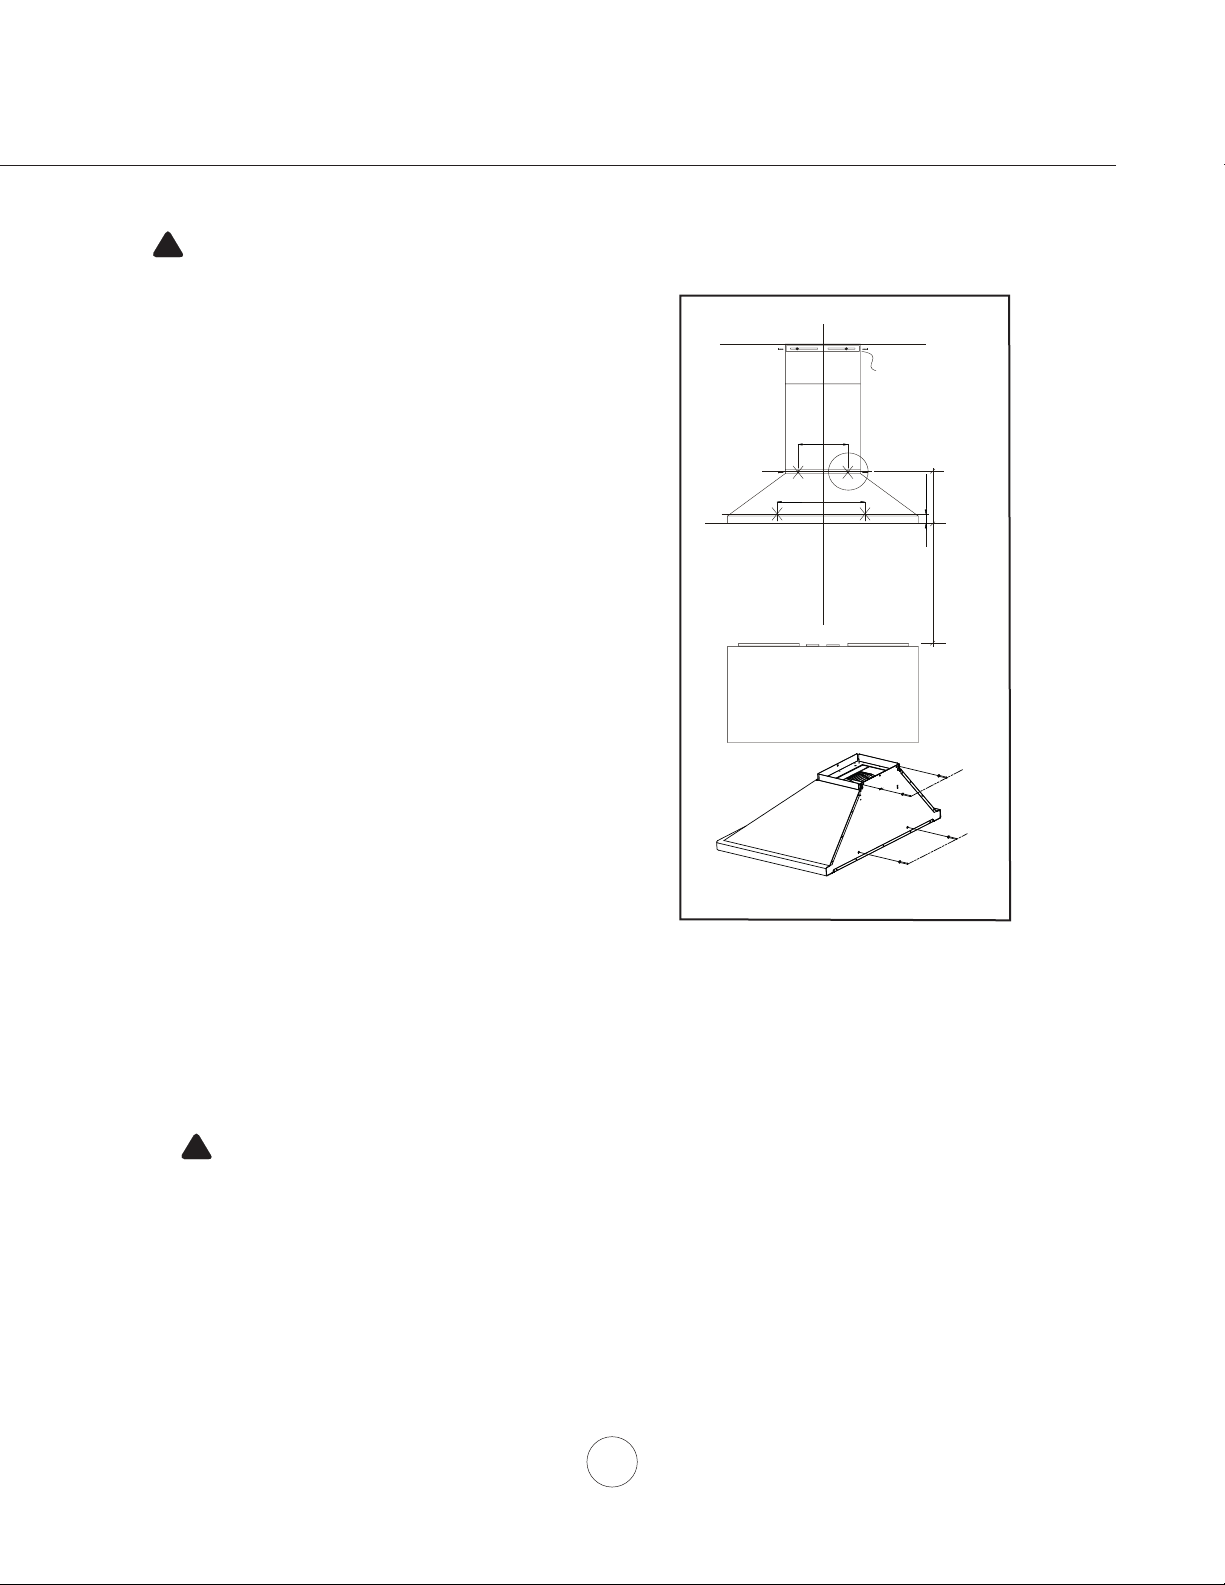
1. Measure from range top to hood bottom and mark line A.
(26” minimum from range top).
2. Plum and mark center line.
3. Mark mounting height line B. (1-5/16” from line A)
4. Mark mounting height line C. (13-1/8” from line A)
5. Mark mounting spread from C/L on line B 12-3/4”
6. Mark mounting spread from C/L on line C 9-7/16”
7. Fasten (2) M6 x 1-1/4” screws into studs on line C. Do not
fasten screws all the way. Note: wood blocking may need
to be added behind the drywall if no studs are present.
Wall anchors may also be used but check local codes
for compliance. Failure to use suitable wall anchors
and screws to hold the weight of the hood could result
in personal injury or damage to cooking surface or
counter.
8. Install 8” round duct collar with backdraft damper to top of
body of hood by (4) M4x8 fl at screws.
9. Hang hood onto screws and hand tighten. (FIG. A #1) Use
the last M6 x 1-1/4” screws to further secure the hood to the
wall from inside the hood on line B.
10. Center and attach duct cover bracket to wall below ceiling
or soffi t using (2) M6 x 1” screws.
11. Install electrical.
12. *Install duct work and duct tape.
13. Power up hood and check for leaks around duct tape.
14. Place telescopic duct covers onto hood and extend inner
(top) duct cover upwards and secure to duct cover bracket
using (2) M4x8” screws.
*If using hood in recirculating mode you must secure air
diverter plate onto wall before installing duct work and duct
covers. Turn to page10 for more details.
A
B
C/L
13-1/8"
9-7/16"
C/L
26" min
Duct Cover
Bracket
C
12-3/4"
1-5/16"
C
B
CAUTION: At least two installers are
required due to the weight and size of the
hood.
!
WARNING: Electrical wiring must be done by a qualified person(s) in
accordance with all applicable codes and standards. This range hood must be
properly grounded. Turn off electrical power at service entrance before wiring.
!
Installation – Mounting the Hood
FIG. A
Loading ...
Loading ...
Loading ...