Loading ...
Loading ...
Loading ...
WWW.STIEBEL-ELTRON-USA.COM SUNWARMTH
™
CIR INFRARED HEATER| 9
ENGLISH
INSTALLATION
INSTALLATION
DANGER: Electrocution!
Do not plug models CIR 200-2 O or CIR 400-2 O into
a wall outlet.
NOTE: The specifi ed voltage on the nameplate must
match the voltage at the circuit breaker panel.
Electrical connection must be performed by a qualifi ed electrical
tradesperson. Installation must conform with the latest edition
Electrical Code ANSI/NFPA N0 70 in the U.S.A. and PART 1 CSA
C22.1 in Canada.
9.6.1 CIR 150-1 I and CIR 150-1 O
Plug heater into a properly grounded wall outlet connected to a
120 V, 60Hz, 20 Amp copper wire circuit that is properly grounded
and controlled by a timer switch.
9.6.2 CIR 200-2 O
Using 12 AWG copper wire, connect the heater to a 240 V, 60Hz,
15 Amp circuit breaker that is properly grounded and controlled
by a timer switch.
9.6.3 CIR 400-2 O
Using 12 AWG copper wire, connect the heater with a timer switch
to each of two independent 240 V, 60Hz, 15 Amp circuit breakers
that are each properly grounded.
9.7 Heat lamp replacement
!
WARNING:
Heater service should only be performed by a qualifi ed
electrician. Failure to comply could result in personal
injury, death, fi re and/or property damage. Tampering
with the heater by an unqualifi ed person will void the
warranty.
!
WARNING:
Before servicing, make sure the power has been turned
off at the circuit breaker panel or unplugged from the
wall outlet, and that the heating element of the heater
is cool. Ensure the power remains disconnected the
entire time the unit is being serviced. Failure to do so
could result in serious burns, electrocution, serious
bodily injury, or death.
!
CAUTION:
Always wear cotton or other fabric gloves when
replacing heat lamp.
Do not touch the lamp surface with your bare hands.
Oils from your skin will cause damage to the lamp.
The heater requires some disassembly to access electrical
connections when replacing the lamp.
Use a container to securely store disassembled components and
screws.
9.7.1 Heat lamp replacement - CIR 150-1 I
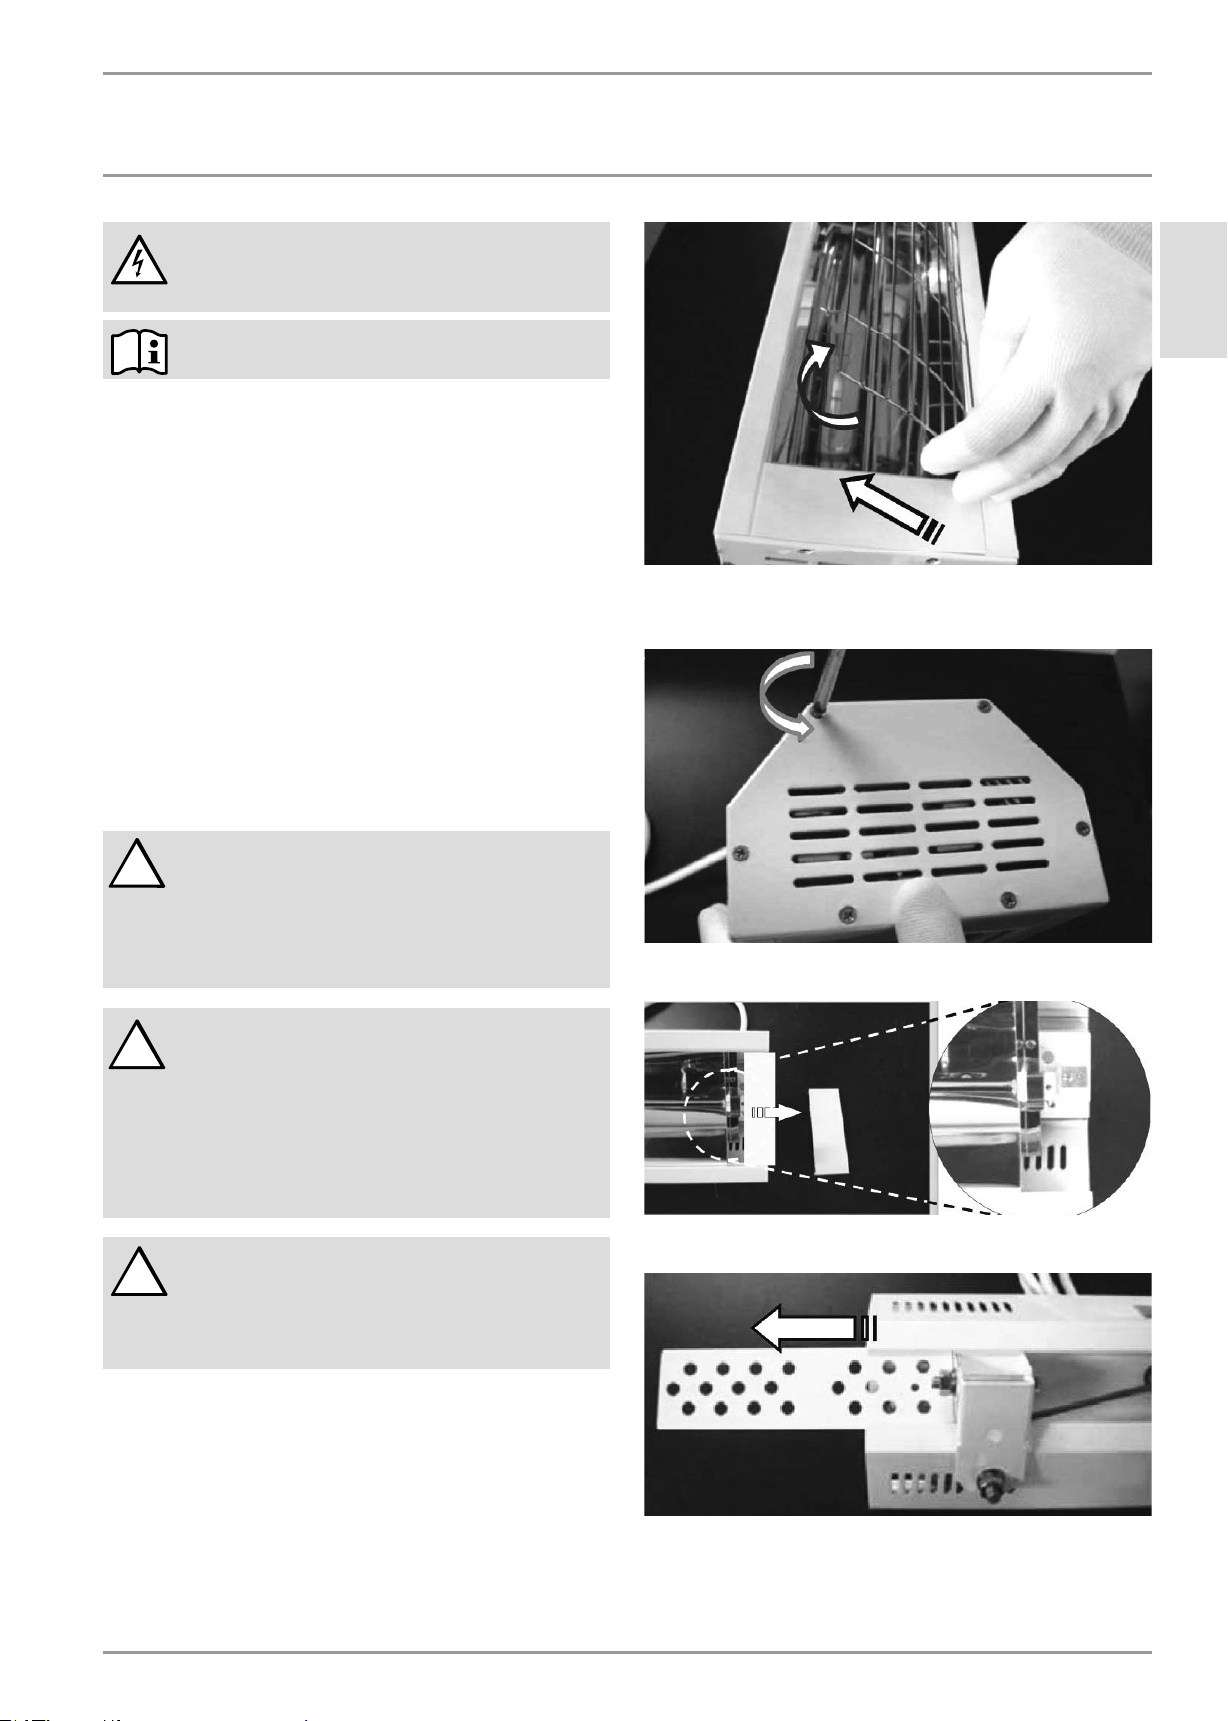
1 Compress the width of the protective grill to retract the
wire tabs from under one edge of the heater body.
» Rotate the loose edge of the grill up and away from heater body.
» Pull the grill away from heater and remove from other edge of
heater body - place safety grill in a secure storage area:
2 Remove end cover at both ends of heater. Six (6) Phillips
screws hold the end cover in place. Remove the screws to
secure storage:
3 Slide out the face plate at each end of heater to expose both
ends of the heat lamp:
4 Turn heater face down, and slide the center cover plate and
the heater mounting bracket out of the heater:
Loading ...
Loading ...
Loading ...